
Updated on
8. Validation Manager
Your account will come with a default validation configuration called ‘SELMA’. This can be configured using your own specifications, or you can leave…
Validation Manager
Your account will come with a default validation configuration called ‘SELMA’. This can be configured using your own specifications, or you can leave it as is, and create a new one.
Add New Validation
Navigate from Settings > Validation Manager
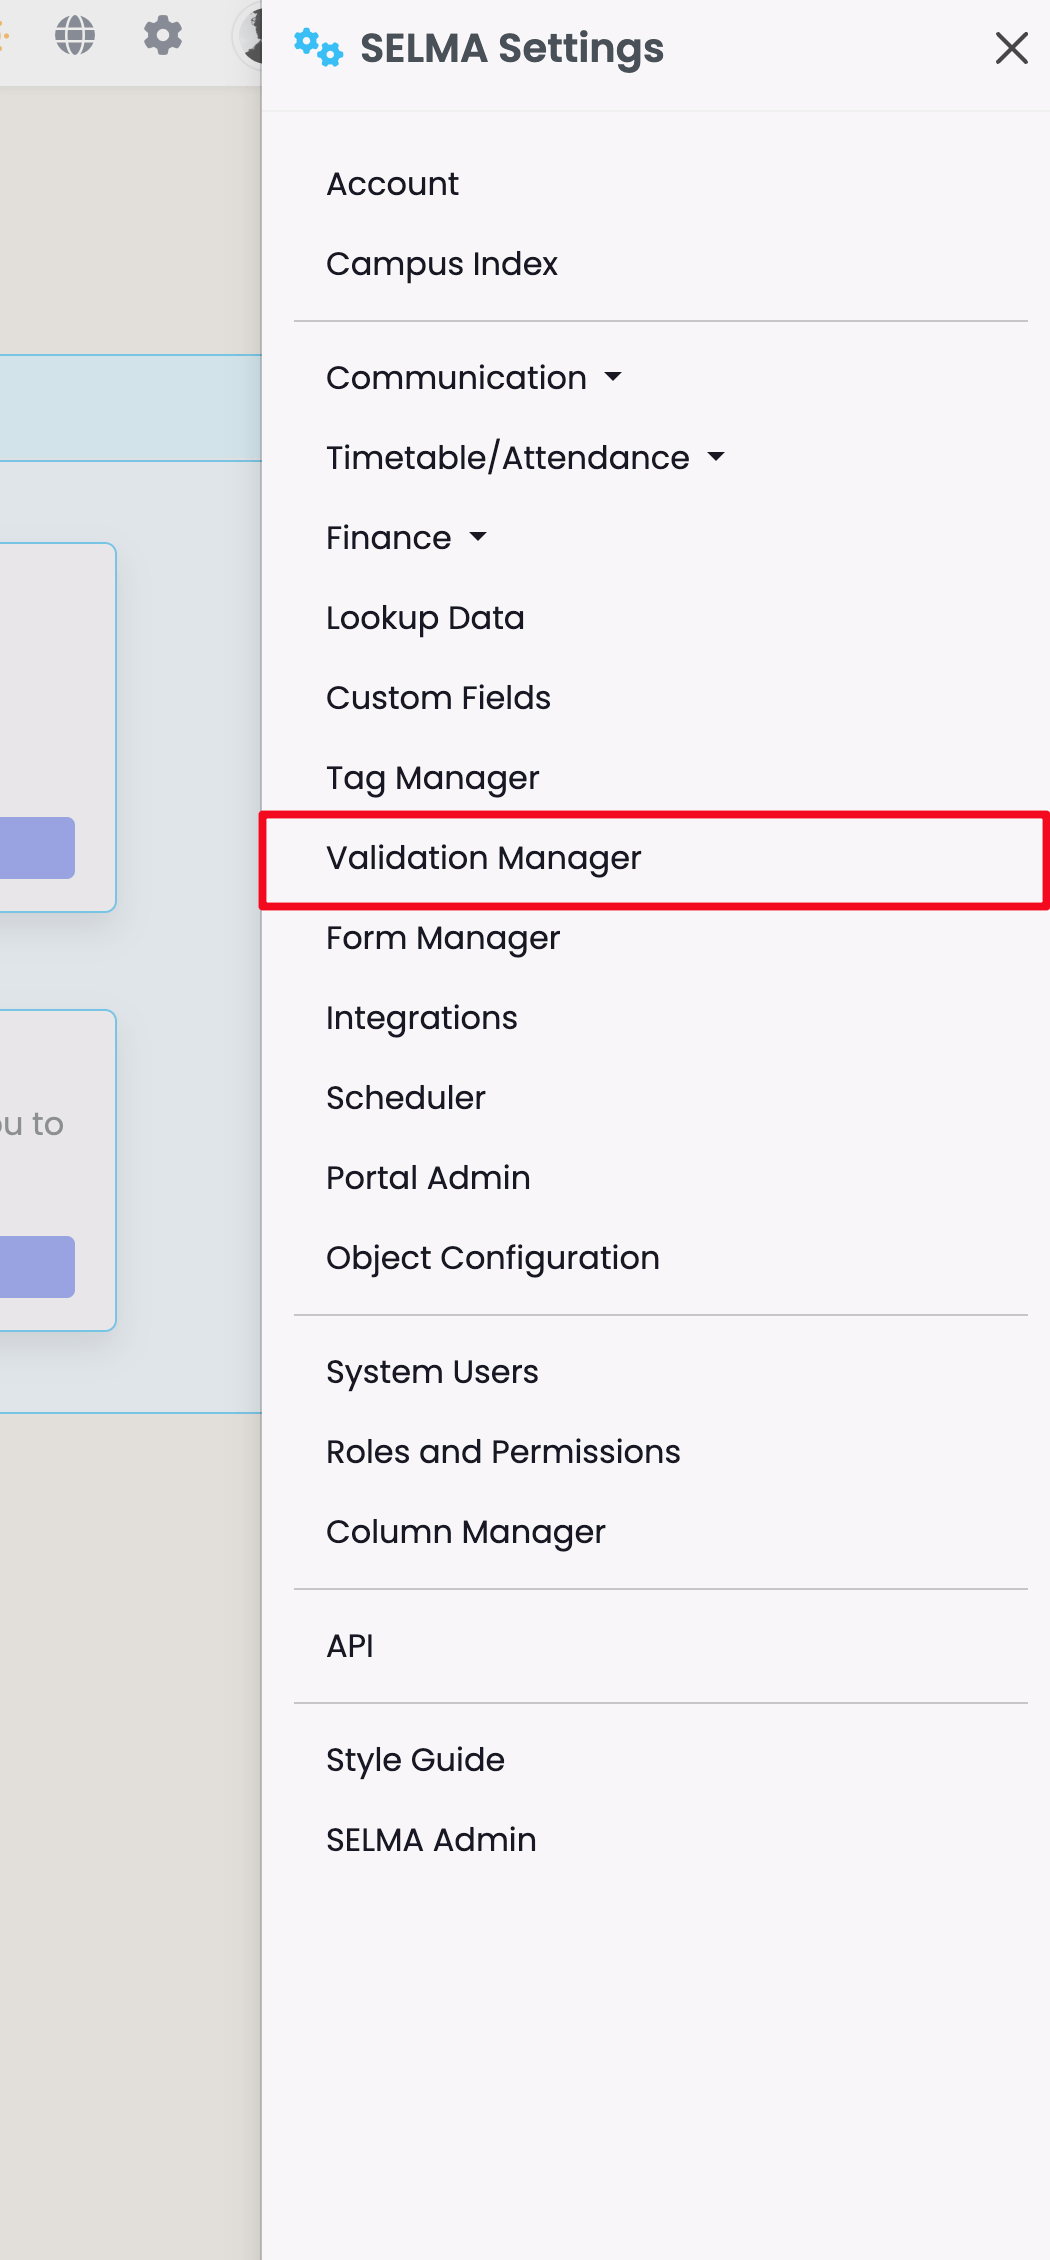
SELMA and SDR are default system validation types ready for use. You will see additional validation types listed, here, after creating them.

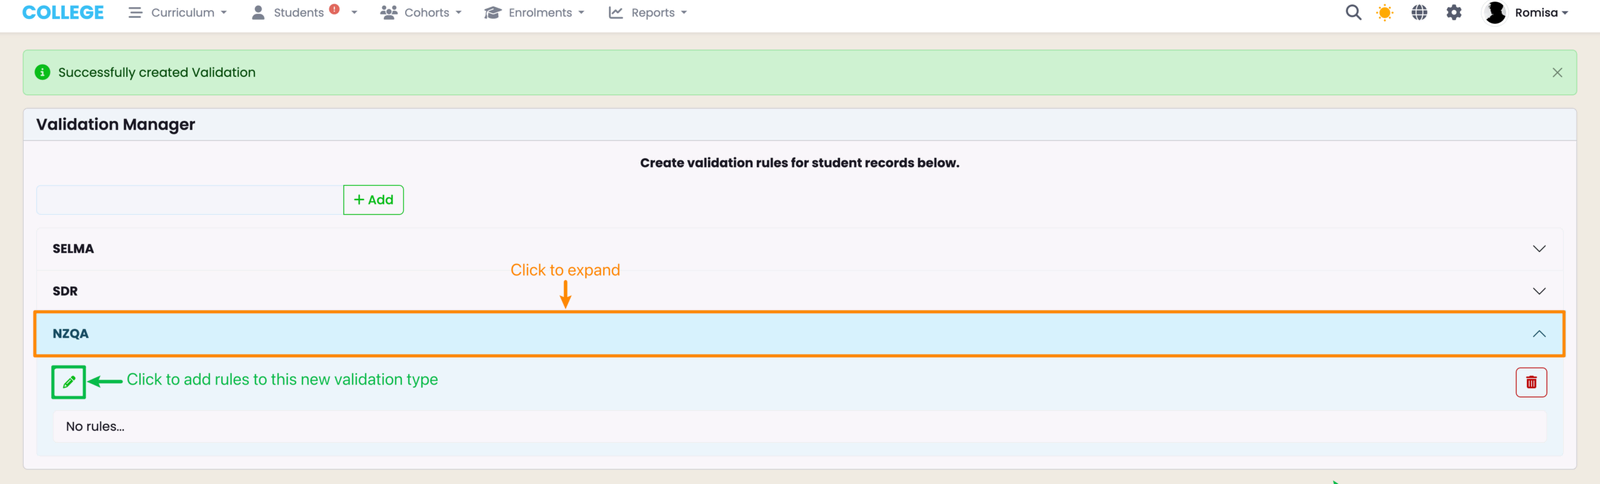
Create a new validation type, by providing a name in the empty field, and clicking the "+Add" button.

Click the new validation name to expand it, then click the pencil icon to create new rules for it.
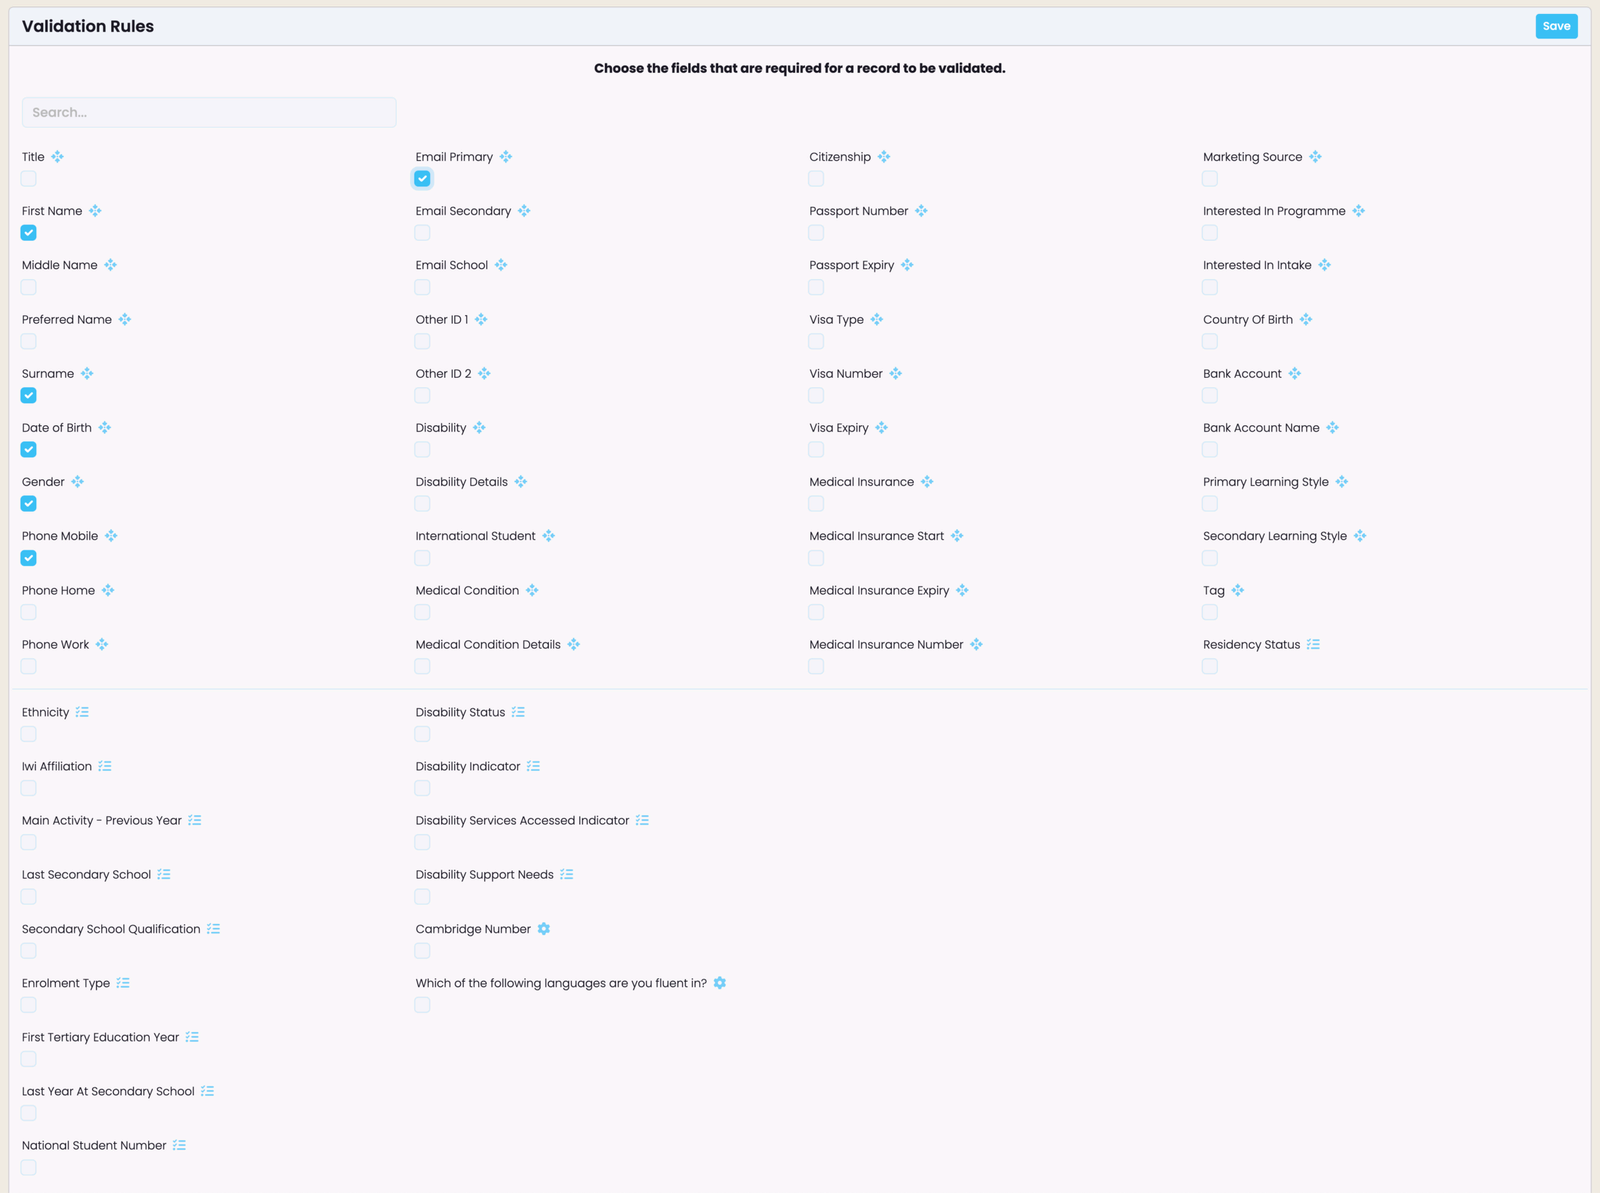
Select the fields that are required for a record to be successfully validated. To remove a rule, simply deselect a field.
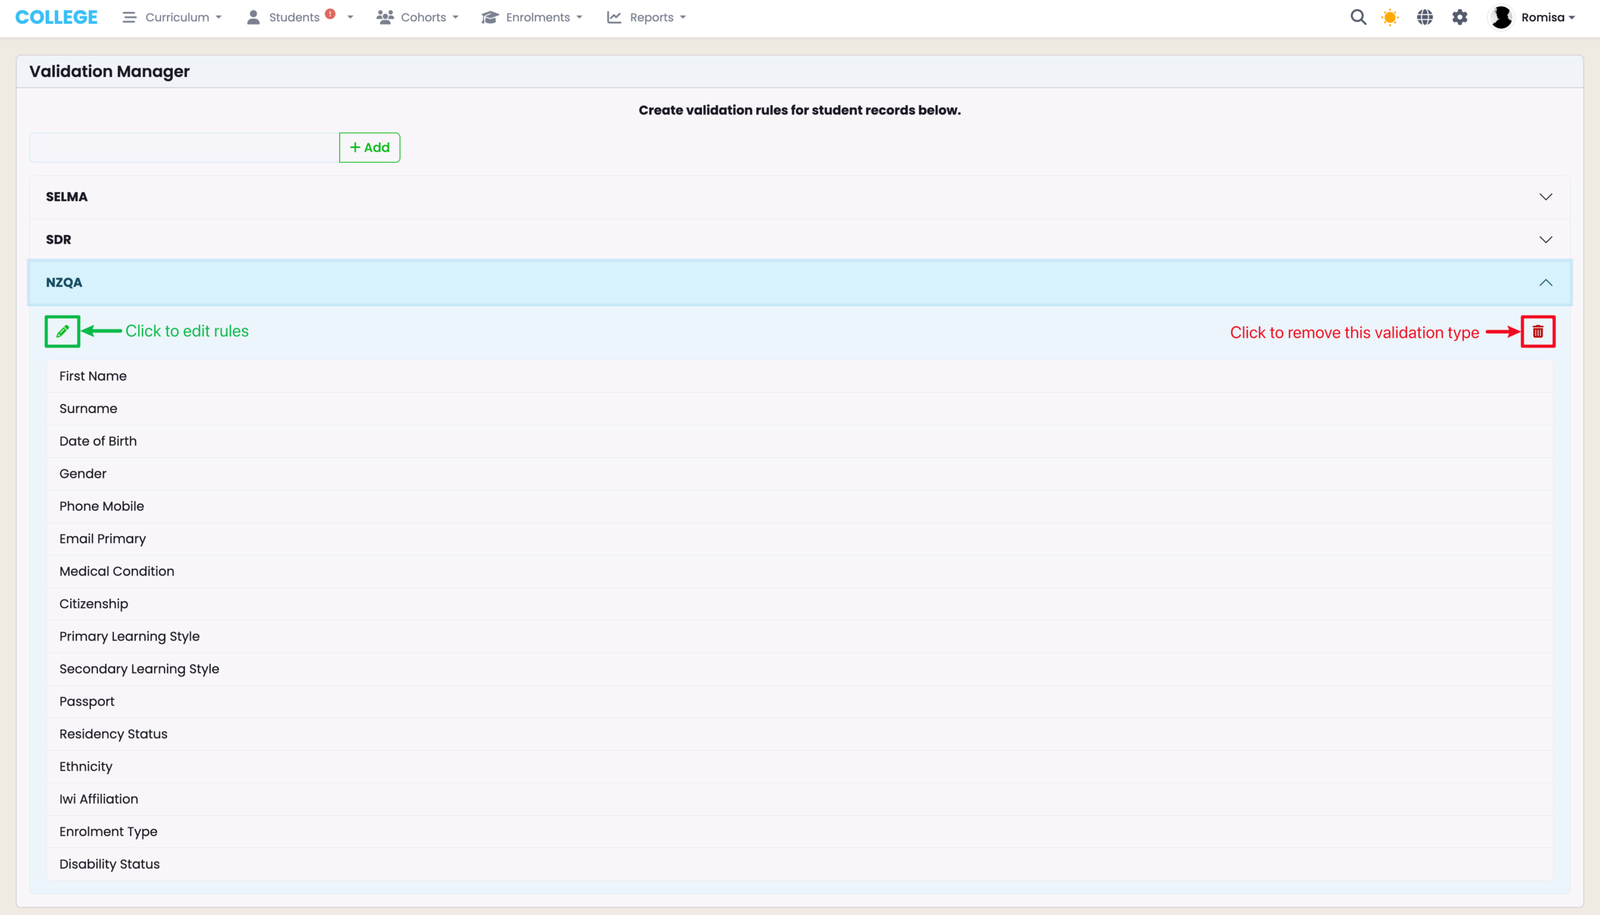
Make Changes on the Validation Manager
You can edit validation rules attached to a validation type, and/or delete an entire validation type.
Click the pencil icon to add or remove validation rules, or delete an entire validation type.
NOTE: If the validation is currently linked to any objects in the system, you will not be allowed to delete it.
Student Validation
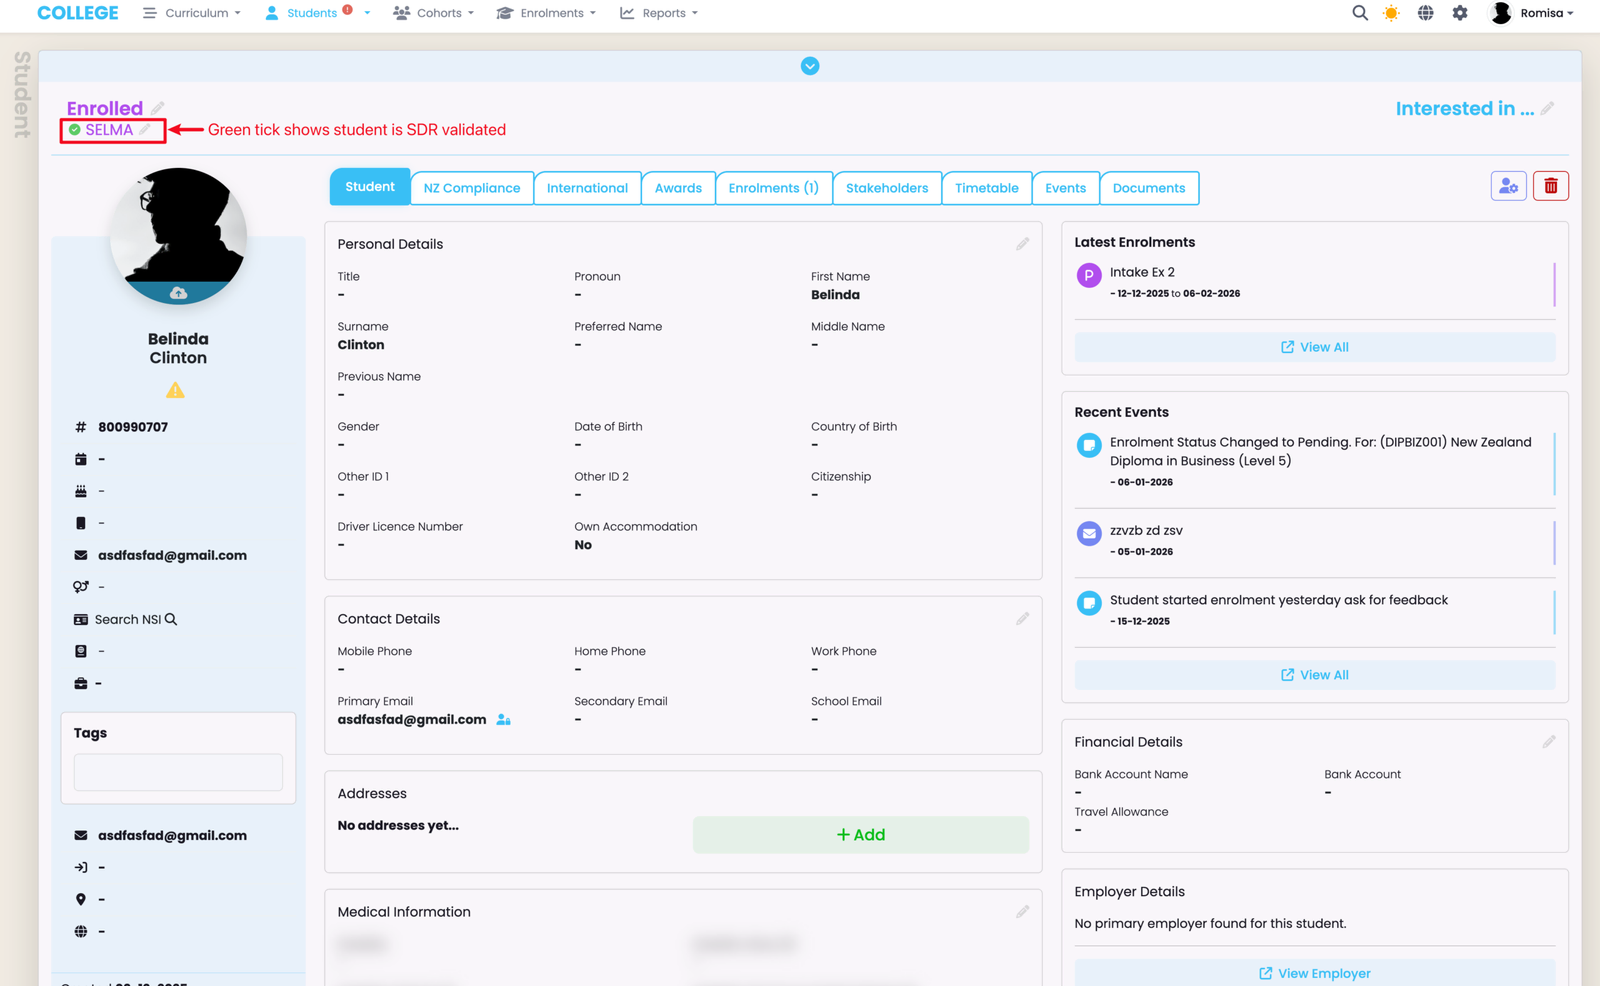
Navigate to a Student Profile to check if a Student is validated, and to change their validation status.
A green tick icon indicates the Student is validated, and has met all the specified validation rules of the validation type: "SDR".
Change Student Validation Status
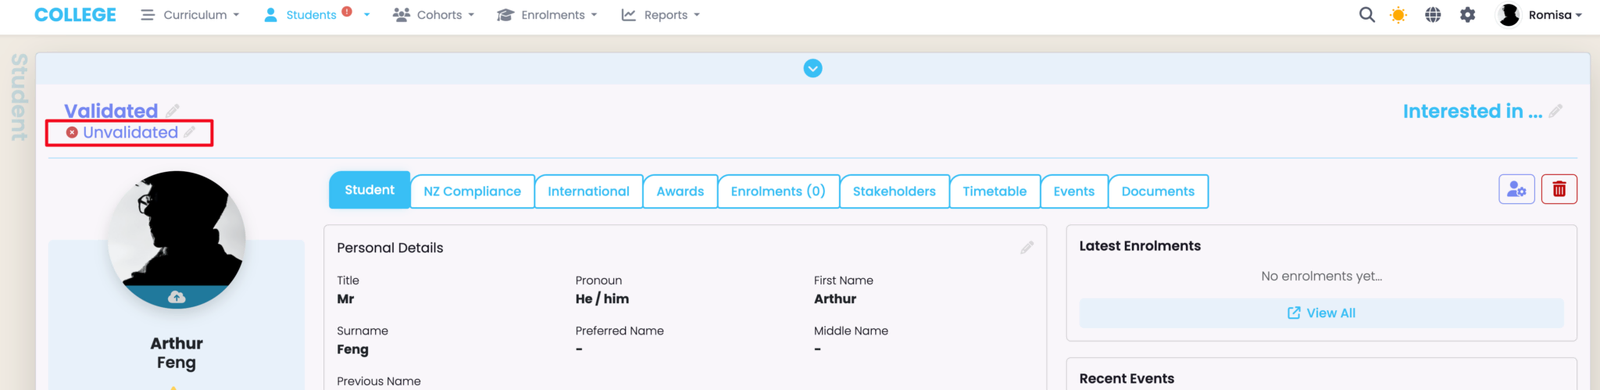
A red "X" icon indicates the Student is not validated, as they are missing required information to meet all validation rules.
When you have added the required details to the Student record, you can validate the Student again, and/or change their Validation Type:
Click the pencil icon to change the validation type and/or validate the student again.
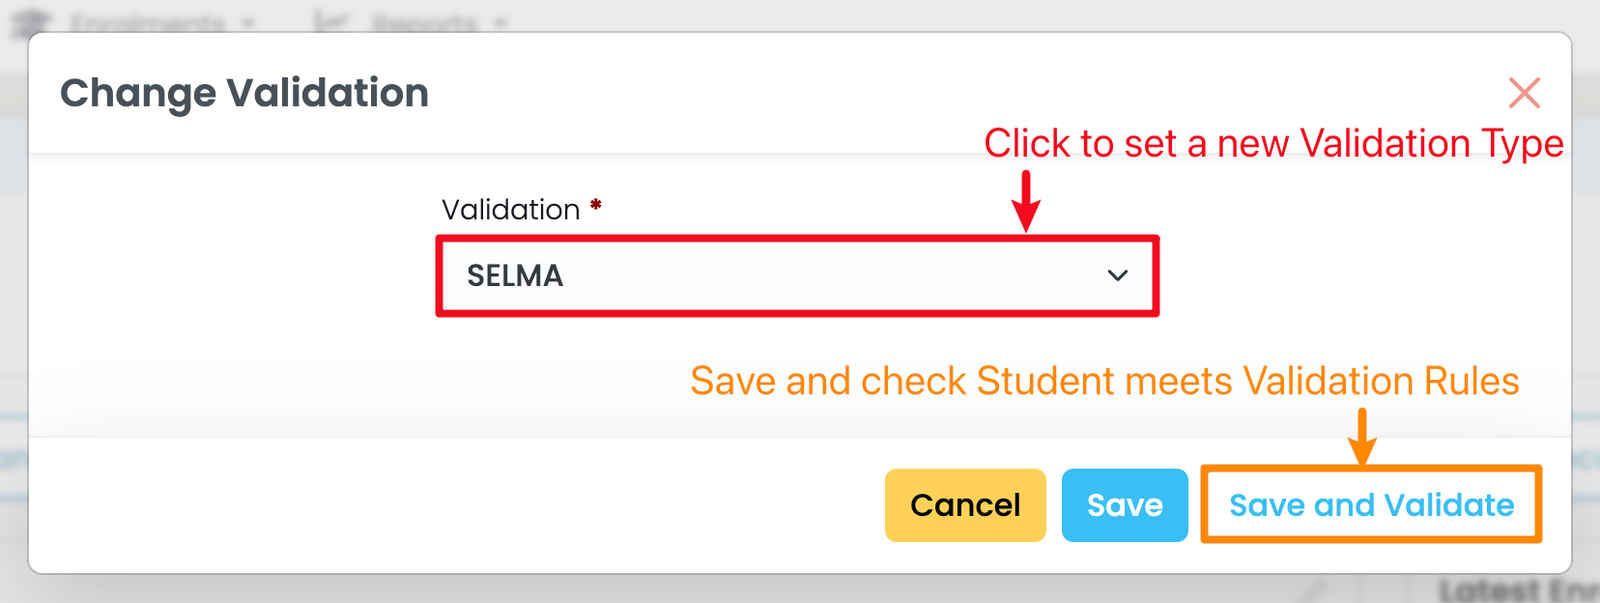
Set a new Validation Type and save it without validating by clicking the blue "Save" button. If you need to check that the Student record meets all validation rules, click "Save and Validate" and observe the change in Validation Status (green tick or red cross).
Programme Validation for Enrolments
Programme validation is set up when you want to enrol Students with specific record details into a Programme.
For example, you may require students to have an email address, date of birth, and gender recorded before they can be enrolled.
In this case, you would first configure Student validation to ensure the required details are present in the Students' profiles. Once the Students are validated, you can then apply Programme validation.
Select a Validation Type on the Programme tab of a Programme.
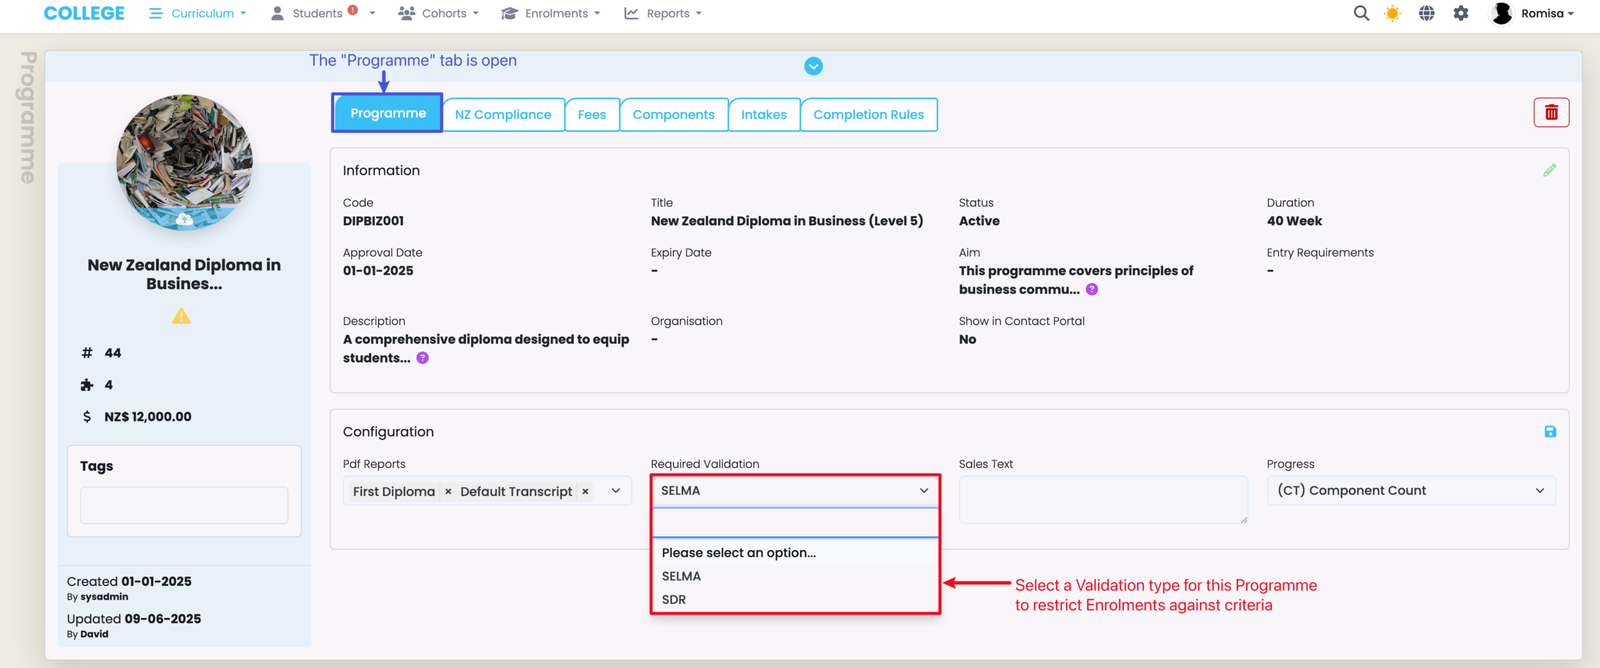
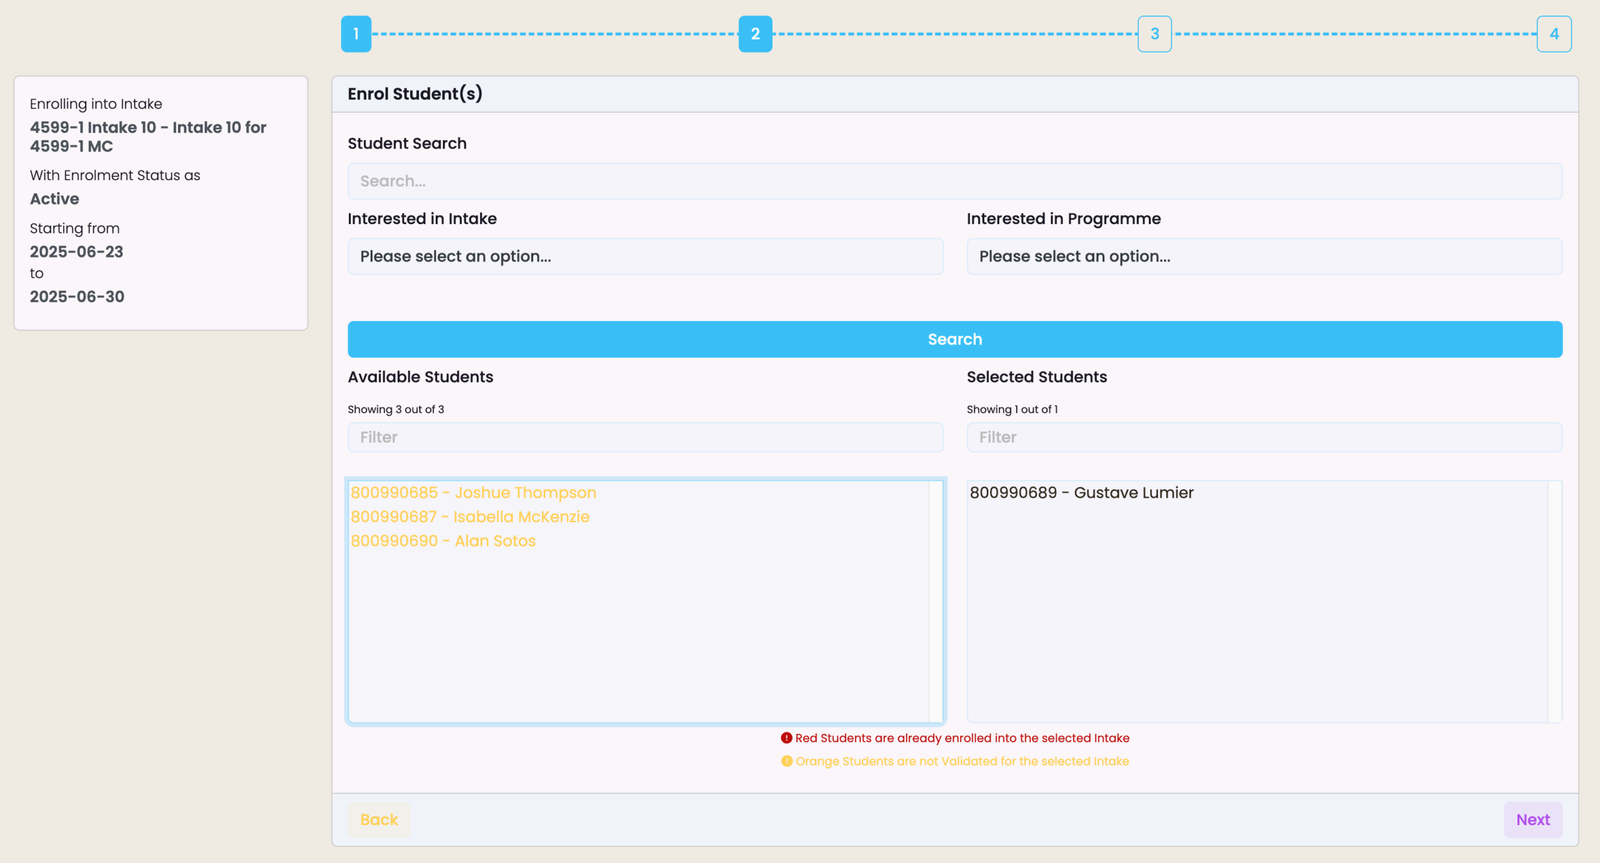
When enrolling Students into an Intake, only those who meet the corresponding Programme validation are enrolled. Students marked by yellow text do not meet Programme validation rules, and cannot be selected, while Students marked by black text meet Programme validation rules and can be selected.
Last updated