
Updated on
4. Custom Fields
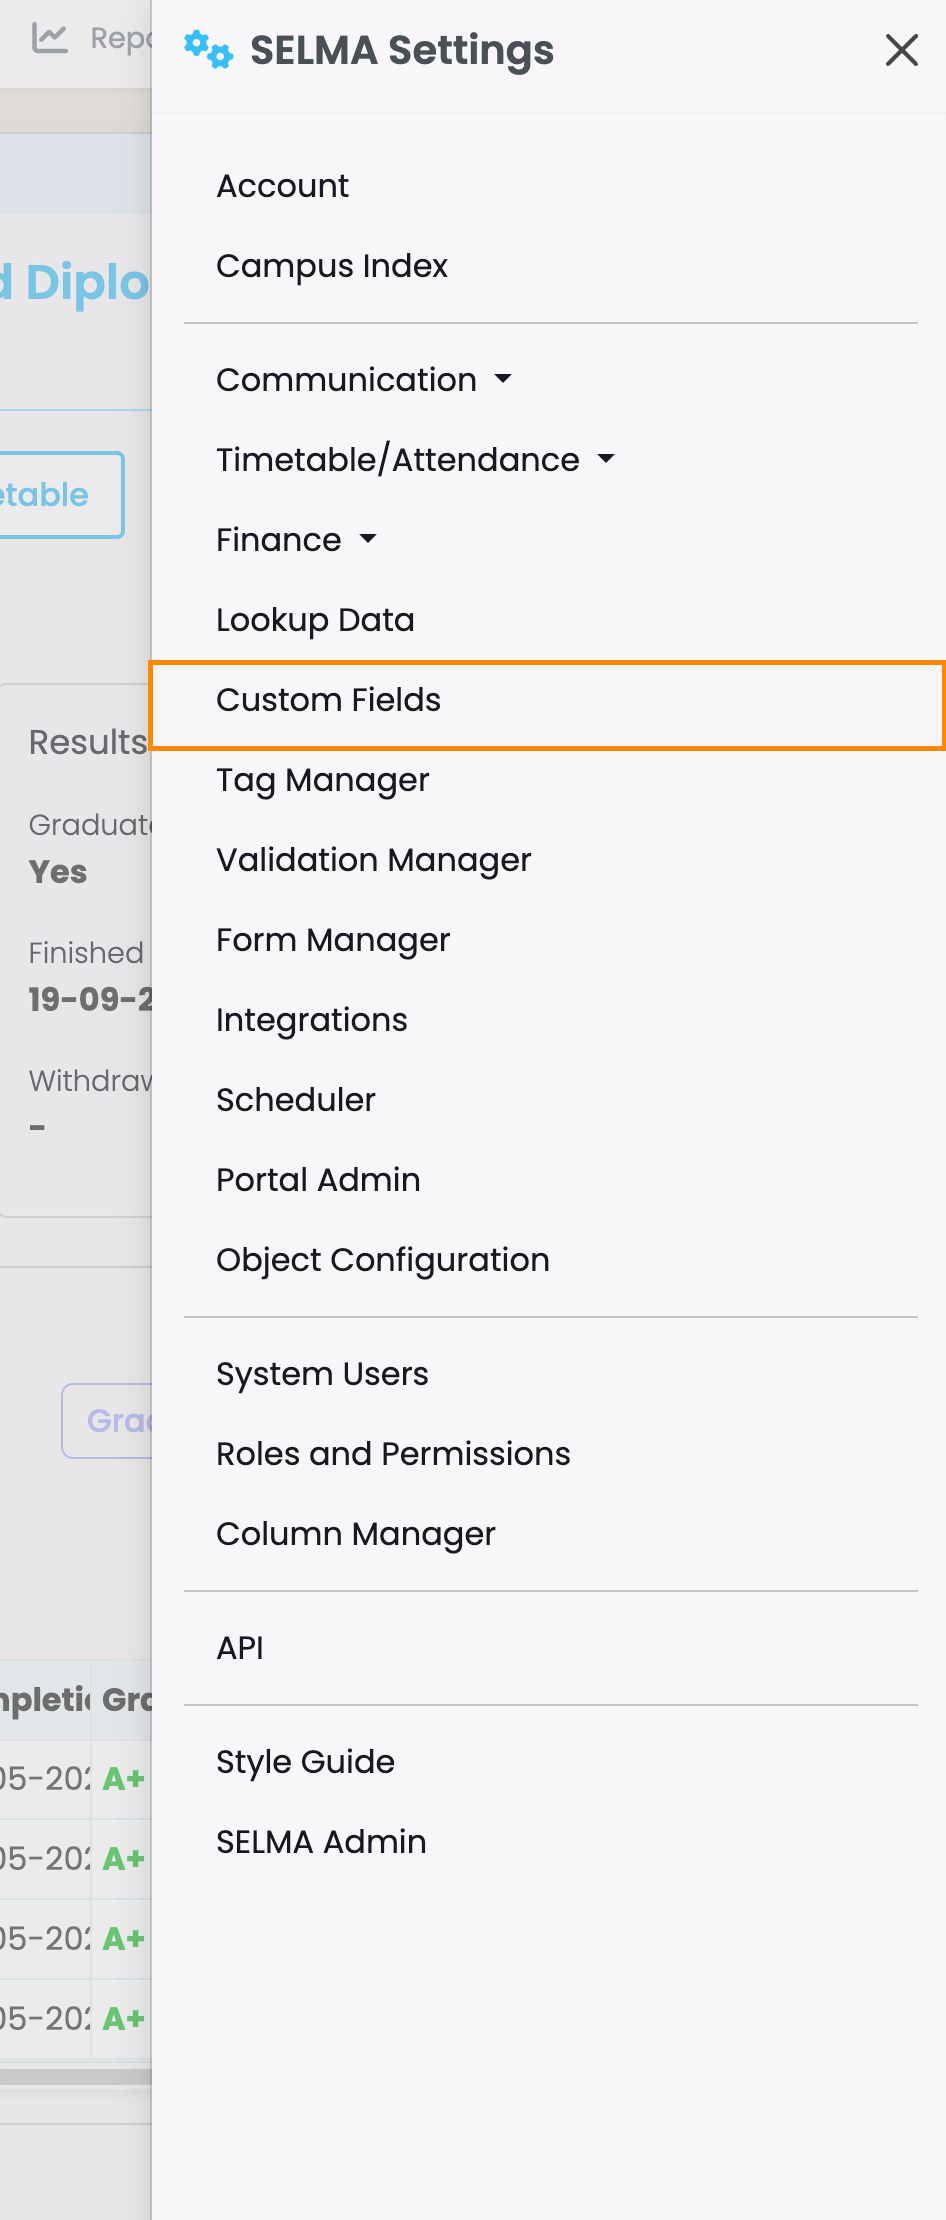
Include customised fields as a new tab on profiles by following the guide below.
Create and Manage Custom Fields
Include customised fields as a new tab on profiles by following the guide below.
Create a Custom Field
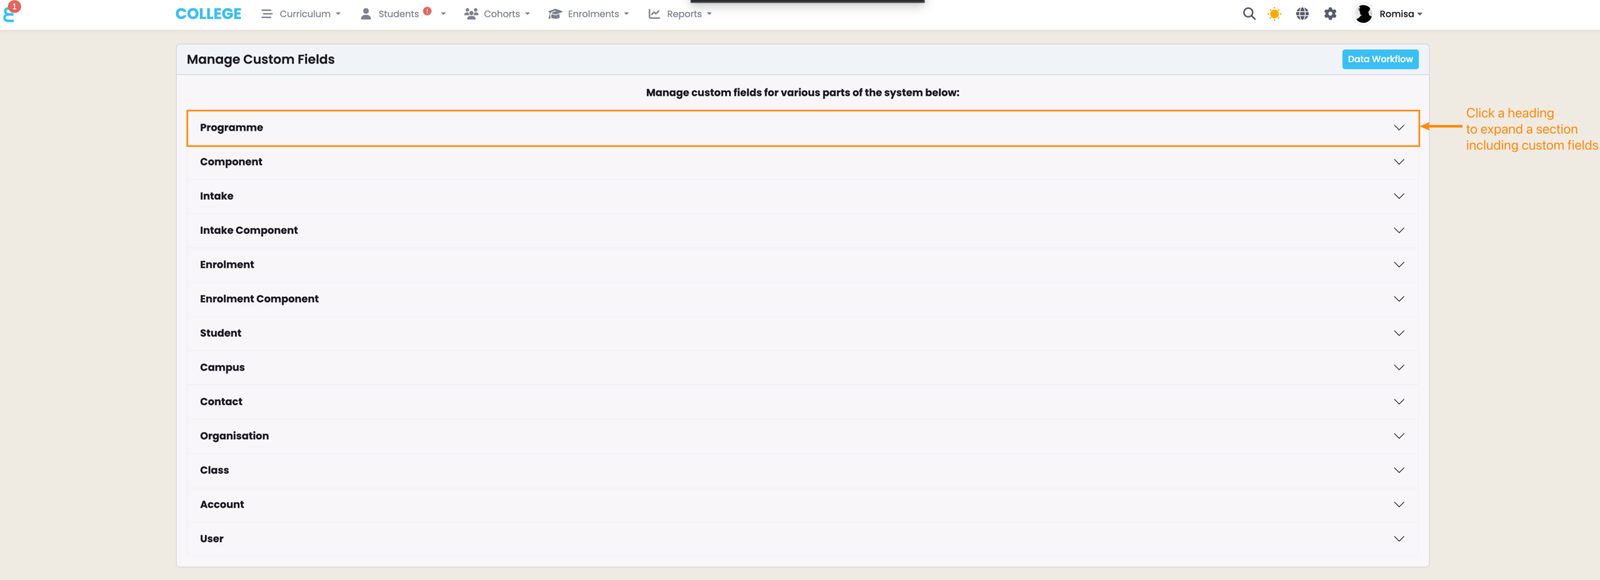
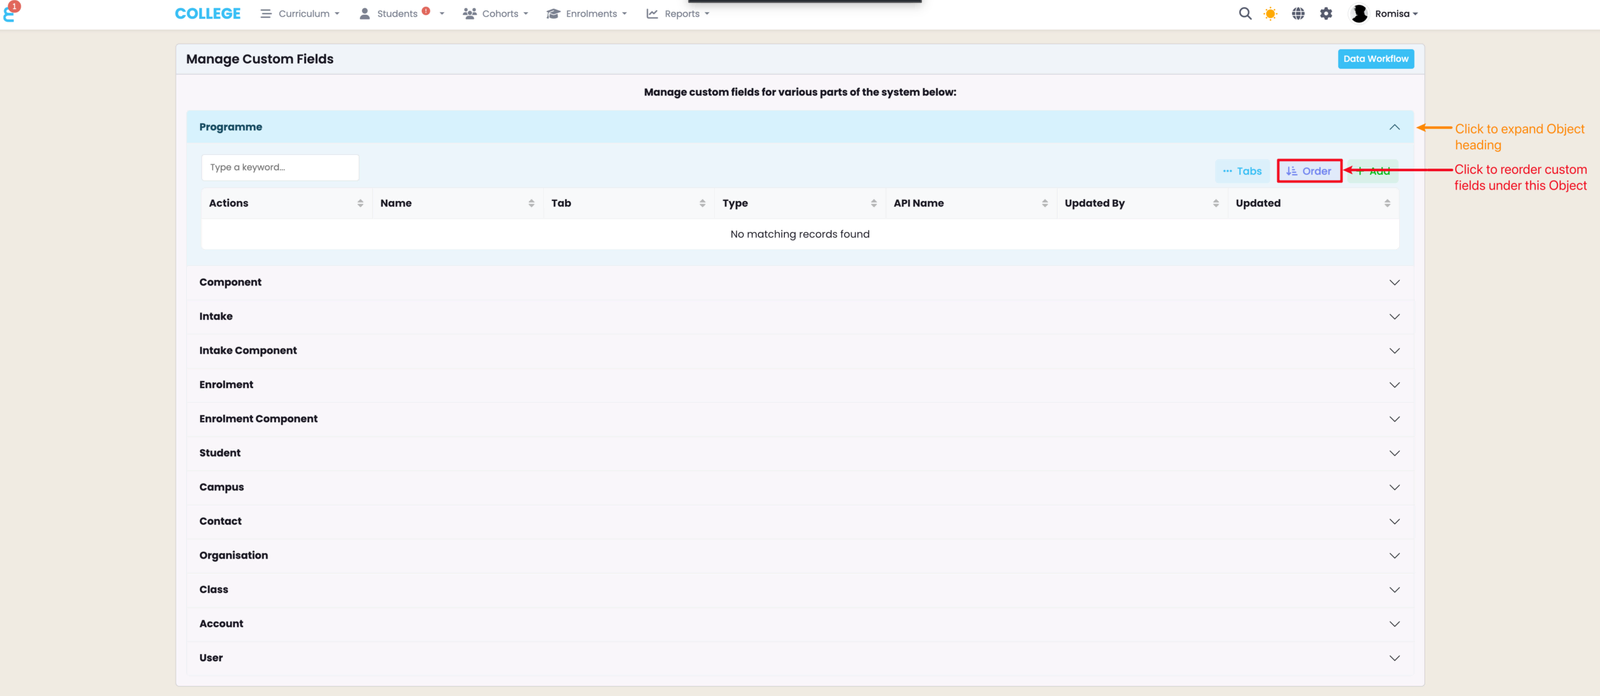
See a list of custom fields under each Object heading, which corresponds with an "Object" in SELMA (orange). The blue "Data Workflow" button takes you to a screen showing how each object inherits data from one another.
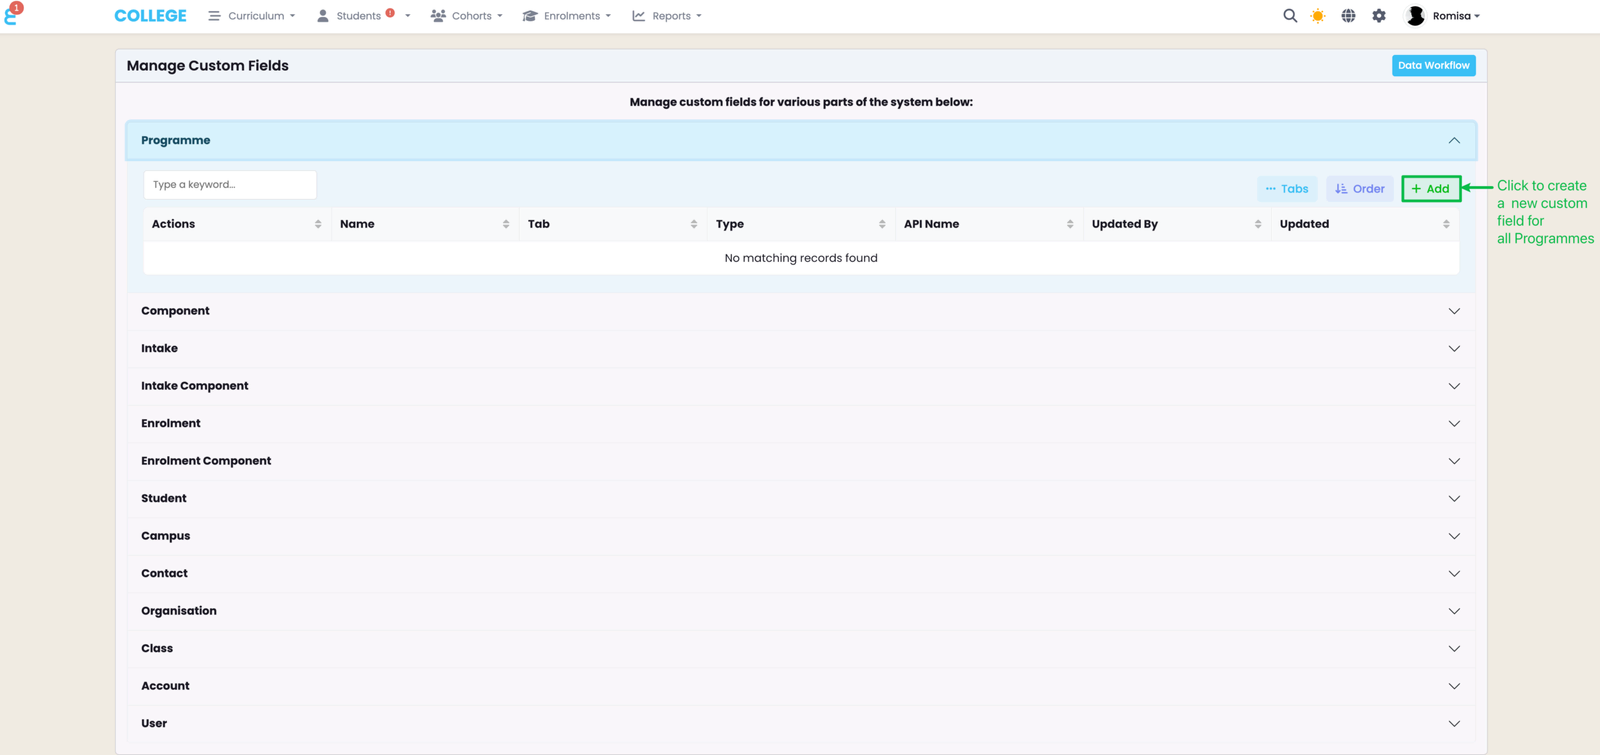
Click the "+Add" button to create a new custom field.
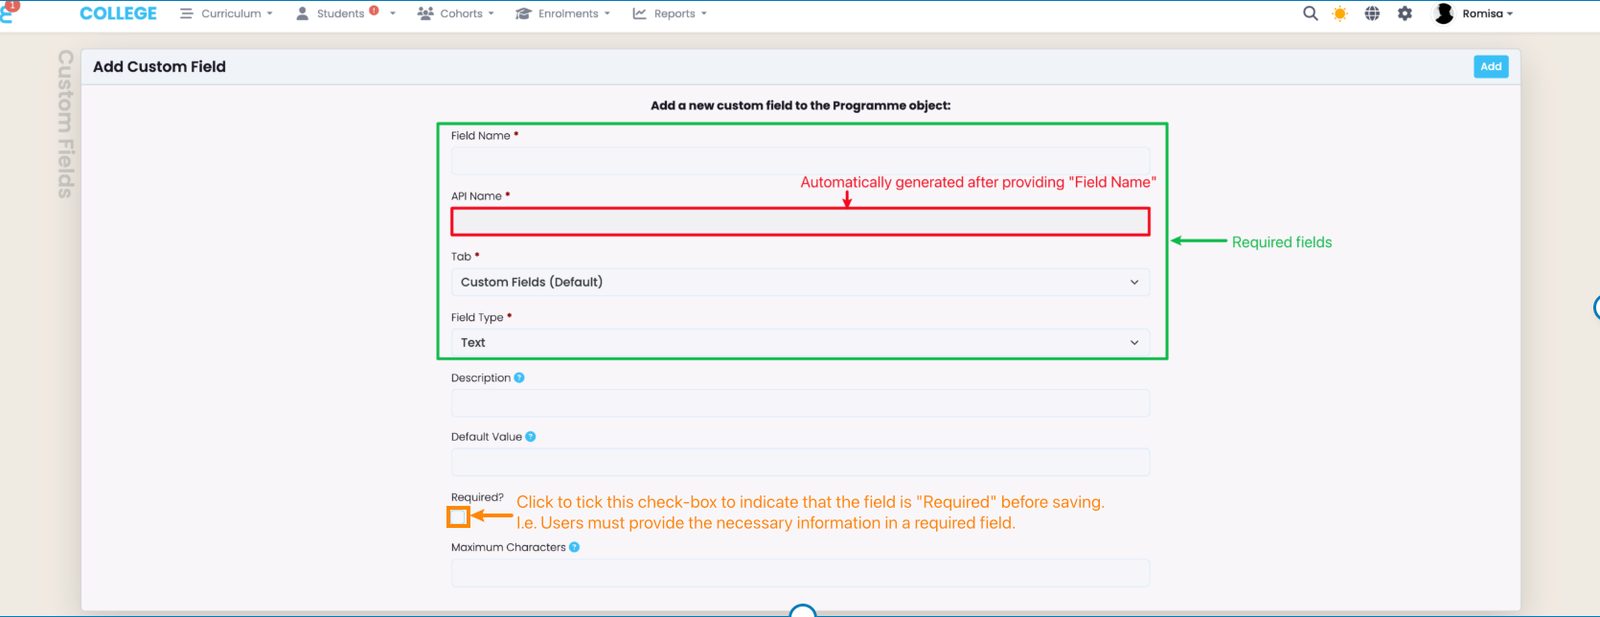
Required details include "Field Name", "API Name" (generated automatically based on the Field Name), and "Field Type". Click the checkbox to indicate, with a red asterisk, that the custom field is mandatory to fill out (orange).
Note: It's recommended to avoid editing a custom field once it's been created.
Reorder Custom Fields
To reorder custom fields, expand an Object heading and click "Order".
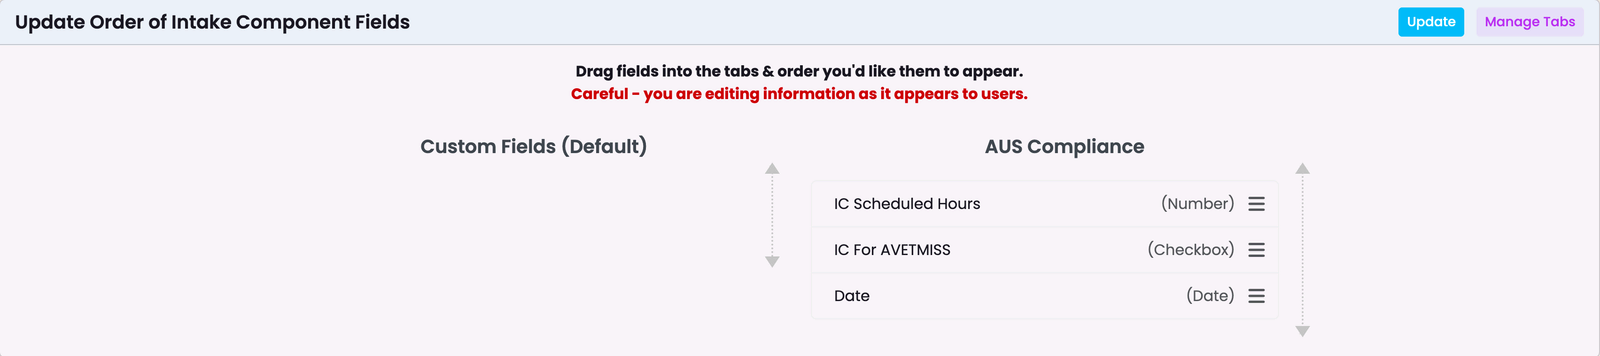
Drag and drop the custom fields into the order you wish to have them presented on an Object tab.
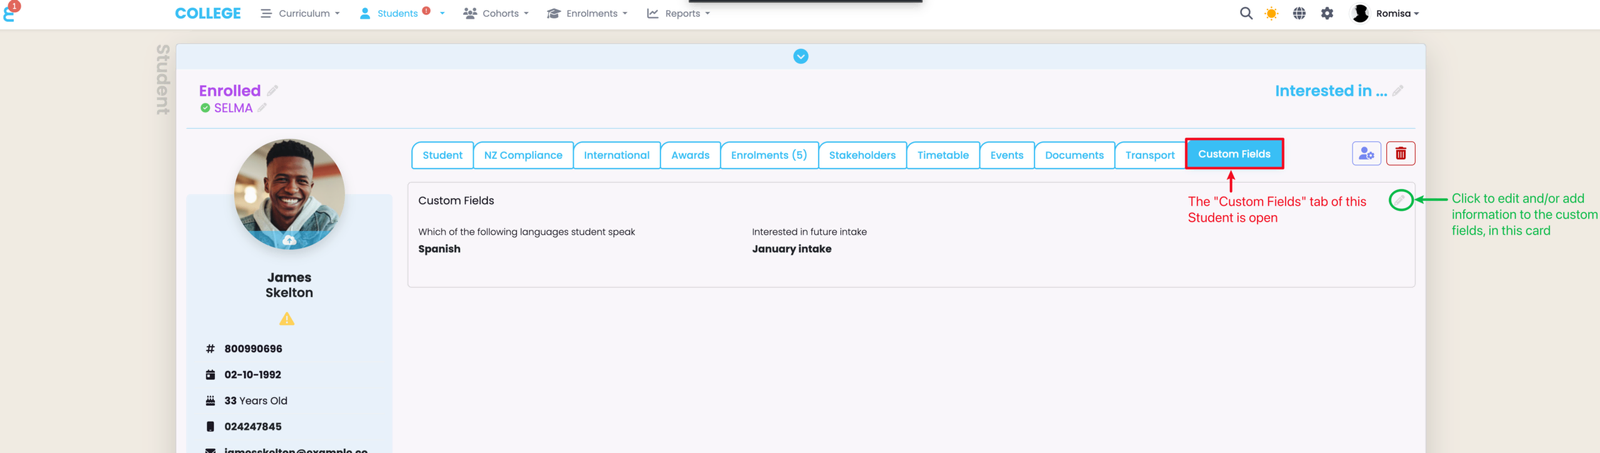
Custom Fields Tab
In this example, the Student Profile page shows a Custom Fields tab (red) including information about fluent languages spoken by the Student, and the future Intake they are interested in. To alter or add relevant information, click the pencil icon in the corner of the card (green).
Last updated