
Updated on
2. Create and Manage an Organisation
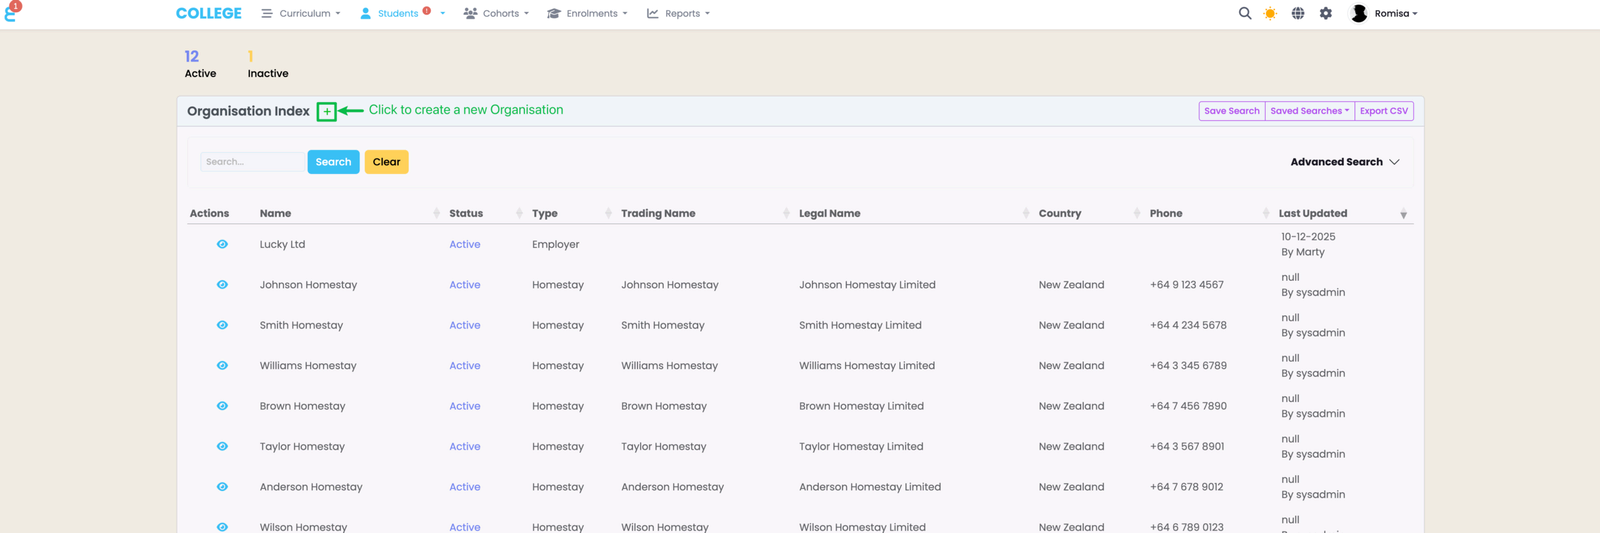
Click on the green "+" icon to create a new Organisation and add it to the Organisation Index.
Create an Organisation
Click on the green "+" icon to create a new Organisation and add it to the Organisation Index.
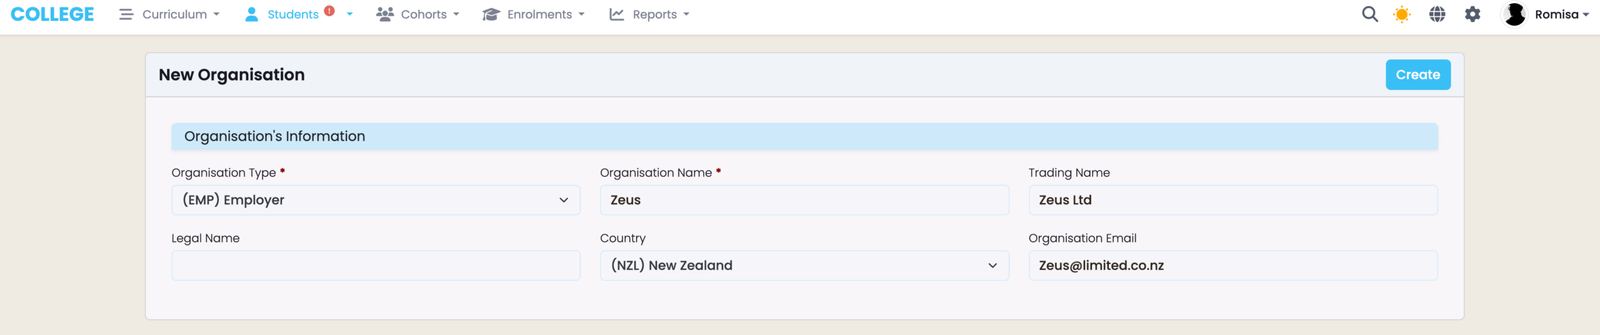
Fill out the required fields, as indicated by red asterisks (red). Click the blue “Create” button to save the new Organisation to the Organisation Index.
Manage Organisations
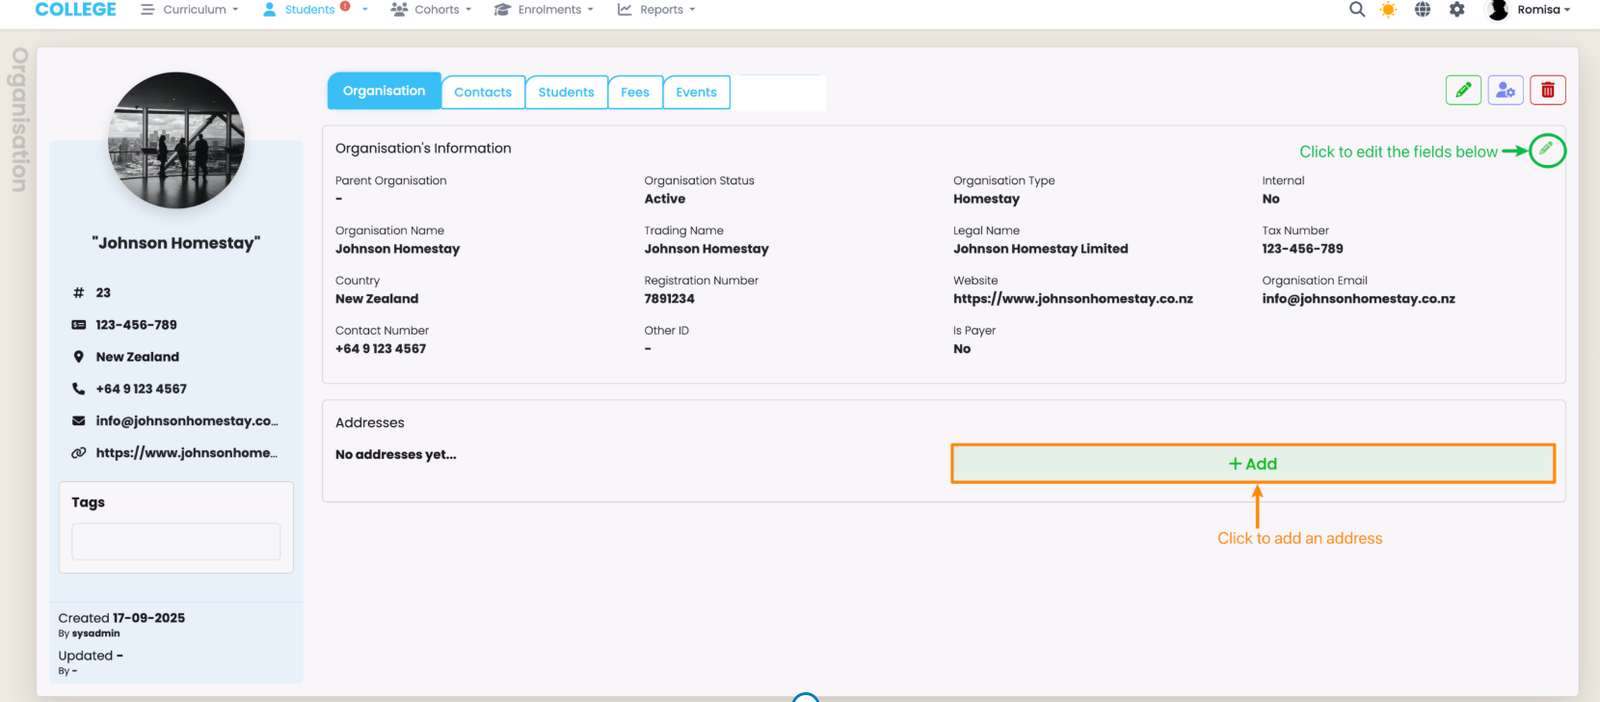
Organisation Tab
Contacts Tab
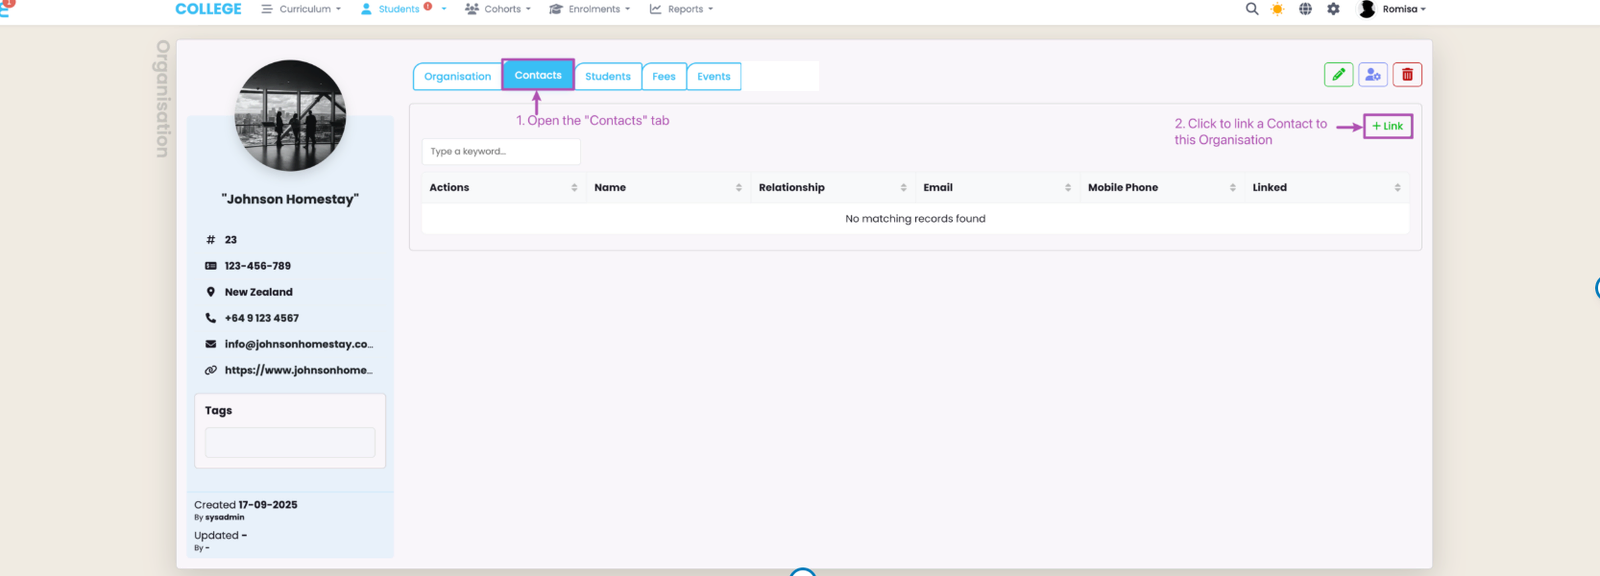
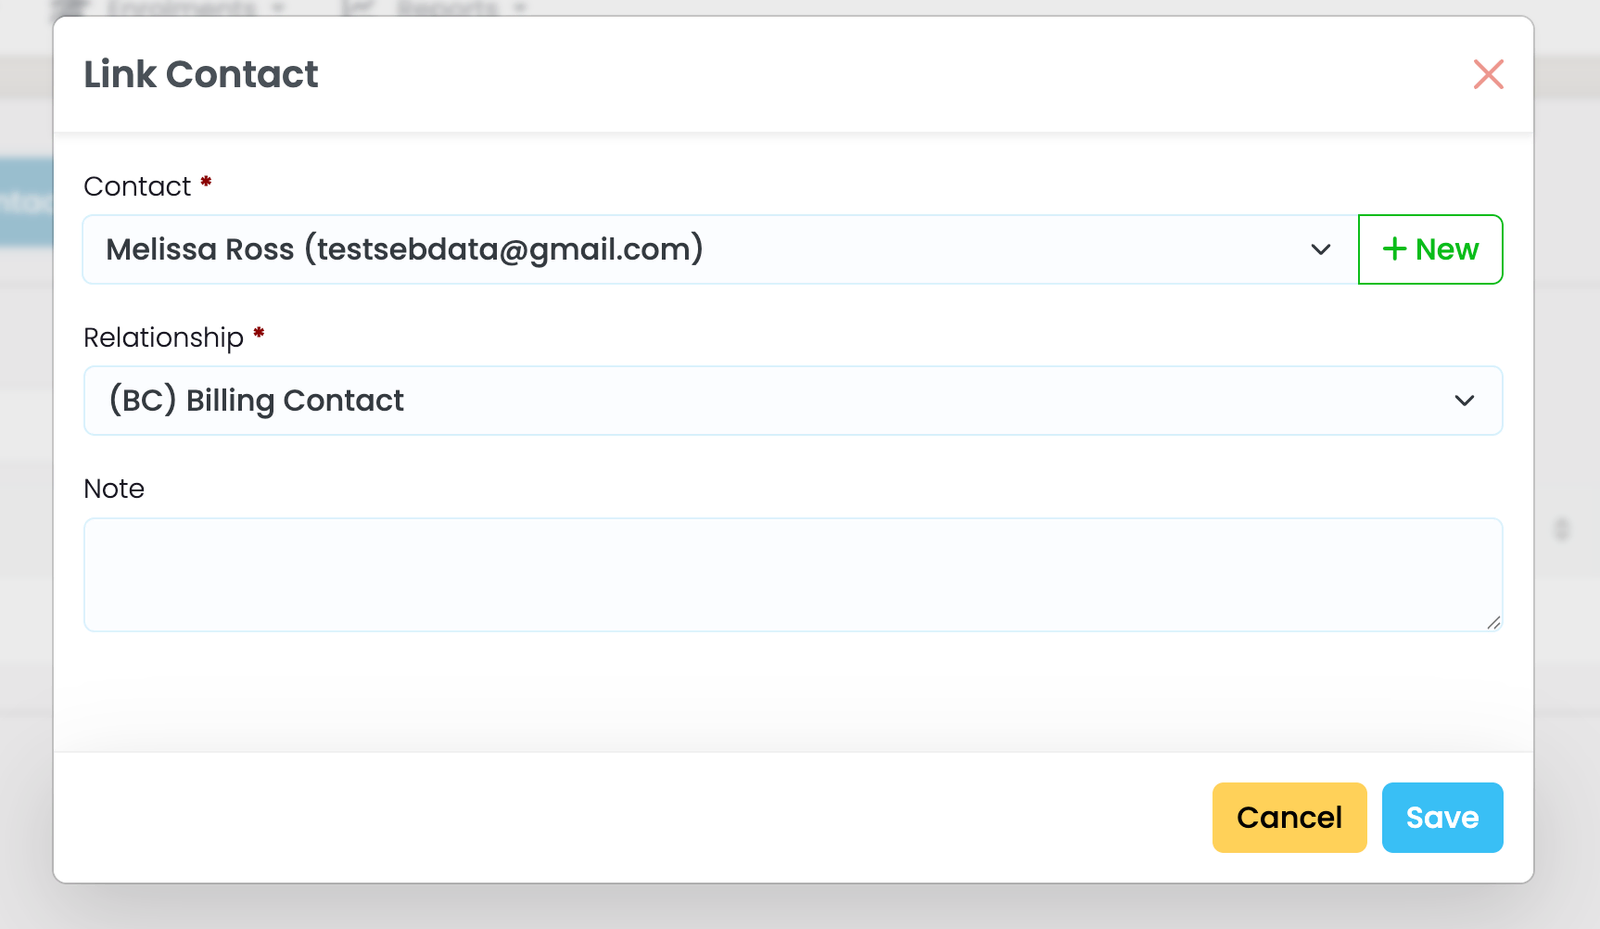
Specify the Contact you are linking, as well as the Contact-Organisation relationship. You can opt to add a note, too. Click “Save” to add the Student-Contact link.nisation Information
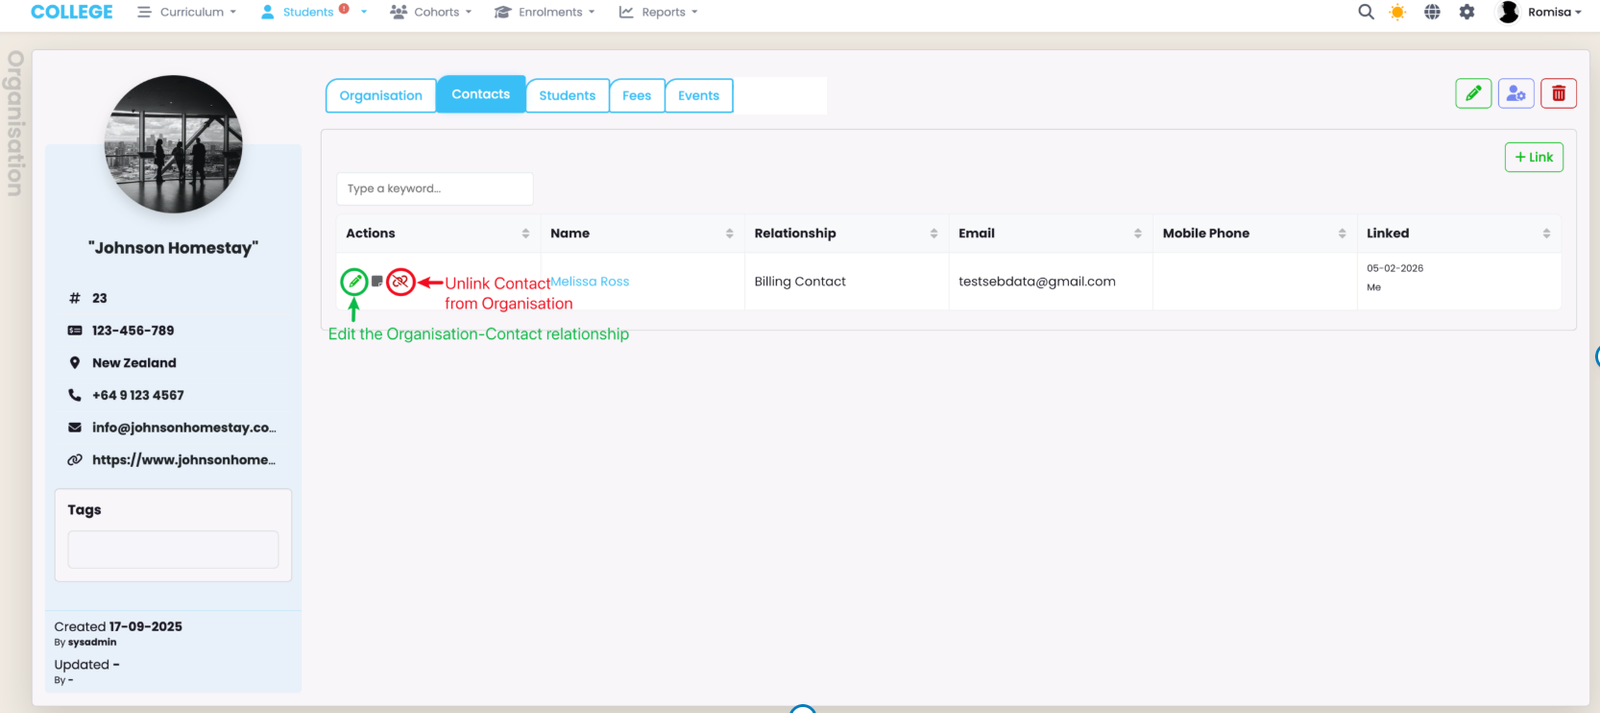
Click the green pencil icon to edit a Organisation-Contact relationship, or remove (unlink) the relationship entirely (red).
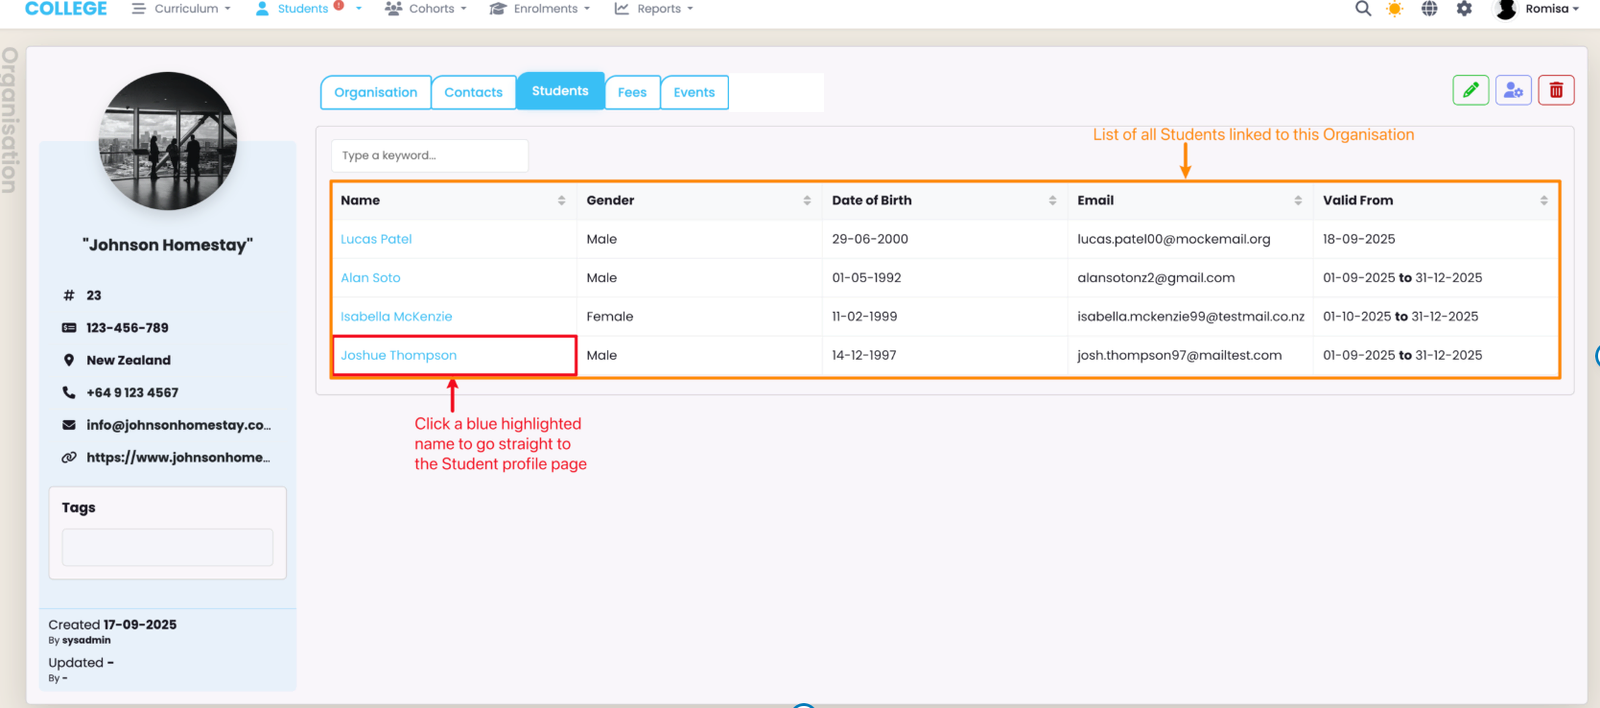
Students Tab
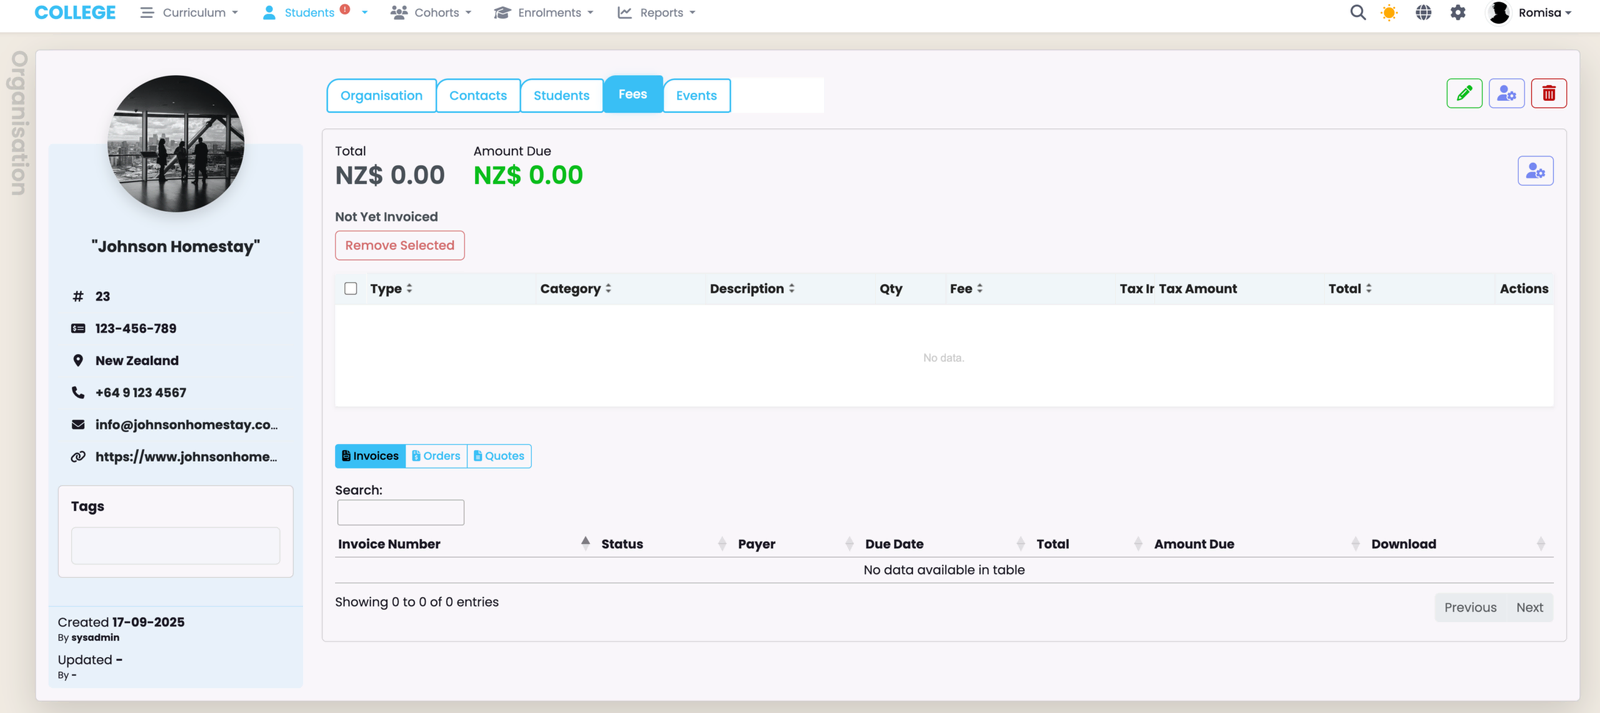
Fees Tab
This is where you can see all Enrolment fees, and invoices and orders associated with an Organisation.
Events Tab
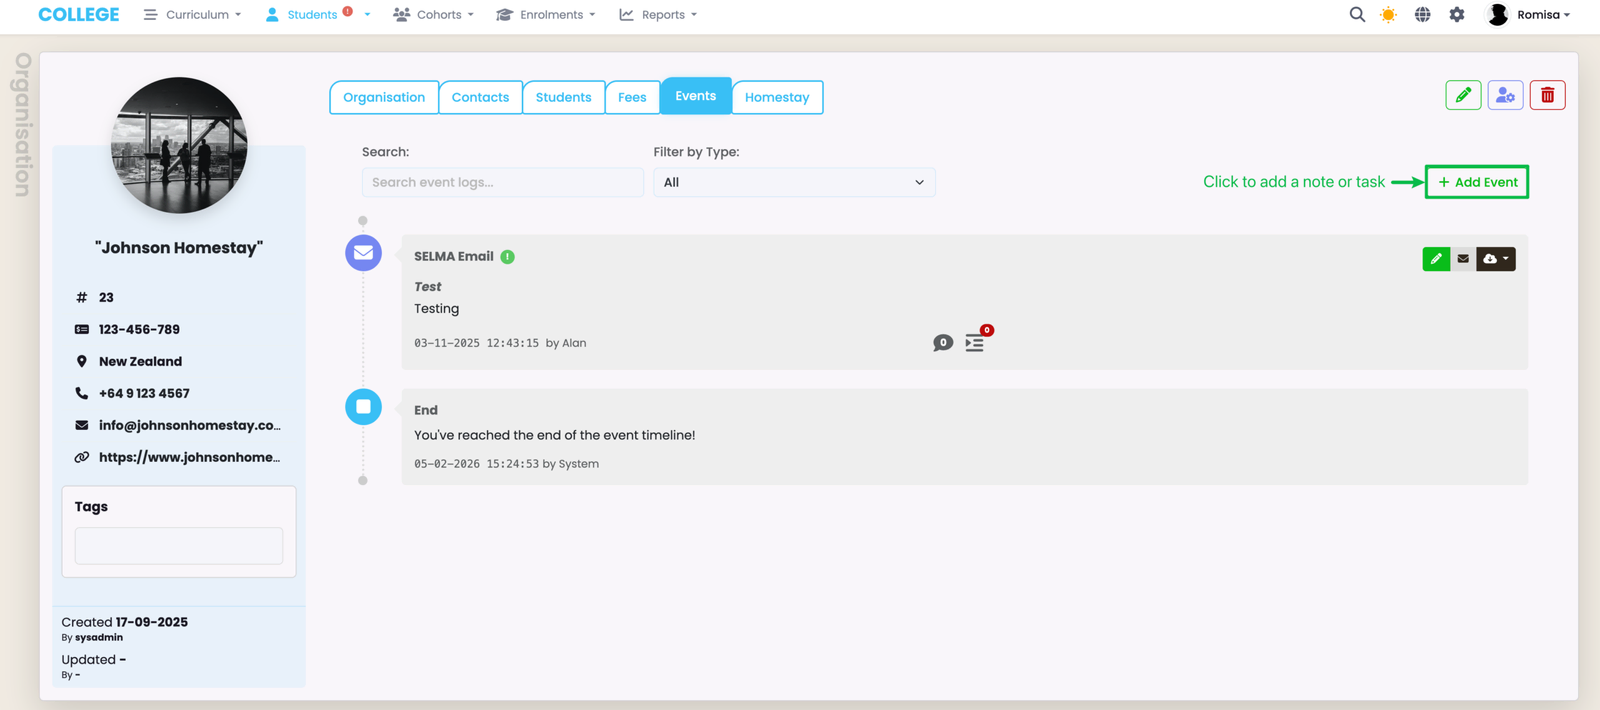
Use the Events tab to create a note on the Organisation profile, or assign a task to a SELMA user.
Click the "+ Add Event" button to create notes on the Organisation page, or assign tasks to internal Users.
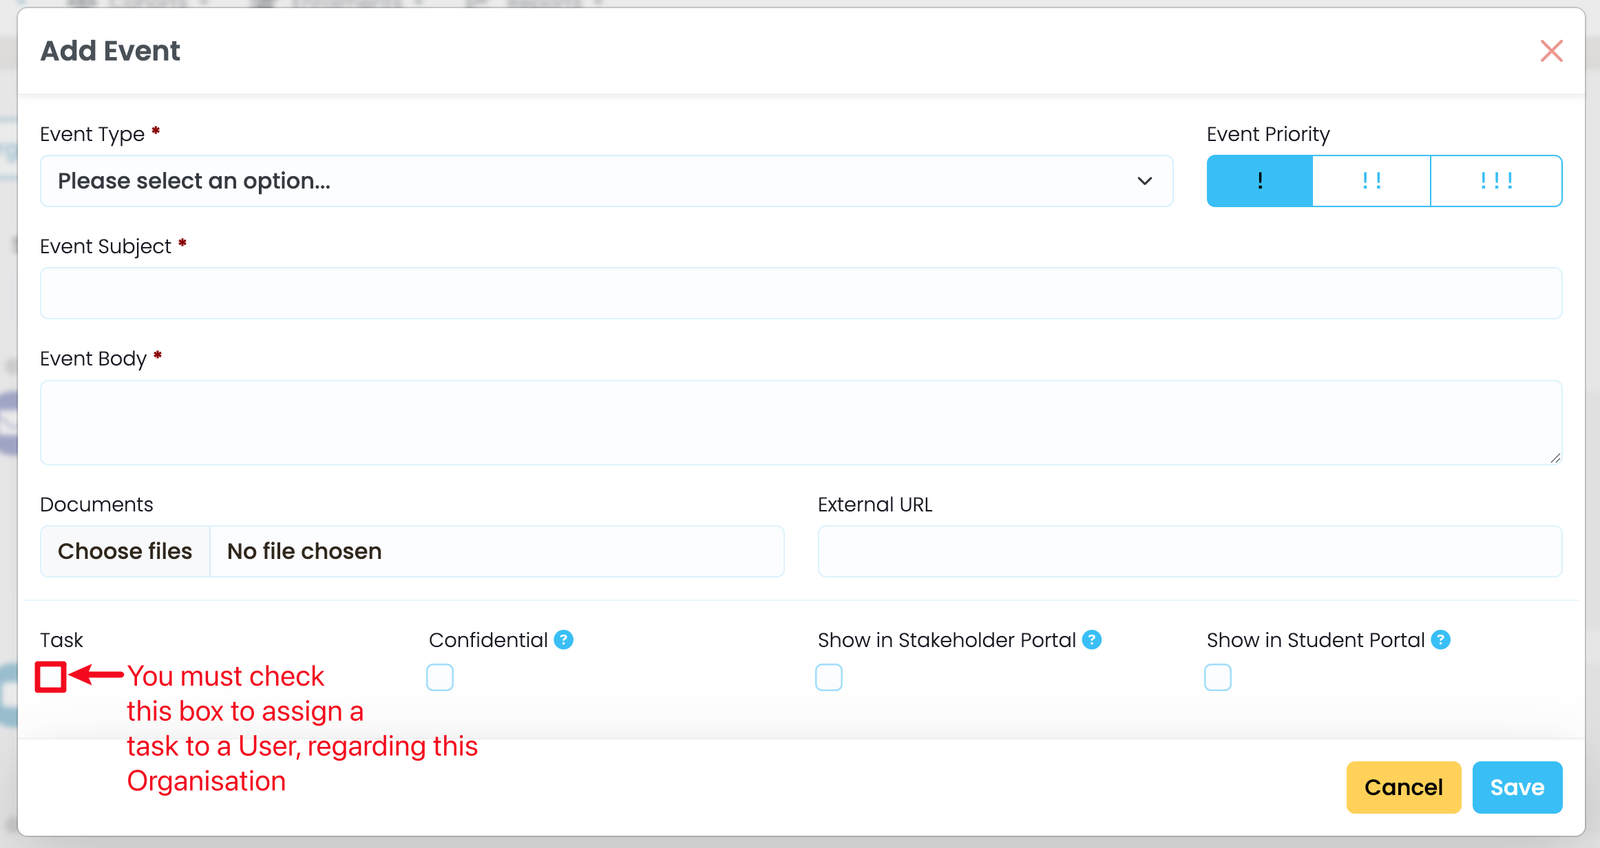
Fill out the required fields, as indicated by red asterisks, and click the blue "Save" button.
Last updated