
Updated on
1. Creating Timetables
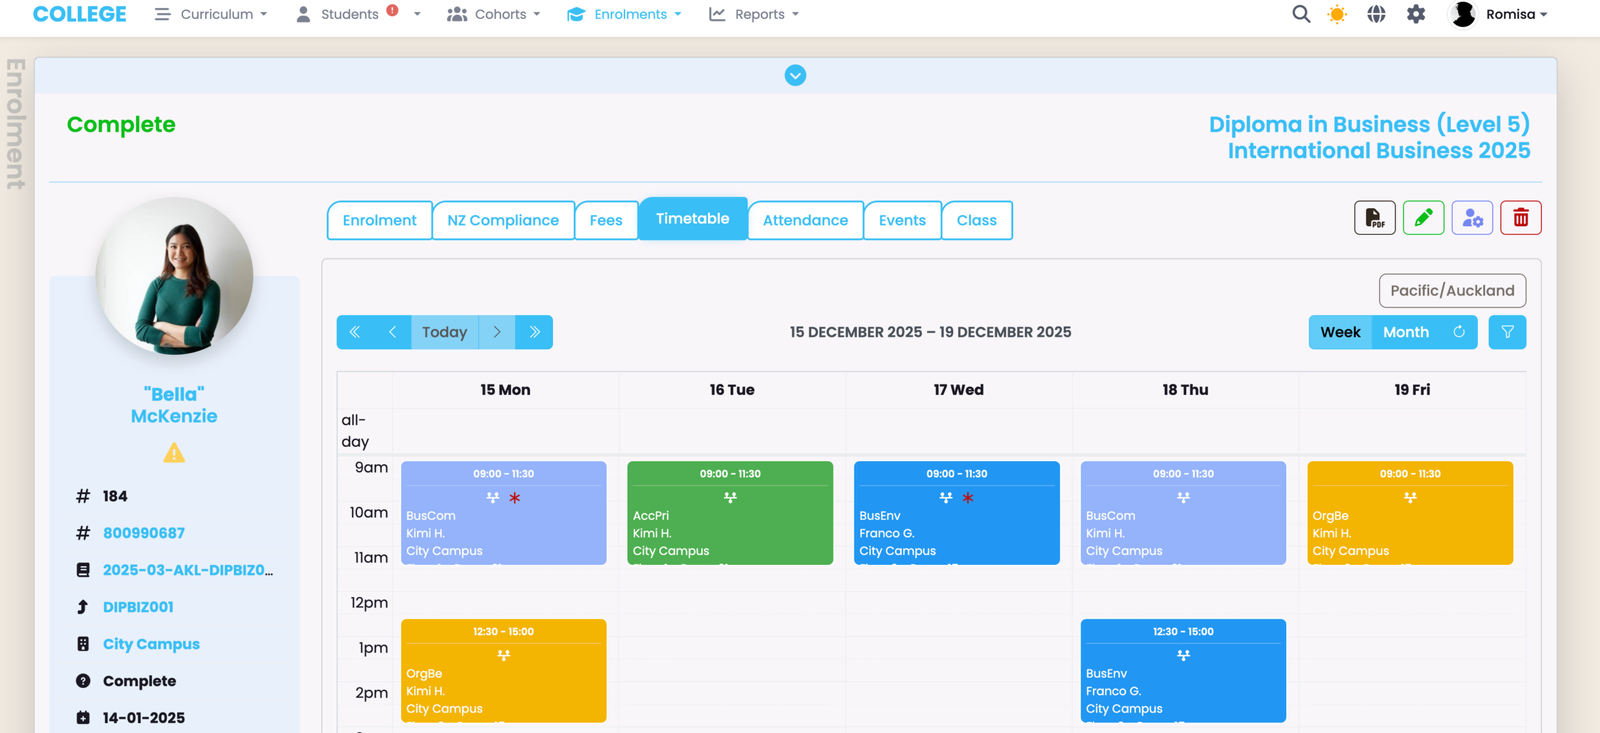
The Student’s timetable will be a combination of all Class, Intake and/or Ad-Hoc Enrolment sessions, if any.
Timetables or attendance sessions are created against an Intake, Class or Enrolment. Therefore, a Student can be marked by attendance after an attendance register has been generated.
The Student’s timetable will be a combination of all Class, Intake and/or Ad-Hoc Enrolment sessions, if any.
Create an Intake Timetable
Intake timetables suit short courses where all students join simultaneously, share a single teacher/tutor, or study one subject. For more complex scenarios, such as multiple classes per subject or multiple teachers, use Class timetabling (common in Higher Education).
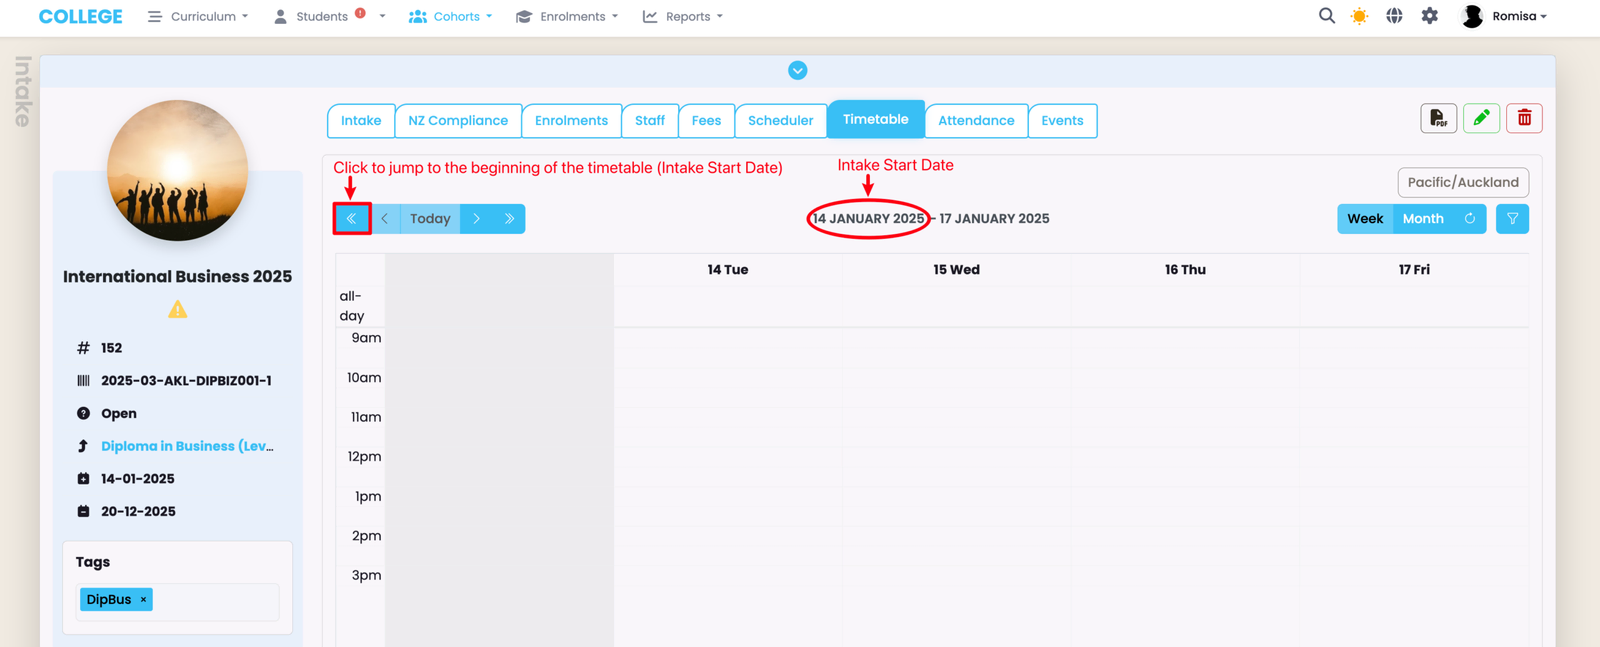
On a select Intake, navigate to the Timetable tab, and click the "<<" arrow to jump to the beginning of the timetable.
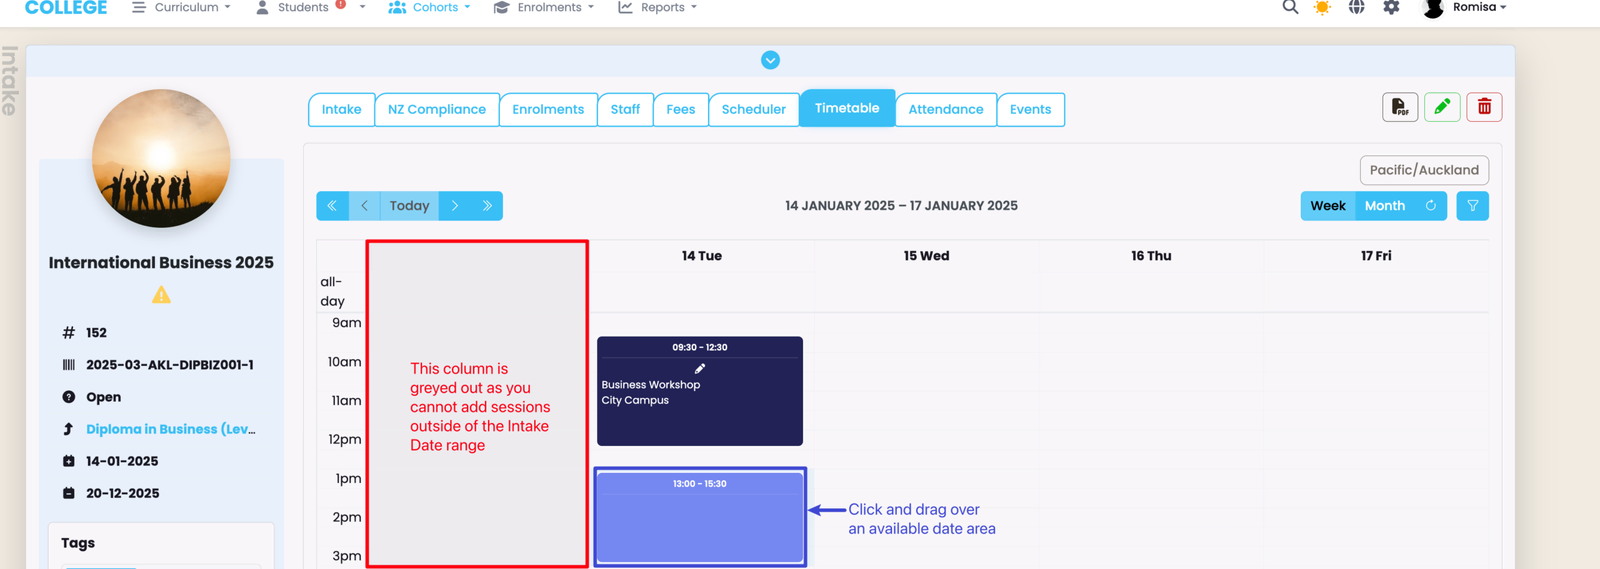
Note: Available calendar dates begin from the Intake Start Date and end on the Intake End Date.
Create a New Timetable Session
To create an Timetable session, click over a start time on an available day, and drag your mouse to the end time.
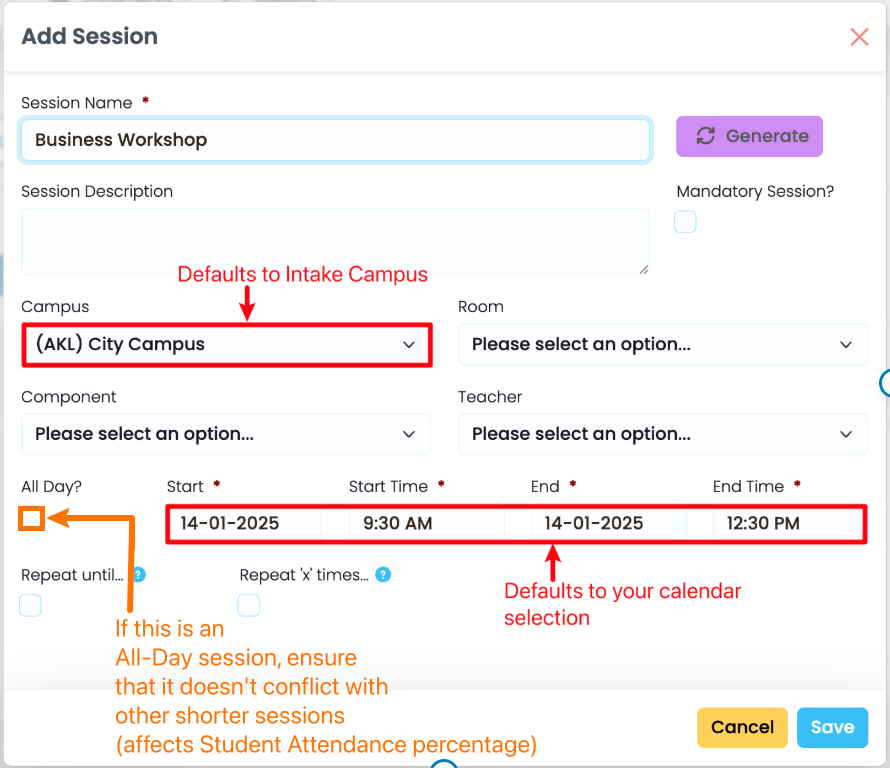
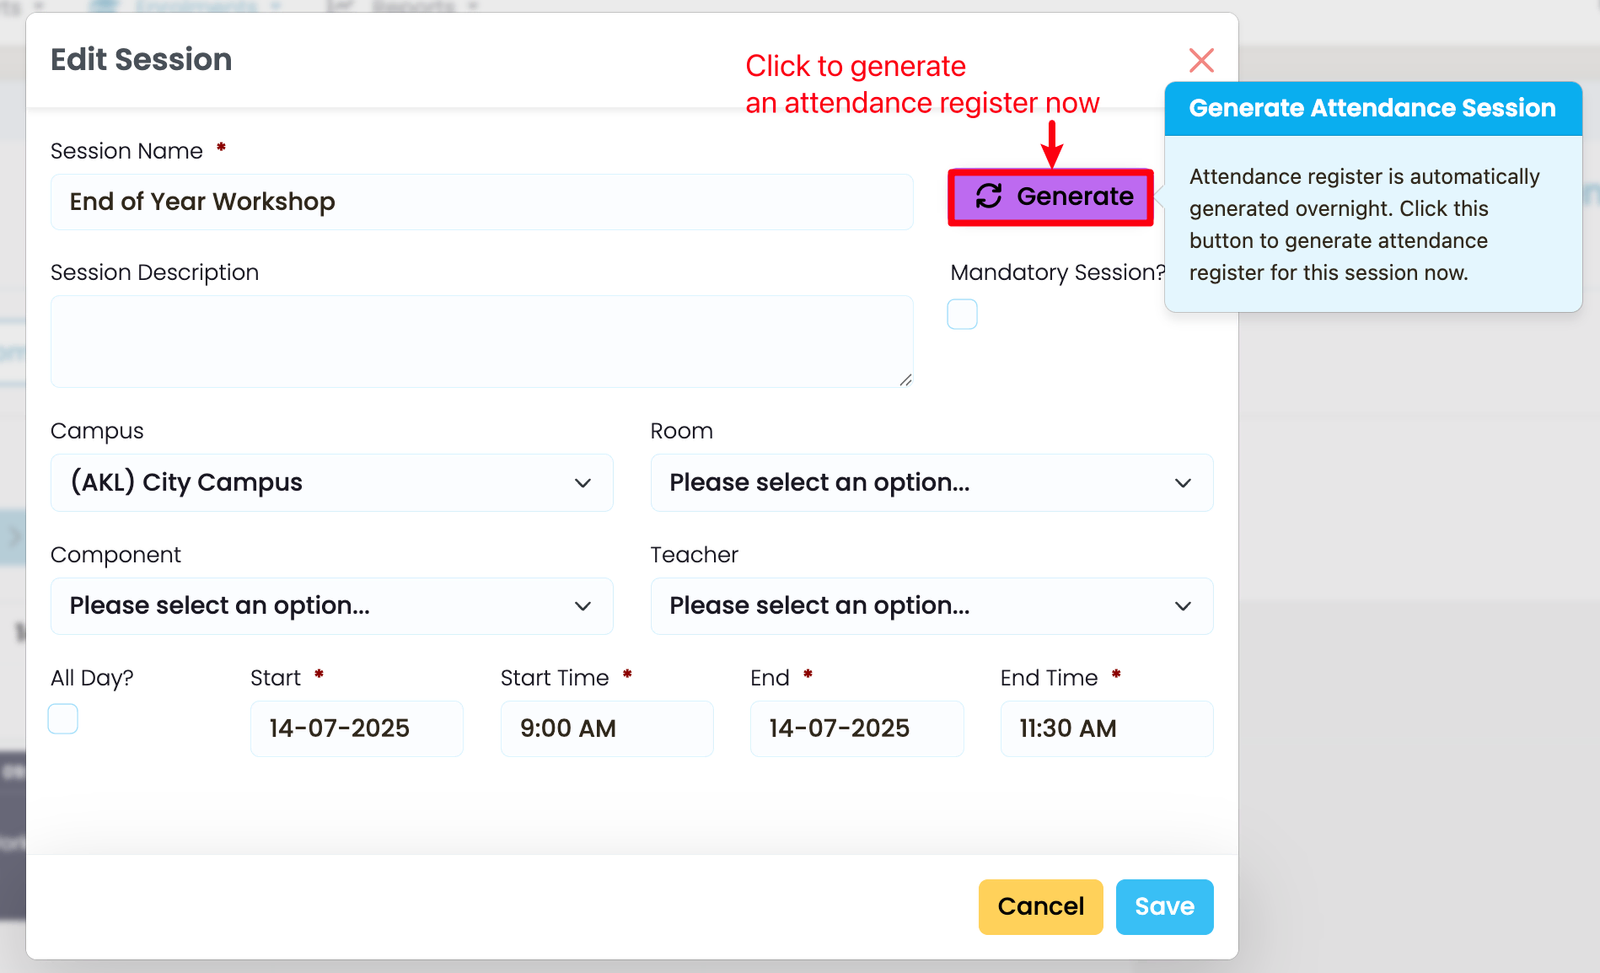
Fill in the required details, as indicated by red asterisks, and click the blue "Save" button. The Date and Start and End time of the session will be auto-populated, as per your calendar selection, and the Campus will default to that of the Intake.
Note: The purple "Generate" button is greyed out as your session will generate overnight, automatically. However, it will be enabled after you save the session, should you need to generate an attendance register on the same day that you create a timetable session.
Create a Recurring Timetable Session
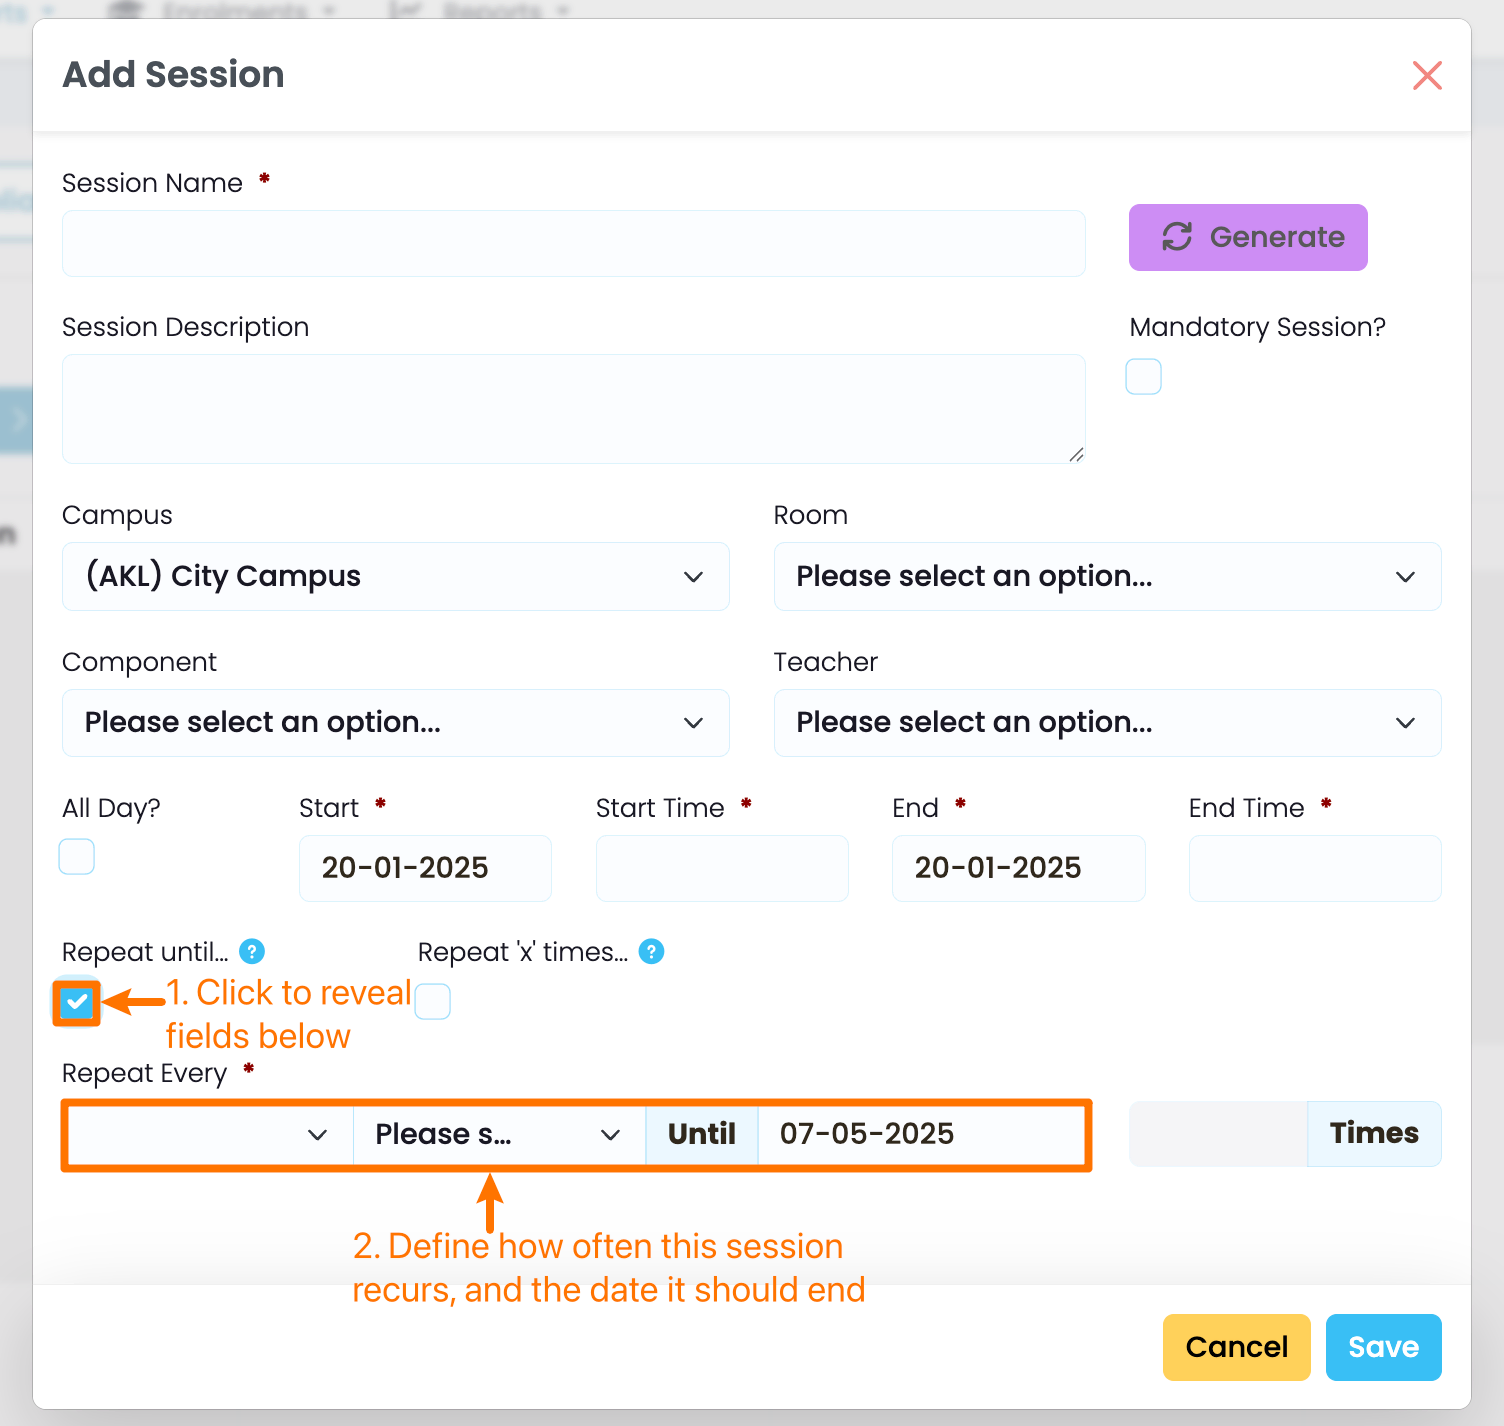
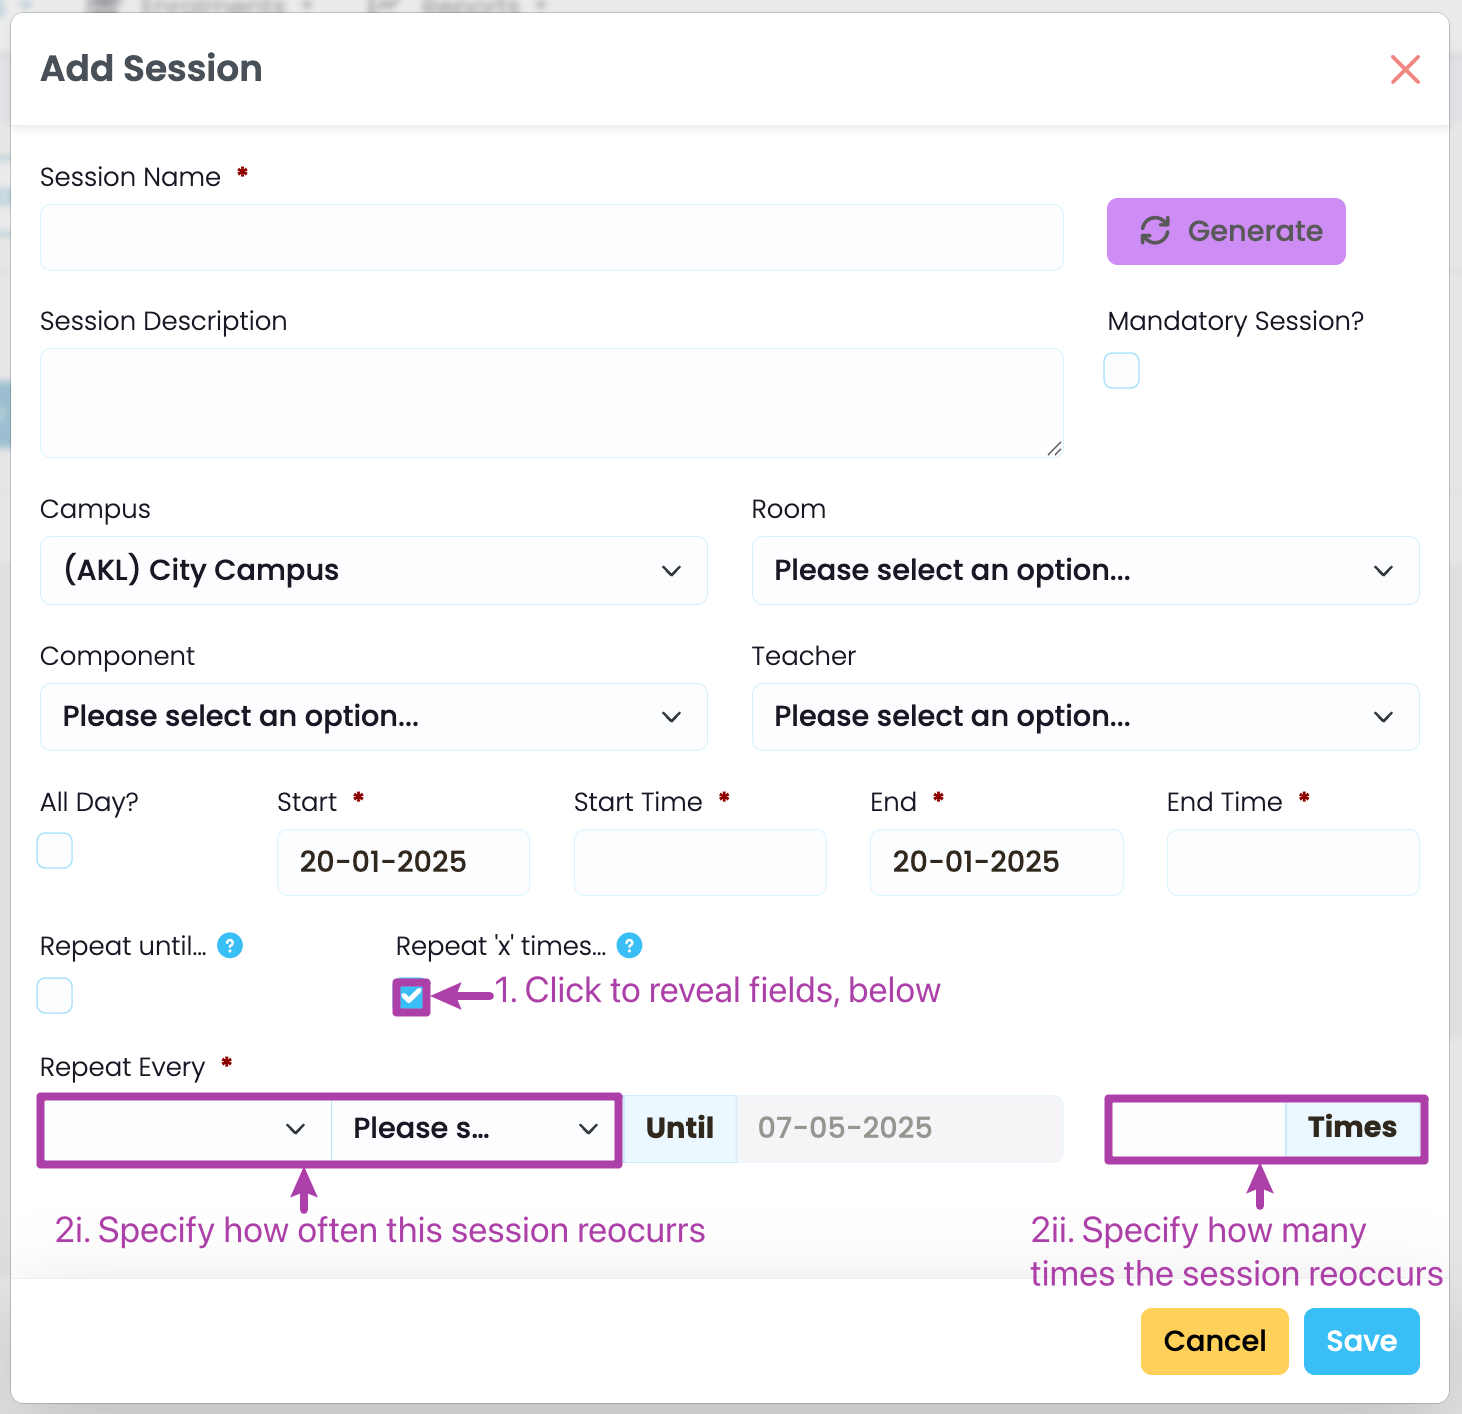
There are two ways to create a recurring session:
- Specifying the frequency by End-Date
- Specifying the frequency by Number
Note: If you specify both ways, whichever of the two that comes first is applied to the timetable session.
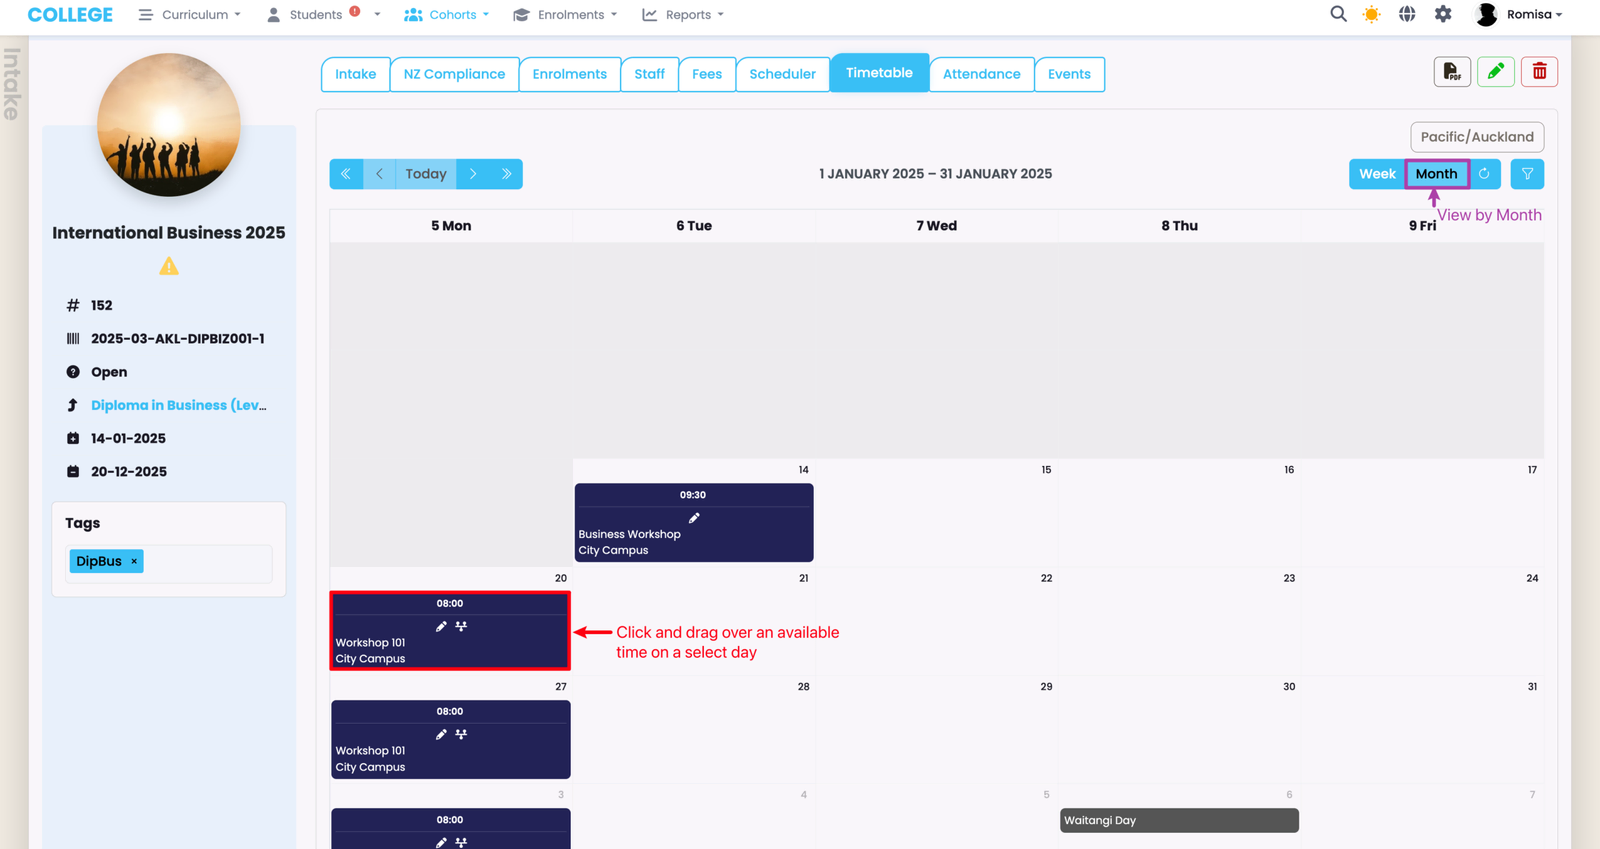
To create a recurring timetable session, change to a monthly view (purple), and click and drag over a time area on a select day.
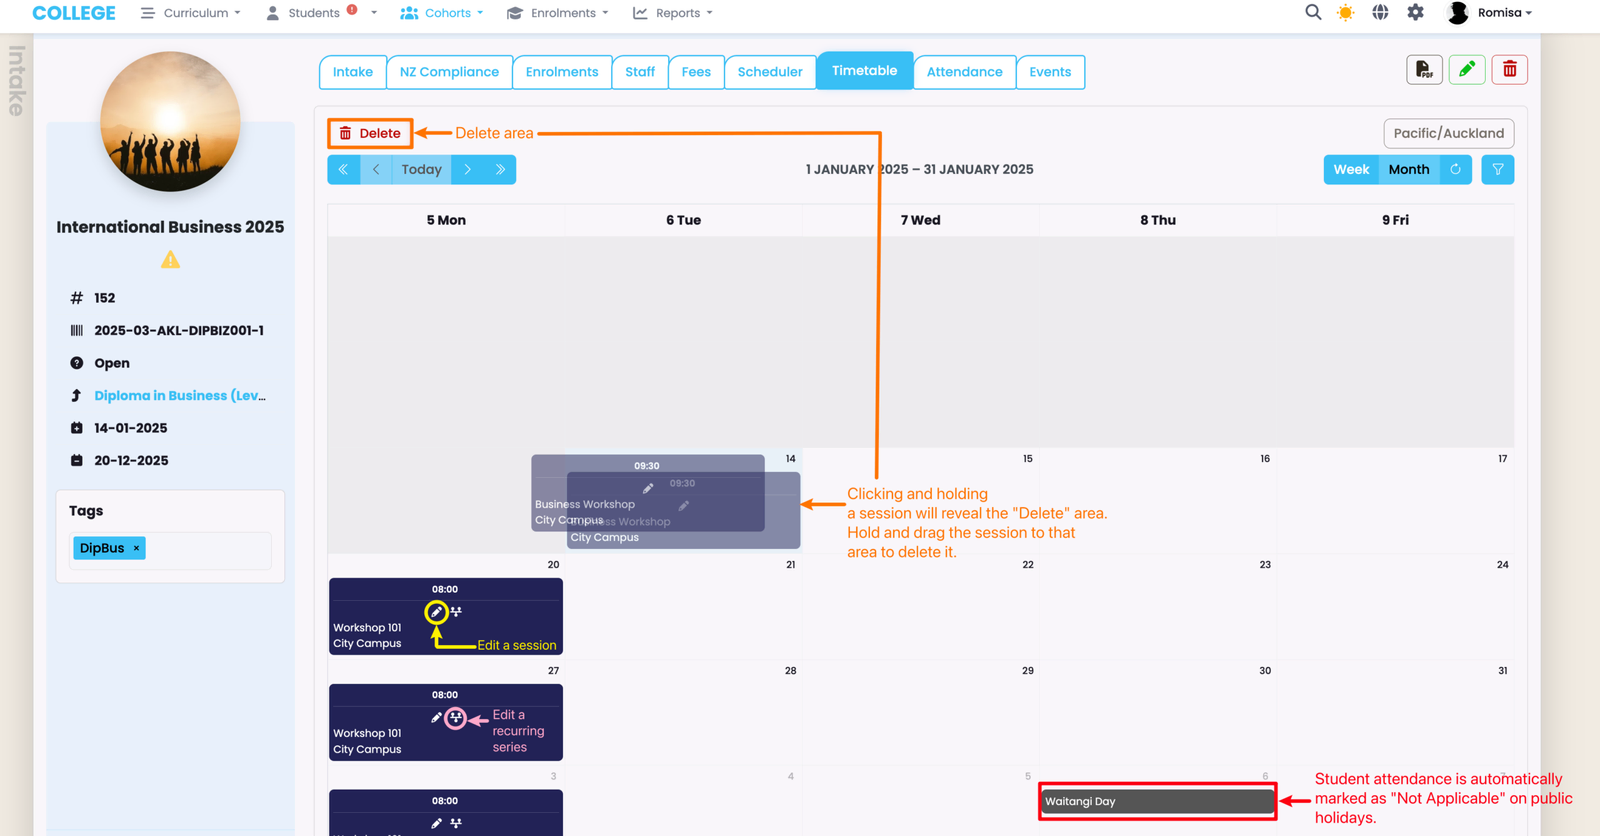
Note: The monthly view will allow you to see the recurring sessions best when you've created them.
Editing Timetable Sessions
Edit individual timetable sessions (yellow), or a series of recurring timetable sessions (pink).
Click and hold a session to reveal the "Delete" area, where you will need to drag the session to for deletion.
Create an Attendance Register
Once a timetable session is created, attendance registers are created for marking, automatically, on Enrolments of the associated Intake.
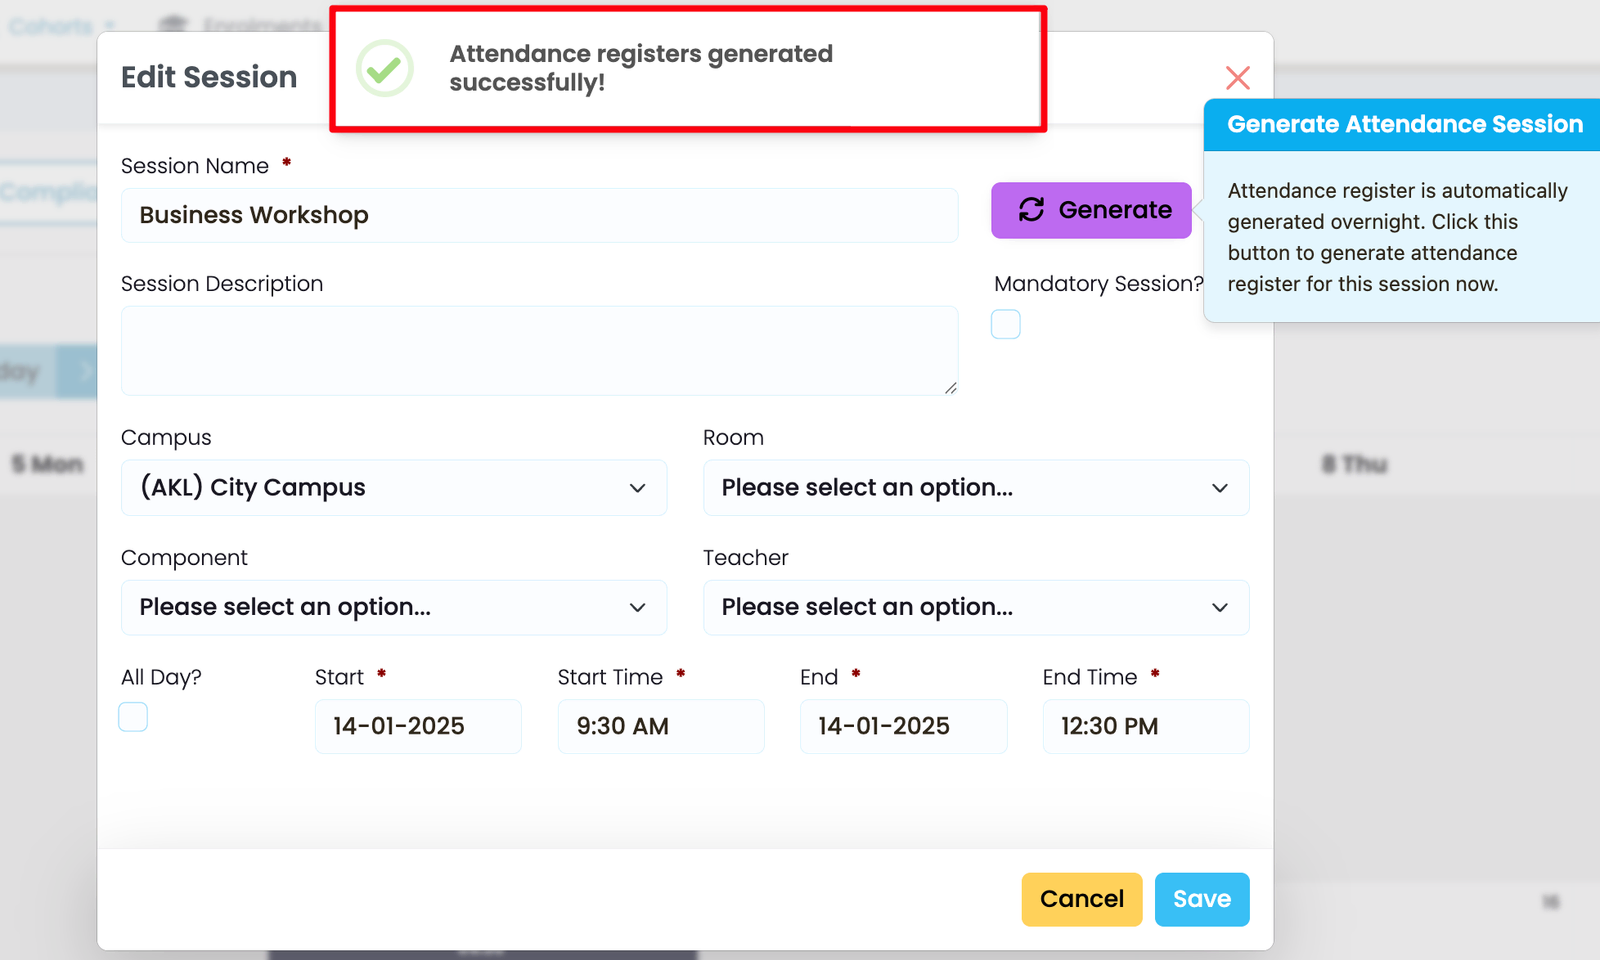
Note: If you create a timetable session and you need to mark attendance on the same day, you can edit the session, and click on the purple "Generate" button to create the attendance register, immediately.
On the timetable session editing screen, click the purple "Generate" button.
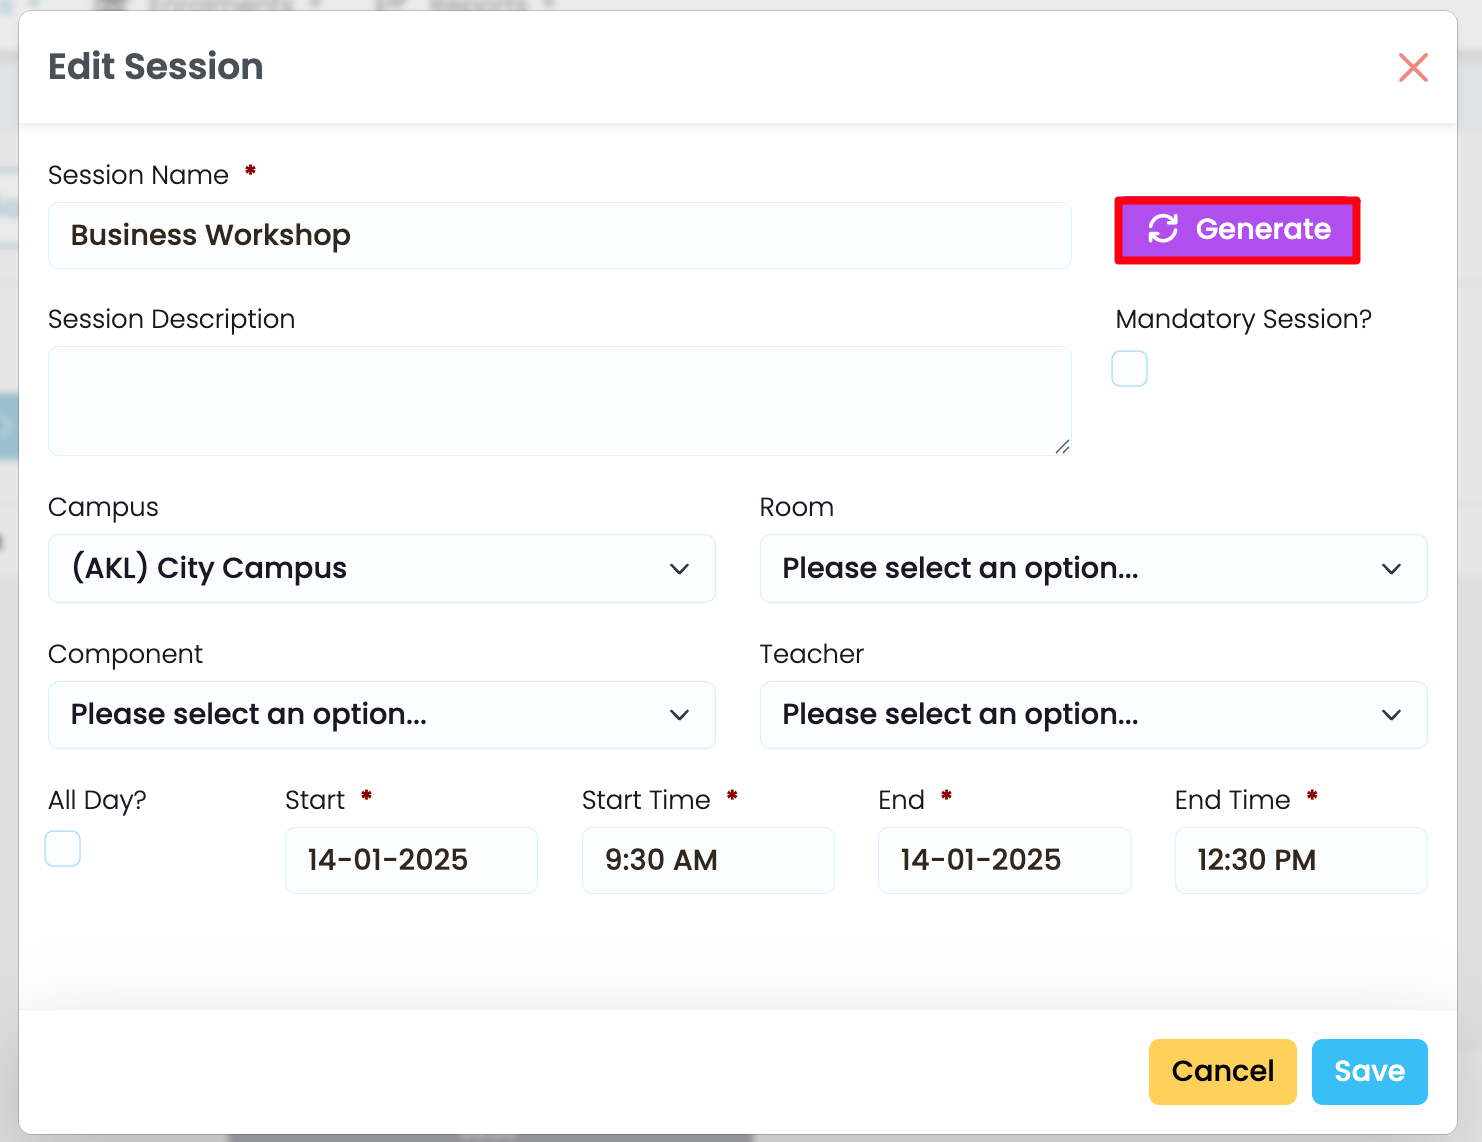
The pop-up message confirms that the Attendance register has been generated successfully.
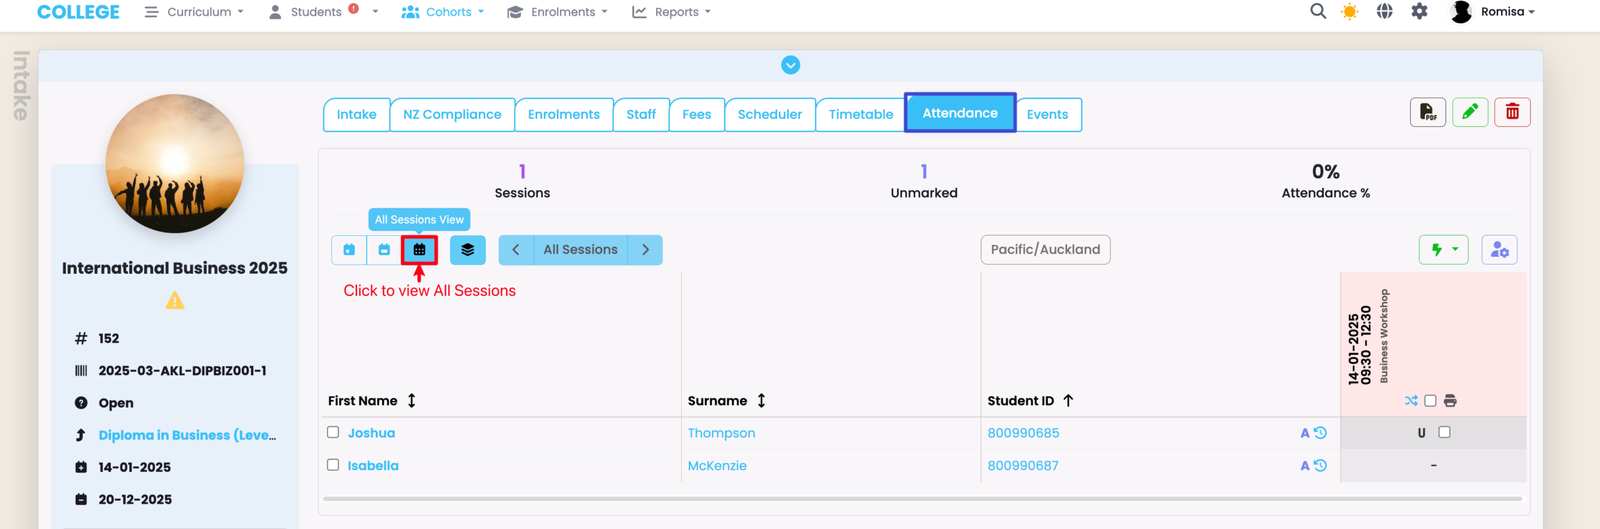
Navigate to the Intake Attendance tab, and click the "All Sessions View" (red) to see the attendance register. Please refer to Attendance - Marking Attendance in this resource for more.
Create a Class Timetable
Class timetables are typically used for:
- Higher Education Students – Students attend multiple classes - usually a class per subject.
- Apprentices in Block Courses – Apprentices who belong to different intakes might be grouped into a single class for a “Block Course”, or a campus-based training period.
To create a Class timetable, follow the exact steps as those for the Intake, above.
Linking Components to a Class Session
Components can be subjects which you can link to timetable sessions. Though this can be done on both the Class and Intake level, it has more relevance on the Class level, for Higher Education students.
Note: Timetable sessions can be colour-coordinated by Component. To do this, set-up the colours at the Component level from the Curriculum Index.
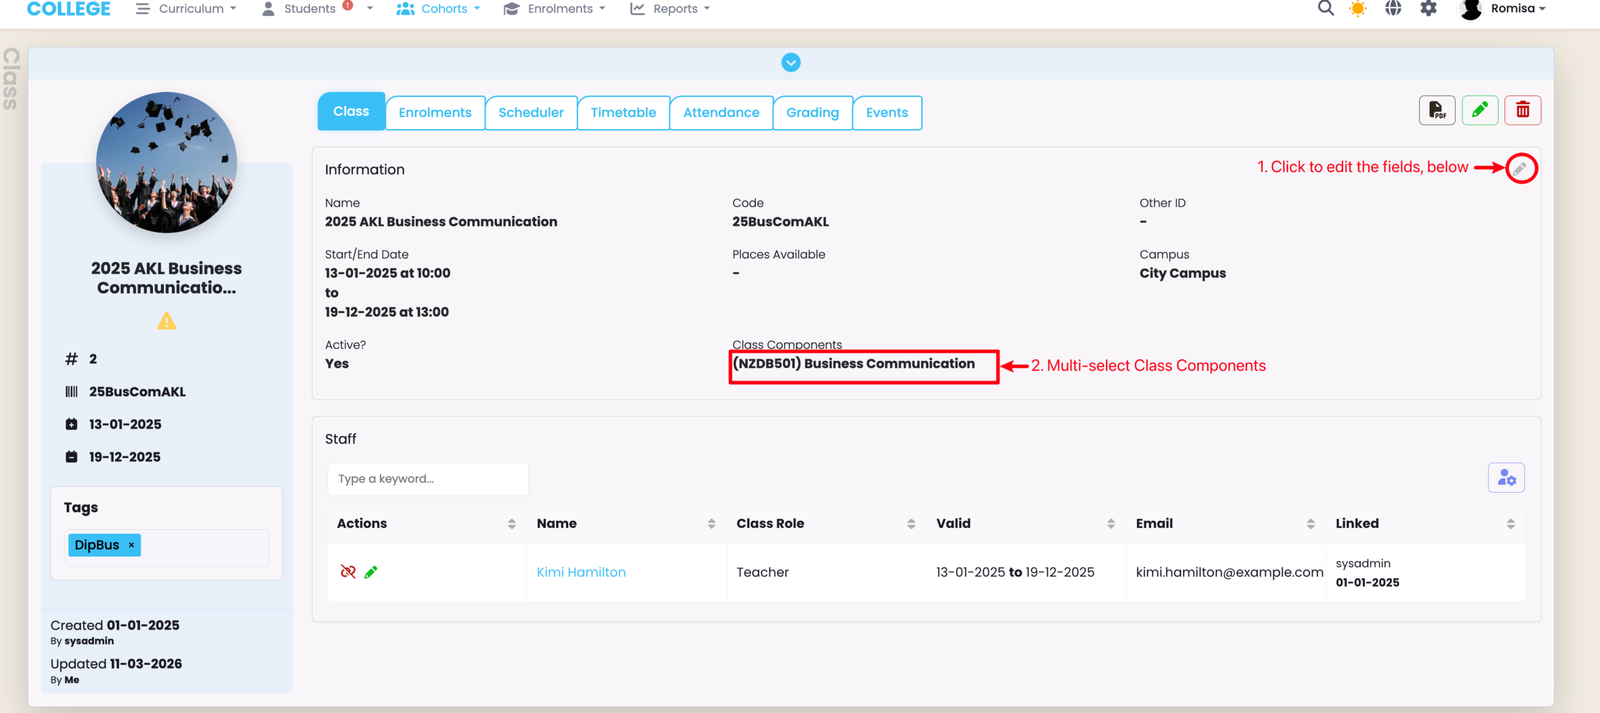
On the Class tab of the Class profile page, select the Components you want to link to the Class.
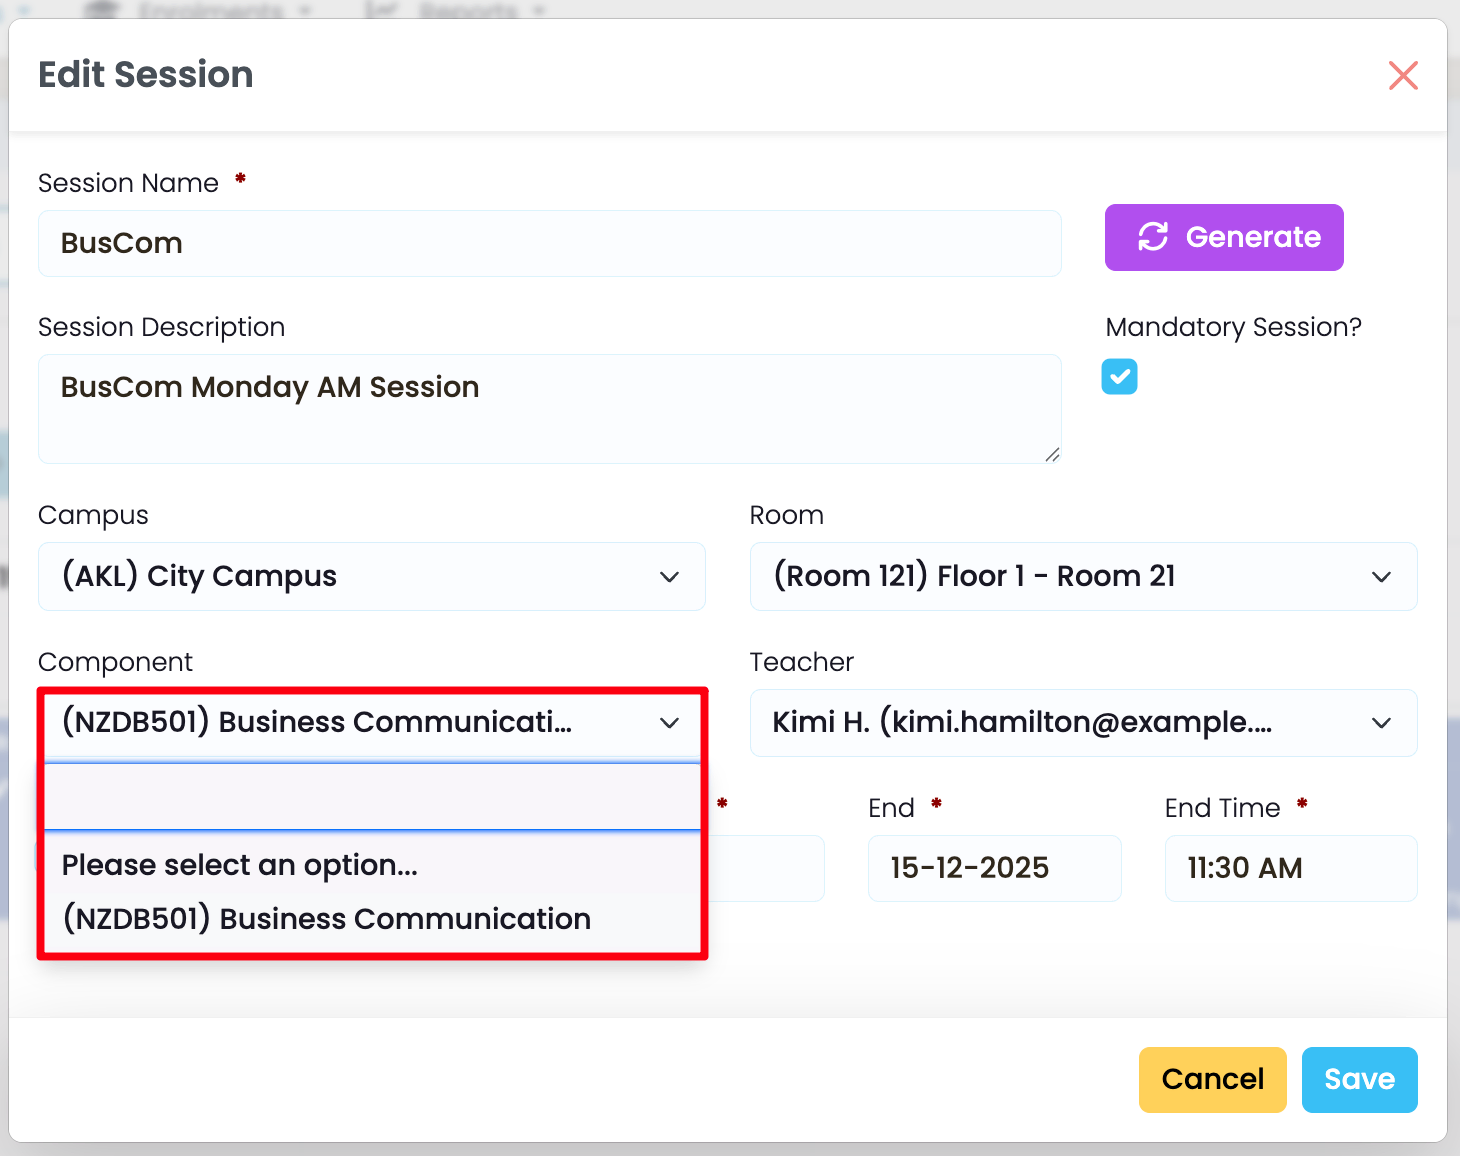
Select from the drop-down list of Class Components you have linked to the Class.
Create an Enrolment Timetable
Timetable sessions can be created at the Enrolment level, when Students require private 1:1 training or tutoring sessions.
Note: You will not be able to edit timetable sessions which have been set-up at the Class or Intake level.
Navigate to the Enrolment Timetable tab, and create a new timetable session by clicking and dragging your mouse over a time period, on an available day.
Click the purple "Generate" button to create an attendance register for marking on the Attendance tab.
Please refer to Attendance - Marking Attendance in this resource for more.
Last updated