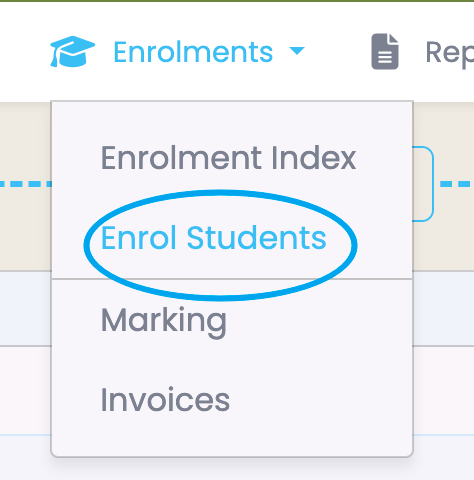
To enrol student(s)navigate to Enrolments -> Enrol Student(s).
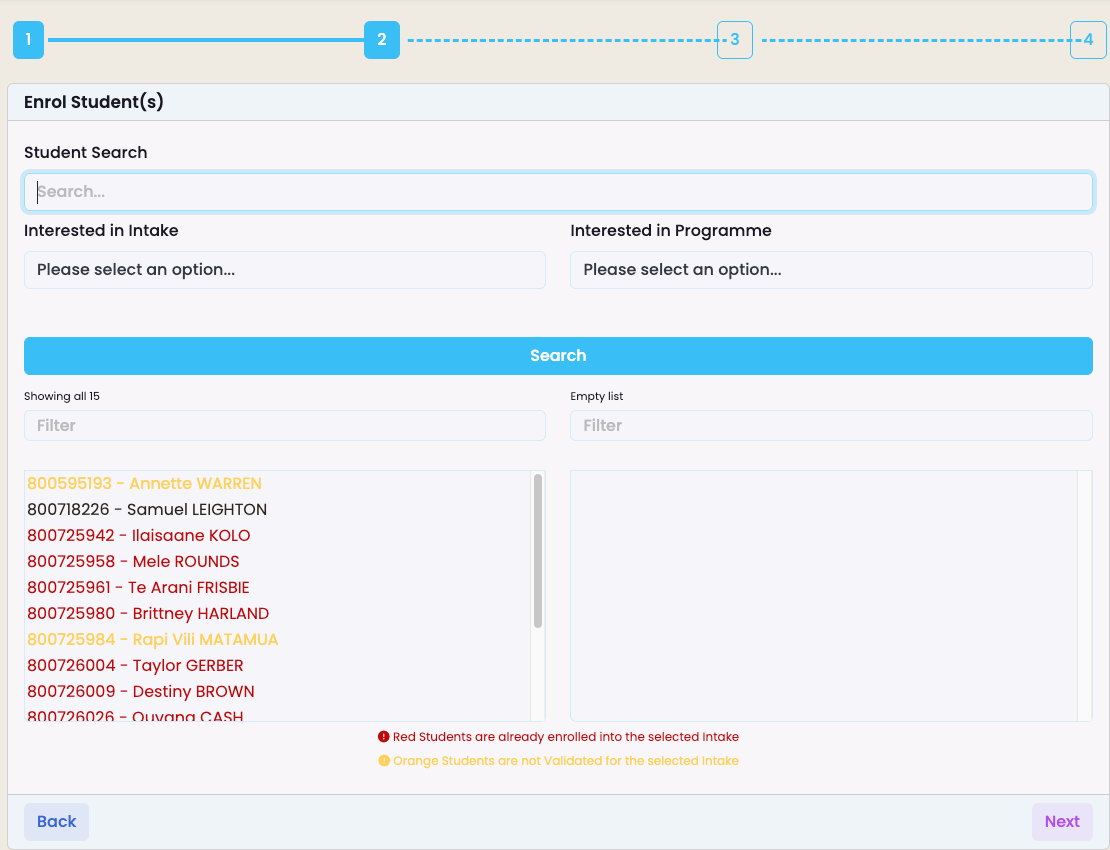
On the next screen there is a completion workflow to help users navigate various steps to complete an enrolment – hover text above each number provides section details.

Select relevant Intake, the Enrolment Status you wish to attribute and Start Date.
You can manually select a start date or use Intake Start Date.

End date can be selected: Manually or click on Intake End Date, Programme Length or Calculated. Then click on Next.
Search for students and click to move across and enrol.
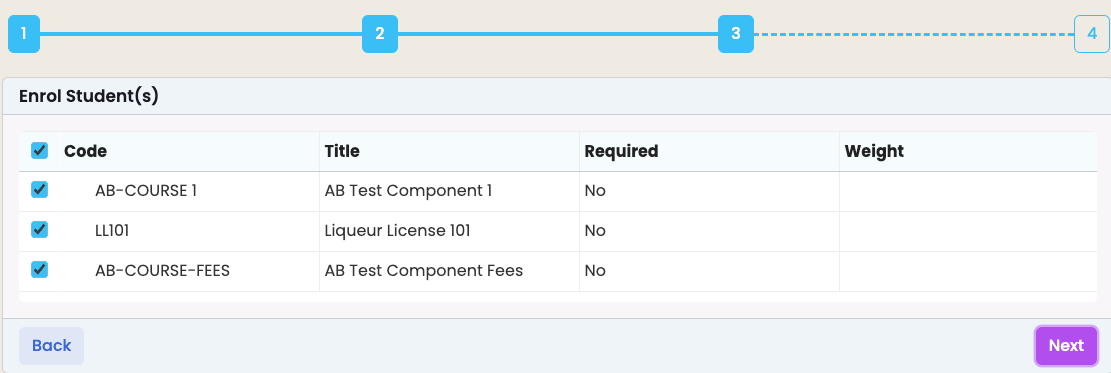
Select relevant components and click on next
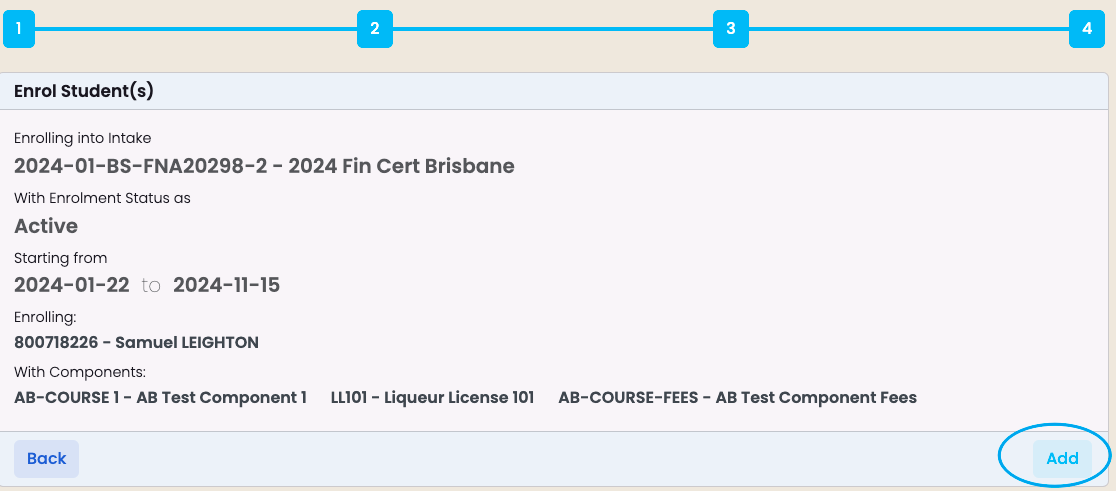
Final step – click on ‘Add’ and enrolment is complete.