
Updated on
2. Report Builder
The Report Builder lets you create your own ad‑hoc reports inside SELMA SIS—no coding required. Pick the fields you want, decide which ones should…
Here’s what you’ll find in this article:
- Report Builder Overview
- Accessing Report Builder
- Creating a Report and Choosing a Base Entity
- Building Your Report
- Build with AI
- Running & Exporting Reports
- Subscribing to a Report
- Pinning a Chart to Your Dashboard
- Sharing a Report
- Report Limits & Best Practices
- Tips & FAQ
- Need Something More Complex?
Report Builder Overview
The Report Builder lets you create your own ad‑hoc reports inside SELMA SIS—no coding required. Pick the fields you want, decide which ones should behave as filters, then run or schedule the report in just a few clicks. Use Report Builder for straightforward data extraction such as:
- Lists of enrolments with programme names and dates
- Basic student directories (name, email, phone)
- Simple intake or class snapshots
- Totals and counts per row or per group (e.g. amount invoiced per student, enrolments per intake)
- Charts of your data (e.g. students by year of birth, enrolments per month)
If your reporting needs involve complex calculations or data drawn from many tables, see Grid Reports instead.
Accessing Report Builder
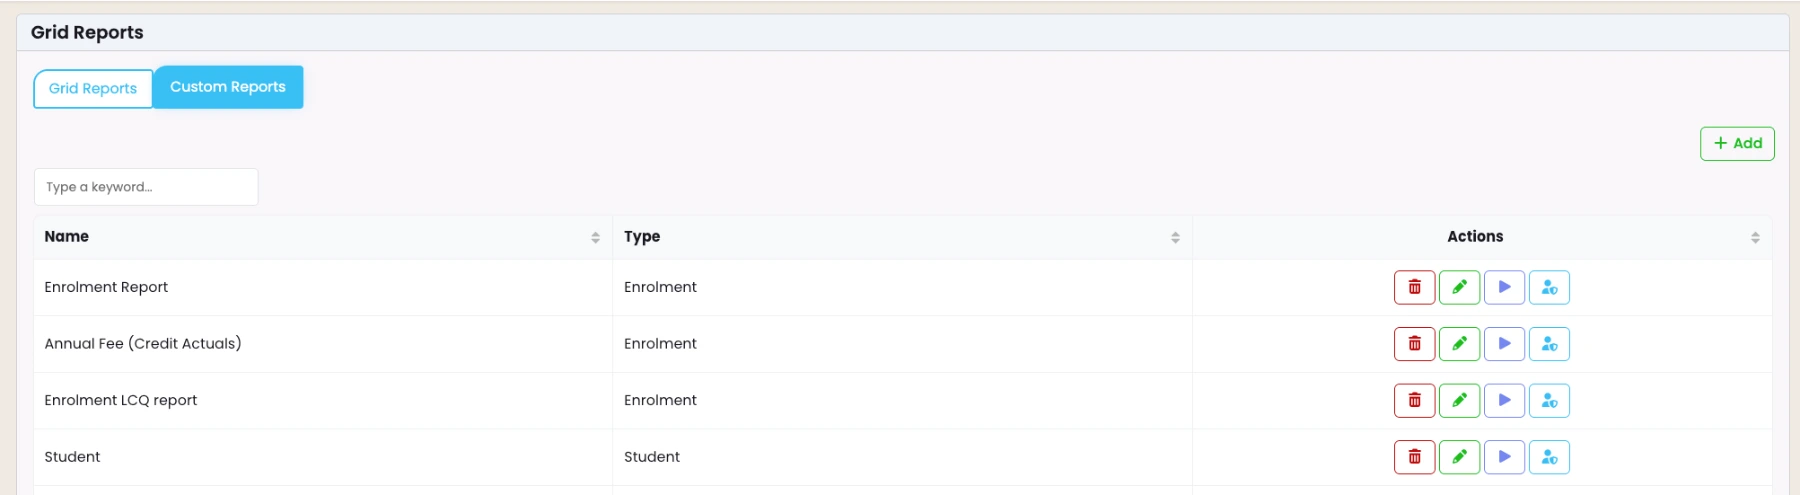
- From the top navigation bar, select Reports → Grid Reports → Custom Reports.
- The Report Builder home page lists every report you’ve already created. Use the row buttons to Edit, Run, Manage Access, or Delete a report.
- To create something new, click the New button in the upper‑right corner.
Selecting a Base Entity
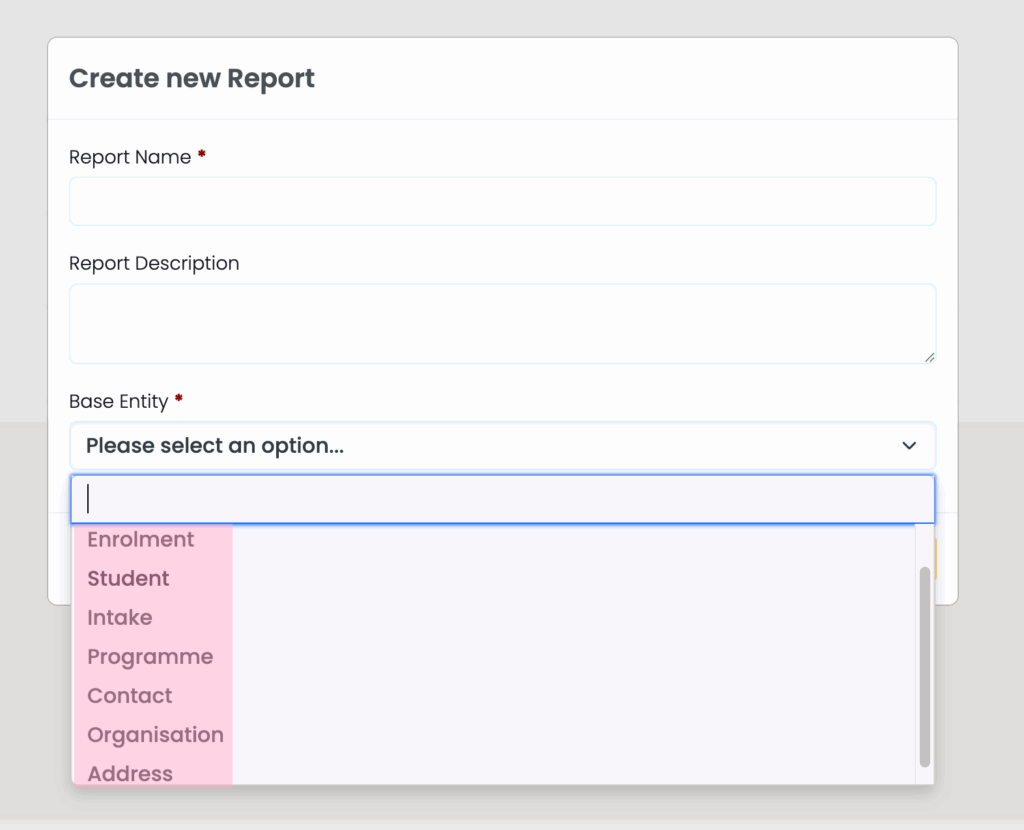
Every report starts with a Base Entity—the primary table the report pulls data from. Choose one of the following:
- Enrolment
- Student
- Intake
- Programme
- Contact
- Organisation
- Address
- Class
- Bill
Your choice determines the initial set of available fields and the relationship map displayed at the top of the builder. You can still traverse to related objects (e.g. start with Enrolment and add fields from Student), but pick the entity that best represents the main focus of your report.
Building Your Report
A report is one base entity, the columns you show, the filters people can fill in, and optional grouping charts.
- Add columns
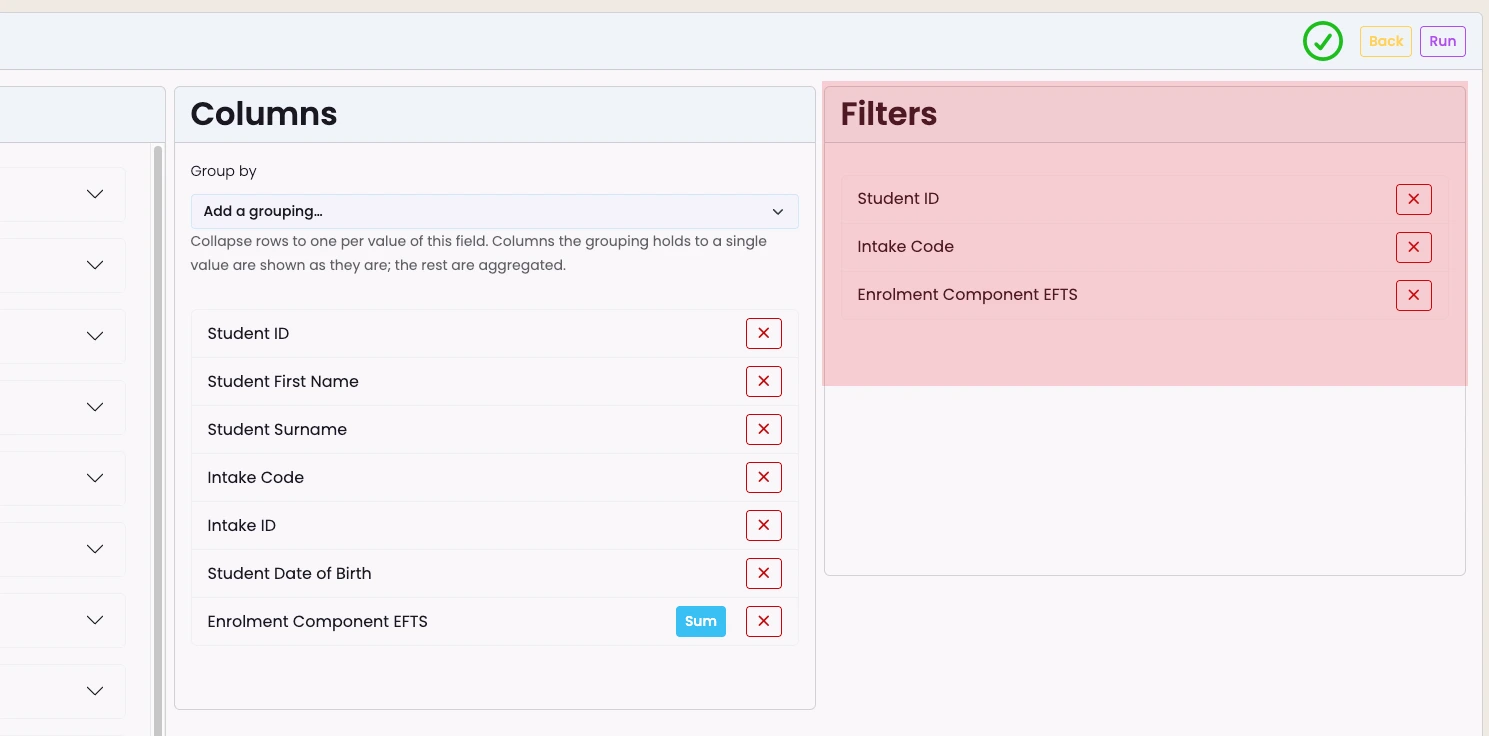
The Fields panel lists every field of the base entity, plus related records grouped in folders (for example an enrolment's Intake or Student). Drag a field into Columns, and drag columns up or down to reorder them. There's no hard limit on the number of columns, filters or related records - add as many as you need.
- Add filters
Drag a field into Filters. You don't set the filter value here - you set it each time you run the report. The same field can live in both Columns and Filters.
- Group the results (optional)
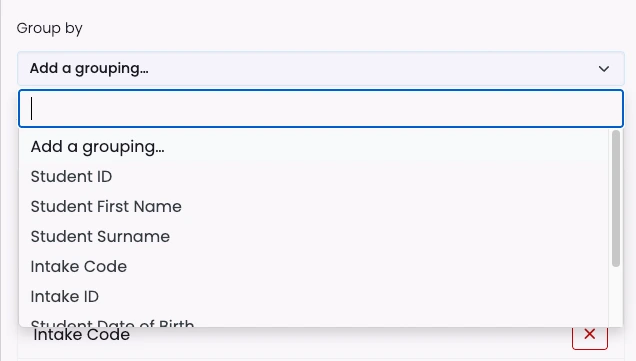
Use Group by -> add a grouping... to get one row per value. For example, one row per intake. Each column then needs a summary: Value, Sum, Average, Minimum, Maximum,**** or Count. You can add several groupings, in order.
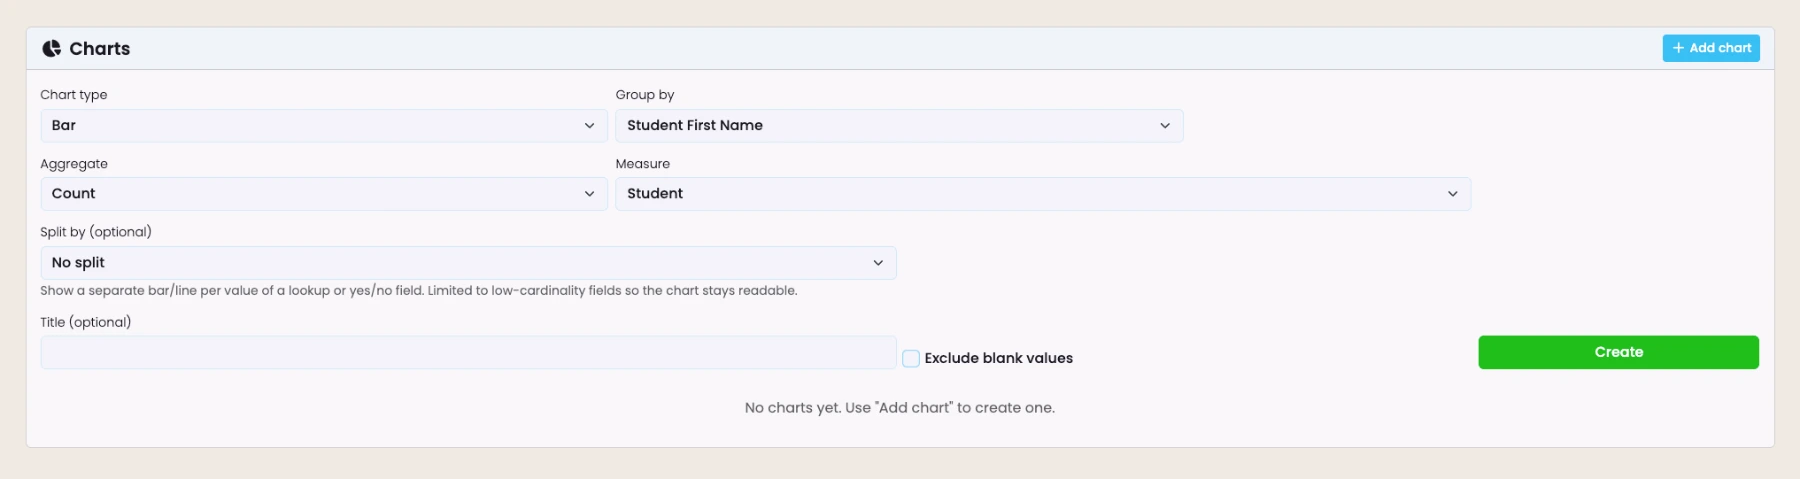
- Add charts (optional)
In the Charts card, click Add chart and choose:
- Chart type — Bar, Pie, Line, Stacked bar or Grouped bar.
- Group by — what each bar or slice is (for dates, also pick Day, Week, Month, Quarter or Year).
- Aggregate and Measure — Count of rows, or the Sum, Average, Minimum or Maximum of a number column.
- Split by (optional) — a second dimension for stacked or grouped bars.
- Title (optional) and Exclude blank values.
Click Create. Charts show at most 20 groups and 8 series.
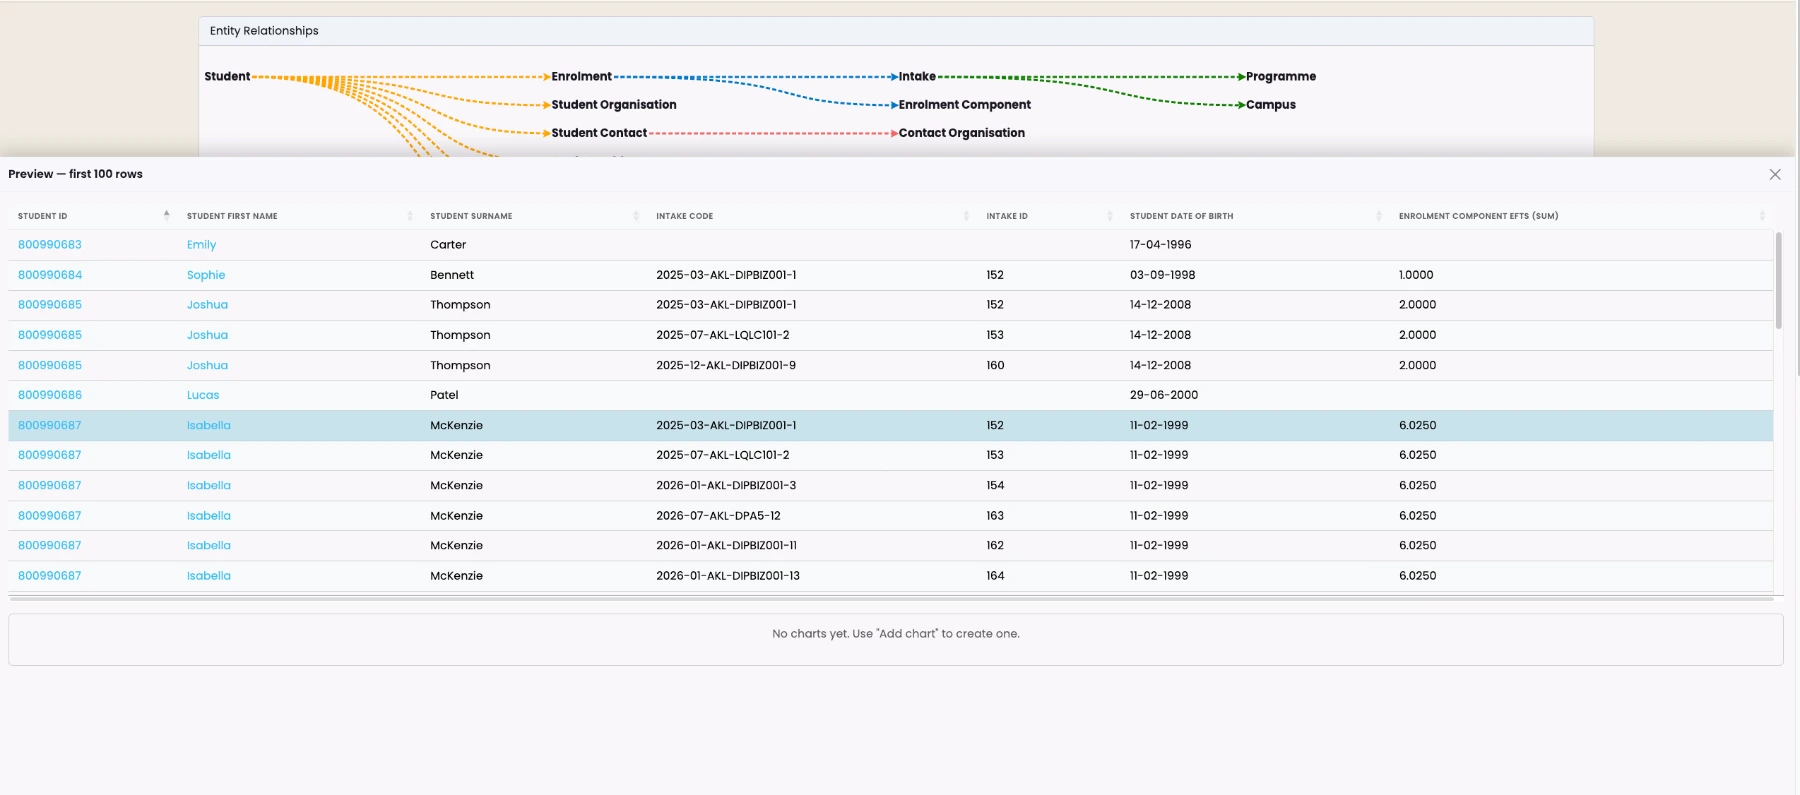
5. Preview
Click the floating Preview button to see the first 100 rows without leaving the editor.
Your changes are saved automatically as you go—there is no Save button.
Build with AI
If your account has AI turned on, the Build with AI chat can draft a report for you. Describe it in plain words (e.g. "active students with their agent and total paid"), then Apply or Discard the draft. Always check the columns and filters it chose before relying on the report.
Running & Exporting Reports
Run a report
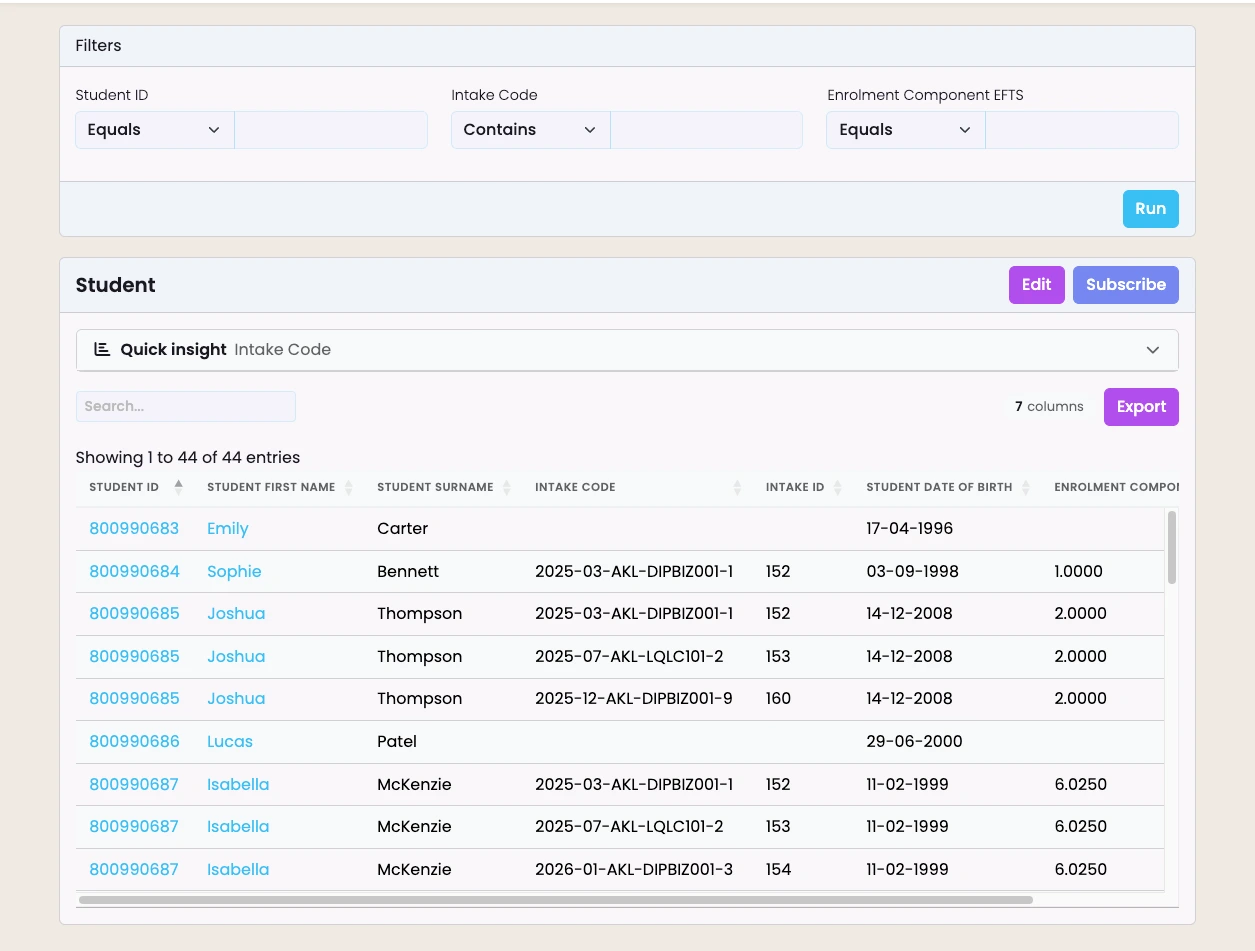
- From the list, click Run (or Run in the editor).
- For each filter, pick an operator (for example Contains, Is any of, Between) and a value. Leave it on Any to skip that filter.
- For date filters, tick Use a relative date to save something like "start of this month". It is recalculated every time the report runs.
- Click Run. Results display on‑screen (max 500 rows). You can search and sort the table in the page.
Use Edit at any time to return to the builder and tweak your columns, filters or charts.
Export to CSV
Need everything? Click Export. The export runs in the background with no on-screen row cap, and you’ll receive an email with a download link when it’s ready. Past exports are also available under Reports → Downloads. Export is CSV only.
Subscribing to a Report
Automate delivery so you never forget to pull the numbers:
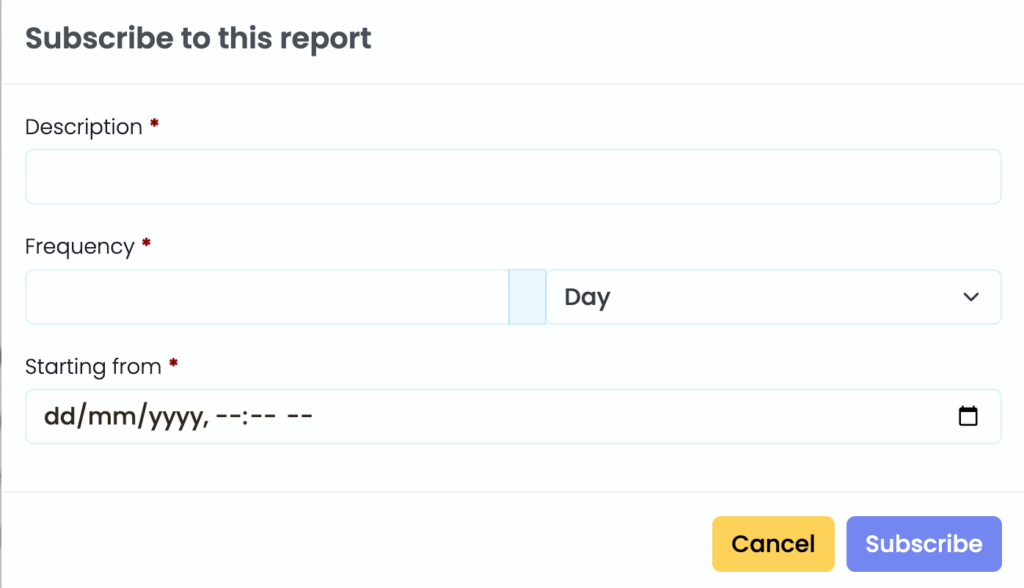
- Run the report with the filters you want, then click Subscribe on the run screen.
- Set a description, a start date and how often it should run (for example every 1 week).
- Save—each time, SELMA runs the report with the filters you chose and emails you the CSV.
You can create as many subscriptions as you need, and manage or pause them later from your Profile → Report Subscriptions.
Pinning a Chart to Your Dashboard
On the run screen, click Pin to dashboard on any chart. The pinned chart uses the filters you ran with. To change them, run the report again with new filters and use the refresh button on the pinned chart.
Sharing a Report
On the Custom Reports list, click Manage Access and choose which roles can see the report. Users with the Manage permission see every report regardless.
Report Limits & Best Practices
| Topic | Details |
|---|---|
| Row limit (on‑screen) | 500 rows. Use Export for the full data set. |
| Editor preview | First 100 rows. |
| Charts | Up to 20 groups and 8 series per chart. |
| Performance | More columns & complex relationships = slower run time. Start simple and add fields incrementally. |
| Naming convention | Prefix reports with an area or team (e.g. Sales – Monthly Intakes) so others can find them easily. |
| Security | Report Builder respects role‑based access control and only ever shows data from your own account. |
Tips & FAQ
- Too many rows, or duplicate rows? Check your base entity. A Student report with an Enrolments column gives one row per enrolment. Use Grouped or Count instead of Rows.
- Totals look doubled? Use the column’s Sum option rather than adding the number field directly through a related record.
- Only 500 rows show. That is the on-screen limit. Use Export for the full report.
- Can’t delete a report? It may be the recipient source of an email list. Remove it from the email list first.
- Some fields are missing. Fields only appear if they are enabled for reporting, and some are country specific (Australia or New Zealand). Lodge a request with the Support Desk if you need one added.
Need Something More Complex?
If you require advanced calculations, multi‑level joins, or highly customised formatting, a Grid Report is the better option. Lodge a request with the Support Desk and include as much detail as possible; simple Grid Reports are often free, while complex builds may incur a development fee.
Last updated