
In this article, we will be covering the details of a Student Profile and where to edit them.
Student Tab
Top Bar – Student Details
Clicking the down arrow allows you to expand the top bar, which features across each tab (Figure 1.).
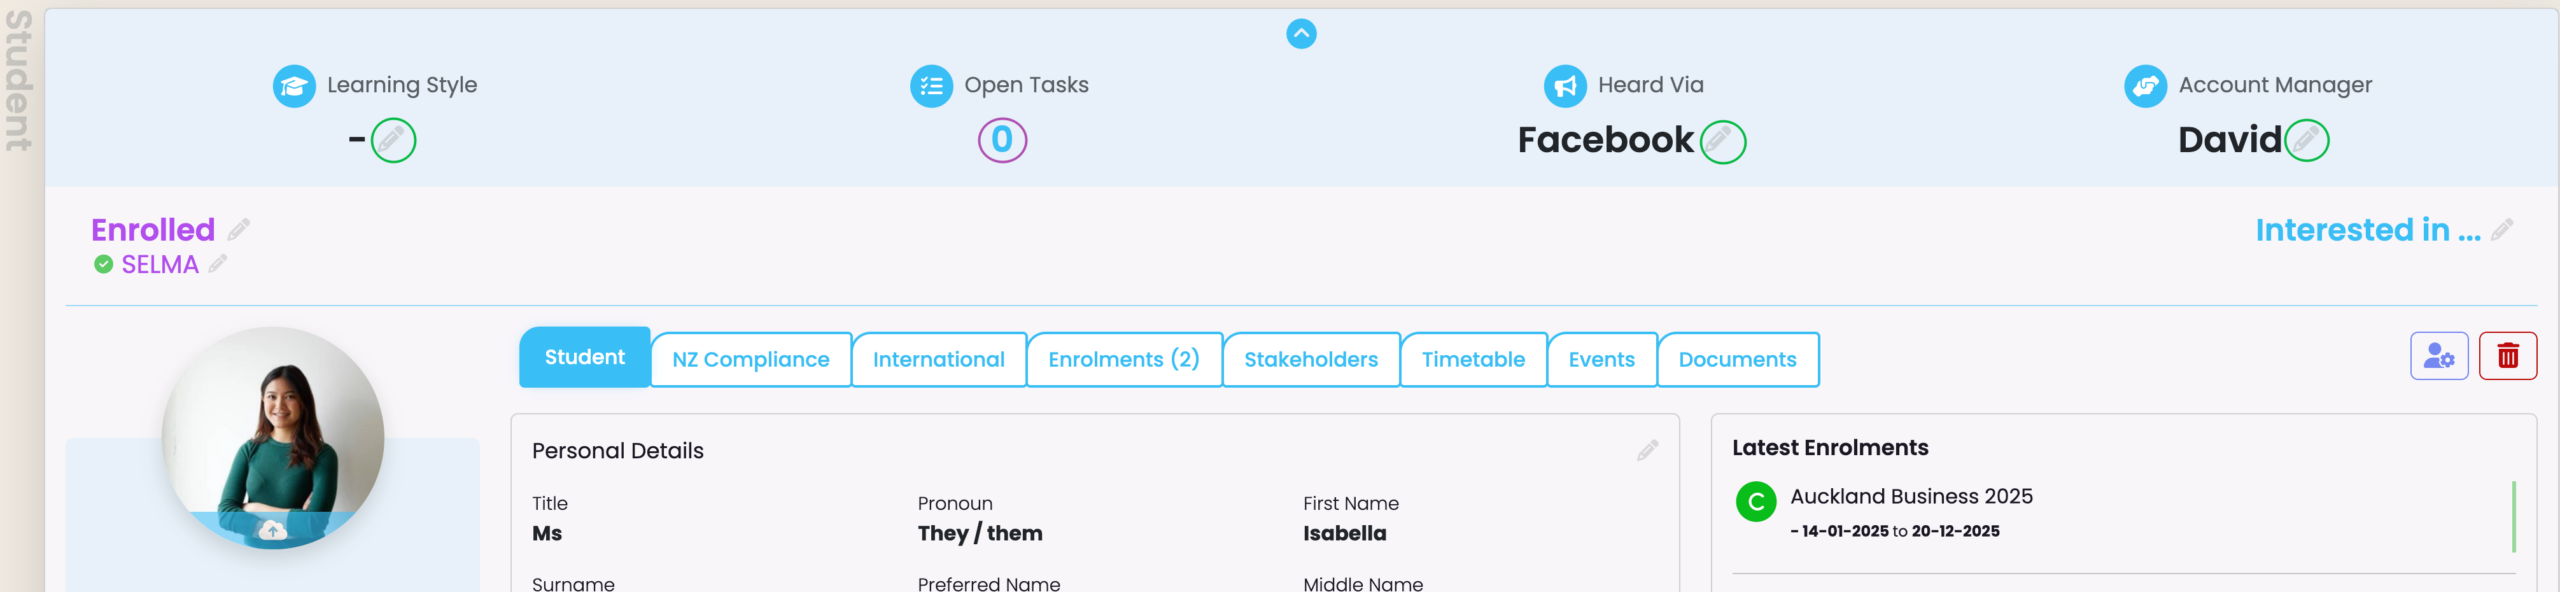
When the bar is expanded, you can click the pencil icons to edit the Student’s Learning Style, Marketing Source and Account Manager, or to view Open Tasks assigned against them in the Events tab (Figure 2.)(See Event Log – The Event Log Report in this resource for more information).
Figure 1. The Student profile features a bar across the top of each tab, which allows you to edit some details about the Student.
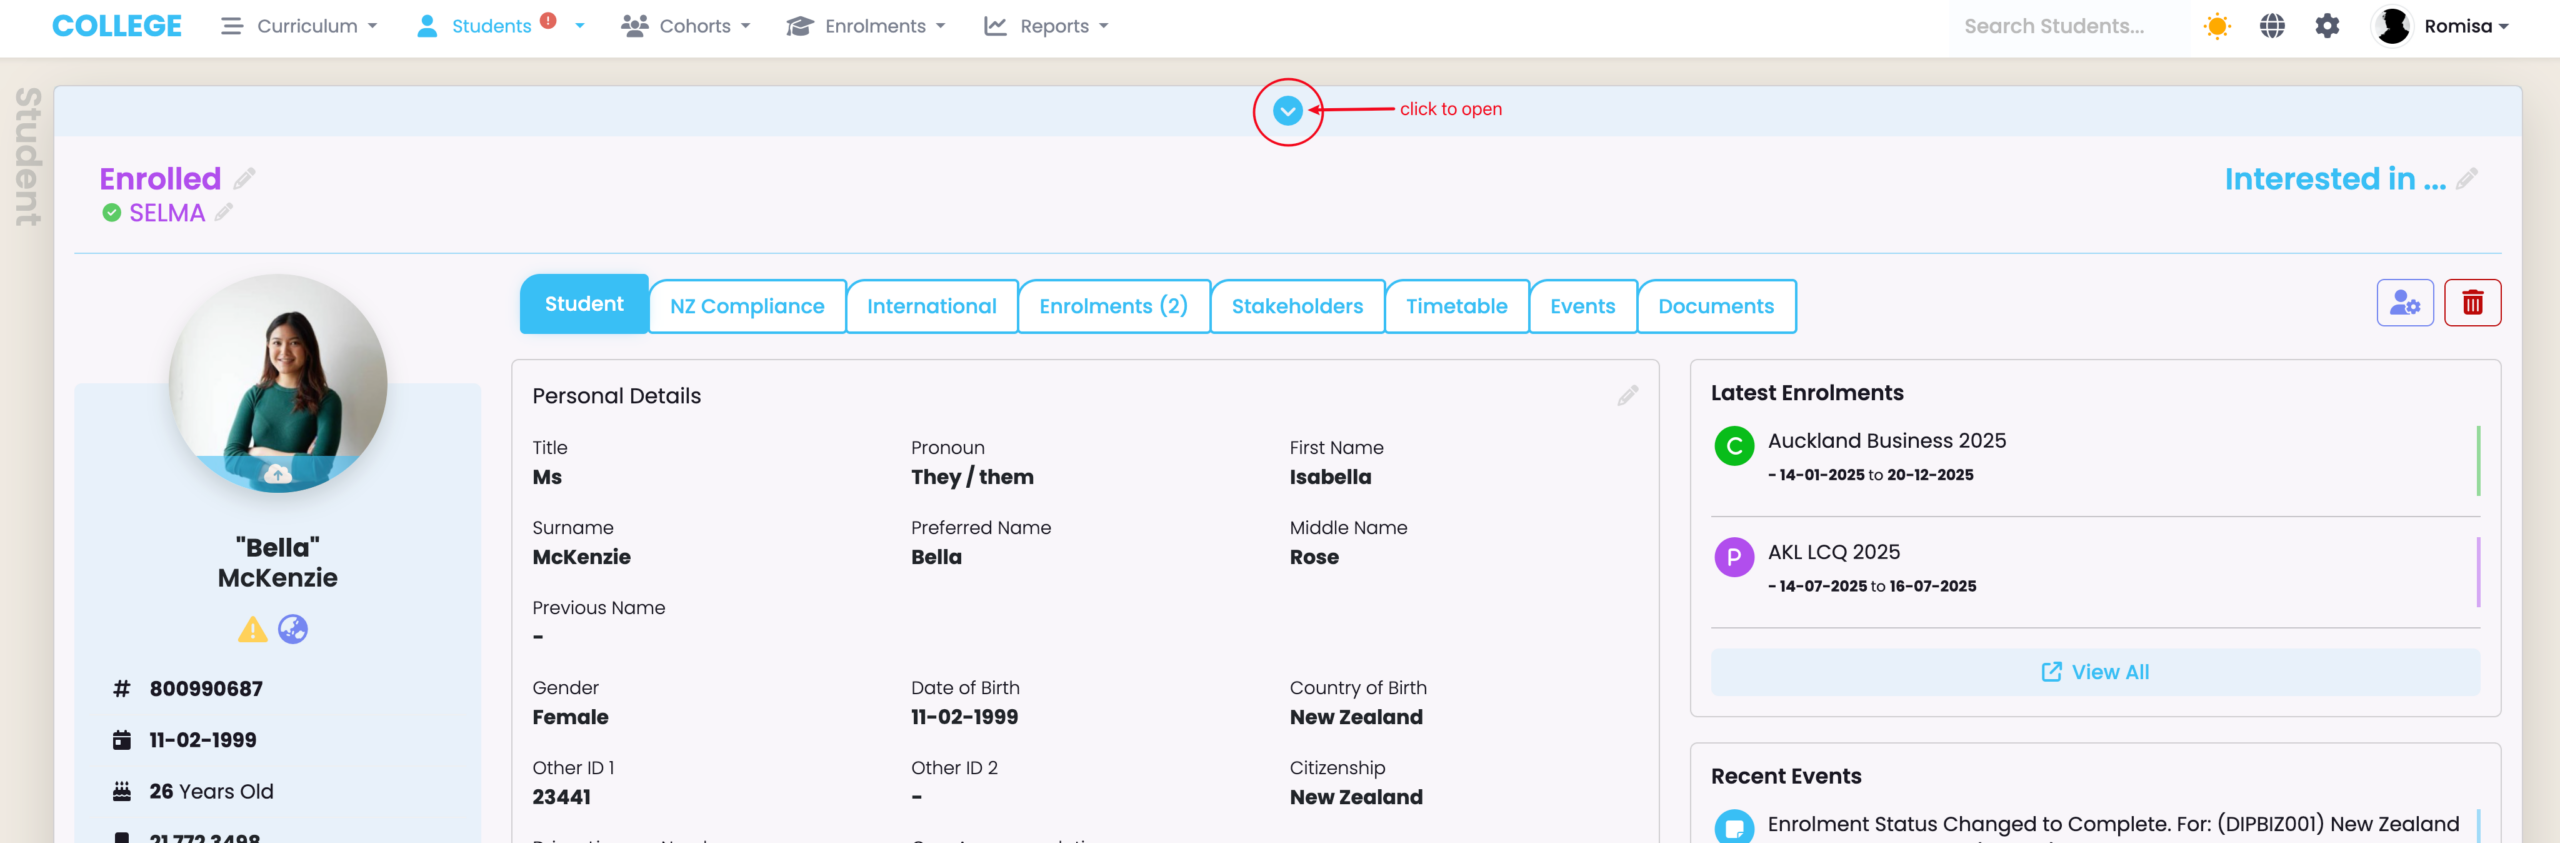
Figure 2. Categories with grey pencil icons next to them indicate editing is enabled (green). Click them to edit those categories or click the digit under “Open Tasks” (purple) to view Event Logs.
Edit the Student Snapshot Panel
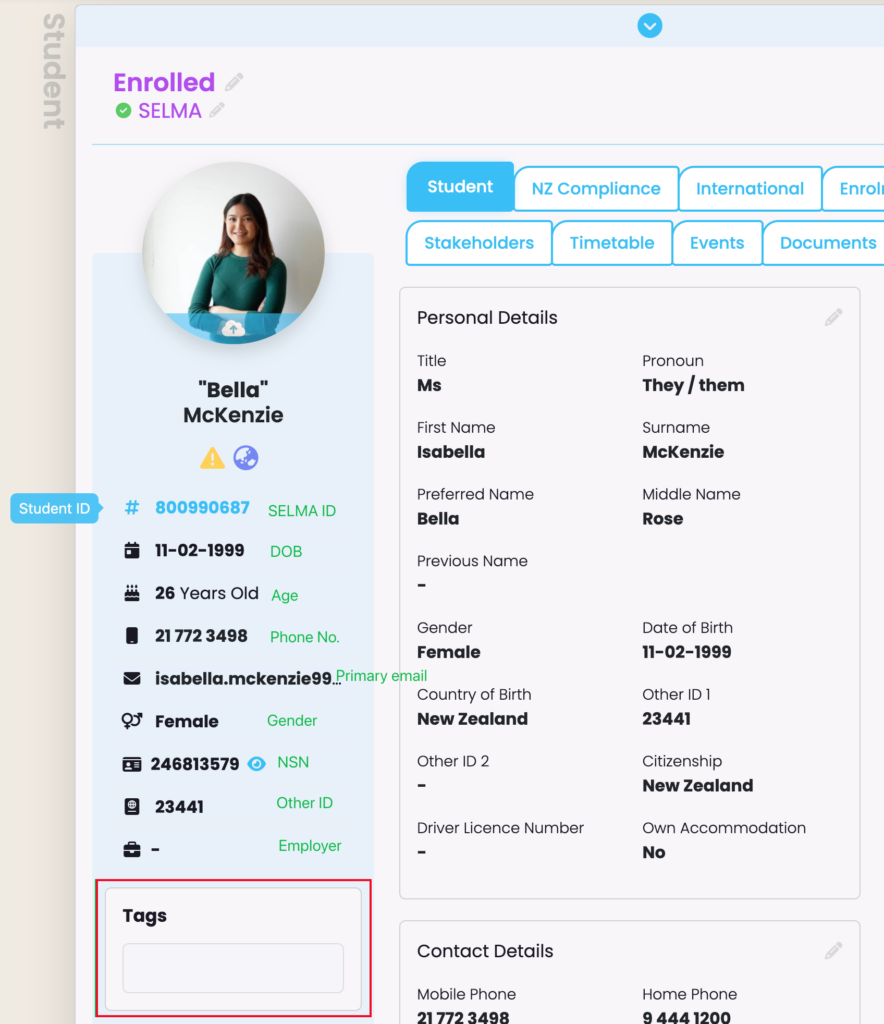
This section provides an overview of key student details, which can be changed within sections of the student profile (Figure 3).
You can also add relevant Tags to the student’s profile (See System Settings – Tag Manager in this resource for more information).
Figure 3. See the left-hand panel annotations for details below the Student profile picture (green text). You can hover over each detail to view their labels as seen for the Student ID (blue tag). The “Tags” field is found at the bottom of the panel (red).
Edit by Section on the Student Tab
On the Student tab of the Student profile, you can click the pencil icons to edit details by section or change the enrolment status of the Student, quickly (Figure 4.).
Note: You can also update the Validation Status (See System Settings – Validation Manager in this resource for more information).
Figure 4. Edit section details (green), change the Enrolment Status (orange) or update the Validation Status (purple).

Edit Address on the Student Tab
Add an Address
Remember to click the the large “+Add” button to add an address.
IMPORTANT NOTE: For NZ compliance, NZQA requires an address. In SELMA, you MUST set one of the addresses as the default so the system can fetch the address for NZQA reporting (Figure 5.).
Figure 5i. The bottom of the Student tab includes the “Address” and “Medical Information” (blue) sections. Click “+Add” (red) to add an address.
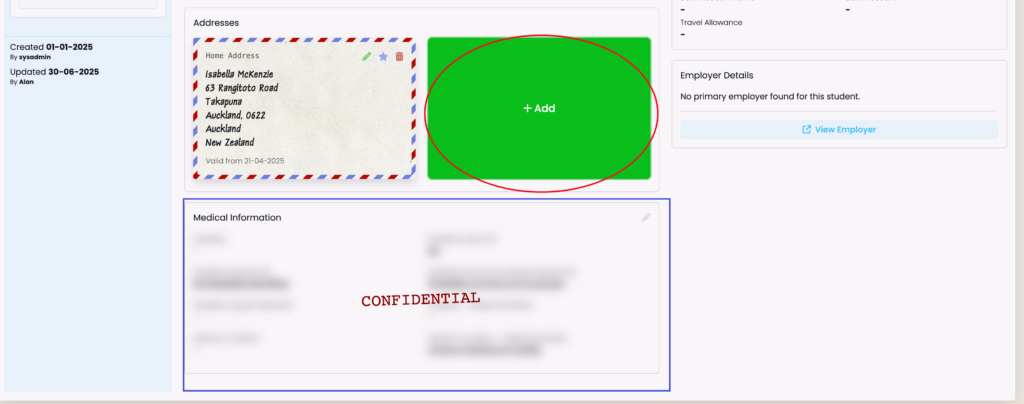
Figure 5ii. If you are an NZ provider, you must click the “Set as Default” button (red) to include that address for NZQA reporting.

Overview Information on the Student Tab
Besides Personal, Financial and Employer details, you will see overview information about the Student’s Latest Enrolments and Recent Events (Figure 6).
Figure 6. See which Programmes the Student is enrolled into (green), and recent Events associated with their account (orange).

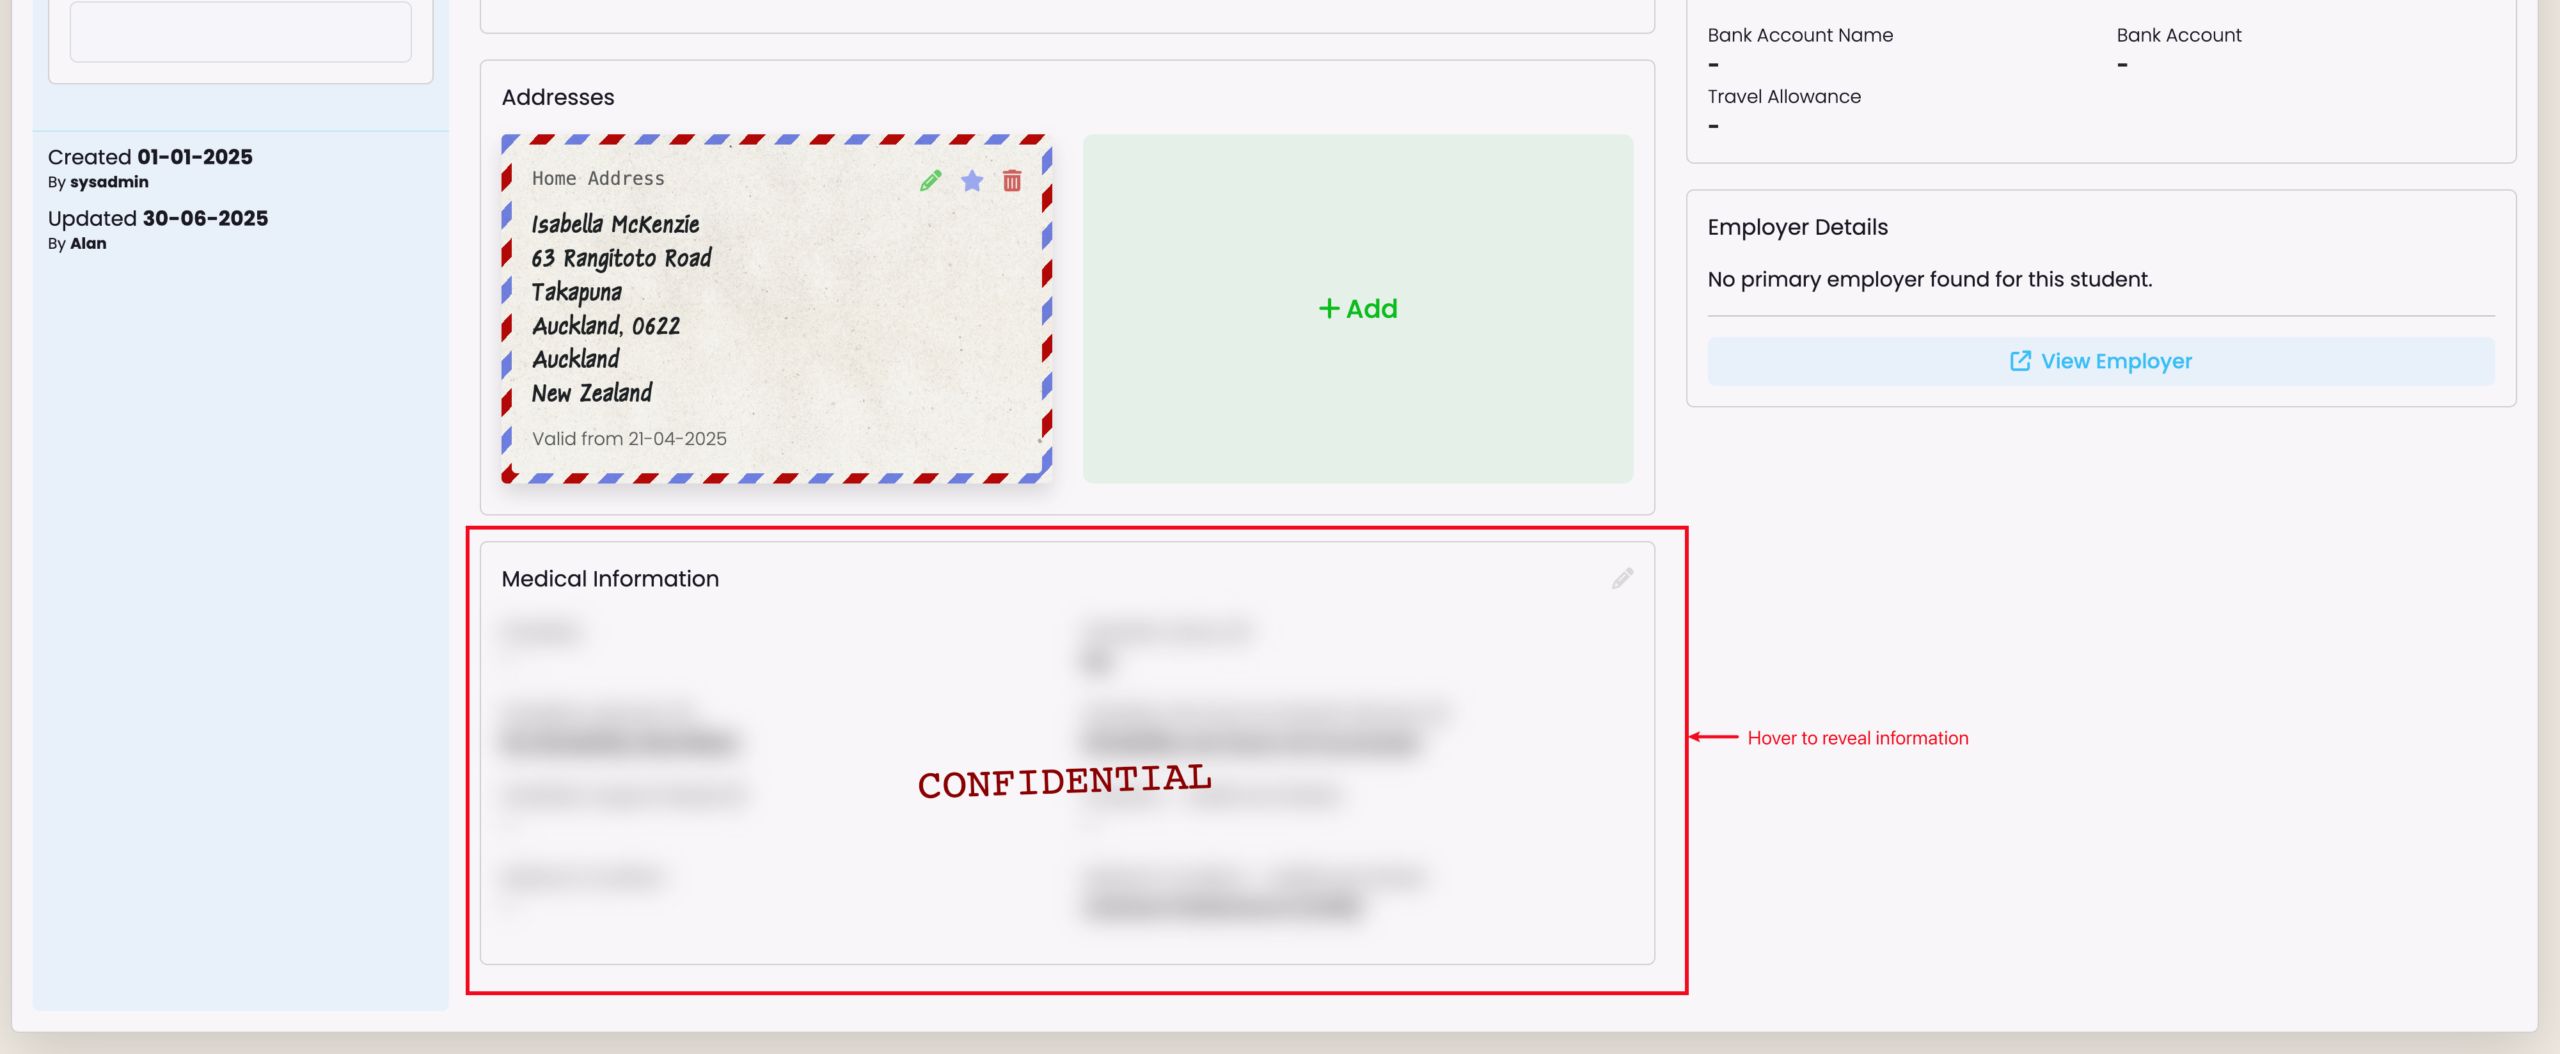
Note: Medical information is blurred out by default to preserve confidentiality. However, it is editable like other sections and hovering over it reveals the hidden information (Figure 7.).
Figure 7. Medical information is confidential so this section is blurred out, unless you hover over it (red).
Compliance Tabs
NZ Compliance Tab
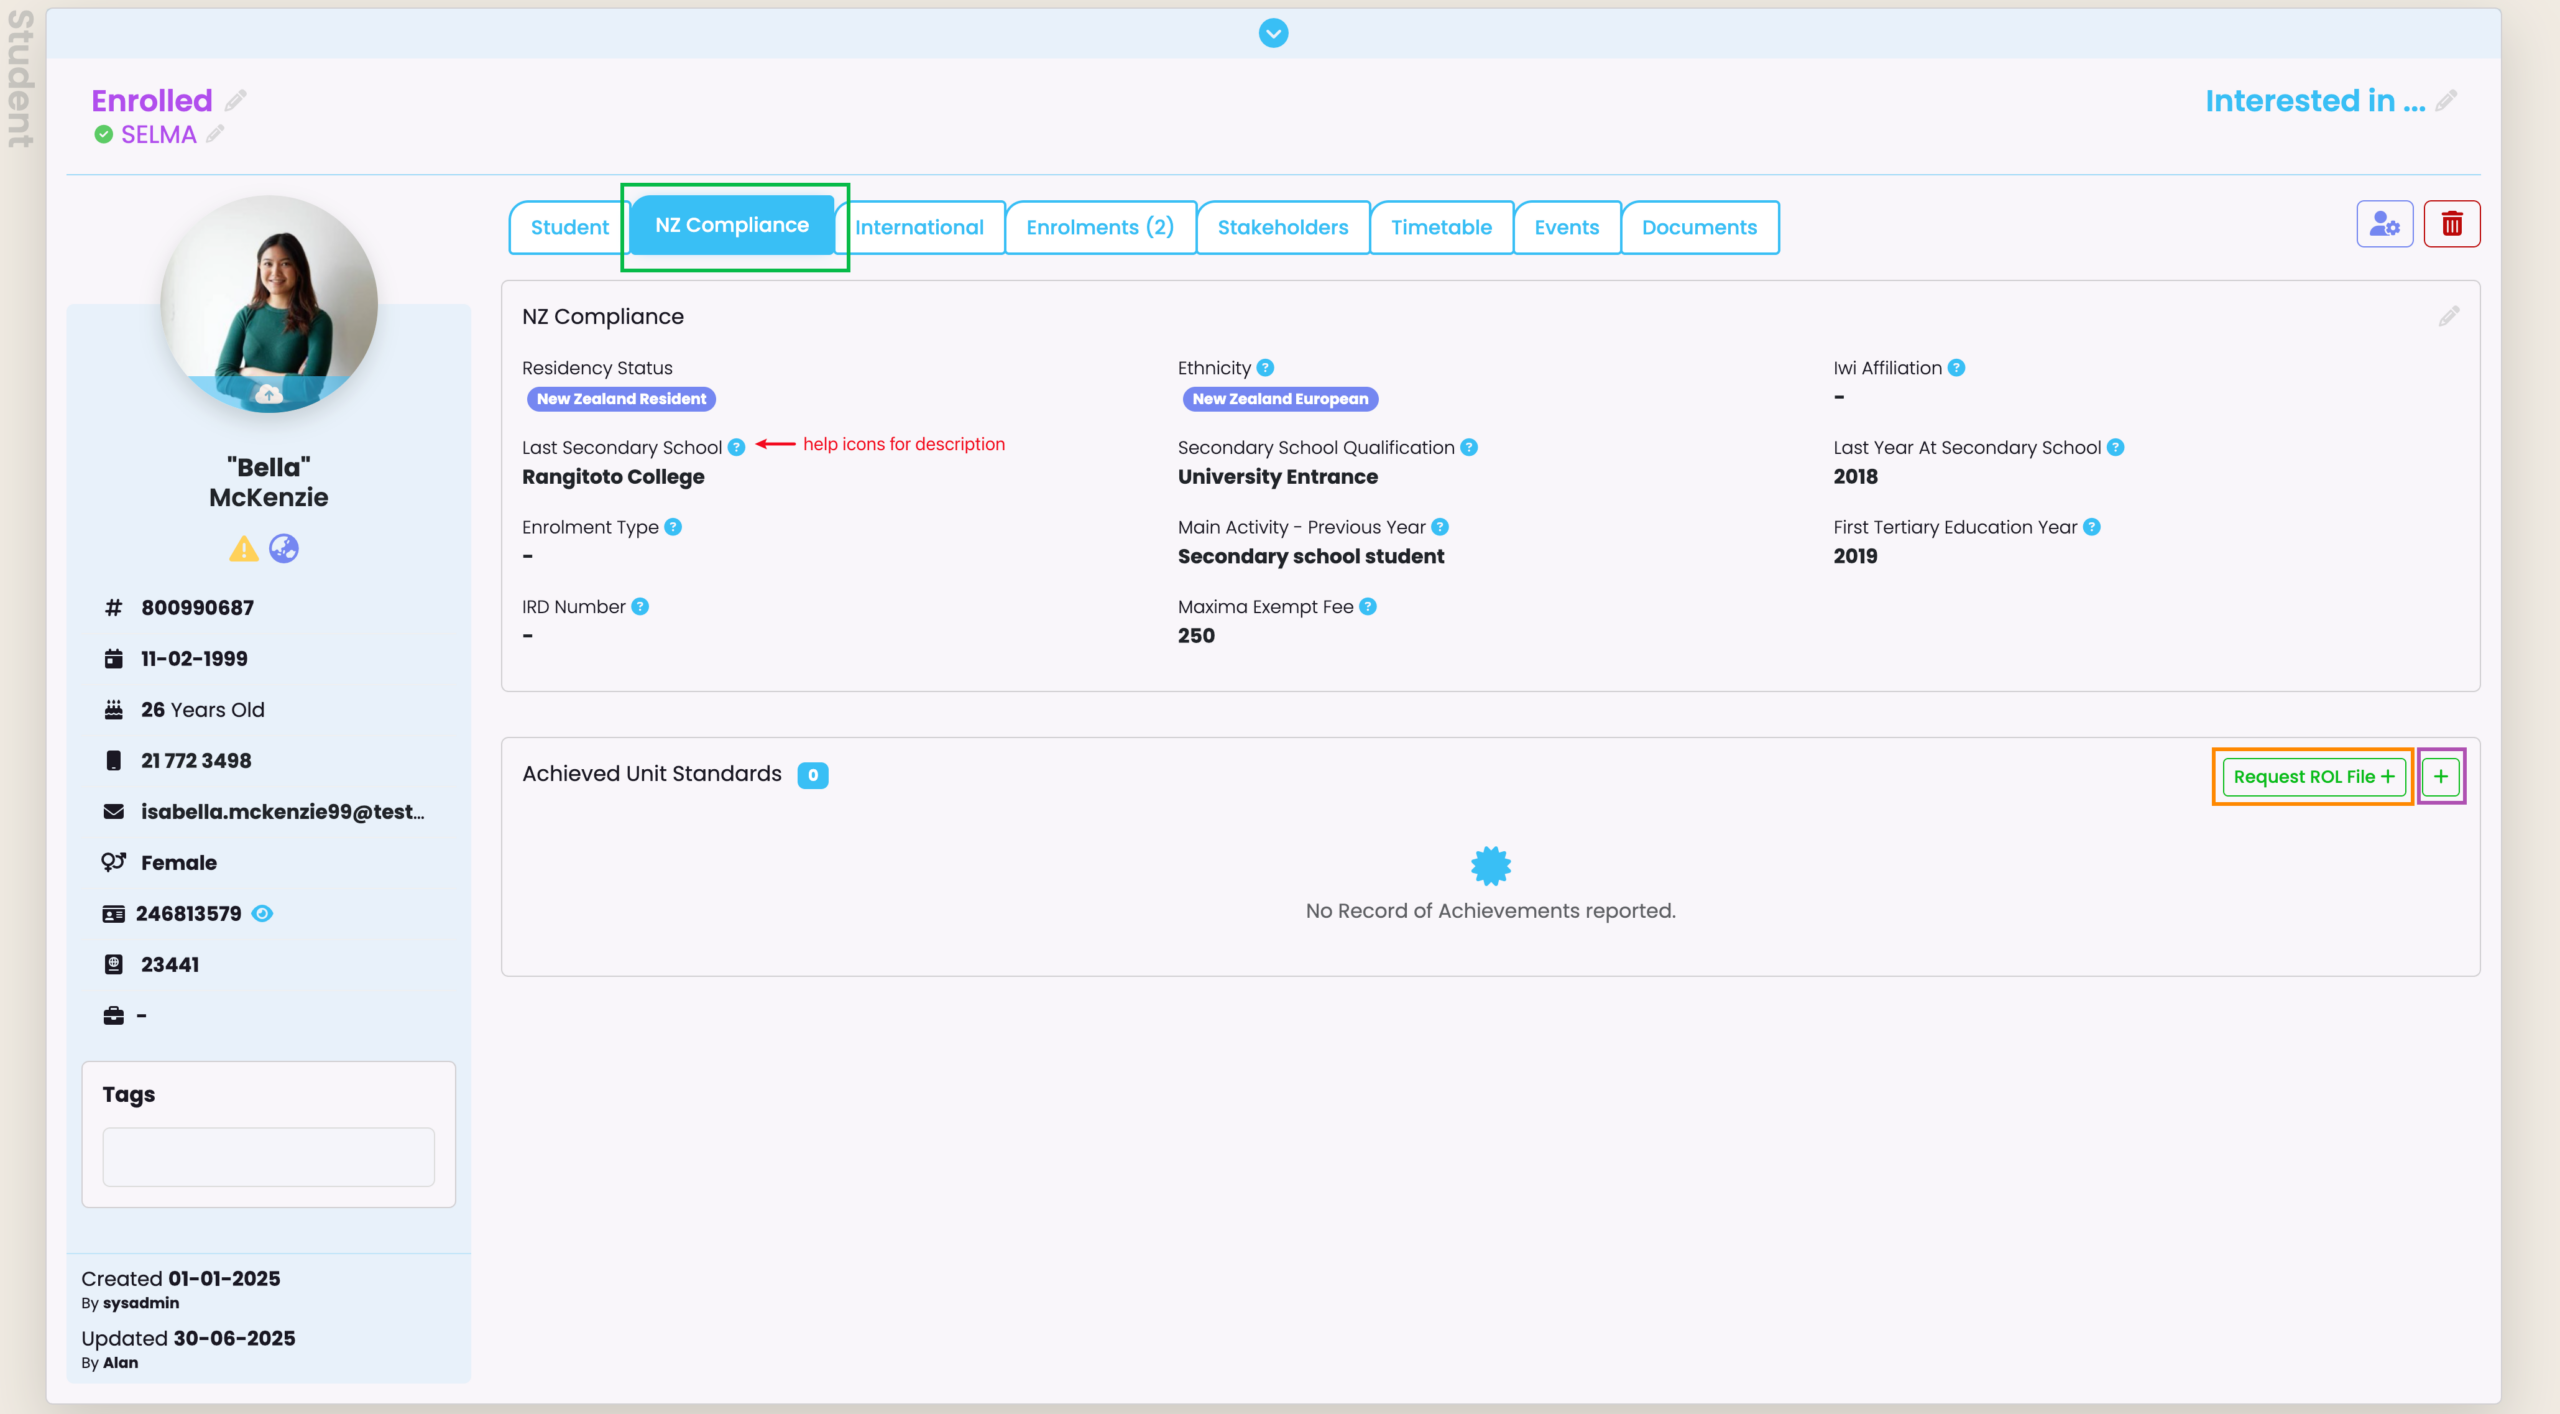
In the NZ Compliance tab under “Achieved Unit Standards”, you can generate a request file to upload to NZQA and return a Student’s Record of Learning (RoL) to import, here.
Alternatively, you can upload Unit Standards manually under the “Achieved Unit Standards” section (Figure 8i.)
See NZ Compliance – NZQA RoA Import in this resource for more information.
Figure 8i. The NZ Compliance tab (green) showing relevant information fields to edit, and the options to request a RoL file (orange) or to add Unit Standards manually (purple).
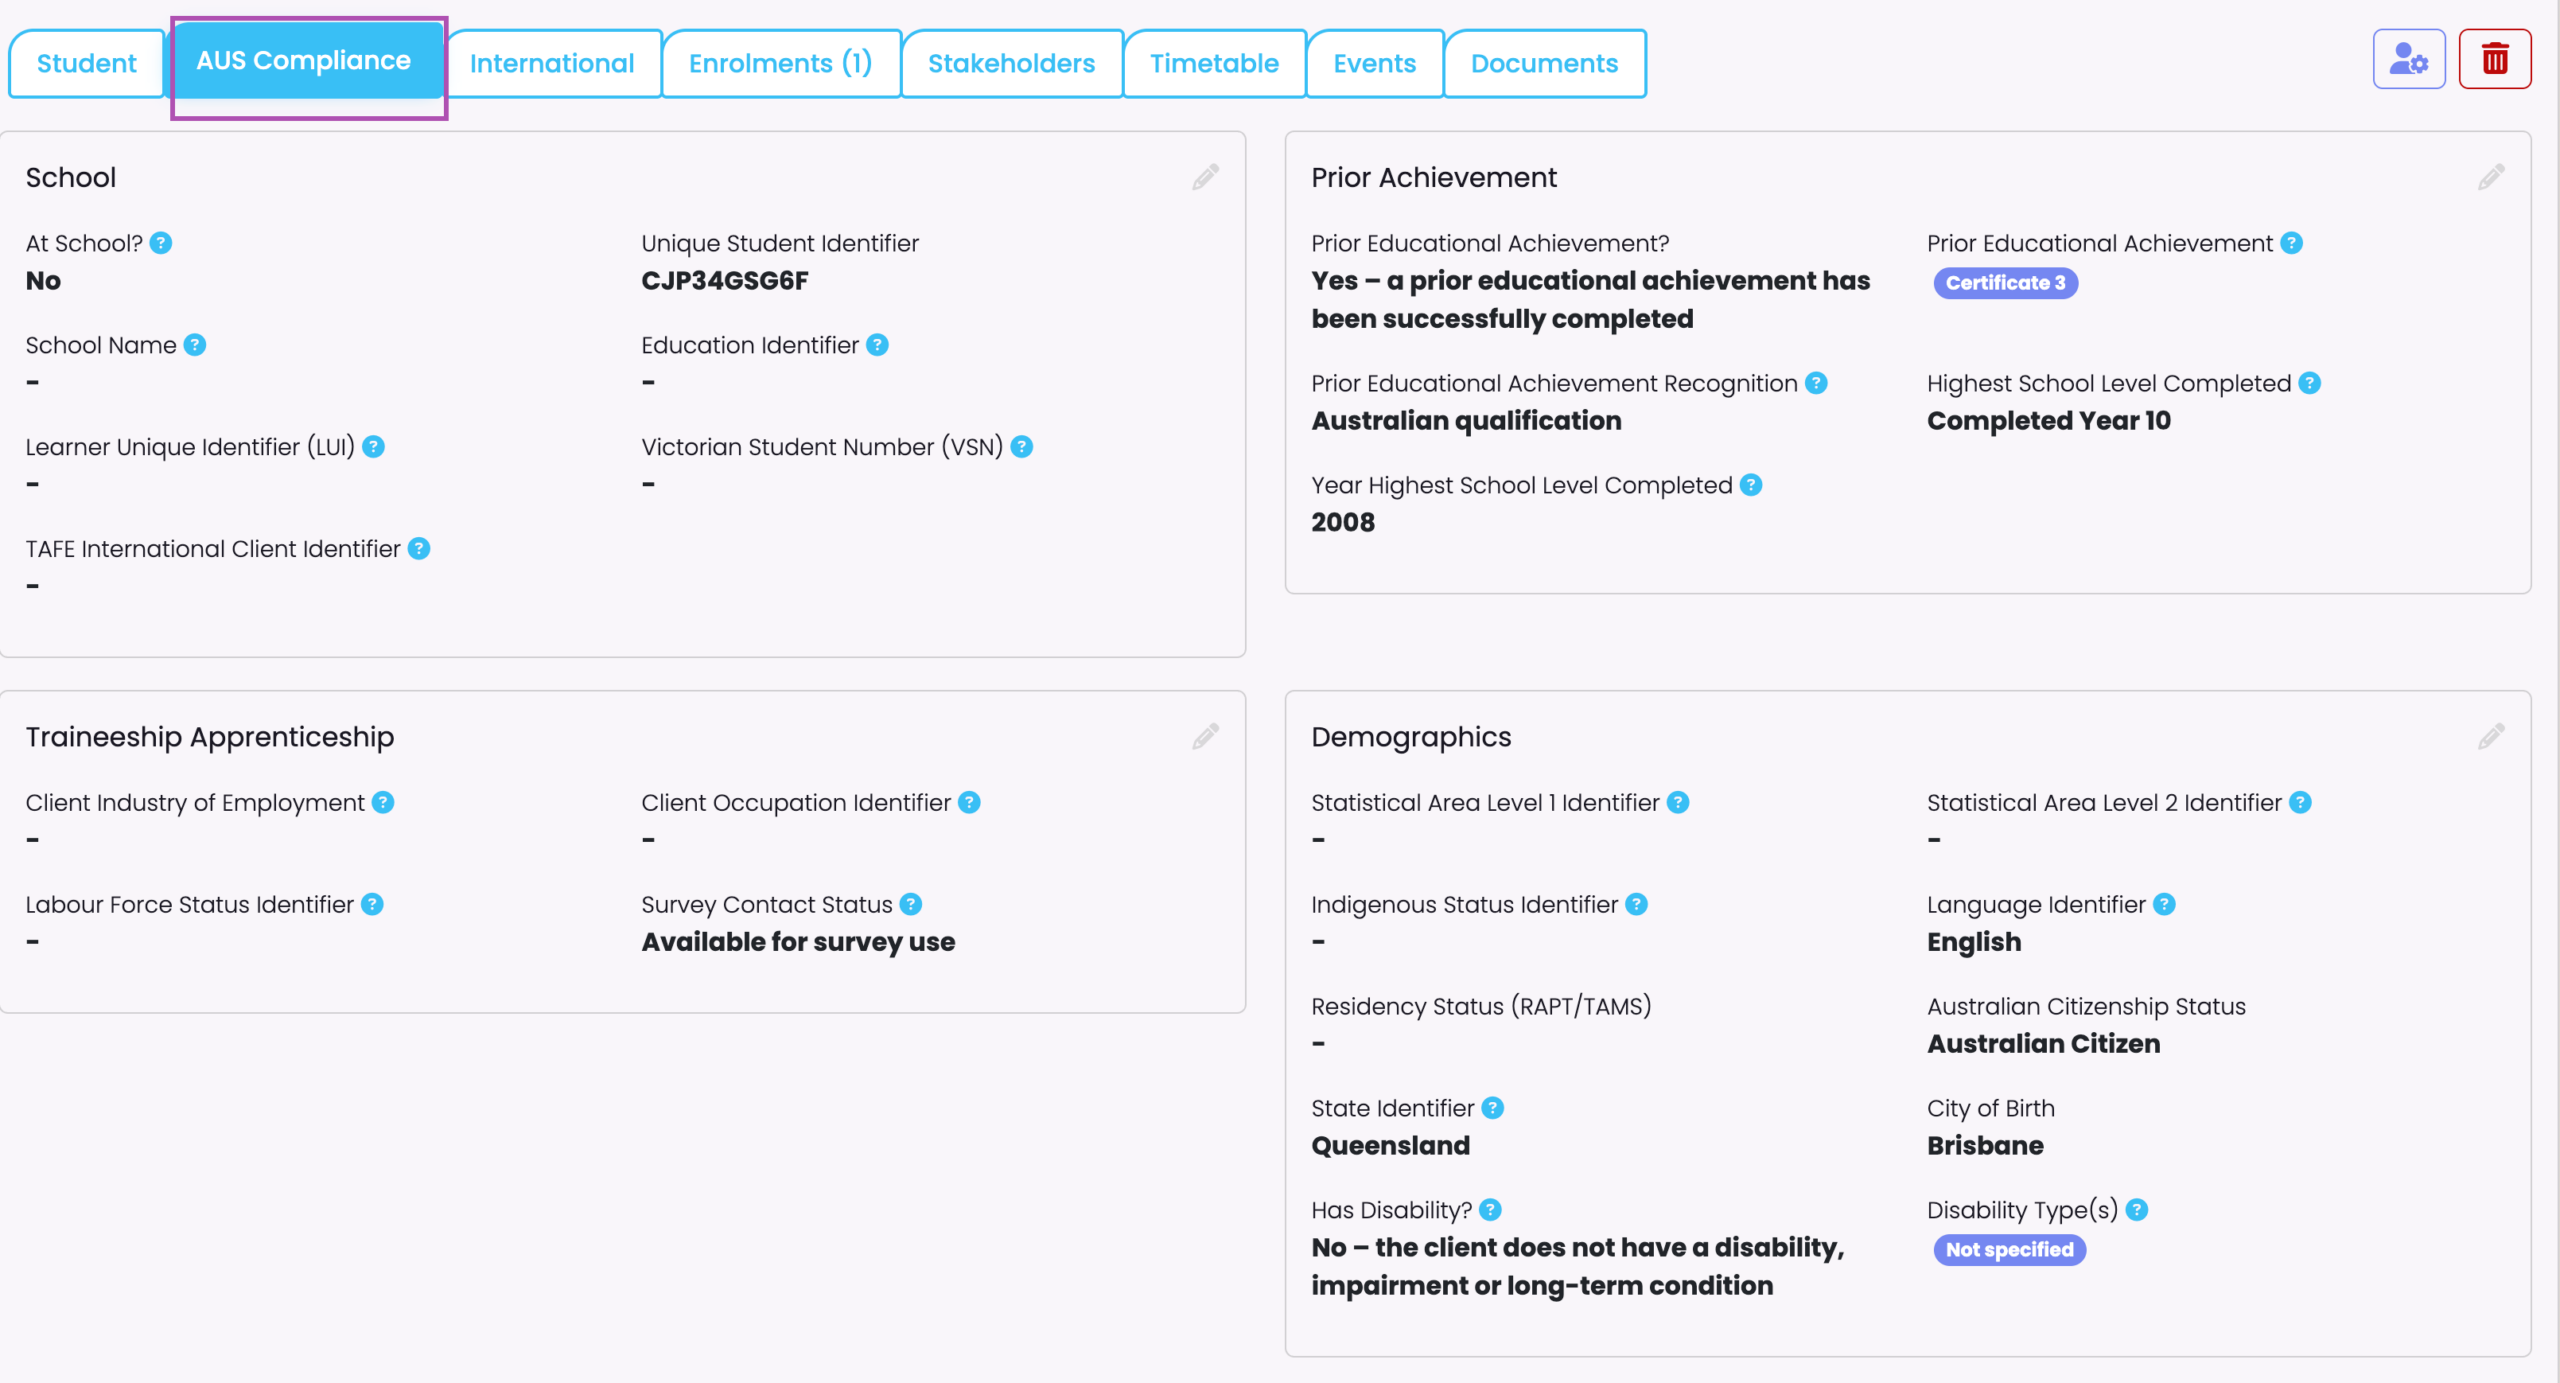
AUS Compliance Tab
Figure 8ii. In the AUS Compliance tab (purple) showing relevant information fields to edit.
International Tab
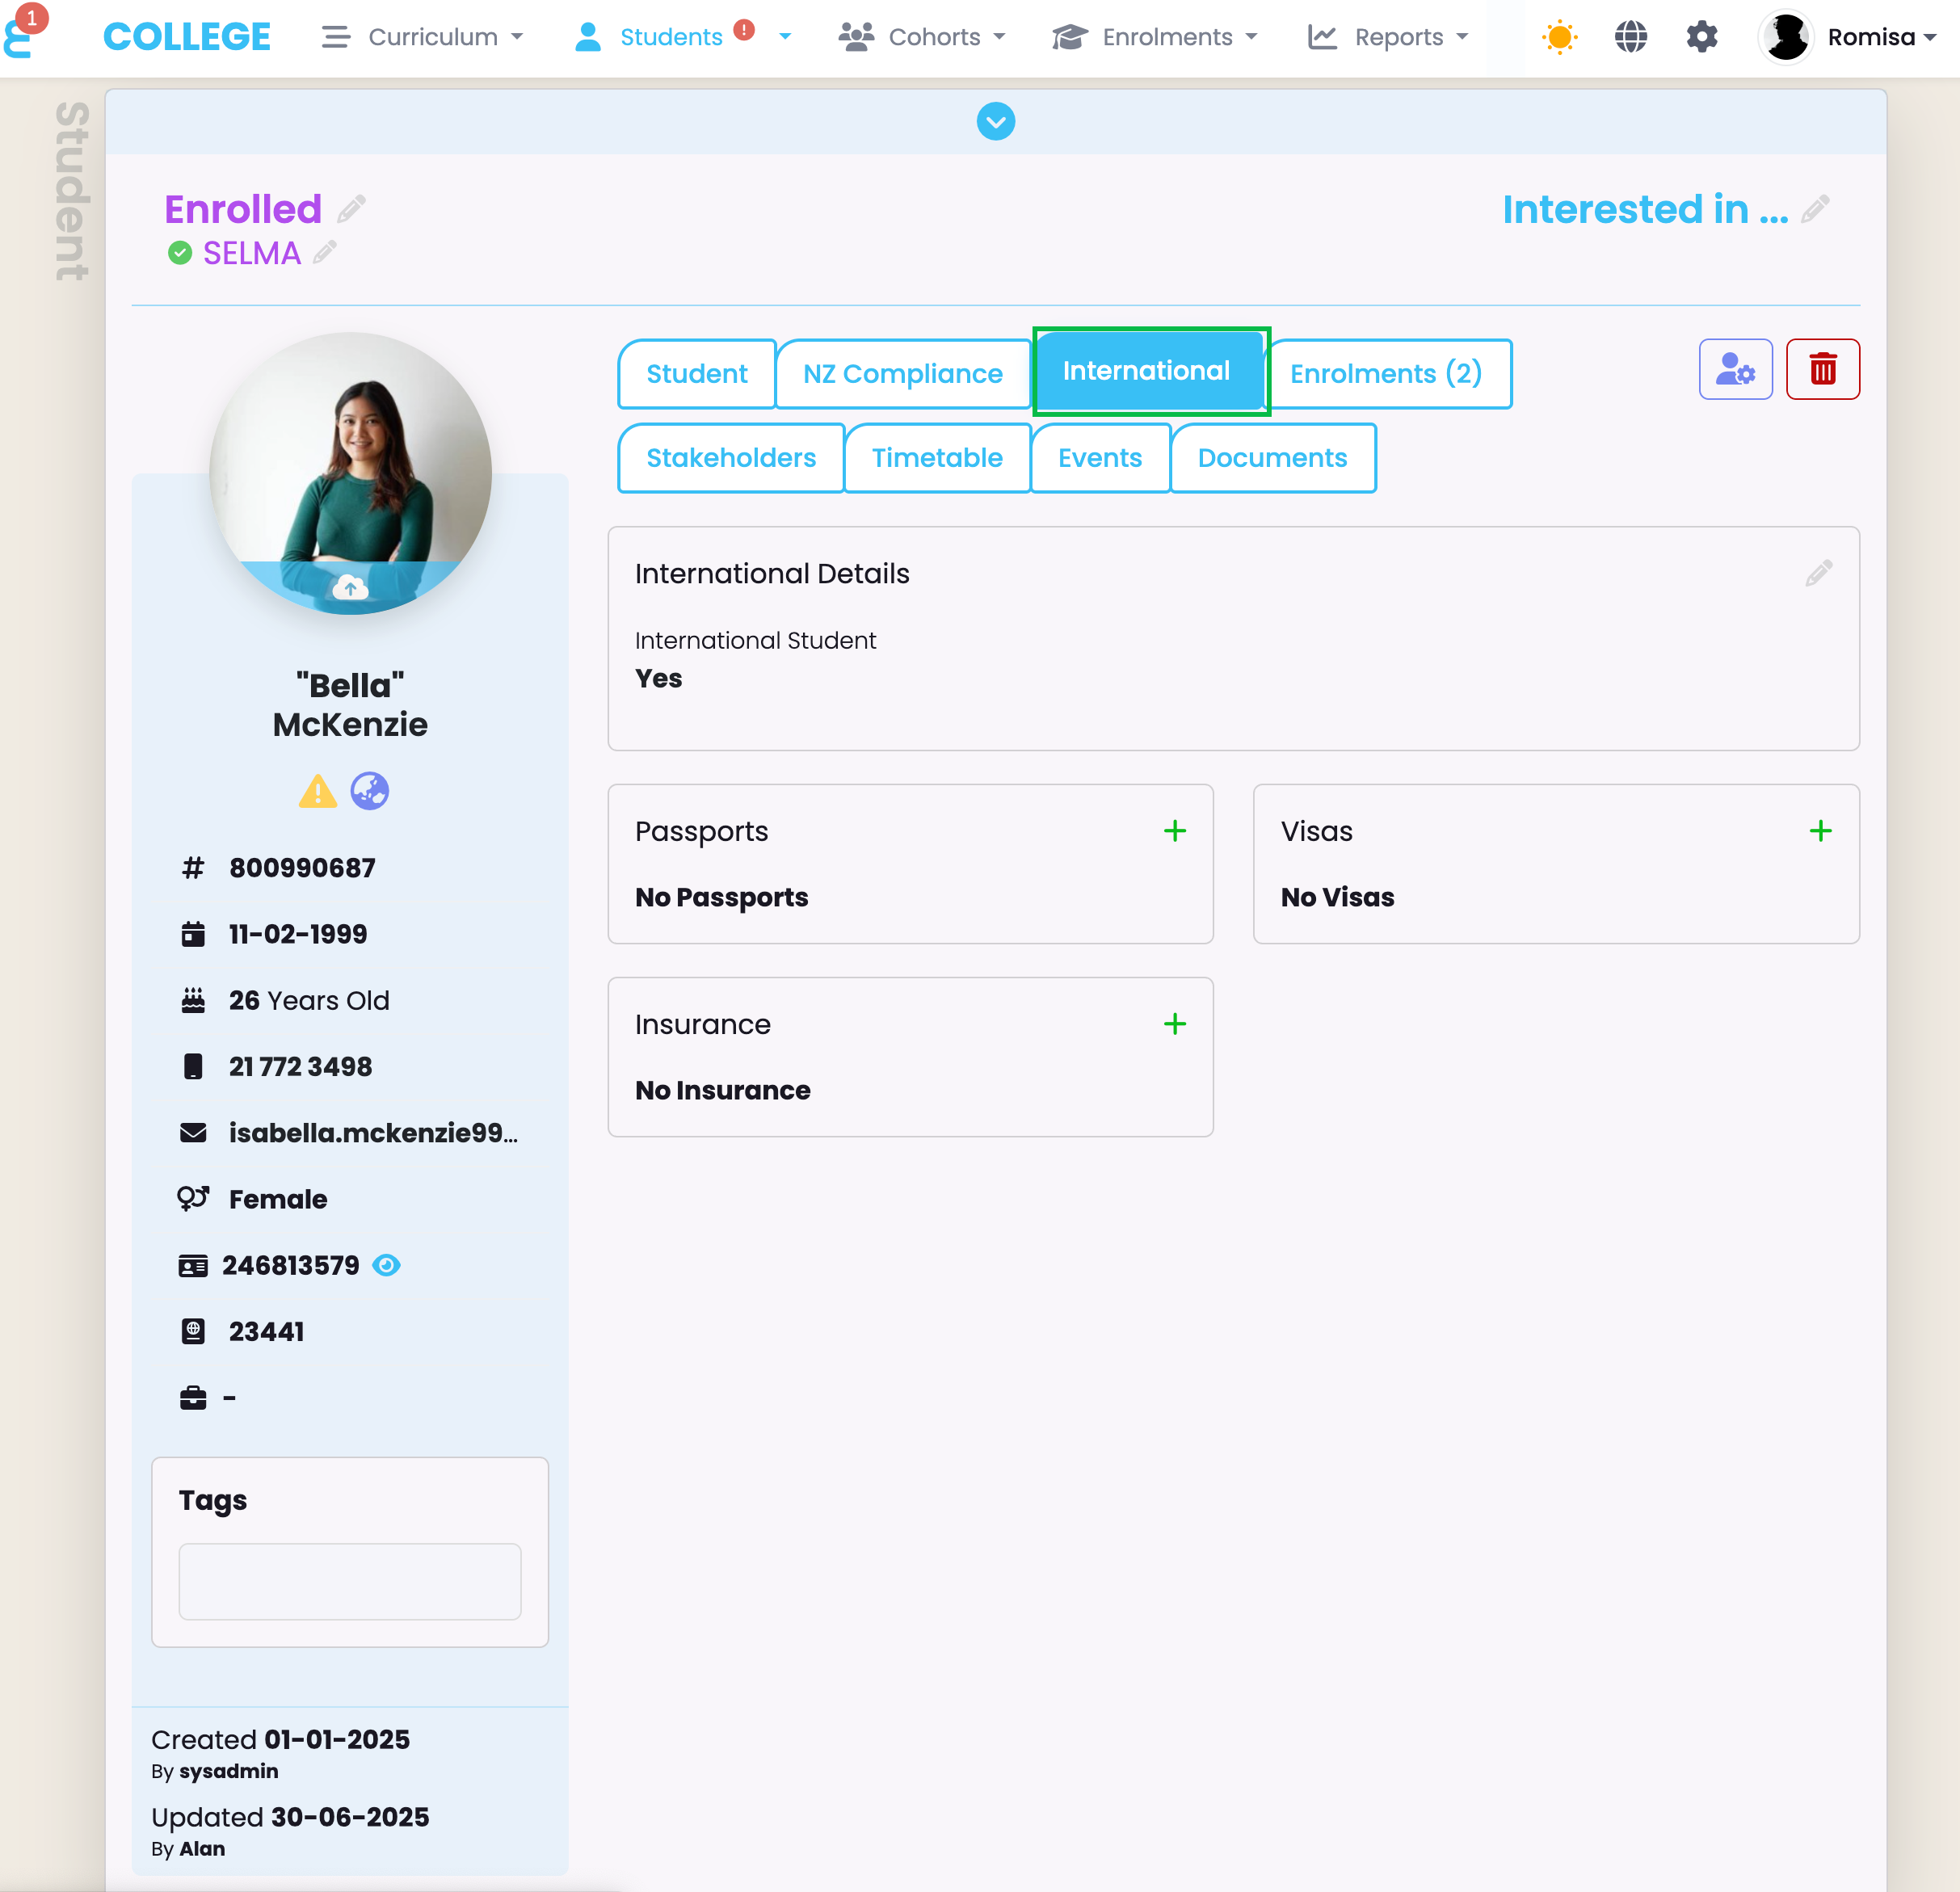
For International Students, you can add their Passport, Insurance and Visa/s details (Figure 9.).
Figure 9. Details to add for International Students, only.
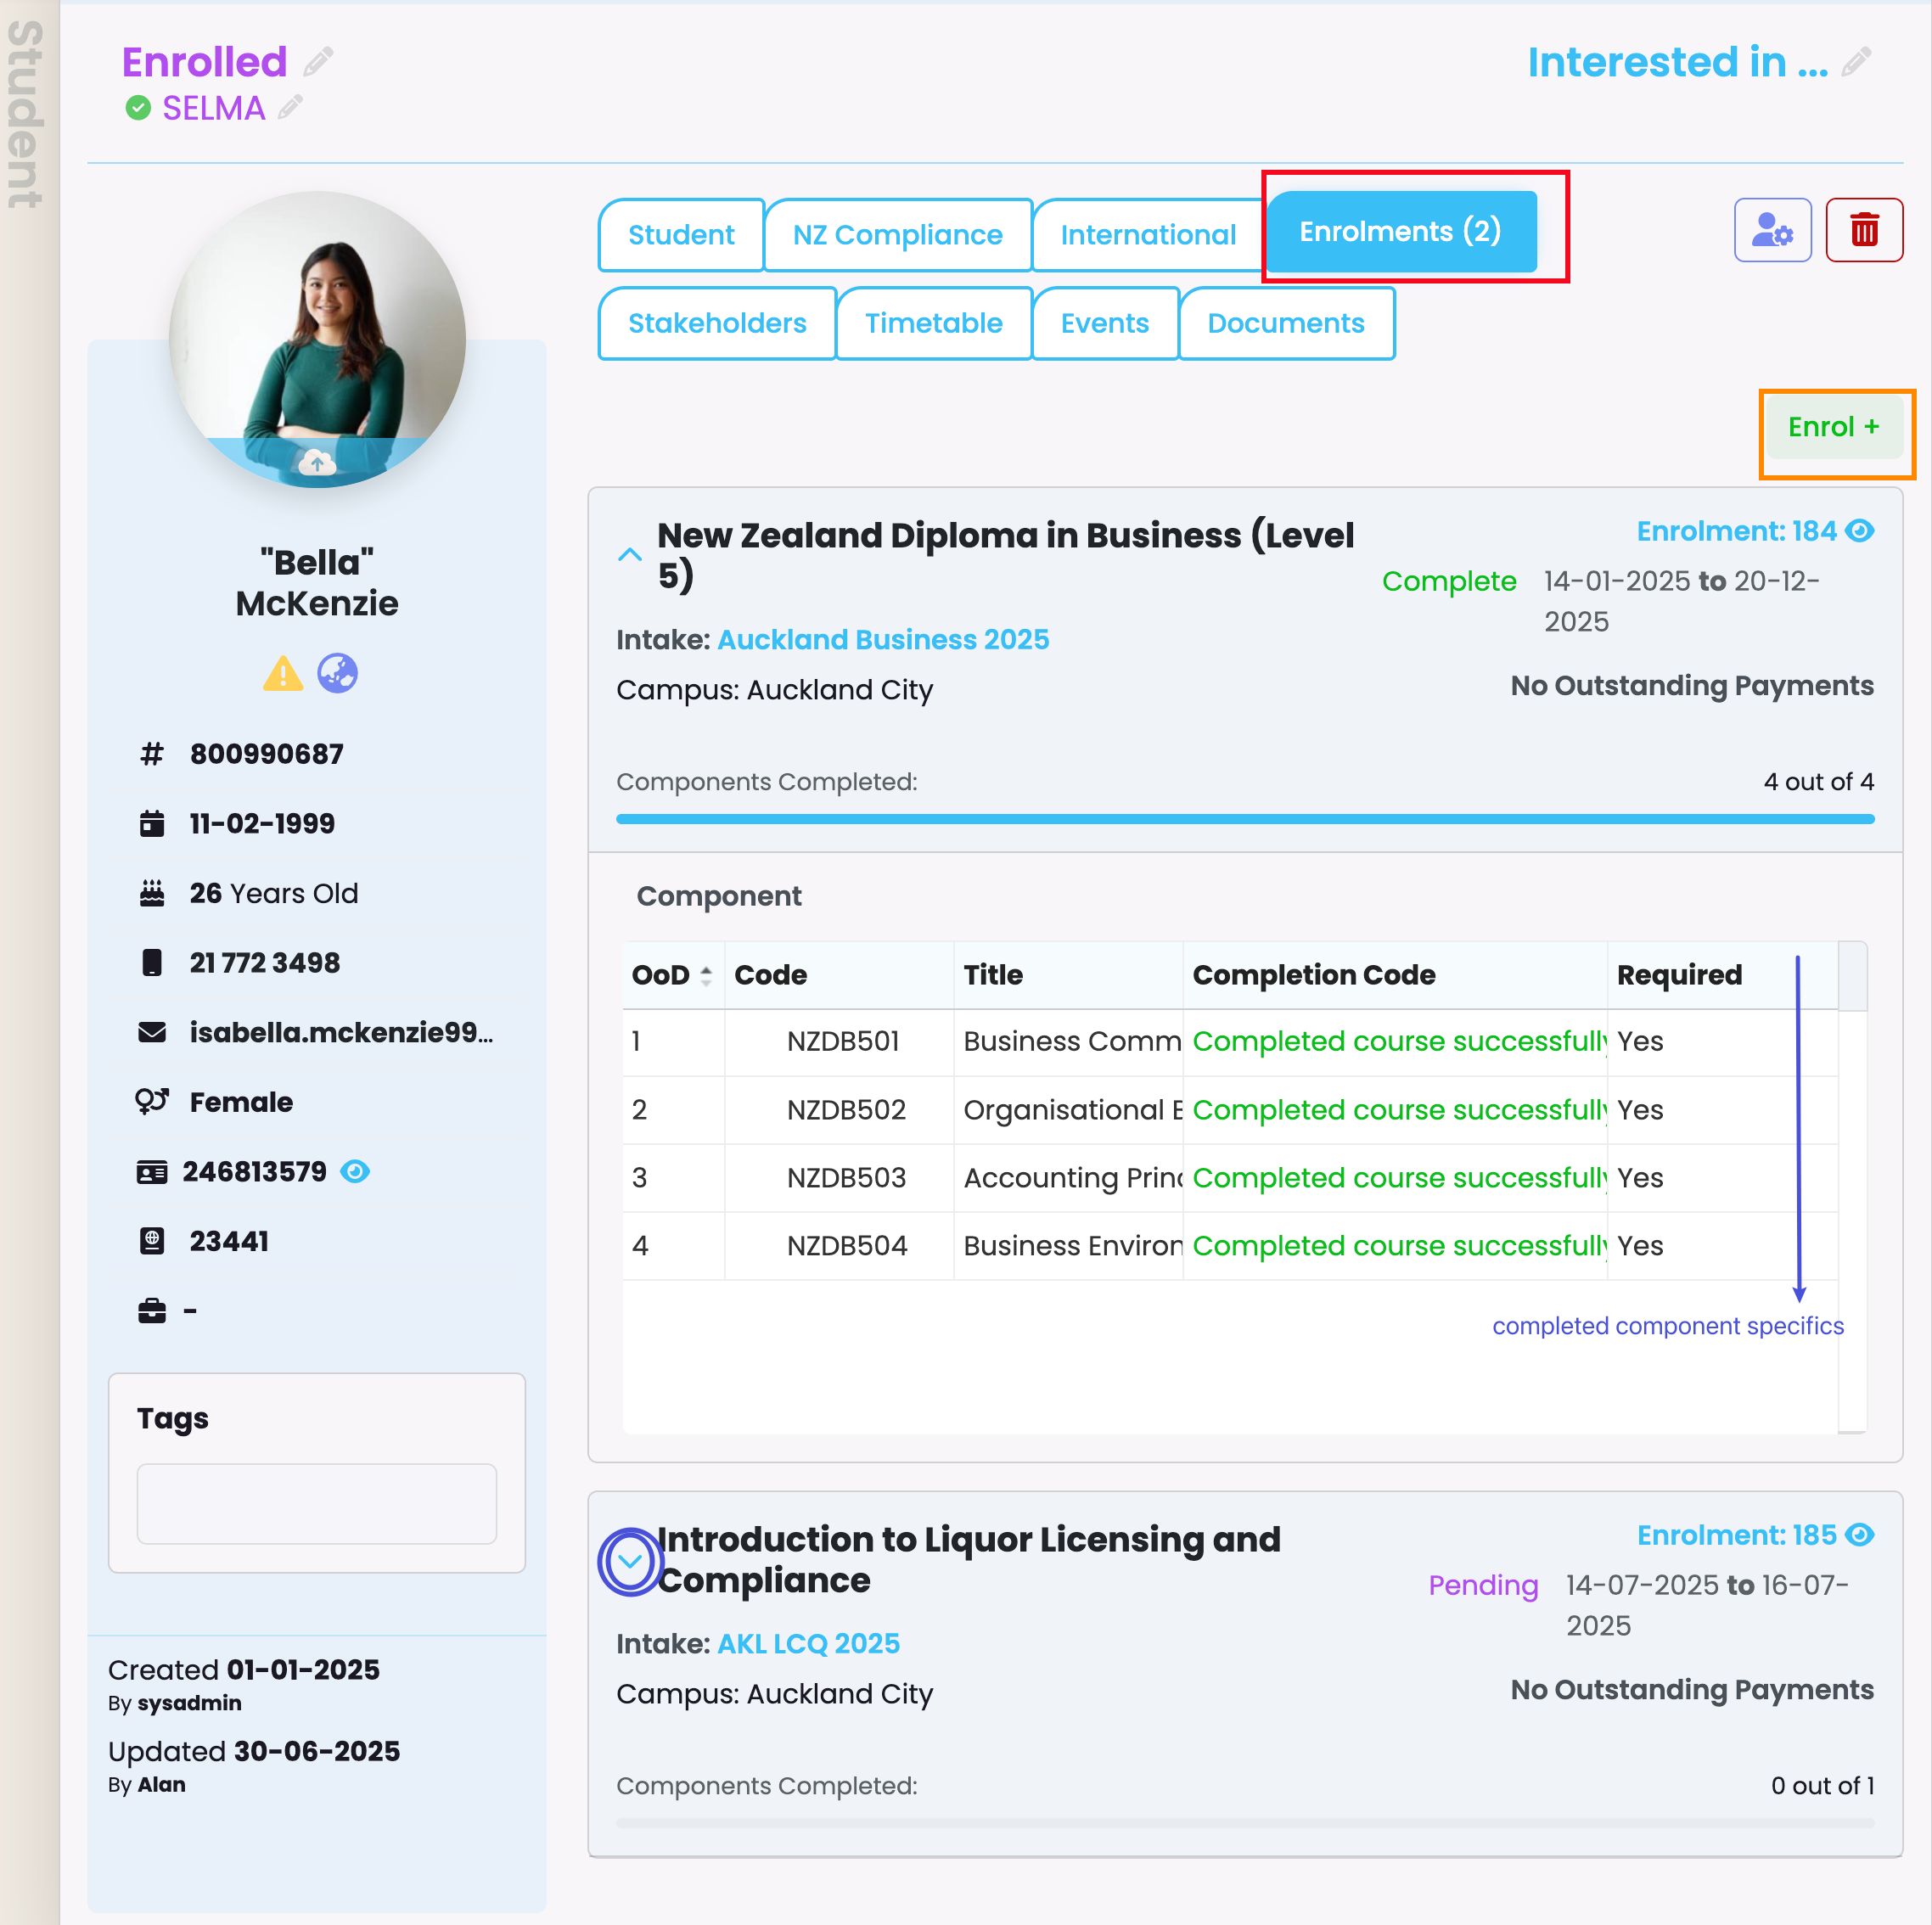
Enrolments Tab
In the Enrolments tab you can view current Enrolments linked to a Student, and add a new Enrolment (Figure 10.).
Figure 10. Under the Enrolments tabs (red) you can add new Enrolments (orange) and view details for current Enrolments. Click the down arrow button within an Enrolment (blue) to view a list of completed components (blue arrow).
Stakeholders Tab
Add Stakeholders
If the Student has Contacts or Organisations related to them, add their details and opt to include them in communications (Figure 11i-ii.).
Note: Organisations can not be added as Emergency Contacts, while Contacts have that option.
Figure 11i. The Stakeholders Tab (red) showing Contacts and Organisations, and their associated details. Click “+Add” on one of the cards (e.g. green) to add a stakeholder.
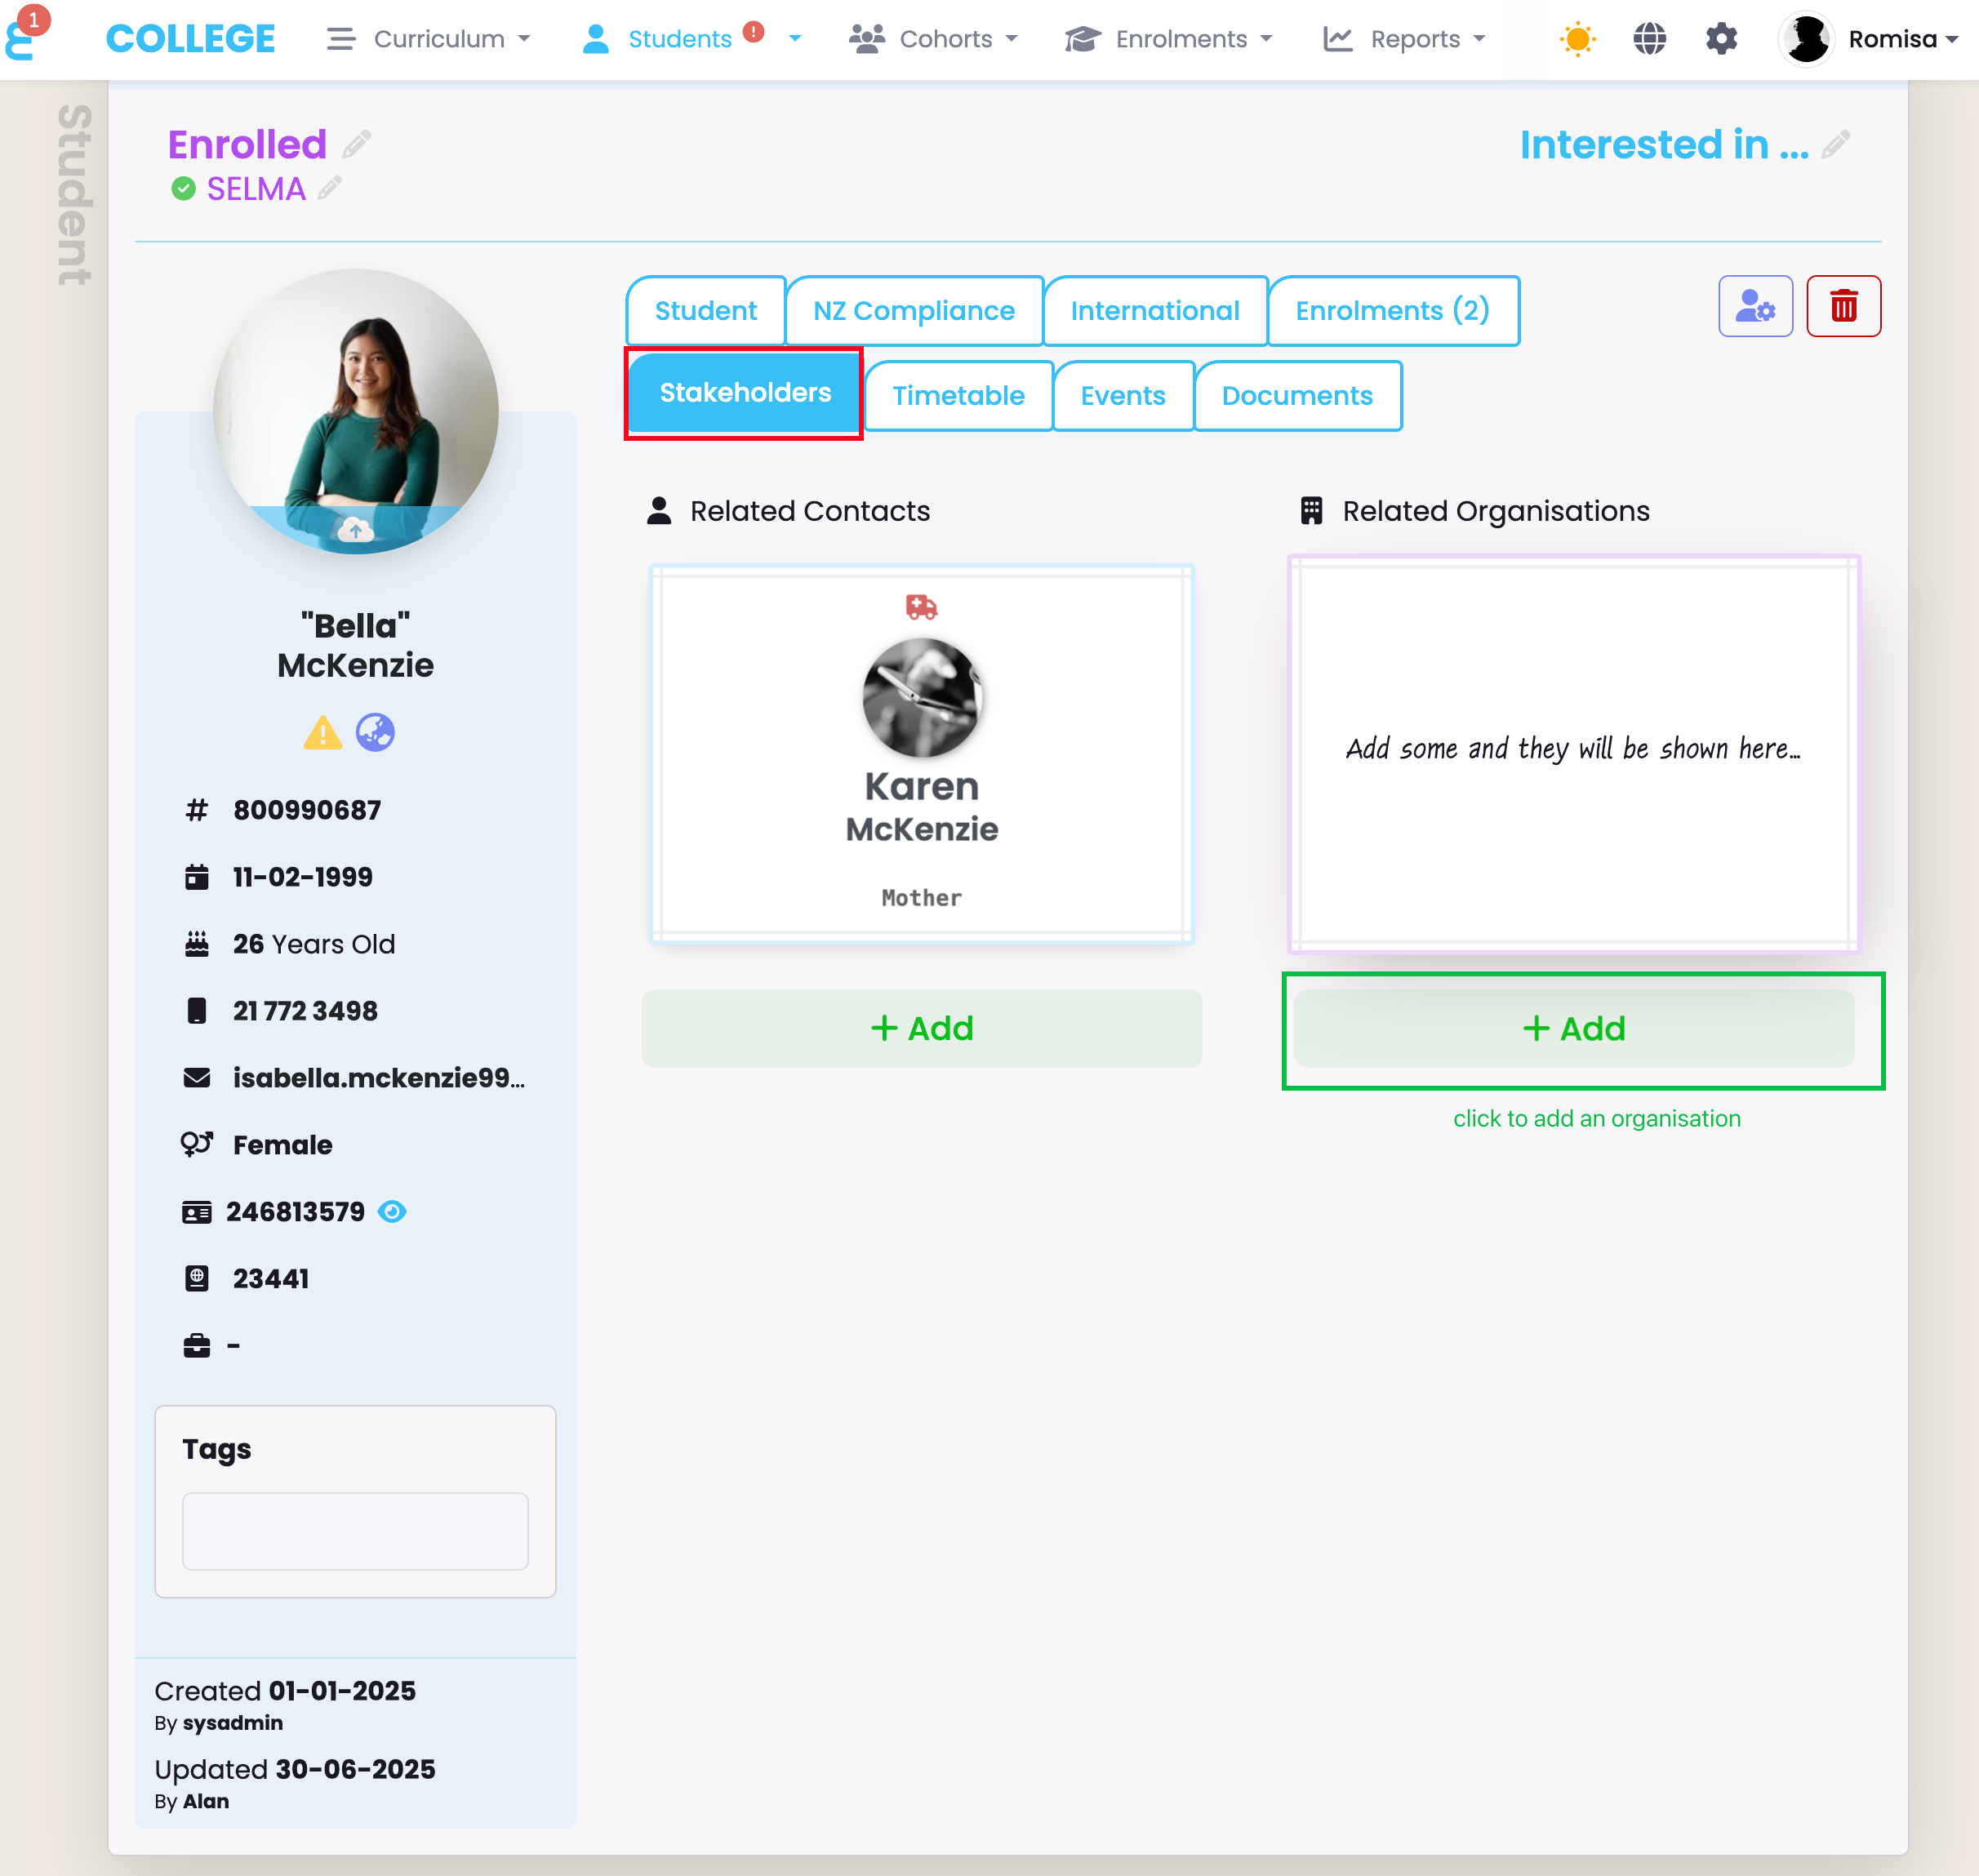
Figure 11ii. When adding a new Contact type, such as an Organisation, you can click the check button (red) to include them in communications.

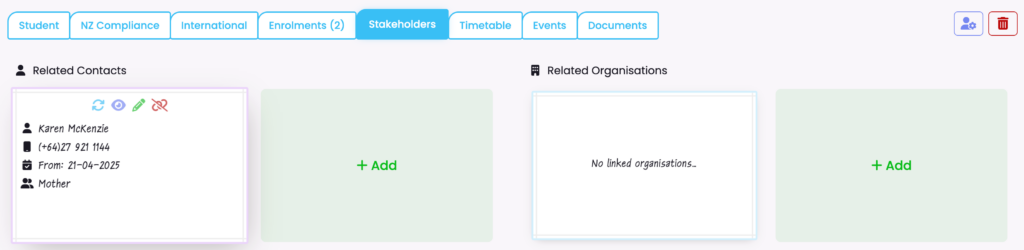
Remove Stakeholders
You can unlink Contacts or Organisations from a Student profile by clicking on a card which flips to reveal more information (Figure 11iii.).
Figure 11iii. A flipped Contact card on the left shows options to view (eye icon), edit (green pencil icon) and unlink the Contact (red chain link icon) from the student profile.
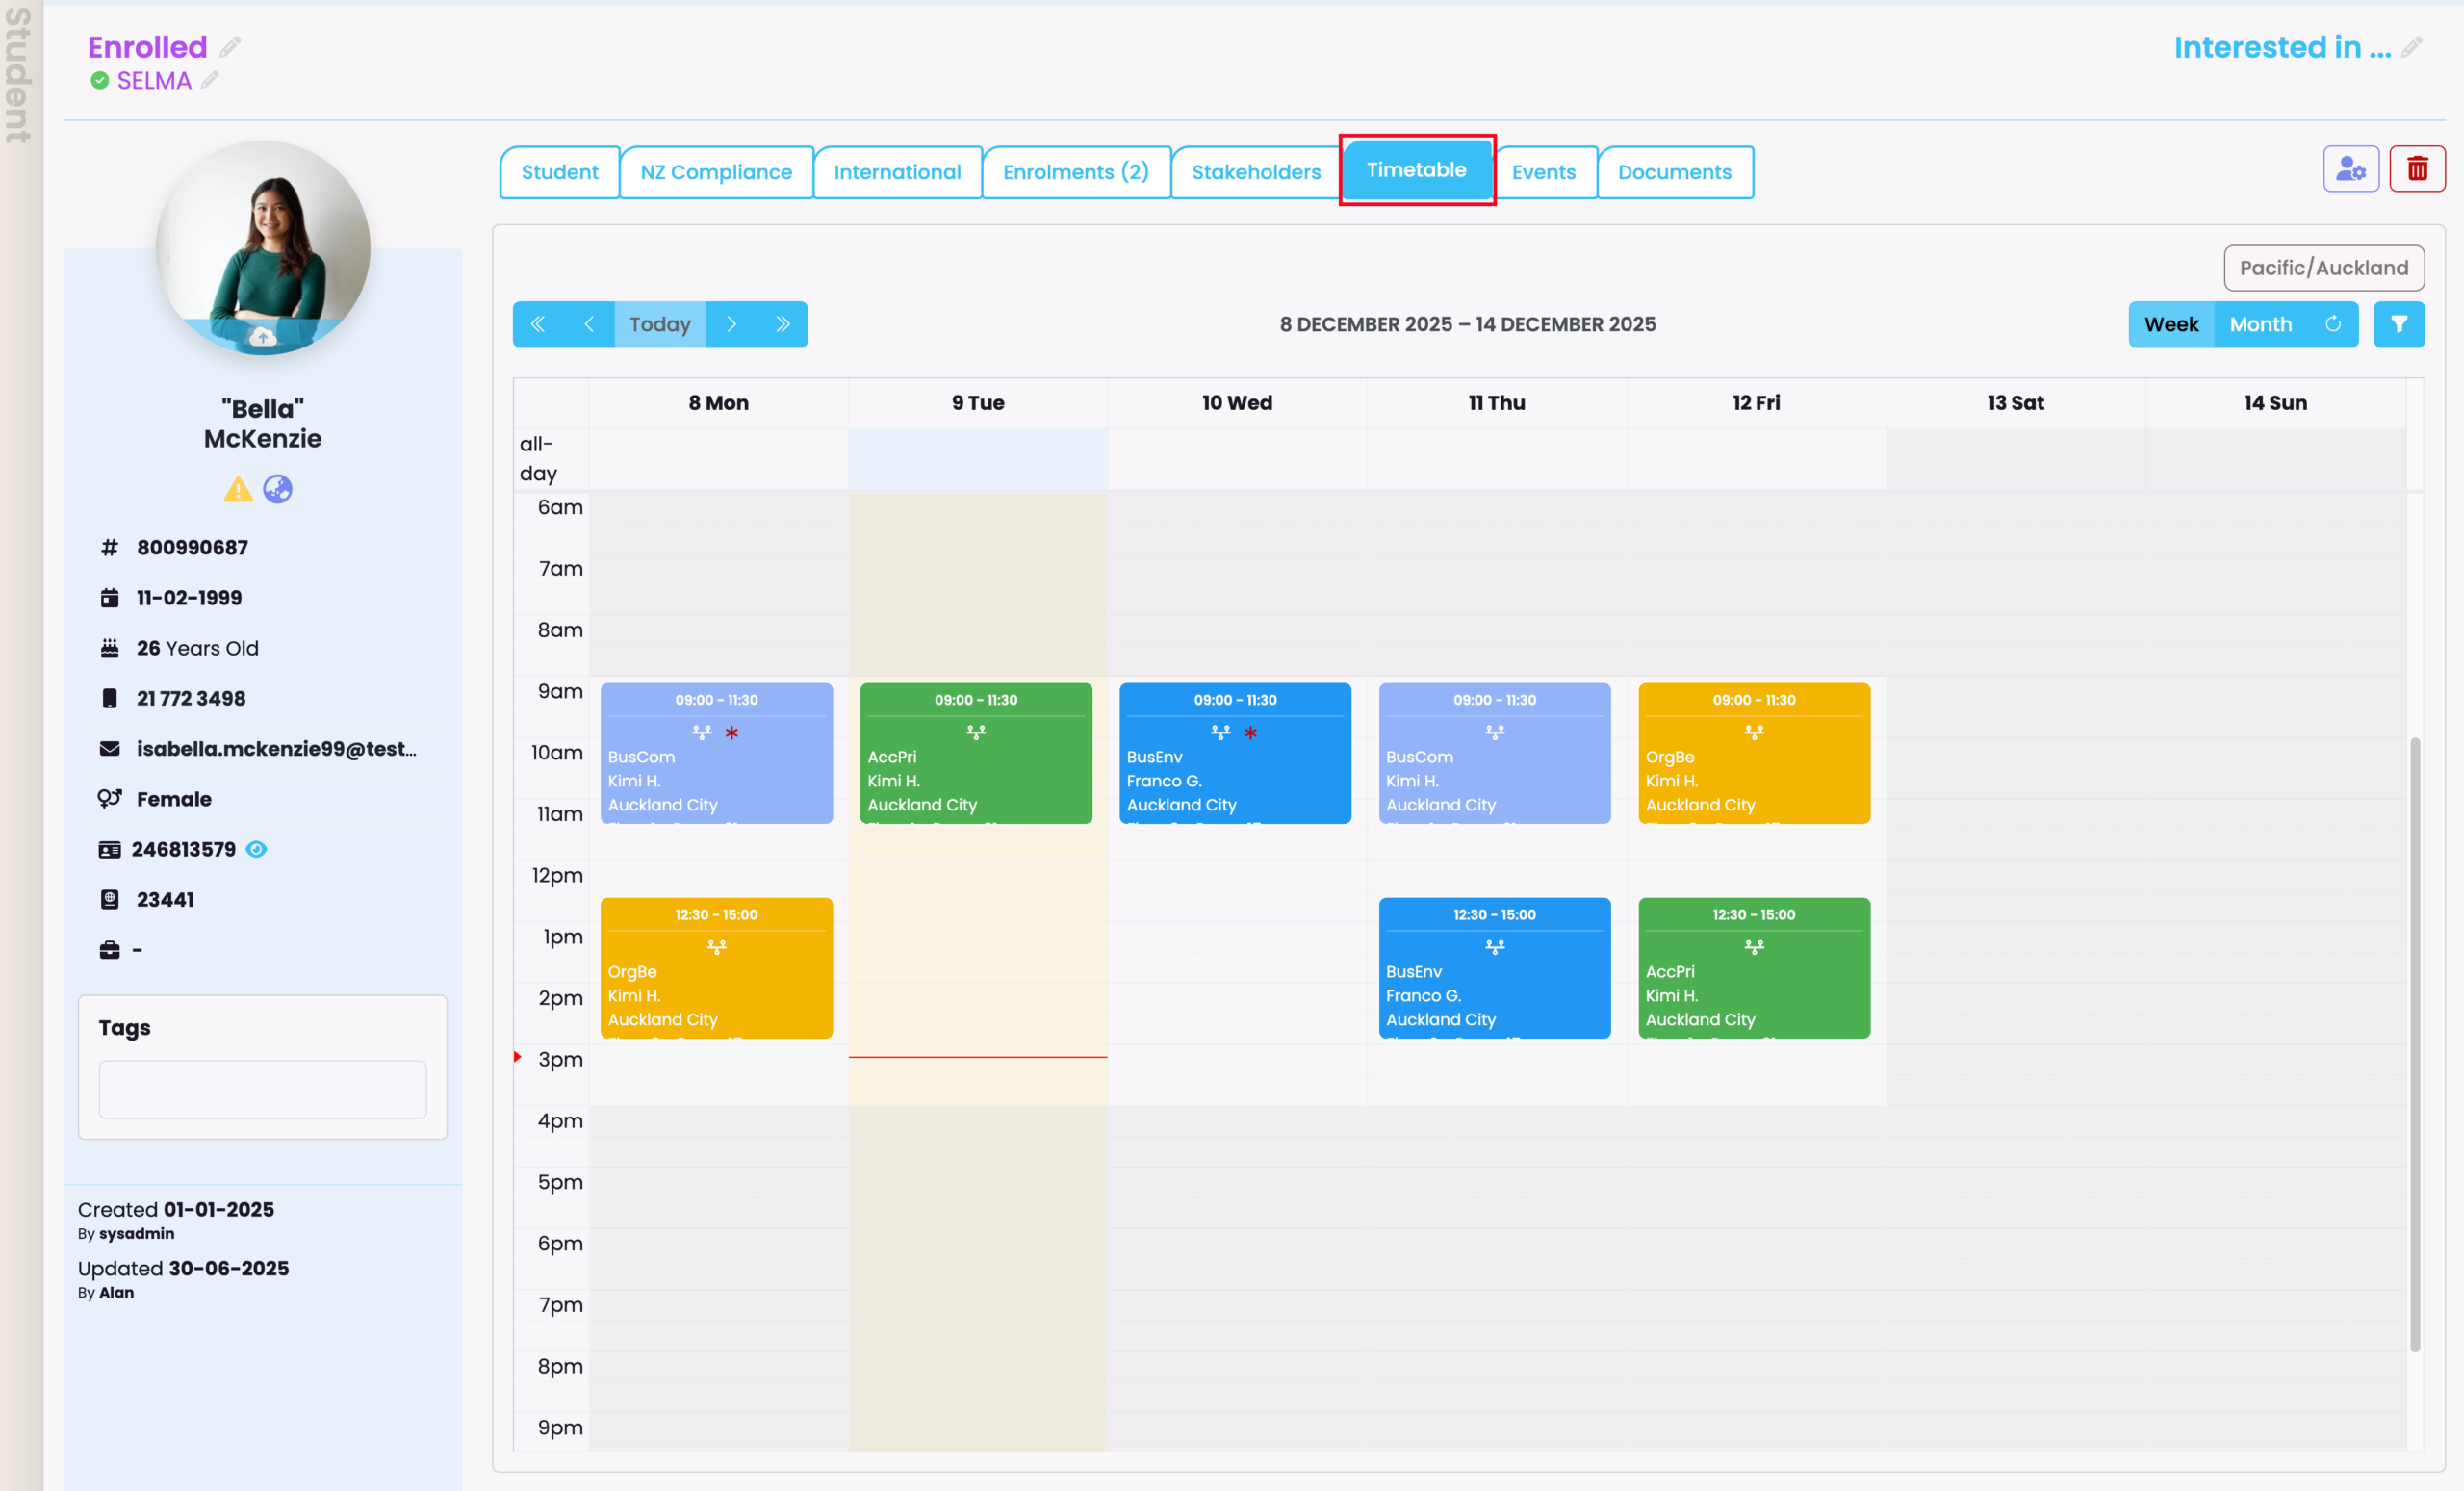
Timetable Tab
In the Timetable Tab, you can view current and future Component sessions for a Student (Figure 12.).
See Attendance – Create Timetables in this resource, to create a Timetable.
Figure 12. In the Timetable tab (red), hover over the colour-coded rectangles to get a full description of the session.
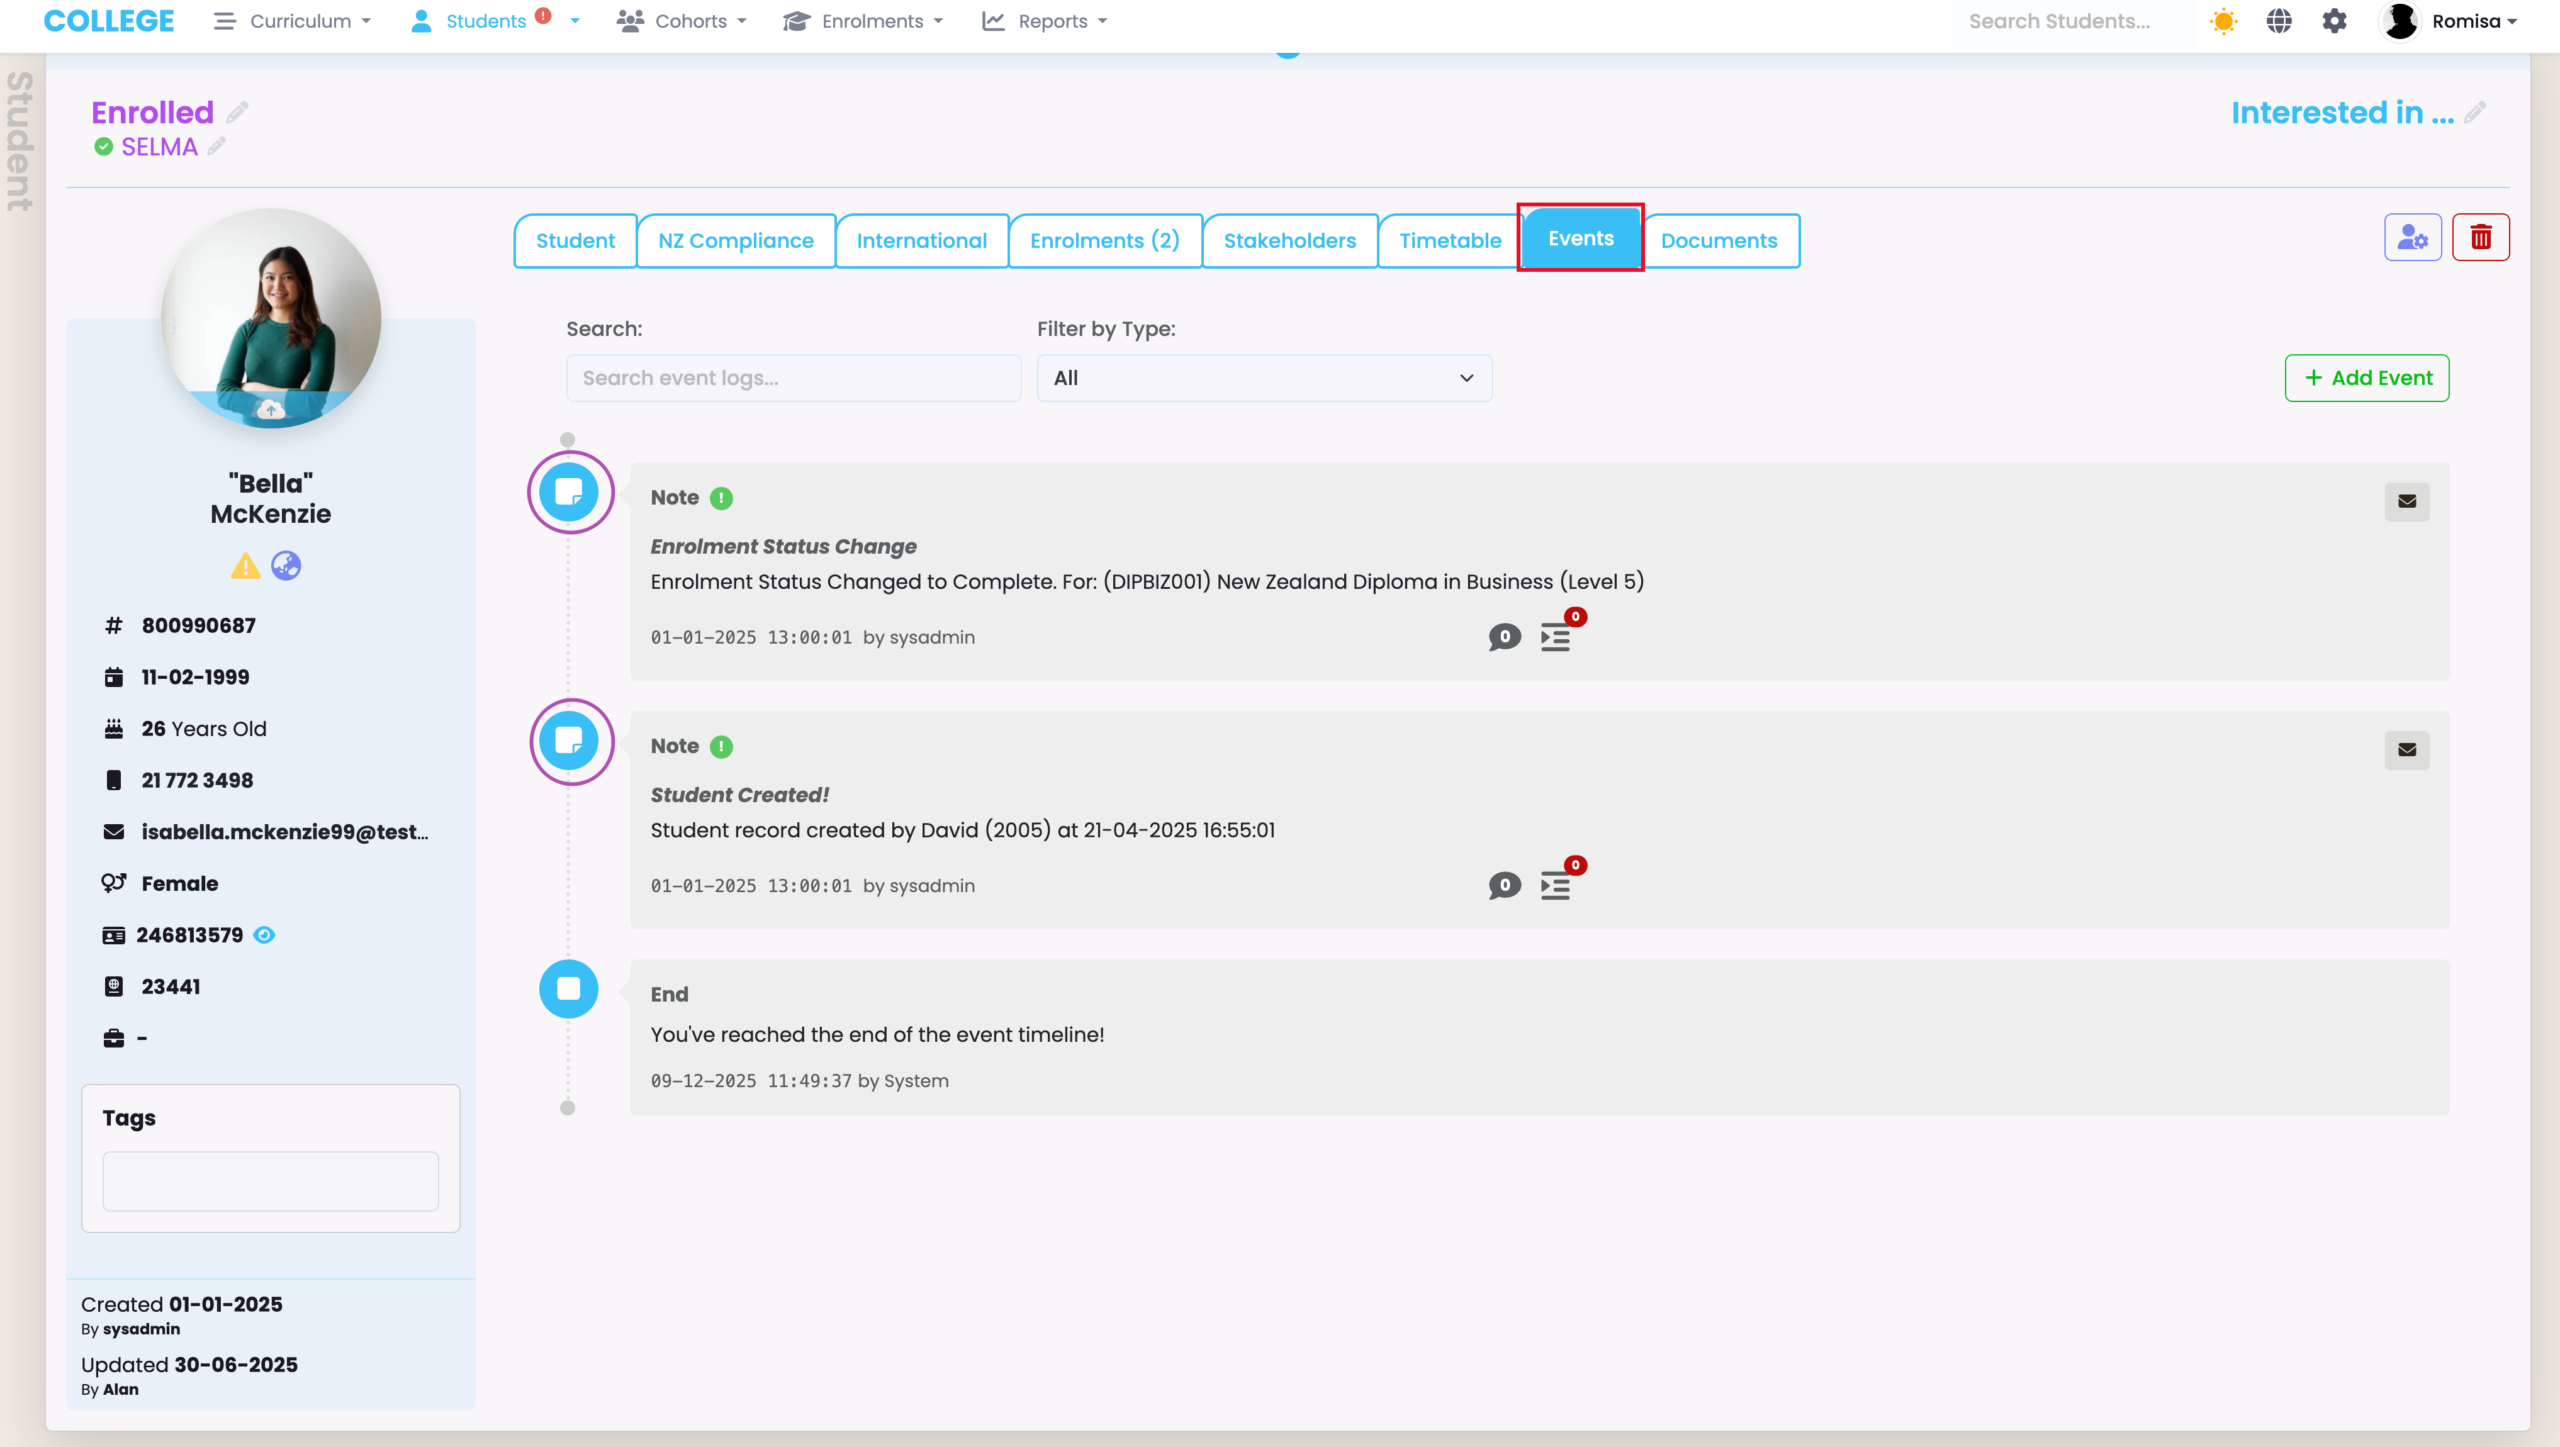
Events Tab
Use the event scheduler to add notes and allocate various tasks pertaining to a specific student; or view the Events Log timeline associated with a Student (Figure 13.).
See Event Log – The SELMA Event Log in this resource for more information.
Figure 13. The Events Tab (red) showing Event notifications (purple) such as an Enrolment Status change and Student record creation.
Documents Tab
In the Documents tab, upload new documents or display existing documents in different modes, including the folder display where you can organise documents into folders (Figure 14i.).
Figure 14i. The Documents tab (blue) shows the “Upload” button (green) and the buttons to change between views. The current view is the menu view (purple), while the folder view is next to it (orange).
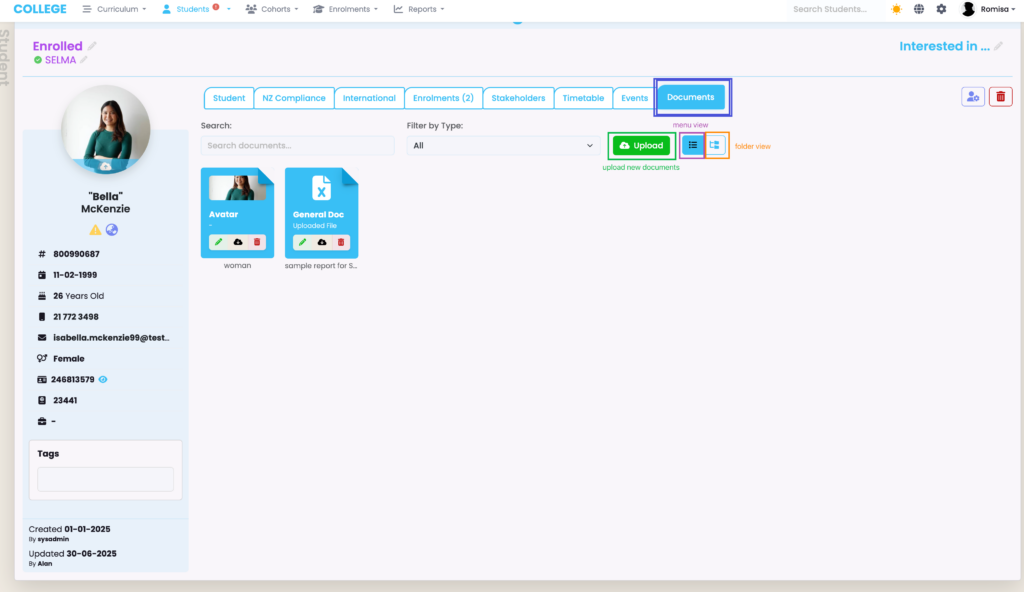
When uploading a document, you have a choice between the default Document Type options. These each serve as folders, automatically, if you upload multiple quantities of either of them (Figure 14ii.).
If you wish to add your own Document Types, navigate to the System’s Settings indicated by the cog icon in the top right of your screen, beside your User profile name.
Then, click “Lookup Data” in the list and search for the “Document Type” where you can add new Document Types and activate them for use on the Documents Tab (Figure ai.).
Figure ai. To customise and add data options, navigate to SELMA Settings > Lookup Data.
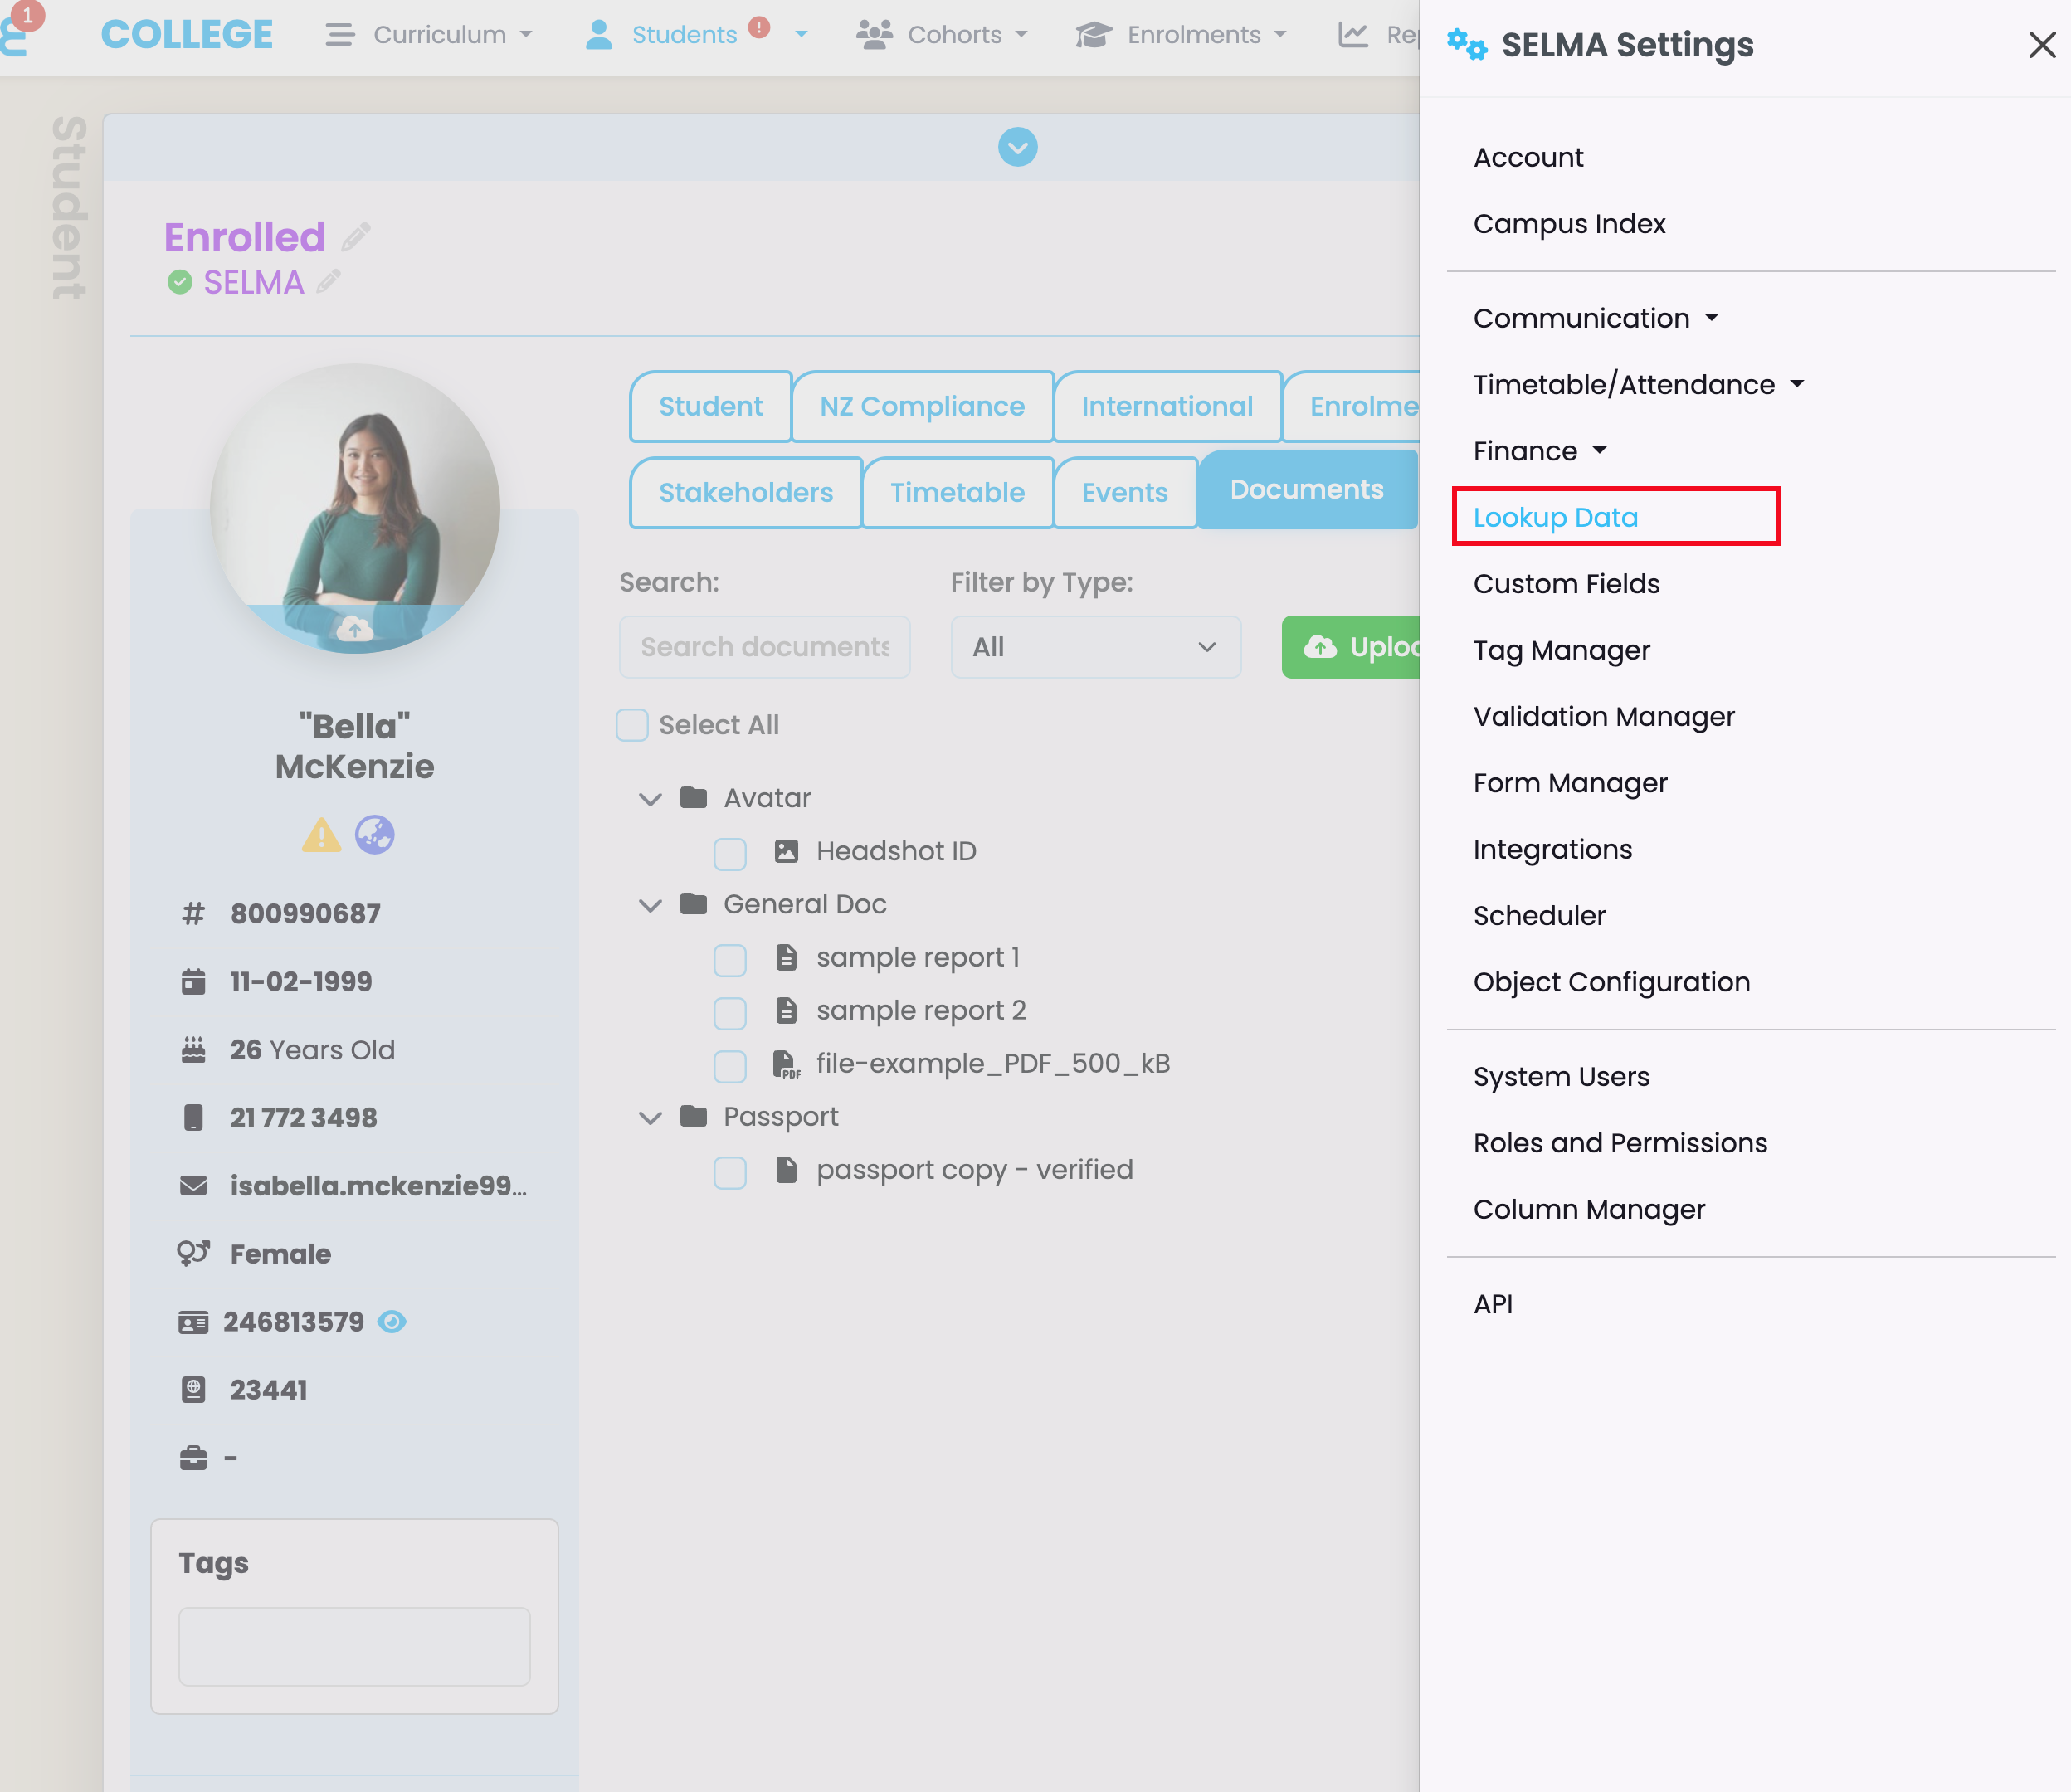
Figure aii. Find and select “Document Type”, and Click the “New” button (green) to add data values. Remember to check the tick-boxes under “Active” (red), to see your Document Type when using the Documents tab.
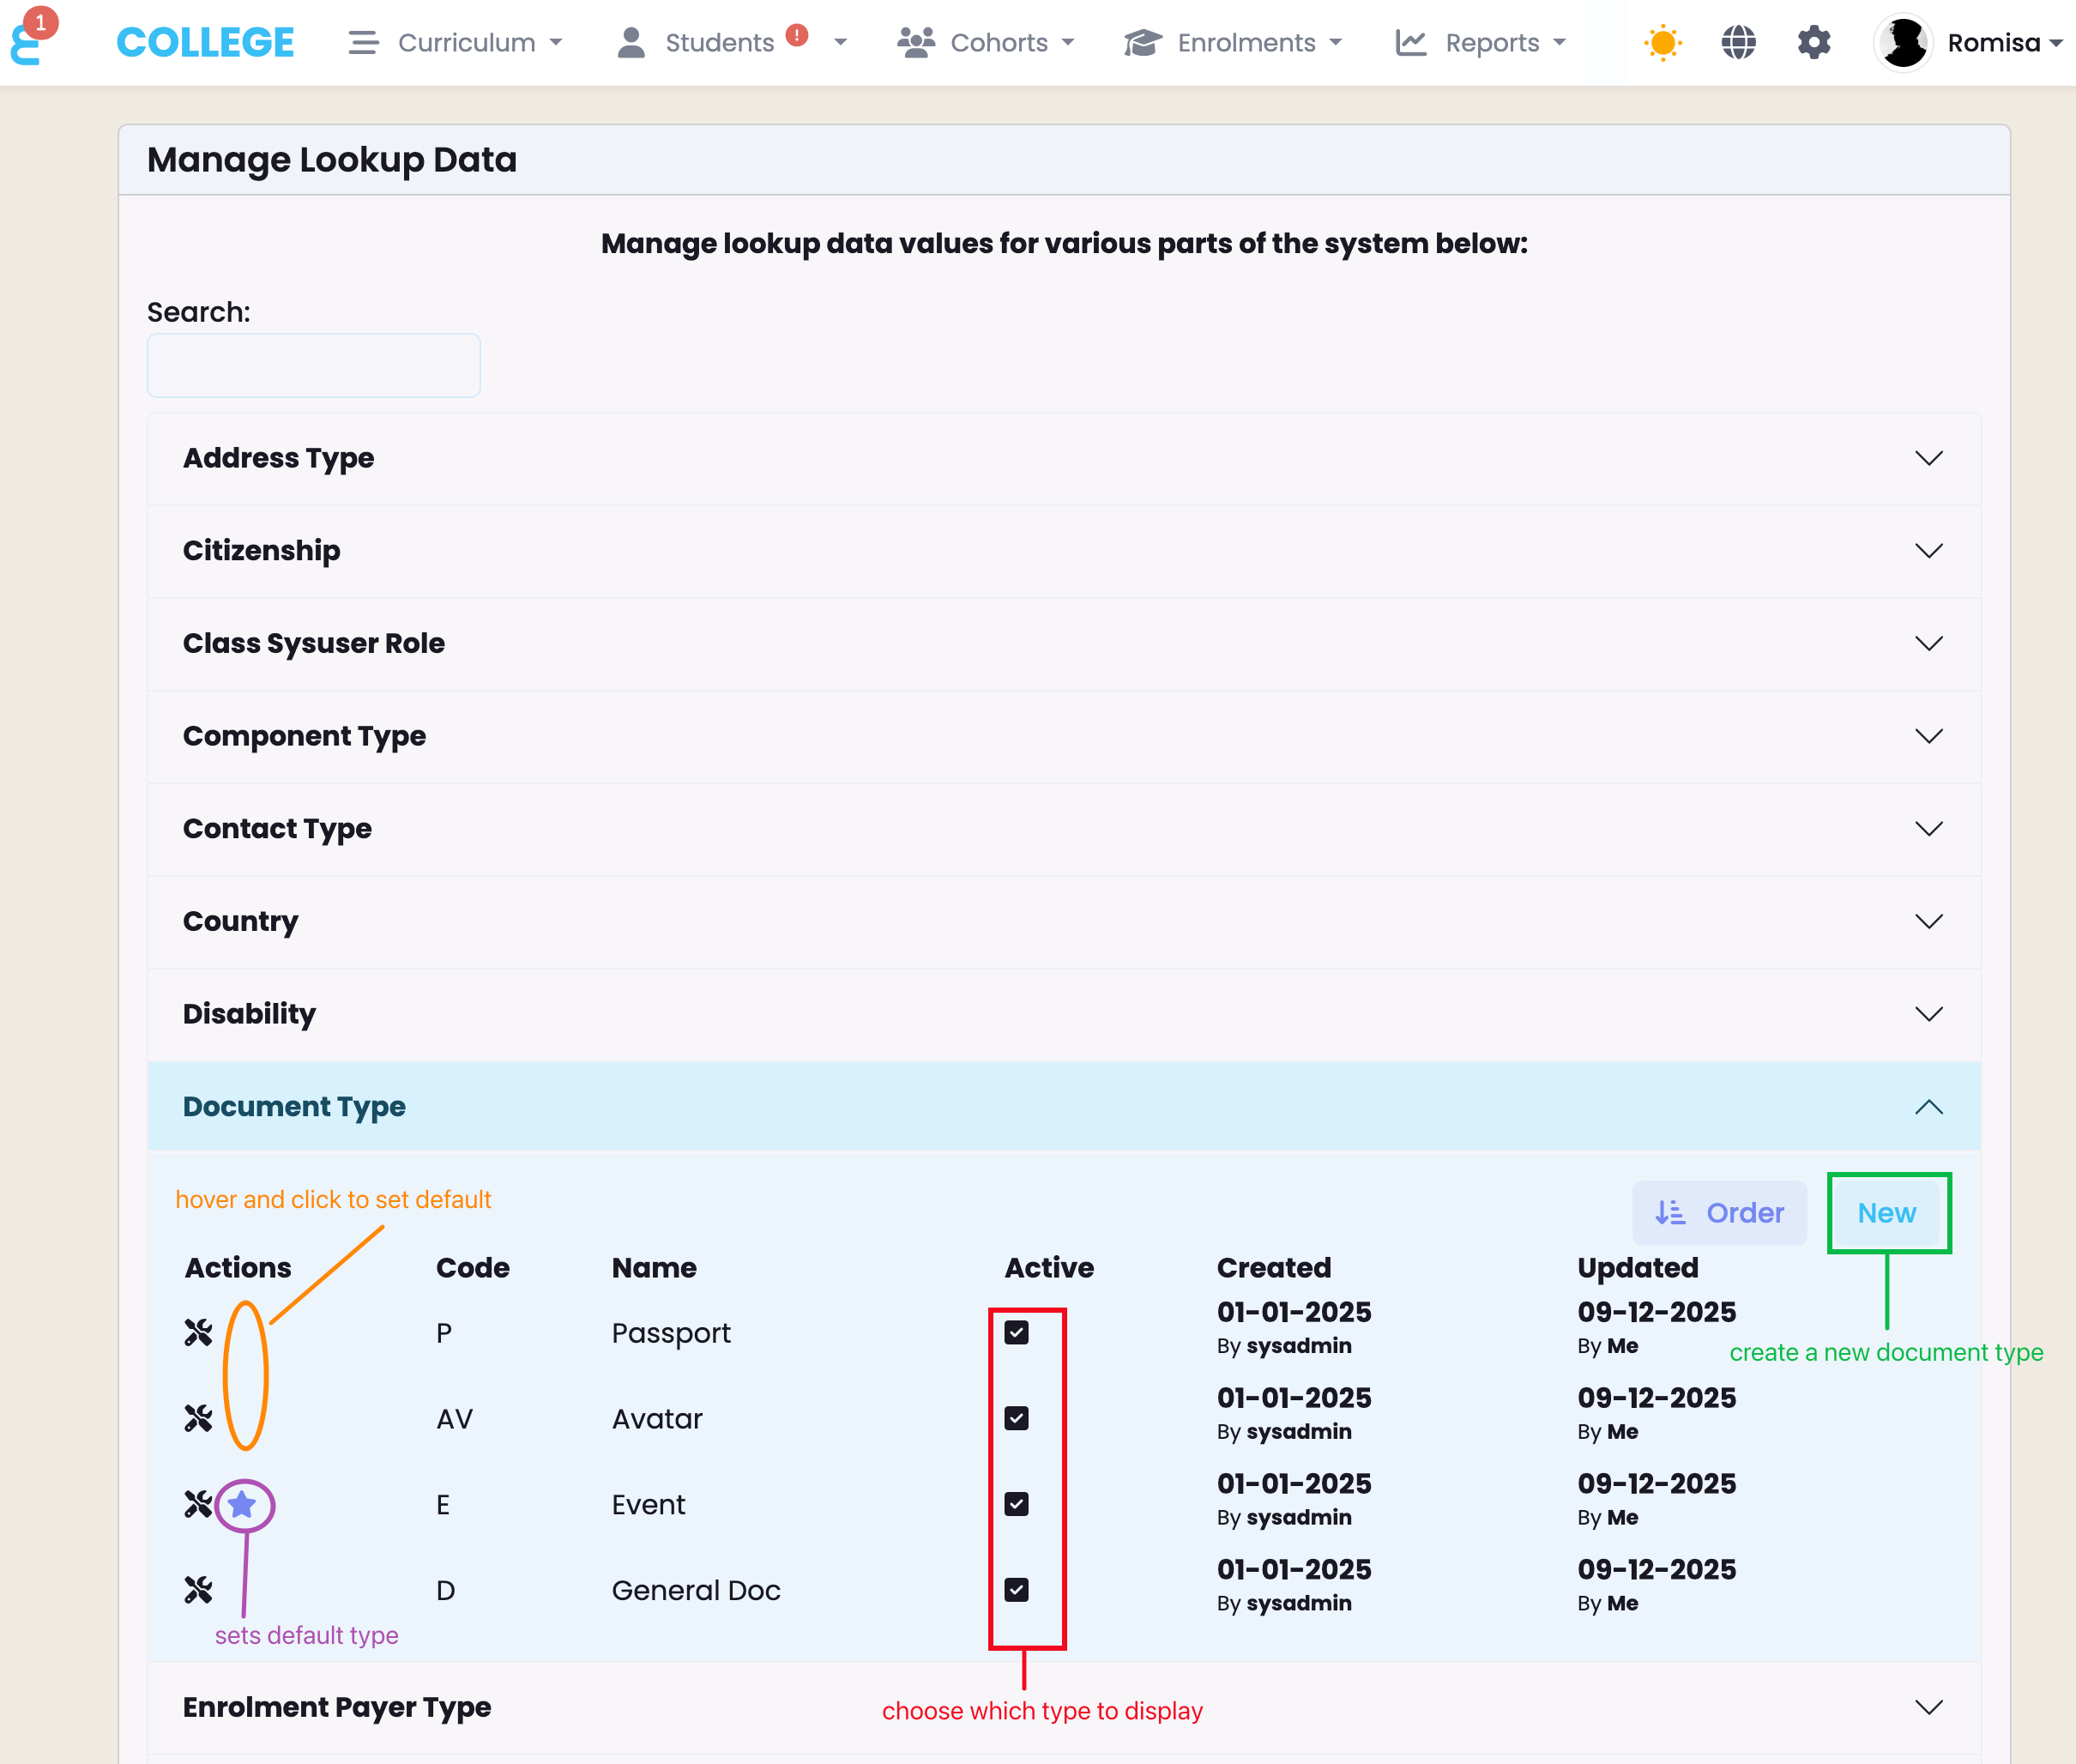
Figure 14ii. The folder view shows each document type organised into one folder. E.g. Three documents are organised into the “General Doc” folder (blue), separate from the others.
