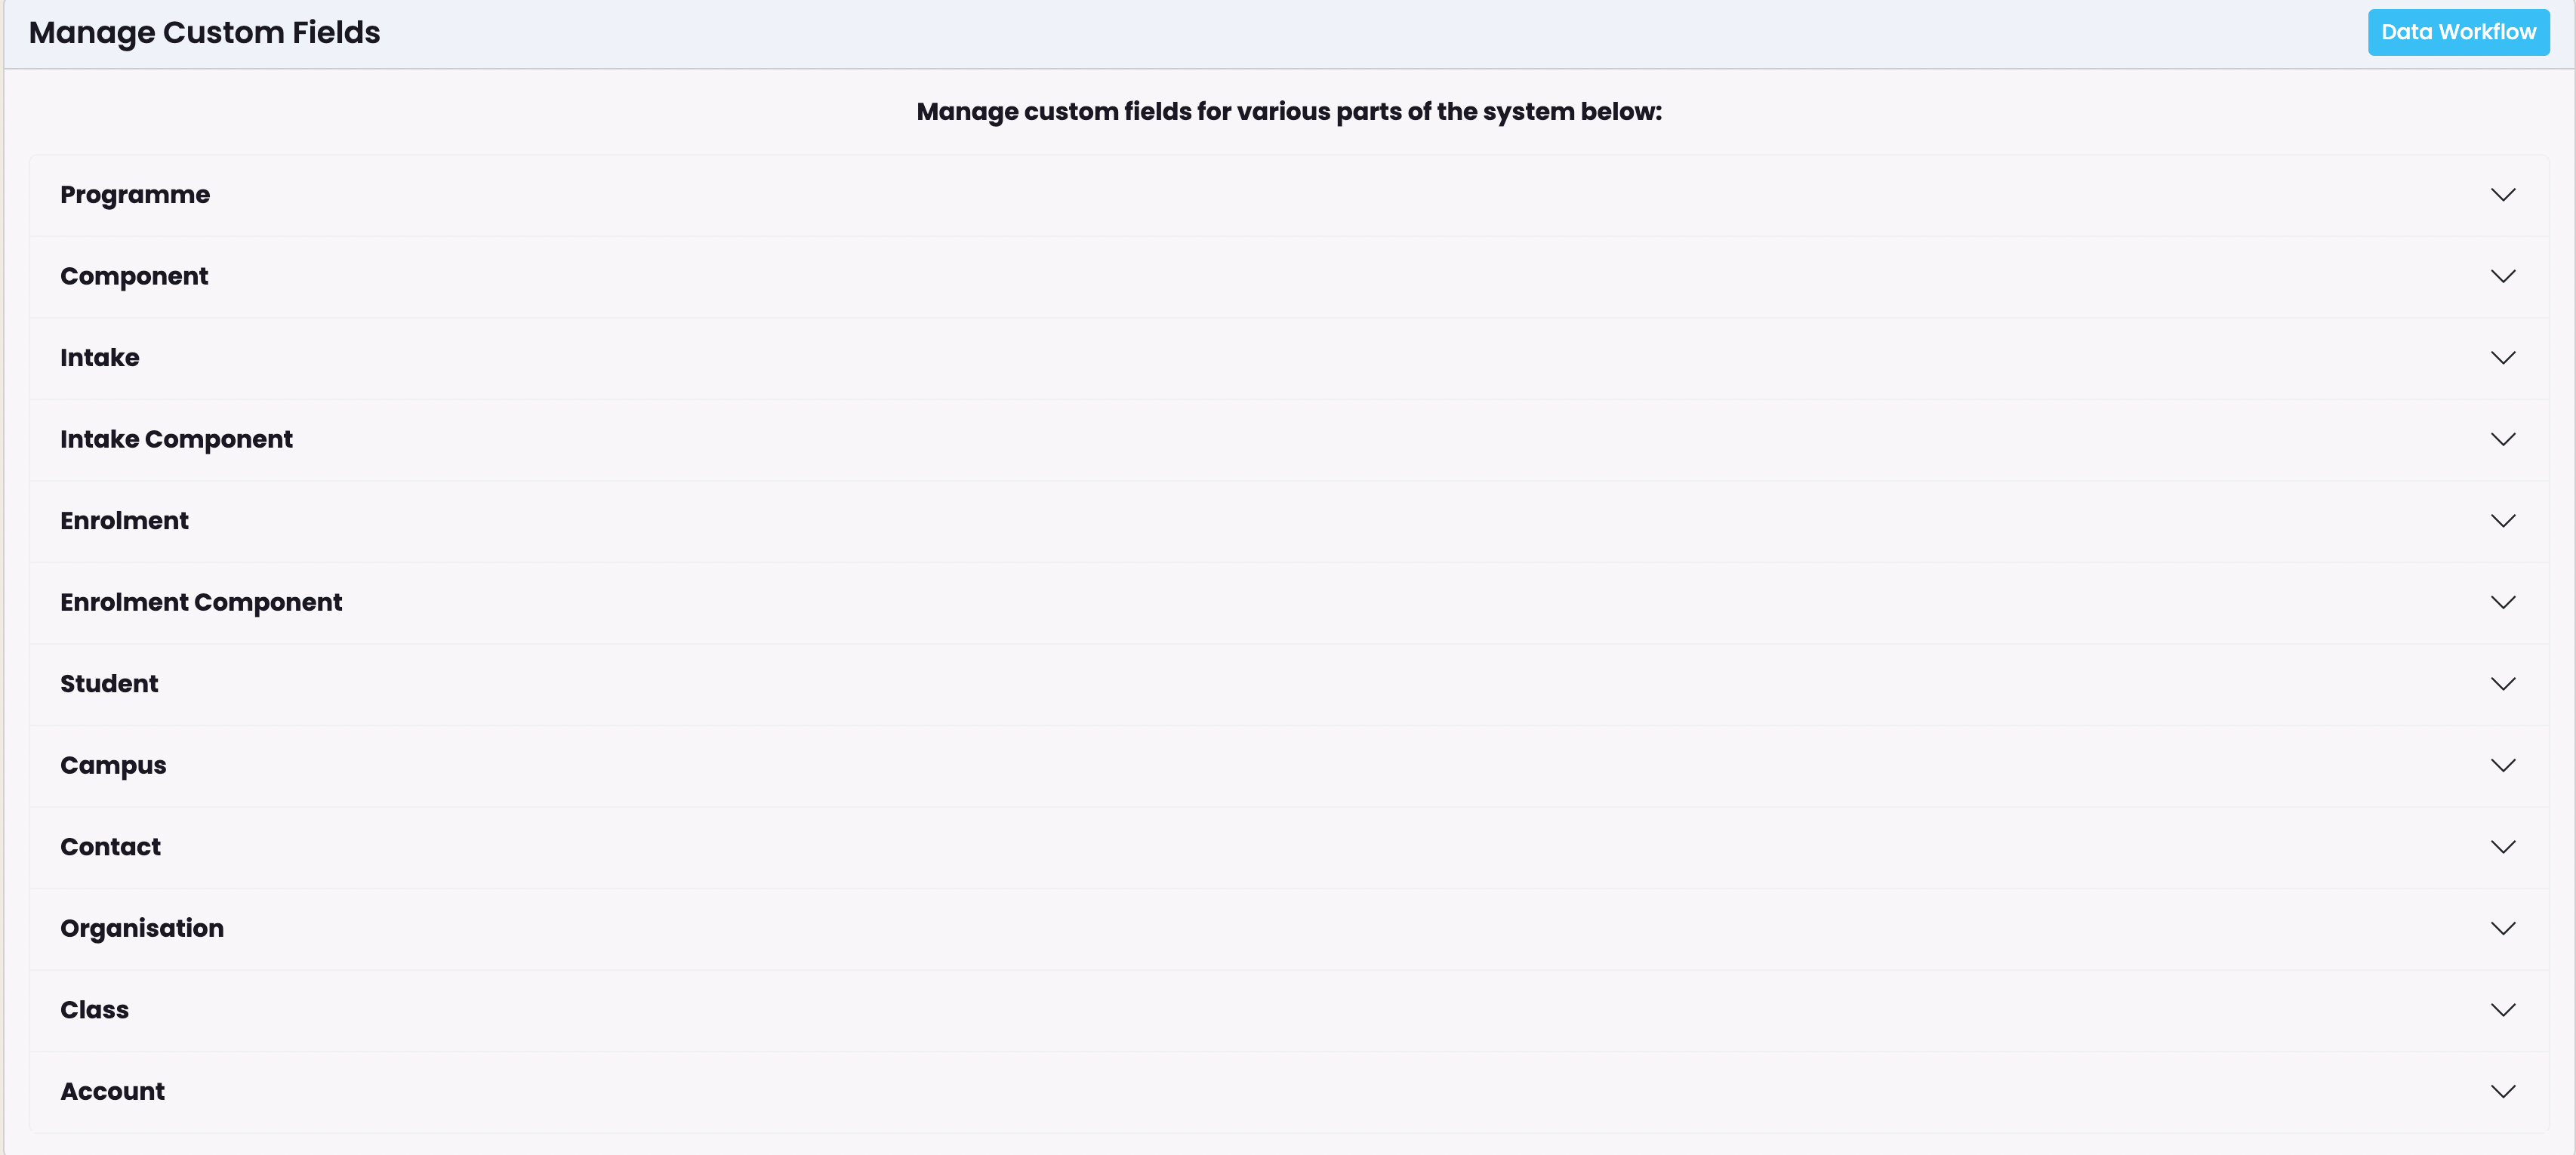
To access Custom fields, navigate to Settings (Cog) -> Custom Fields
You can personalise your SELMA instance by adding, editing and re-ordering Custom field tabs for the following sections:
![A screenshot of a computer
Description automatically generated](https://wiki.selmasis.com/wp-content/uploads/2024/02/a-screenshot-of-a-computer-description-automatica-20.png)
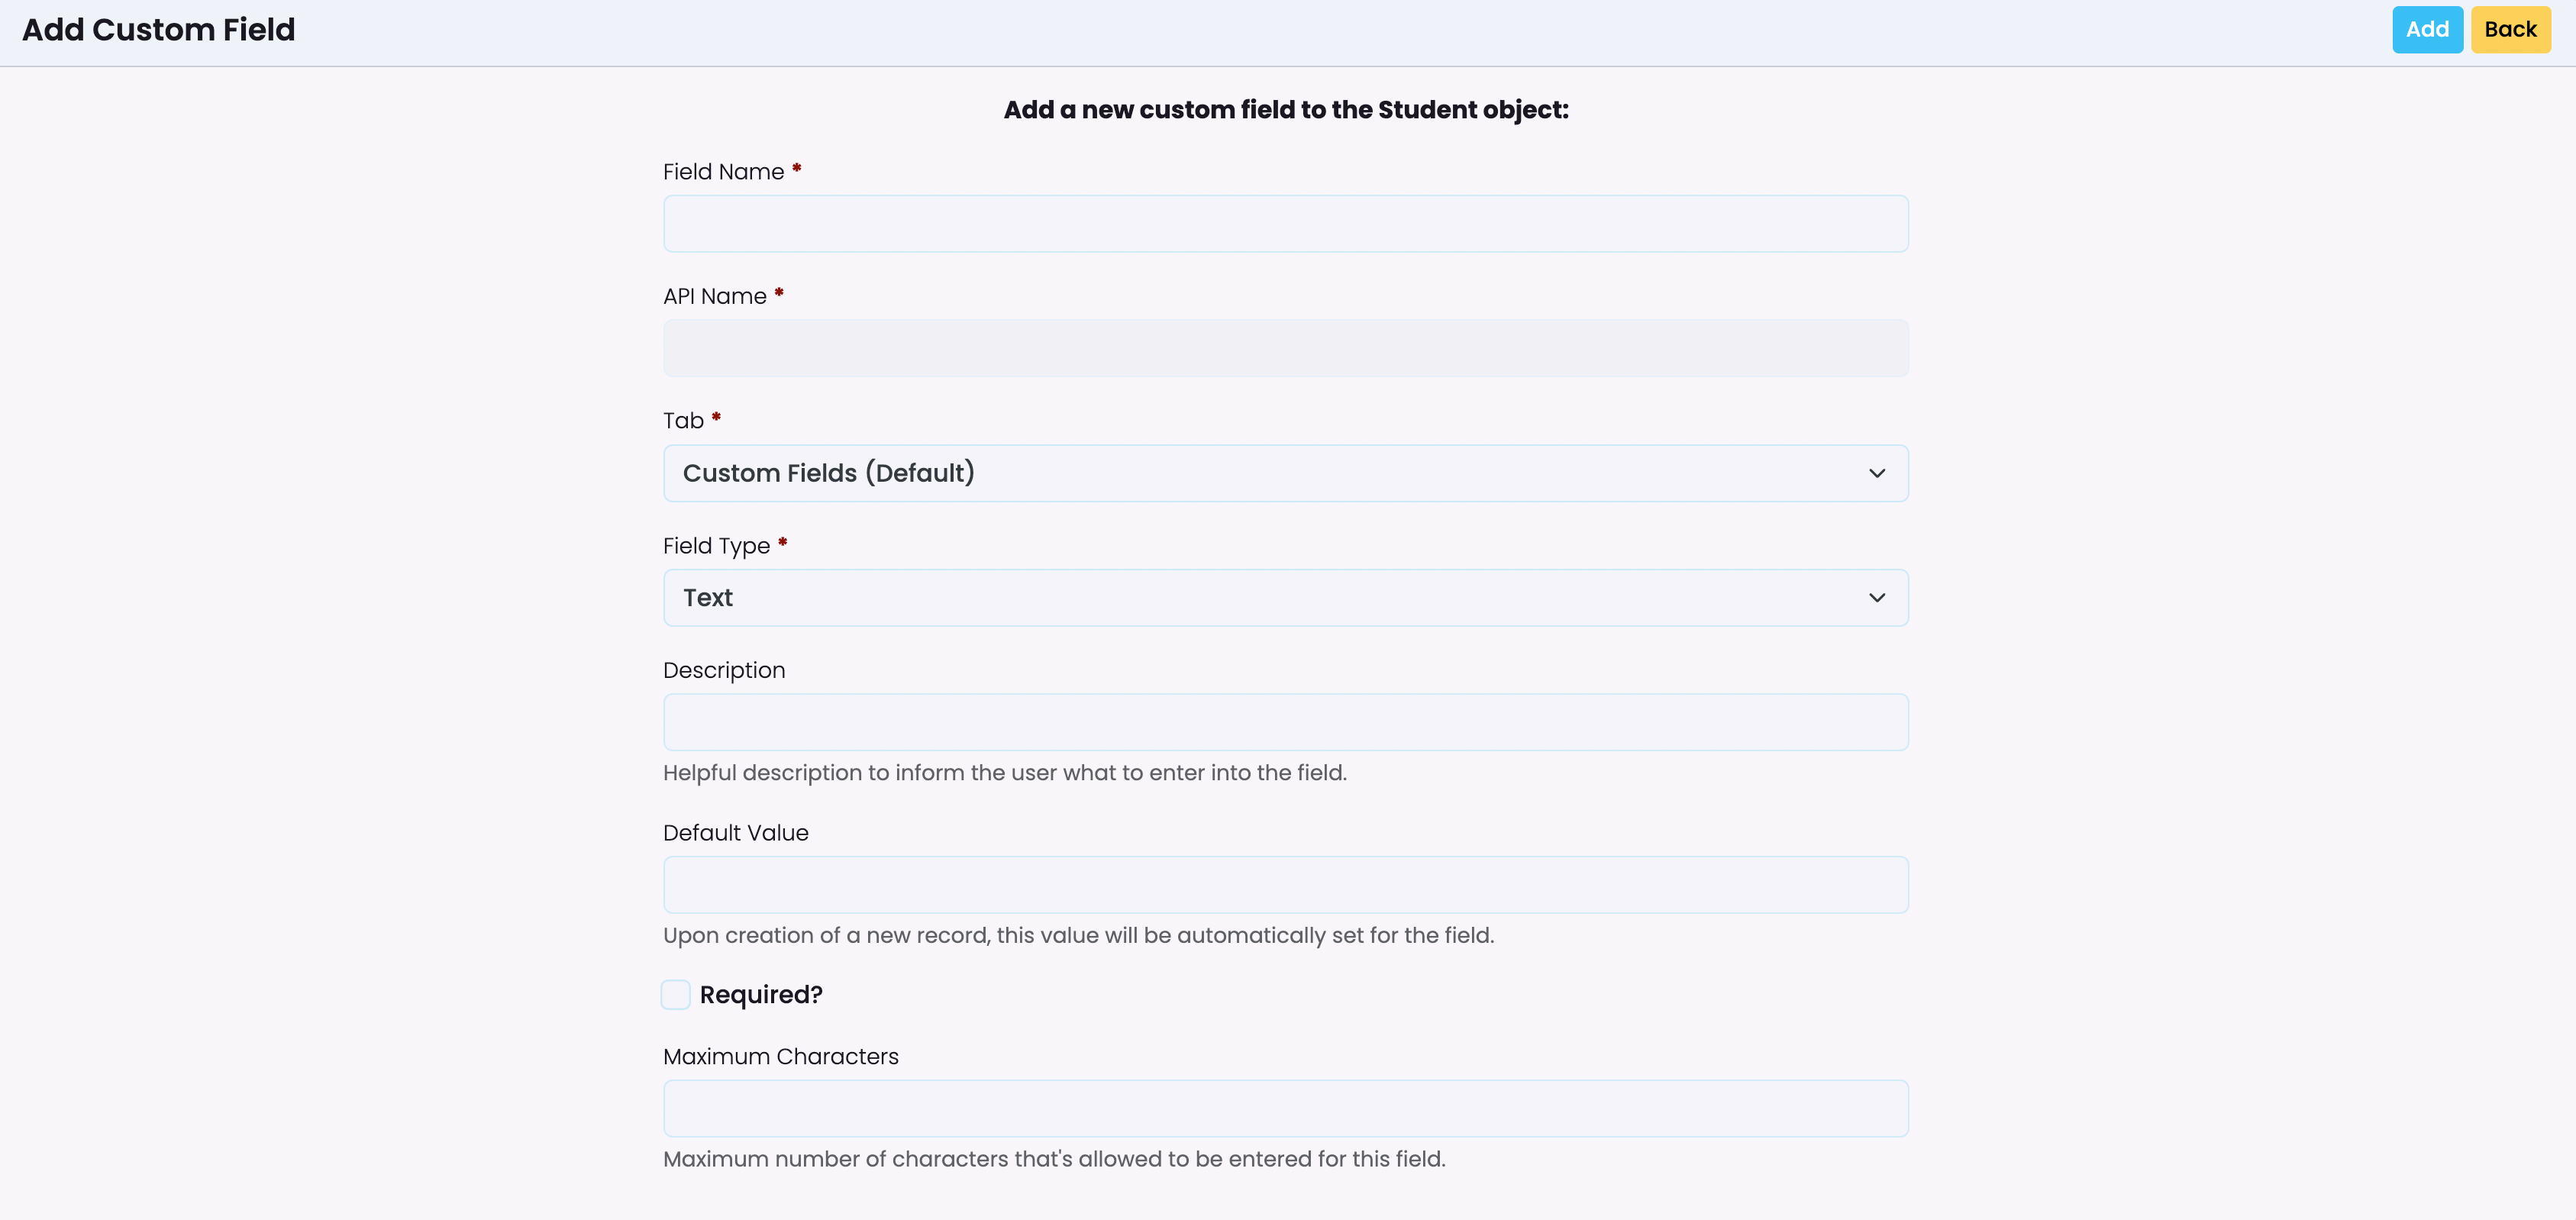
To add a new Custom Field click on Add –
![A screenshot of a phone
Description automatically generated](https://wiki.selmasis.com/wp-content/uploads/2024/02/a-screenshot-of-a-phone-description-automatically.png)
Required information – Field Name, API Name (generated automatically based on the Field Name) and Field Type
![](https://wiki.selmasis.com/wp-content/uploads/2024/02/word-image-1183-3.png)
Once the details have been entered, click Add –
![](https://wiki.selmasis.com/wp-content/uploads/2024/02/word-image-1183-4.png)
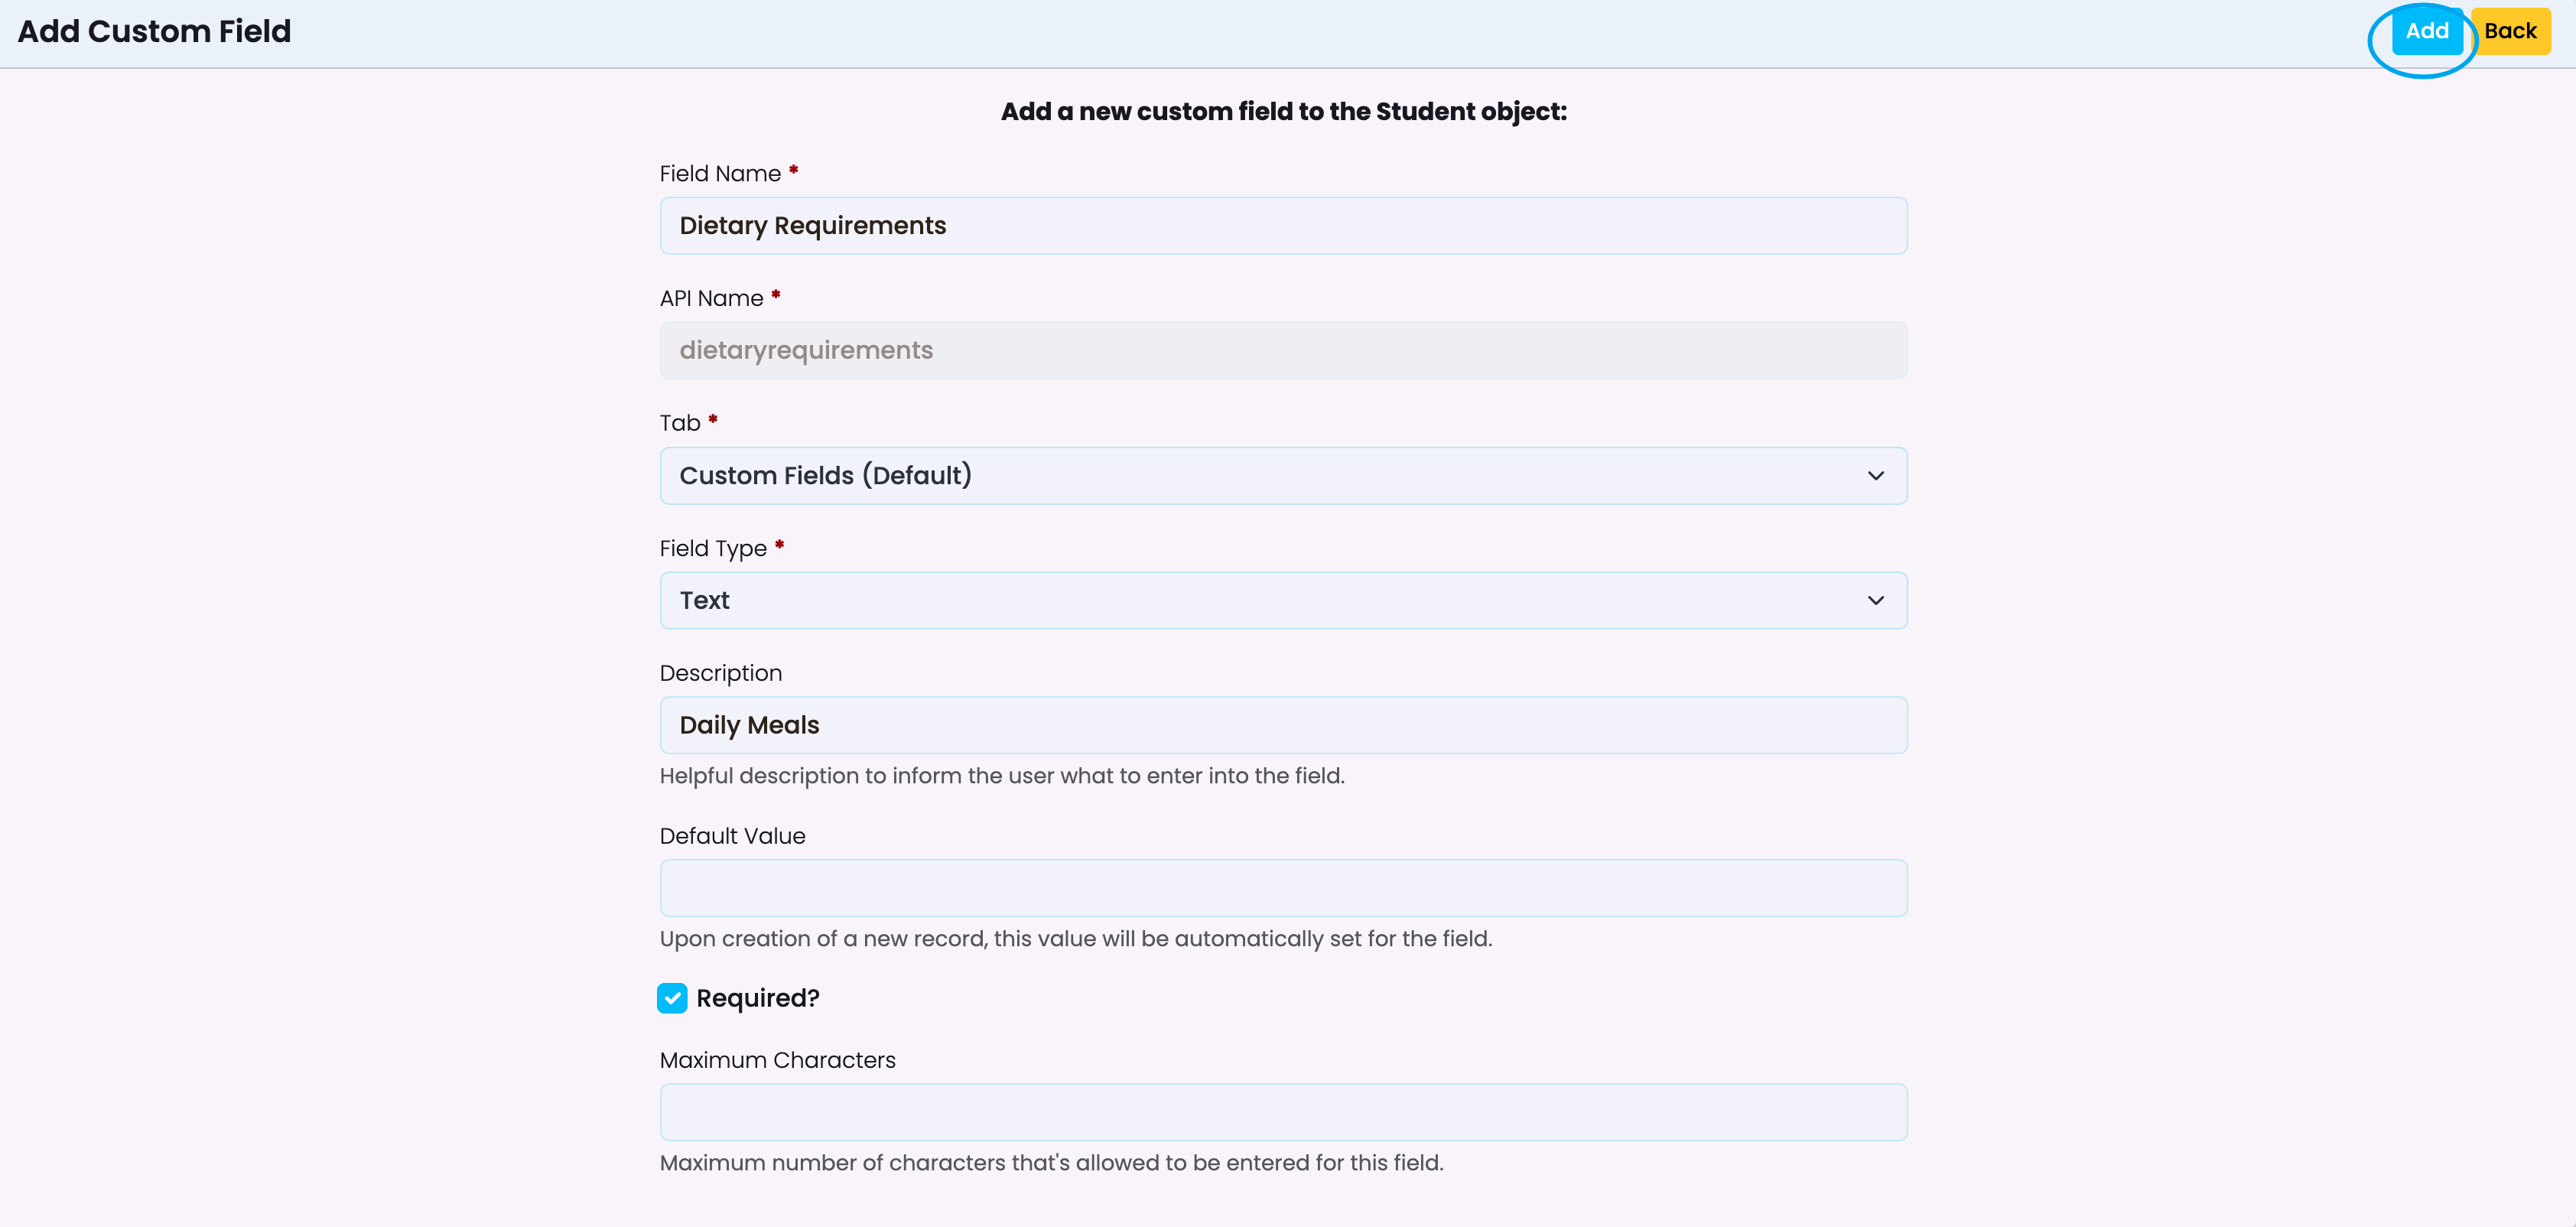
The field created in this example – Dietary Requirements, in Students – can now be viewed under the Custom Fields tab within a student profile:
![A screenshot of a computer
Description automatically generated](https://wiki.selmasis.com/wp-content/uploads/2024/02/a-screenshot-of-a-computer-description-automatica-21.png)
To reorder custom fields, click on Order and drag/drop the fields into the order you wish to have them presented:
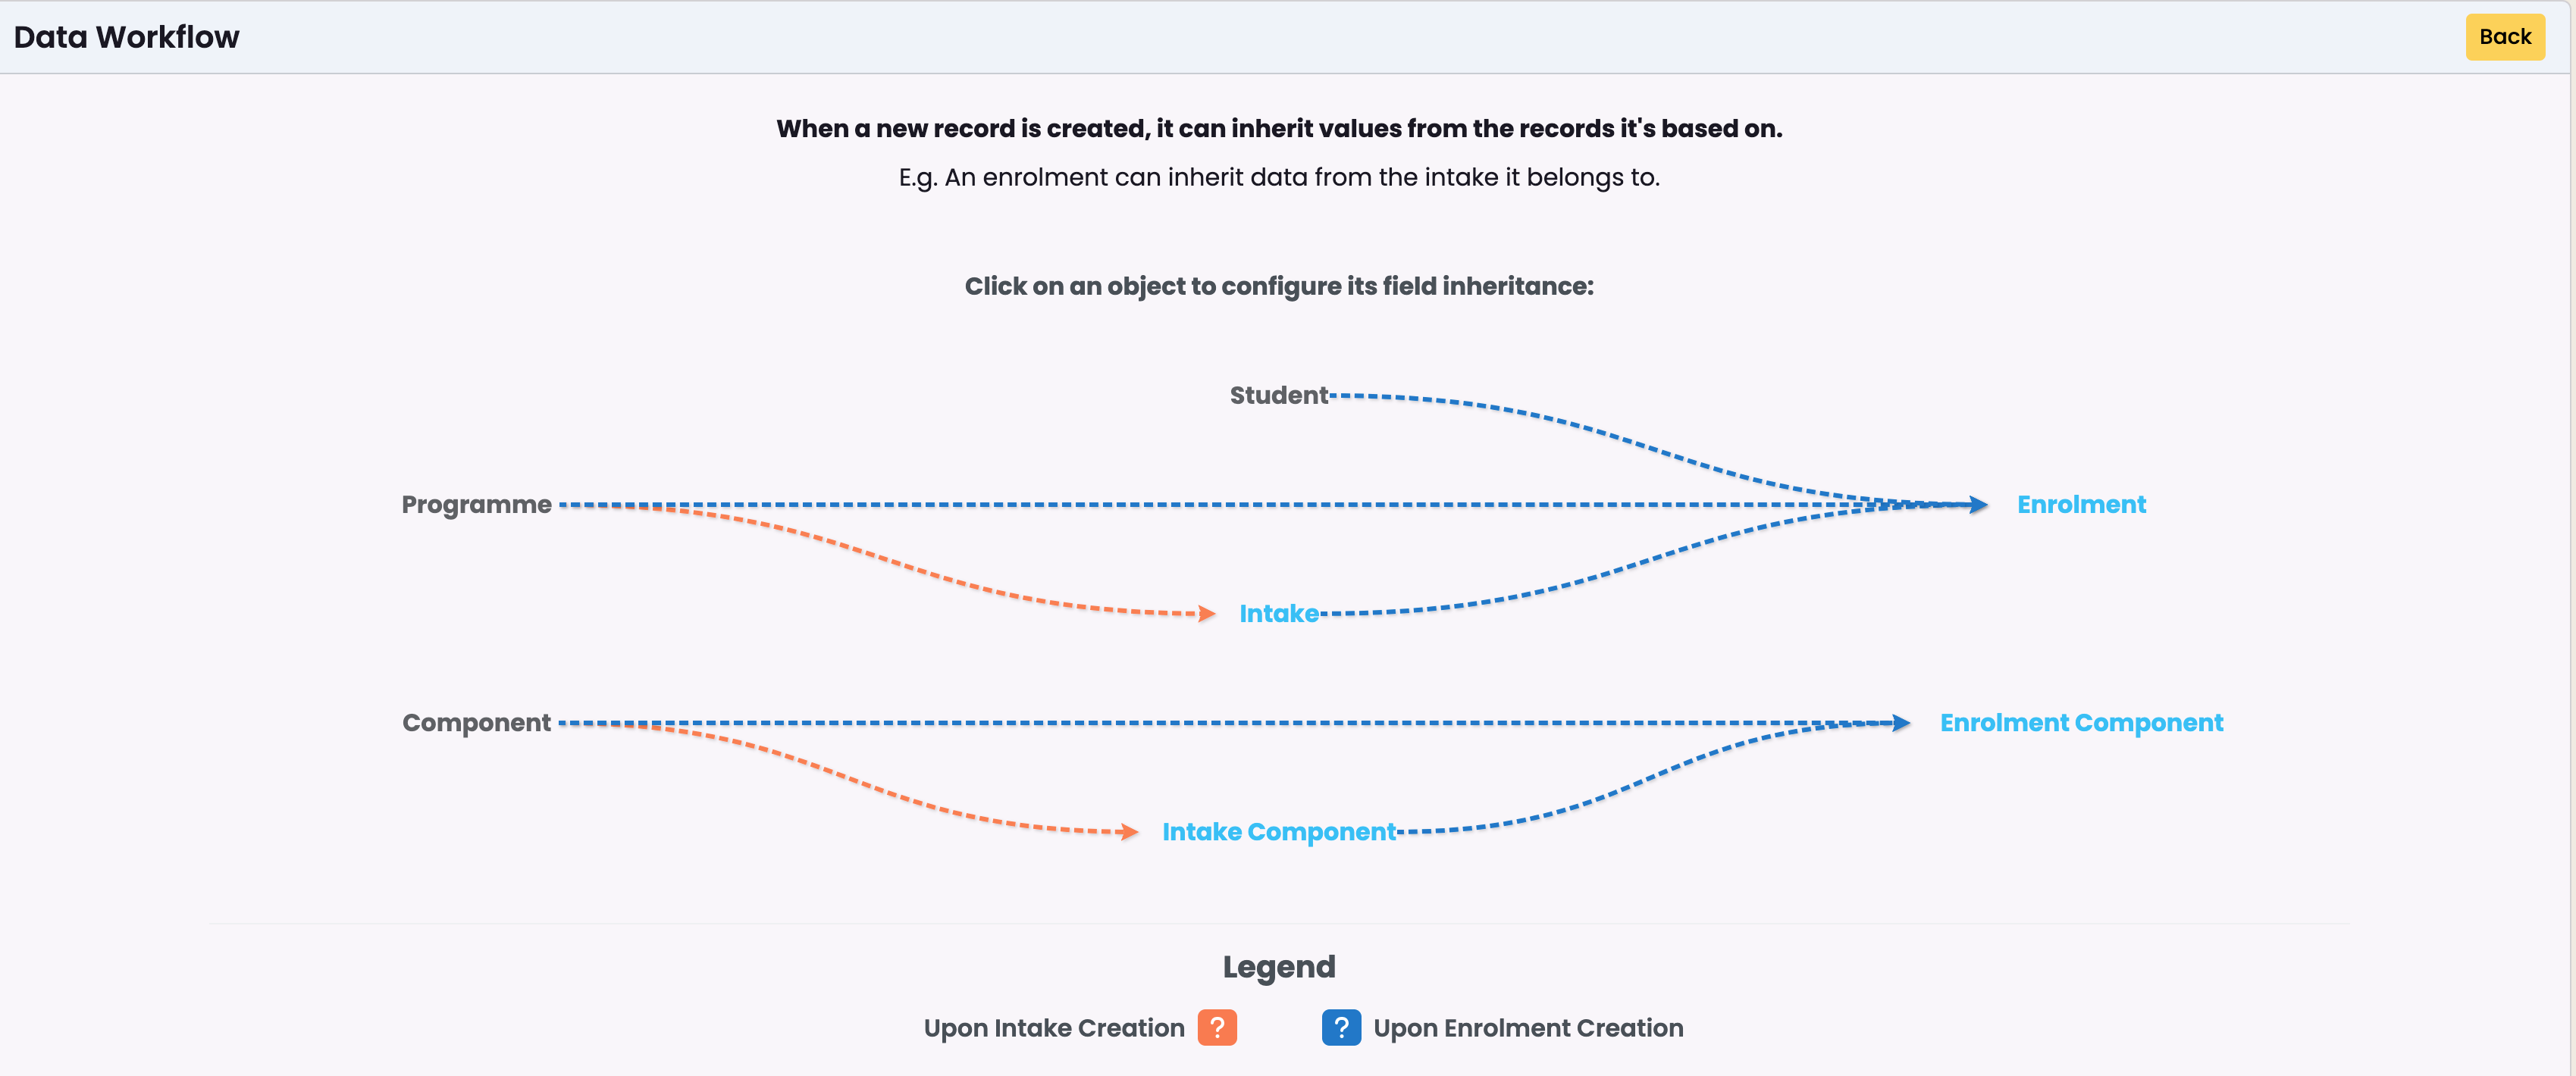
![A screenshot of a computer
Description automatically generated](https://wiki.selmasis.com/wp-content/uploads/2024/02/a-screenshot-of-a-computer-description-automatica-22.png)
Data Workflow (TBC)
![](https://wiki.selmasis.com/wp-content/uploads/2024/02/word-image-1183-7.png)