
If you deliver Unit Standards, it is crucial to report completed Unit Standards to NZQA, and no later than 2 months after completion.
SELMA allows you to create a batch file to upload to NZQA for Unit Standard reporting, i.e. a report detailing multiple completed Unit Standards.
Read further to understand how to create a Unit Standard Report.
In this Section:
- Reporting Pre-requisites
- Reporting Completed Qualifications
- Create and Submit a Report
- Unsuccessful Batch Upload
Reporting Pre-requisites
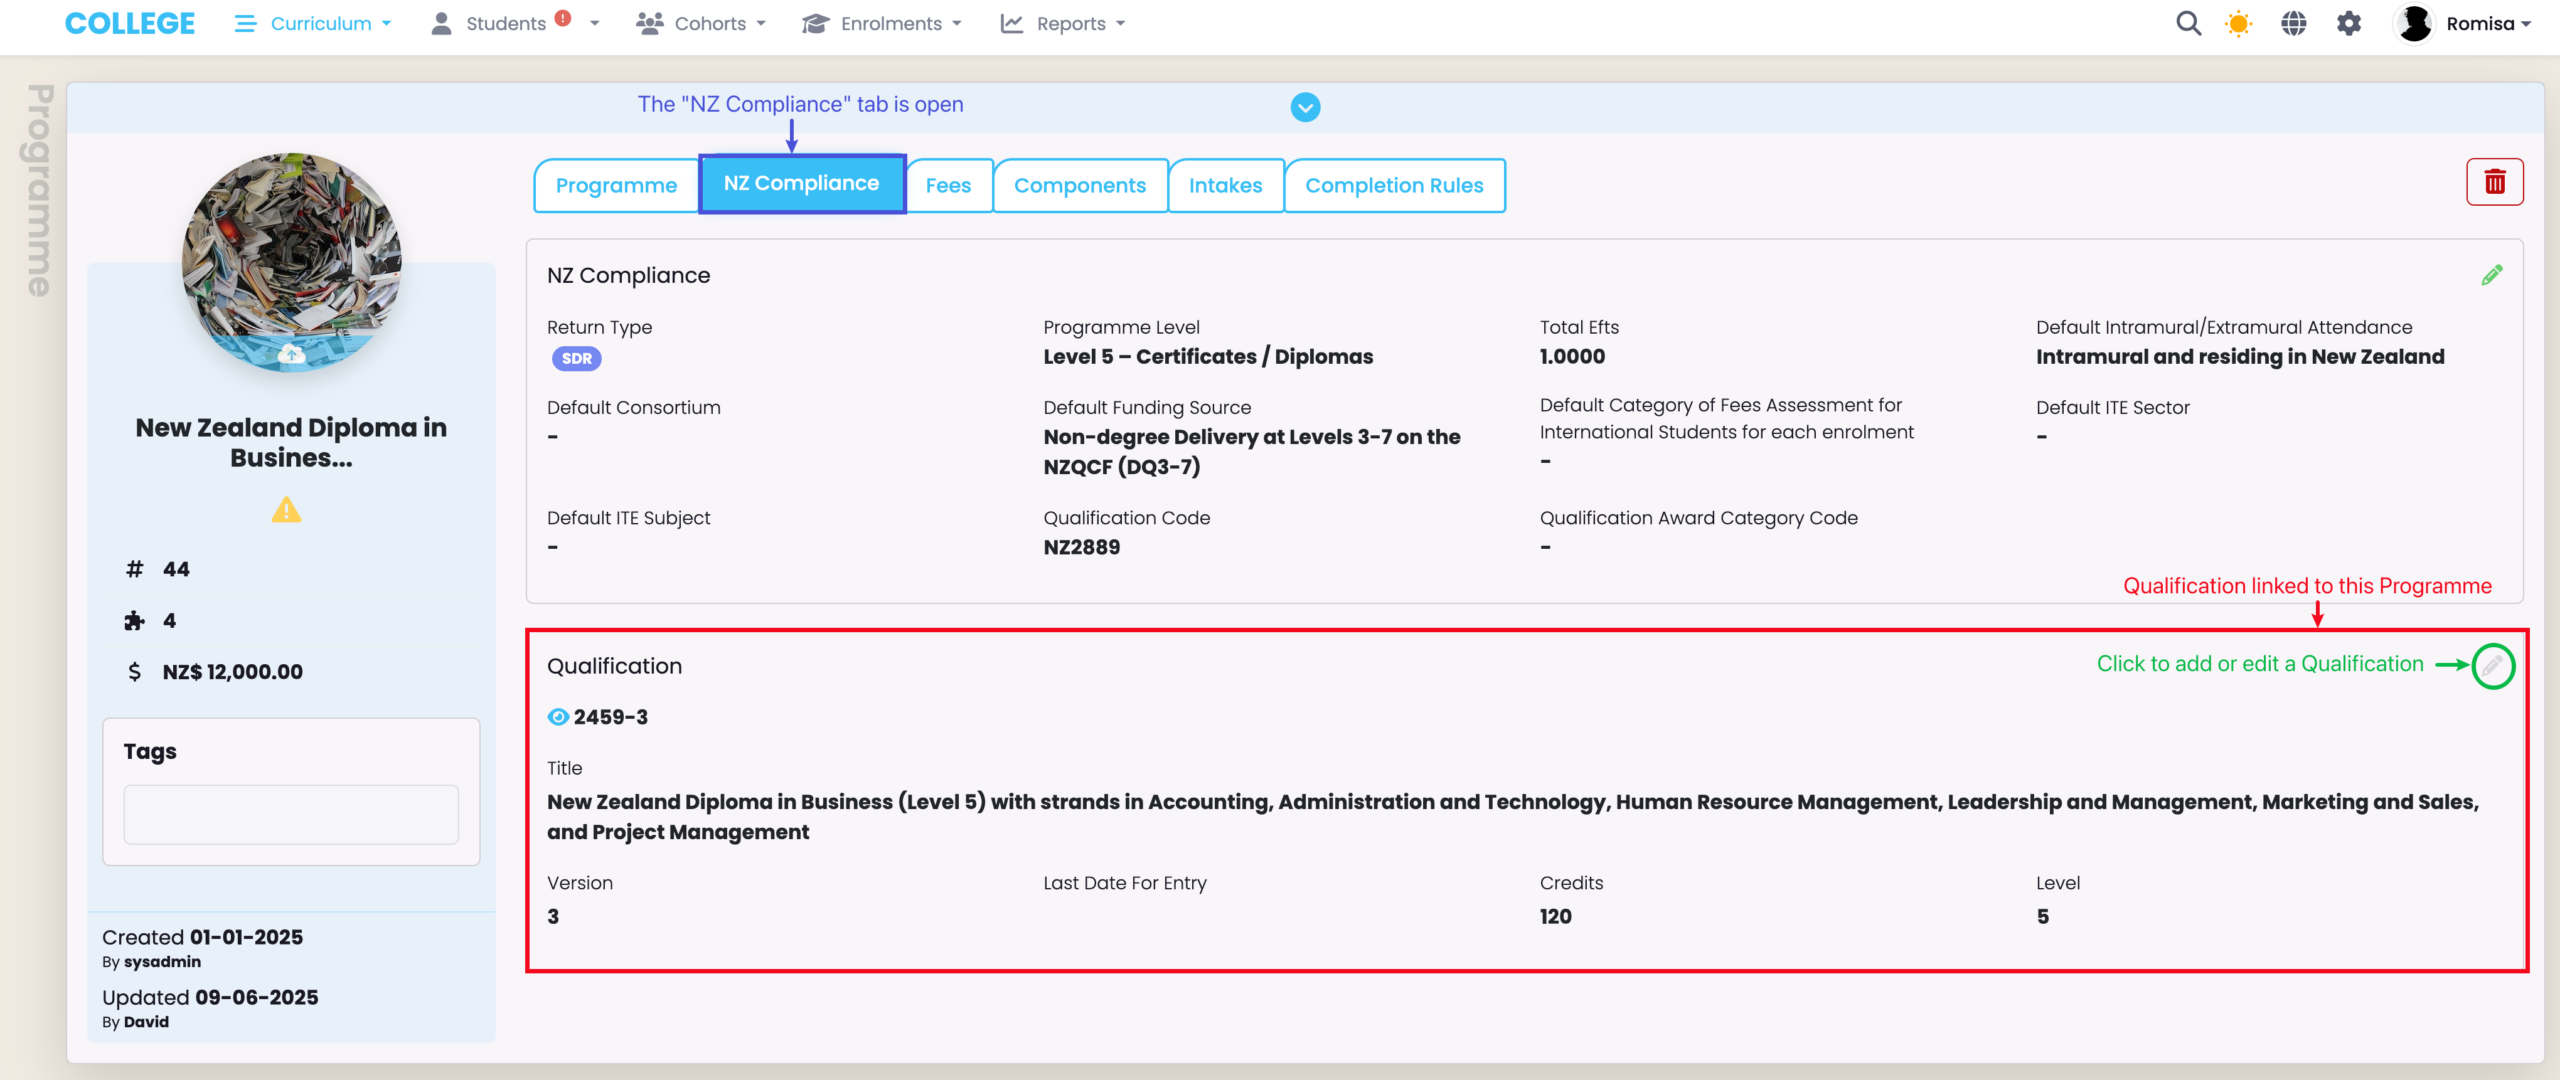
To report a Qualification to NZQA, you must have Students enrolled into Programmes that are linked to a Qualification (Figure 1.).
- Please refer to NZ Compliance – Uploading Units & Qualifications (NZQA) to read how to upload Qualifications and link them to Programmes.
Figure 1. Check that a Programme is linked to a Qualification
Check the “NZ Compliance tab“of a Programme and navigate to the bottom of the page to see a linked Qualification (red). Then, click to add or edit the Qualification (green).
Reporting Completed Qualifications
Complete a Qualification
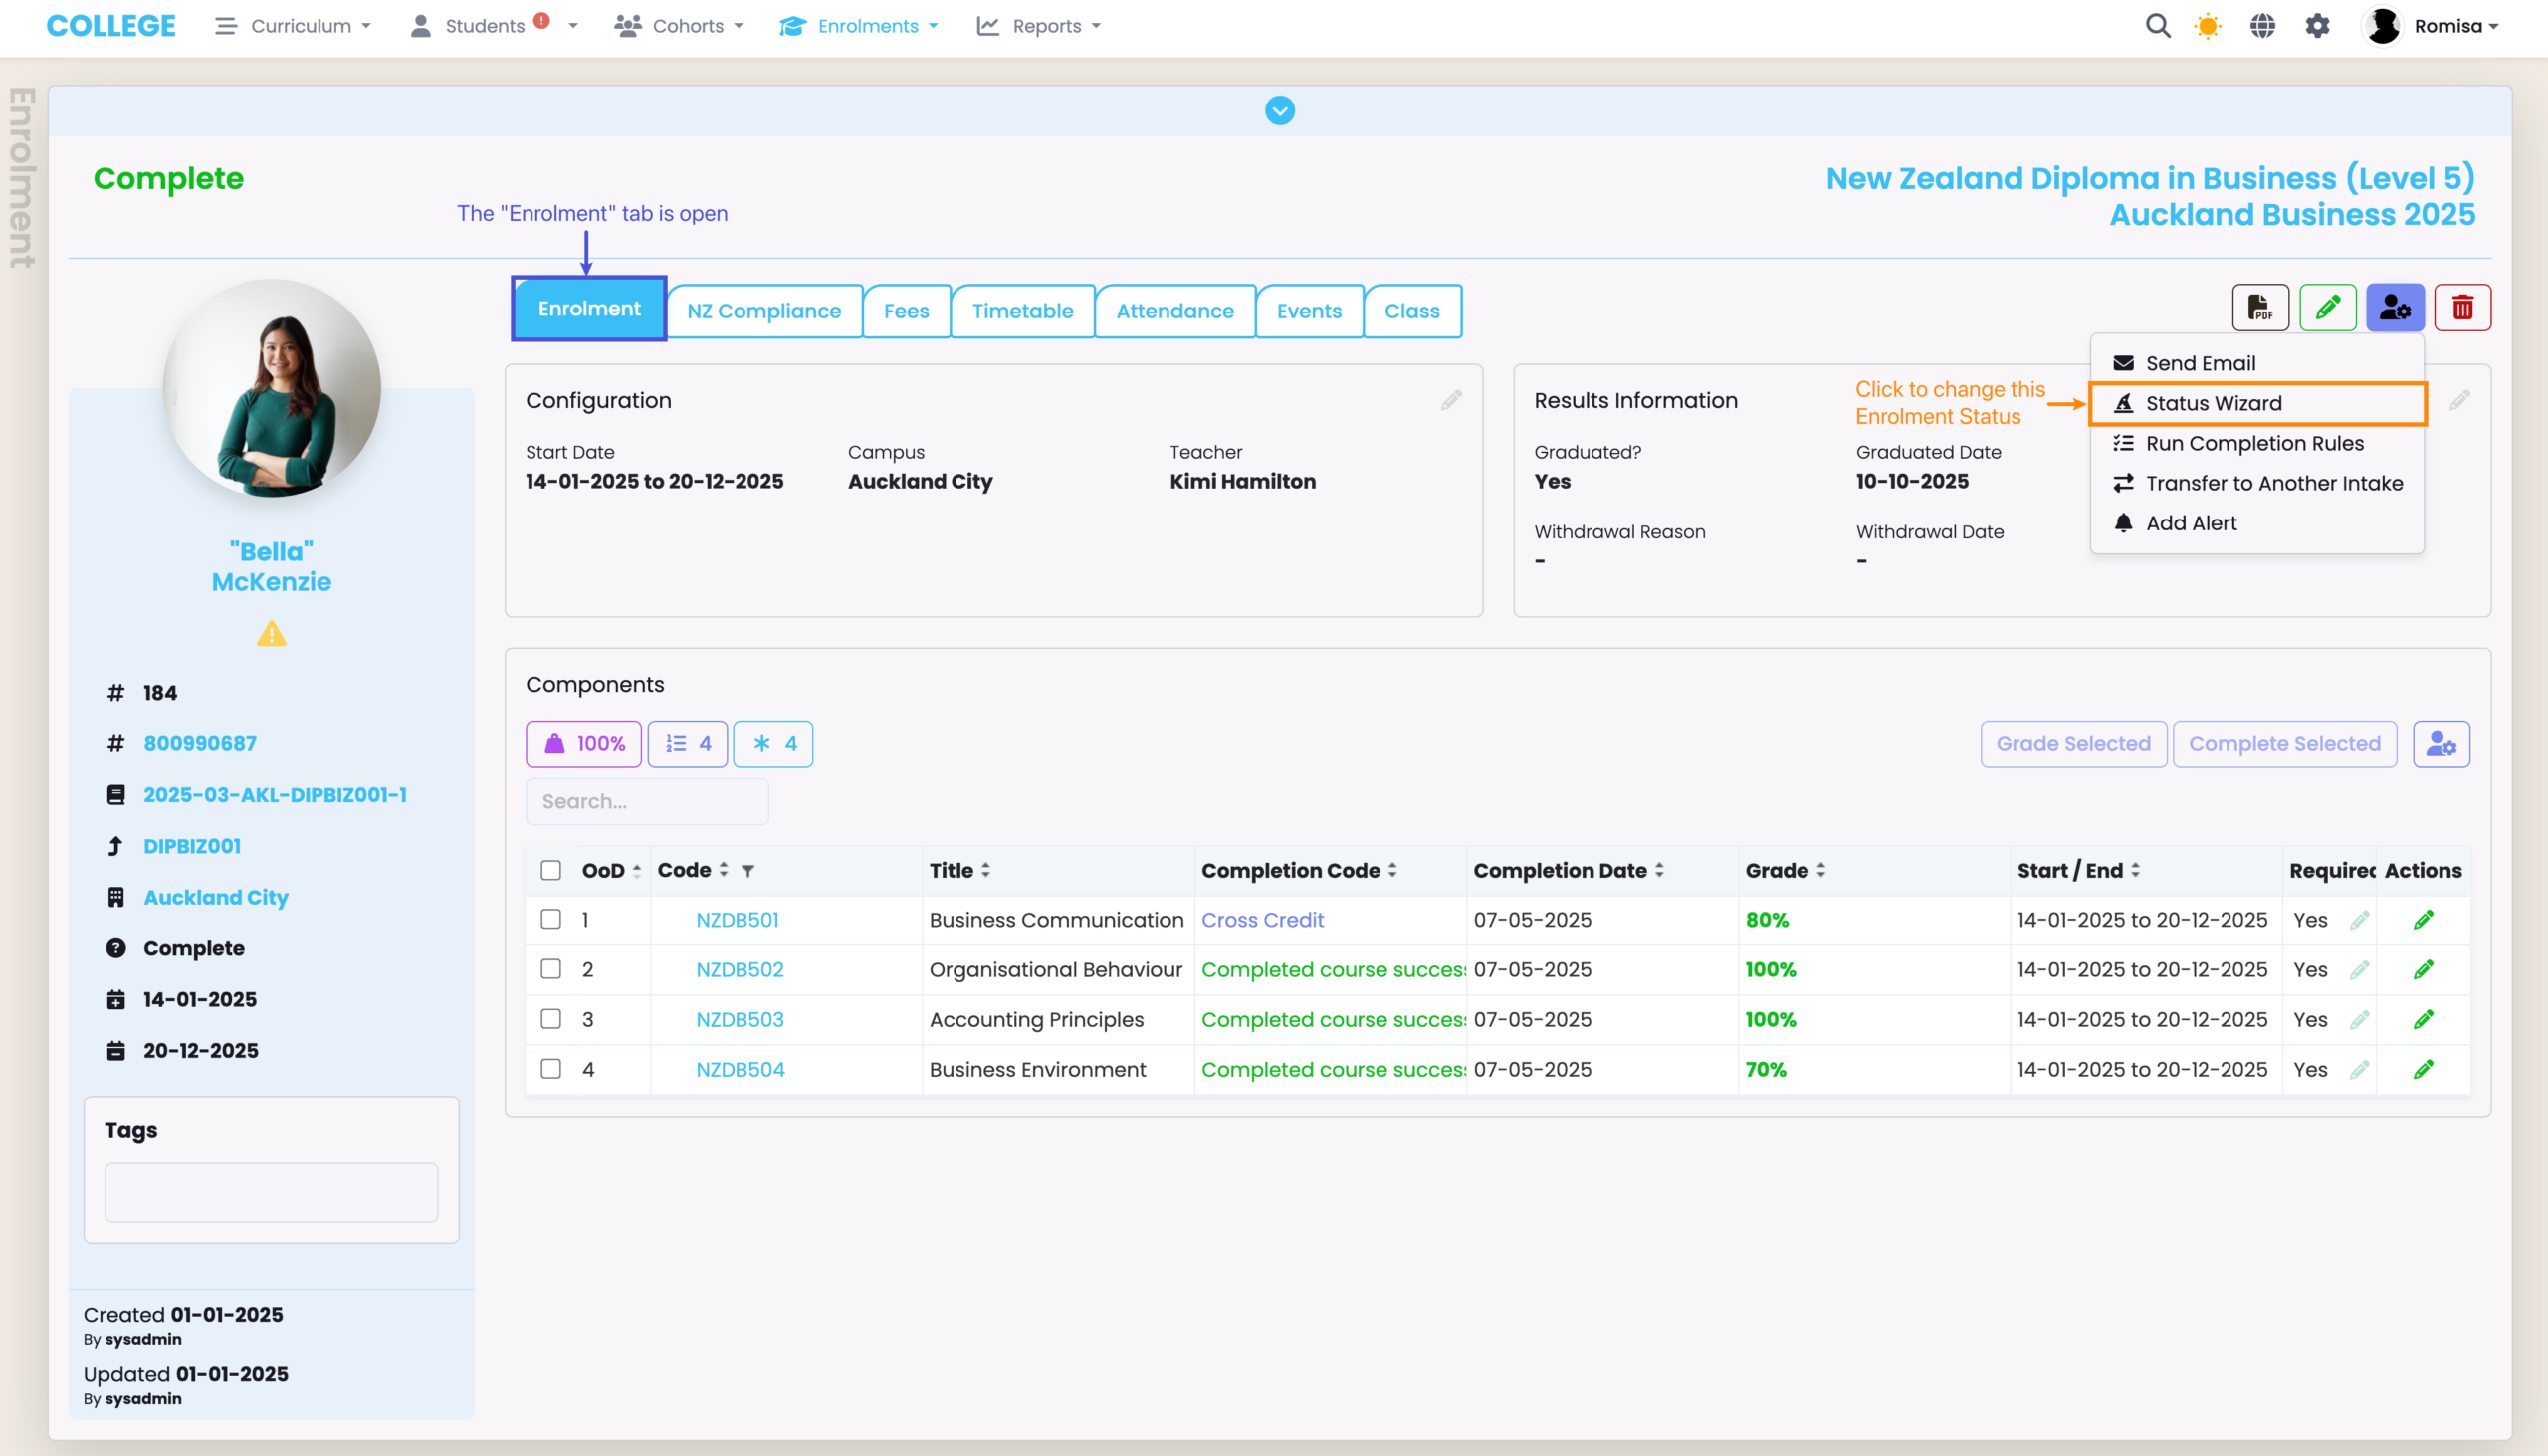
When a Student meets the requirements to complete a Programme, change the Completion Status of the Enrolment to “Complete“.
Figure 2i: Select Enrolment
Click the eye icon to open an Enrolment page (red).

Figure 2ii: Change Enrolment Status
Change the Completion Status of the Enrolment to “Complete“.
Create and Submit a Report
Generate a Batch File from SELMA
Navigate from Reports > NZQA Reports, and select to upload a “Qualification Report (QE1)” under the heading “NZQA Report“.
Select relevant filters for the batch file, including the “Campus“, which may be different to the “Reporting Provider Location“. Then, select all or some of the Unit Standards you would like to report from the Report table.
You will be redirected back to the NZQA Reports page, where you can now download the batch file.
Figure 3i: Access NZQA Reports
Click “Reports” in the top navigation bar (orange), and navigate to “NZQA Reports” (purple).
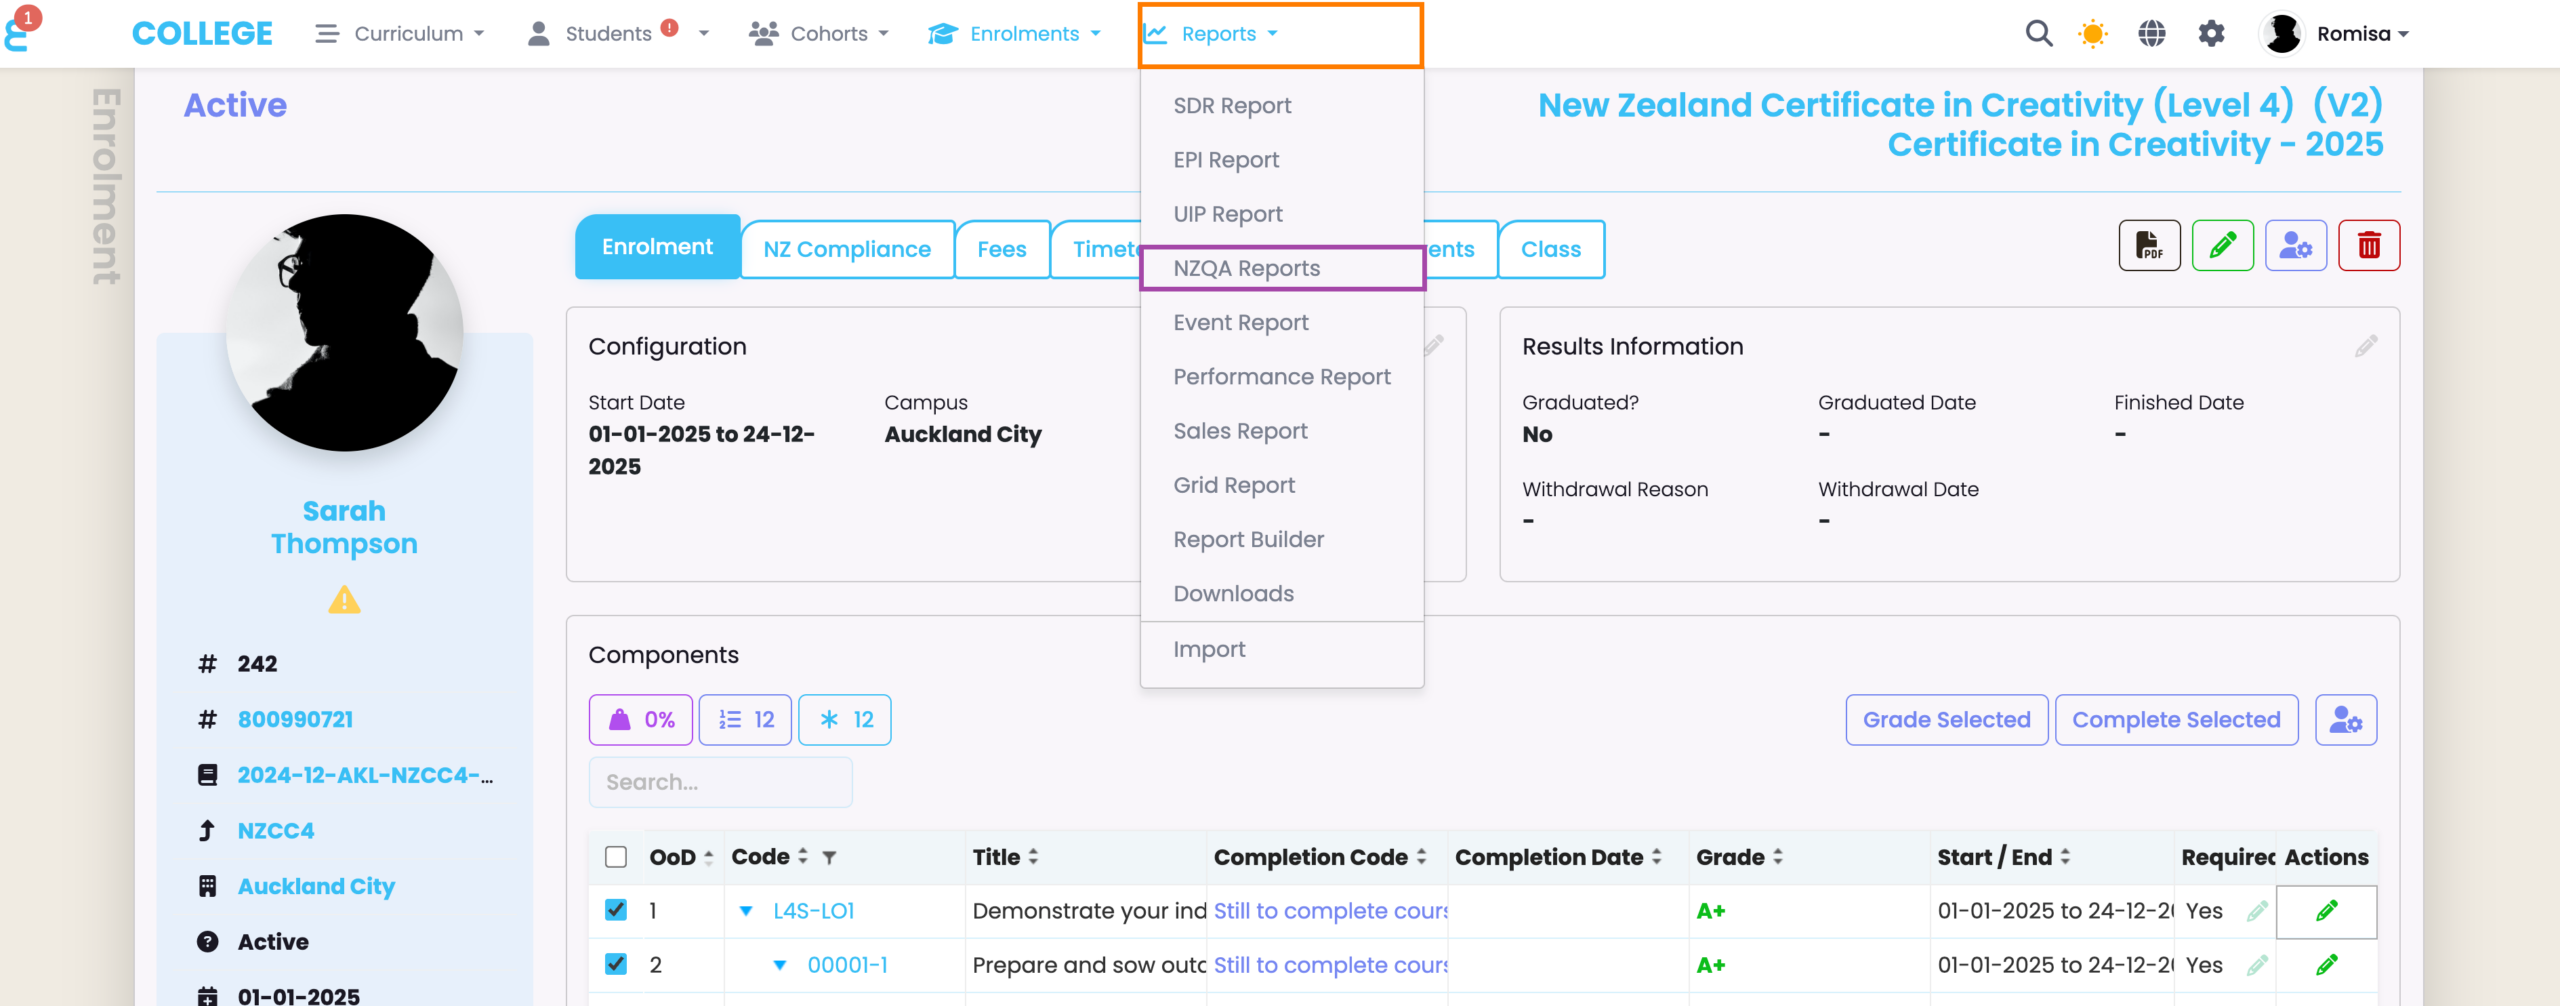
Figure 3ii: Create Unit Standard Report
Click the green “+” button next to the heading “NZQA Report” (red), and select “Qualification Report (QE1)” (orange).
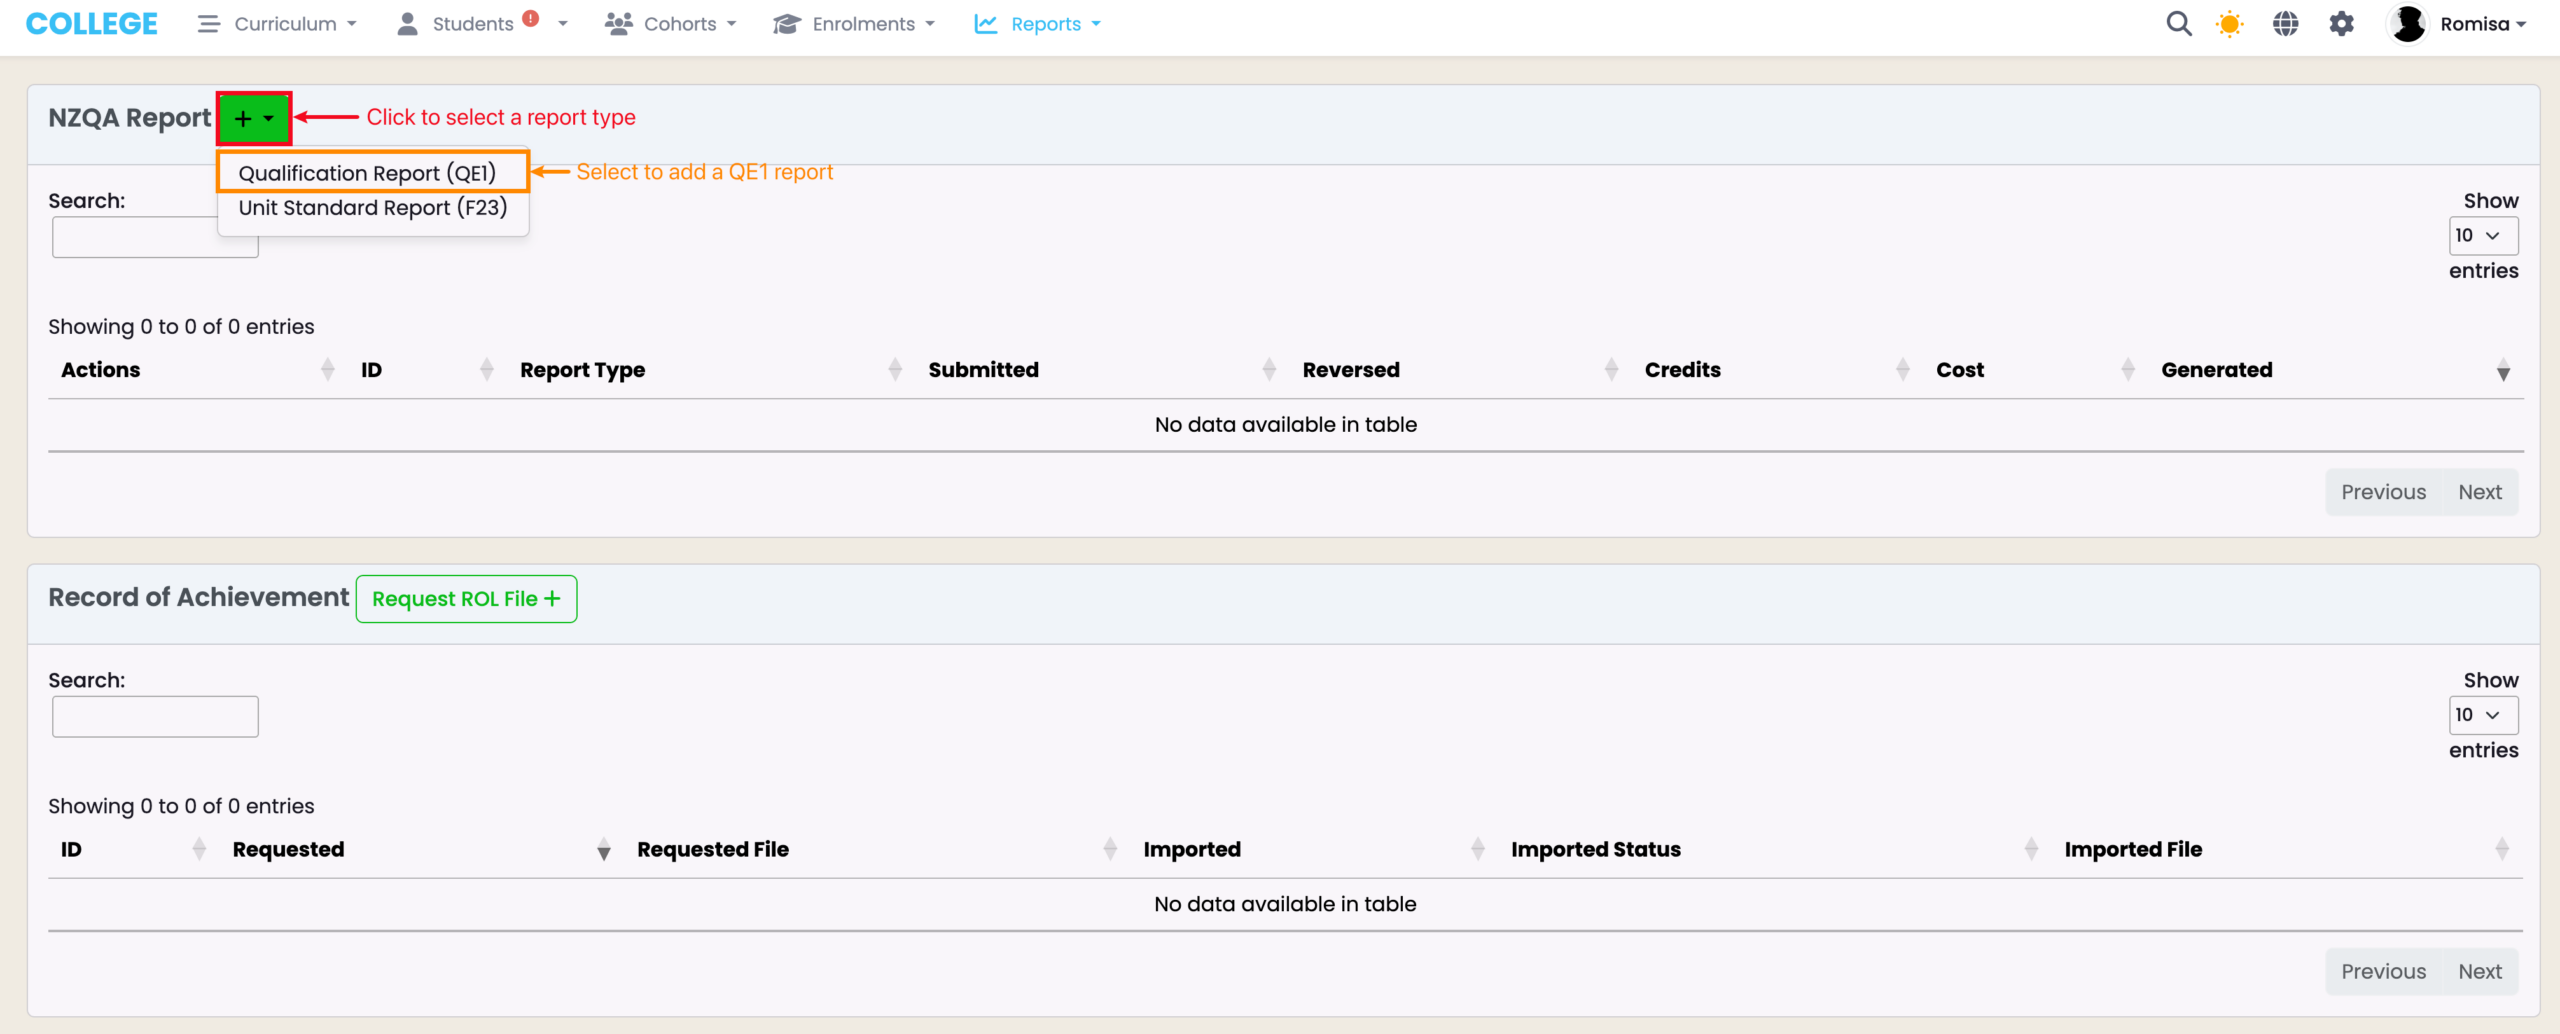
Figure 4: Select Enrolments for Batch File
Select relevant filters and completed Enrolments to include in the batch file.

Generate Different QE1 File Types
When you click the “Generate Files” button, you can choose between multiple QE1 file types:
- A Status Check file will generate a request to NZQA to check if the student has met the requirements (Unit Standards) to be awarded the Qualification. This request does not register the Qualification on the Student’s Record of Achievement (RoA), and you will not be charged for this request.
- A Verification file will check that a Qualification has been completed against a Student’s RoA, and if not, registers the Qualification. A fee will be charged to the provider for the reporting of the qualification completion.
- A Certificate Request file will check that a Qualification has been completed against a Student’s RoA, and if not, registers the Qualification It will also instruct NZQA to print a physical certificate and mail it to the students address. A fee will be charged to the provider for this request.
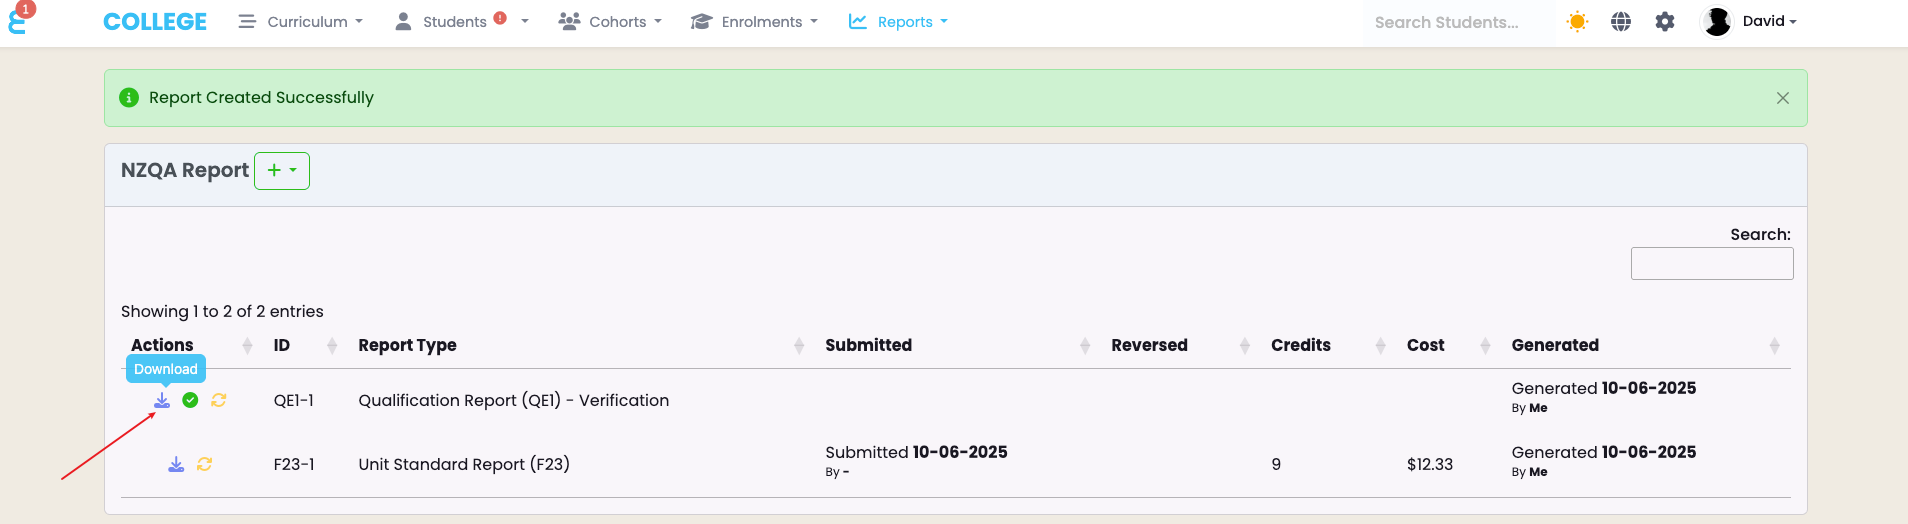
Figure 6: Download Batch File
Download the generated batch file from the NZQA Reports page.
Upload the Batch File to NZQA
- a. Navigate to NZQA and click on “Submit Data File“
- b. Upload the file and click “Submit“.
- Download the NZQA “User Guide” for an explanation on how batch processing works in NZQA.
- c. If your batch file was successfully uploaded, you will find it under “View Batches“.
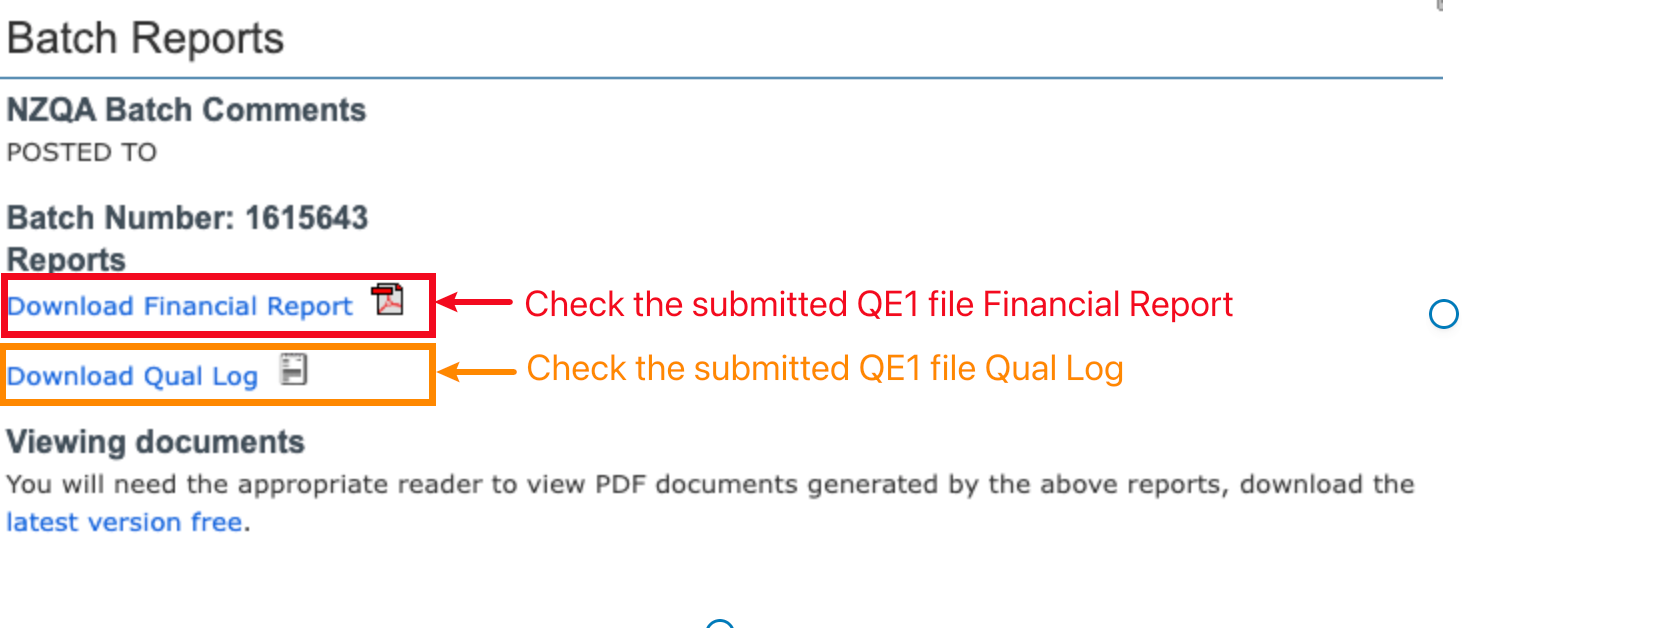
- d. Select the batch you just submitted to review the Error Report and Financial Report.
Figure a. Navigate to the NZQA Site
Once you have the file downloaded, go to NZQA and select “Submit Data File”:

Figure a. Submit Data File
Select the batch file you have just created, and upload it to NZQA.
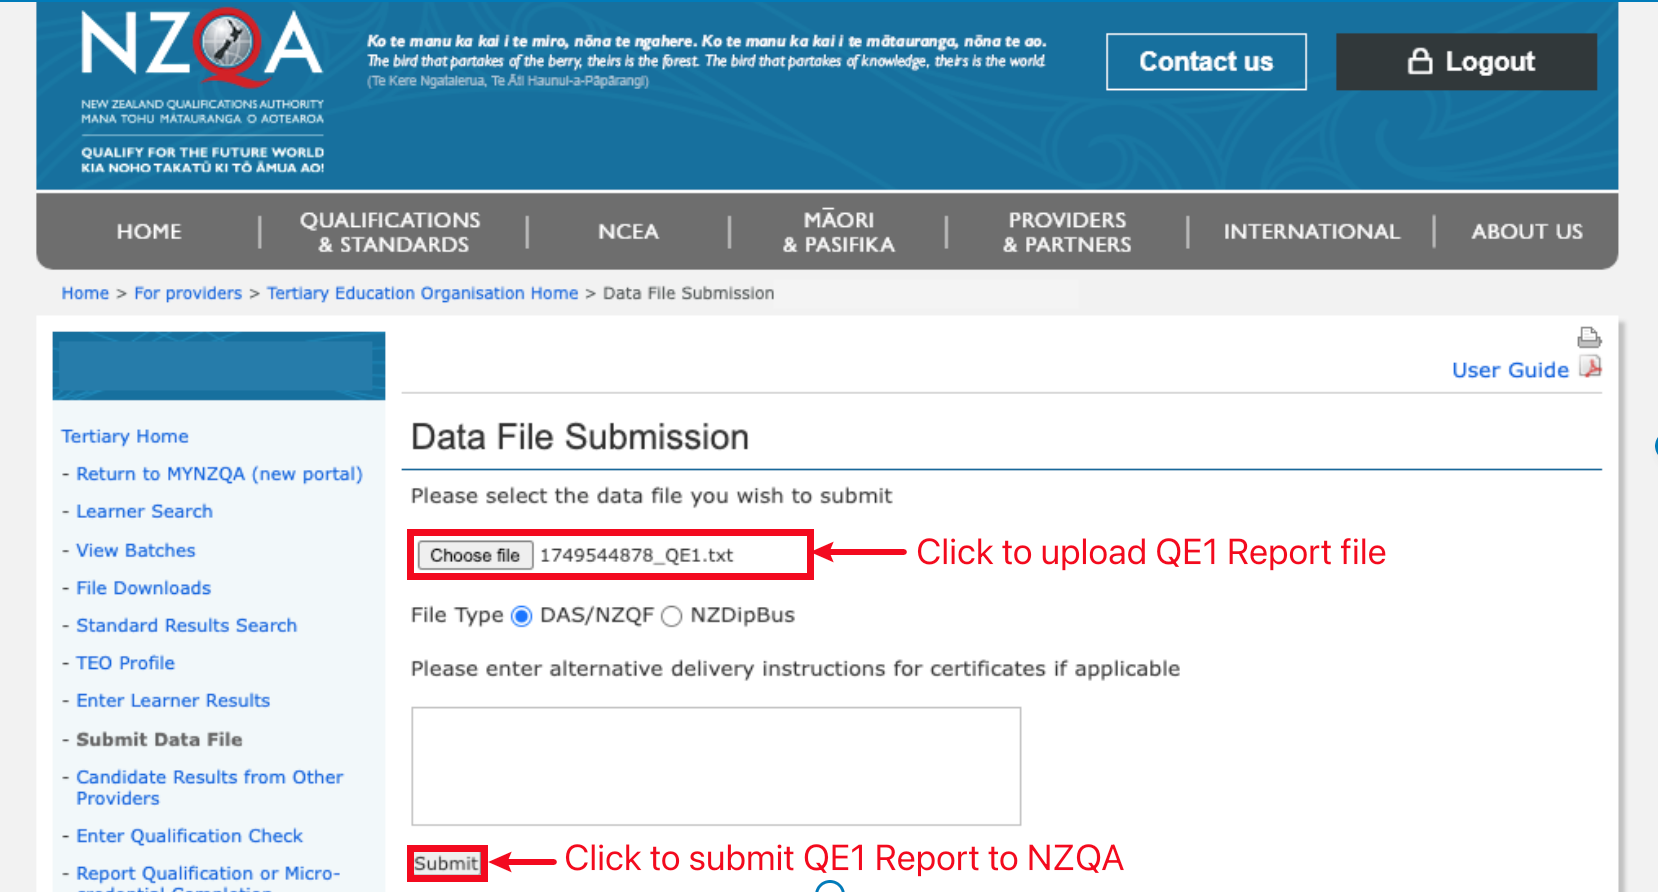
Figure c. View Uploaded Batch File
Select the batch file you created to review the details again.
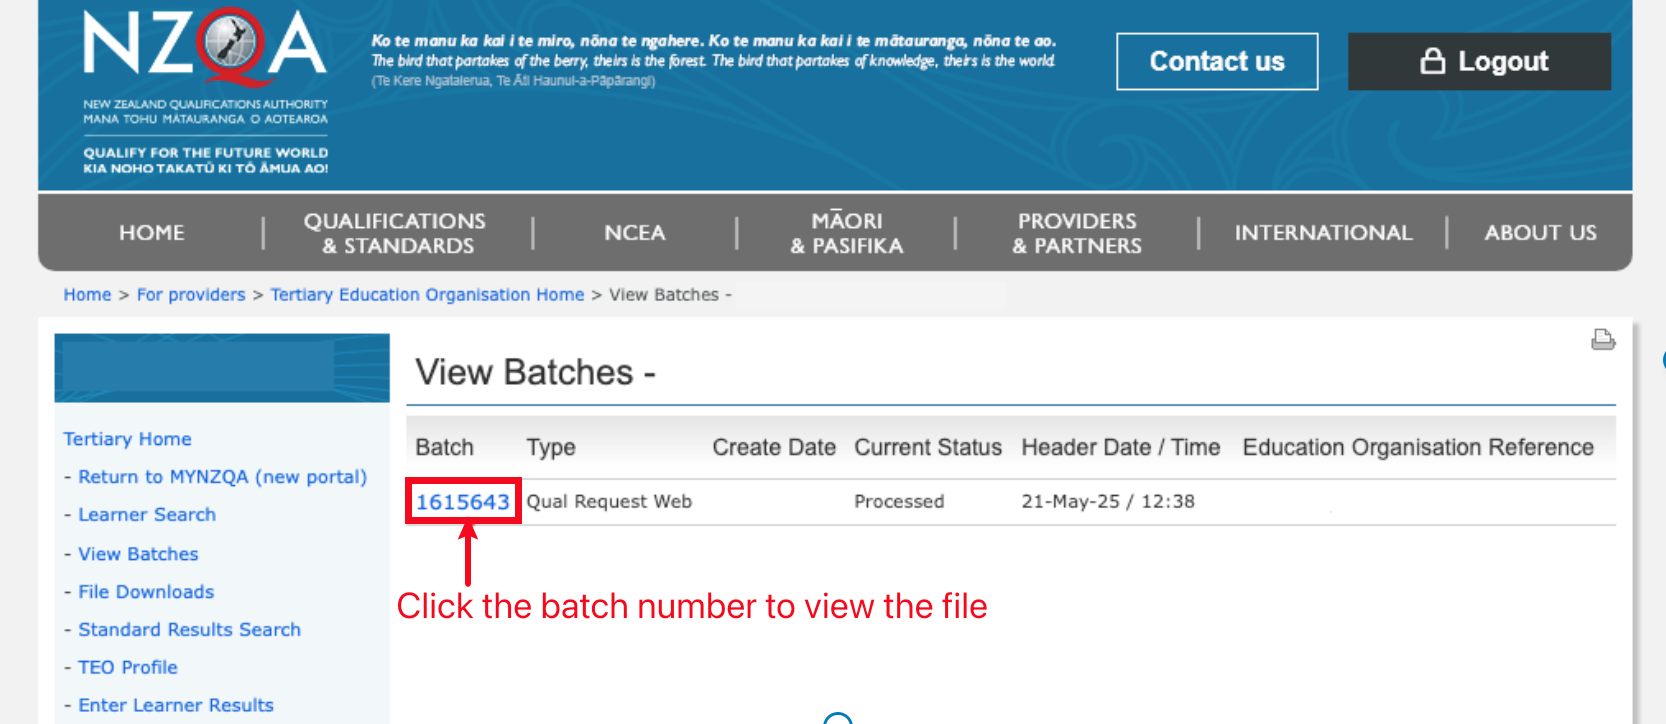
Figure d. Review the Financial Report and Logs
Check to see if a batch file’s financial report and error/warning report (Qual log) is as expected.
Verify Report Submission on SELMA
Once you are satisfied, go back to SELMA and mark the batch as successfully submitted:
Figure 7. Submit the Batch File in SELMA
In the NZQA Reports menu, click the green “Submit” button on the relevant batch file (red arrow).
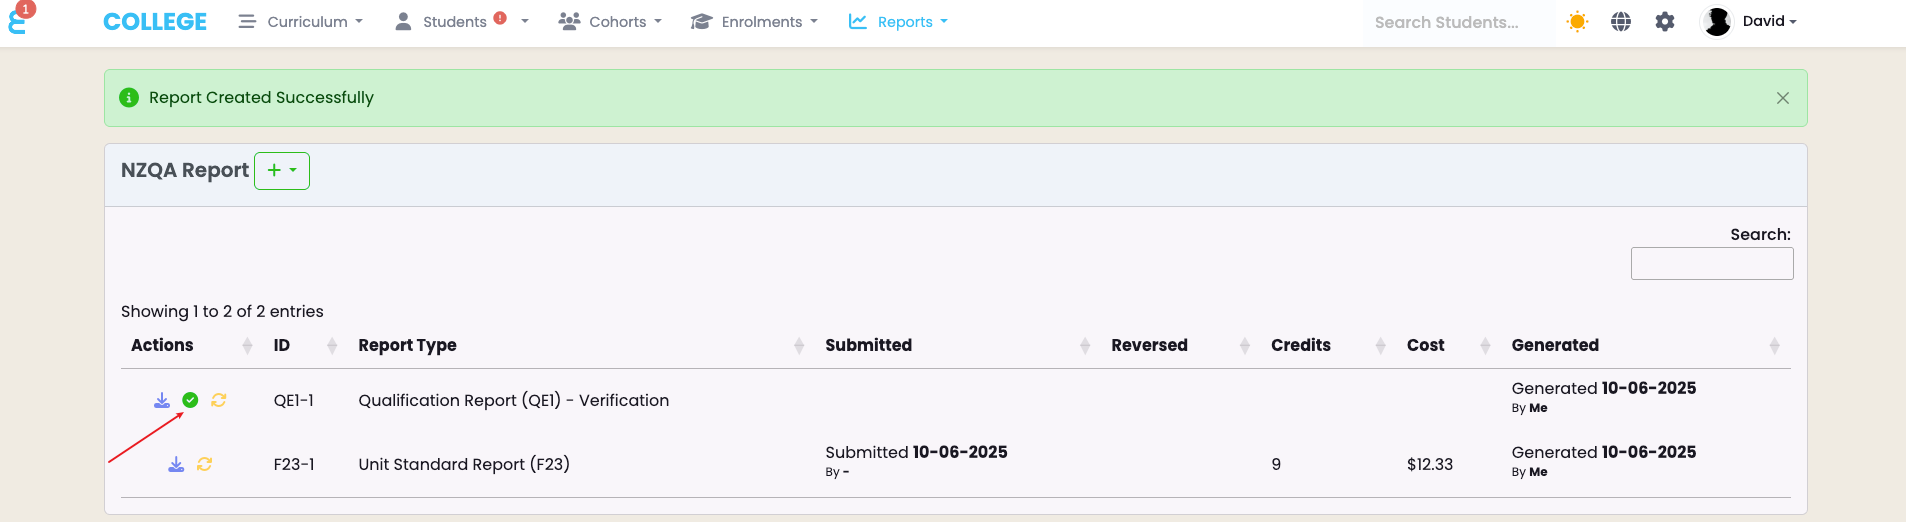
Figure 8. Verify the SELMA Update
Navigate to an Enrolment linked to the Qualification and check that there is a “Report ID” present (red). This indicates that the Qualification has been reported to NZQA as a batch file submission.
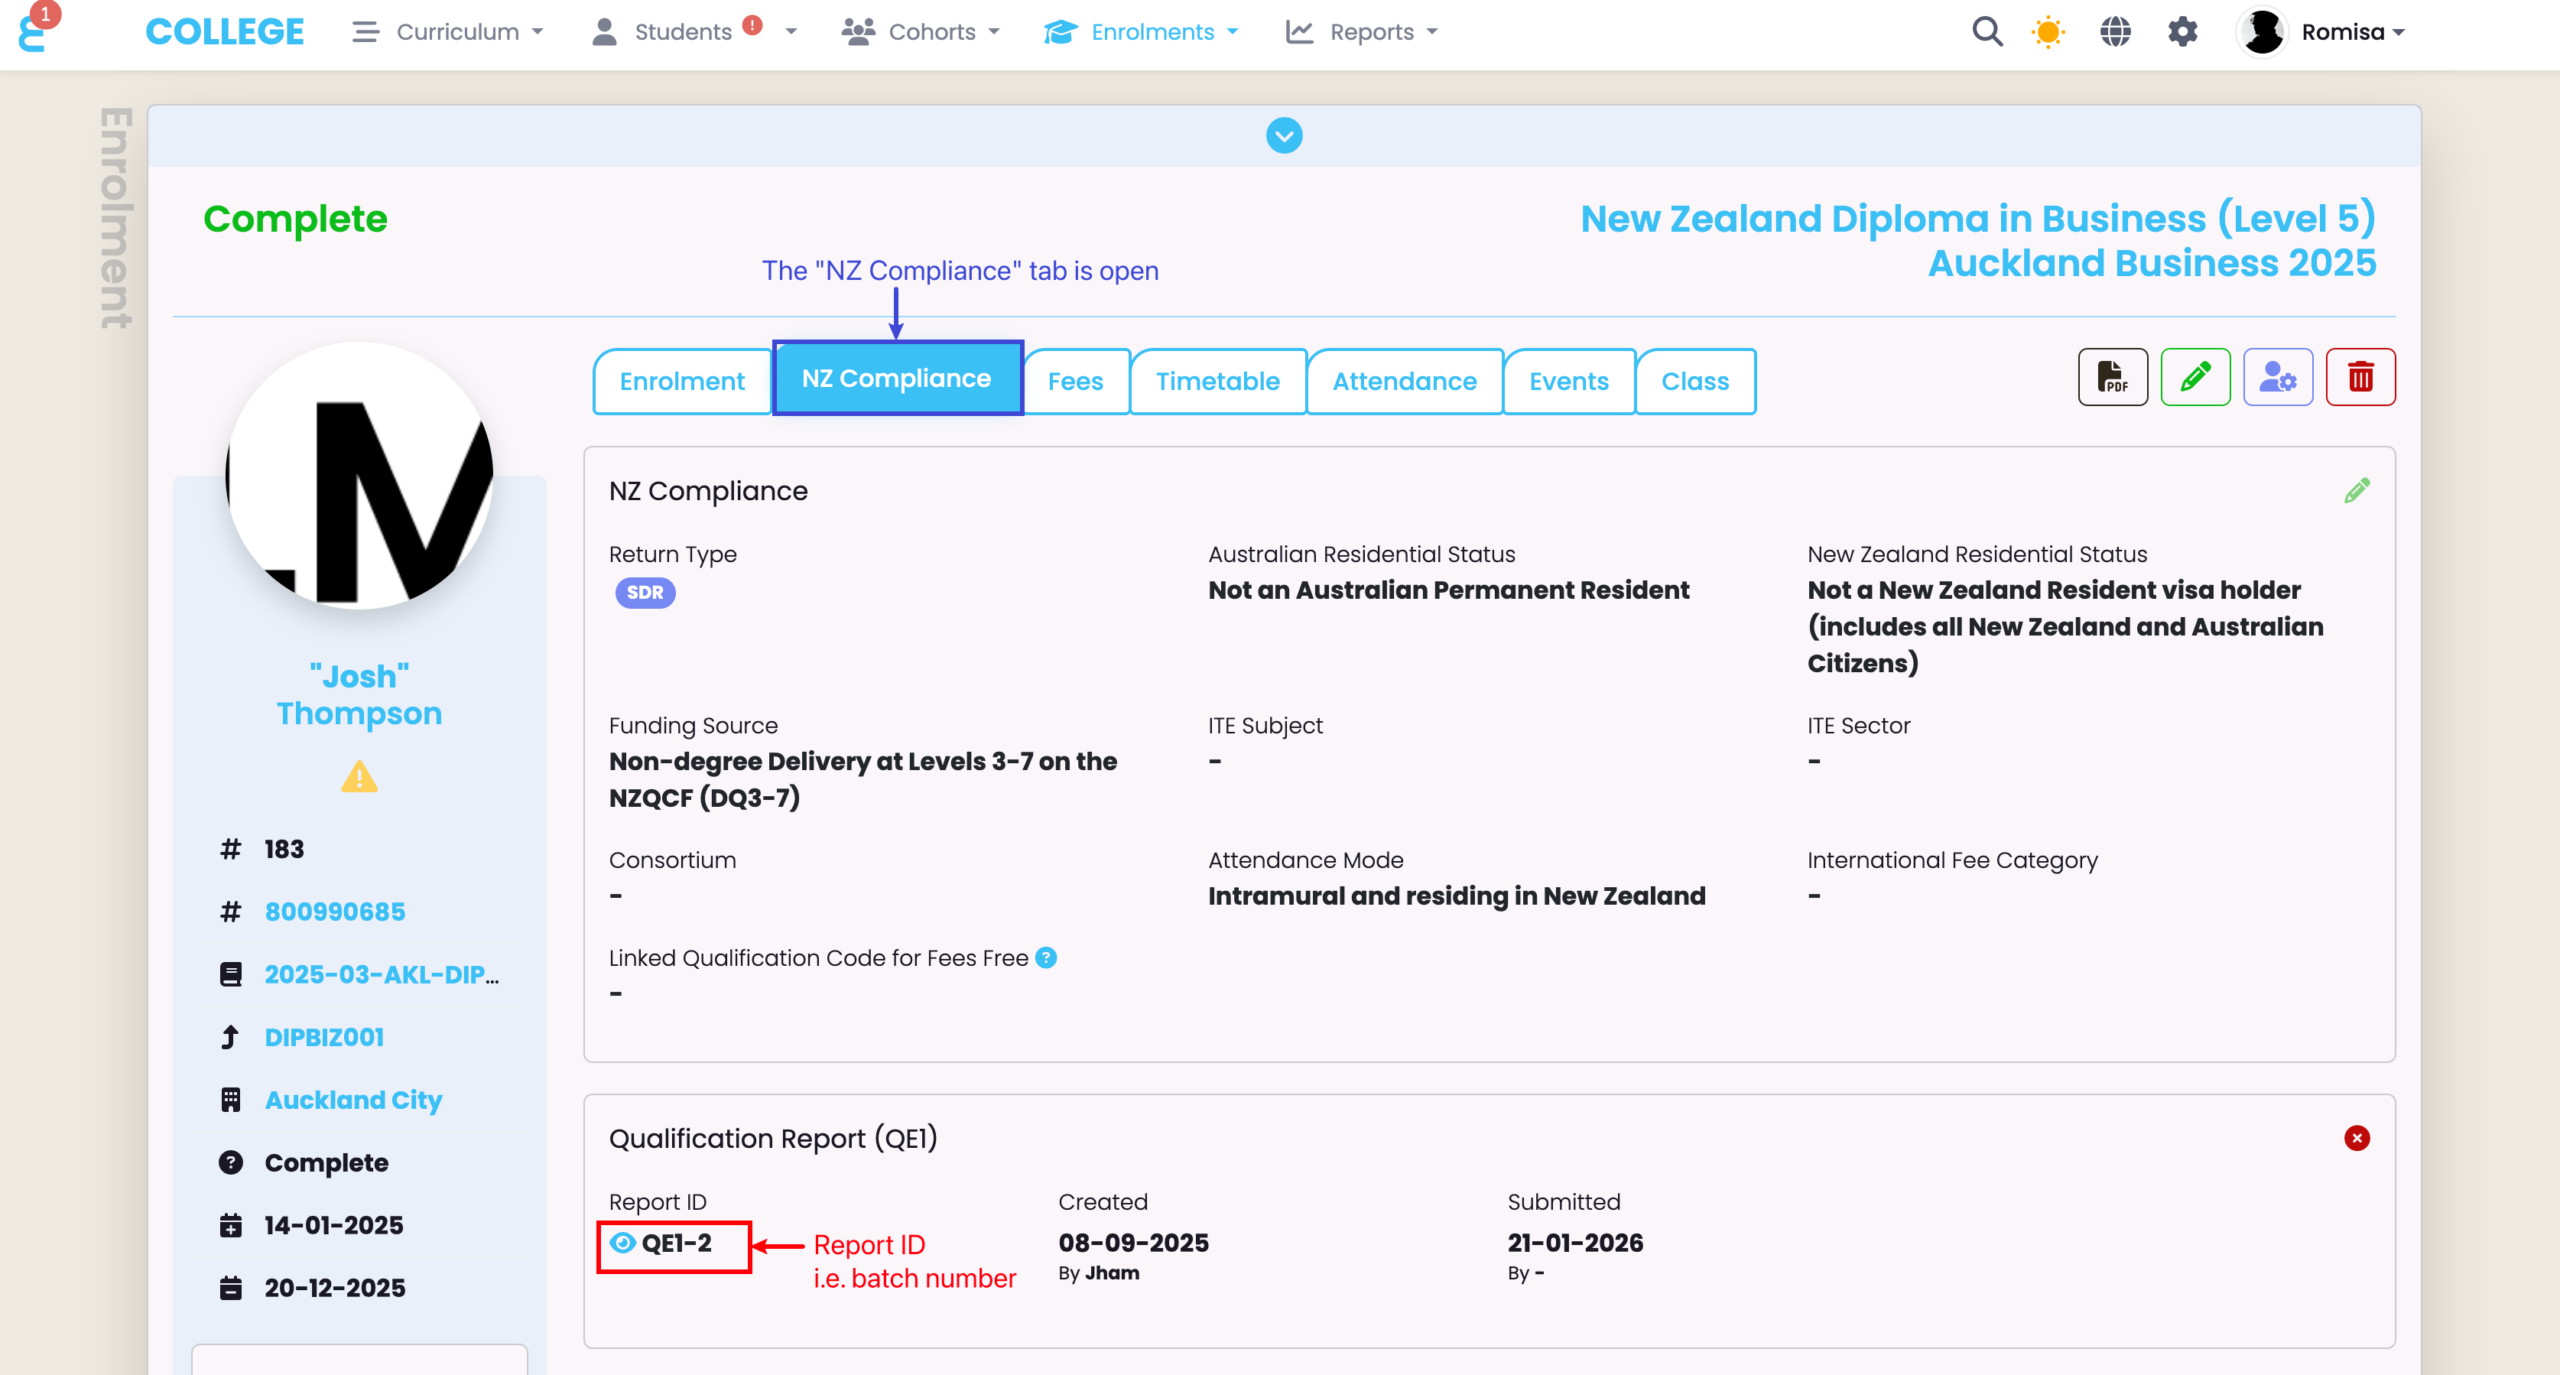
NOTE: The “Status Check” QE1 Report will not mark a qualification as reported.
Unsuccessful Batch Upload
Reverse Reports with Errors
If your batch upload to NZQA was unsuccessful or has too many errors, you may choose to reverse the entire batch report and try again:
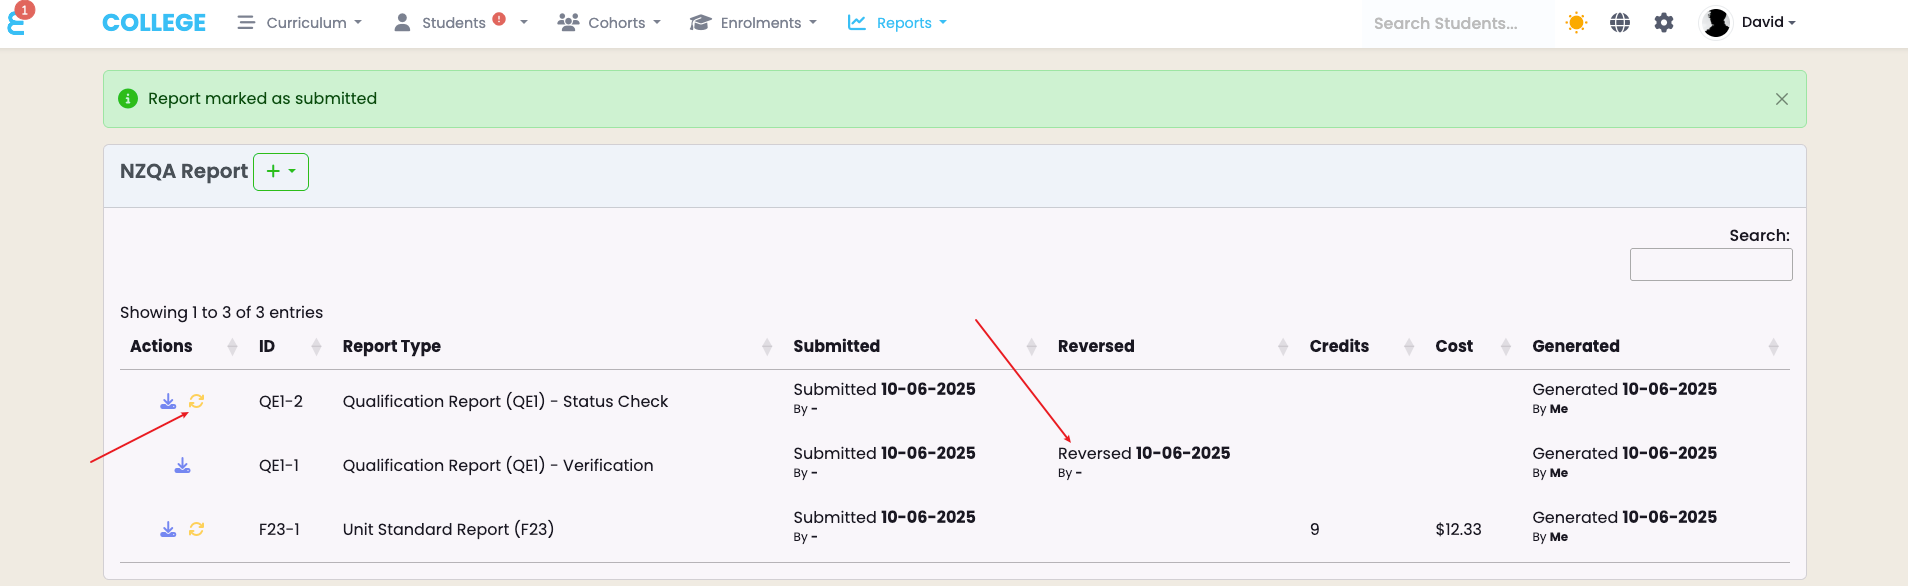
Figure 9. From the NZQA Reports menu, click the “Reverse” button
From the NZQA Reports menu, click the yellow “Reverse” button, under the “Actions” column.
Cancel a Qualification Linked to an Enrolment
If you have an error for a Qualification linked to a particular Enrolment, you may choose to remove that Qualification before generating a new batch file.
Figure 10. Unlink a Qualification from the Enrolment Component
Click the cross icon to cancel the Unit Standard from the Enrolment and, therefore, the batch submission (red arrow).
