In this section:
Profile
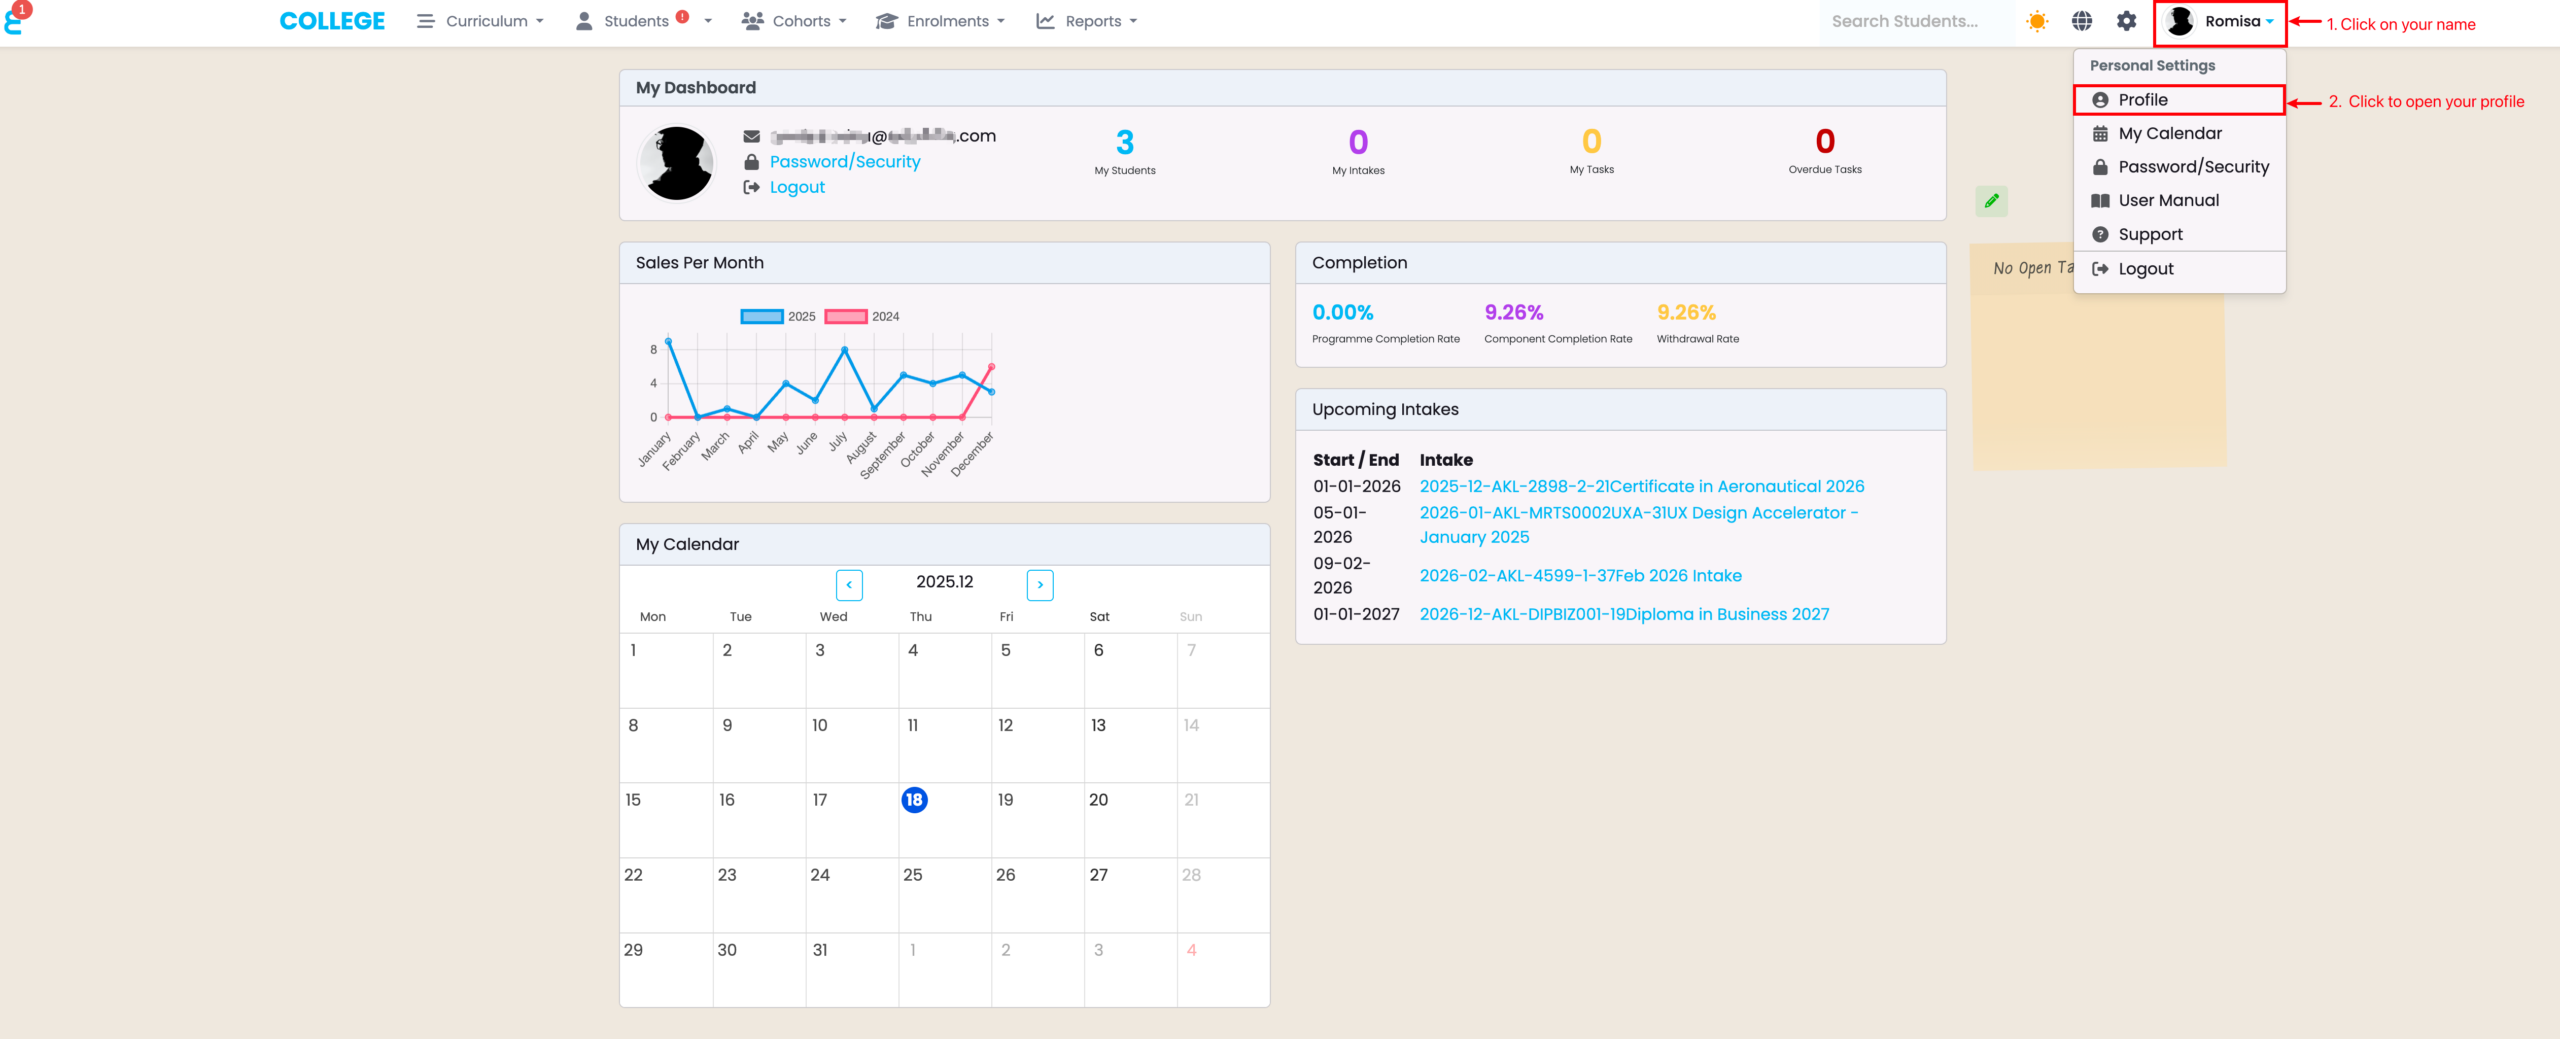
Navigate from your Account Name in the top right corner of the navigation bar, and click “Profile” (Figure 1).
Figure 1. Follow the two steps to open your profile page.
Your Profile Tabs
In your Profile, you will see a sequence of tabs which we will now cover in order.
Contact Details
The “Contact Details” tab displays an overview of your details, where some may be edited, and some system settings can be changed here, too (Figure 2.).
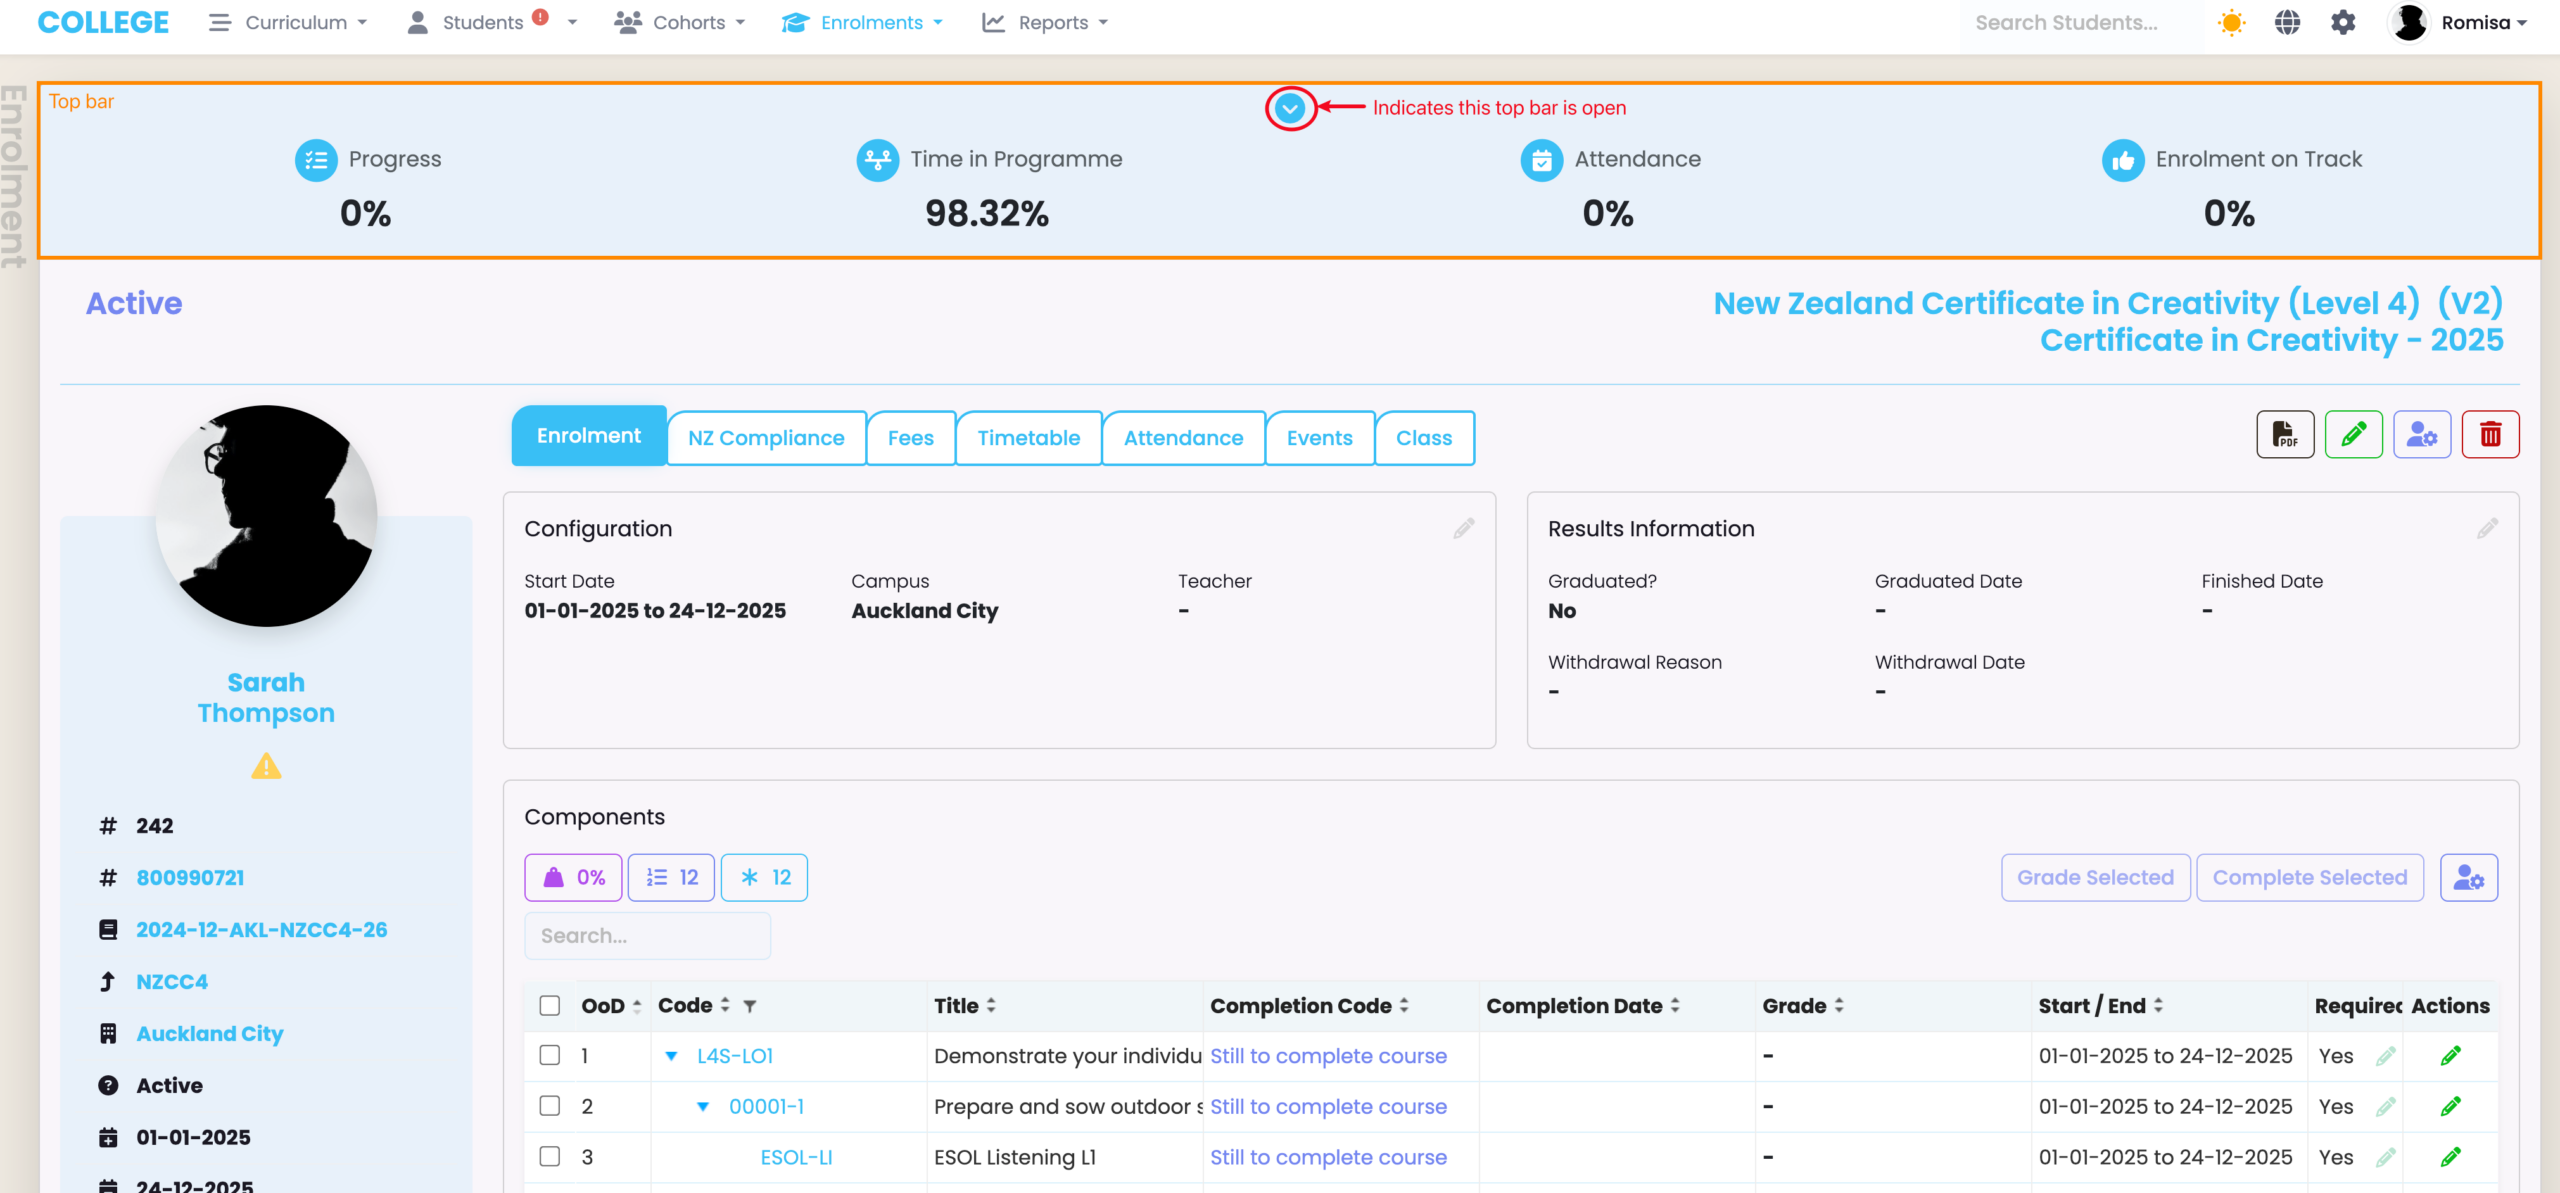
Note: You can select to keeps the top bars featured across Student, Intake, and Enrolment profiles open, by default (Figure 2.). See Figure 3 for an example of what this looks like.
Figure 2. The side-panel displays a list of specific Contact details (orange). Edit some information by clicking the pencil icon (brown), and change some System settings such as Date formatting (green), and screen display (blue). Clicking the “Top Bar Extended” tick-box keeps the top bars of Student, Intake, and Enrolment profiles open, by default.
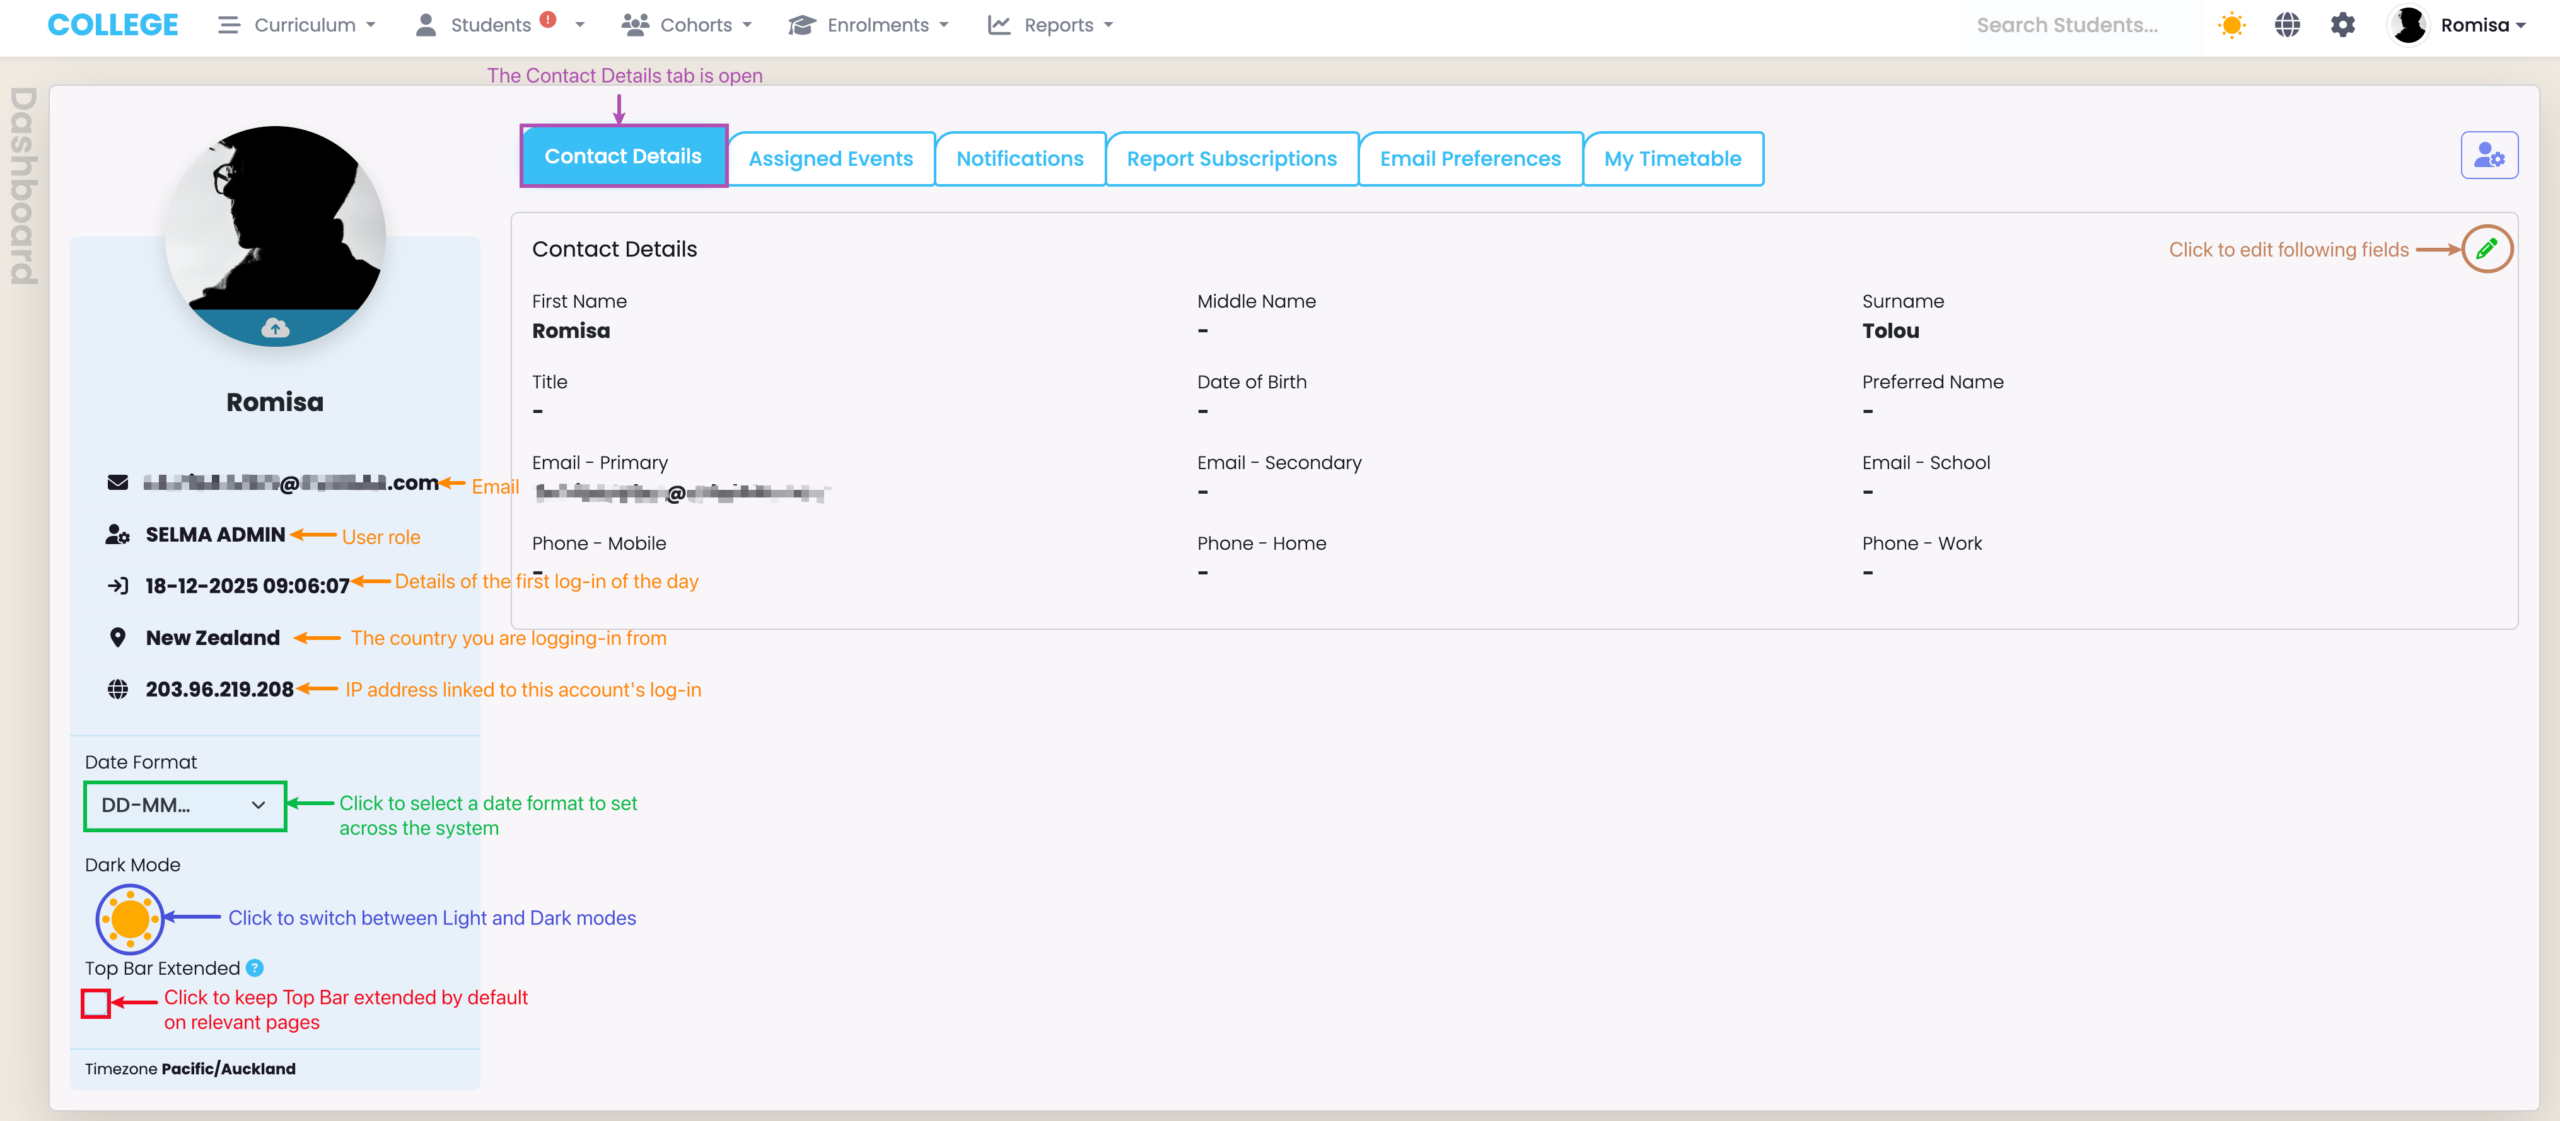
Figure 3. The top bar (orange) of an Enrolment profile is open by default. Click the down arrow button (red) to close it.
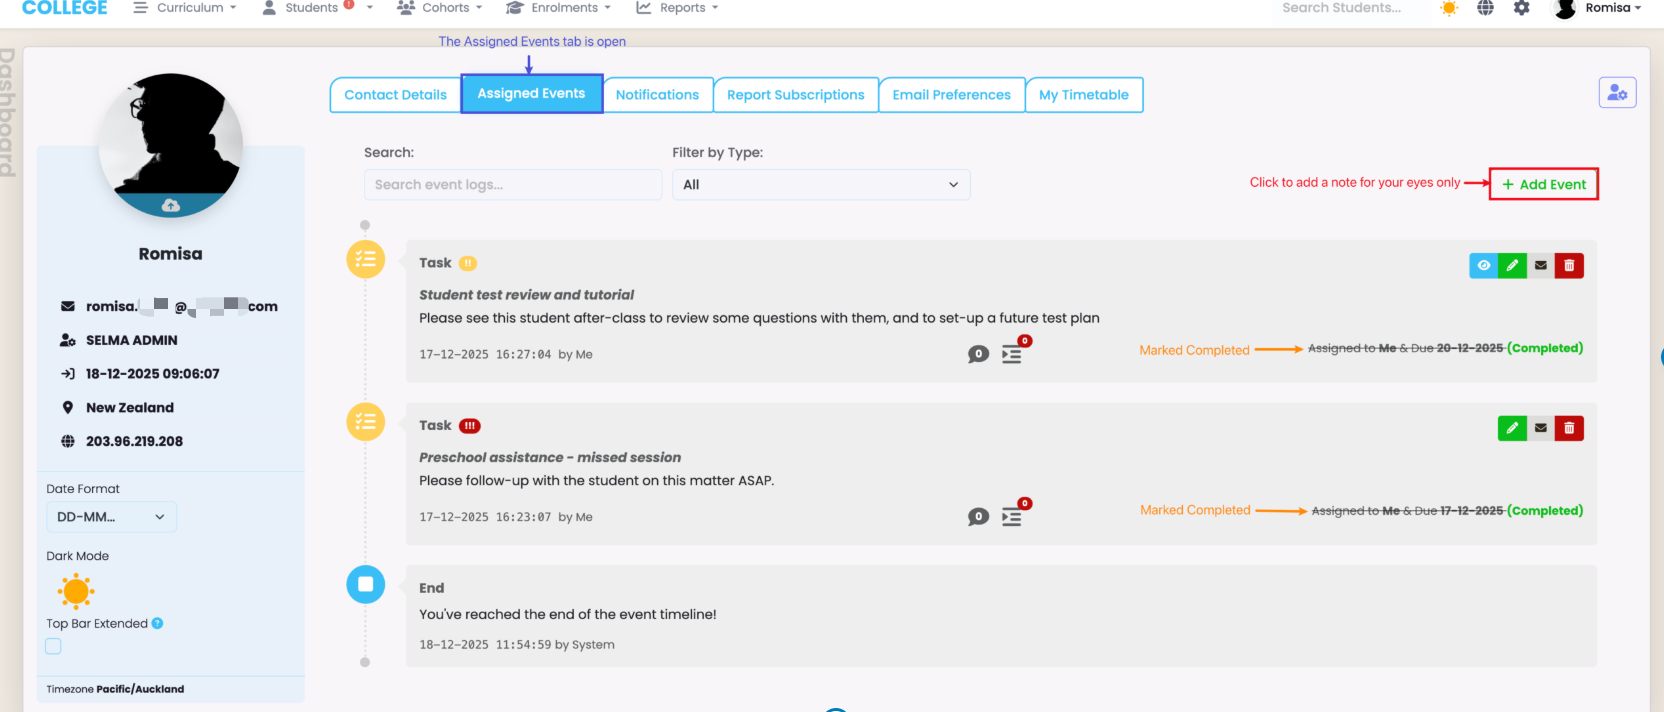
Assigned Events
On the “Assigned Events” tab you can view a list of tasks assigned to you, and make notes for yourself (Figure 4.).
Figure 4. This tab shows your list of tasks, and allows you to add notes only you can see (red).
Notifications
The “Notifications” tab shows you a list of all notifications relevant to you.
If you choose to close some notifications after you have viewed them in the notifications panel, you will still be able to view them on this tab (Figure 5.).
Figure 5. This tab shows you a list of all notifications ever sent to you. Access the notifications panel in the top left corner of the navigation bar to read notifications from any page (red).

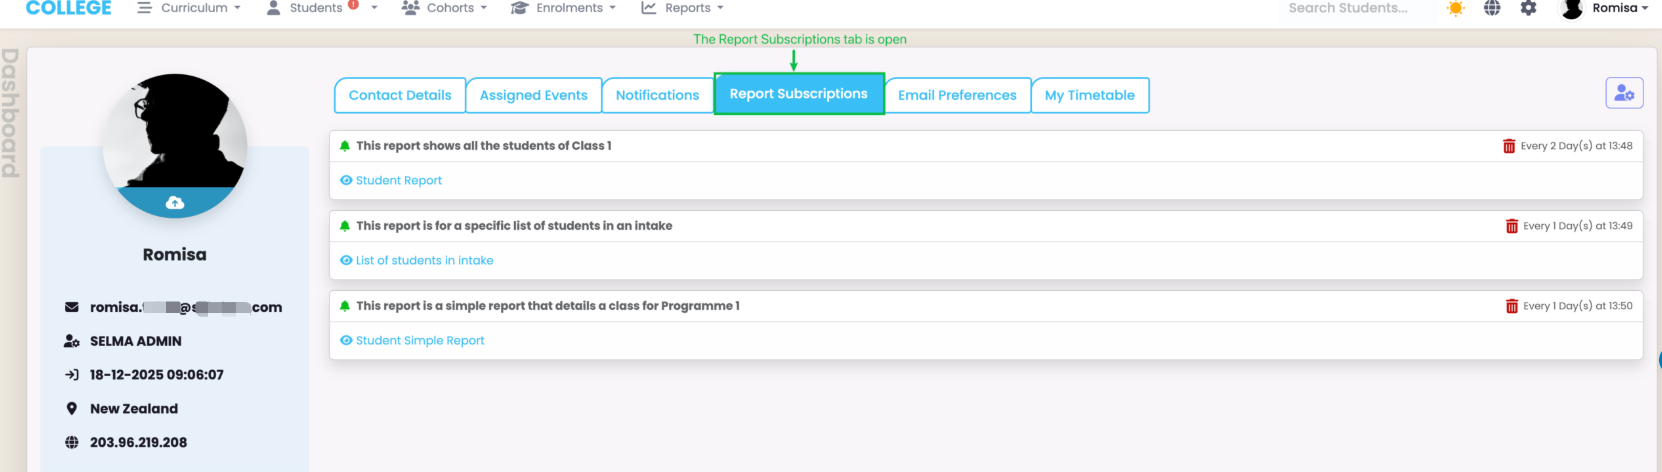
Report Subscriptions
The “Report Subscriptions” tab shows you all grid reports or report builders that you are subscribed to (Figure 6.).
Please refer to Reporting – Grid Reports and Reporting – Report Builder in this resource for more information.
Figure 6. See all your Report subscriptions, here, including subscription frequency and time. You can also delete a subscription by clicking the red trash icons next to each description.
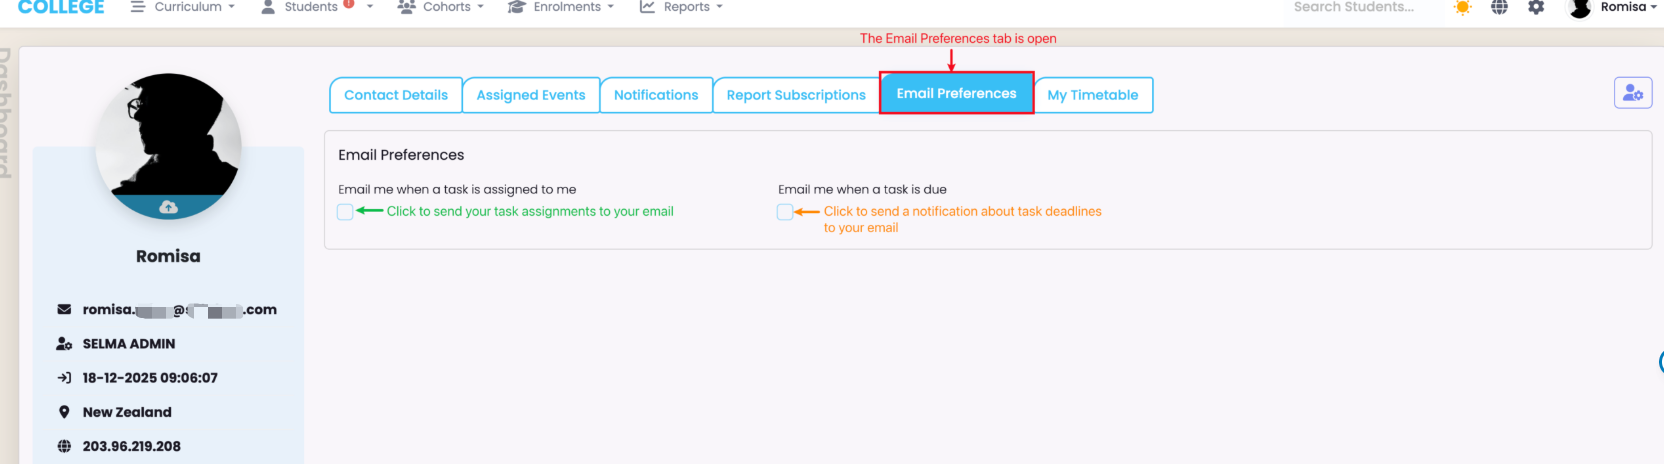
Email Preferences
In the “Email Preferences” Tab, you can choose to send yourself emails of task assignments when they are created, and/or emails of task deadlines.
Figure 7. To receive emails of task assignments, click the tick-box indicated green. To receive emails of task deadlines, click the tick-box indicated orange.
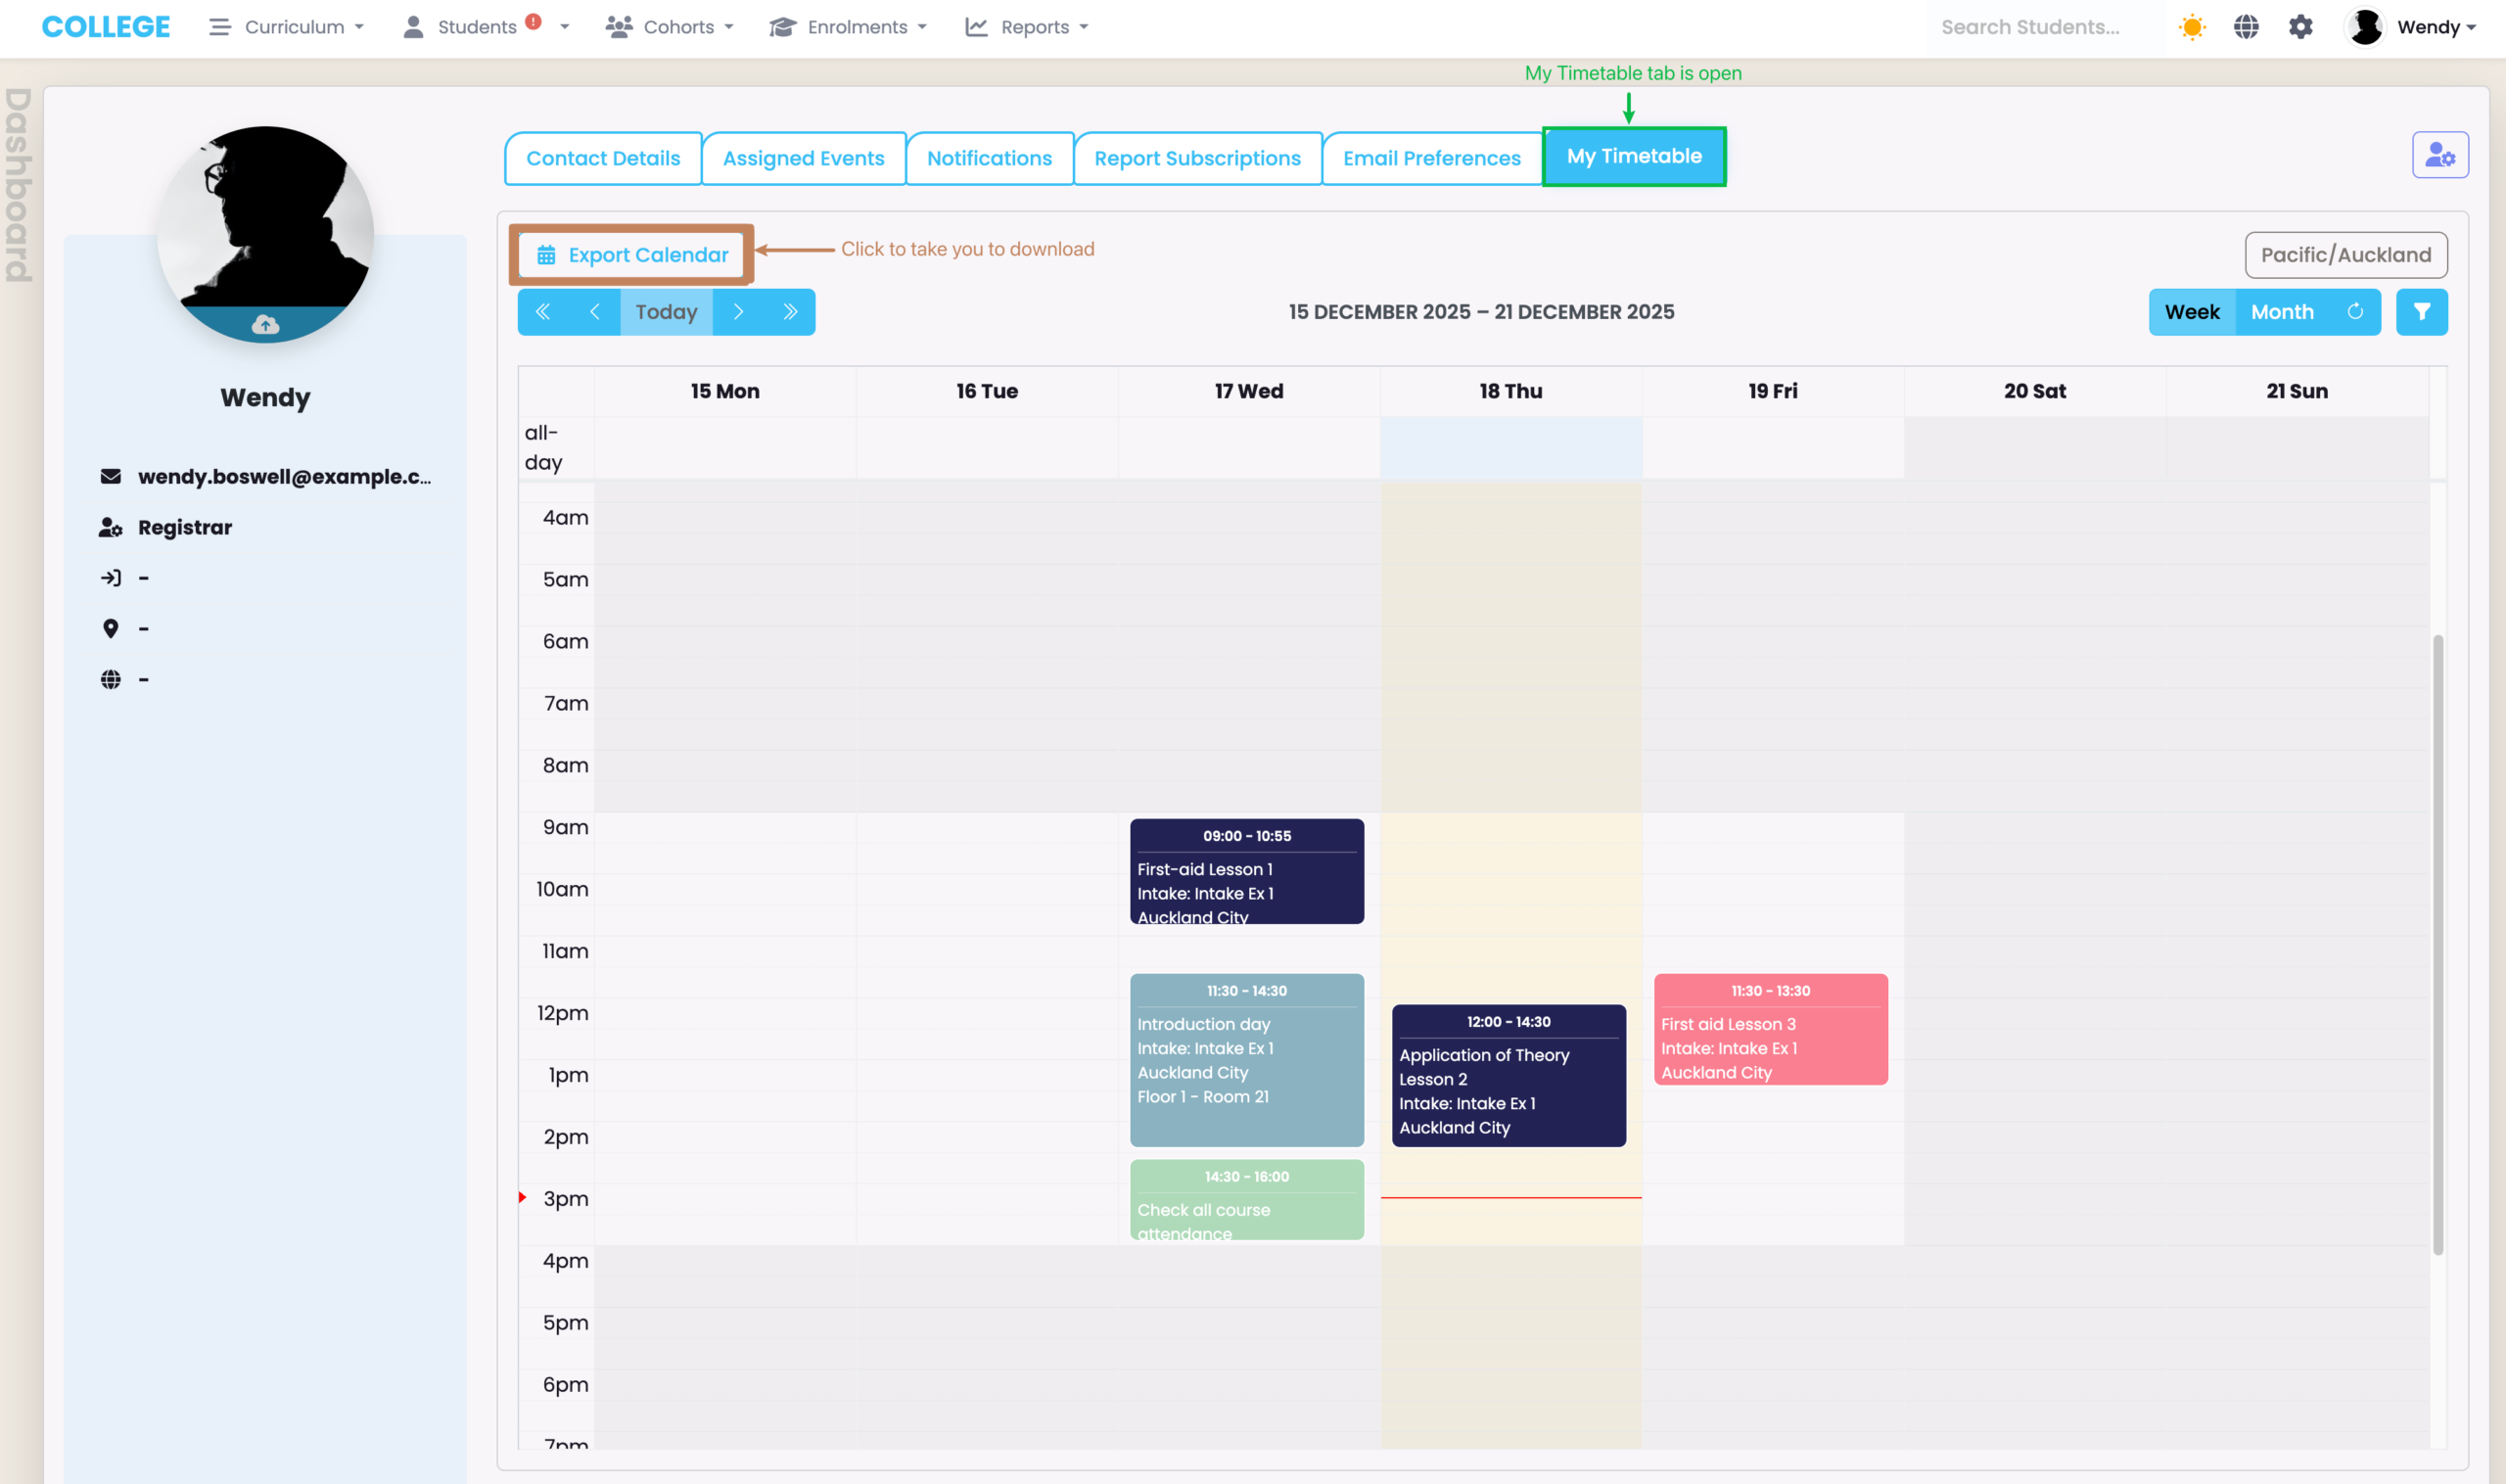
My Timetable
The “My Timetable” tab shows all sessions assigned to you. However, you can select to see other Users’ timetables, too.
Figure 8. See all timetable sessions you and other System Users are assigned. Click the “Export Calendar” button (brown) to take you to download a copy of this screen.
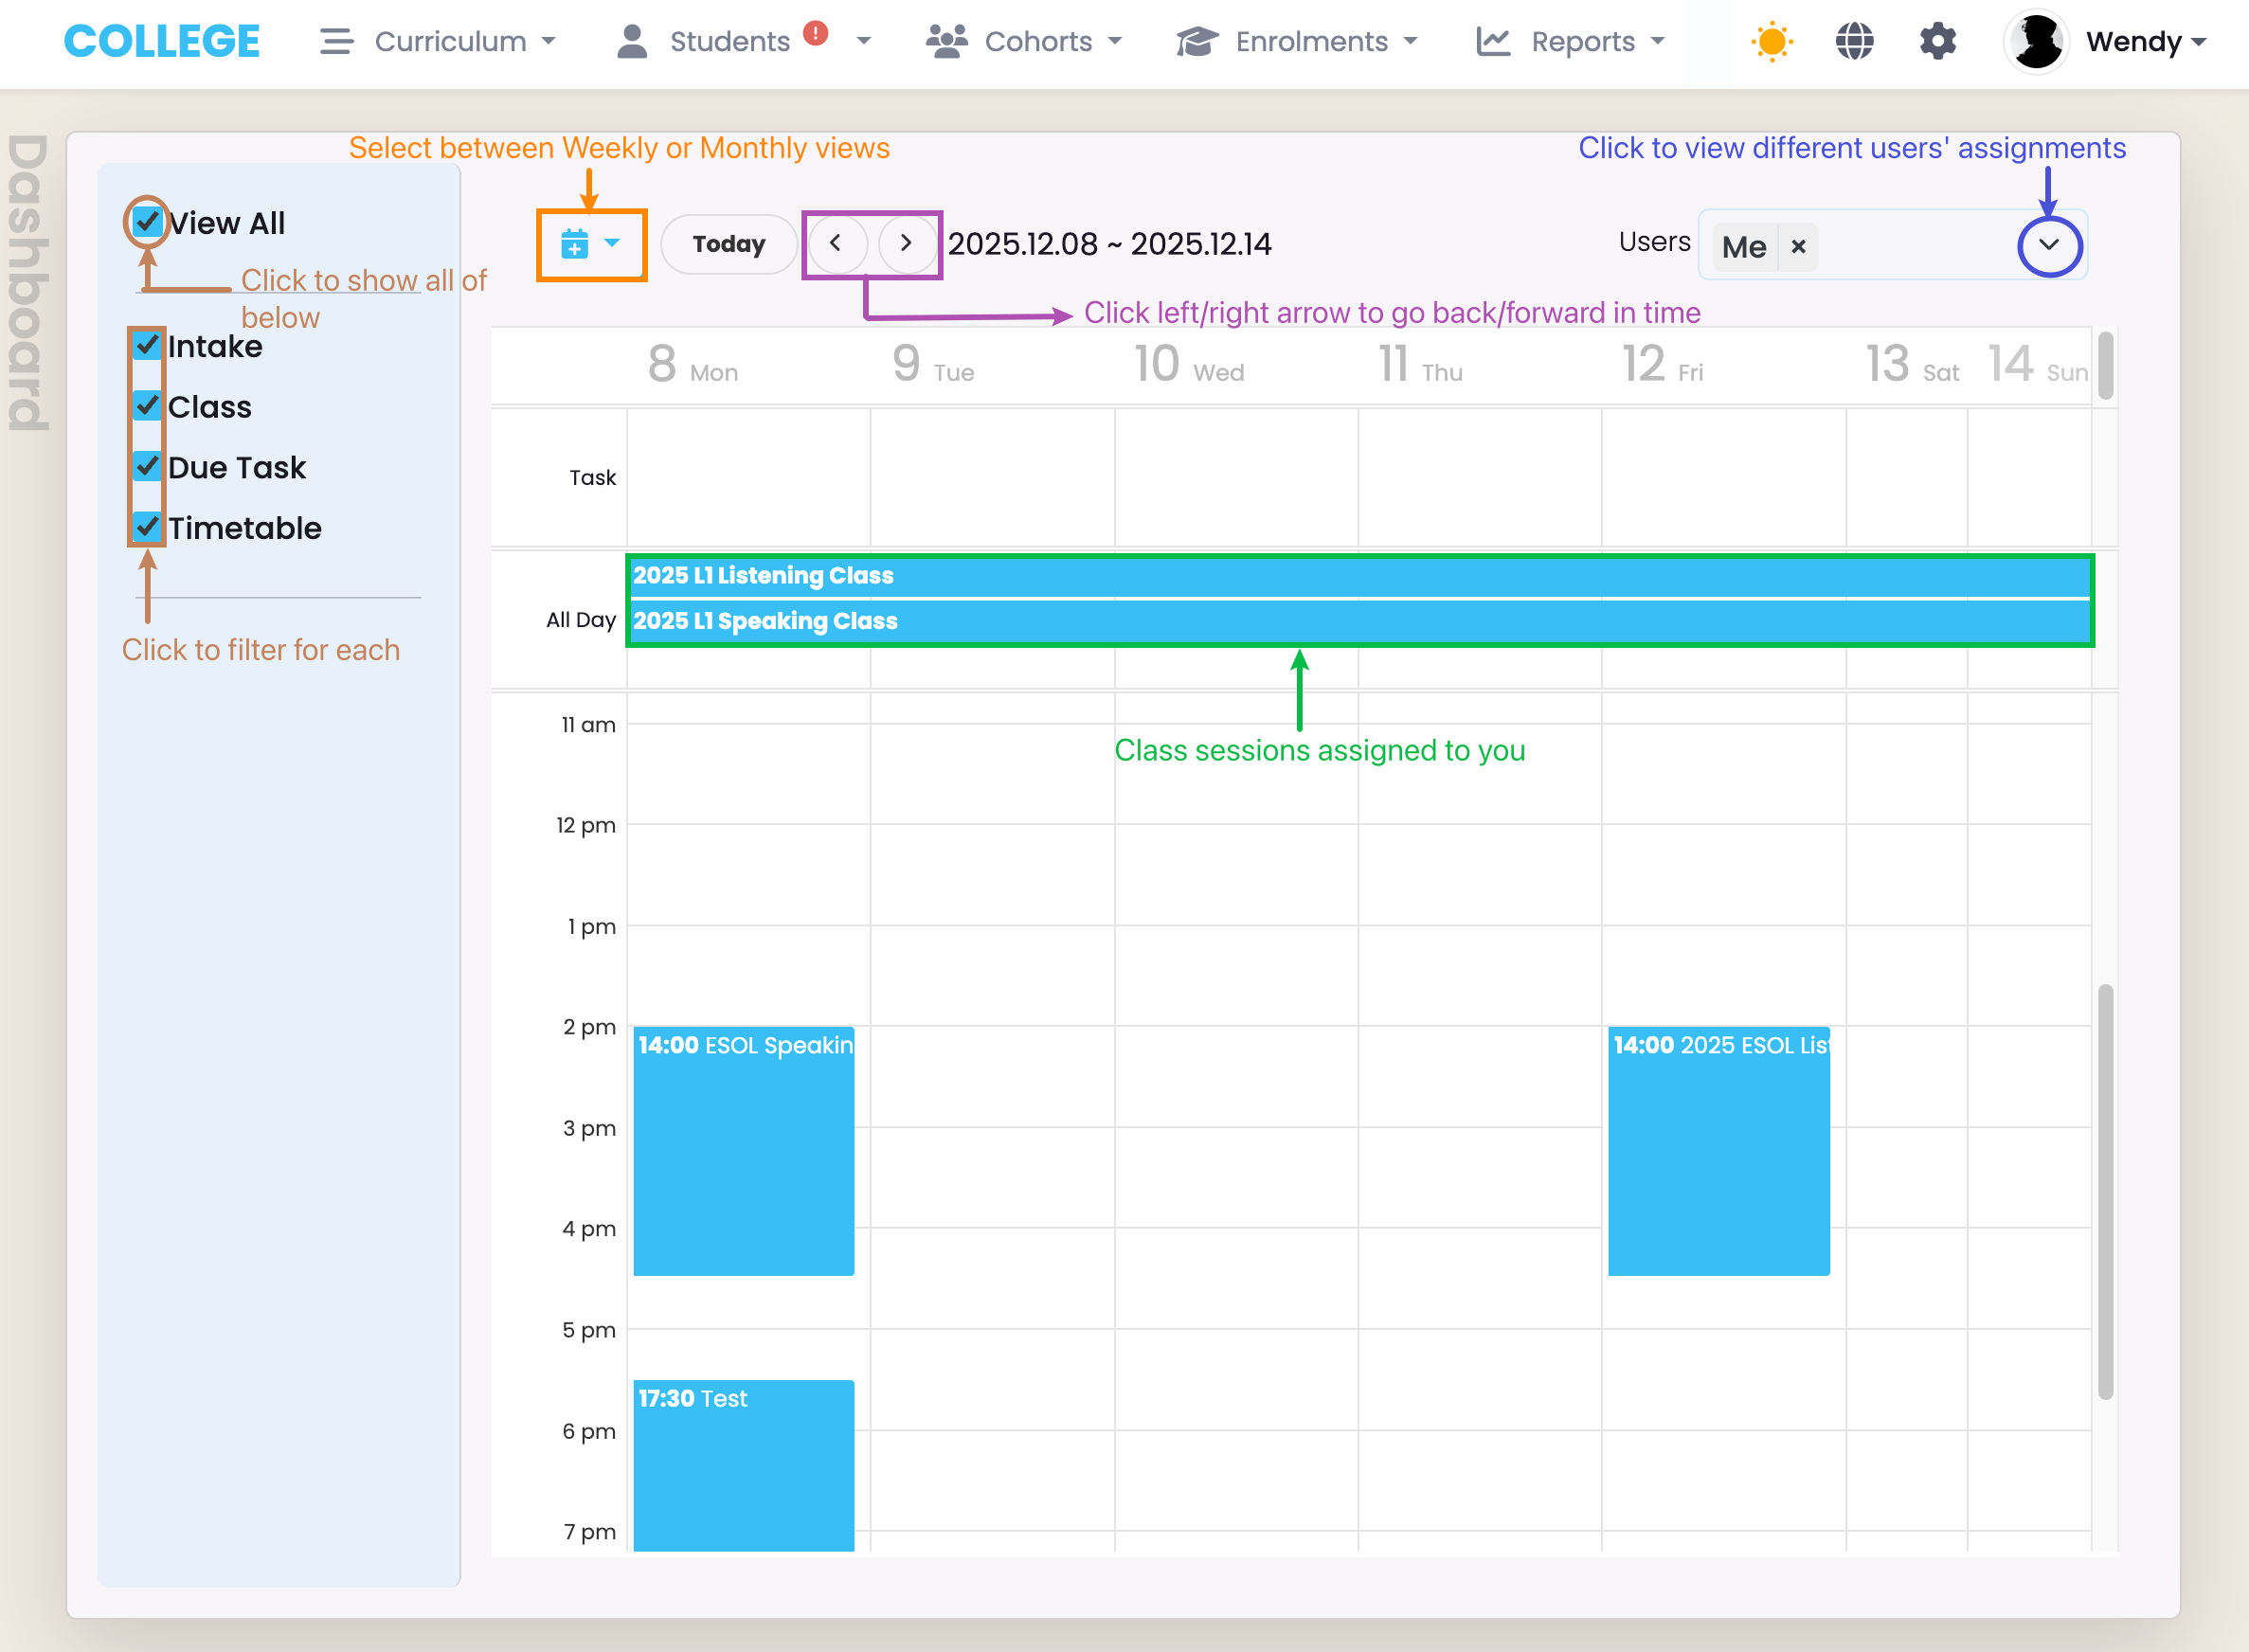
My Calendar
The “My Calendar” tab shows all types of sessions assigned to you, including due tasks. However, you can select to see other Users’ calendars, too.
Figure 9. See all timetable sessions you and other System Users are assigned (blue). Click the tick-boxes on the left (brown) to filter for specific types of sessions, and navigate using different views (orange) and the left and right arrows (purple).
Password/Security
If you wish to change your SELMA Log-in password, navigate from Account Name > Password/Security in the right corner of the navigation bar (Figure 10.).
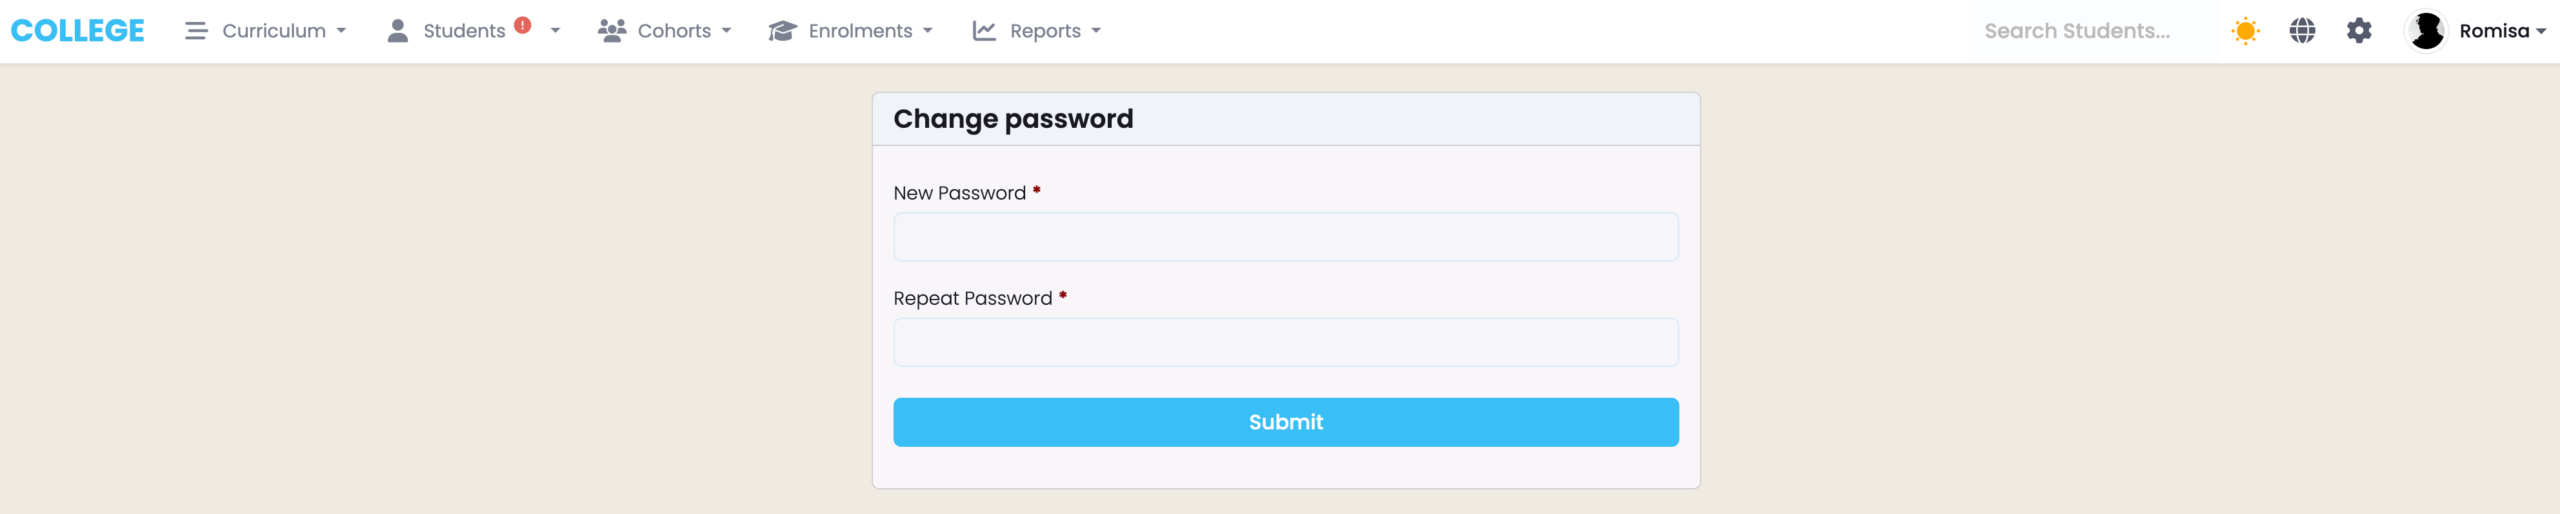
You will then be taken to a new page where you can enter a new password (Figure 11.).
Figure 10. Click “Password/Security” (red) to set-up a new Log-in password.
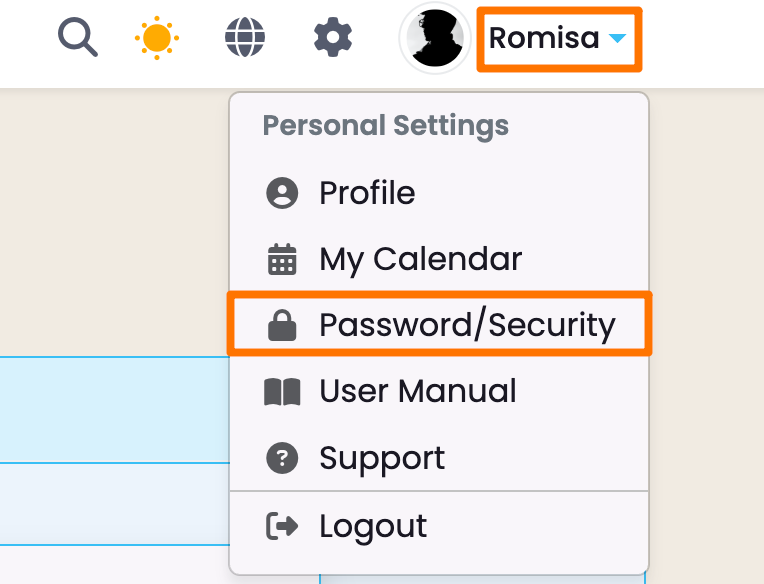
Figure 11. Set-up a new password by filling out the two required fields.
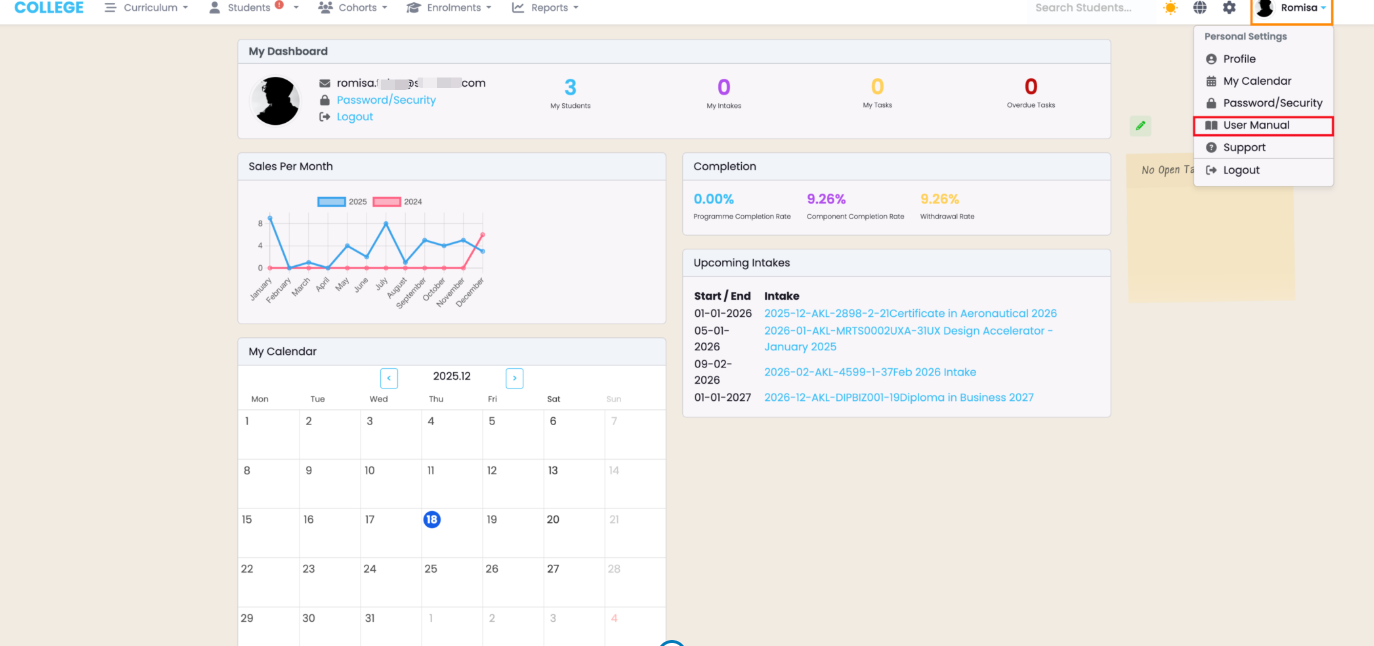
User Manual
You can access the Wiki resource you are reading now, by navigating from Account Name > User Manual (Figure 12.).
Figure 12. The User Manual (red) takes you directly to this Wiki resource.
Support
The SELMA Support Team can be contacted through our Help-desk.
To reach us, navigate from Account Name > Support (Figure 13.).
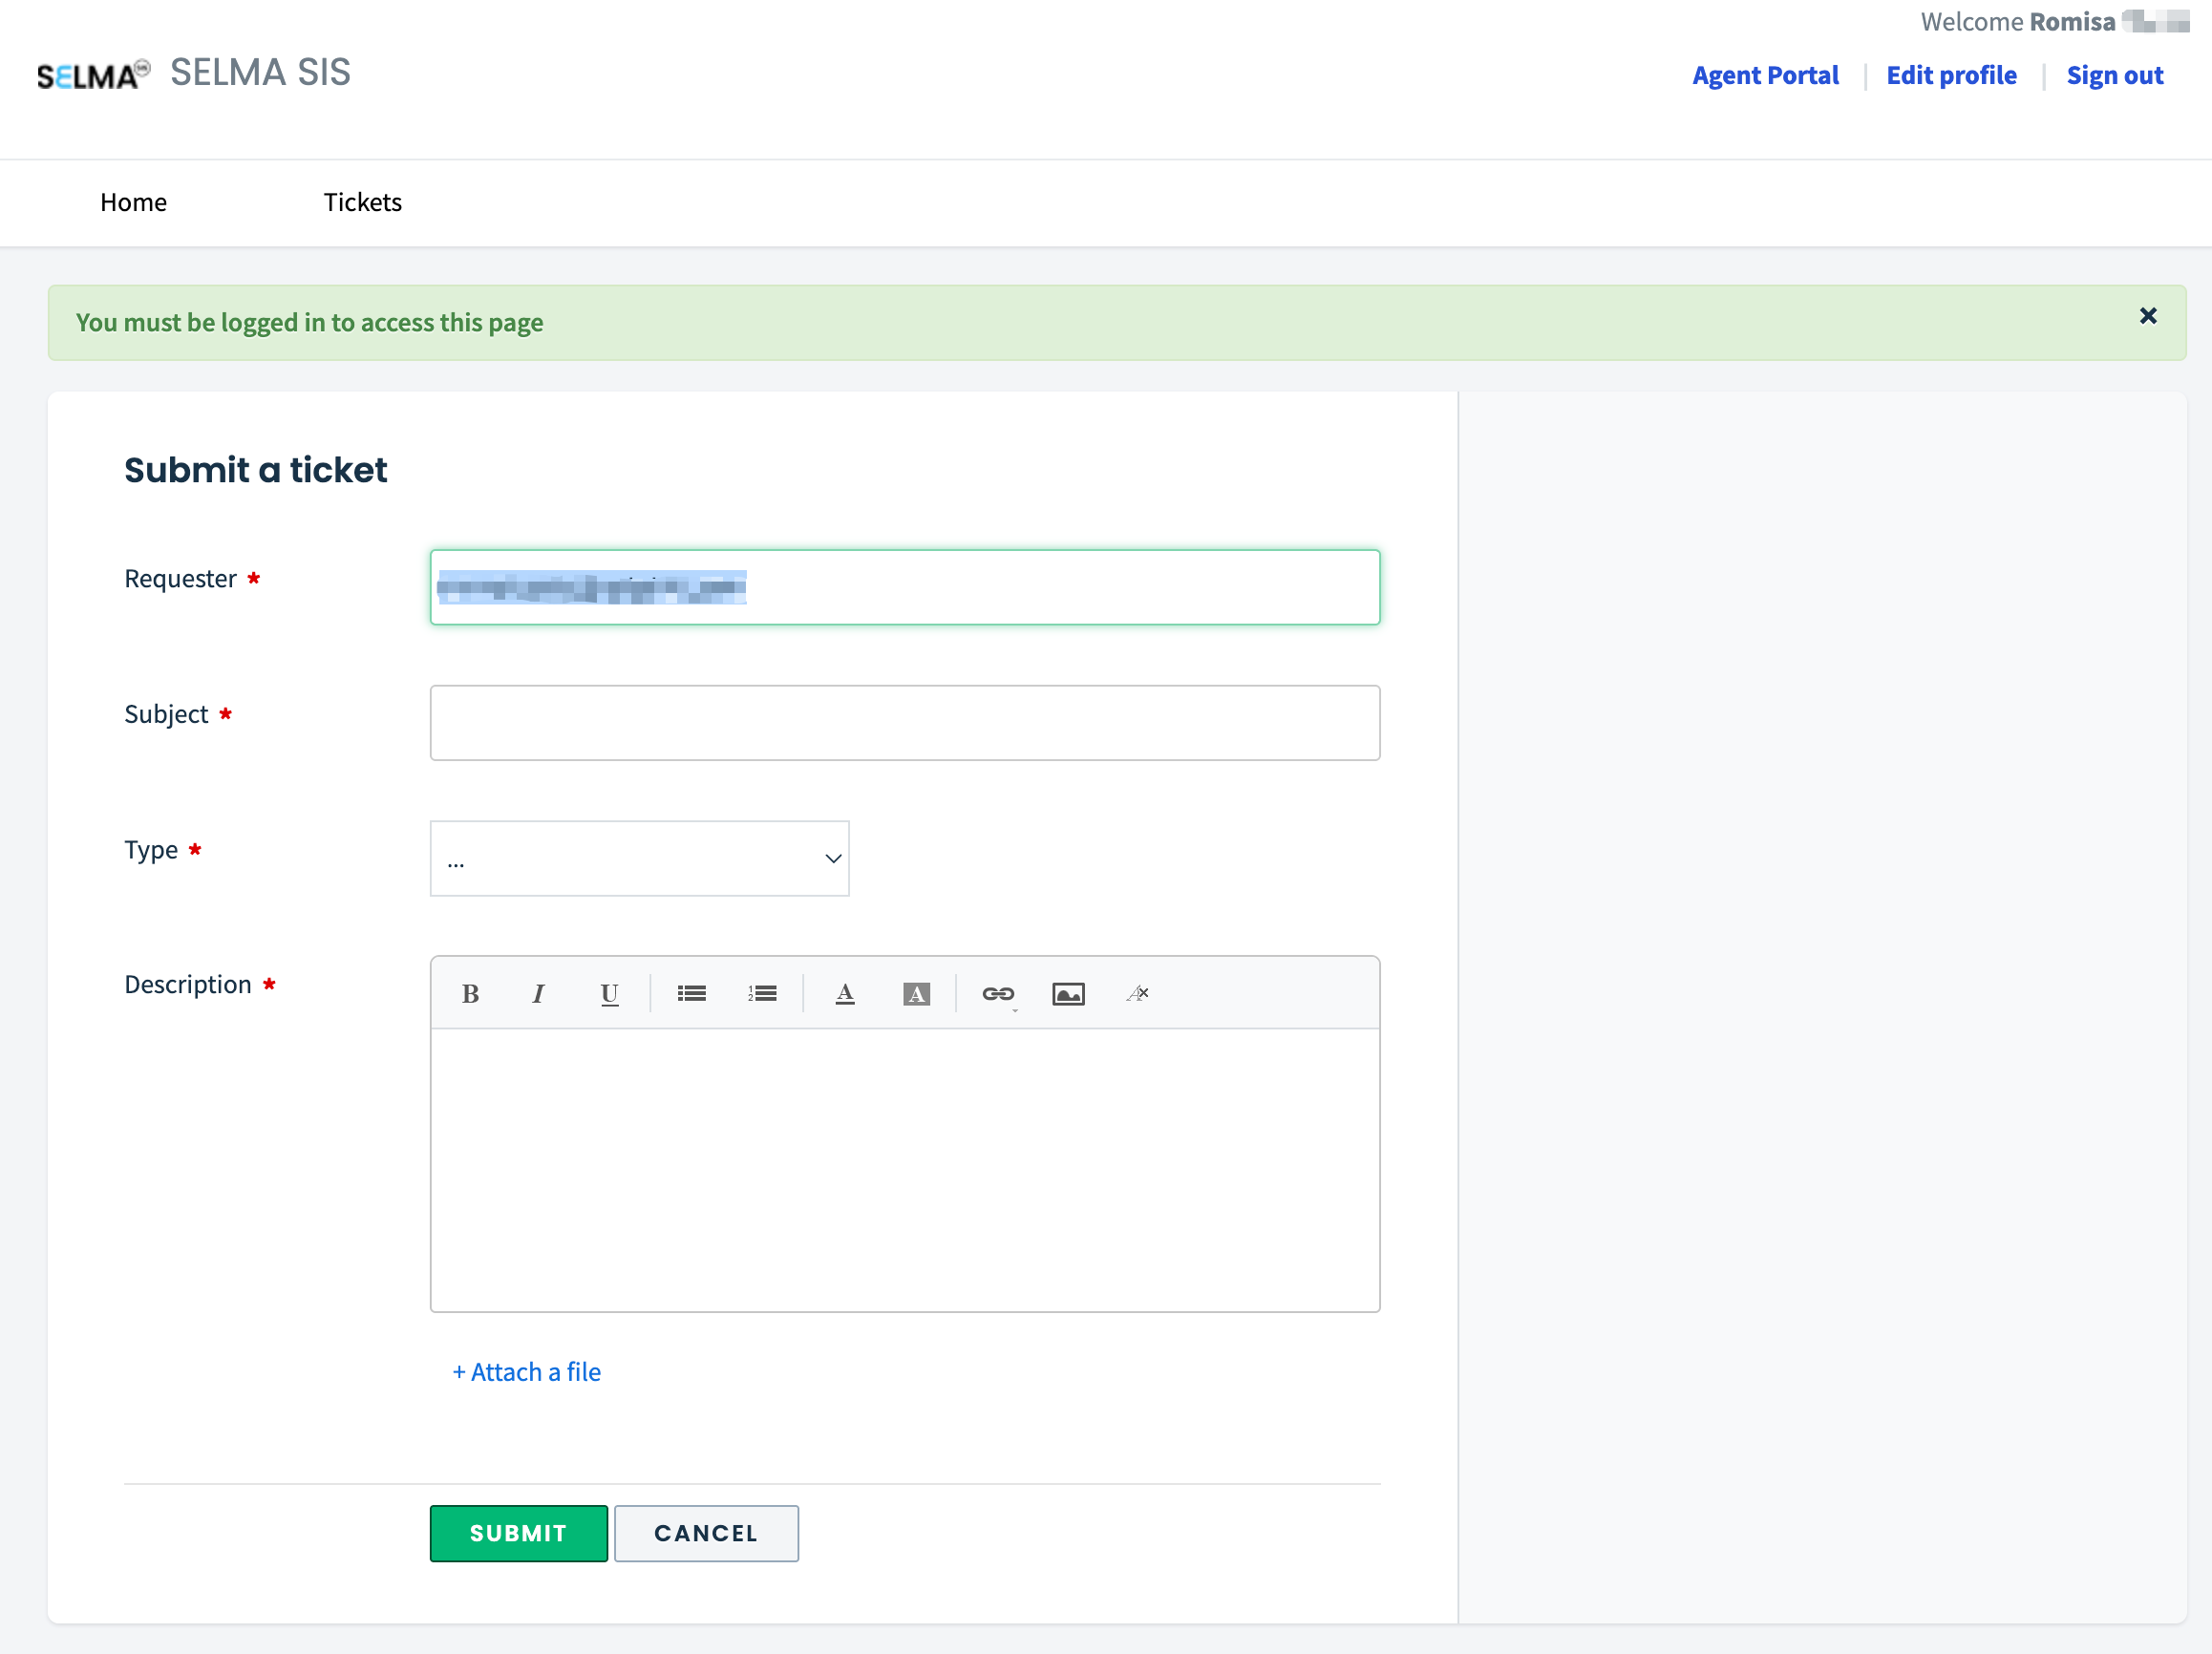
You will then be directed to a new tab in your browser, where you can submit a ticket (Figure 14.).
Note: For swift trouble-shooting, please ensure you identify your issue with a full description, including specific details and screenshots (Figure 14.).
Figure 13. Click “Support” to take you to our the SELMA Help-desk.
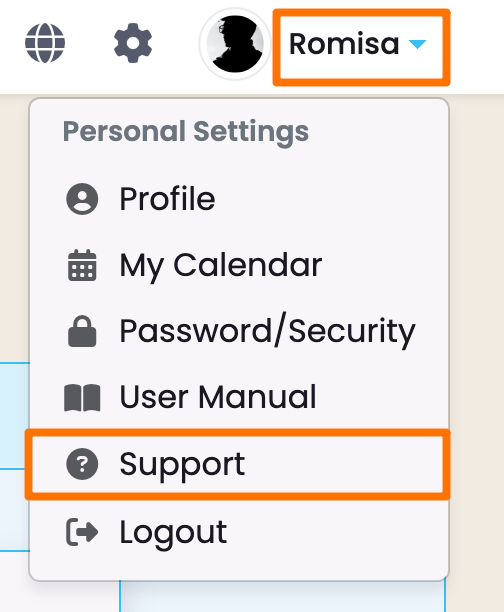
Figure 14. The following screen is what you see when submitting a ticket to the SELMA Support Team.