
- Overview
- Getting Started
- Creating a Workflow
- Triggers
- The Workflow Designer Canvas
- Conditions
- Actions
- Workflow Statuses
- Run Once Per Entity
- Best Practices & Tips
Overview
The Workflow Builder allows you to automate repetitive tasks in SELMA by creating workflows that respond to events or run on a schedule. A workflow consists of a trigger (what starts it), optional conditions (decision logic), and one or more actions (what it does).
Common use cases include:
- Automatically sending a welcome email when a new Student is created.
- Creating a follow-up Task when an Enrolment status changes.
- Sending a Webhook to an external system when a record is updated.
- Running a nightly query to find Enrolments expiring within 30 days and notifying staff.
Getting Started
Figure 1. Navigate to the Workflow Builder
Navigate to Settings > Workflow Builder from the main menu. This page lists all existing workflows along with their Status, Trigger type, and Entity.
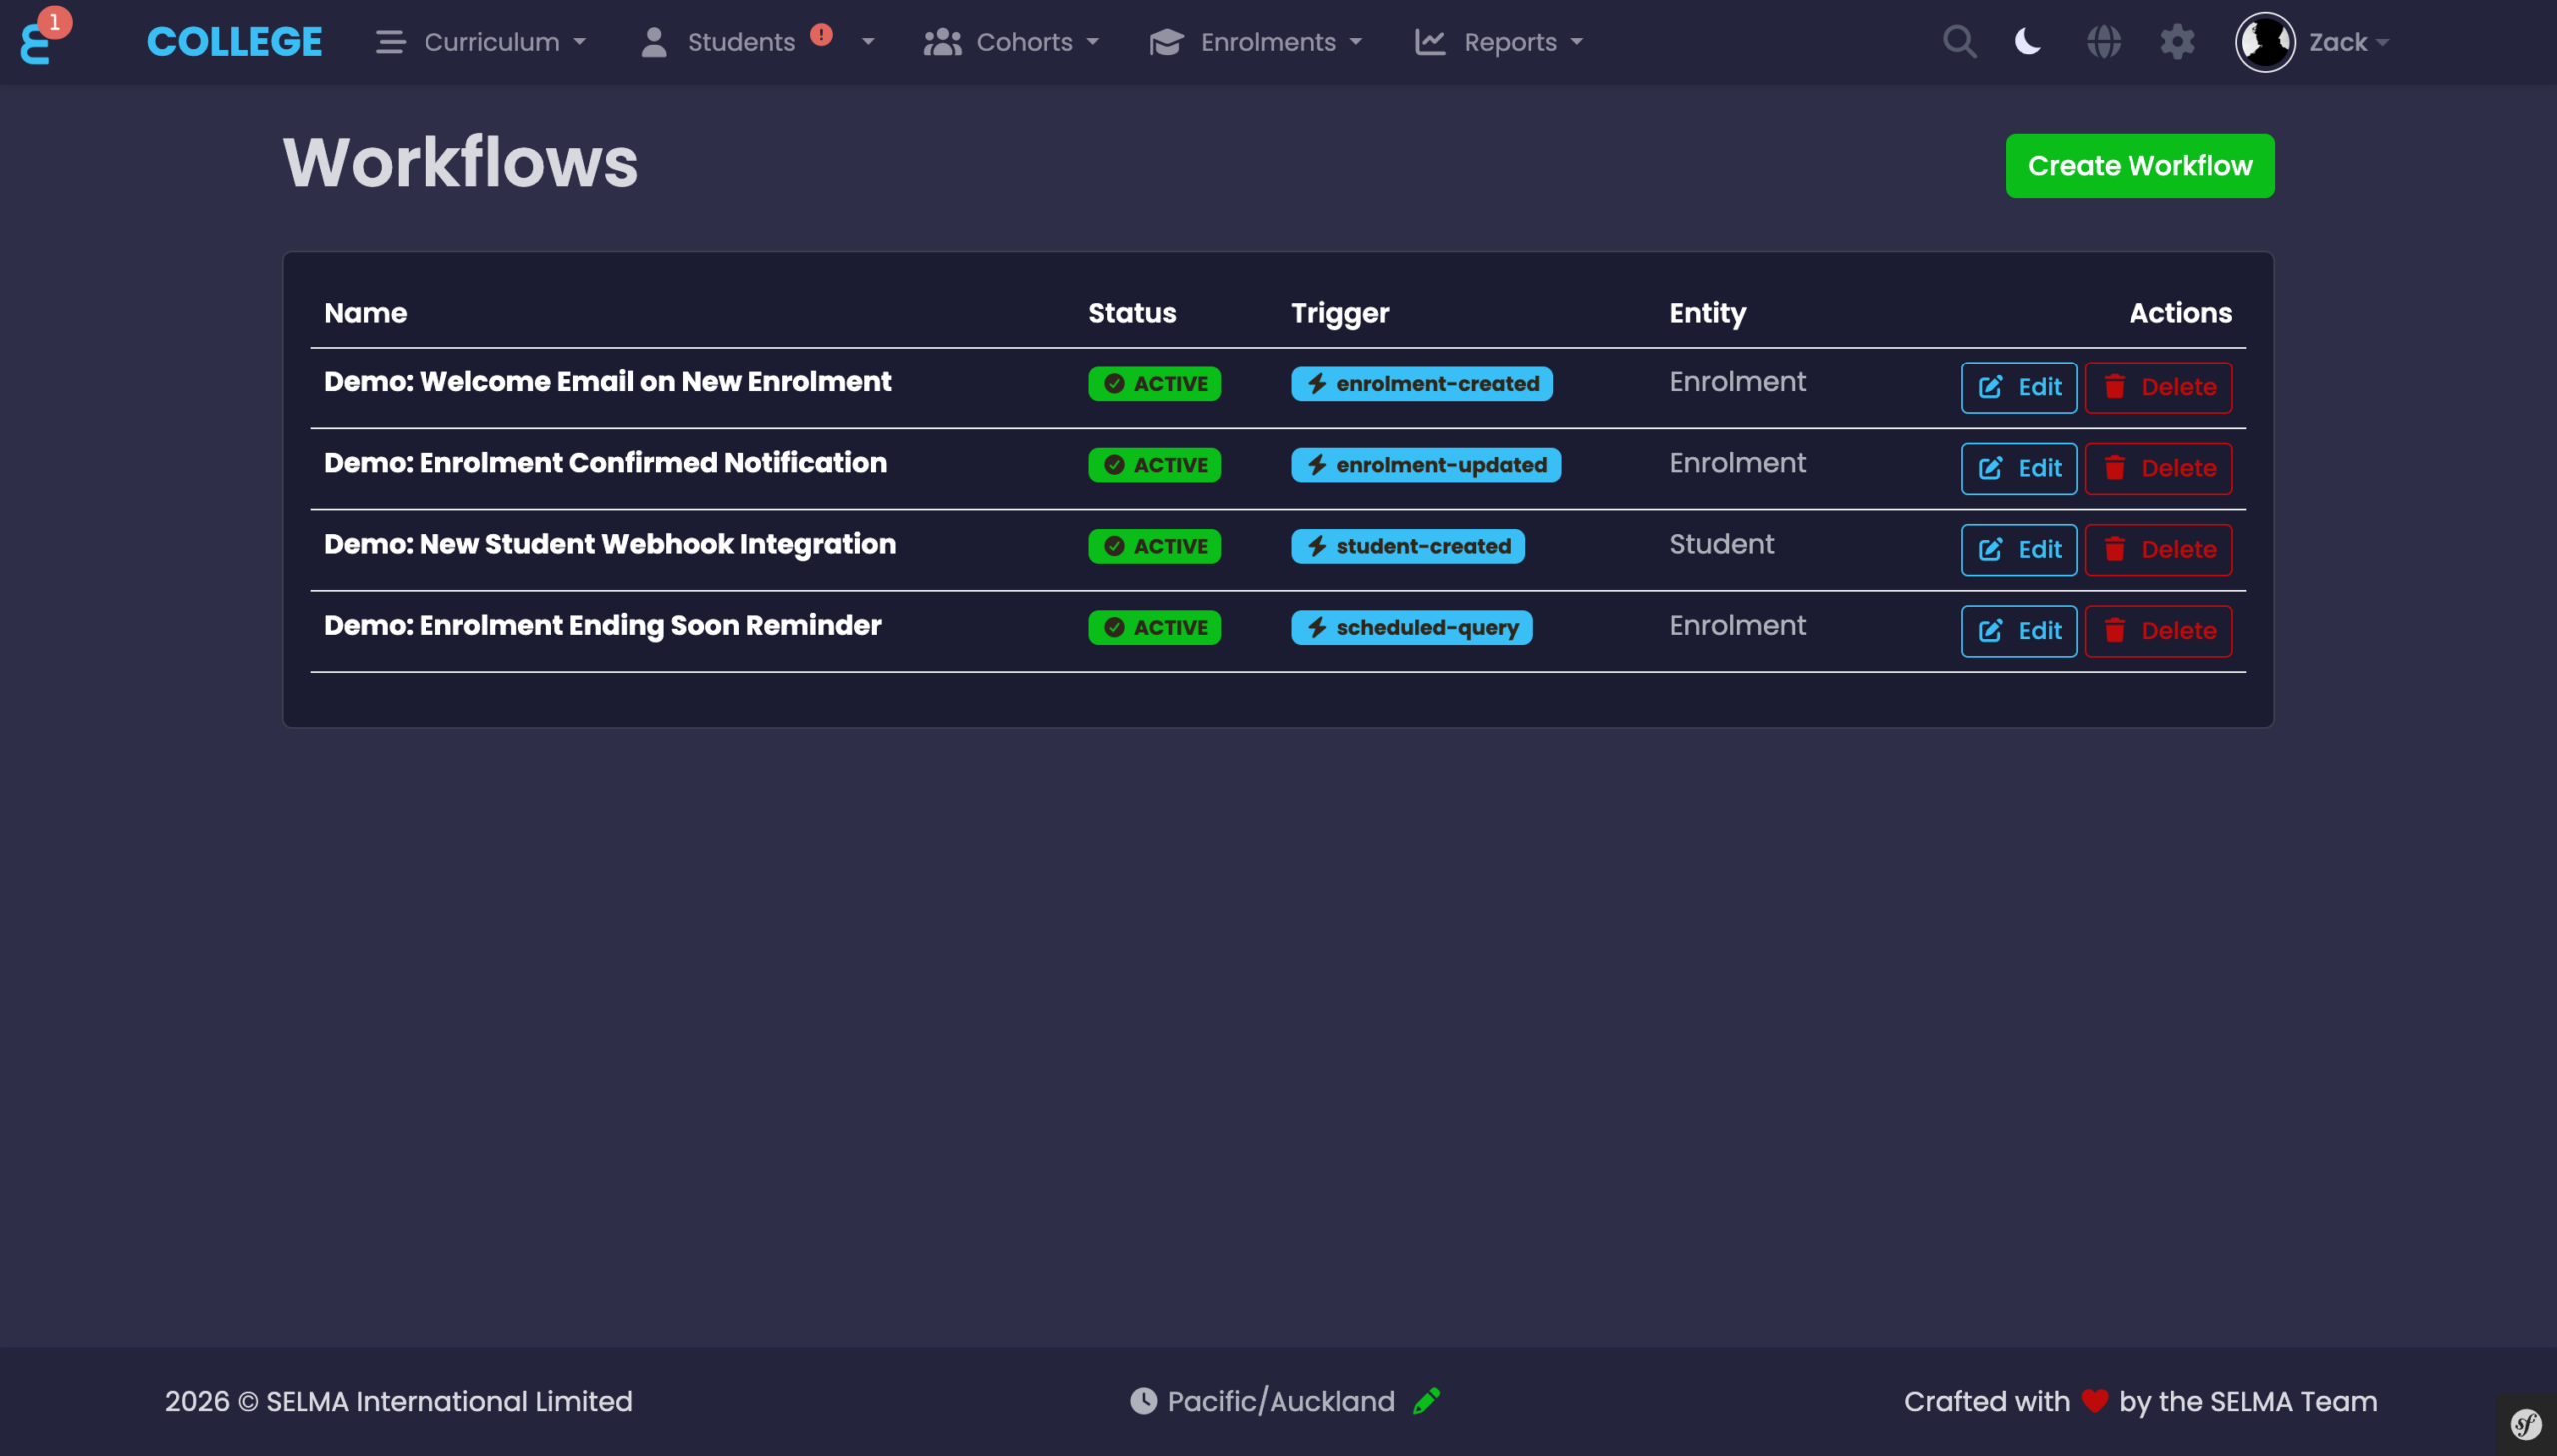
NOTE: Access to the Workflow Builder requires the “Workflow” permission. If you cannot see the menu item, please contact your system administrator to update your role permissions.
Creating a Workflow
Figure 2. Create New Workflow
Click the “Create Workflow” button to open the creation modal. Enter a descriptive Workflow Name and select a Trigger from the dropdown.
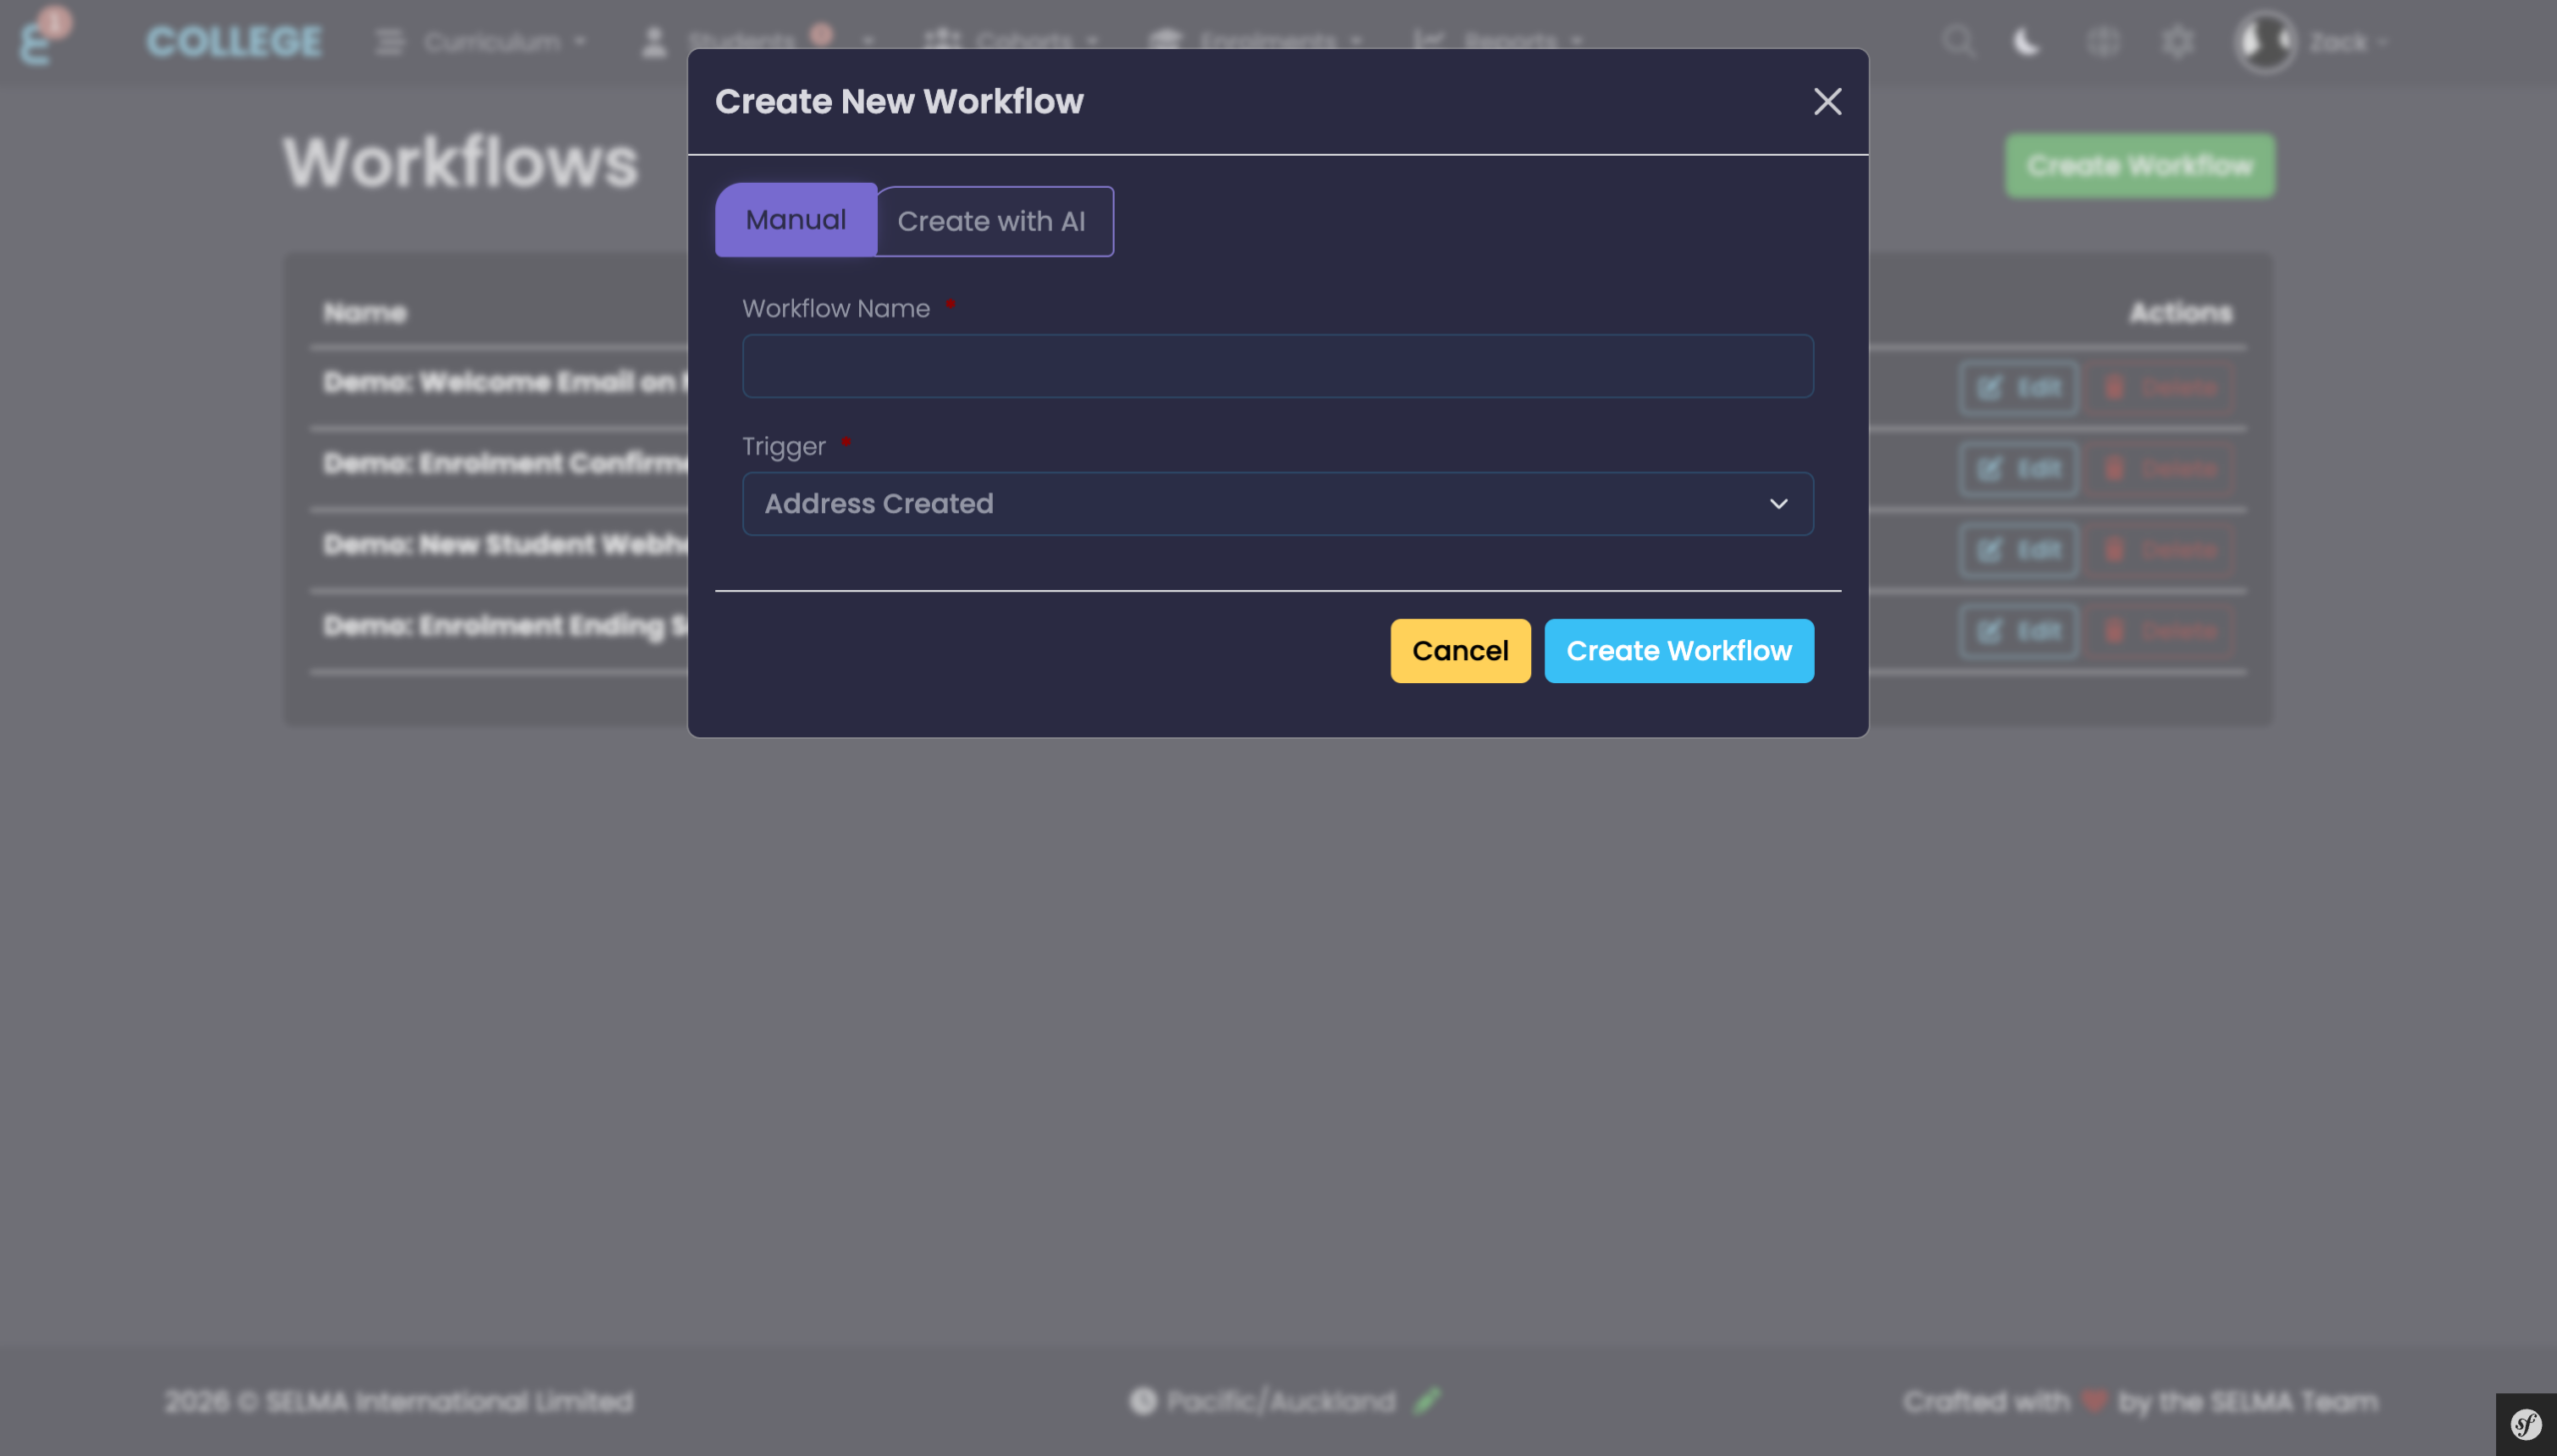
All new workflows are created in Draft status. They will not execute until you change the status to Active.
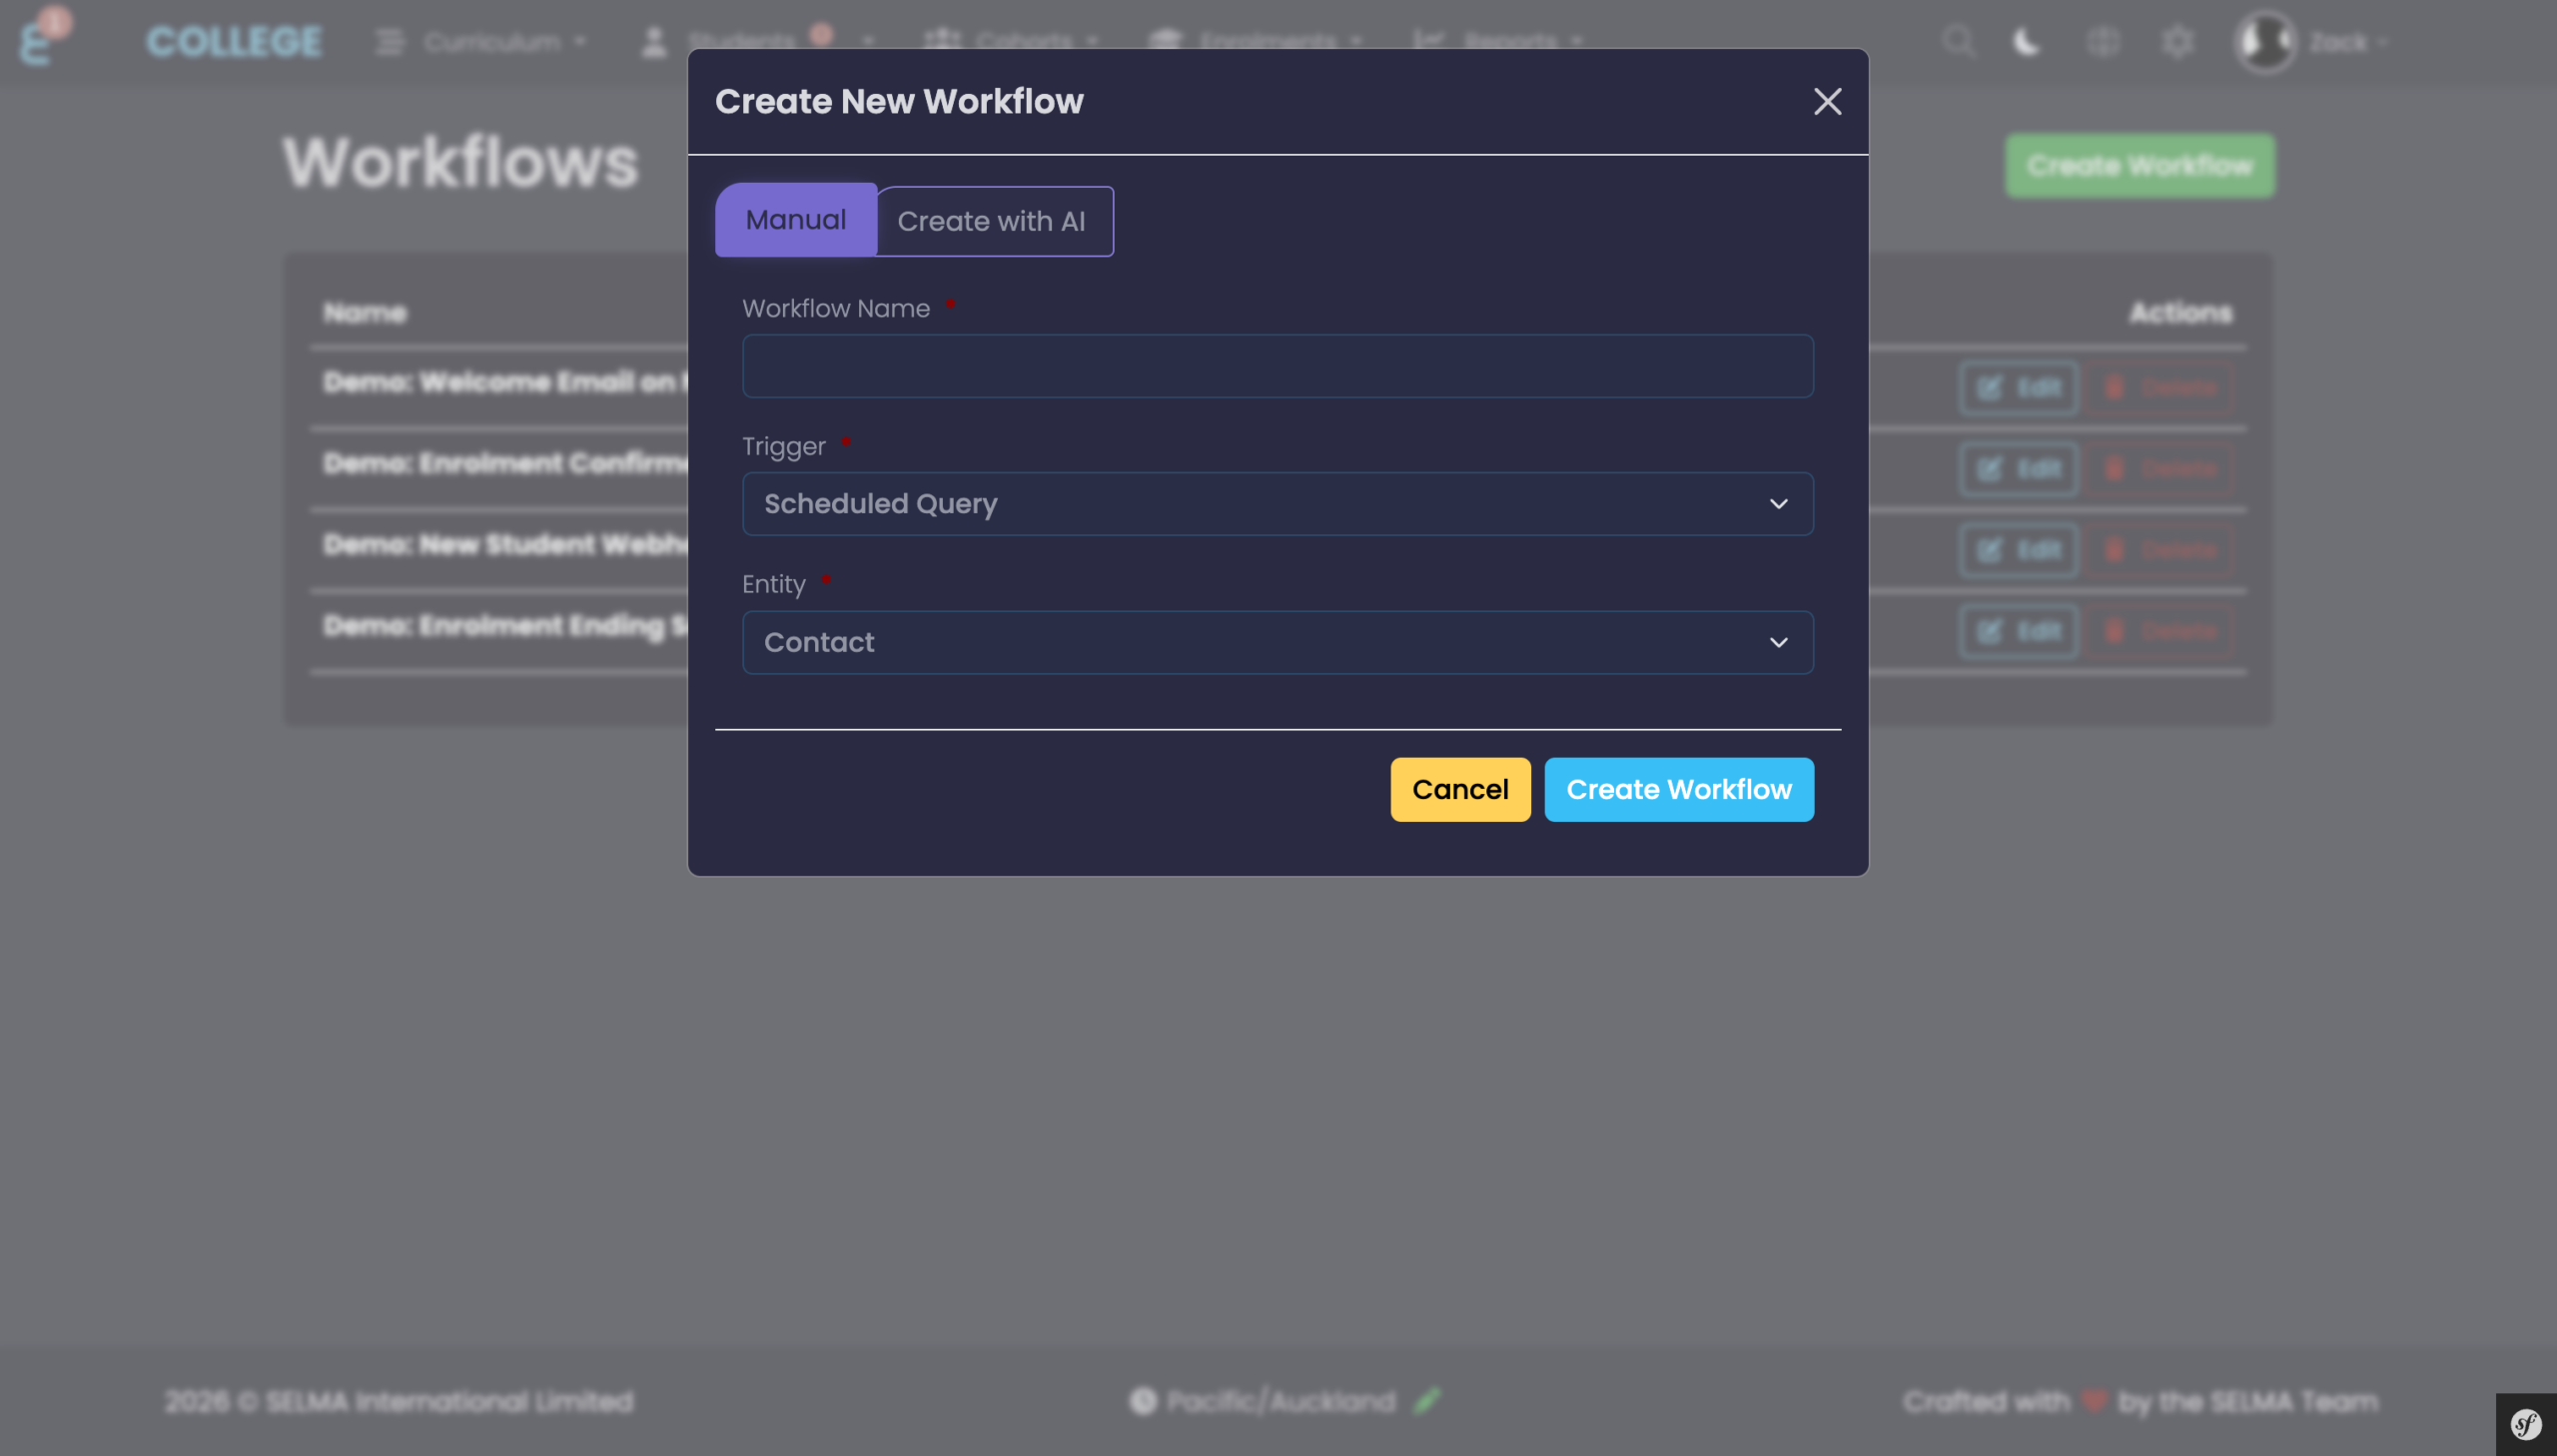
Figure 3. Scheduled Query — Select Entity
When selecting the Scheduled Query trigger, an additional Entity dropdown appears. Choose the entity type the query will run against (e.g. Student, Enrolment, Contact).
Create with AI
You can also use the “Create with AI” tab to describe the workflow you want in plain language. SELMA will generate the workflow configuration for you. This is useful for quickly setting up common automation patterns without manually configuring each step.
Triggers
A trigger defines the event that starts your workflow. SELMA supports two categories of triggers: event-based and scheduled.
Event-Based Triggers
Event-based triggers fire automatically when a record is created or updated in SELMA. Triggers are available across a wide range of entities including Students, Enrolments, Contacts, Organisations, Addresses, Identification documents, Invoices, and Attendance records.
NOTE: “Updated” triggers include a changeset containing the old and new values for each changed field. This is used by the Field Changed condition to detect specific value transitions (e.g. when an Enrolment Status changes from “Pending” to “Active”).
Scheduled Query Trigger
The Scheduled Query trigger runs on a cron schedule (e.g. every day at 2:00 AM, or every 10 minutes during business hours) and queries the database for records matching your criteria. This is useful for time-based automation such as:
- Finding Enrolments expiring within a certain number of days.
- Sending reminders based on upcoming dates.
- Detecting attendance registers that have not been marked.
Figure 4. Scheduled Query Trigger Configuration
Expand the “Trigger Configuration” panel to set the Schedule (cron expression), Timezone, and Query Criteria. Conditions can be combined with AND or OR logic. Available condition types include standard field comparisons, relative date ranges, time offsets, and collection checks.
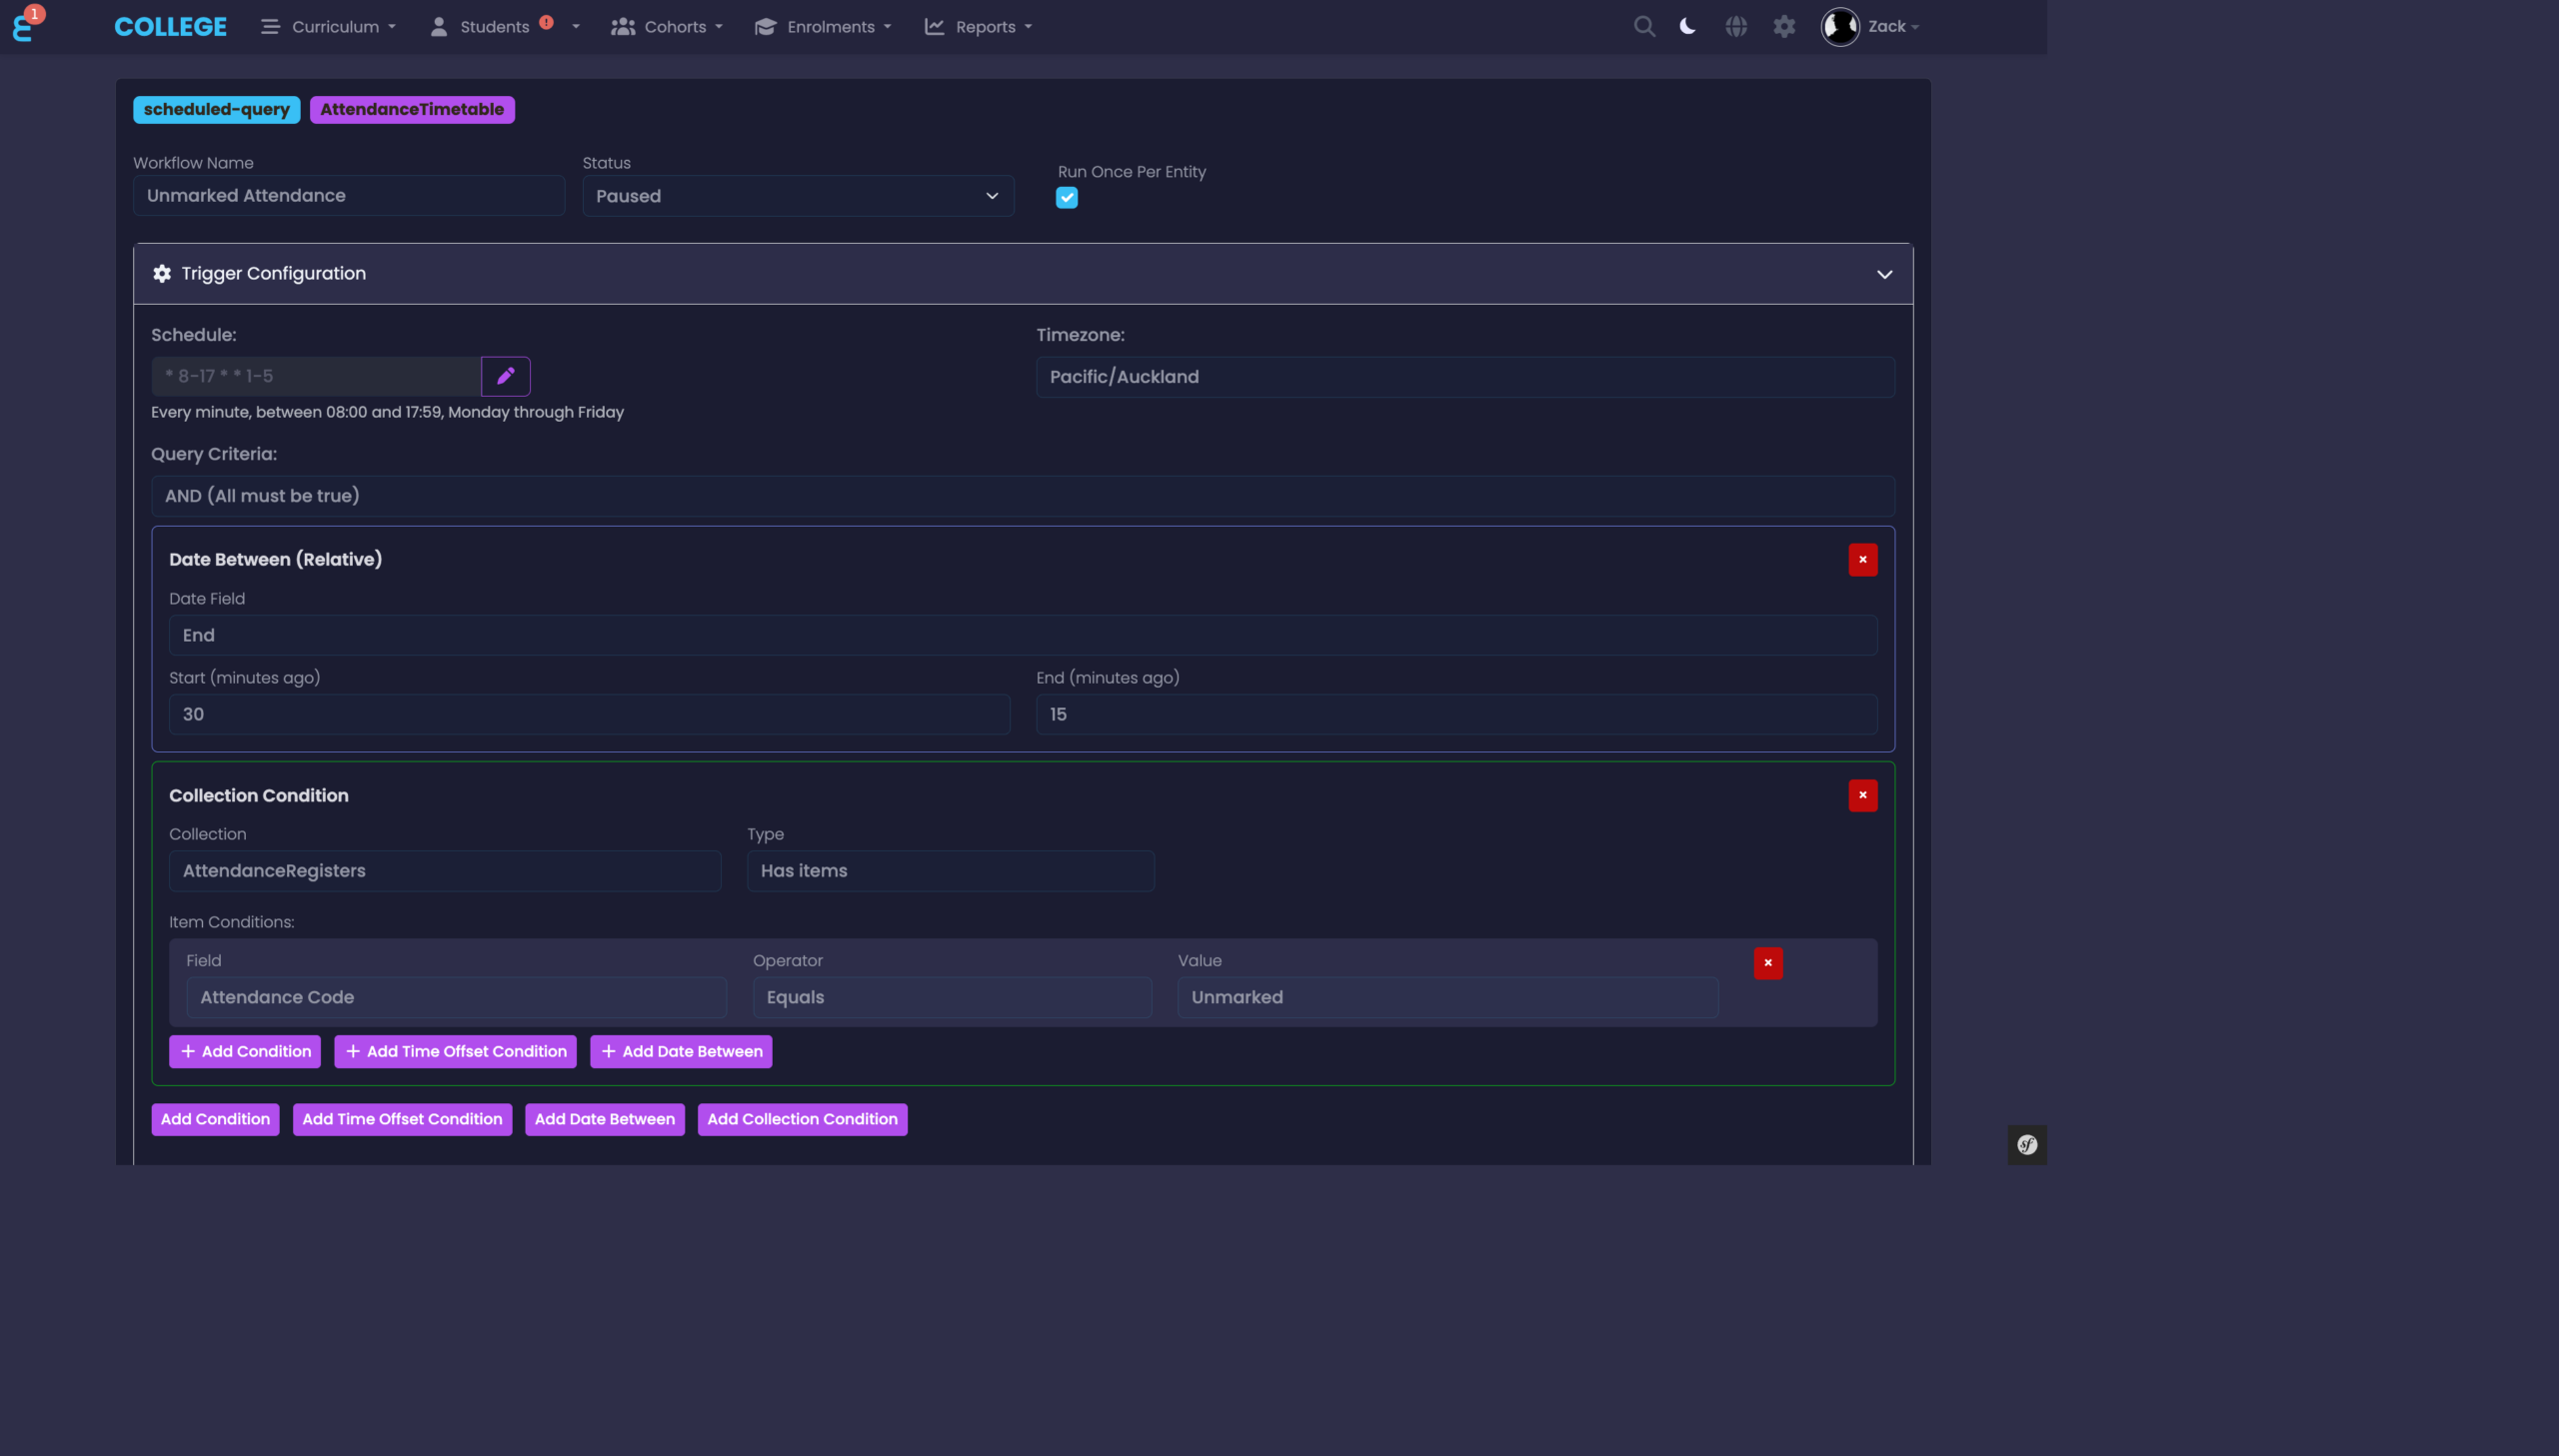
Each matching record triggers the workflow’s action sequence independently.
The Workflow Designer Canvas
Figure 5. The Designer Canvas
After creating a workflow, you are taken to the visual designer canvas. The canvas displays your workflow as a sequence of steps connected by arrows. The Toolbox on the left contains all available Conditions and Actions that you can drag onto the canvas. The Workflow Properties panel on the right shows the configuration for the currently selected step.
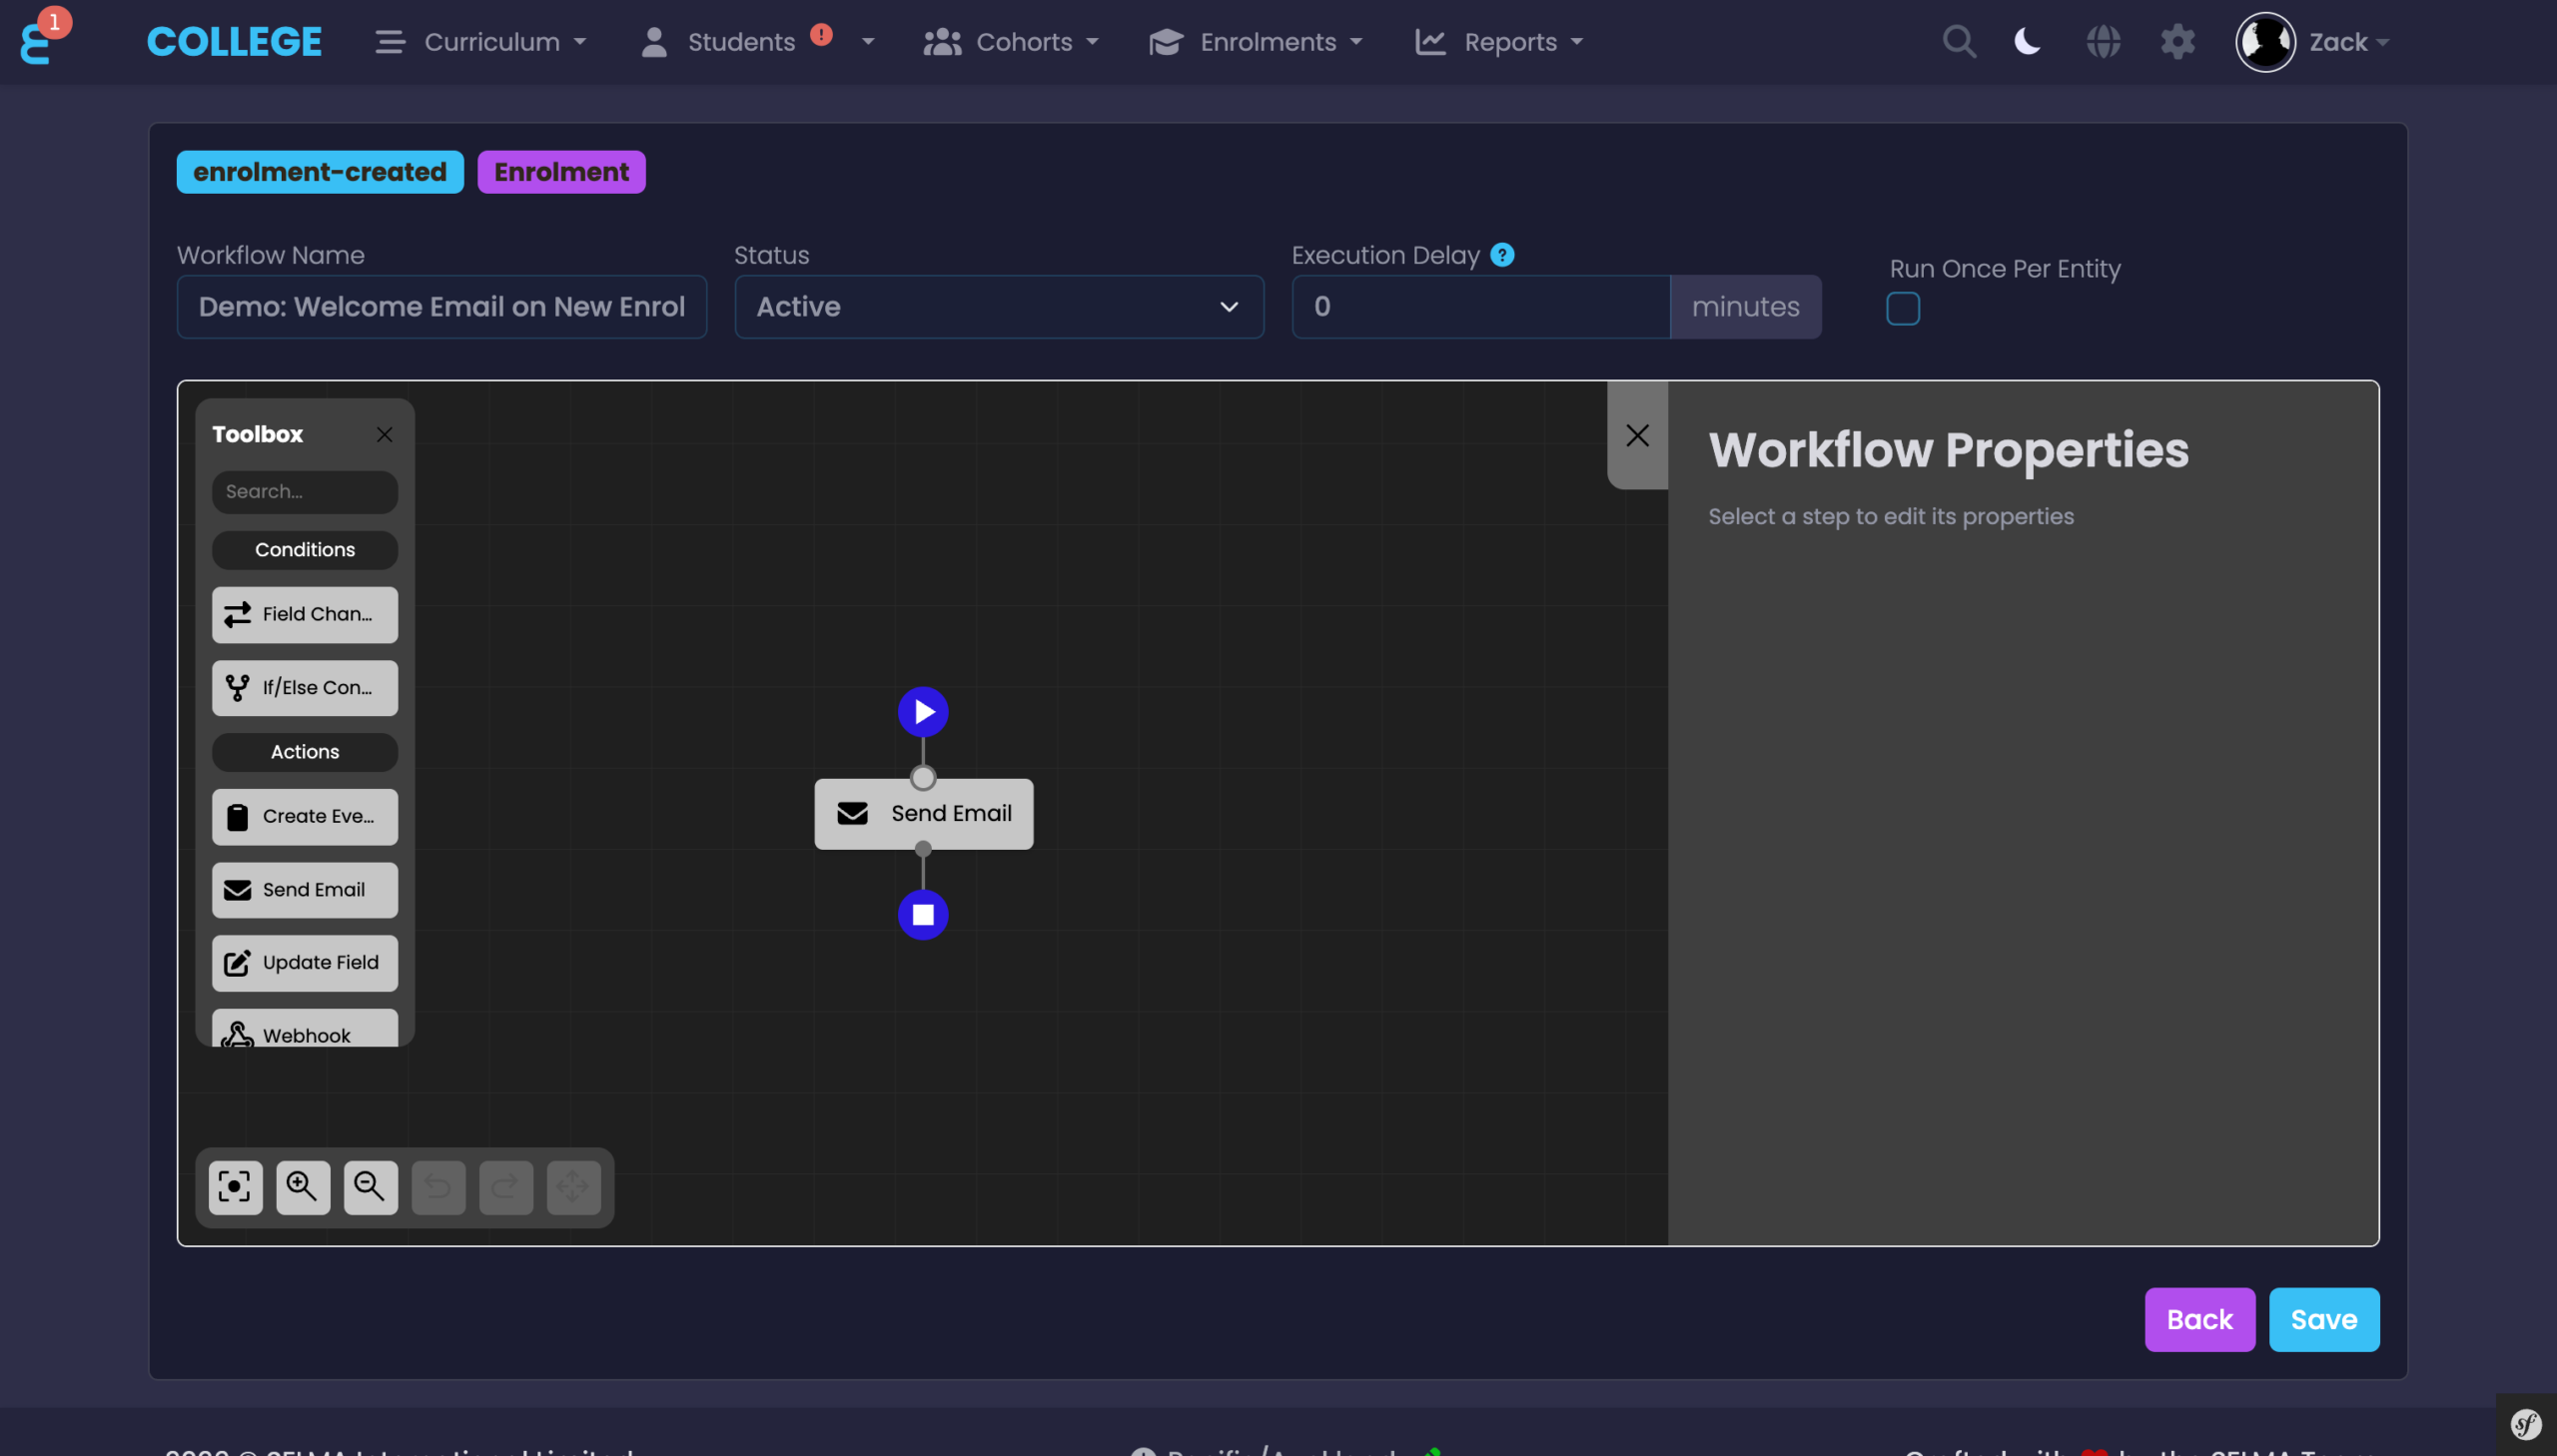
At the top of the canvas you can edit the Workflow Name, change the Status, set an Execution Delay (in minutes), and toggle Run Once Per Entity.
Conditions
Conditions allow you to add decision logic to your workflow. When a condition is evaluated, the workflow follows either the True or False branch.
If / Else Condition
The If / Else condition evaluates a field on the triggering entity against a value using an operator. Available operators include Equals, Not Equals, Greater Than, Less Than, Contains, Is Empty, and Is Not Empty.
Field Changed Condition
The Field Changed condition checks whether a specific field changed from one value to another. This is only available on “Updated” triggers which provide the changeset data.
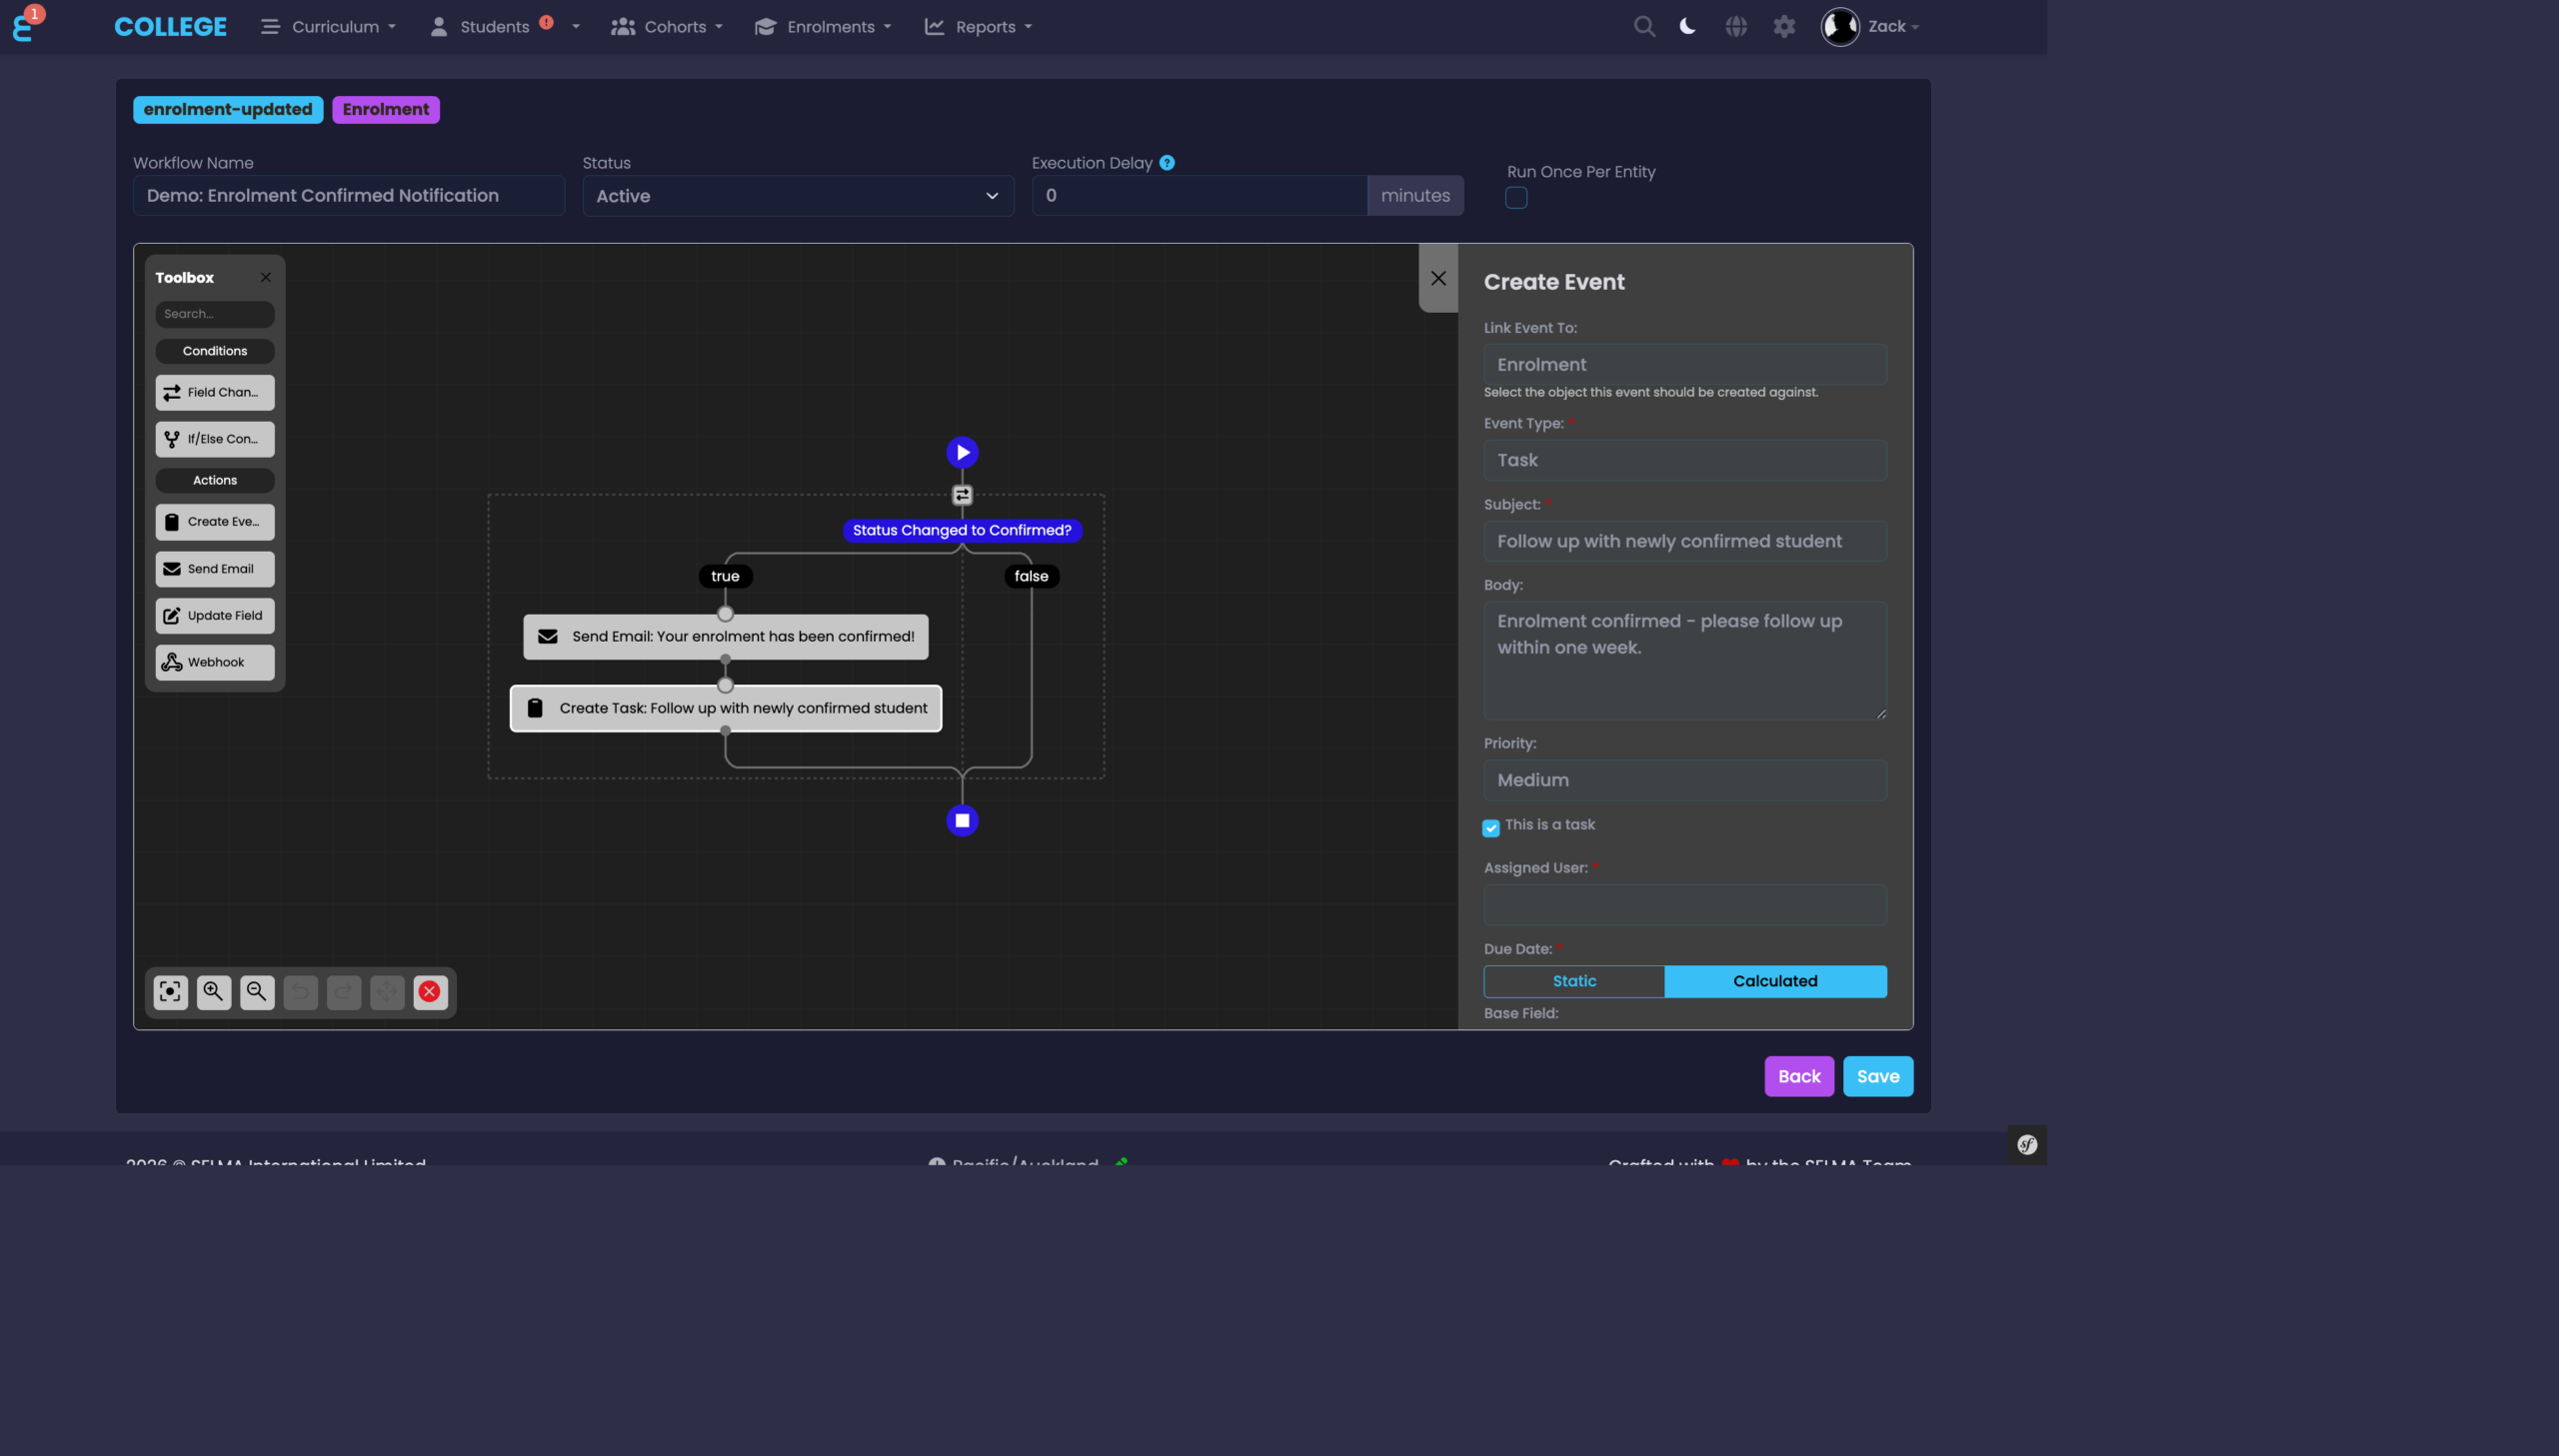
Figure 6. Condition with Branching
This example shows a workflow that checks whether the Enrolment Status changed to “Confirmed”. If True, it sends a notification email and creates a follow-up task. If False, the workflow takes no further action.
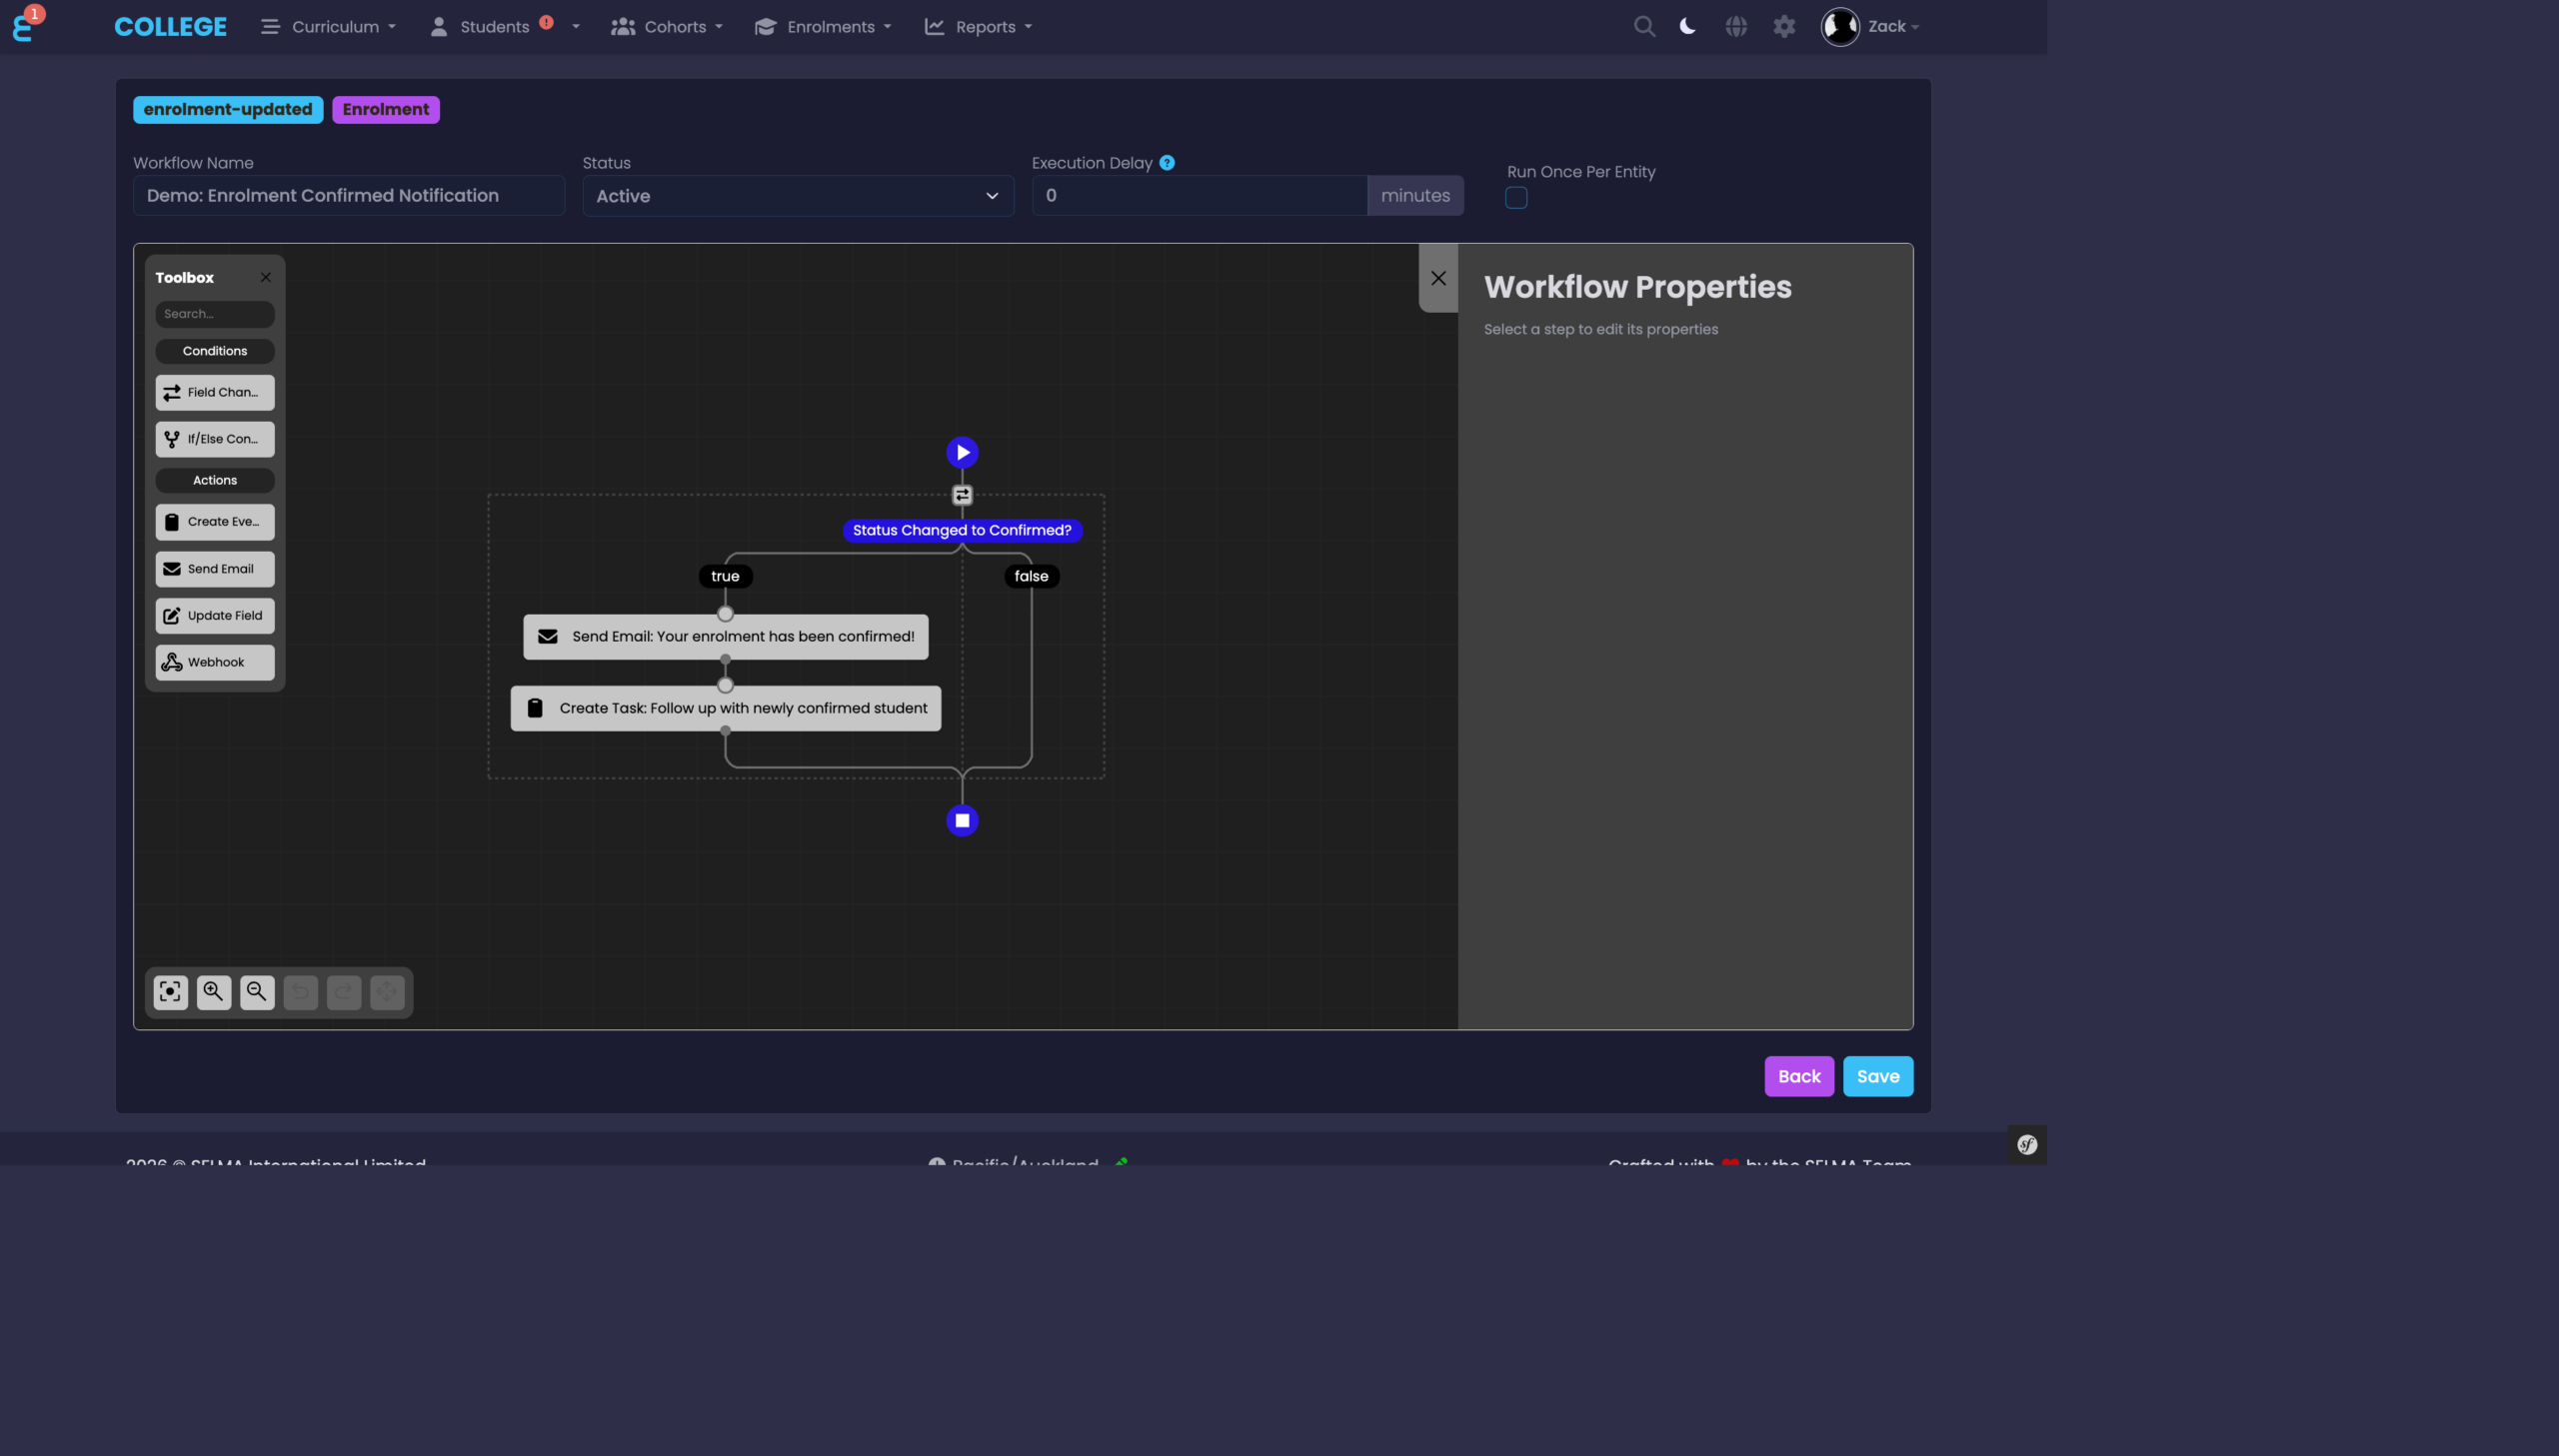
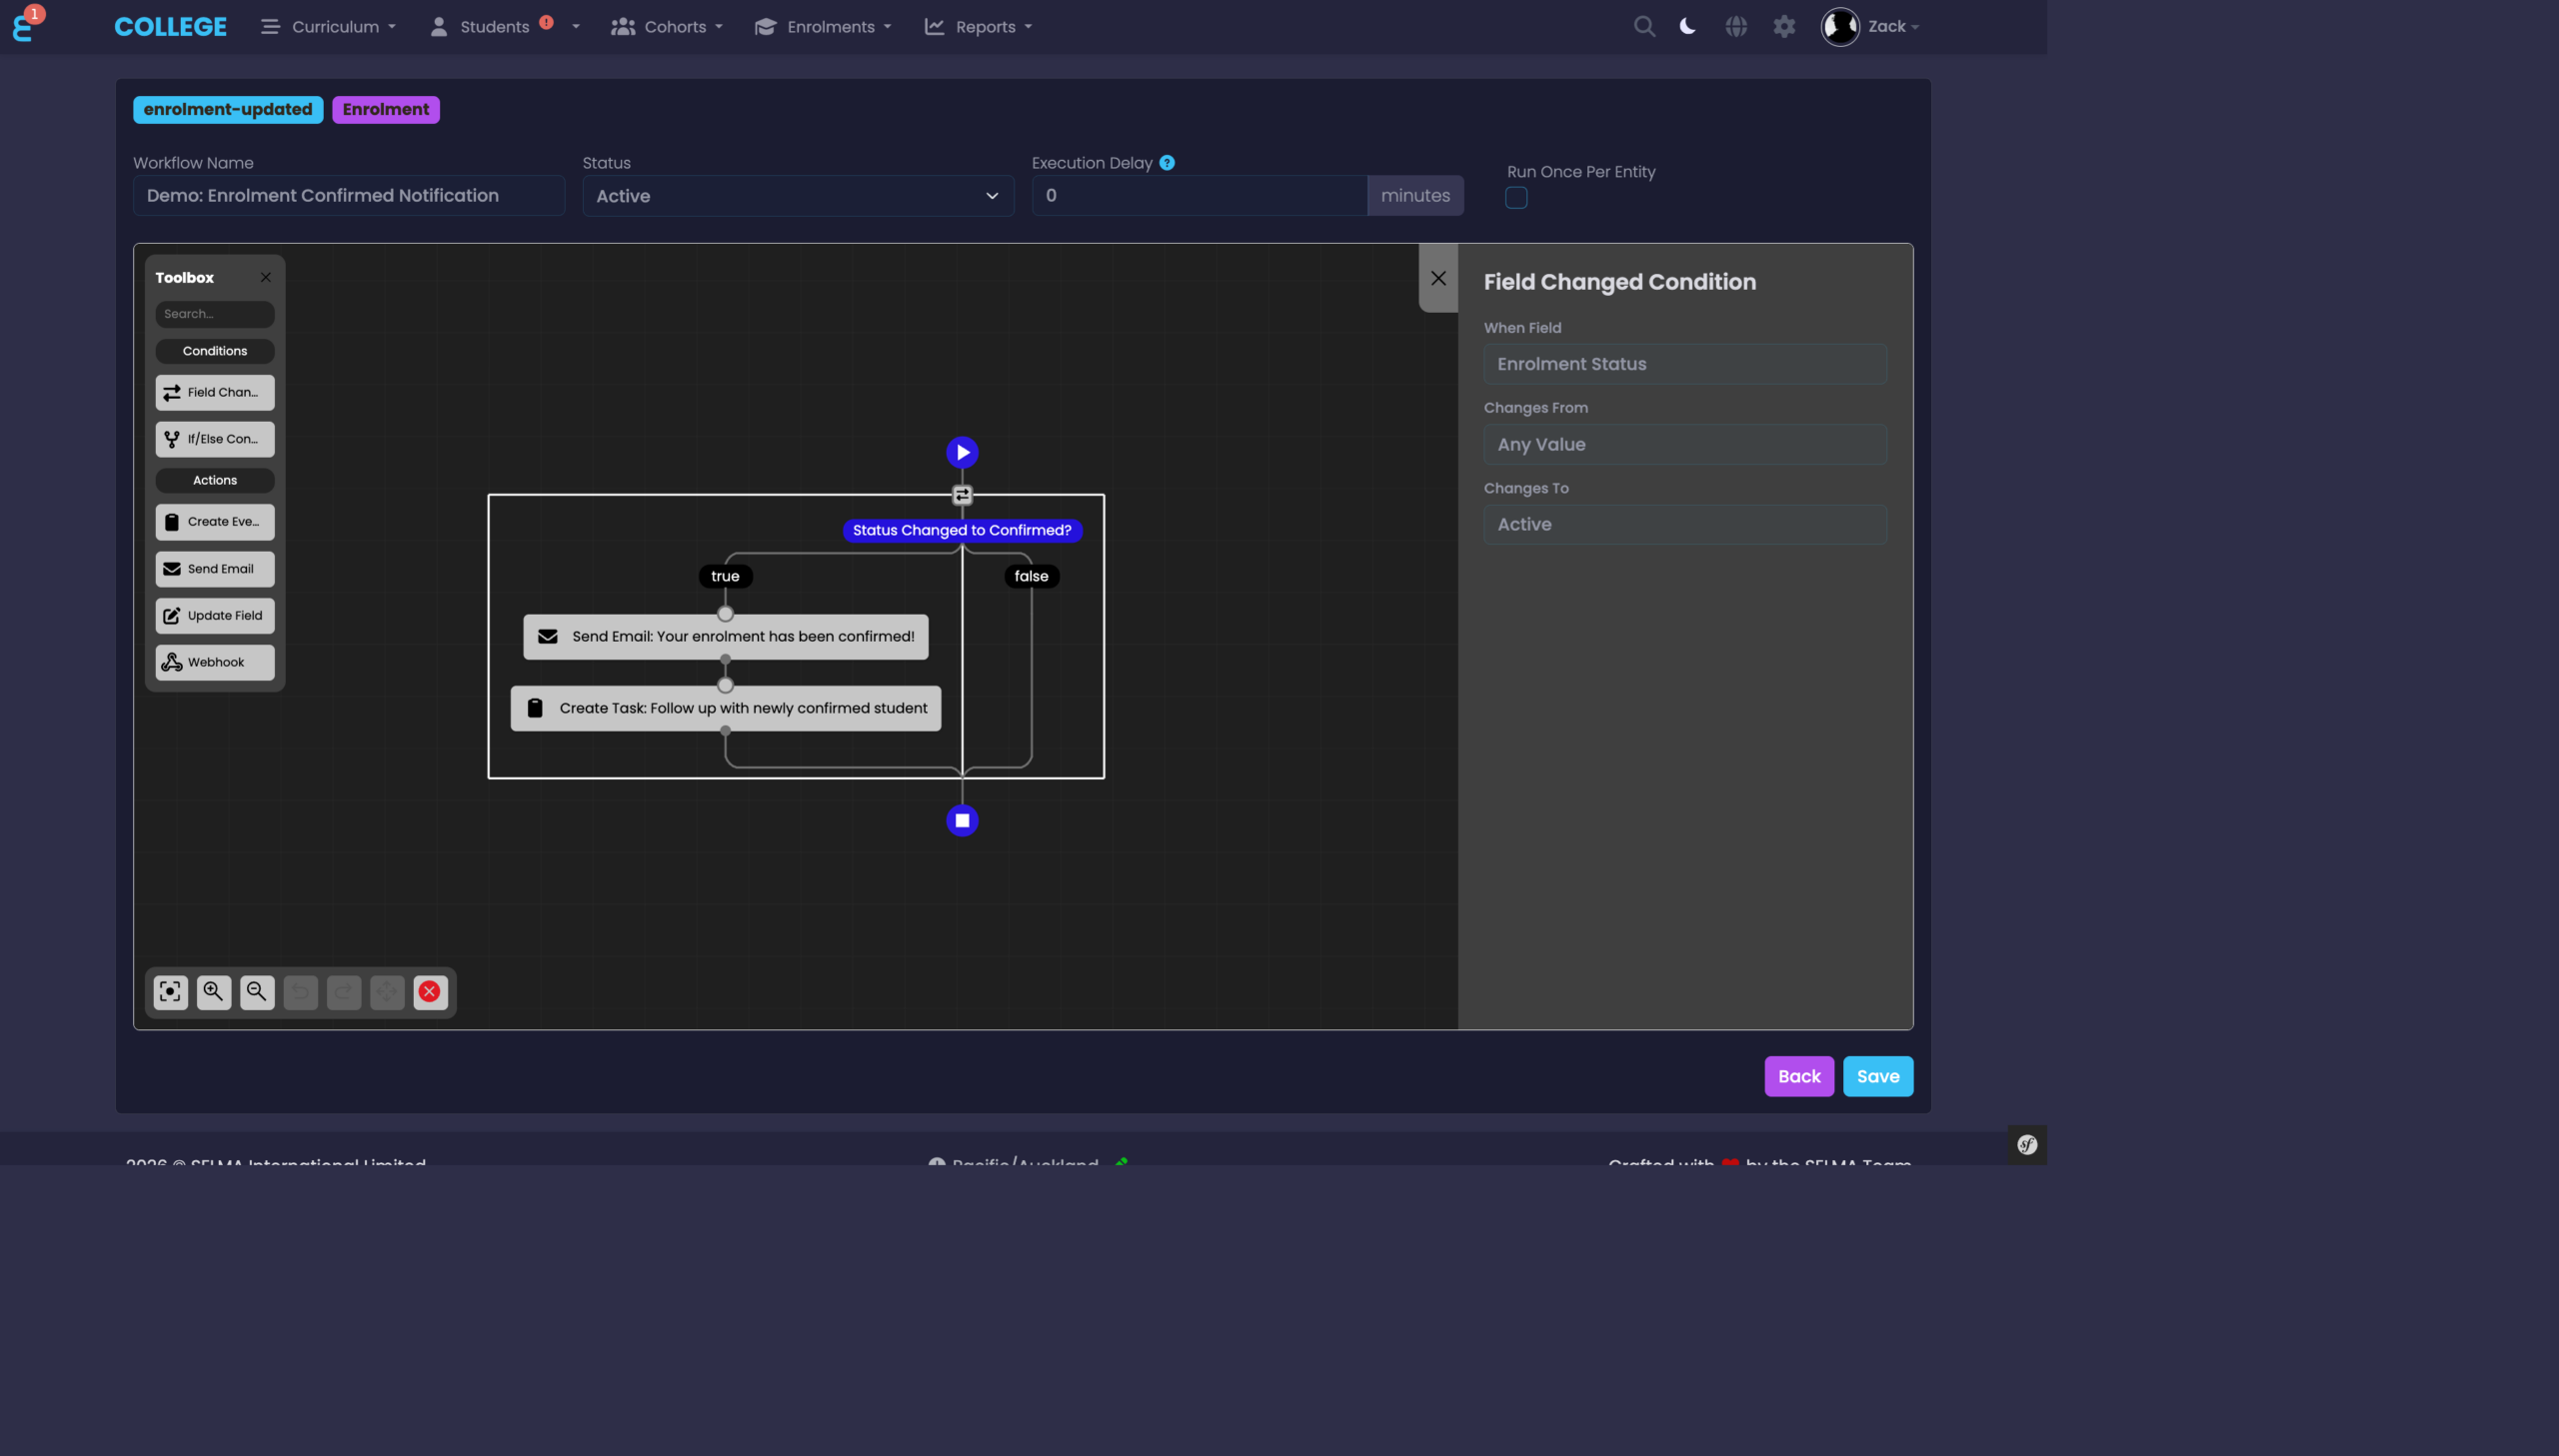
Figure 7. Field Changed Condition Properties
Select the Field to monitor, the Any Value (from), and the Changed To value. Leave the “from” value blank to match any previous value.
Actions
Actions are the steps that do something when the workflow runs. You can chain multiple actions together, and place them inside condition branches for conditional execution.
Send Email
The Send Email action sends an email to a recipient related to the triggering entity. You can choose between two modes:
- Use Template — select an existing Communication Template configured in SELMA.
- Custom Email — write a custom subject and body with merge fields (e.g.
{{firstName}},{{enrolmentStatus}}).
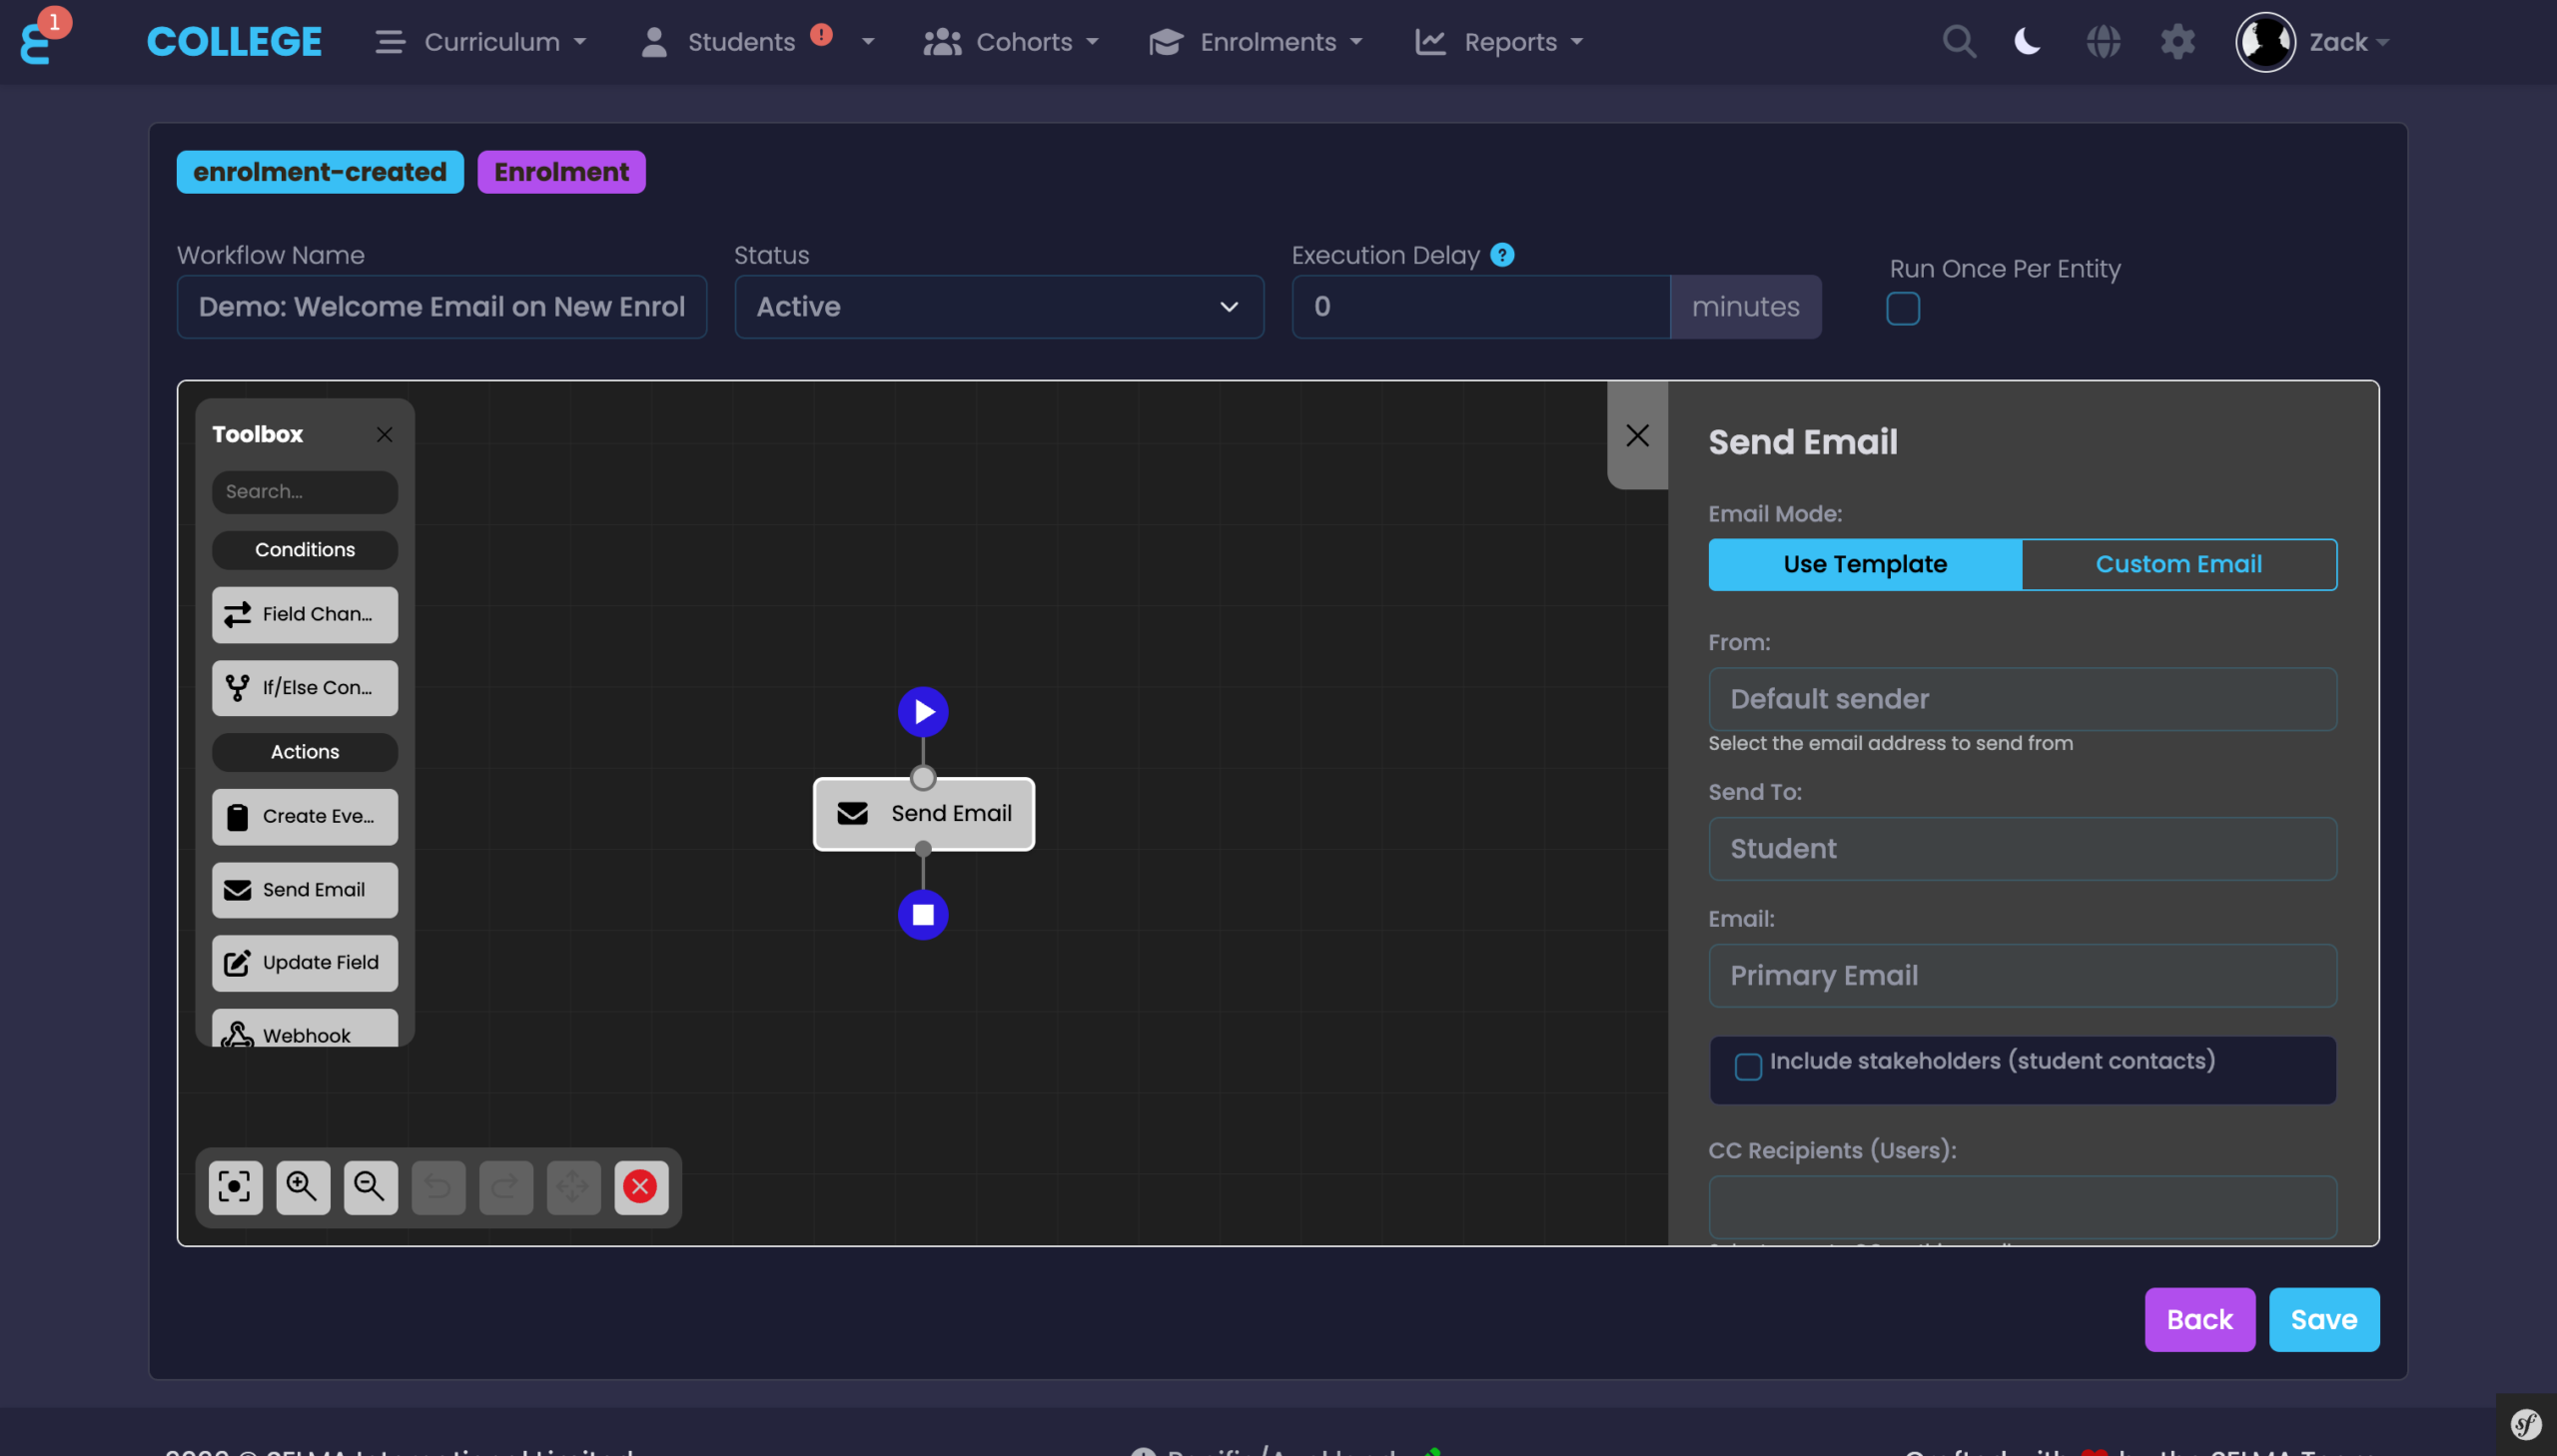
Figure 8. Send Email Properties
Configure the From address, Send To recipient, Email field, and optionally Include Stakeholders (student contacts) and CC Recipients.
Create Event / Task
The Create Event action creates an Event or Task on the triggering entity. Toggle “Task” to create a task with an Assigned User and Due Date. The due date can be set as a static date or calculated relative to a field on the entity (e.g. “2 weeks after Enrolment Start Date”).
Figure 9. Create Event / Task Properties
Update Field
The Update Field action changes a field value on the triggering entity or a related entity. Select the Field and provide the new Value. System fields (such as id, uuid, created_at) are protected and cannot be updated.
Webhook
The Webhook action sends an HTTP request to an external URL. This is useful for integrating SELMA with third-party systems such as CRMs, notification services, or custom APIs.
Figure 10. Webhook Workflow
This example shows a workflow triggered by a new Student being created. It first sends a welcome email, then notifies an external CRM via a webhook.
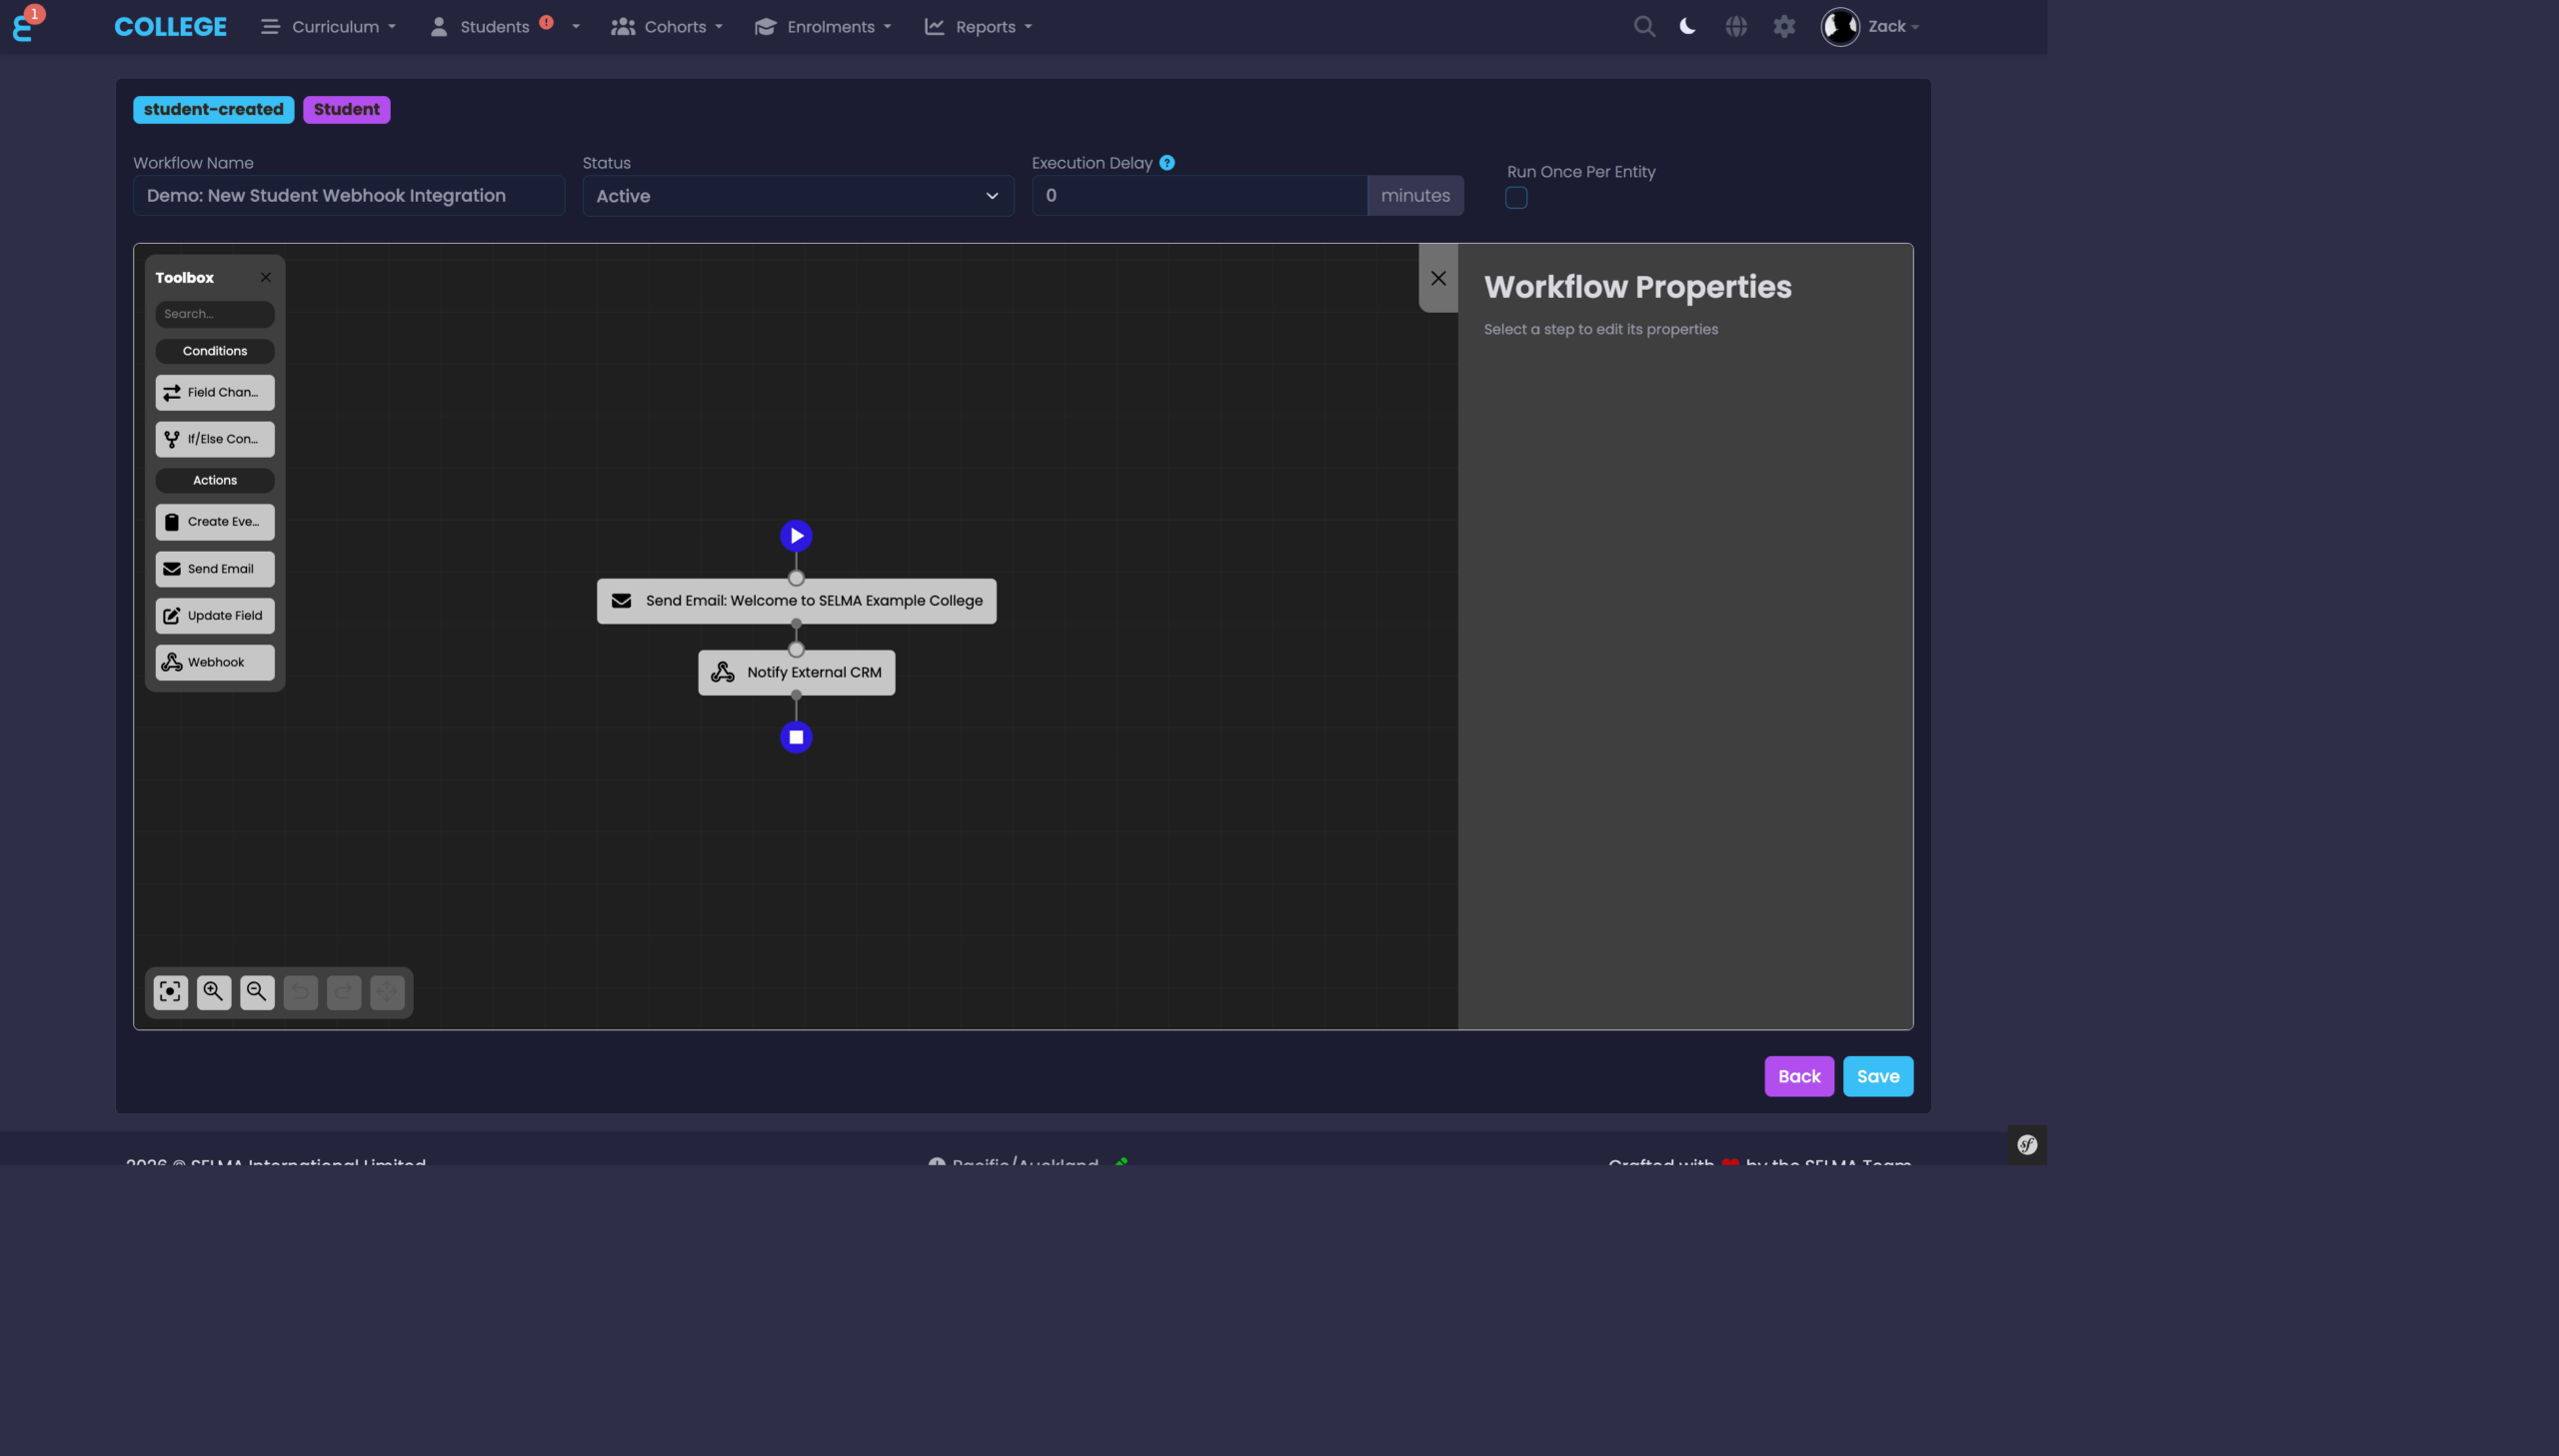
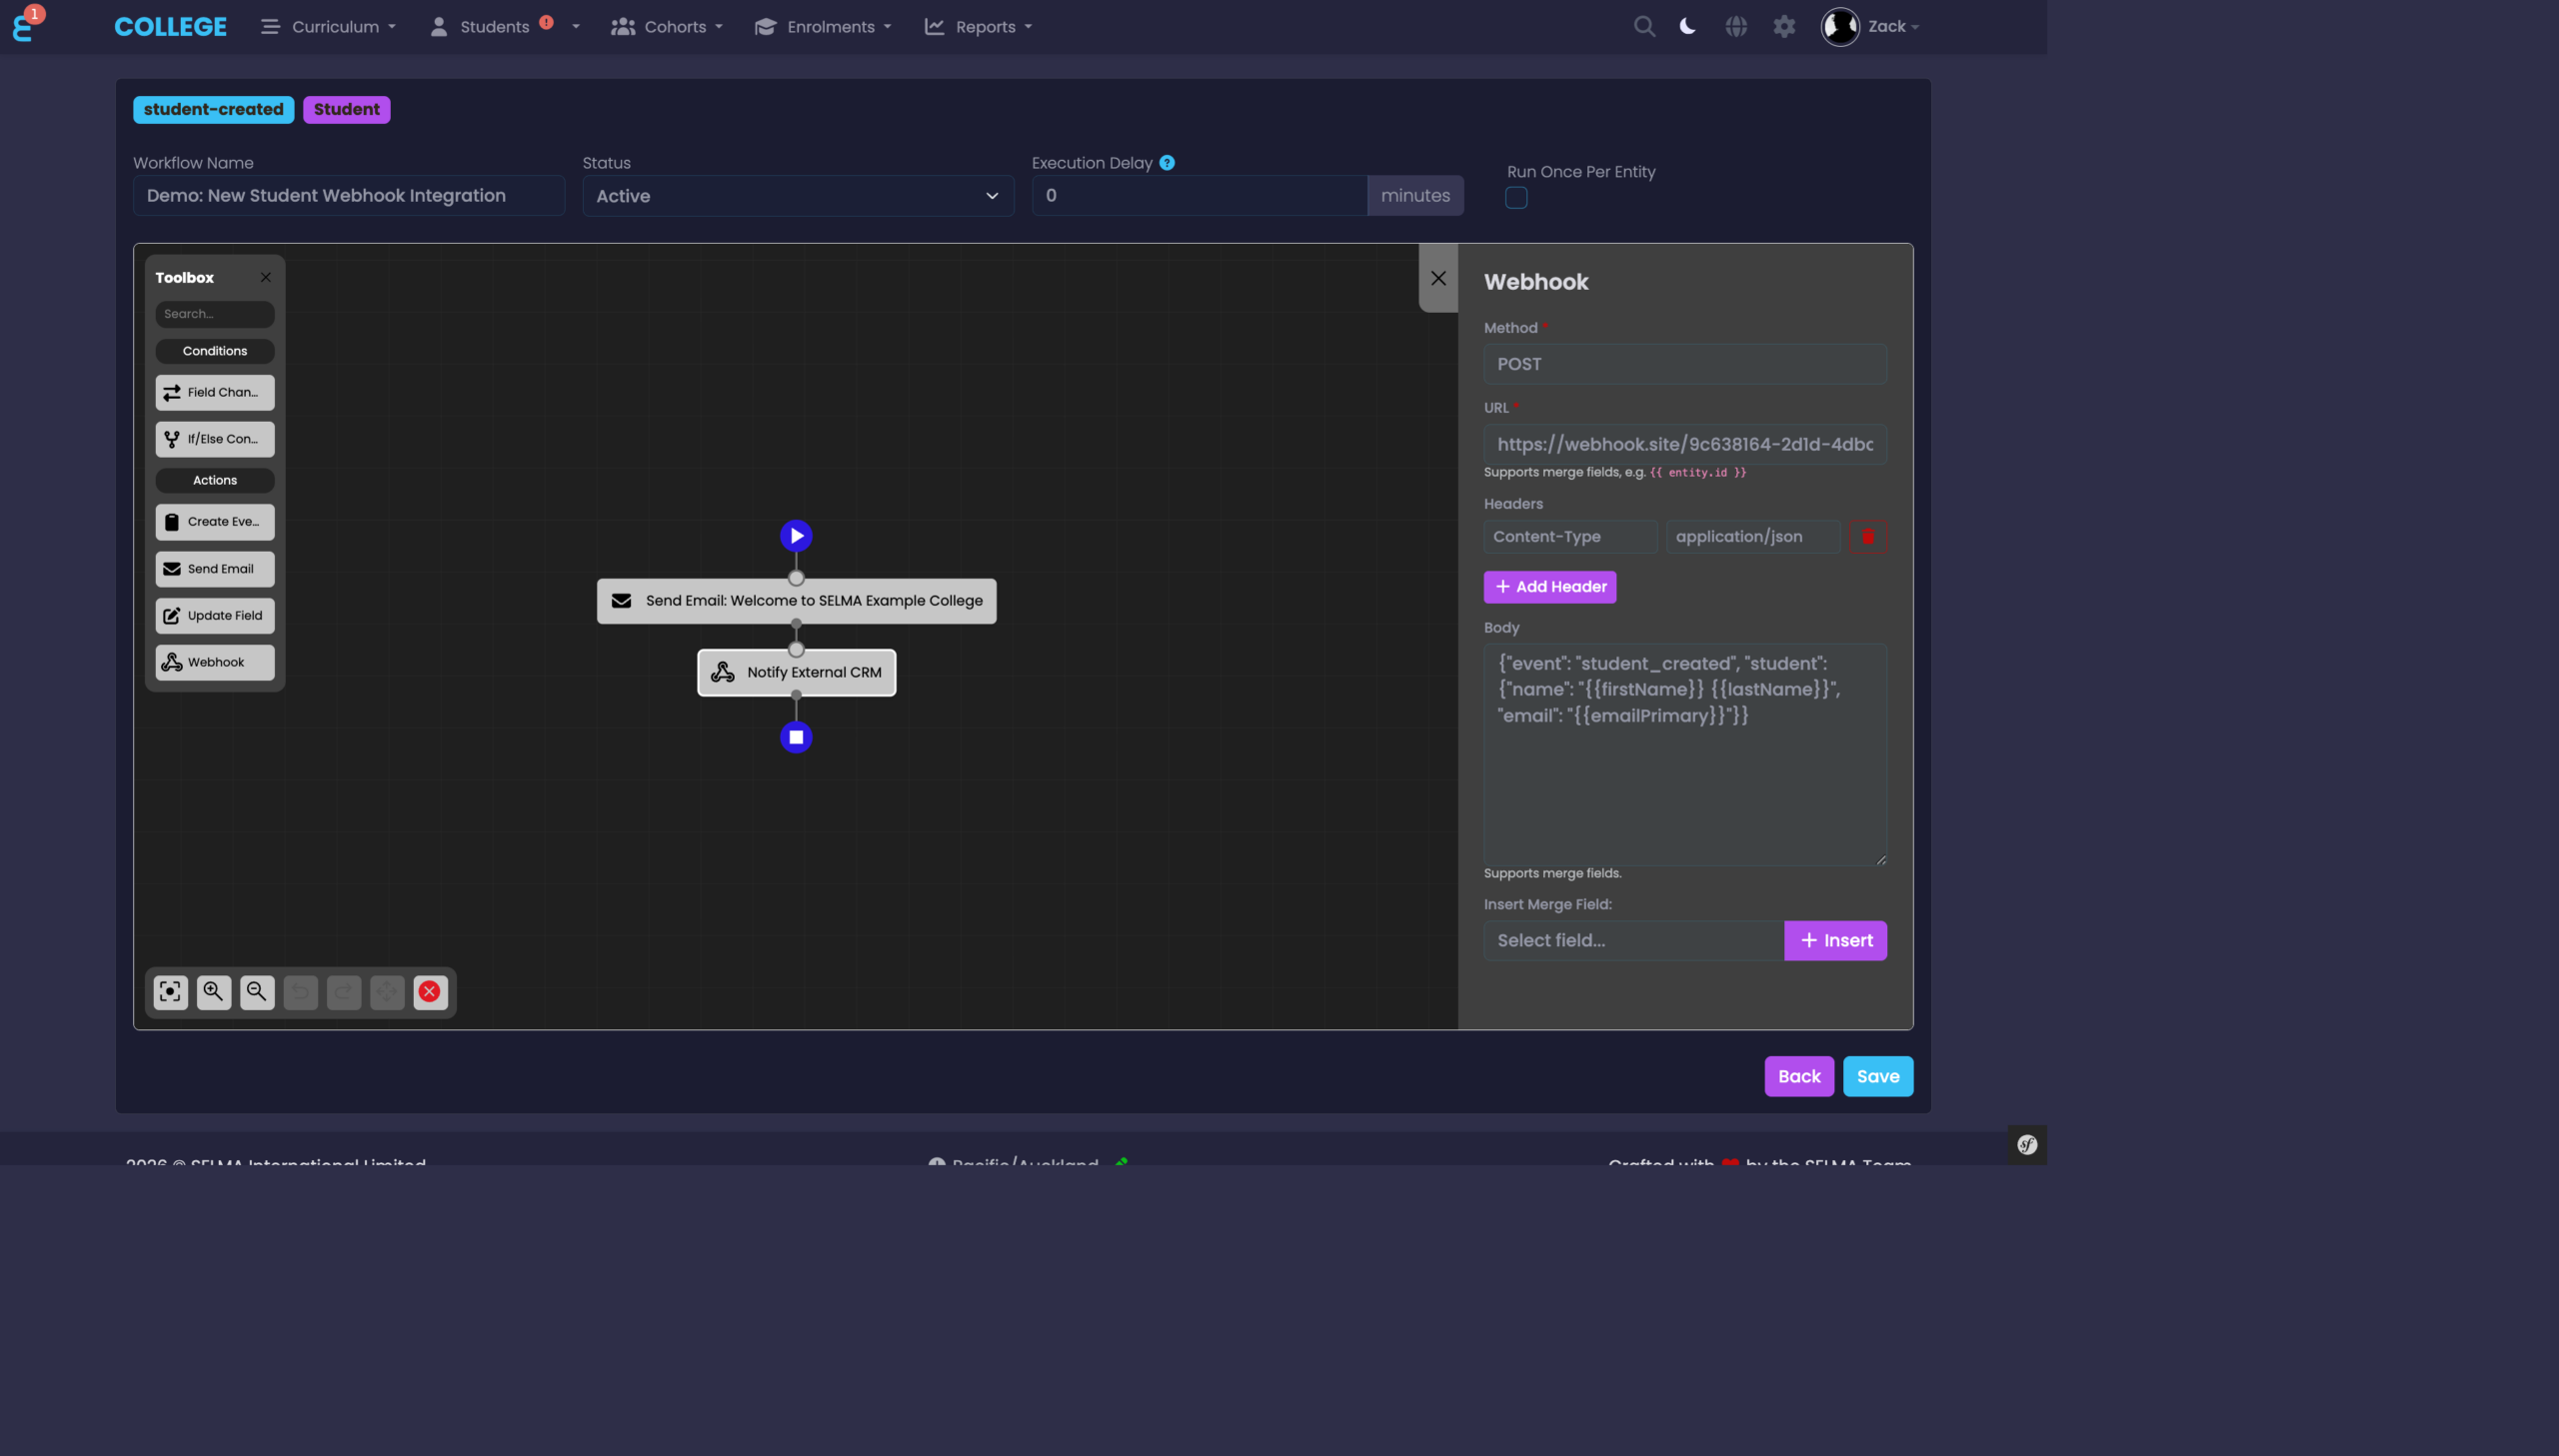
Figure 11. Webhook Properties
Configure the URL, Method (GET, POST, PUT, PATCH, DELETE), custom Headers, and the request Body. Use merge fields (e.g. {{firstName}}) in the URL, headers, and body to include entity data in the request.
Workflow Statuses
Every workflow has one of four statuses:
- Draft — the workflow is being configured and will not execute.
- Active — the workflow is live and will execute when its trigger fires.
- Paused — the workflow is temporarily disabled. It can be reactivated at any time.
- Archived — the workflow is no longer in use. It can be restored if needed.
You can change the status from the Status dropdown at the top of the designer canvas, then click “Save”.
Run Once Per Entity
Enable “Run Once Per Entity” to ensure the workflow only executes once for each record. For example, if you have a welcome email workflow triggered by a Student being updated, enabling this option prevents the email from being sent every time the Student record is saved — it will only send the first time.
This setting is available as a checkbox at the top of the designer canvas.
Best Practices & Tips
- Start in Draft — always build and test your workflow in Draft status before setting it to Active.
- Use descriptive names — name your workflows clearly so other users can understand their purpose at a glance (e.g. “Welcome Email — New Students” rather than “Workflow 1”).
- Use conditions to narrow scope — on “Updated” triggers, always add a Field Changed condition to avoid the workflow running on every save.
- Use Run Once Per Entity — enable this for one-time actions like welcome emails to prevent duplicates.
- Use Execution Delay — add a delay (in minutes) if you want the workflow to wait before executing. This can be useful to allow related data to be completed before the workflow runs.
- Test webhooks carefully — ensure your external endpoint is reachable and returns a success status code (2xx). Webhook URLs pointing to internal or private network addresses are blocked for security.
- Use Communication Templates — where possible, use existing templates rather than custom emails. Templates are easier to maintain and can include merge fields configured by your team.