In this Section:
Adding Fees to the Fees Tab
Fees added to a Programme or Component are propagated to the corresponding Intakes and Enrolments, sequentially.
However, you can add fees directly to the Intake and Enrolment, too.
- Note: The process to add fees to Objects (Programme, Component, Intake and Enrolment), is identical.
- The Search Panel features across all Object Indices (see Figure a.).
Figure a. Search Panel
Use the Basic Search and/or the Advanced Search features to navigate an Index quickly.

Programme
Figure 1i. Navigate to Curriculum > Curriculum Index
Select a Programme from the Programme Index.
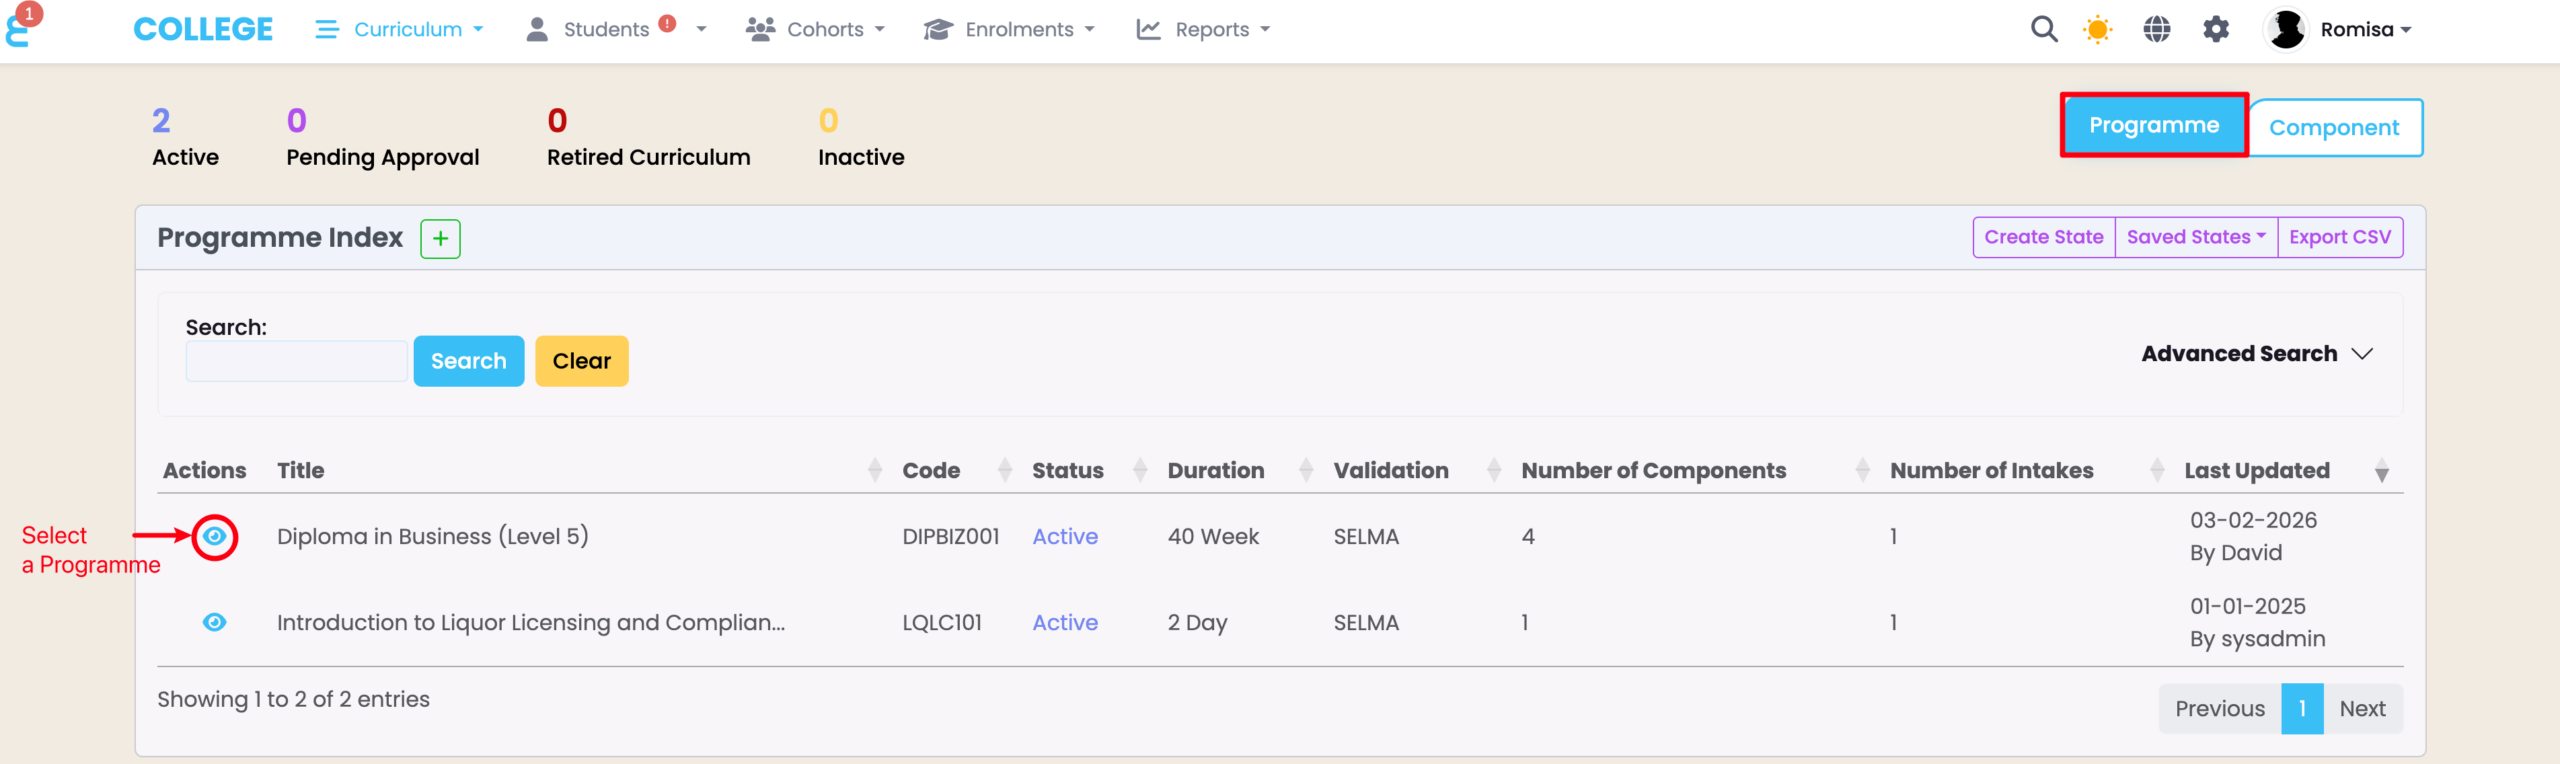
Figure 1ii. Click the “+Add” Button on the Fees Tab
On the Fees tab, click the “+Add” button.
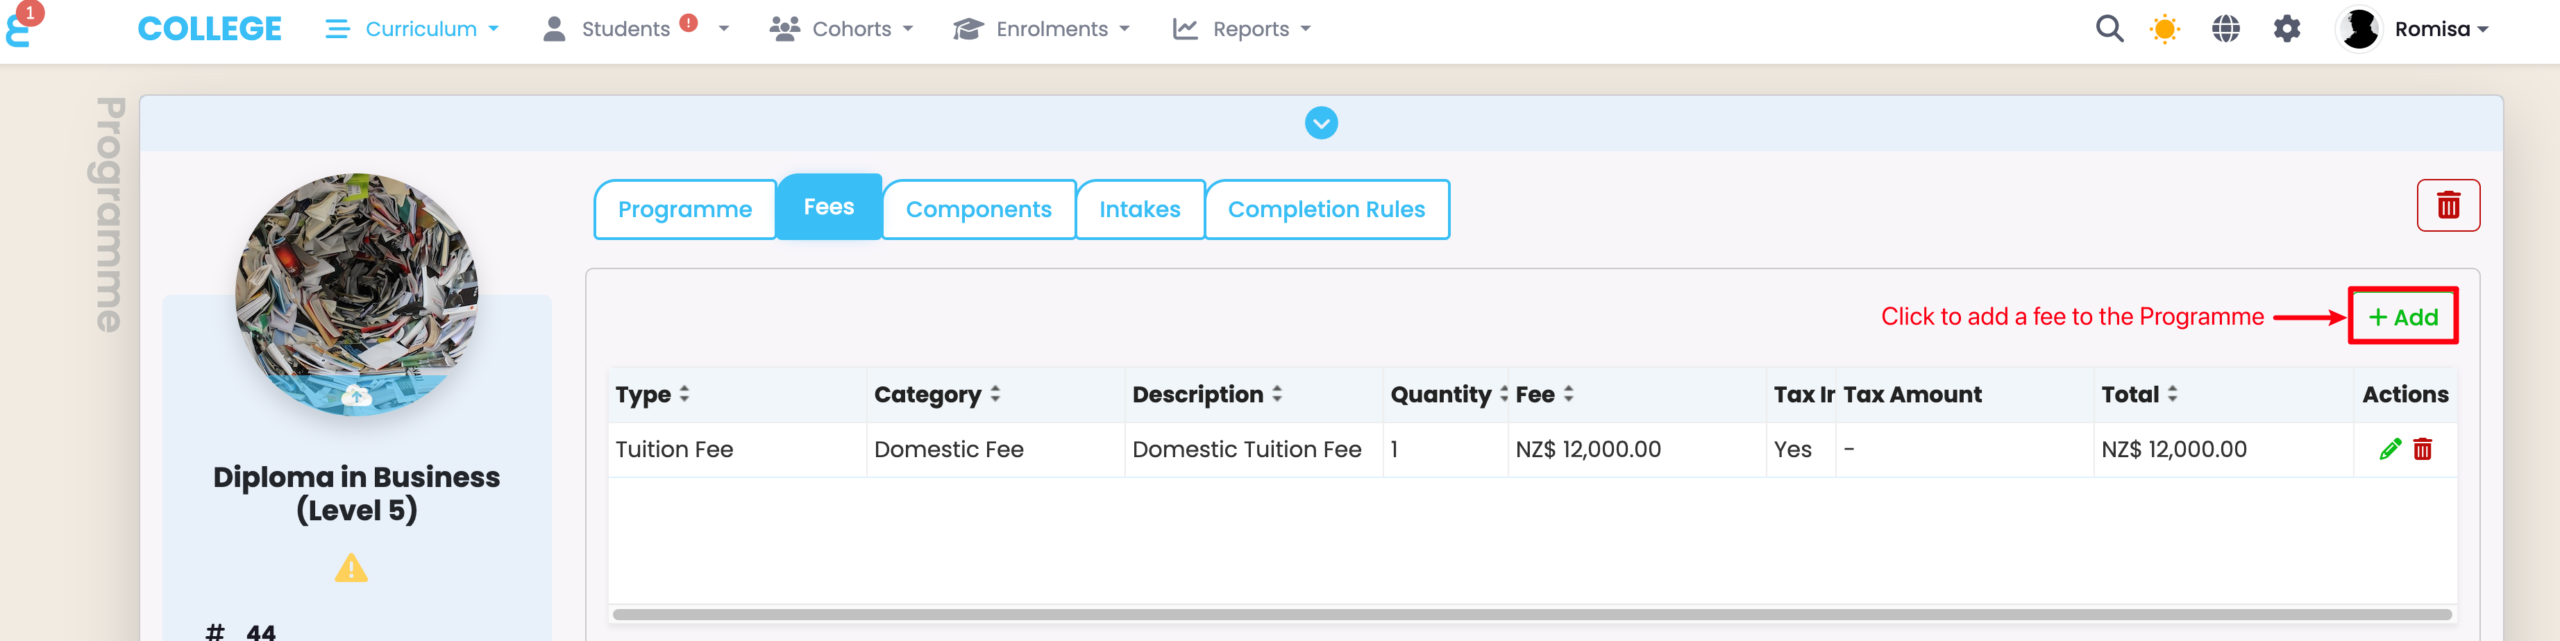
Figure 1iii. Provide Required Details and Save
Provide the necessary details, as indicated by red asterisks. Please also note that you can apply a tax rate against the specified fee amount. This is set as 15% by default, but you can edit the percentage number (Settings > Account). Fee type and category also have default options, but you can add other custom values (Settings > Lookup Data).
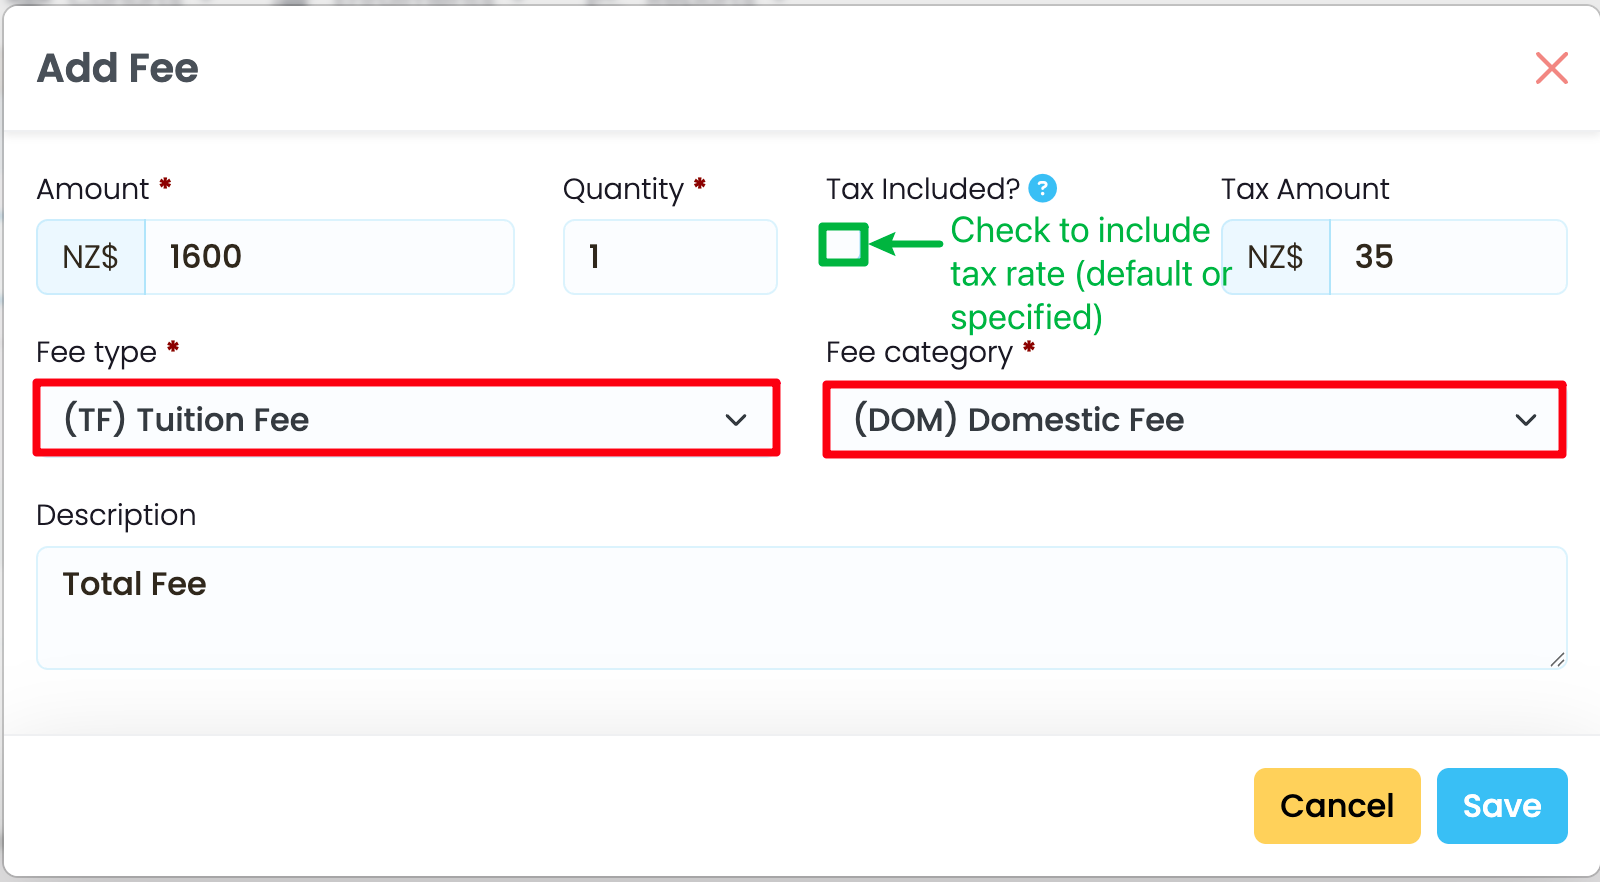
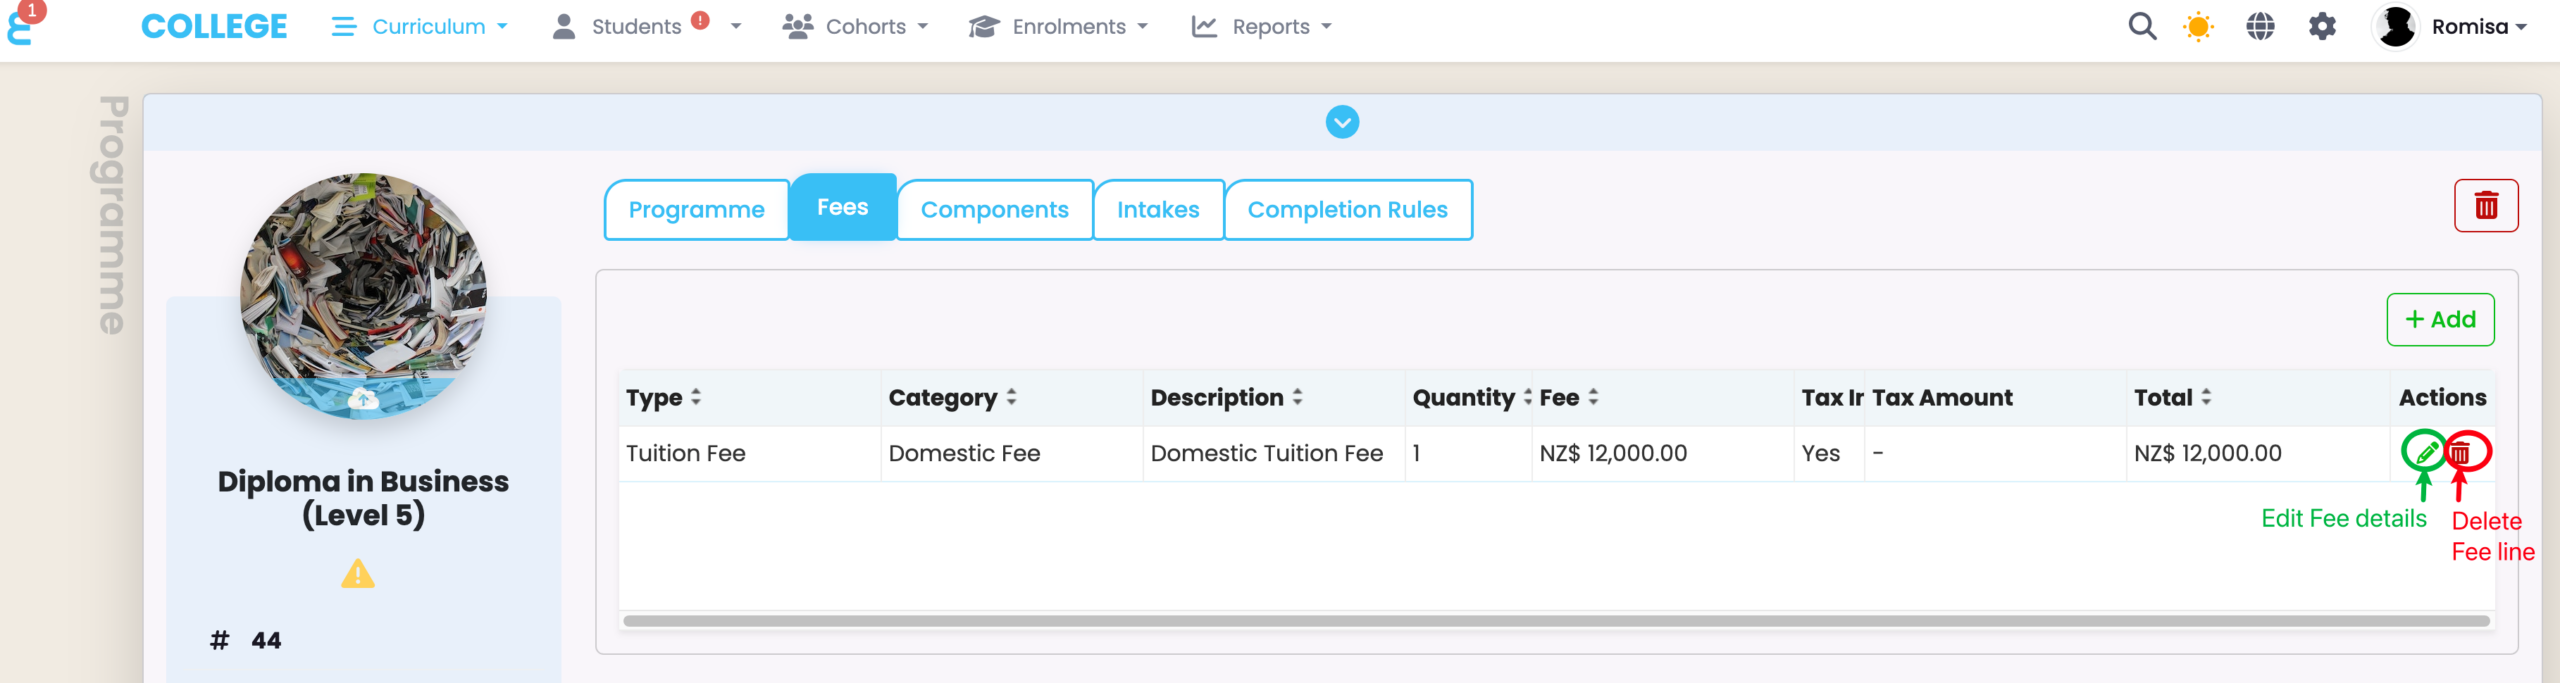
Figure 1iv. View Programme Fee Lines
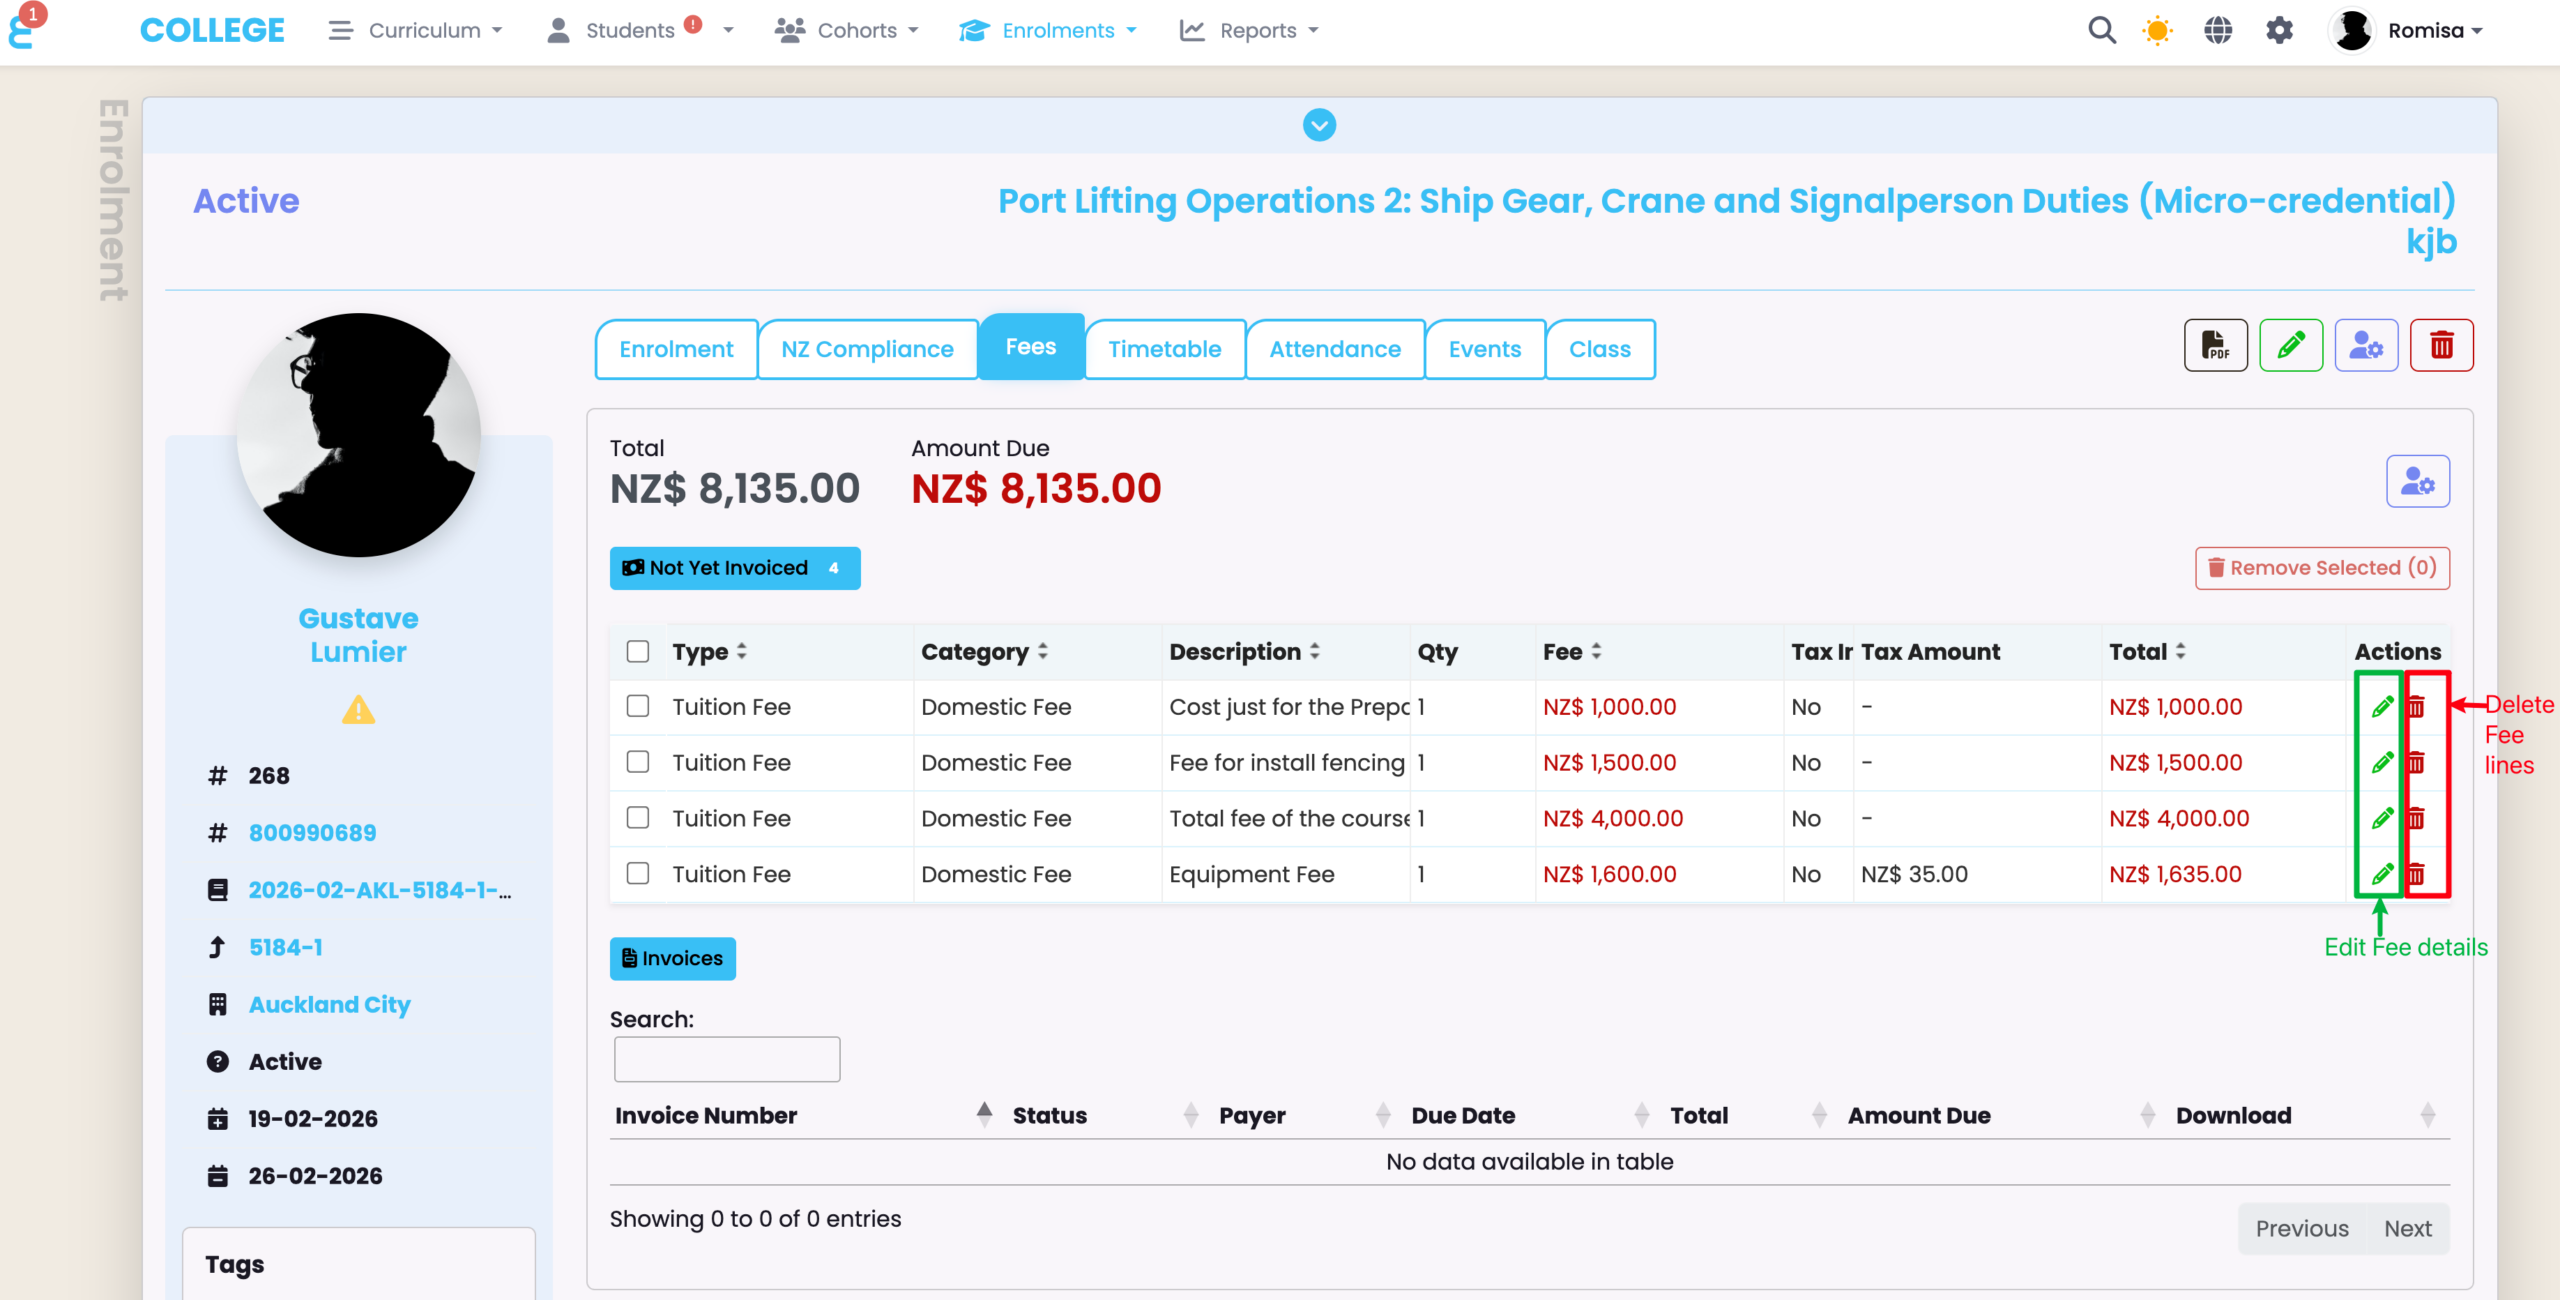
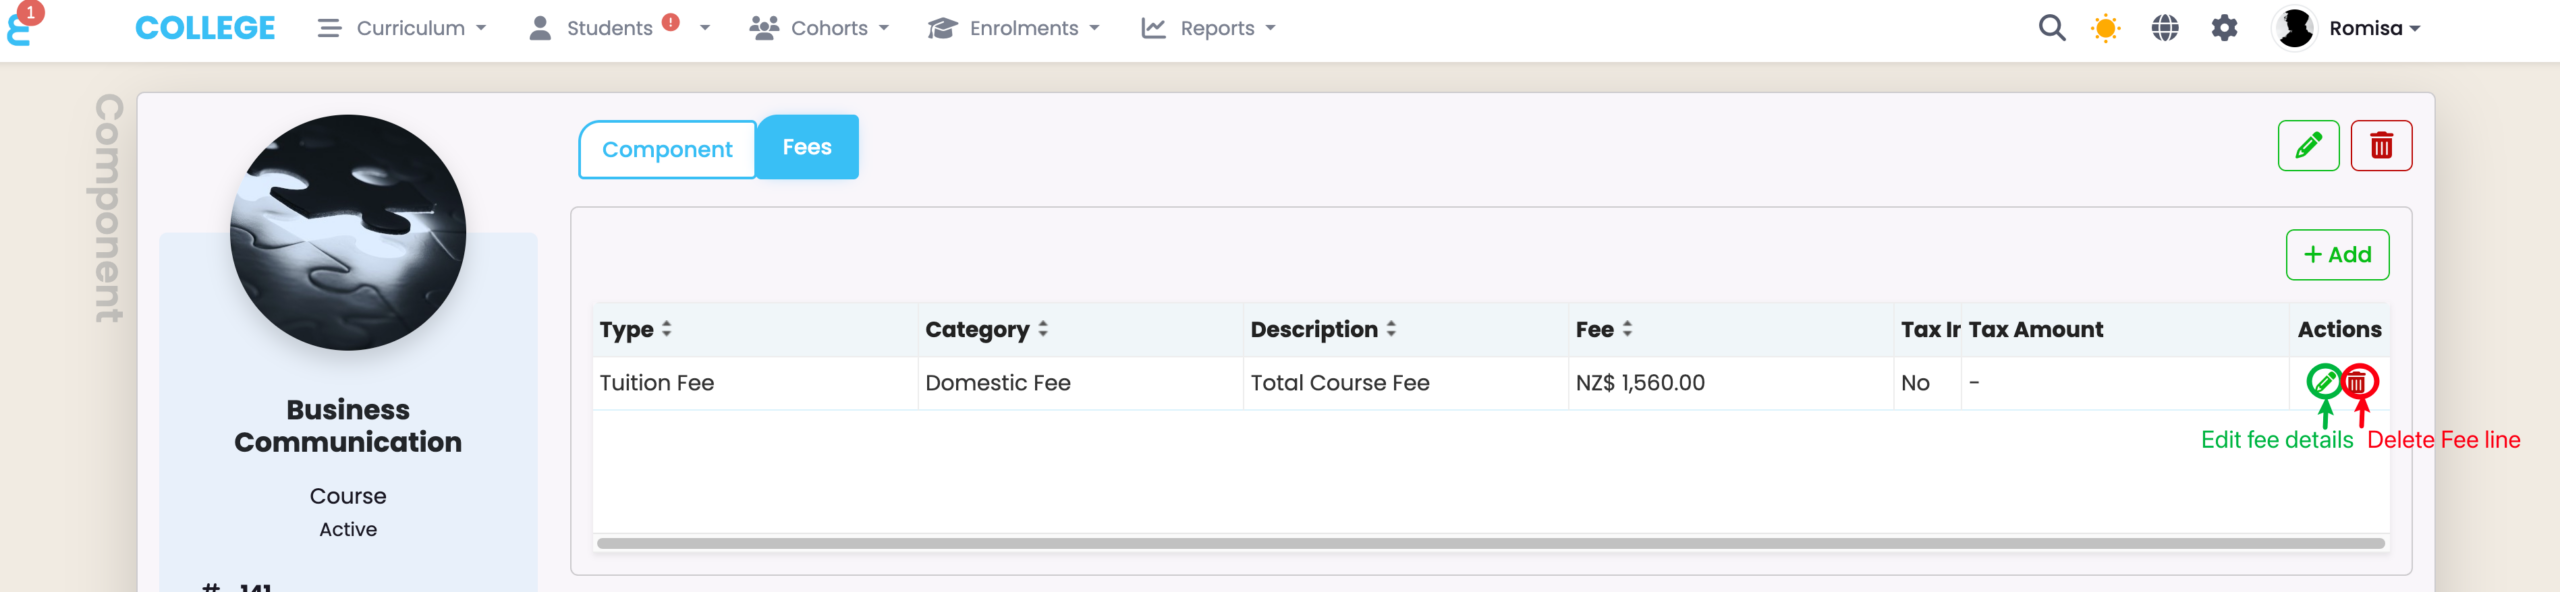
Edit Fee details and delete Fee lines added to the Fees tab.
Component
Figure 2i. Navigate to Curriculum > Curriculum Index
Select a Component from the Component Index.
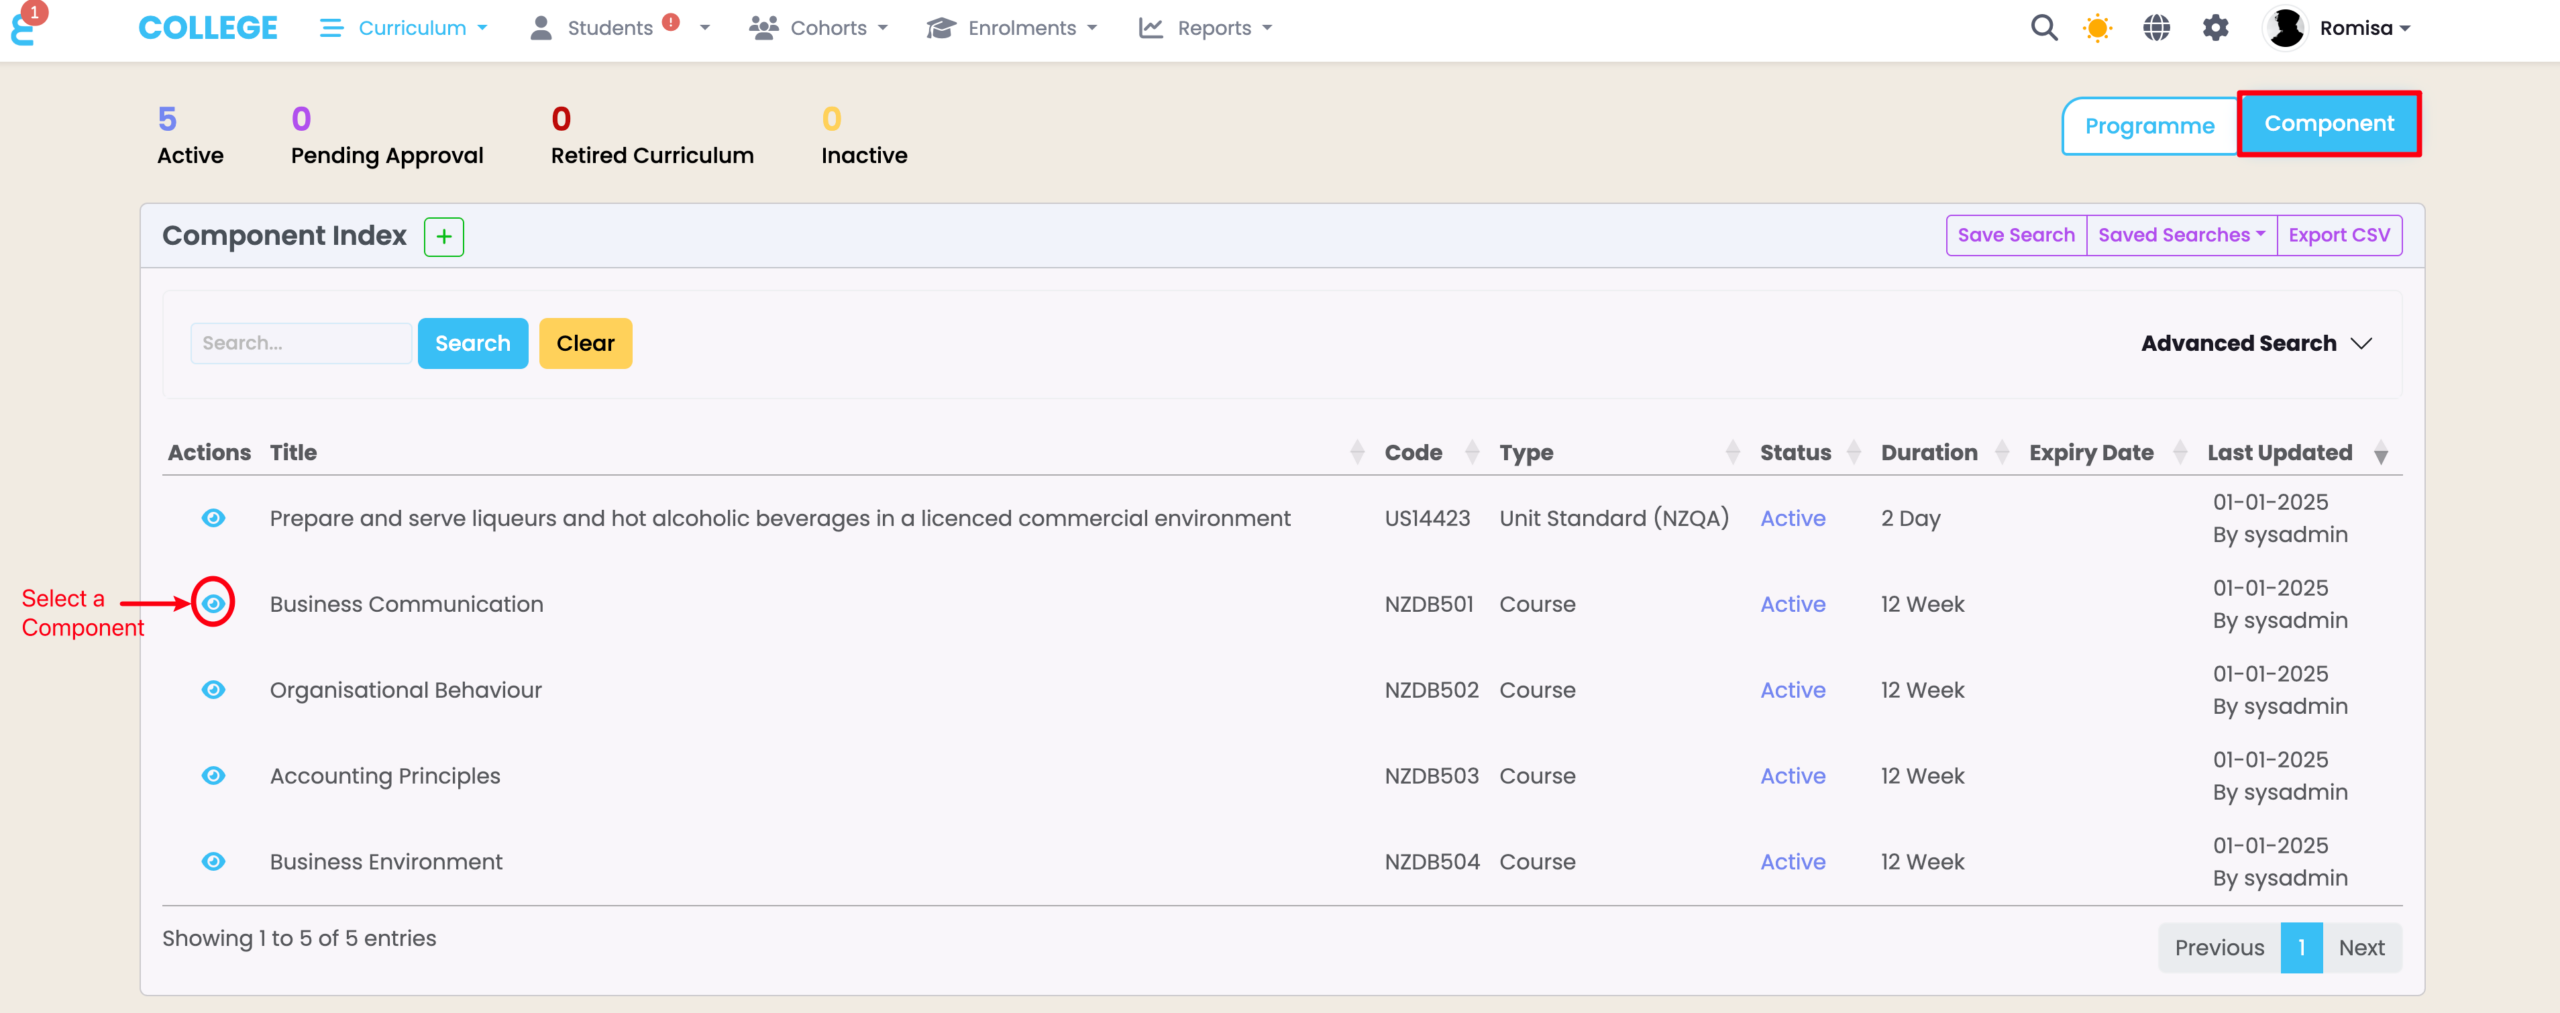
Figure 2ii. Click the “+Add” Button on the Fees Tab
On the Fees tab, click the “+Add” button.
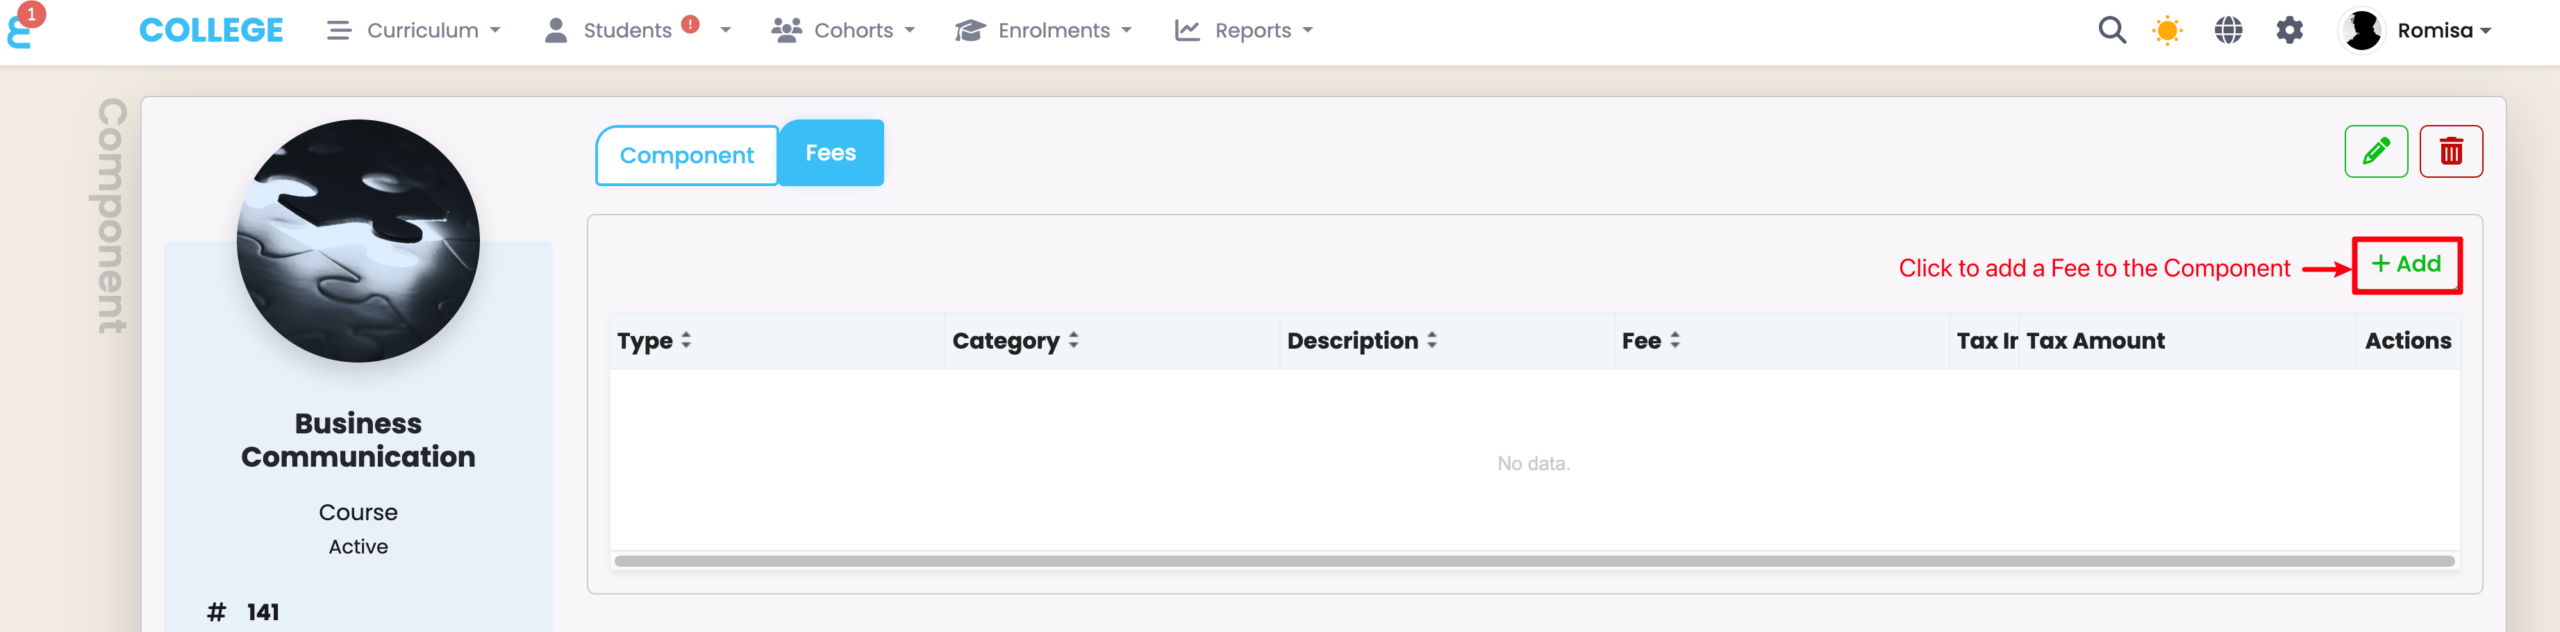
Figure 2iii. Provide Required Details and Save
Provide the necessary details, as indicated by red asterisks. Please also note that you can apply a tax rate against the specified fee amount. This is set as 15% by default, but you can edit the percentage number (Settings > Account). Fee type and category also have default options, but you can add other custom values (Settings > Lookup Data).
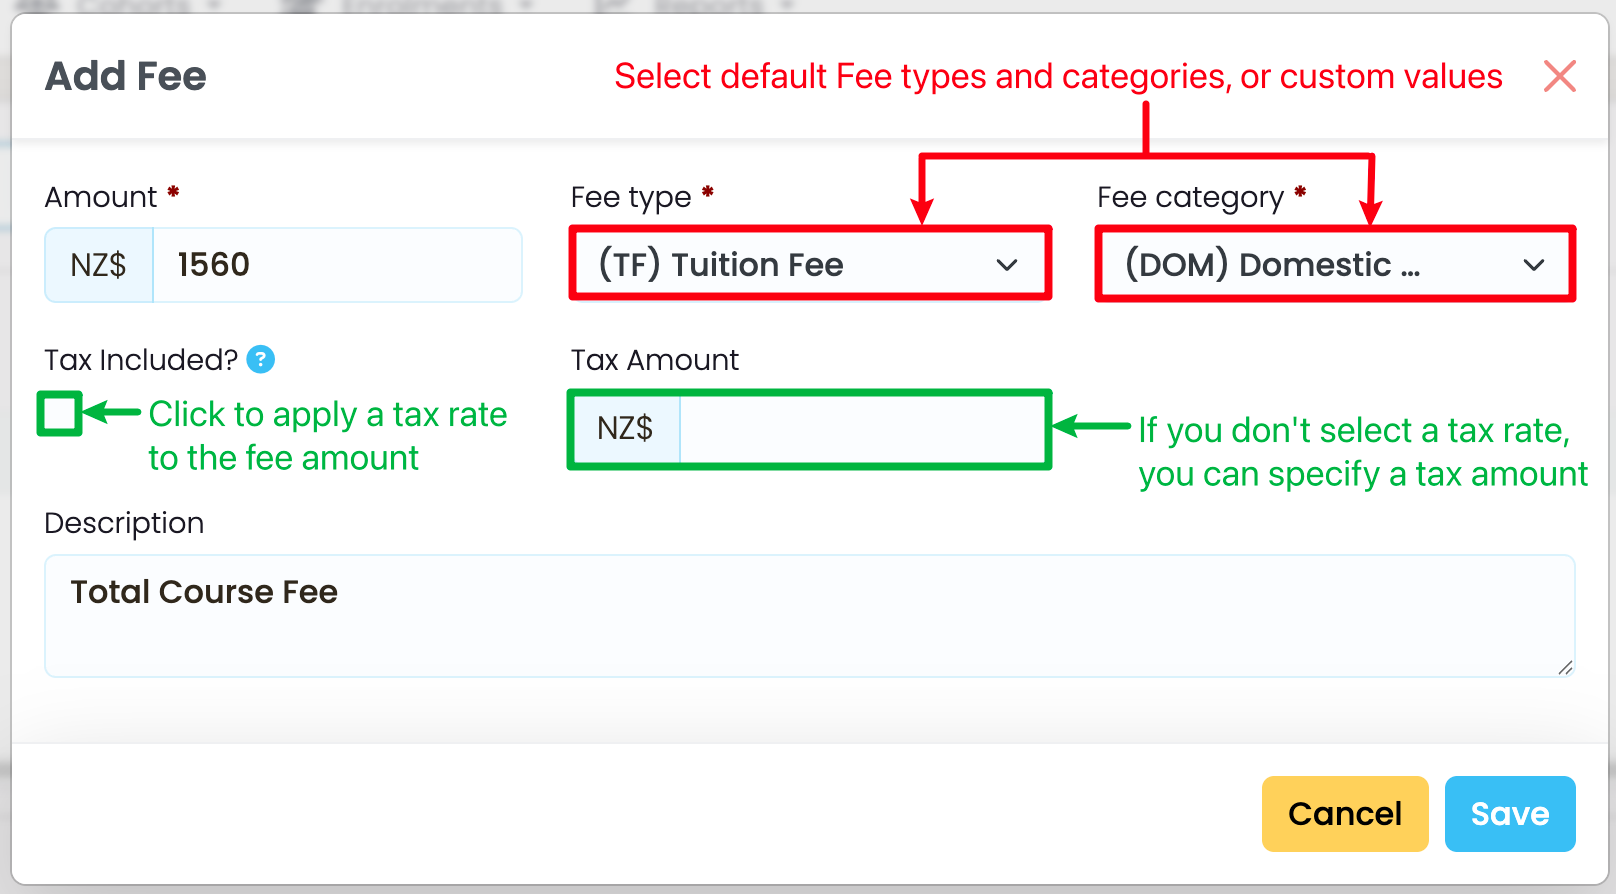
Figure 2iv. View Component Fee Lines
Intake
Figure 3i. Navigate to Cohorts > Intake Index
Select an Intake from the Intake Index (red). Use the Basic Search or Advanced Search (orange) to quickly filter the index.
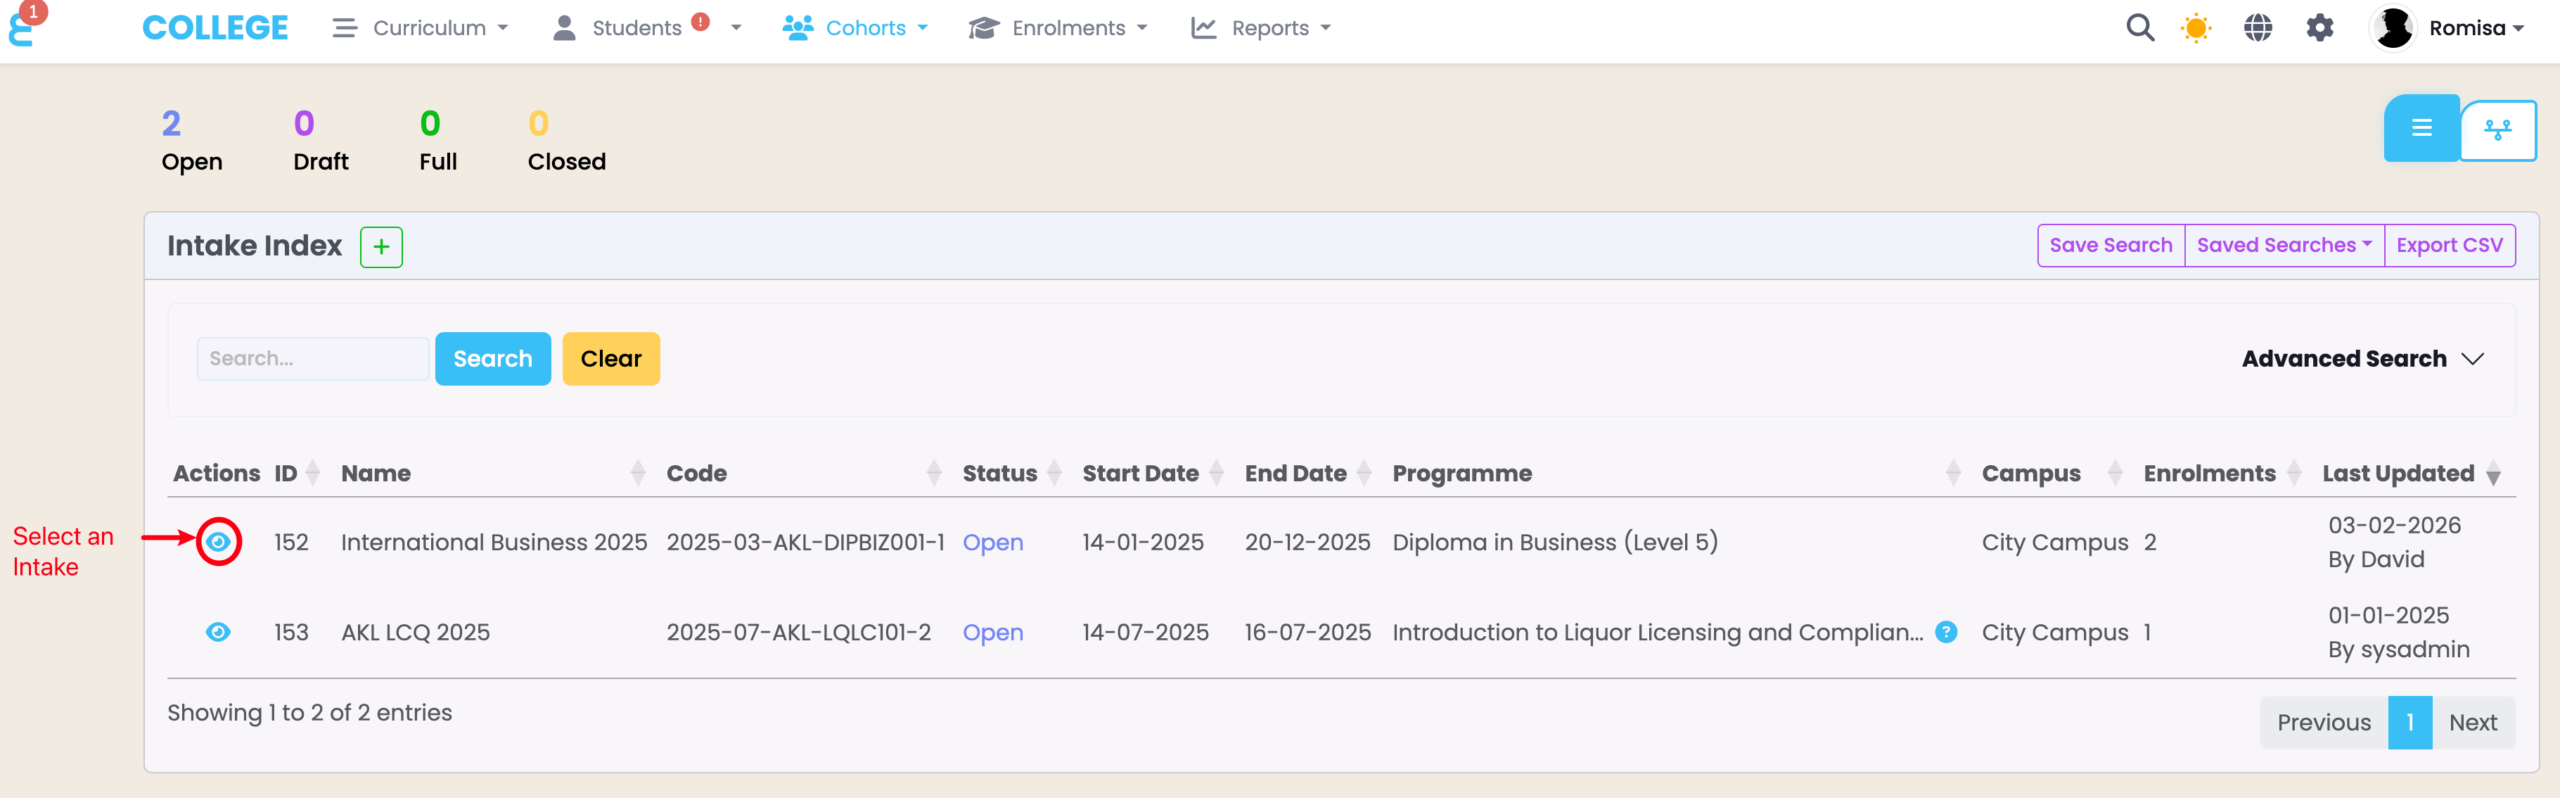
Figure 3ii. Click the “+Add” Button on the Fees Tab
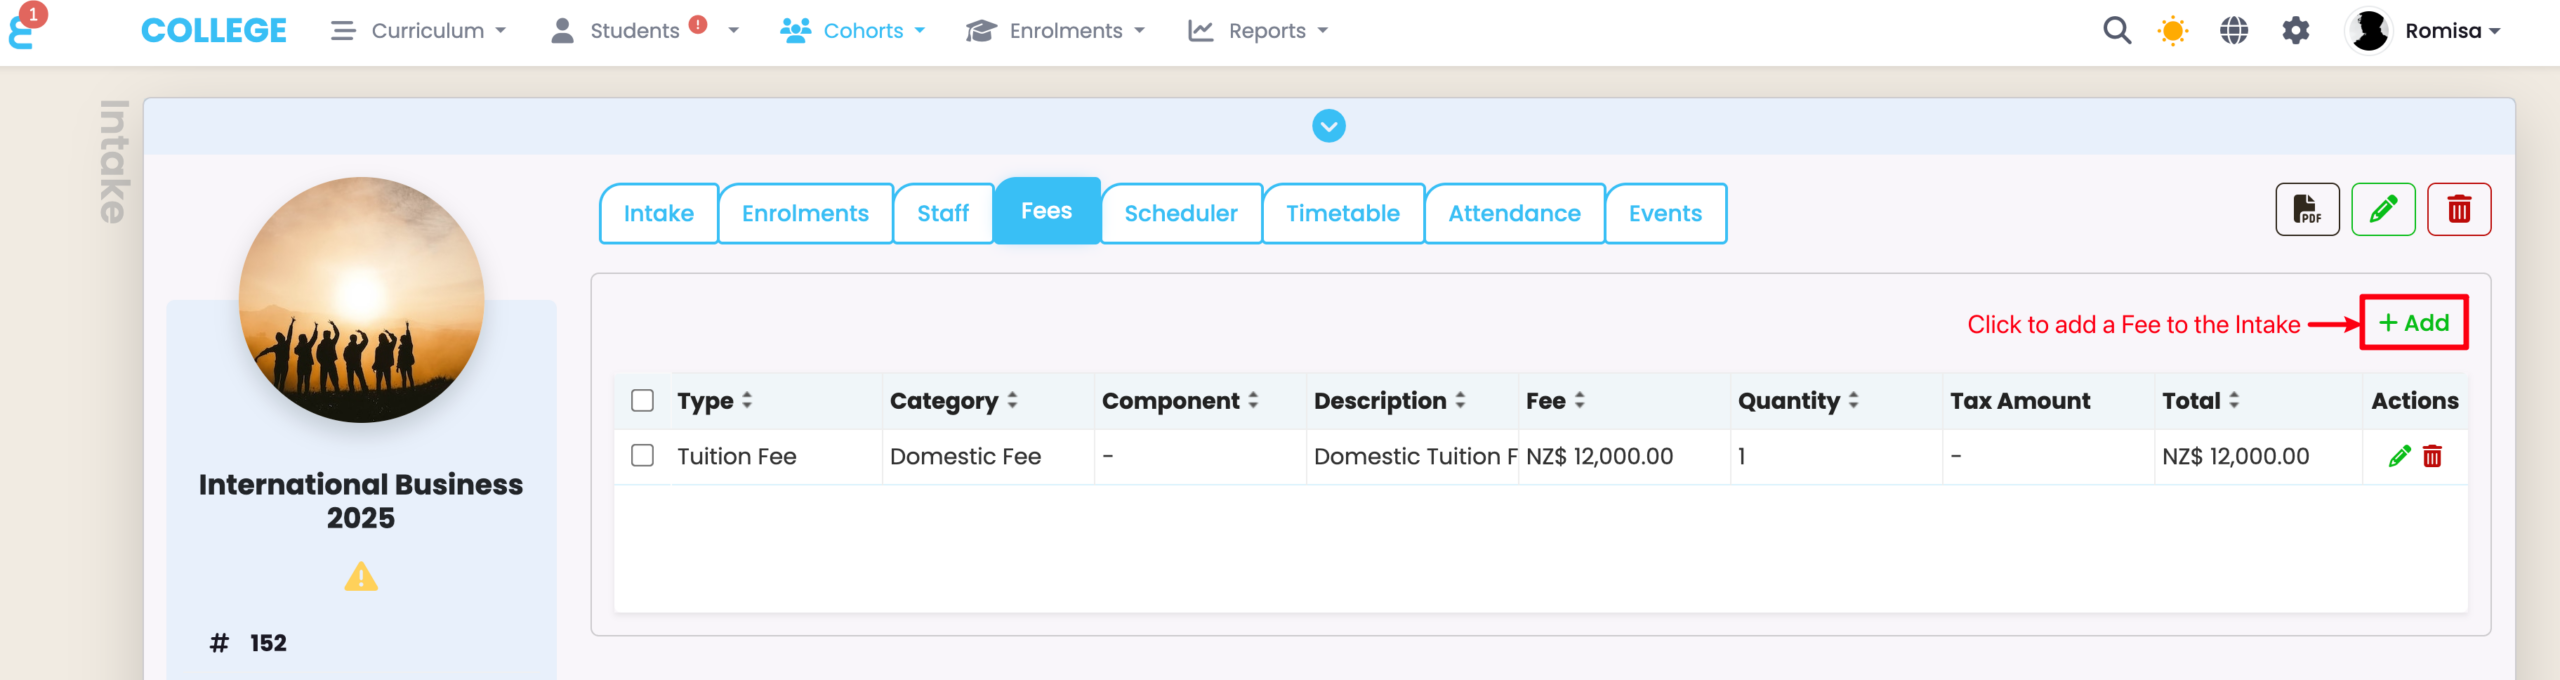
Figure 3iii. Provide Required Details and Save
Provide the necessary details, as indicated by red asterisks. Please also note that you can apply a tax rate against the specified fee amount. This is set as 15% by default, but you can edit the percentage number (Settings > Account). Fee type and category also have default options, but you can add other custom values (Settings > Lookup Data).
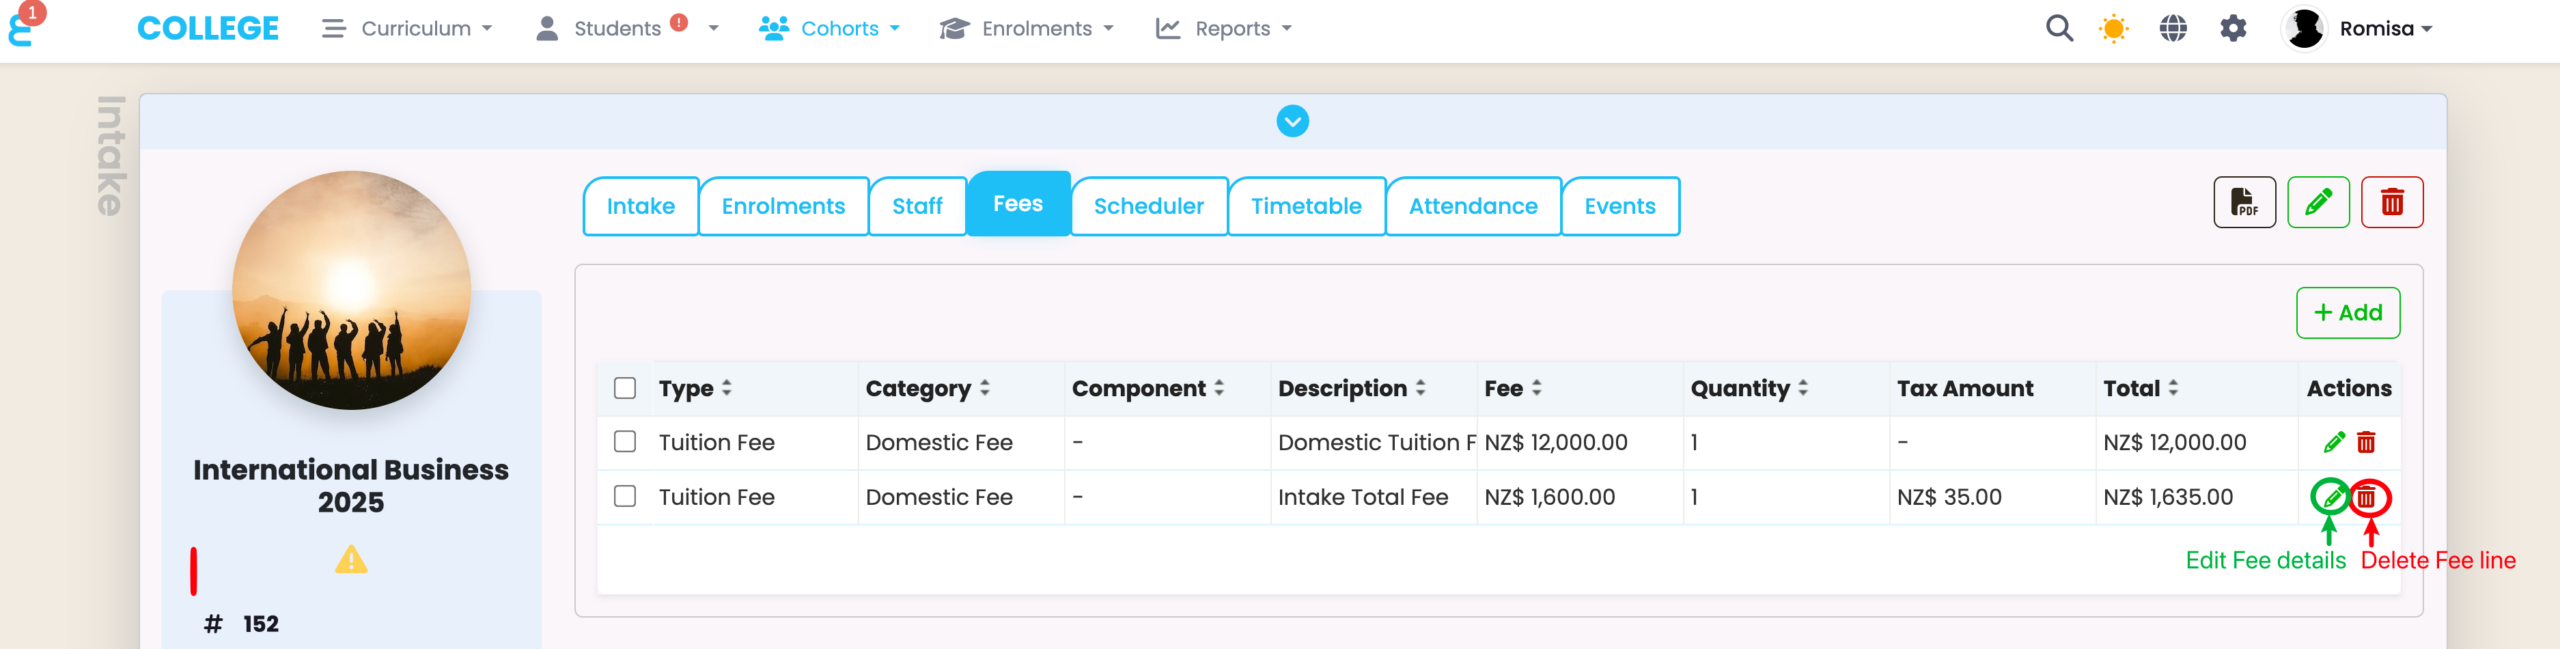
Figure 3iv. View Intake Fee Lines
Enrolment
Figure 4i. Navigate to Curriculum > Curriculum Index
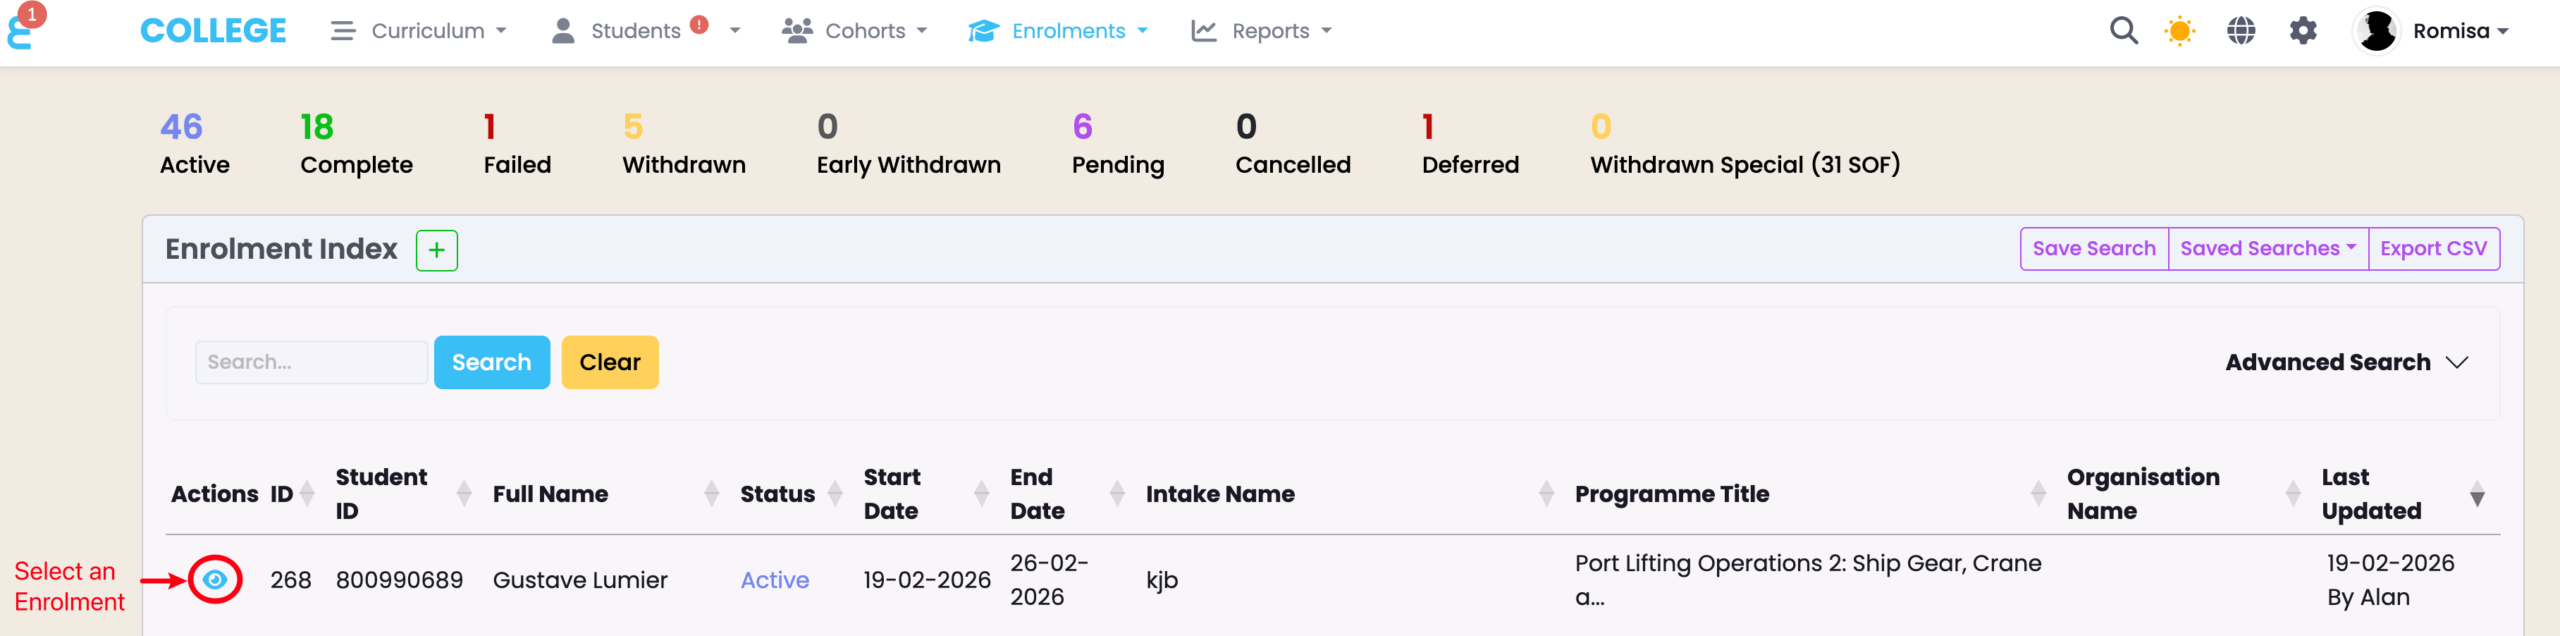
Figure 4ii. Click the “Add Fee” Button on the Fees Tab
Click the purple cog icon in the top right of the Fees tab. You will see an option to add a Fee line.
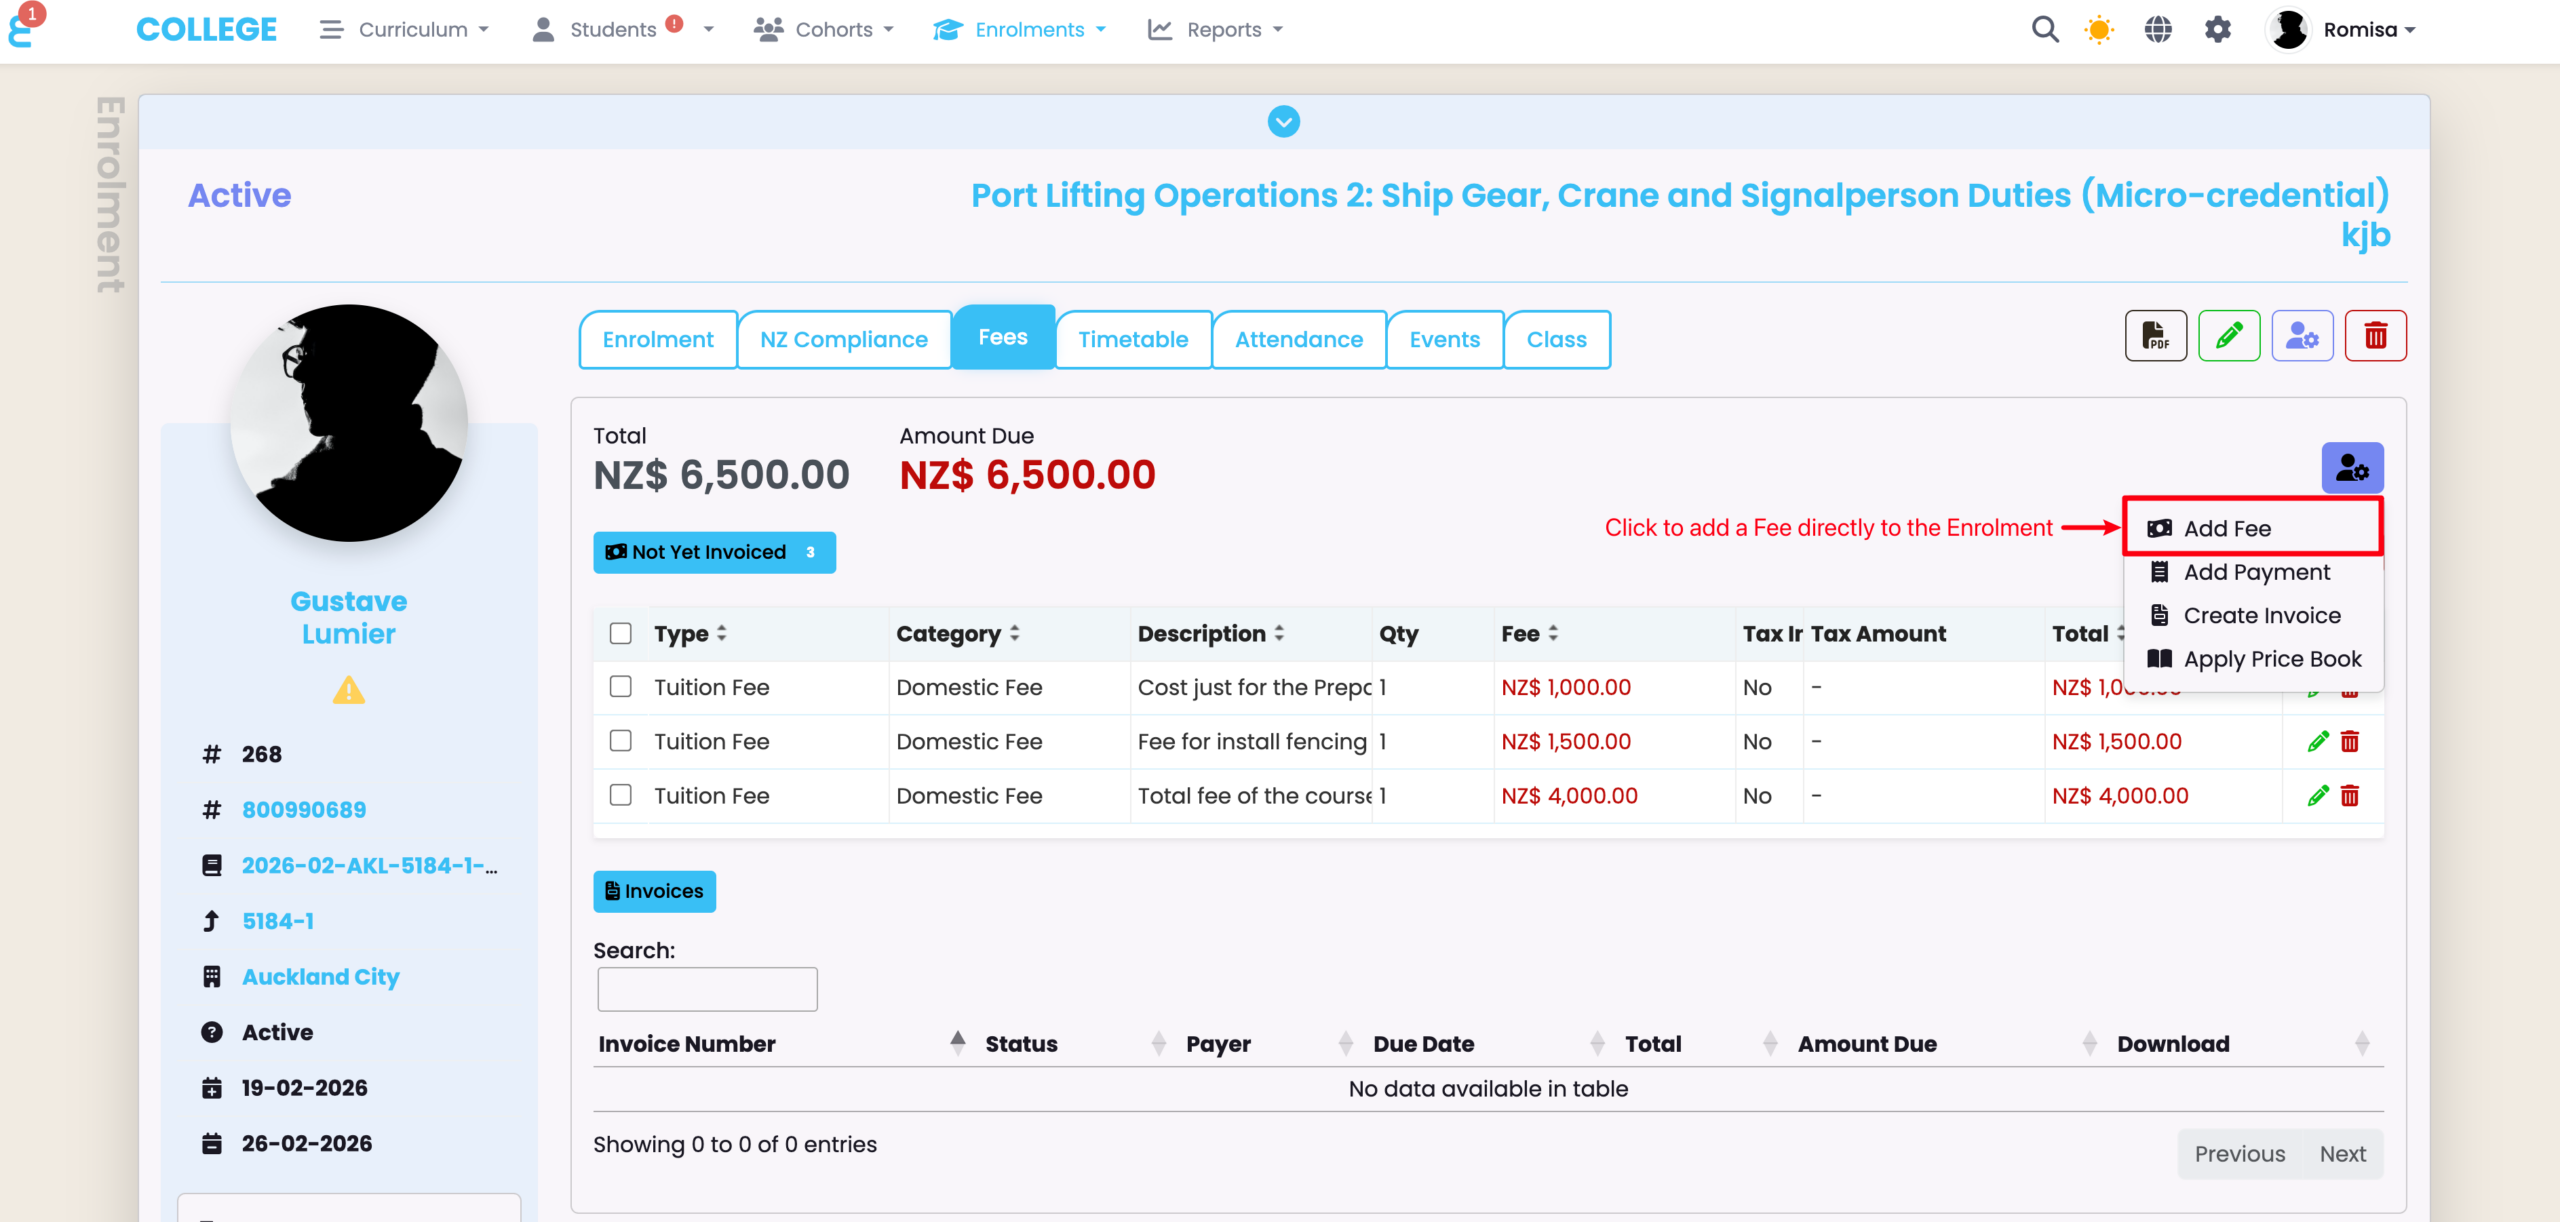
Figure 4iii. Provide Required Details and Save
Provide the necessary details, as indicated by red asterisks. Please also note that you can apply a tax rate against the specified fee amount. This is set as 15% by default, but you can edit the percentage number (Settings > Account). Fee type and category also have default options, but you can add other custom values (Settings > Lookup Data).
Figure 4iv. View Enrolment Fee Lines