Once you have configured the WBT Integration, you should connect it to the Programme and Organisation.
In this Section:
Programmes
Organisations
Create a Programme
Please refer to the steps in Curriculum – Programmes.
Edit the Programme
Figure 2. Navigate to the Programme Tab
Fill in the “Approval Date” and “Expiry Date”.
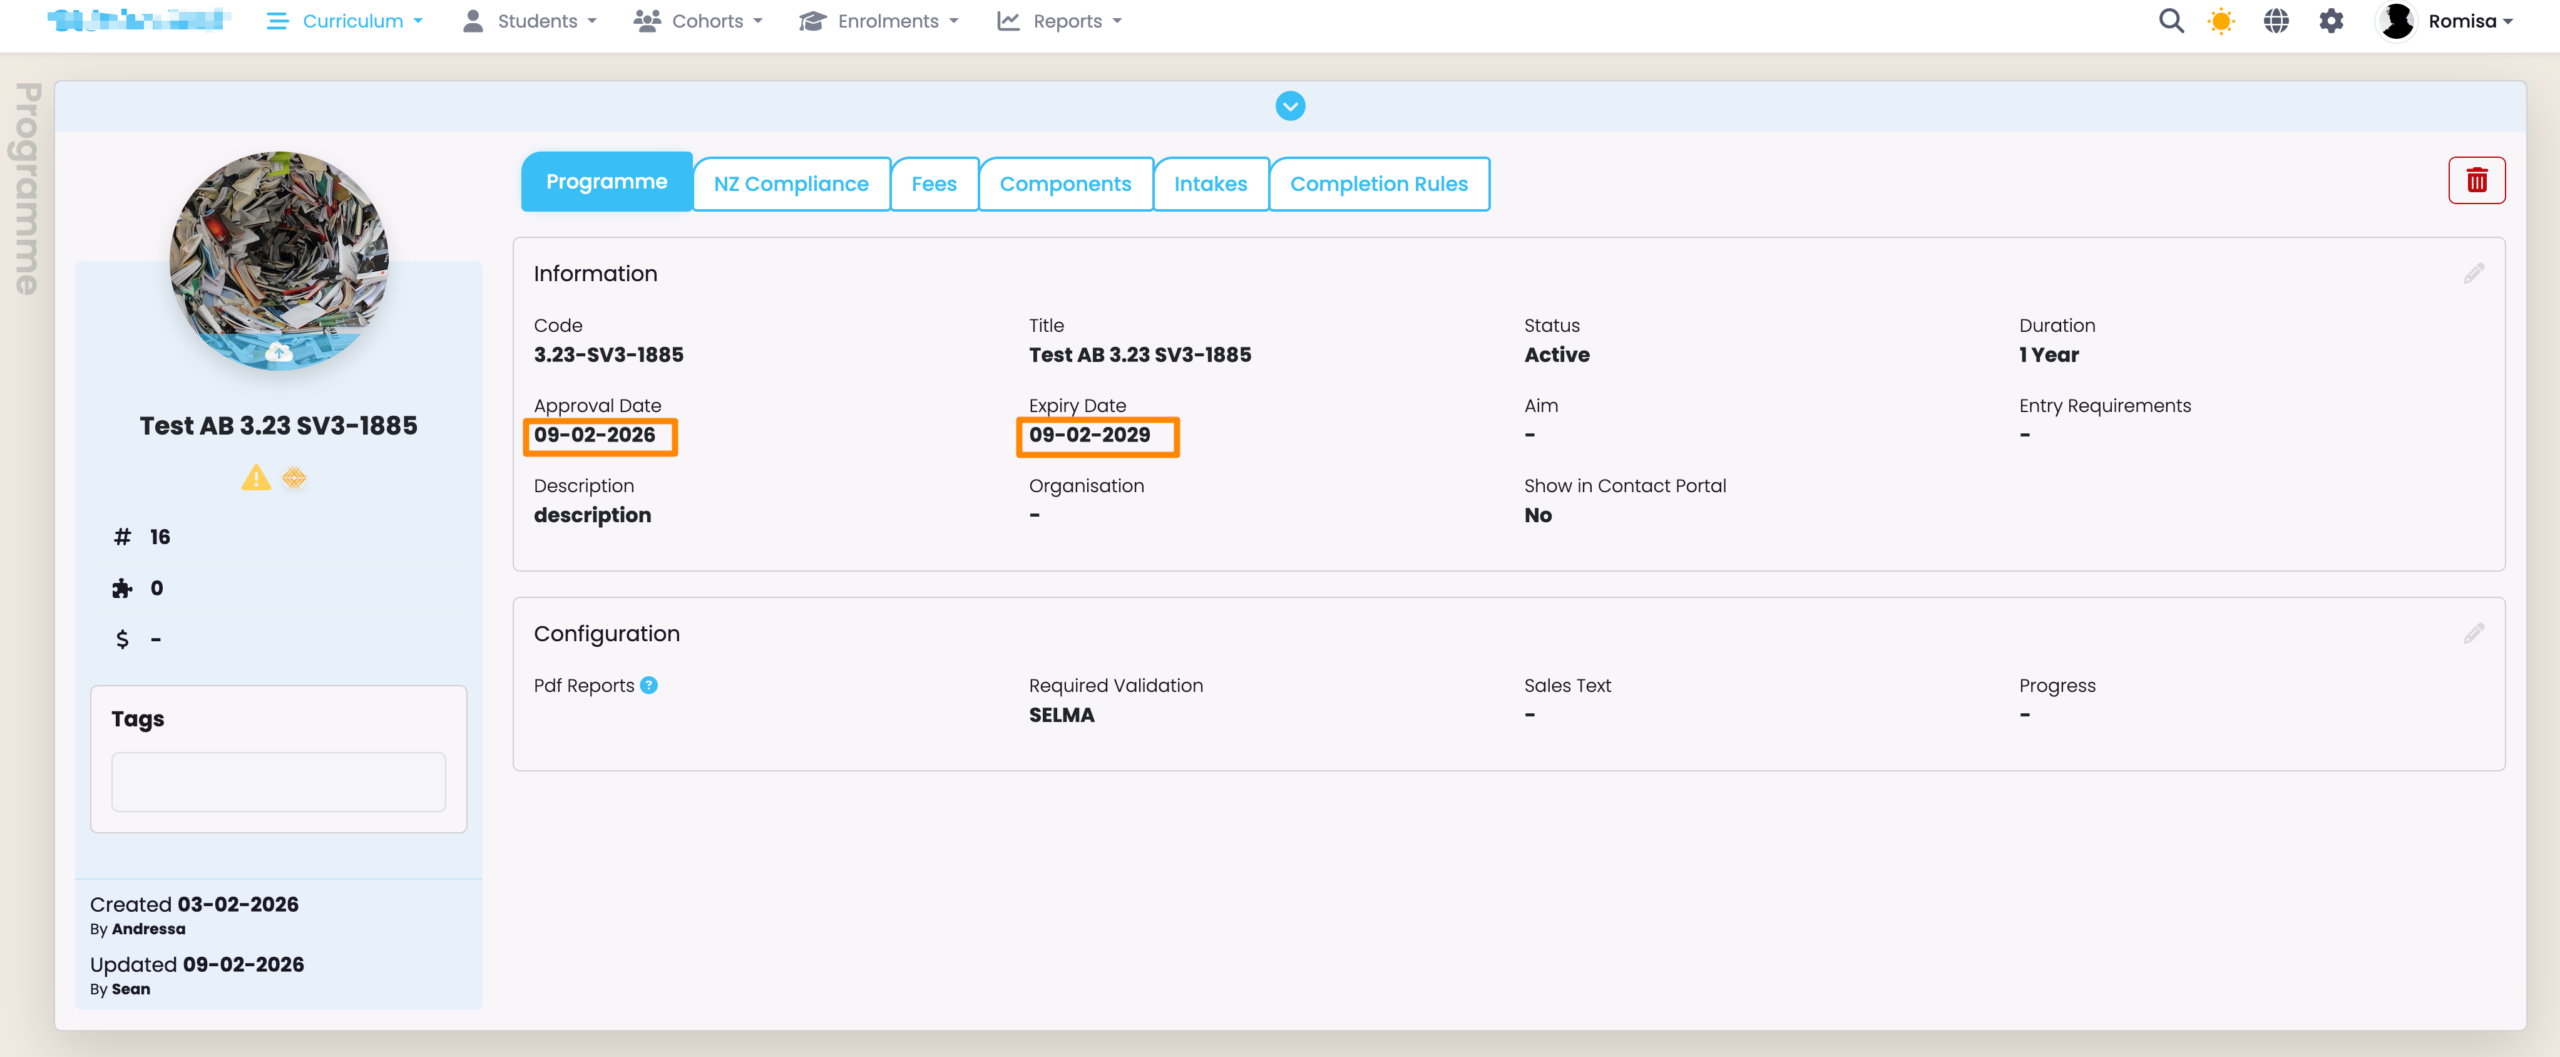
Figure 3. Navigate to the NZ Compliance Tab
Set “Return type” as “WBT”. This must be done to show the Work Based Training card further down the page (please keep reading to see this).
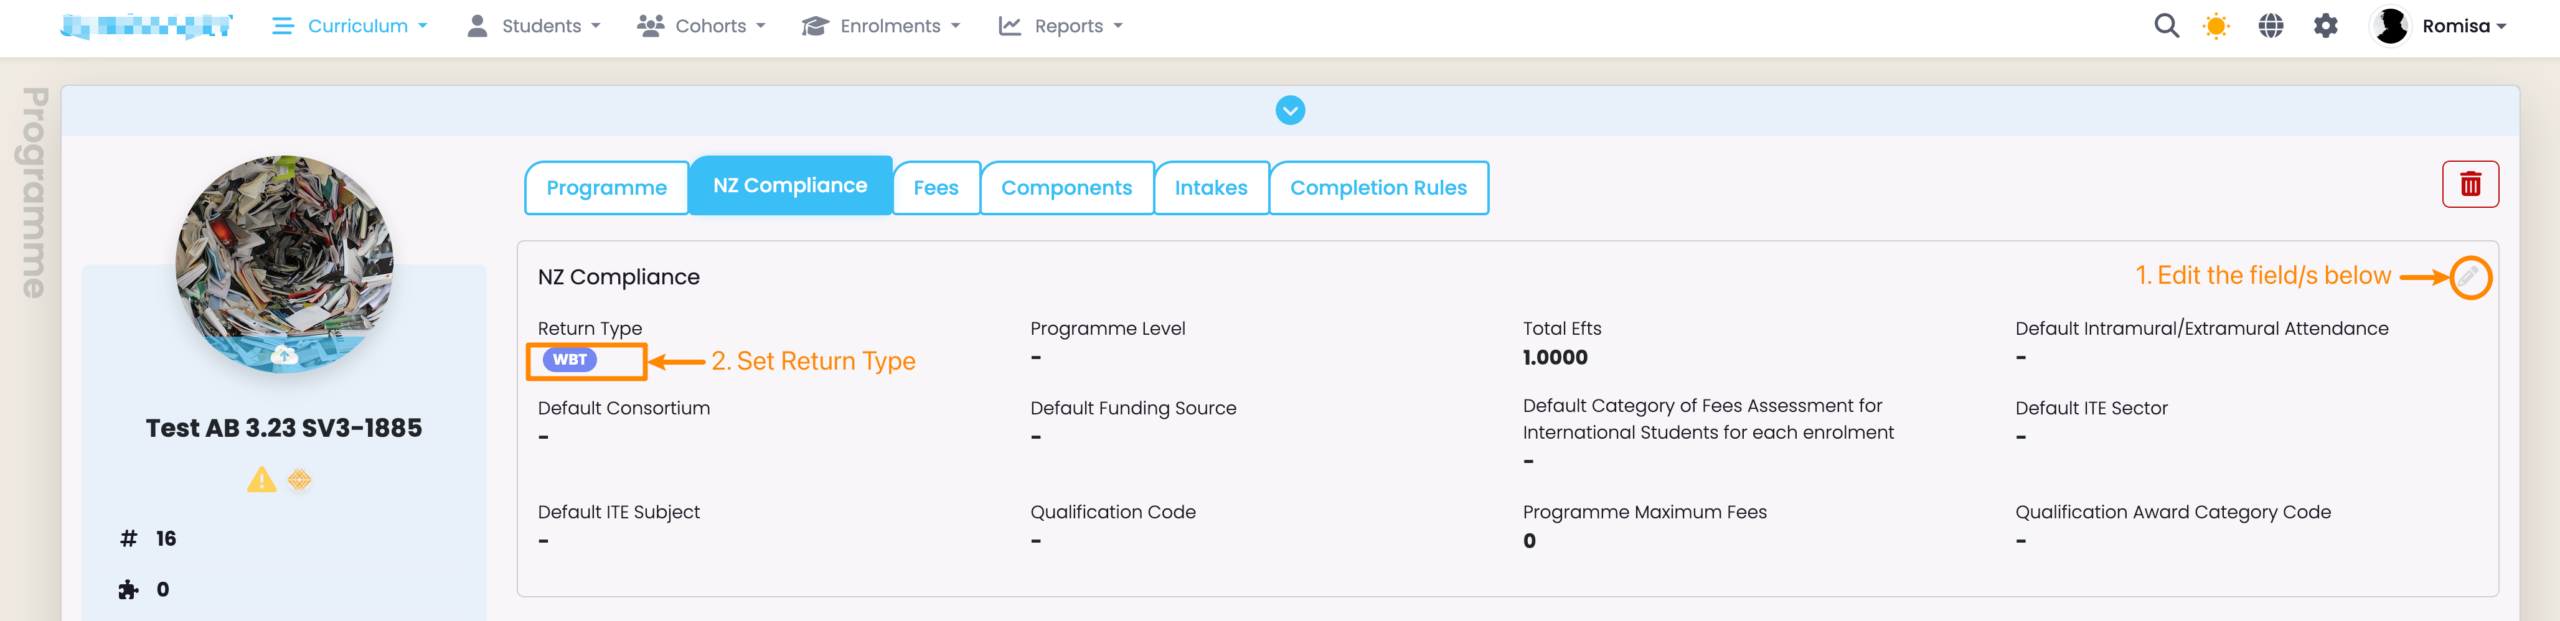
Figure 4. Set-up a Qualification
Link an “Active” Qualification on the Programme. If you haven’t uploaded Qualifications to SELMA yet please see Compliance – Uploading Units & Qualifications – Importing Qualifications to SELMA.
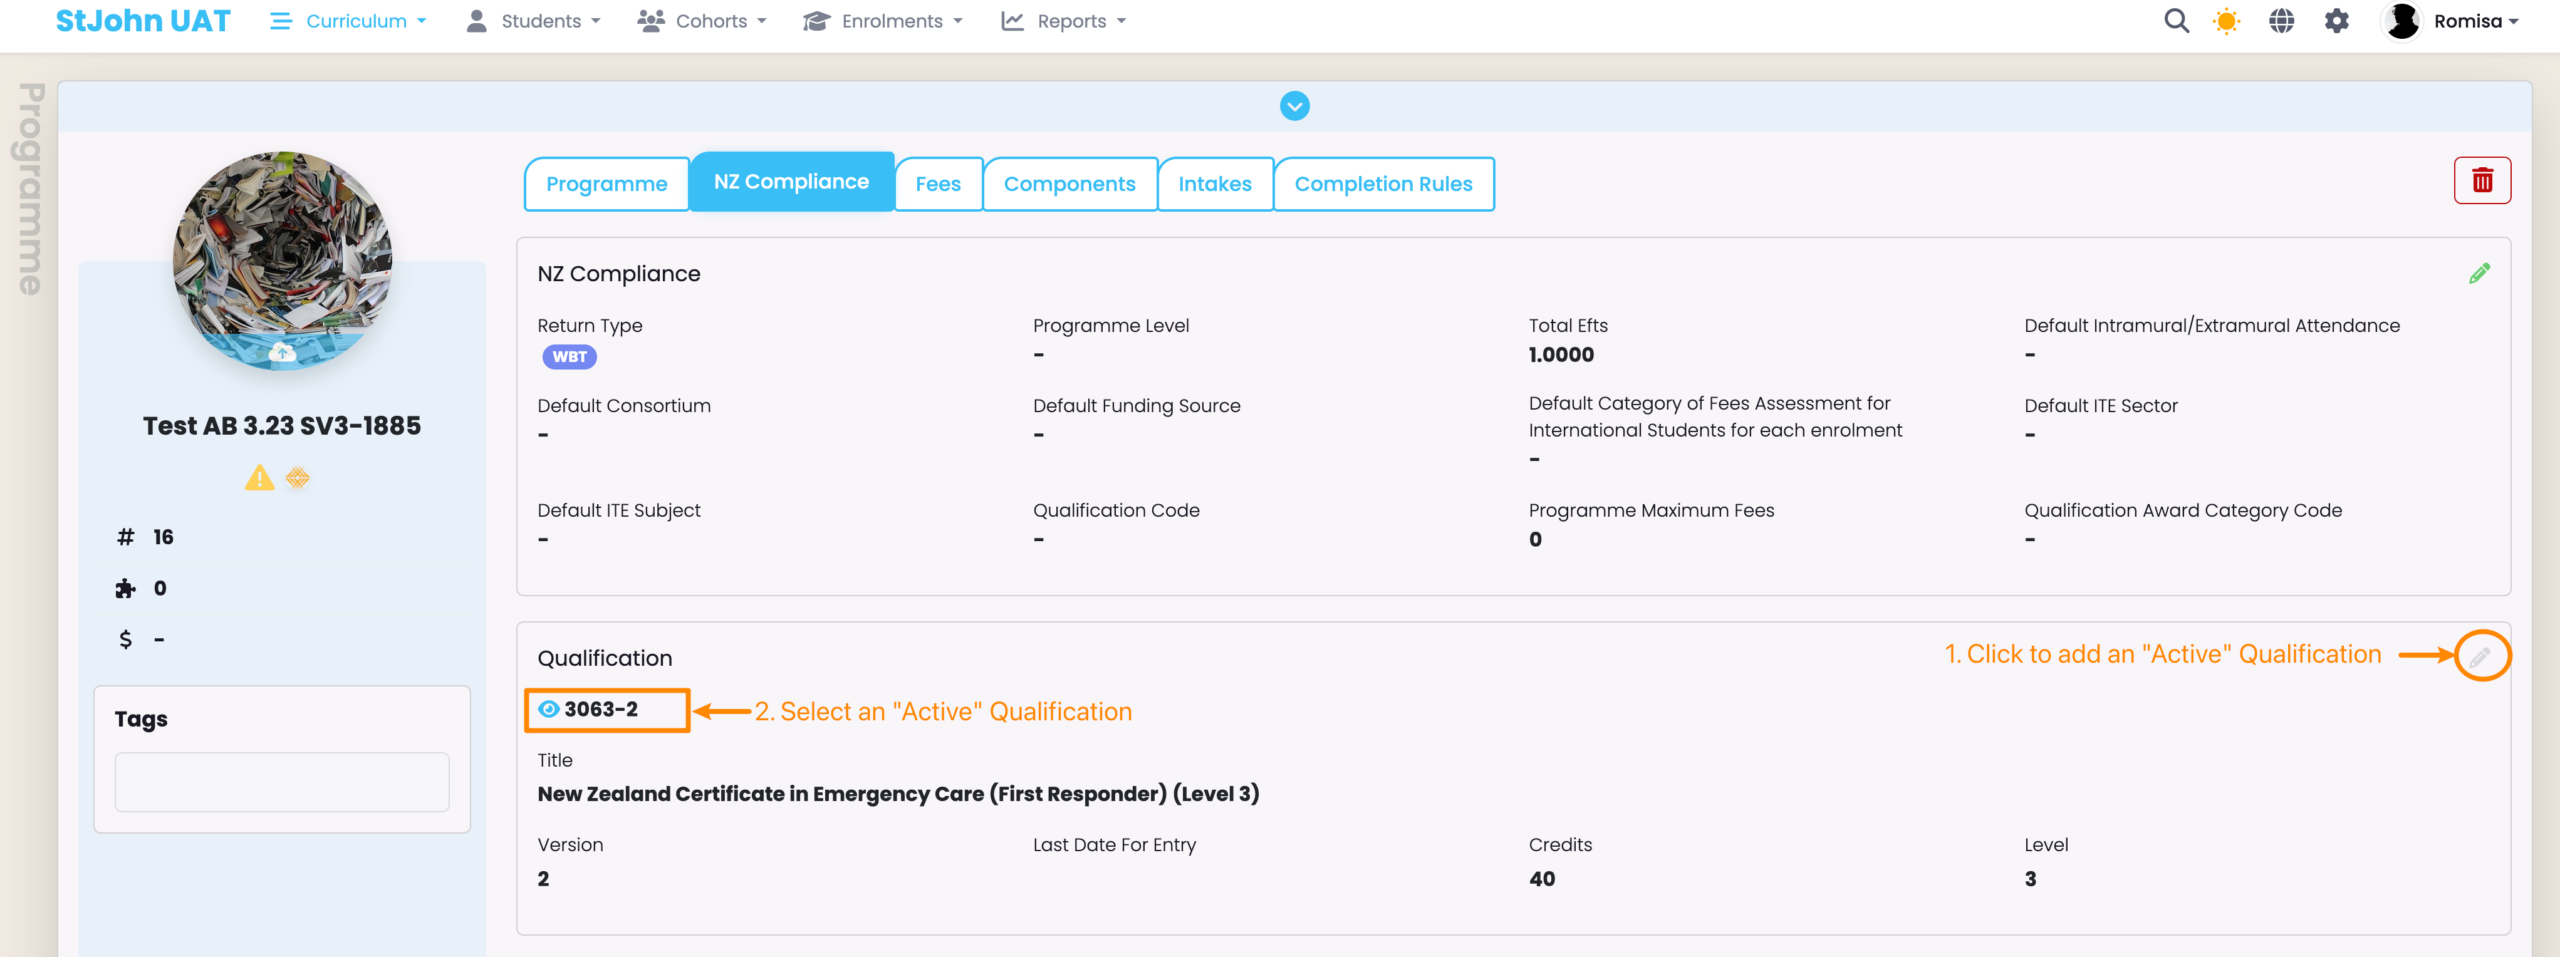
Figure 5i. WBT Information
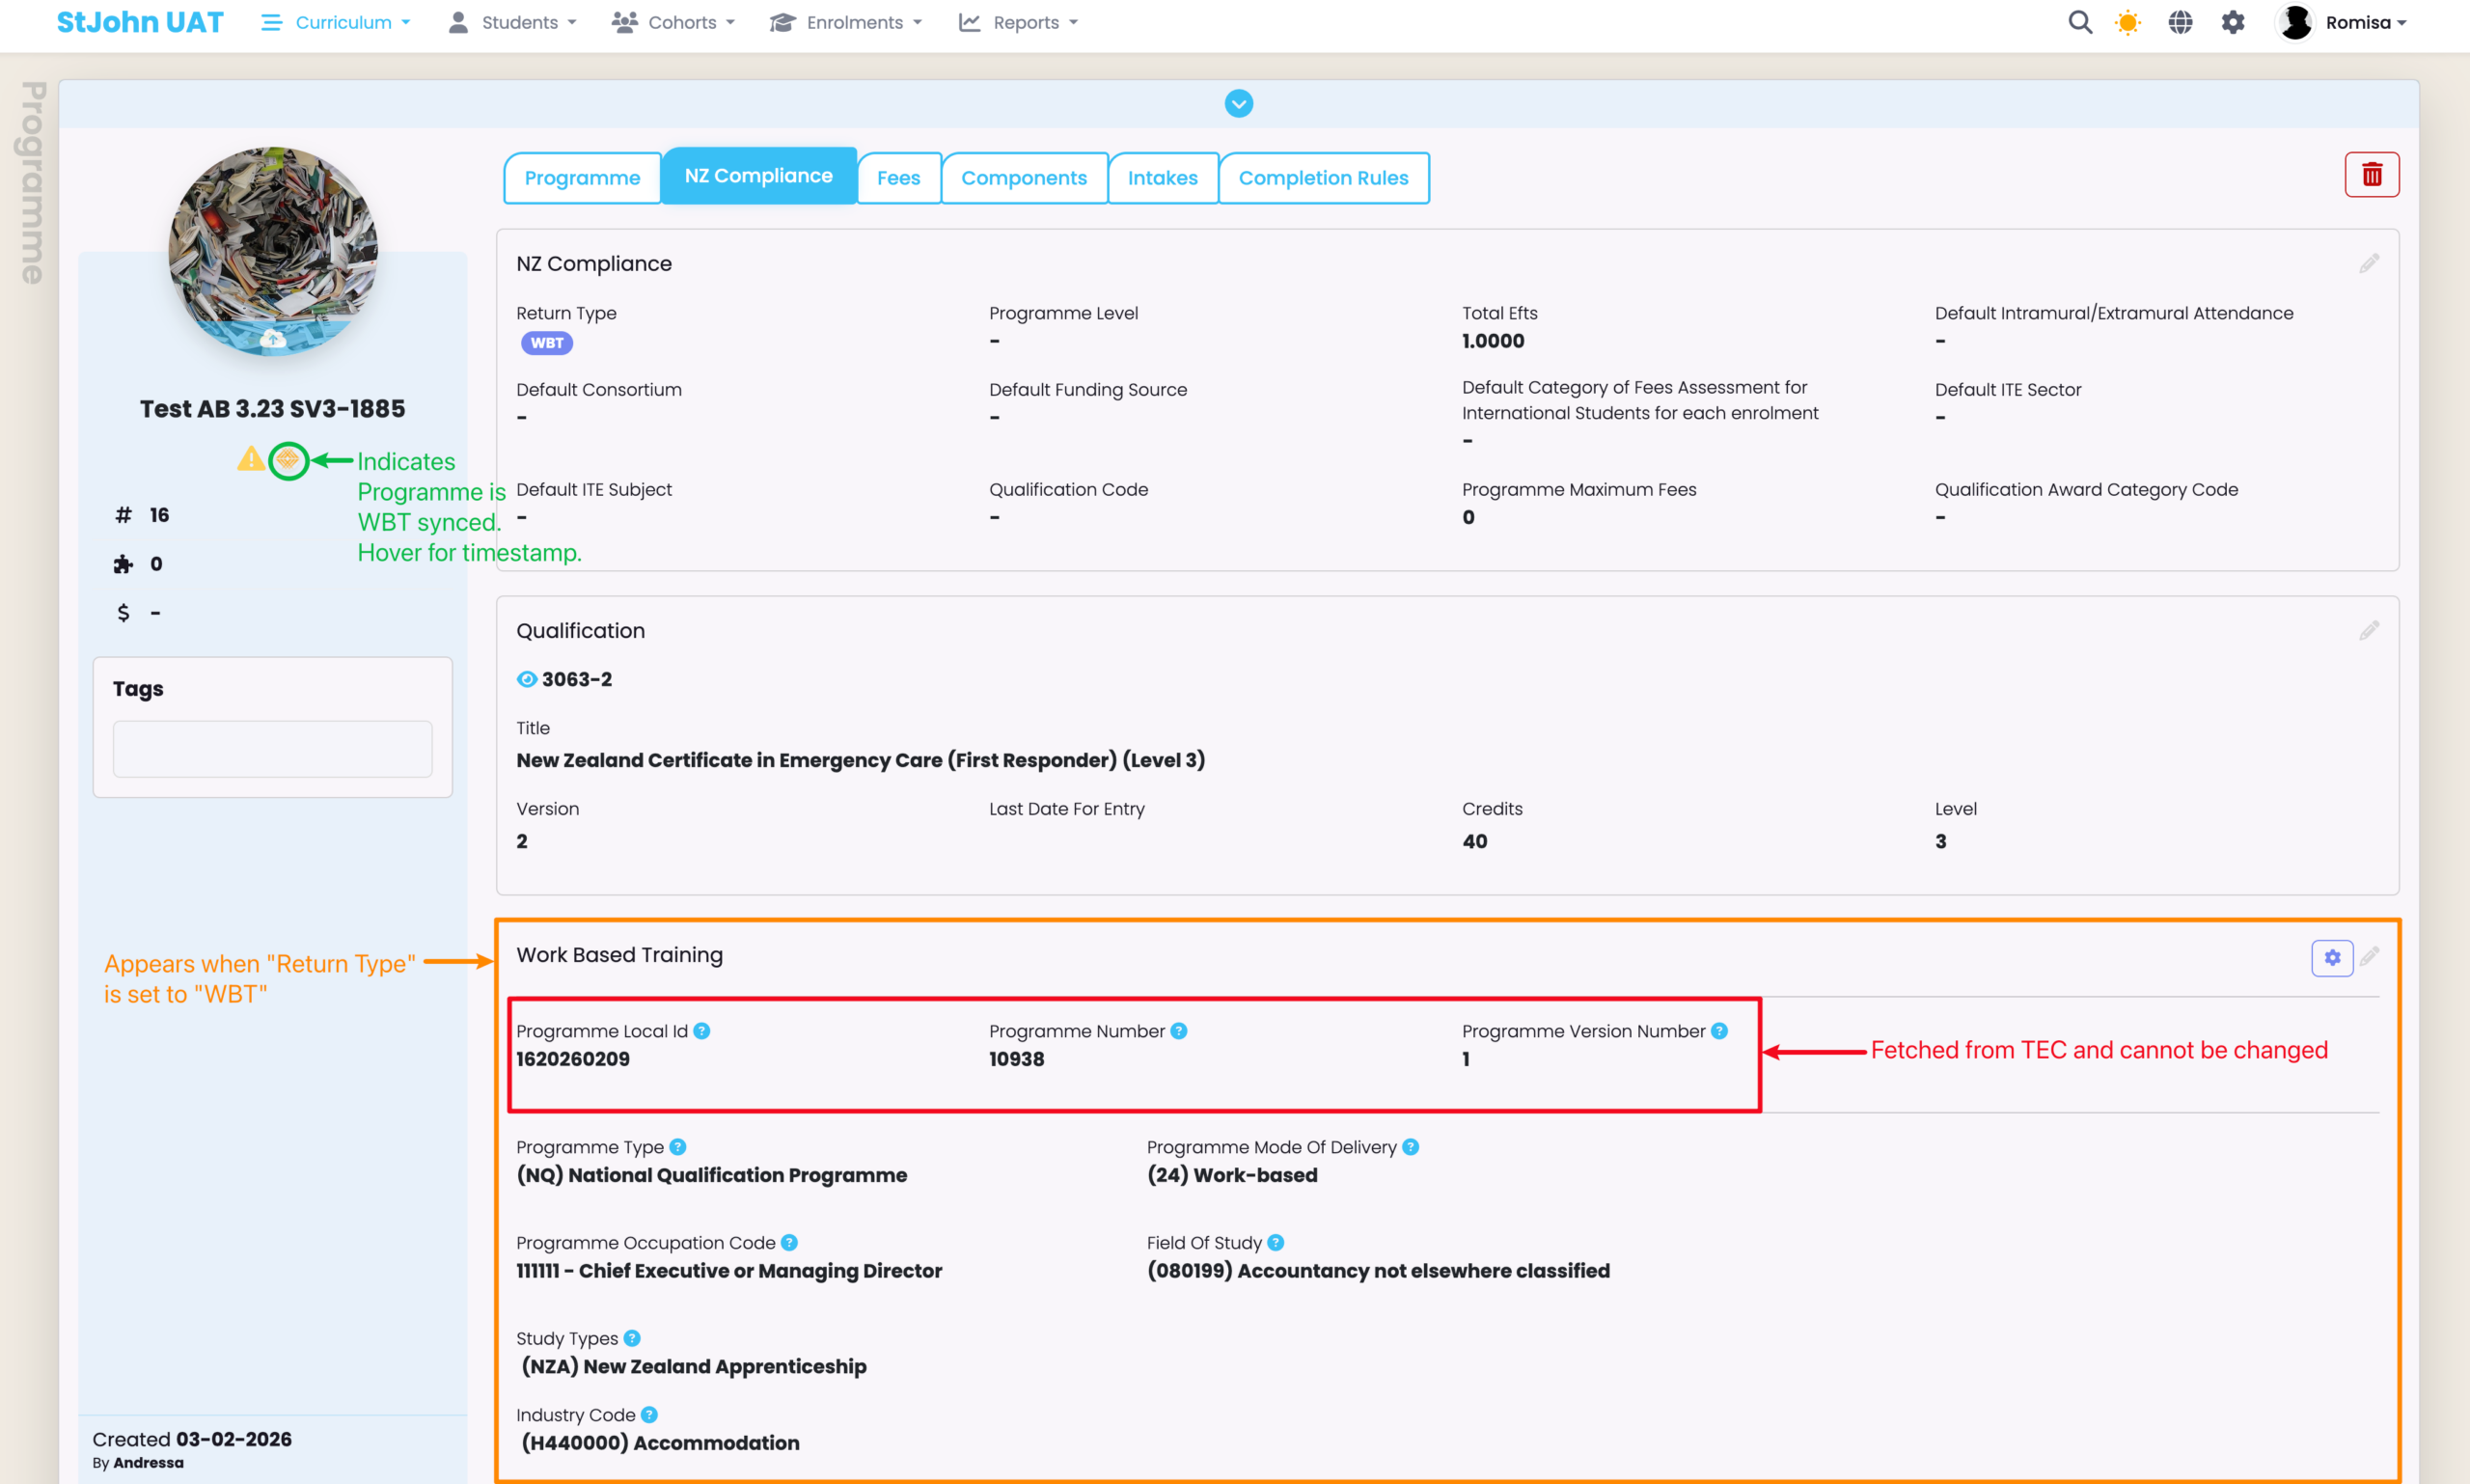
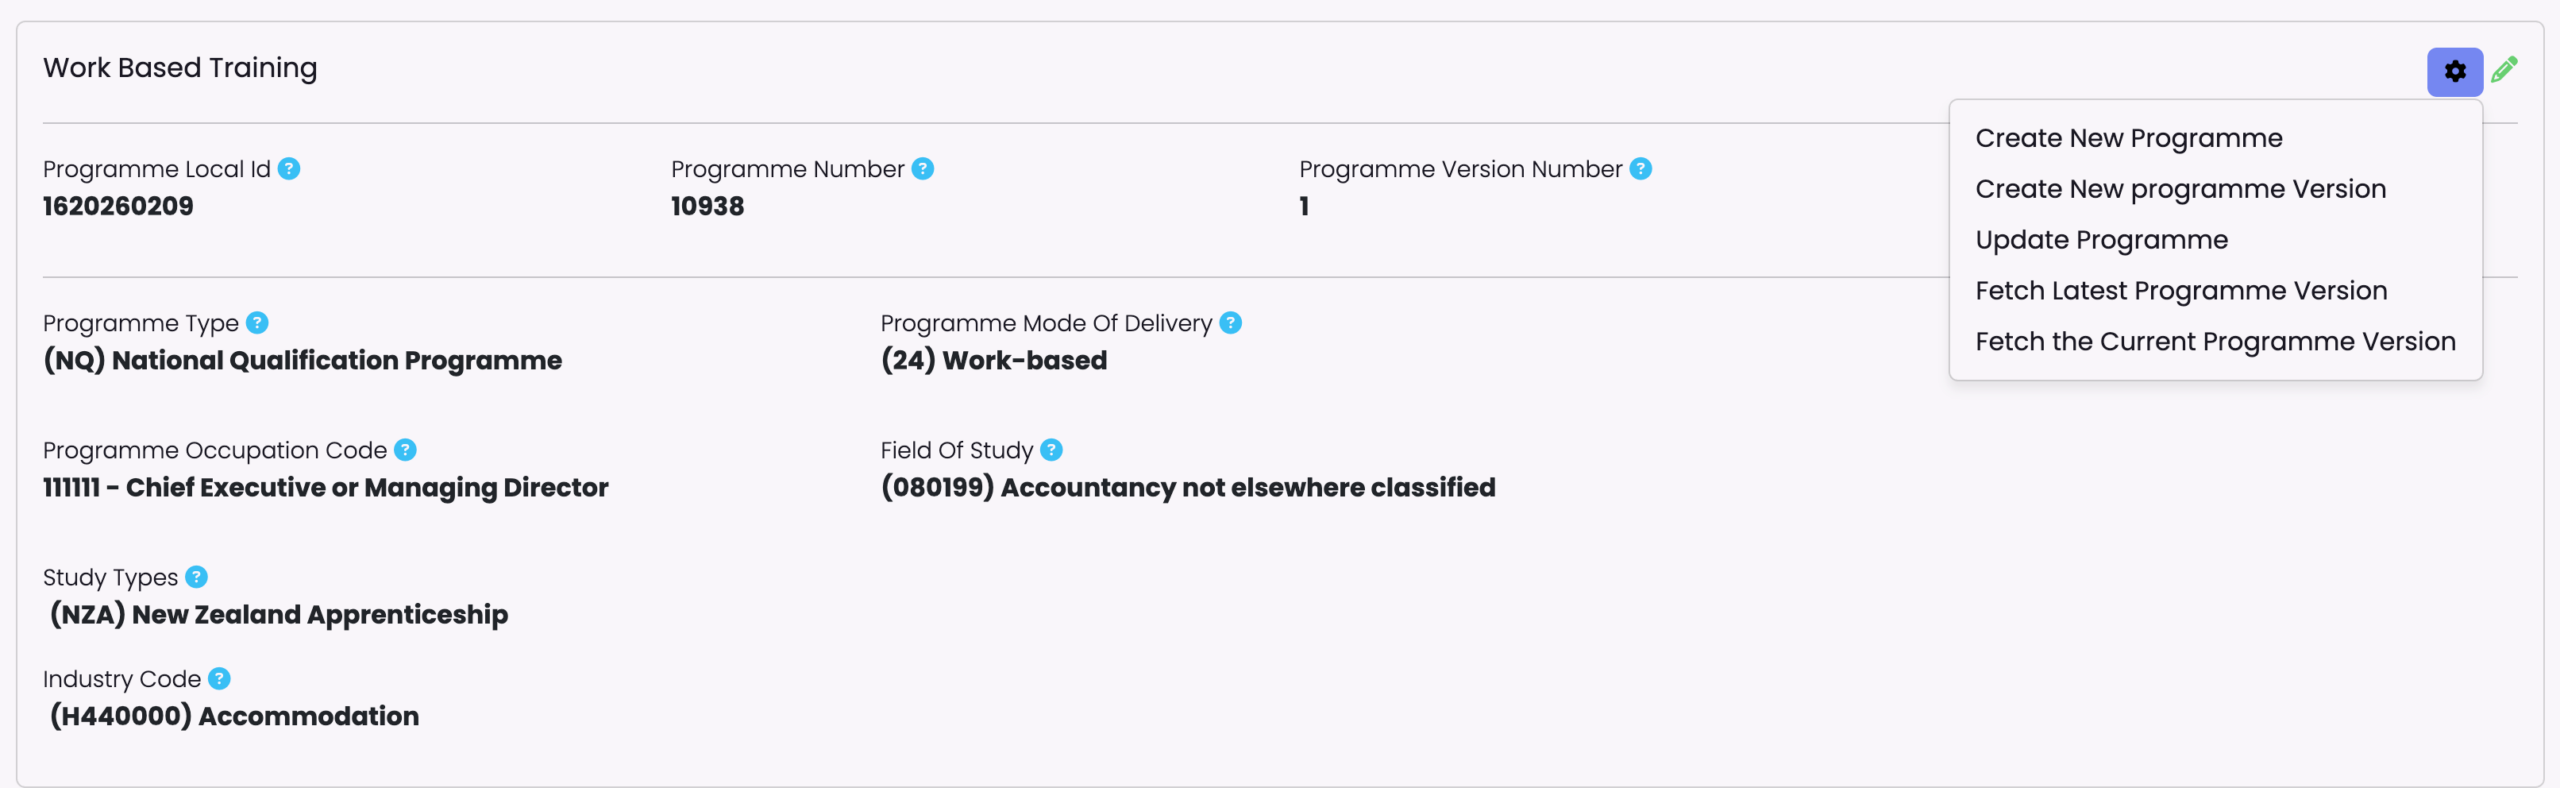
Figure 5ii. WBT Programme Actions
The “Create” buttons sends the Programme or Programme Version details within this card to the DXP, while the “Fetch” buttons bring in the Programme or Programme Version details from the DXP to this card.
- NOTE: A new Programme version is needed if you want to change any field other than the “Expiry date” or the “Programme Maximum Fees” under the NZ Compliance card.
Create an Organisation
Please refer to the steps in Organisations – Create and Manage an Organisation
Edit the Organisation
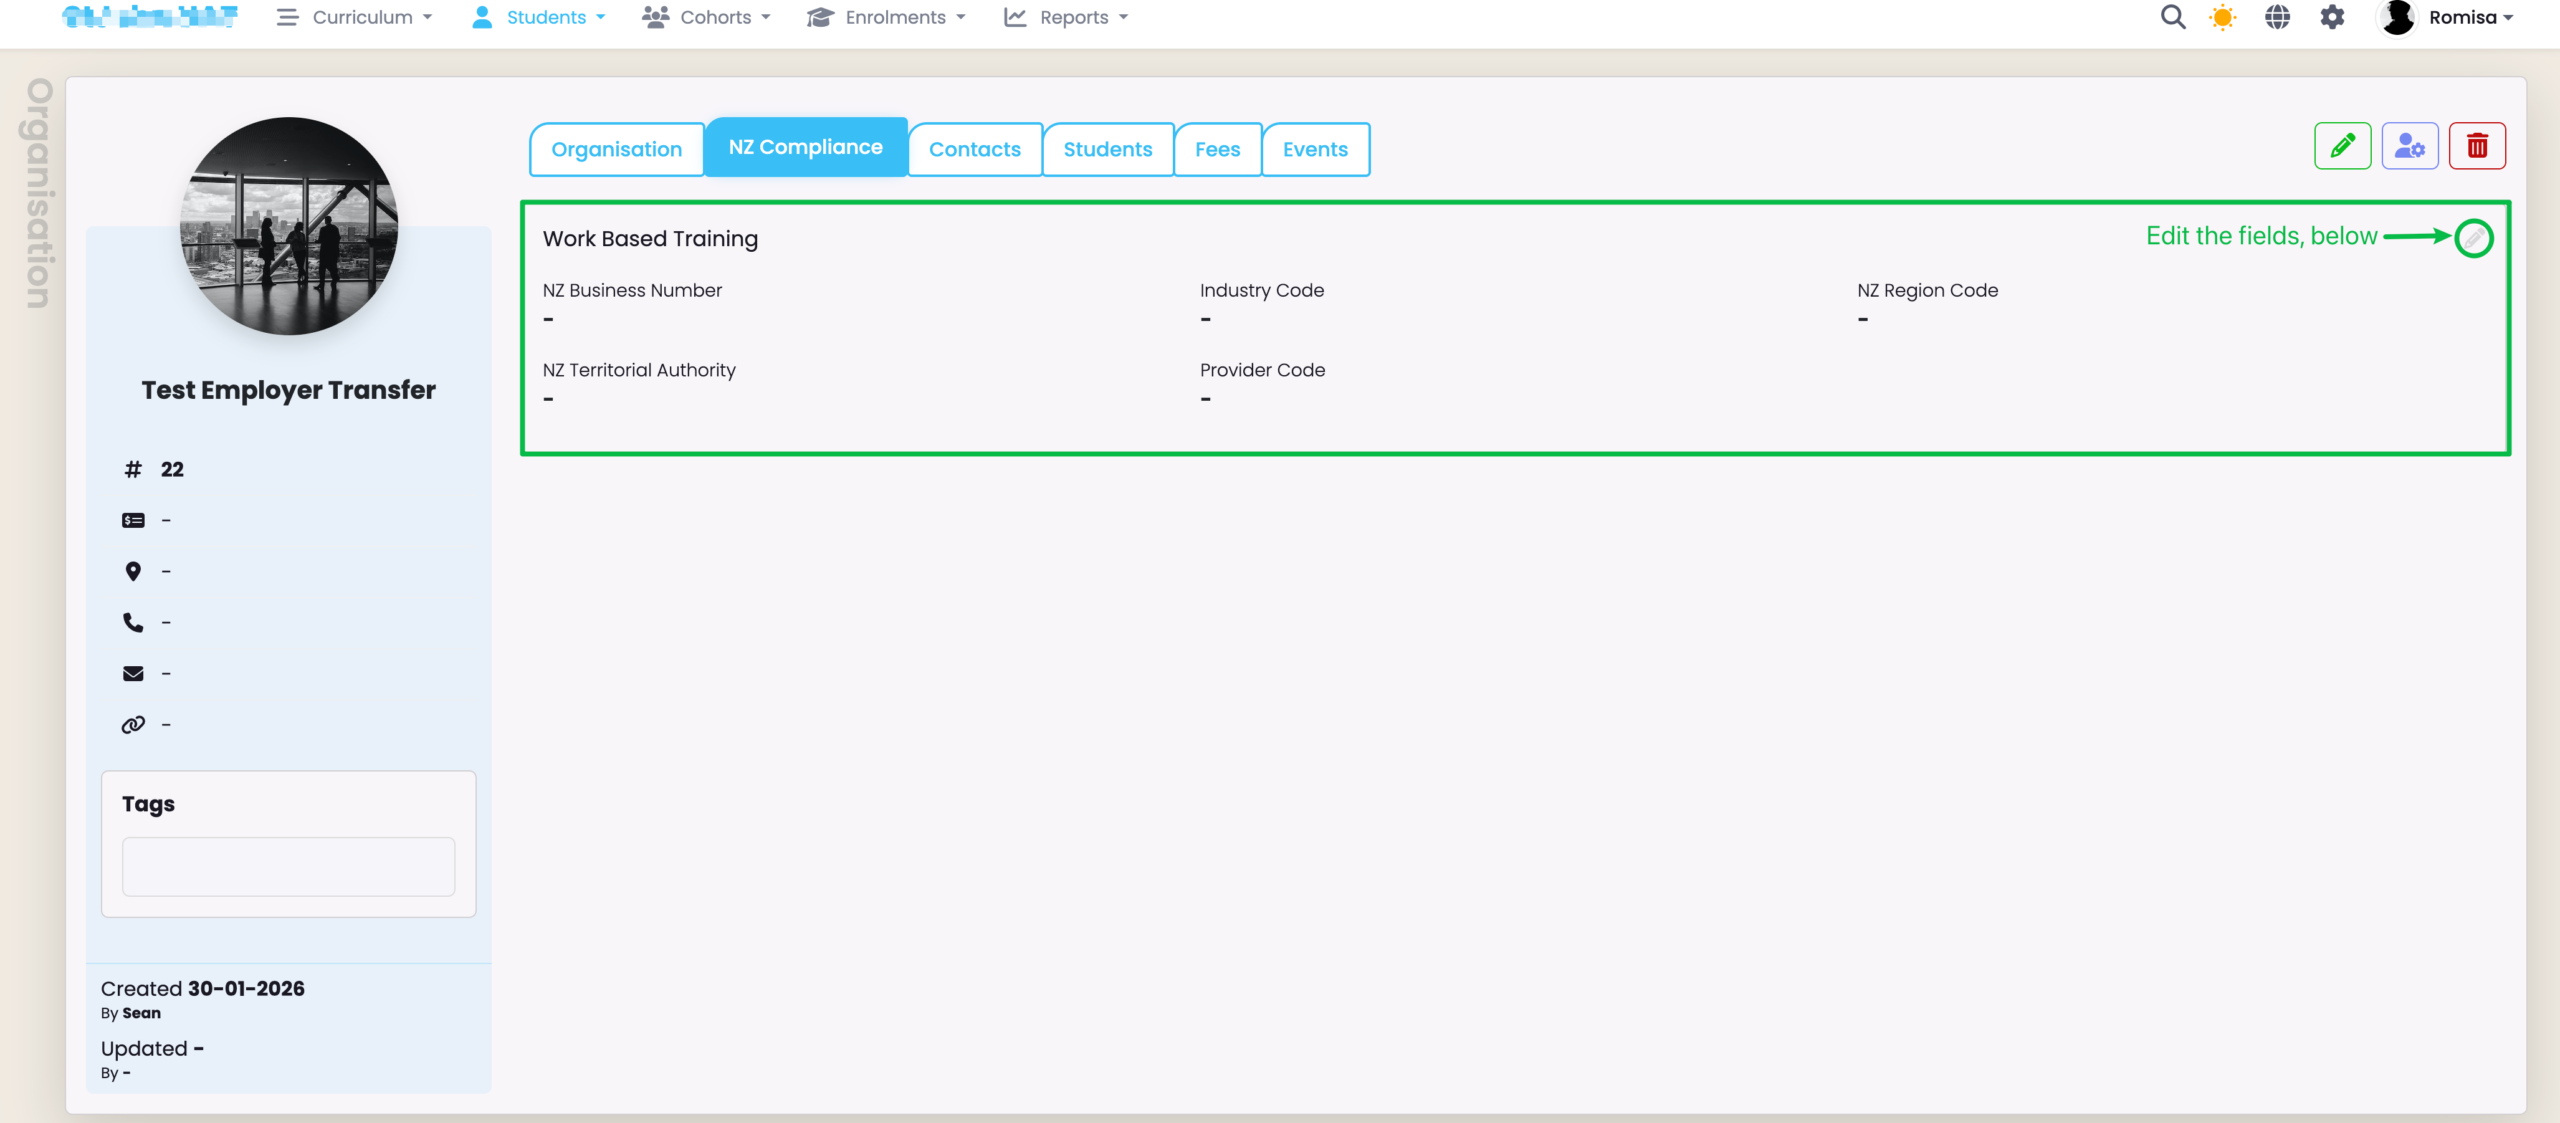
WBT required fields need to be updated on the Organisation under the “NZ Compliance” tab.
The fields required are:
- NZ Business Number – 13 Digit New Zealand Business Number issued by GS1 New Zealand
- Industry Code – Employer Industry Code (ANZSIC) is defined by Statistics New Zealand and identifies the industry the learner is primarily working in.
- NZ Region Code – A code defined by Statistics New Zealand that identifies the Region the Learner’s place of employment is located in.
- NZ Territorial Authority – A code defined by Statistics New Zealand that identifies the Territorial Authority the Learner’s place of employment is located in.
Figure 6i. Navigate to Organisation > NZ Compliance
Fill in all the relevant details under the Work Based Training card.
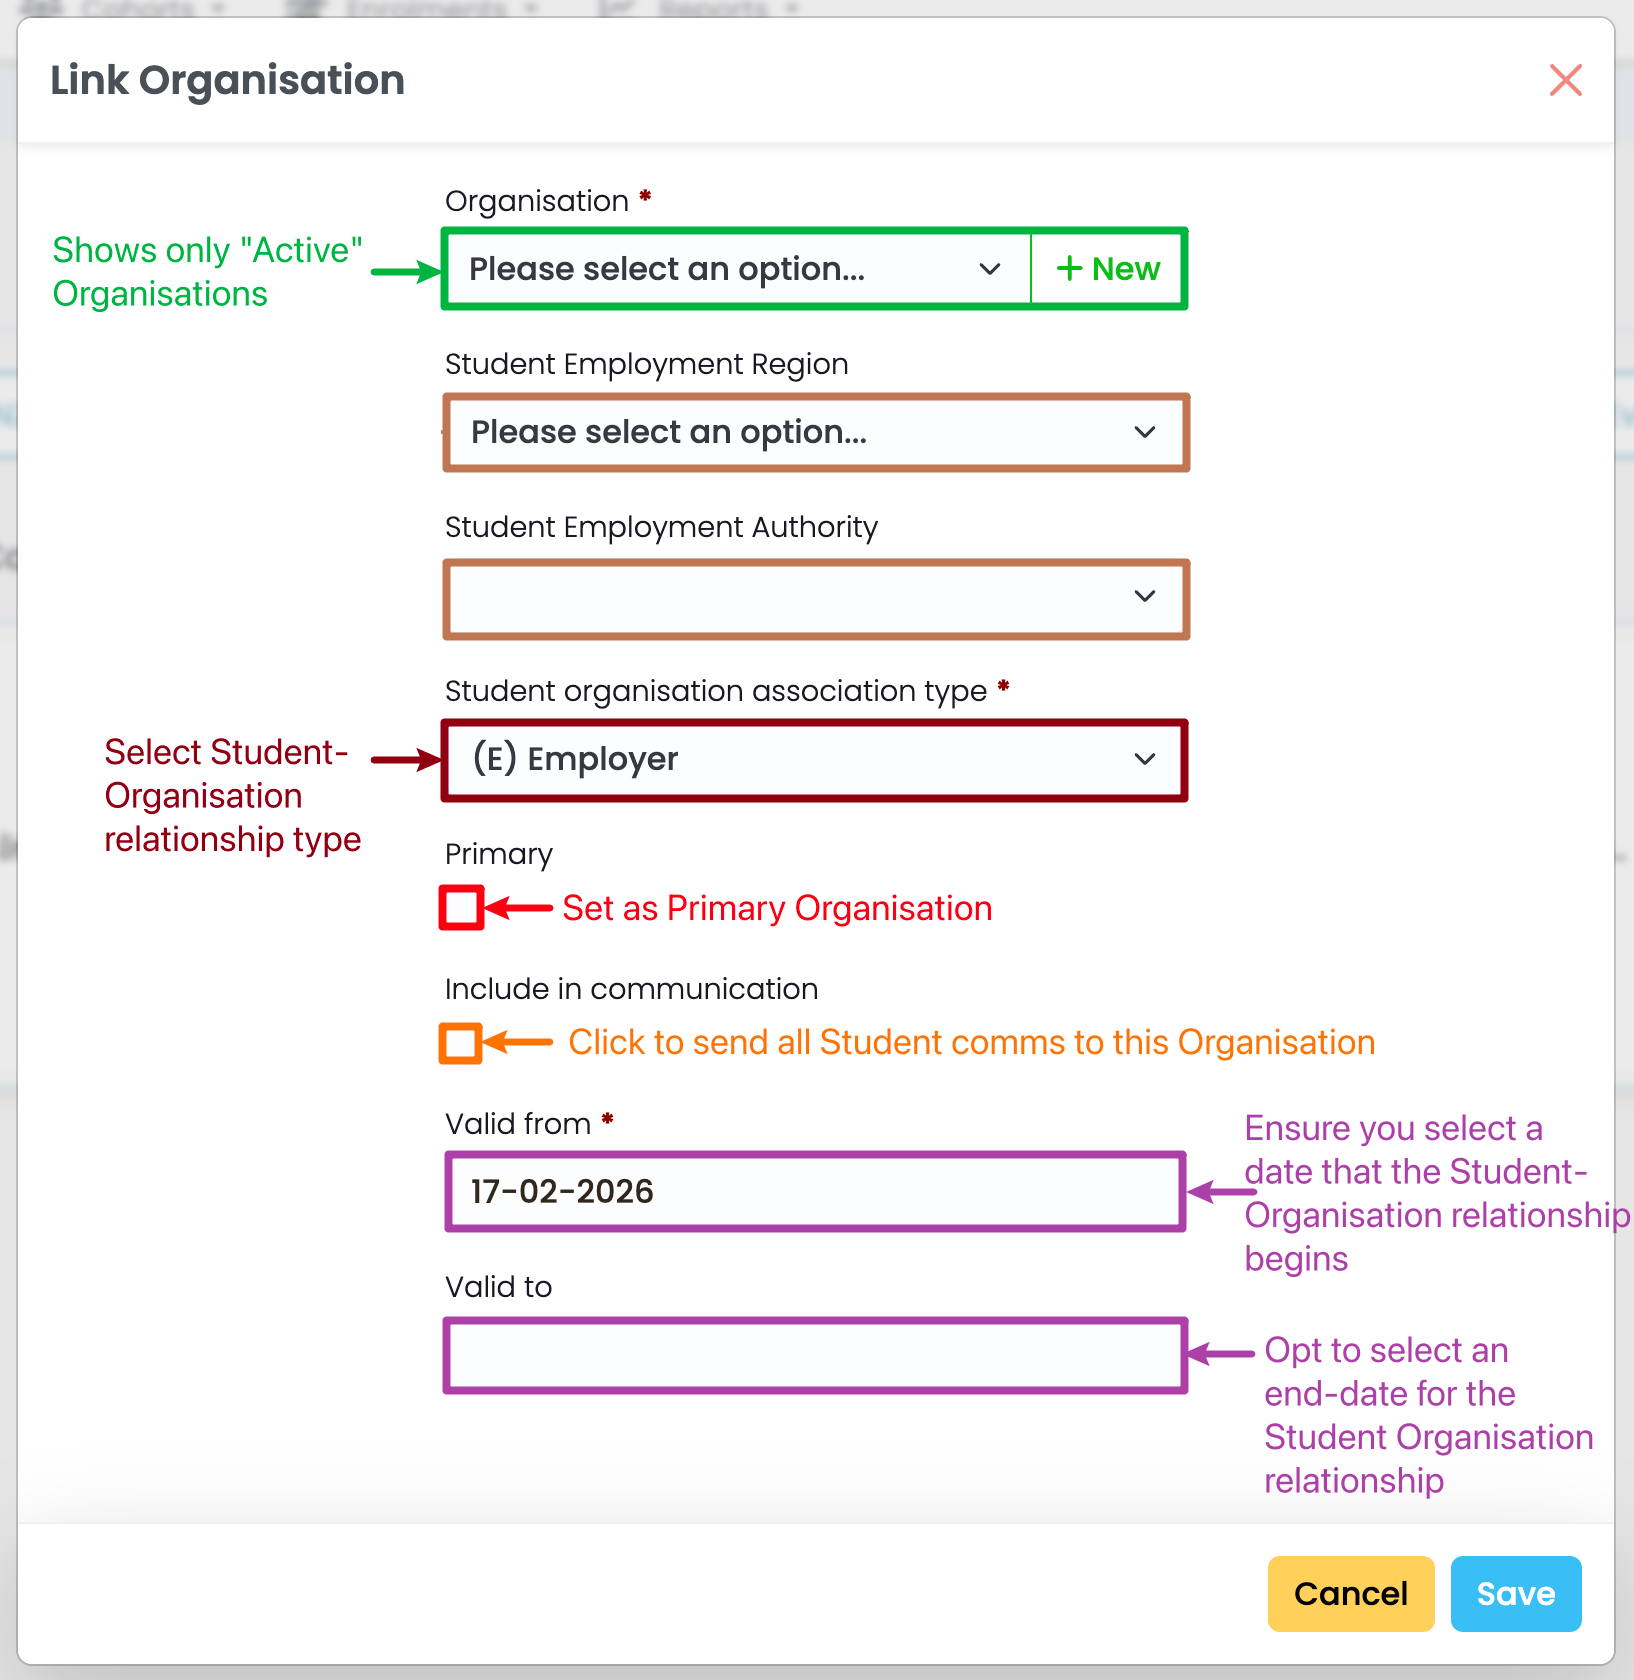
Link the Organisation to the Student
Figure 6ii. Navigate to Student > Stakeholders
Click the “+Add” button to link an Organisation.
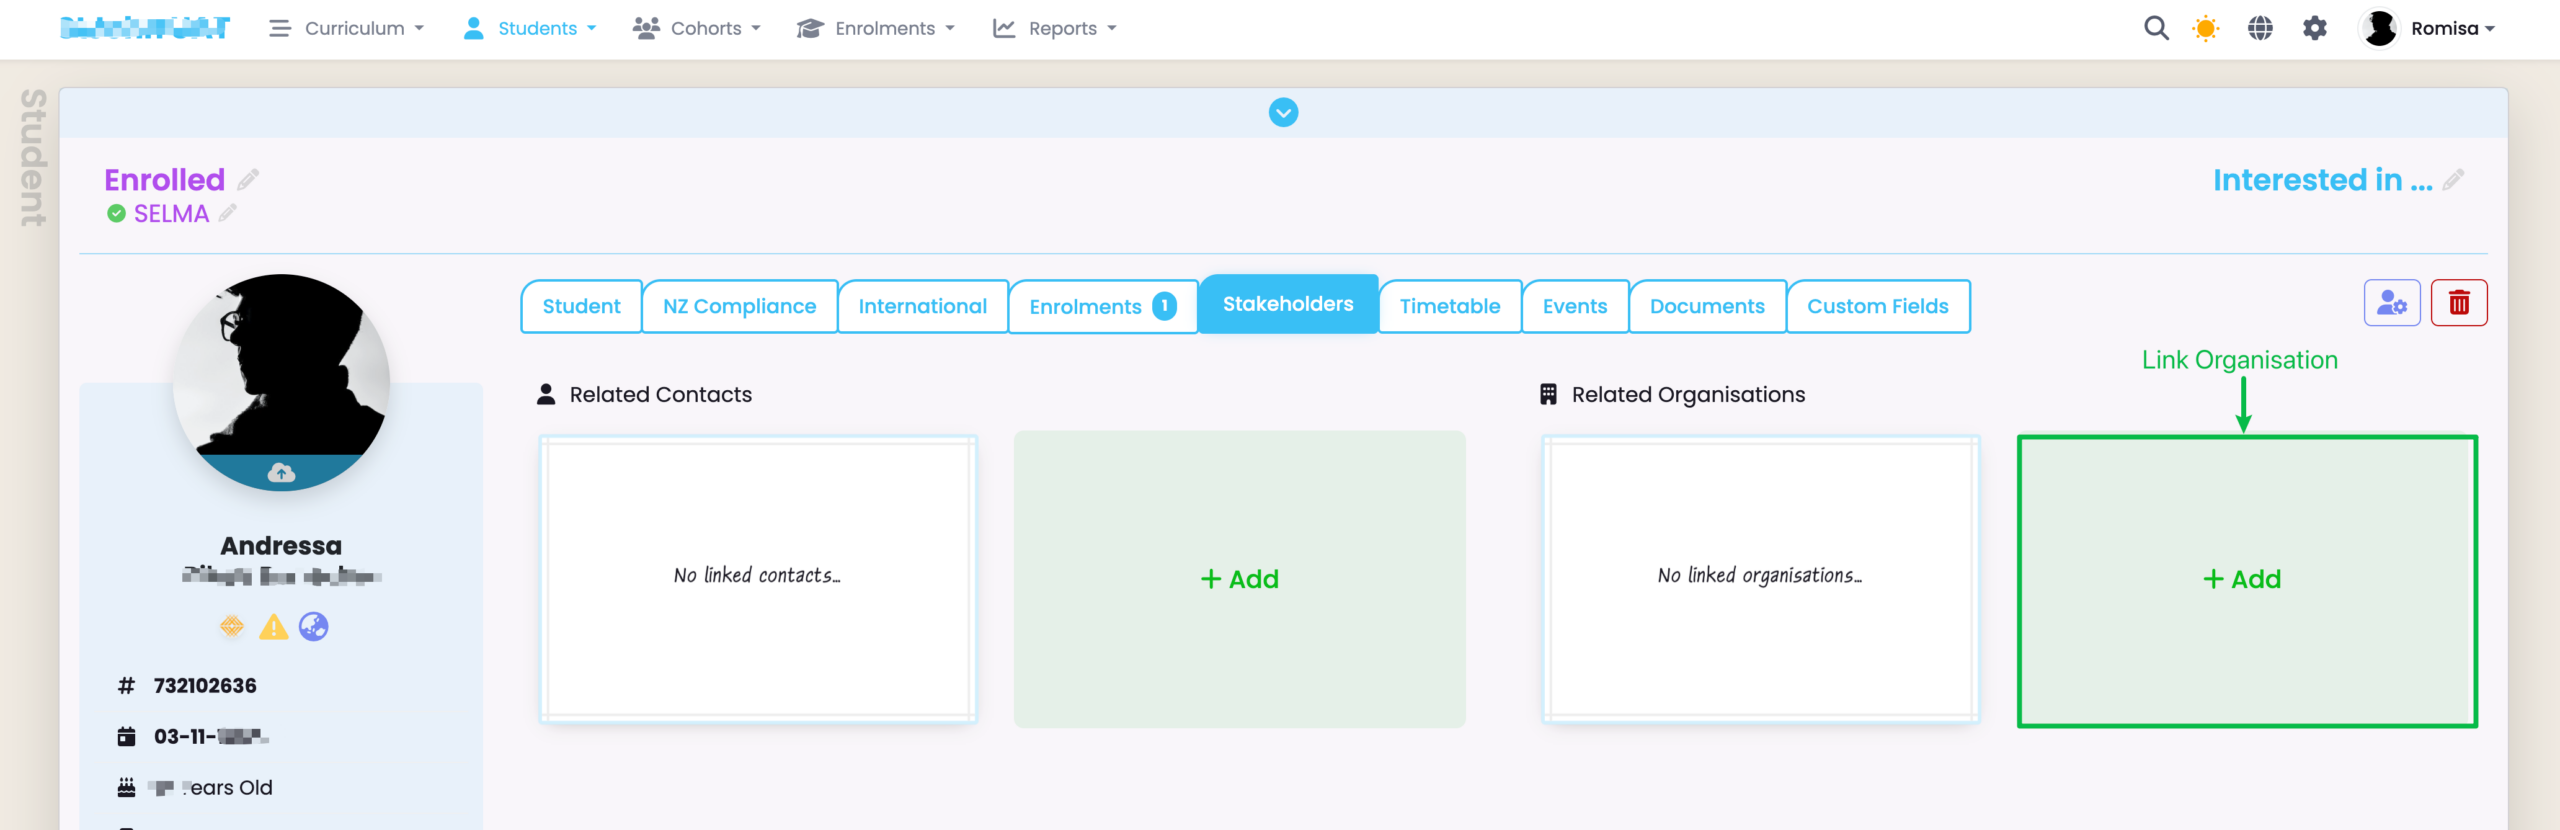
Figure 6ii. Add Required Details and Save
The Organisation Status must be previously set to “Active” to display as an option in the drop-down list of the field “Organisation”.