4. Custom Fields

In this Section:


Create and Manage Custom Fields

Include customised fields as a new tab on profiles by following the guide below.

Create a Custom Field

Figure 1. Navigate to Settings > Custom Fields

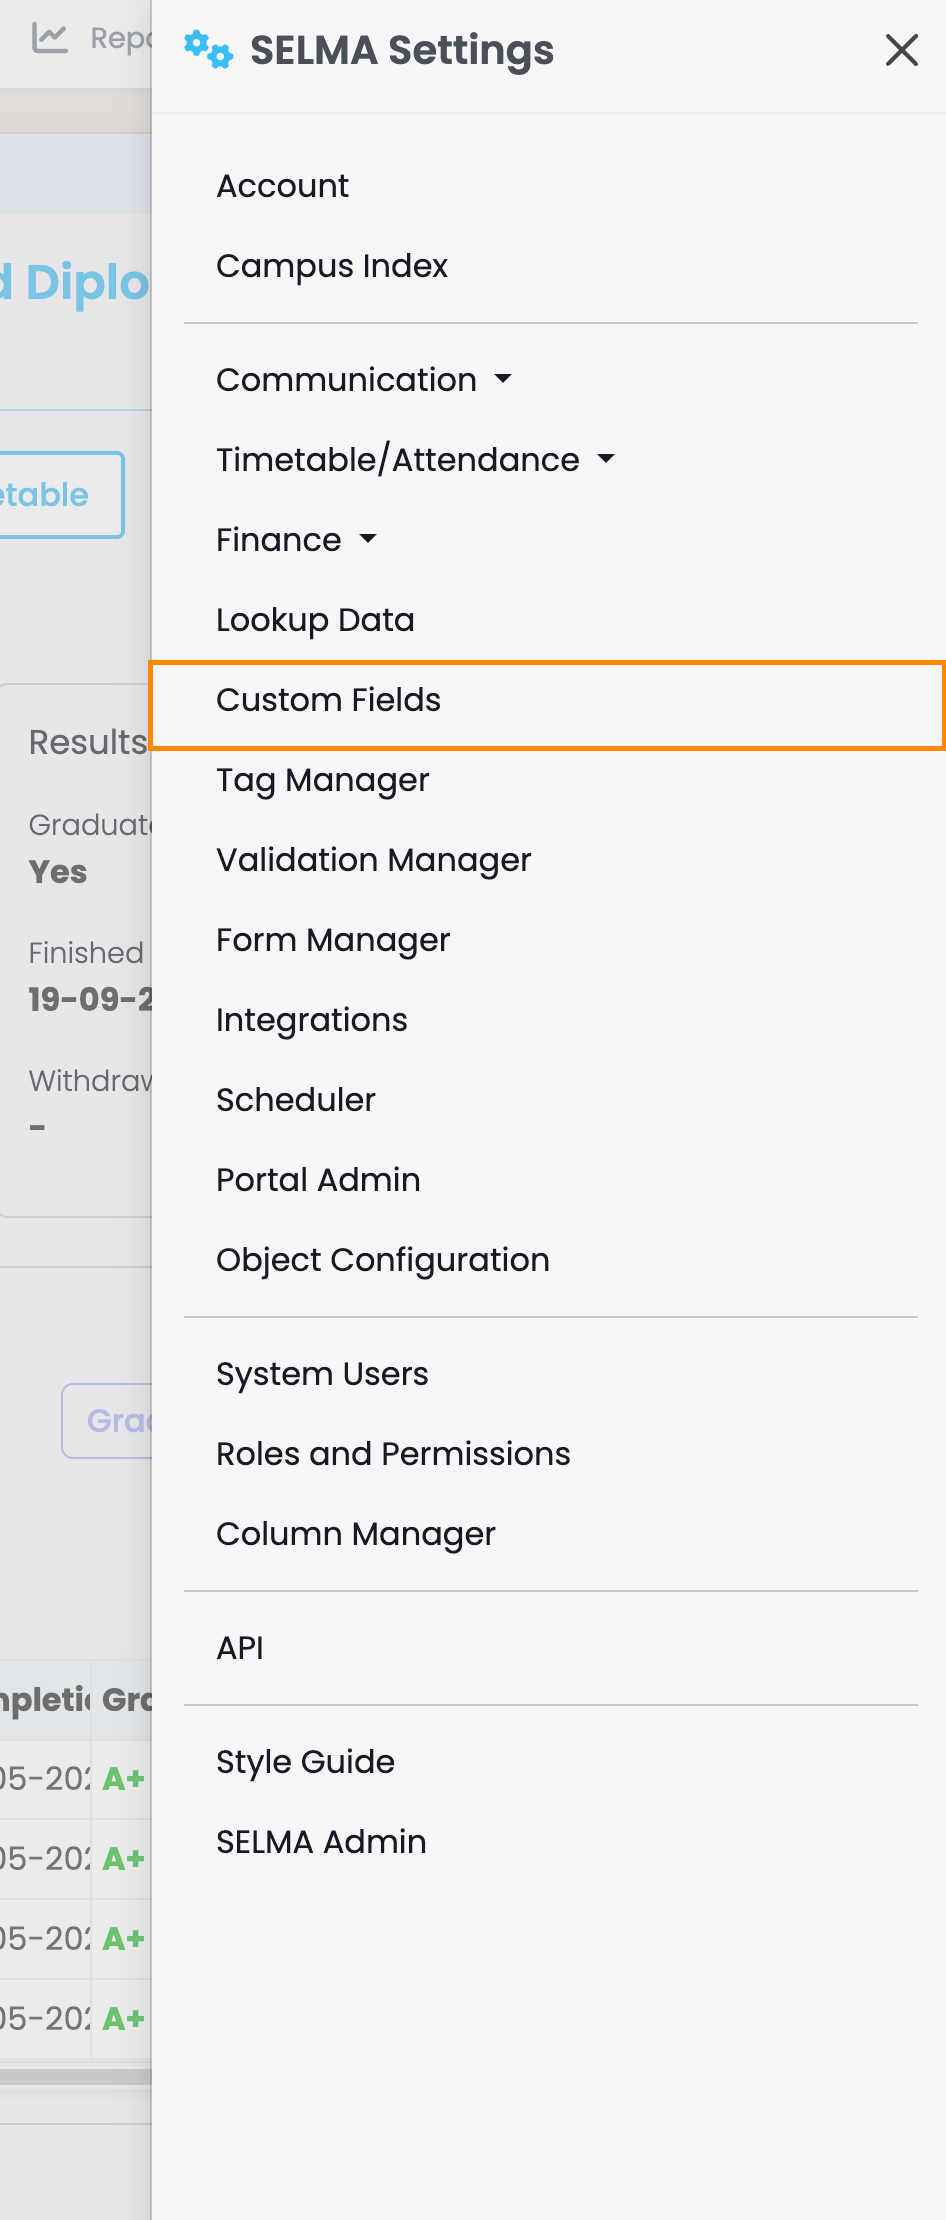
Figure 2. Custom Field Overview

See a list of custom fields under each Object heading, which corresponds with an “Object” in SELMA (orange). The blue “Data Workflow” button takes you to a screen showing how each object inherits data from one another.

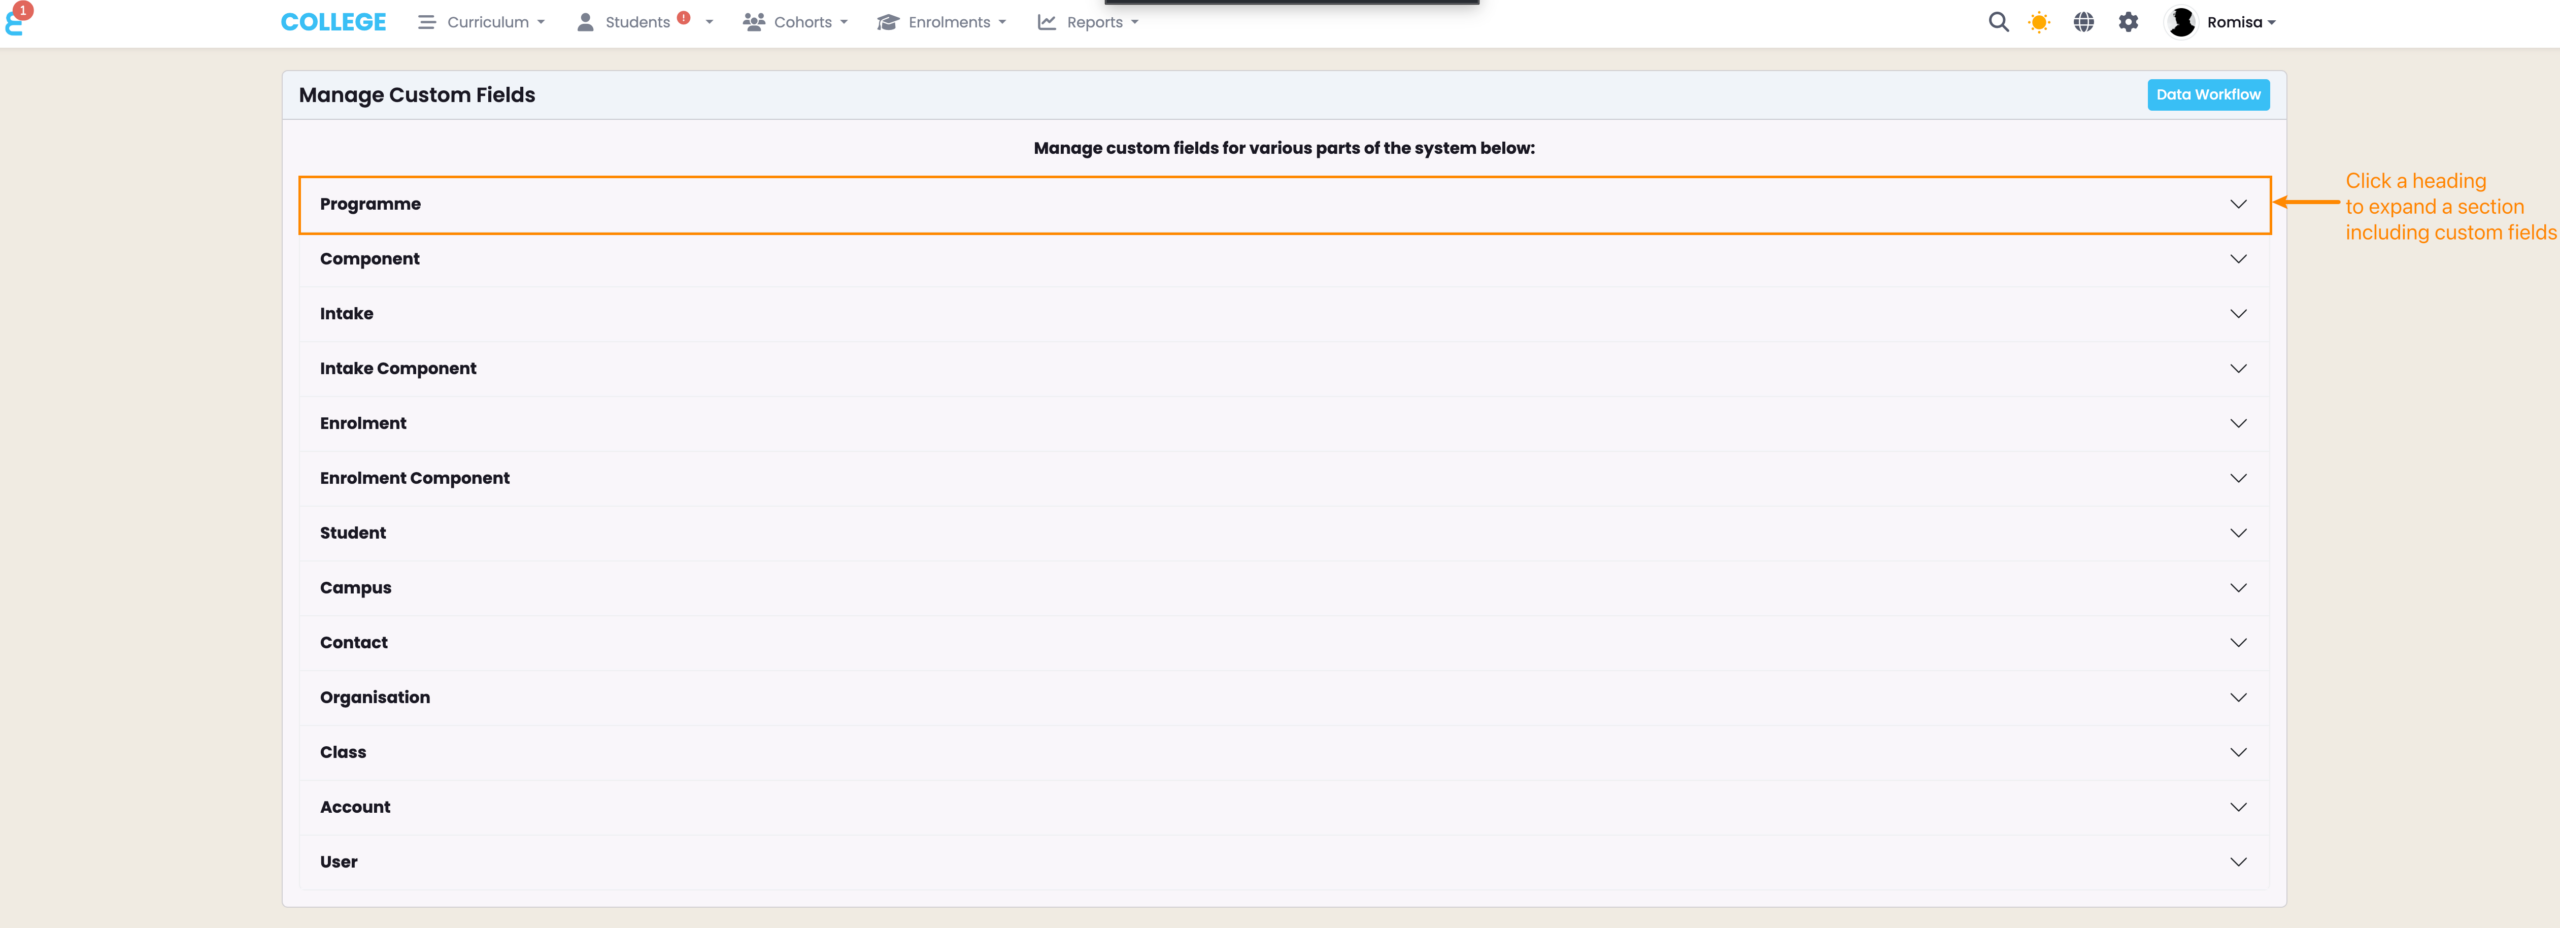
Figure 3i. Create a Custom Field

Click the “+Add” button to create a new custom field.

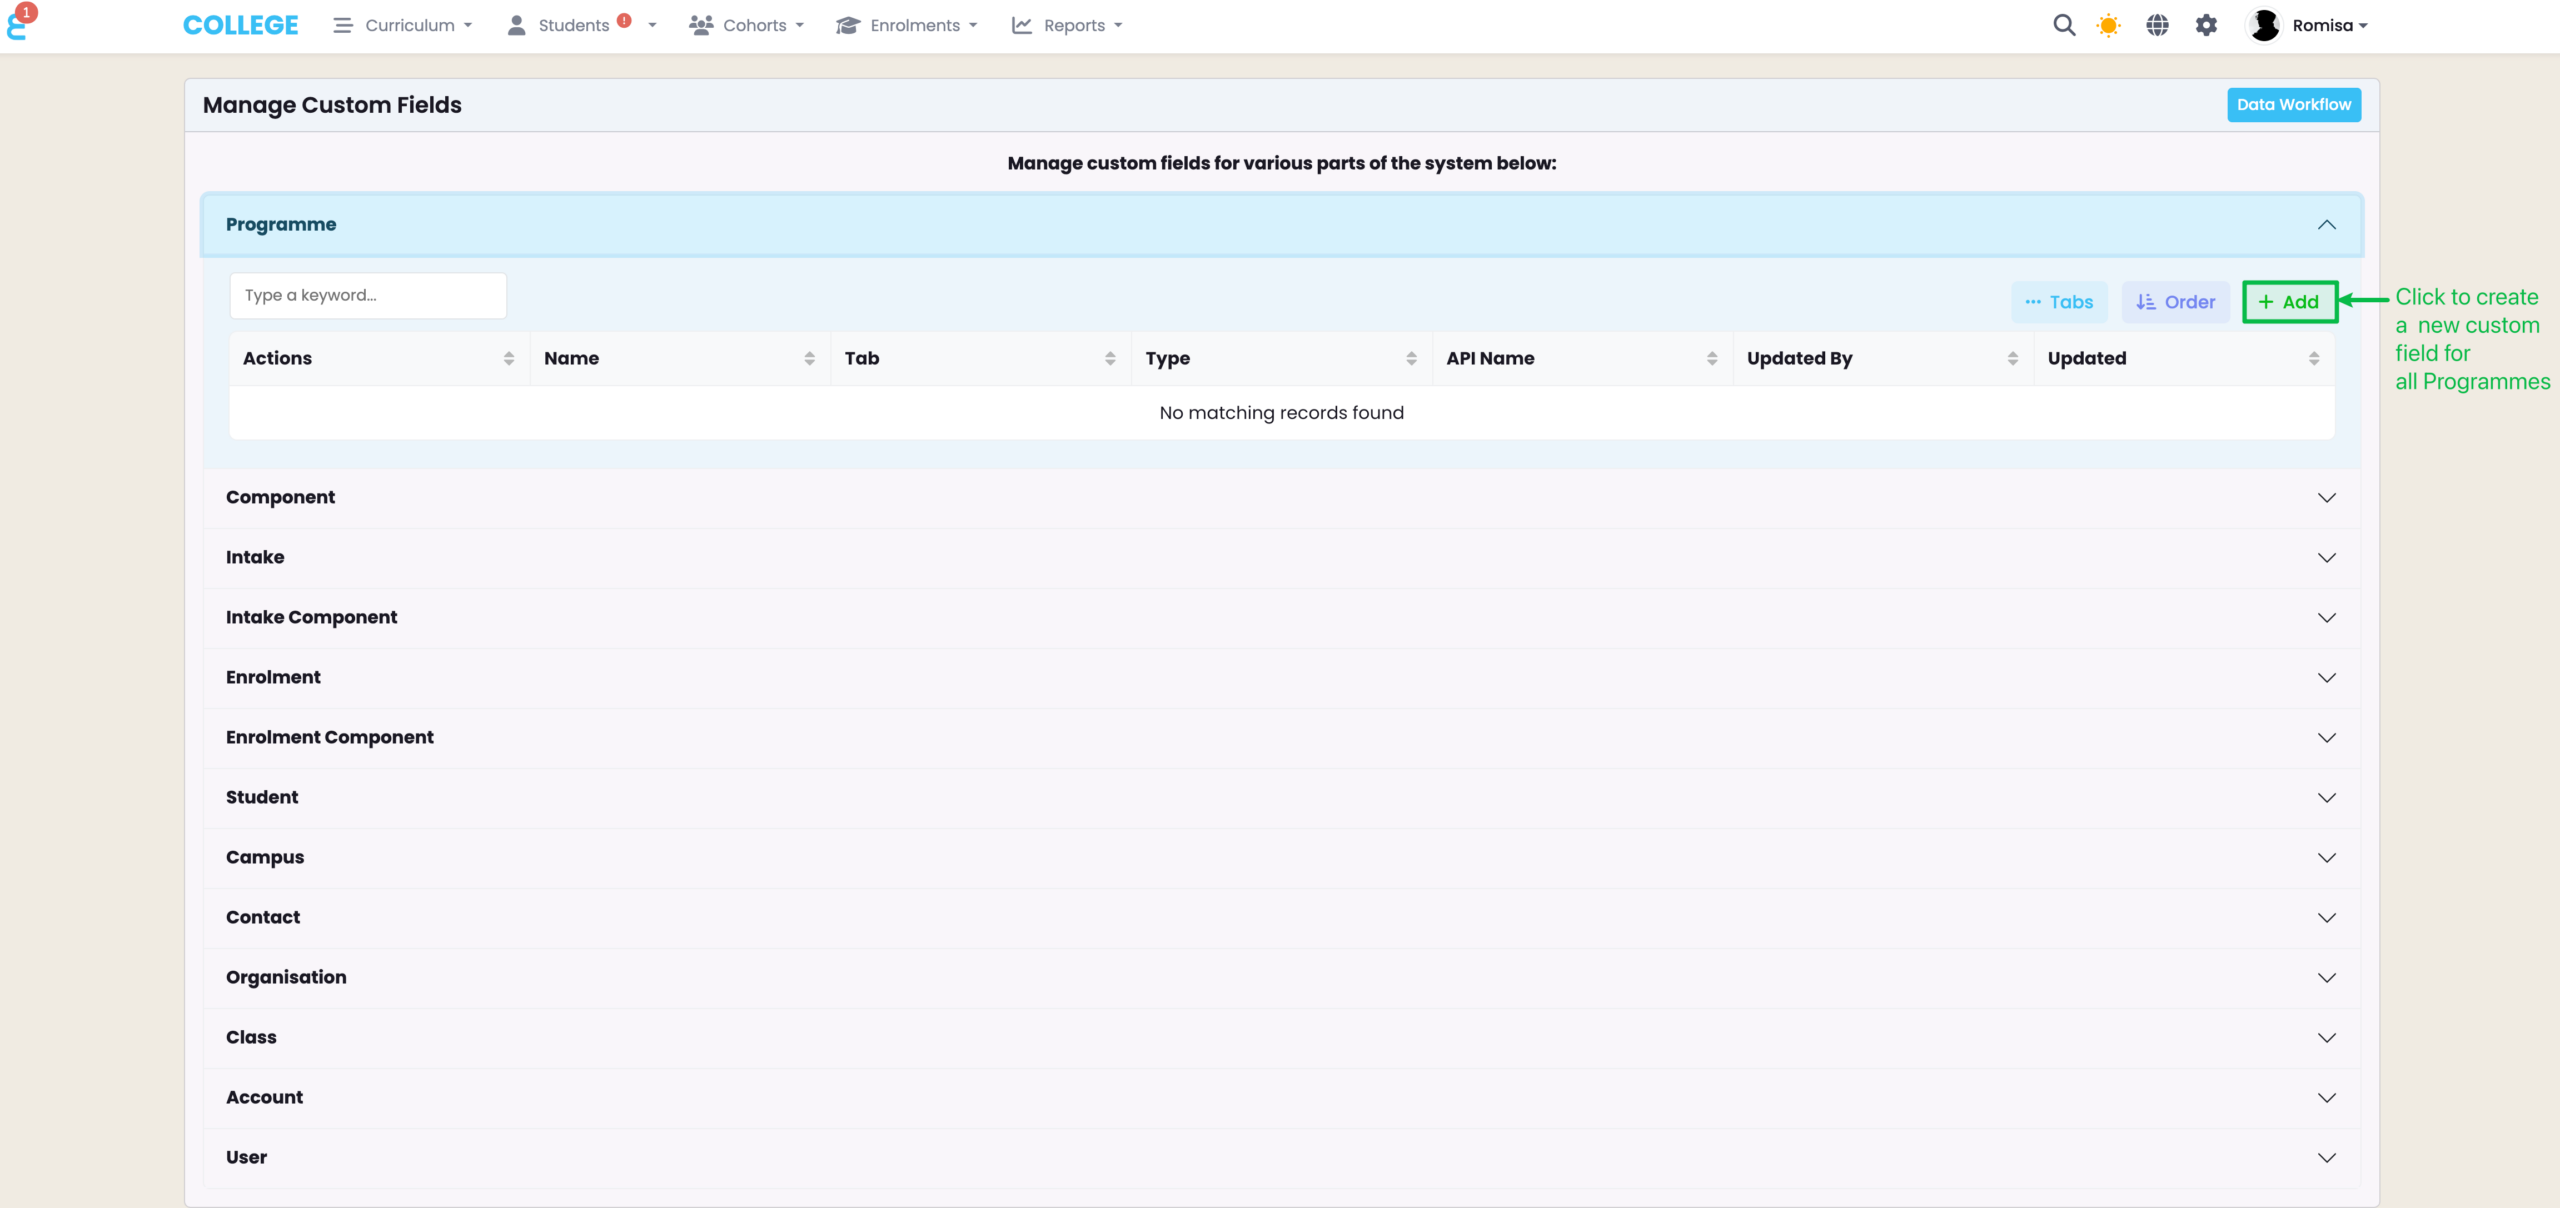
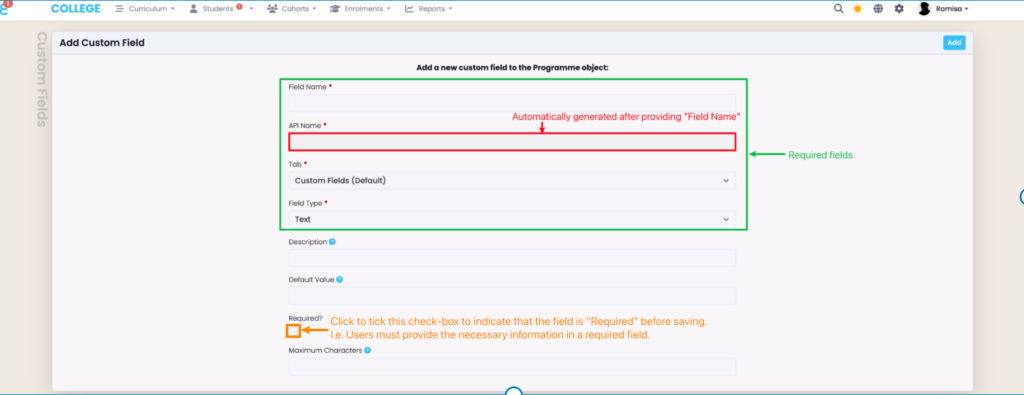
Figure 3ii. Add Custom Field Details

Required details include “Field Name”, “API Name” (generated automatically based on the Field Name), and “Field Type”. Click the checkbox to indicate, with a red asterisk, that the custom field is mandatory to fill out (orange).
Note: It’s recommended to avoid editing a custom field once it’s been created.


Reorder Custom Fields

Figure 4i. Select an Object

To reorder custom fields, expand an Object heading and click “Order”.

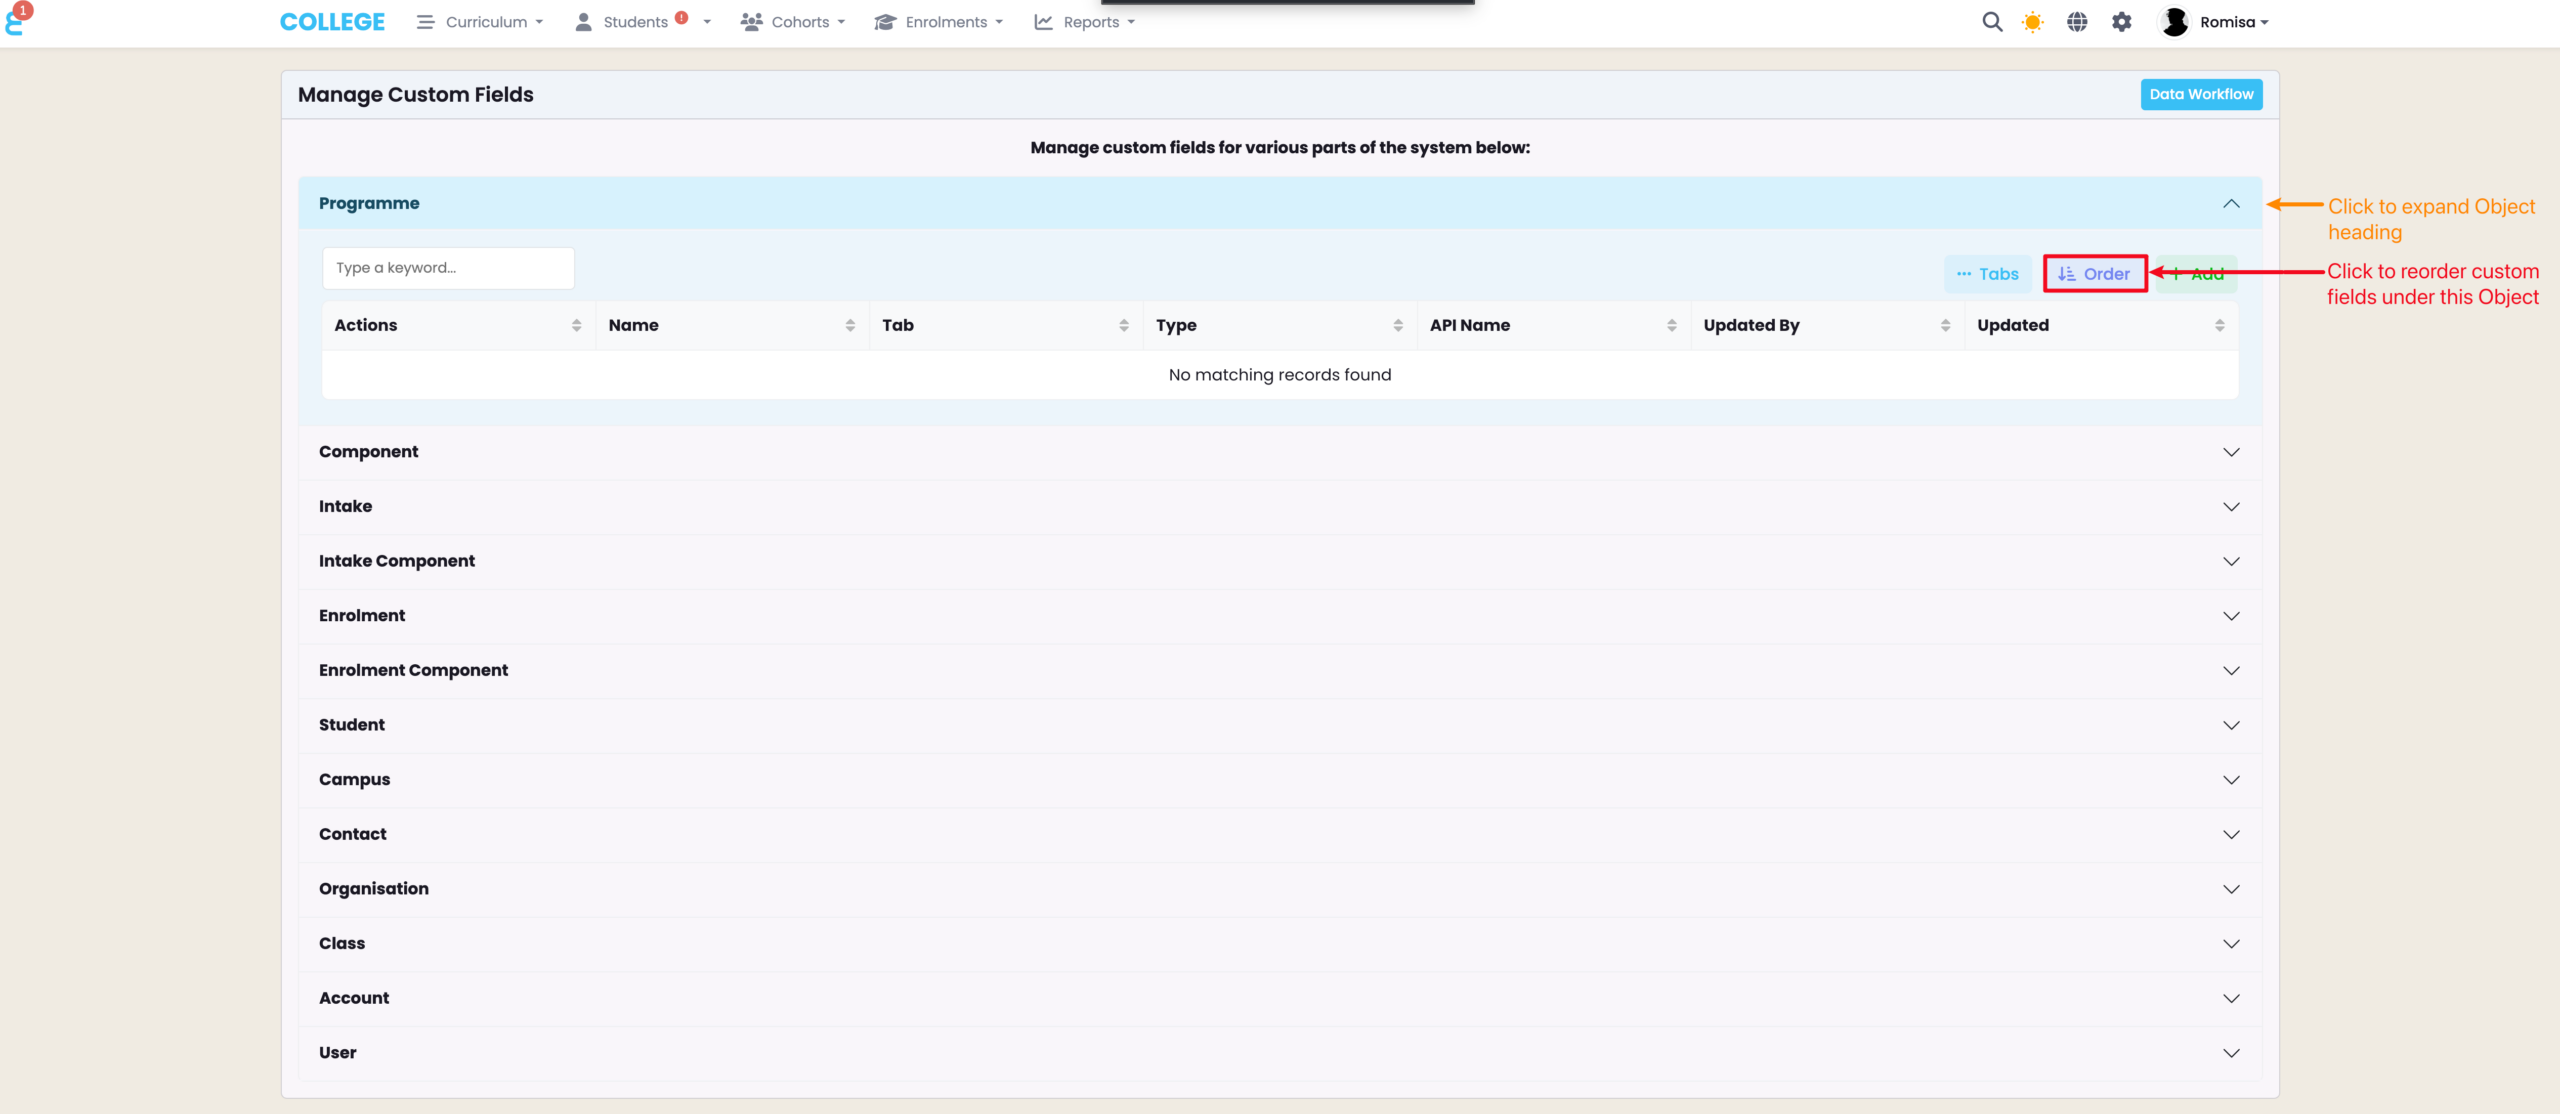
Figure 4ii. Reorder Custom Fields

Drag and drop the custom fields into the order you wish to have them presented on an Object tab.
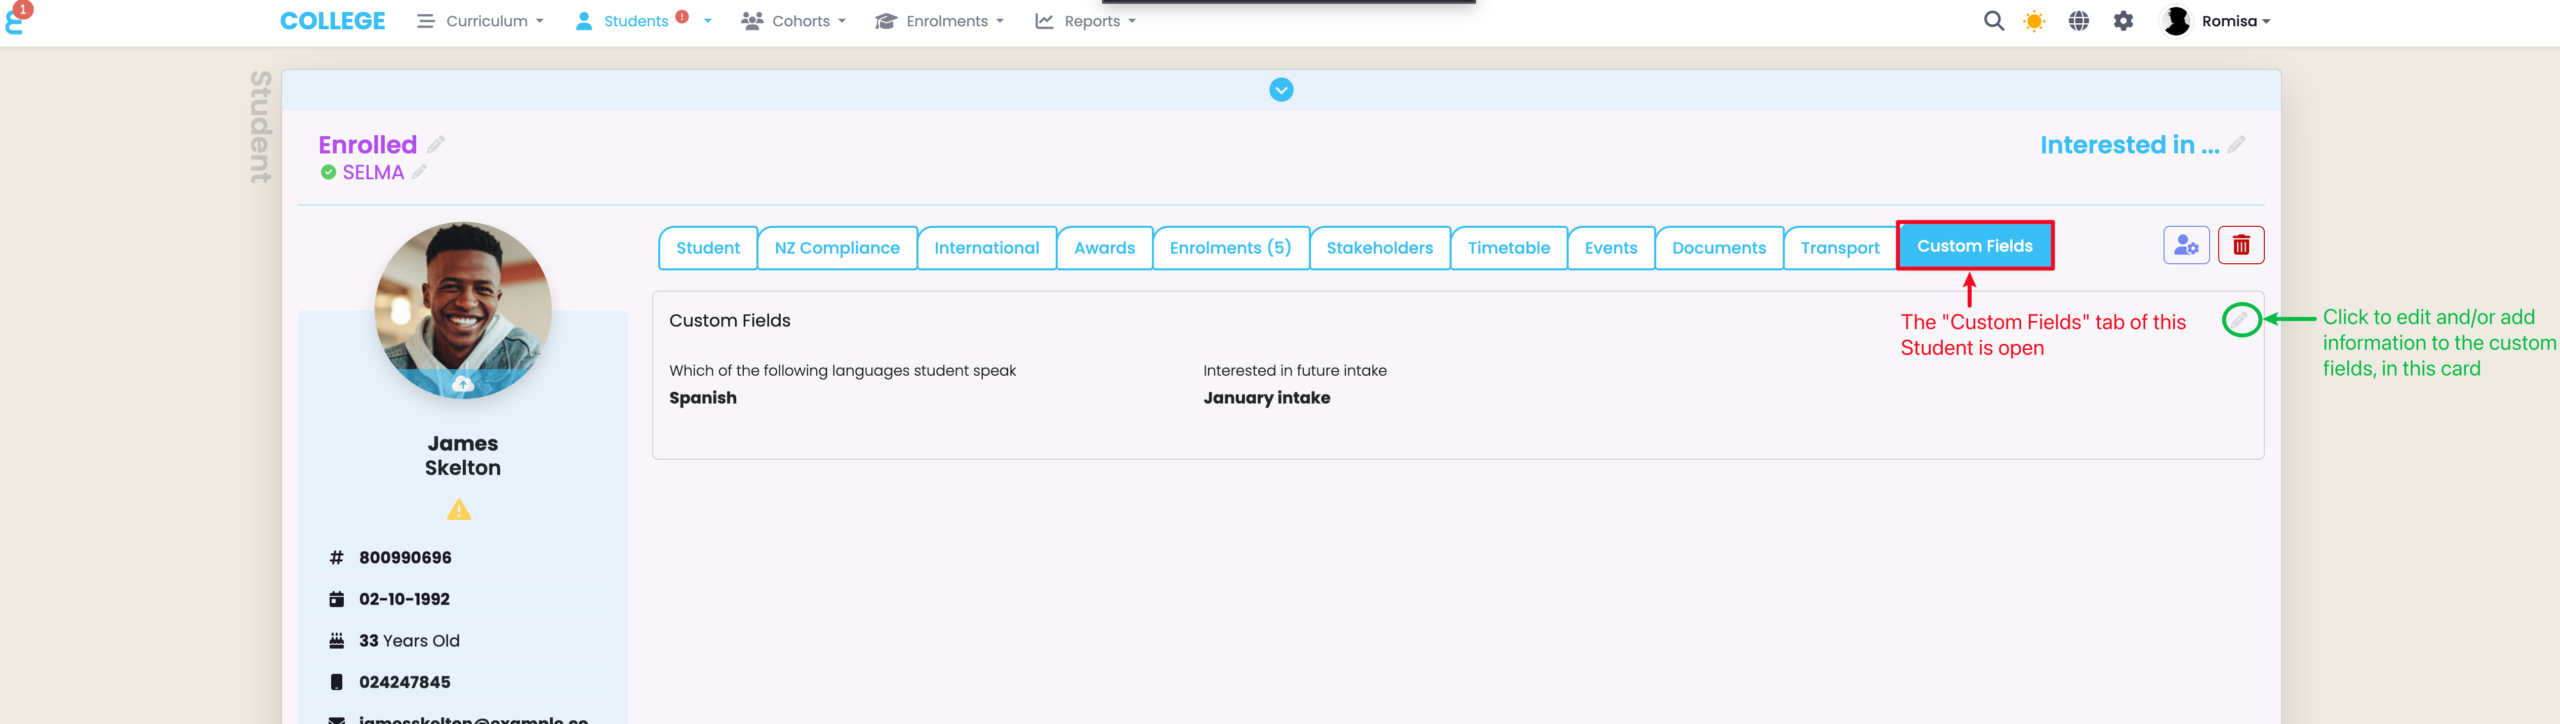
A screenshot of a computer

Description automatically generated

Custom Fields Tab

Figure 4. Use the Custom Field

In this example, the Student Profile page shows a Custom Fields tab (red) including information about fluent languages spoken by the Student, and the future Intake they are interested in. To alter or add relevant information, click the pencil icon in the corner of the card (green).

Related Articles

8. Validation Manager

In this Section: Validation Manager Your account will come with a default validation configuration called ‘SELMA’. This can be configured using your own specifications, or you can leave it as is, and create a new one. Add New Validation Figure 1i. Access Validation Manager Navigate from Settings > Validation Manager Figure 1ii. Validation Manager Overview SELMA …

1. Account

In this Section: Find your Account Details Figure 1. Navigation Bar Click the cog icon in the top navigation bar (red). Figure 1ii. Settings Panel Click “Account“. Account Tab The Account tab is where you can make changes to the basic details set-up by SELMA. Figure 2. Key Details Set-up key parameters such as your …

9. Form Manager

In this Section: Access the Form Manager The Form Builder is an additional paid feature to your SELMA subscription plan. Figure 1. Navigation Bar Click the cog icon in the top navigation bar. Figure 1ii. Settings Panel Click “Form Manager“. Form Manager Overview The Form Manager allows you to create and store Enquiry and Enrolment …

7. Tag Manager

In this Section: Create and Manage Tags The Tag Manager is a tool that allows SELMA Users to assign and manage tags against different Objects within the system, such as Students or Components. Tags are labels used to classify batches of information, and make it easier to search for a related Object. Create a Tag …