
This article discusses how to create a User in SELMA, and how to navigate the User Index.
In this section:
Creating a User
In SELMA, there is a single way to create a System User. Follow the next steps to do so:
- Navigate from Settings > System Users.
- The following page reveals the User Index, where you can add a new User (Figure 2.).
- Fill out the necessary details on the New User form, including the User’s email address, and assign them a Role (Figure 3i-ii.).
- Default Roles include:
- Registrar (highest System access level)
- Admin (medium System access level)
- Teacher (restricted access to assigned Intakes and Classes)
- Please see System Users – User Roles and Privileges for more information.
- Notes:
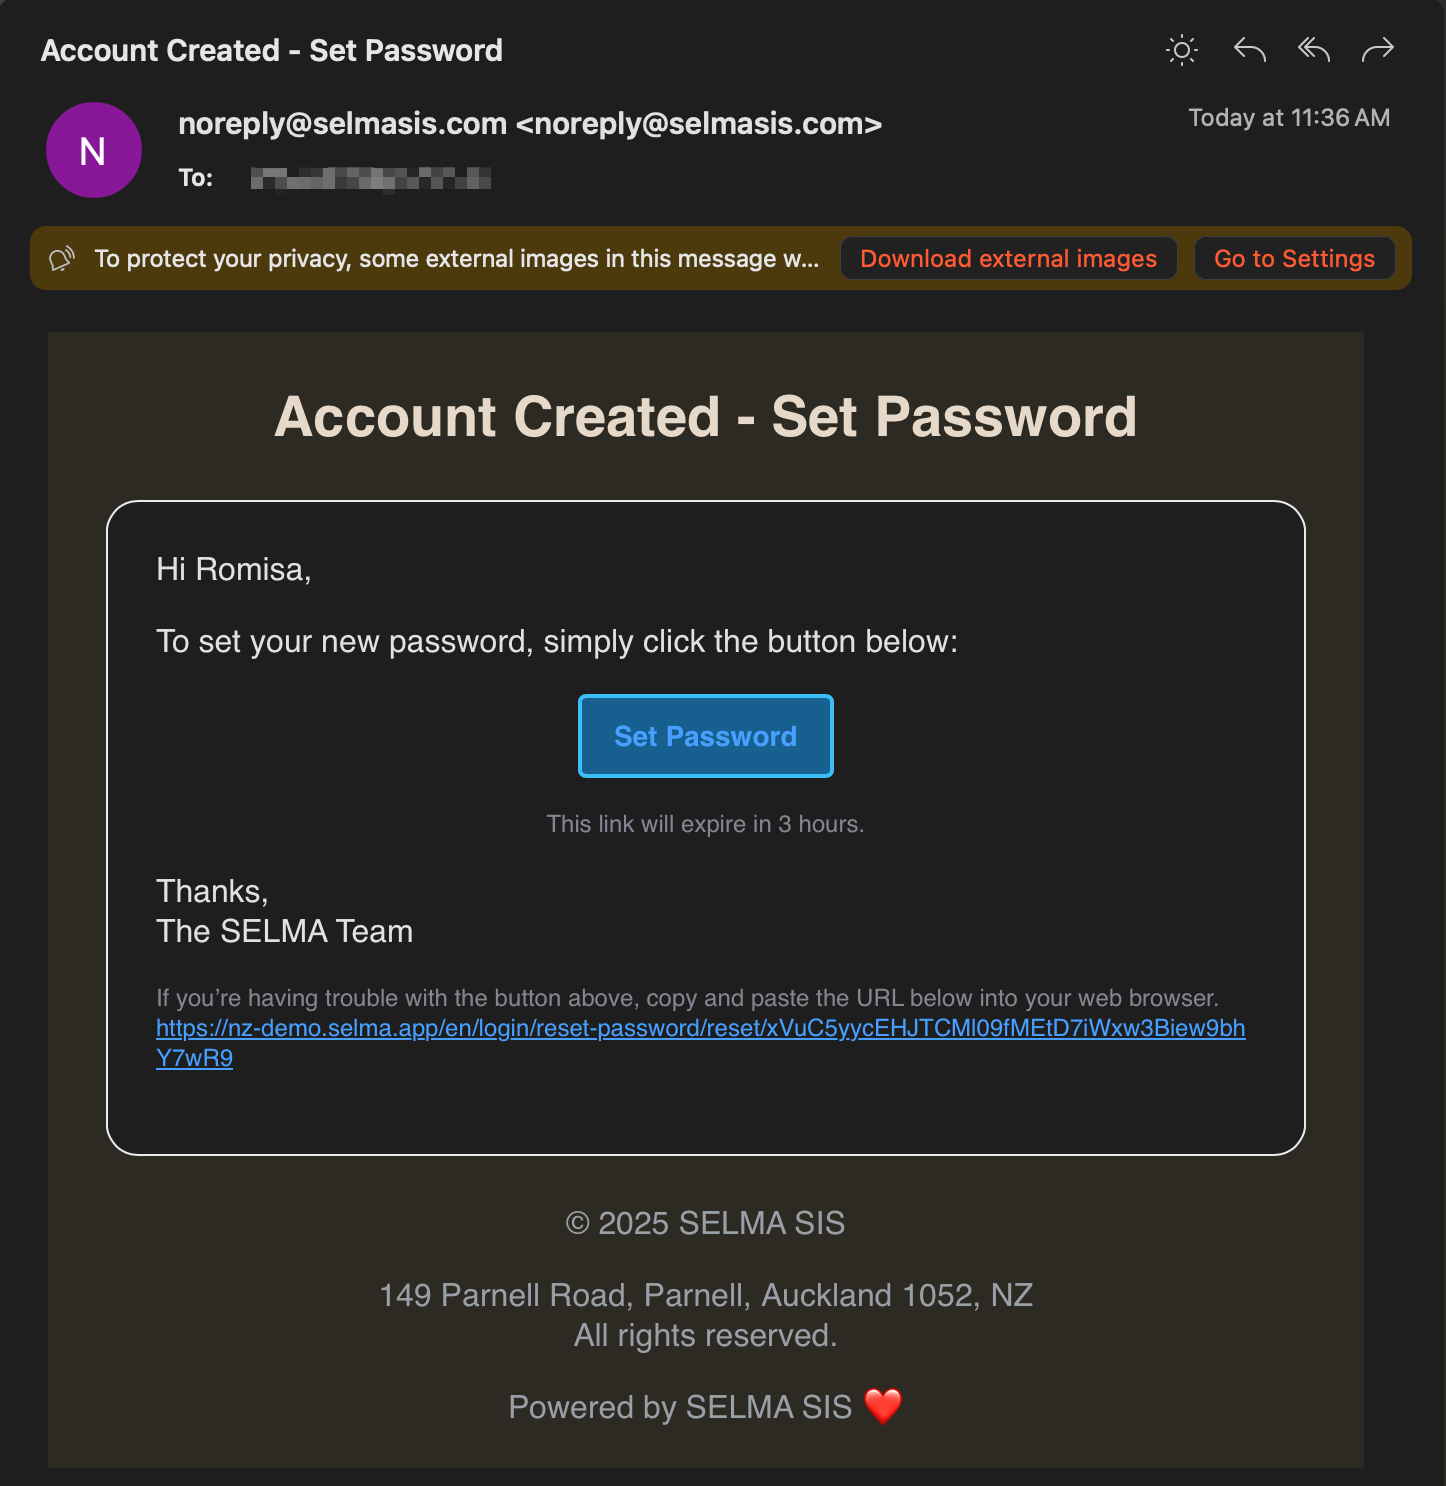
- On submission of the New User form, the email address will be used to send an activation email to the User. They will then need to set-up a password and log-in to SELMA to fully activate their account.
- If an activation email is not found, please direct Users to search their “Other” and “Spam” inboxes, before resending an activation email to them.
- You can create new Roles to assign Users.
- Please see System Users – User Roles and Permissions to guide you.
- On submission of the New User form, the email address will be used to send an activation email to the User. They will then need to set-up a password and log-in to SELMA to fully activate their account.
- Default Roles include:
Figure 1. Click the cog icon to open SELMA Settings, and navigate to “System Users” (purple).
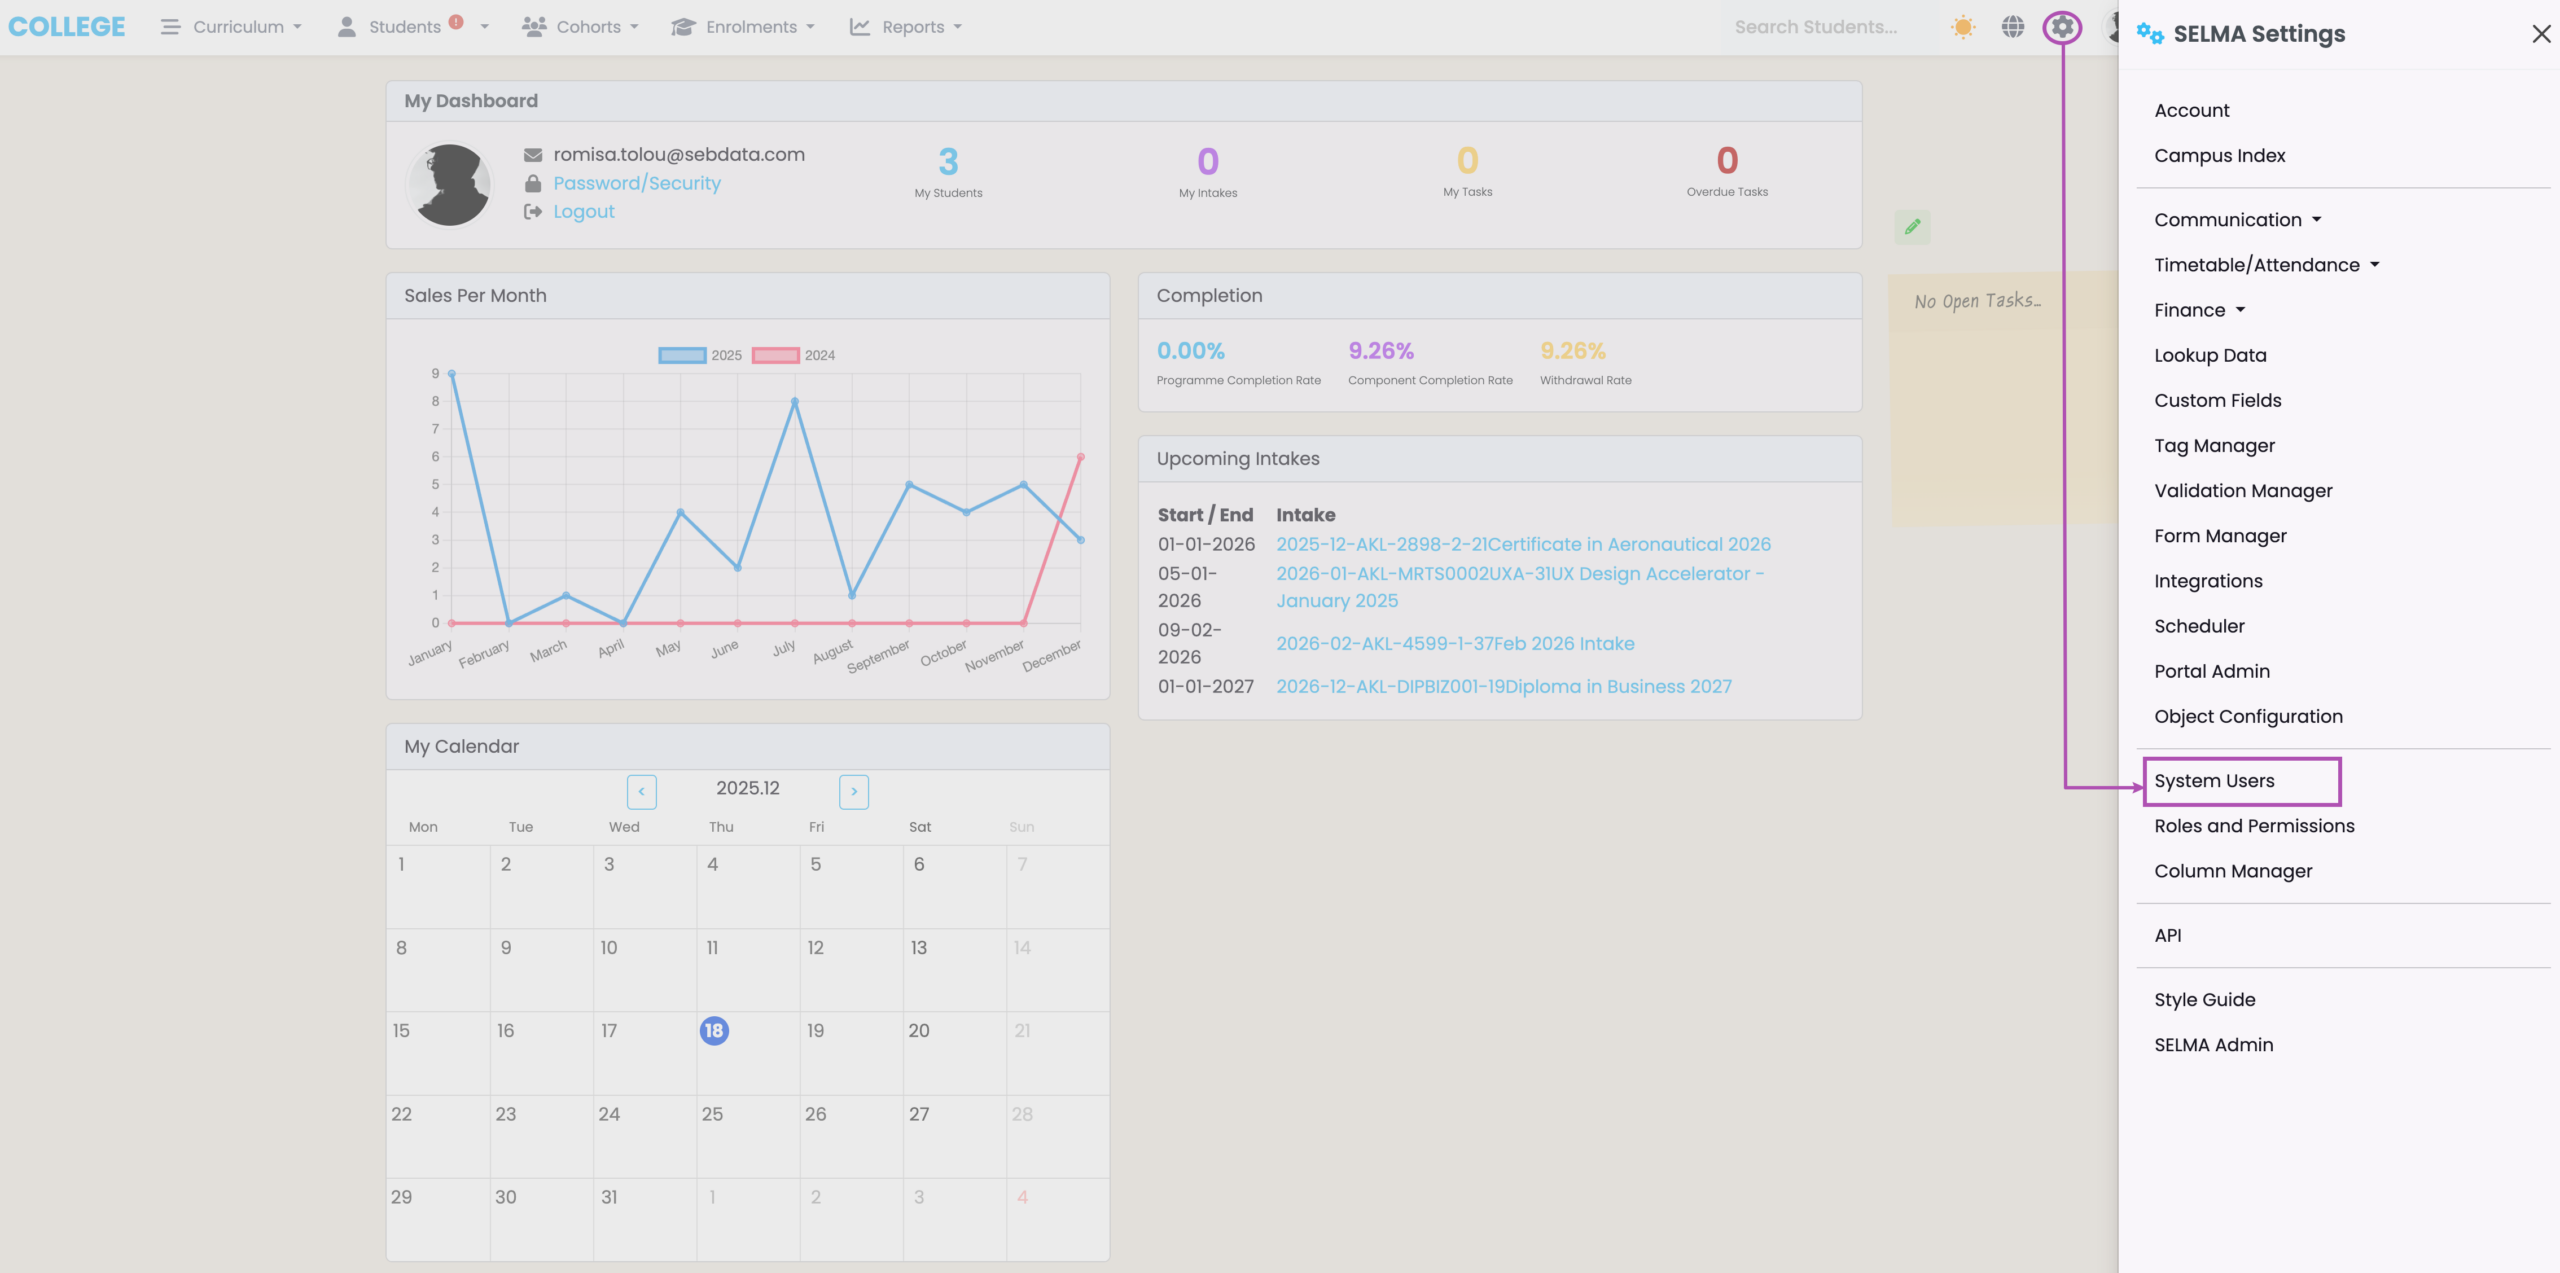
Figure 2. To create a new User, click the green cross icon (red). Filter the User Index by User Status (orange). You can search the list of Users with a quick, basic search (blue), or an Advanced Search with specific search criteria (green), which you can save and access later (purple).
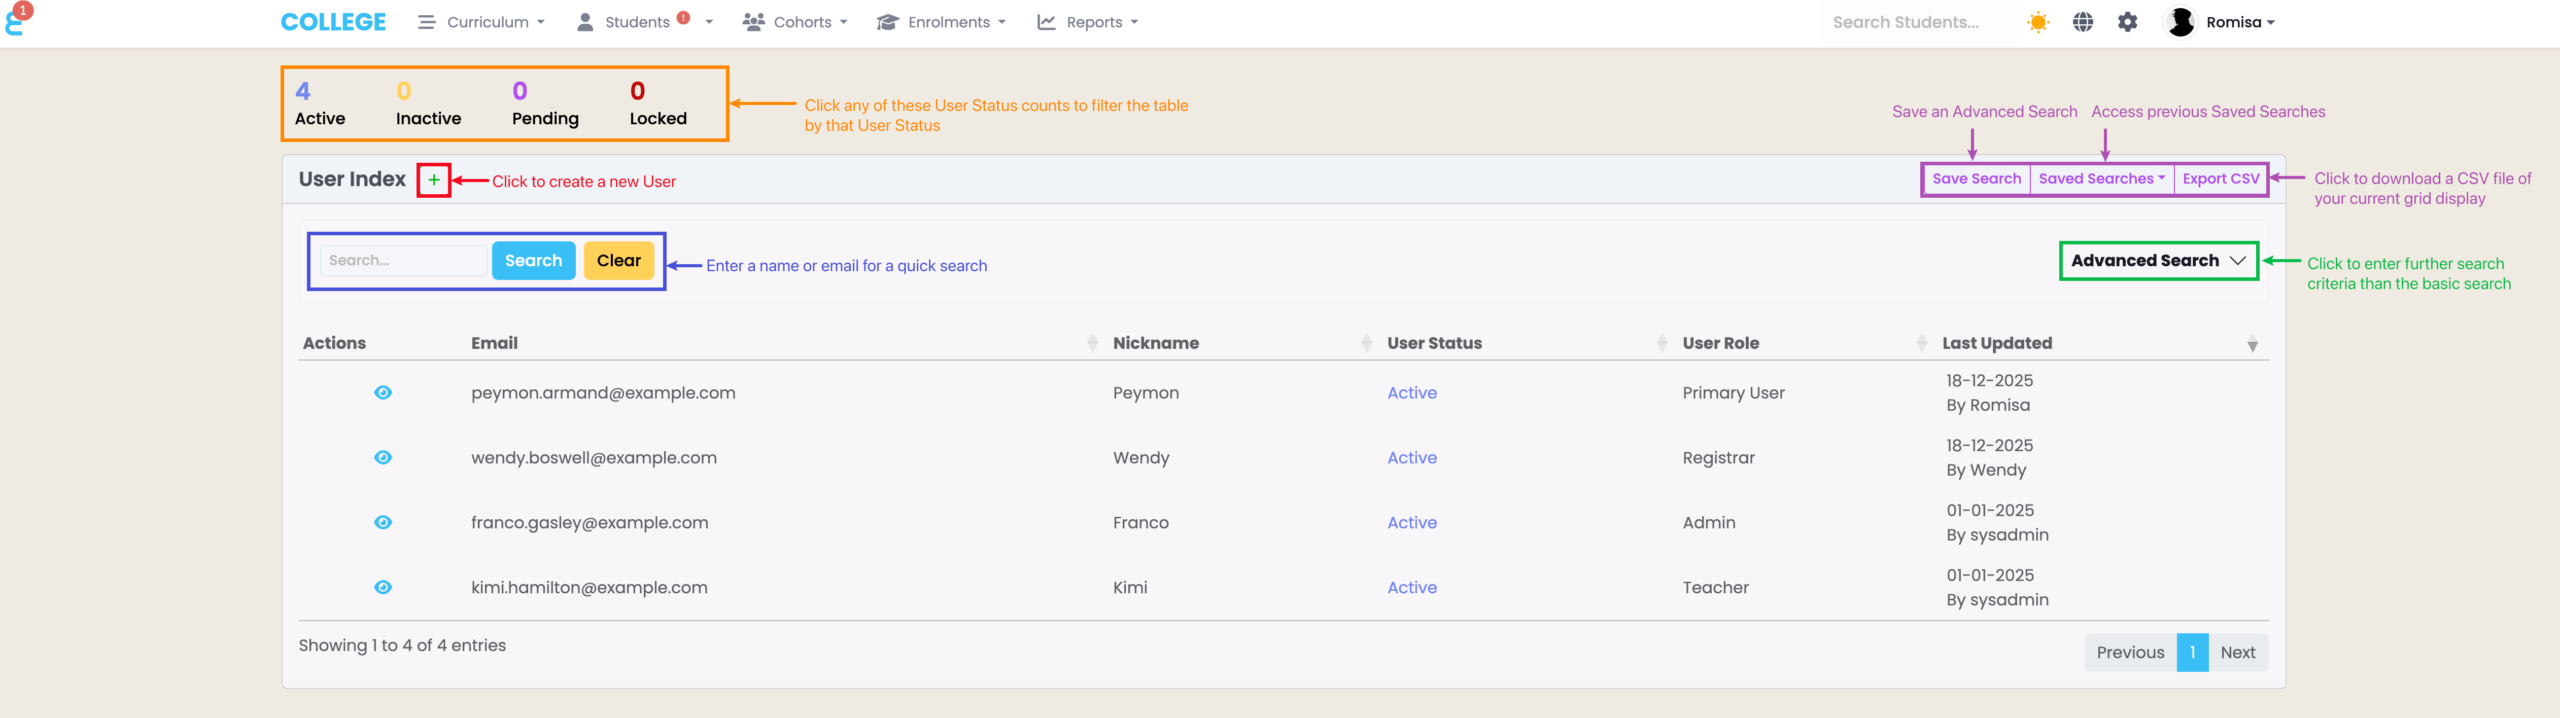
Figure 3i. Ensure the Email address is provided and correct (purple). Assign the User a Role in the system (red).
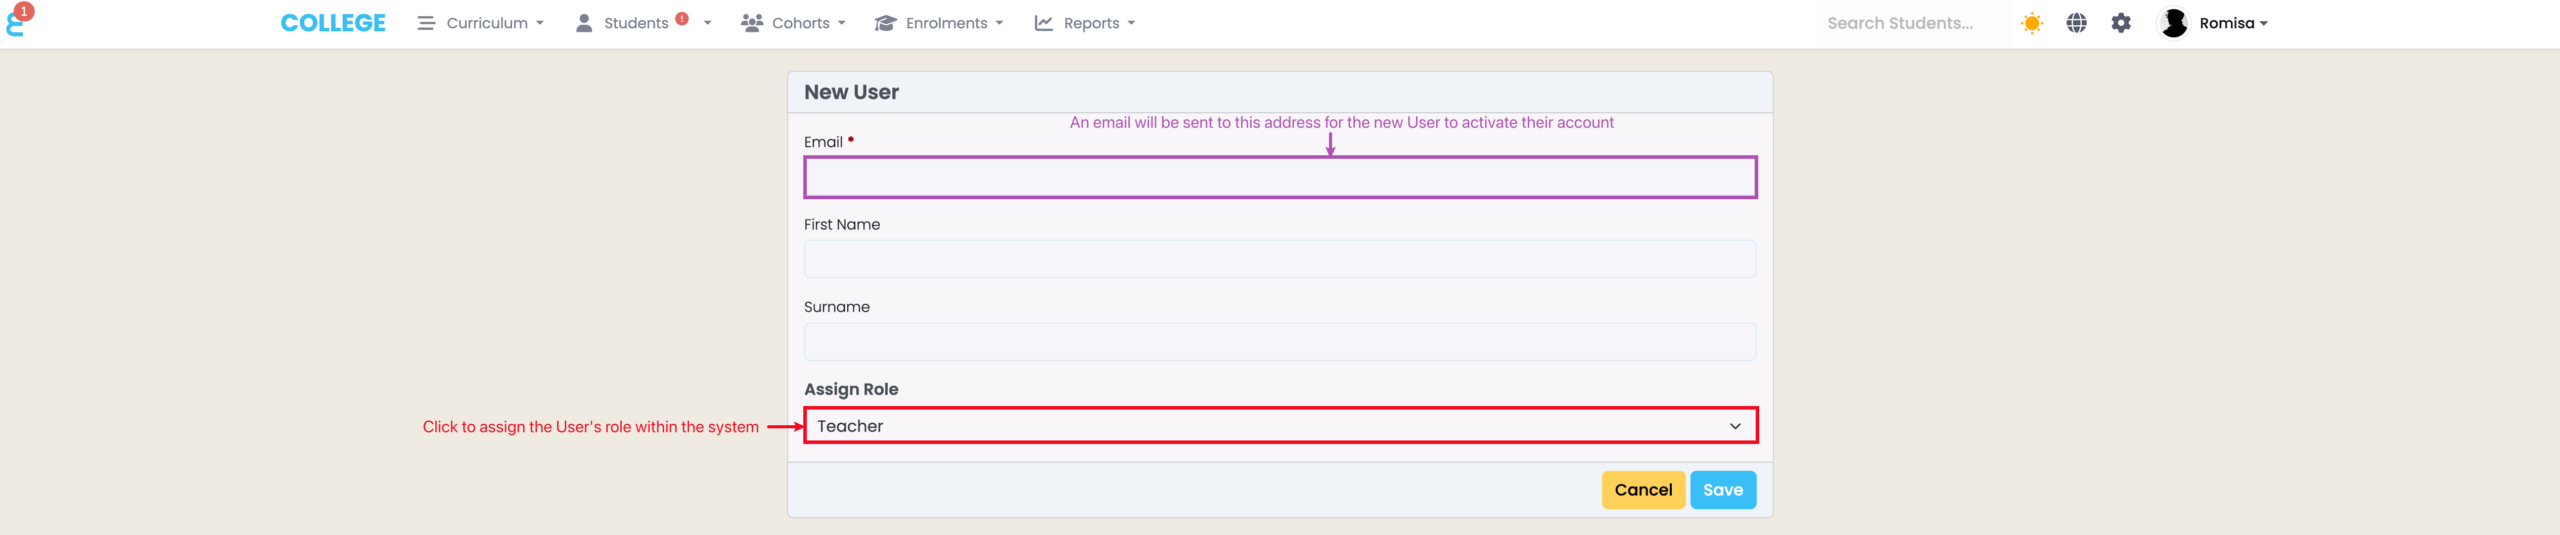
Figure 3ii. The Pending User will receive the following Activation Email, where they must click the blue “Set Password” button to set-up a password and log-in to their SELMA User account.
The User Profile
There are three tabs within the User profile, which we will cover in order now.
The User Tab
When you have created a new User, or if you select to access a User profile from the User Index, you will be taken to the “User” tab.
Here, you can see the User Status as a heading, and add or remove details from their profile (Figure 4.).
The purple actions button features across each User tab, and can be used to perform a range of actions against the User (Figure 5.):
- Activate or Deactivate the User
- Notes:
- Users can’t be deleted as they are linked to existing records.
- Only Registrars can deactivate users.
- Notes:
- Resend an Activation Email, if the User has missed it
- Note: Please inform the User to check their spam emails, first
- Assign another Role to the User
- Send an Email directly to the User, if their User Status is “Active”
- Send a Text message directly to the User, if their User Status is “Active”
- Impersonate a User, to view the System from the User’s perspective
- Note: While impersonating a User, any changes you make to the system on their behalf will be recorded in the SELMA audit log.
Figure 4. The purple “Pending” heading above the User’s profile picture indicates that they haven’t logged-in to activate their account, yet. Once they have set up a password and logged-in, it will change to “Active”. You can see an overview of information in the side-panel (orange) and you can edit specific details by clicking the pencil button (green).

Figure 5i. The actions button allows you to disable or enable User access to the system (green), or to change their assigned role (orange). Browse the system from the User’s perspective by clicking “Impersonate” (burgundy).

Figure 5ii. The purple top banner indicates you are in Impersonation mode (red arrow), confirmed by the Account Name (purple arrow). Click to “Exit Impersonation” (orange) to return to your account.

The Students Tab
The “Students” tab shows you a list of students that this User is associated with (Figure 6i.).
Notes:
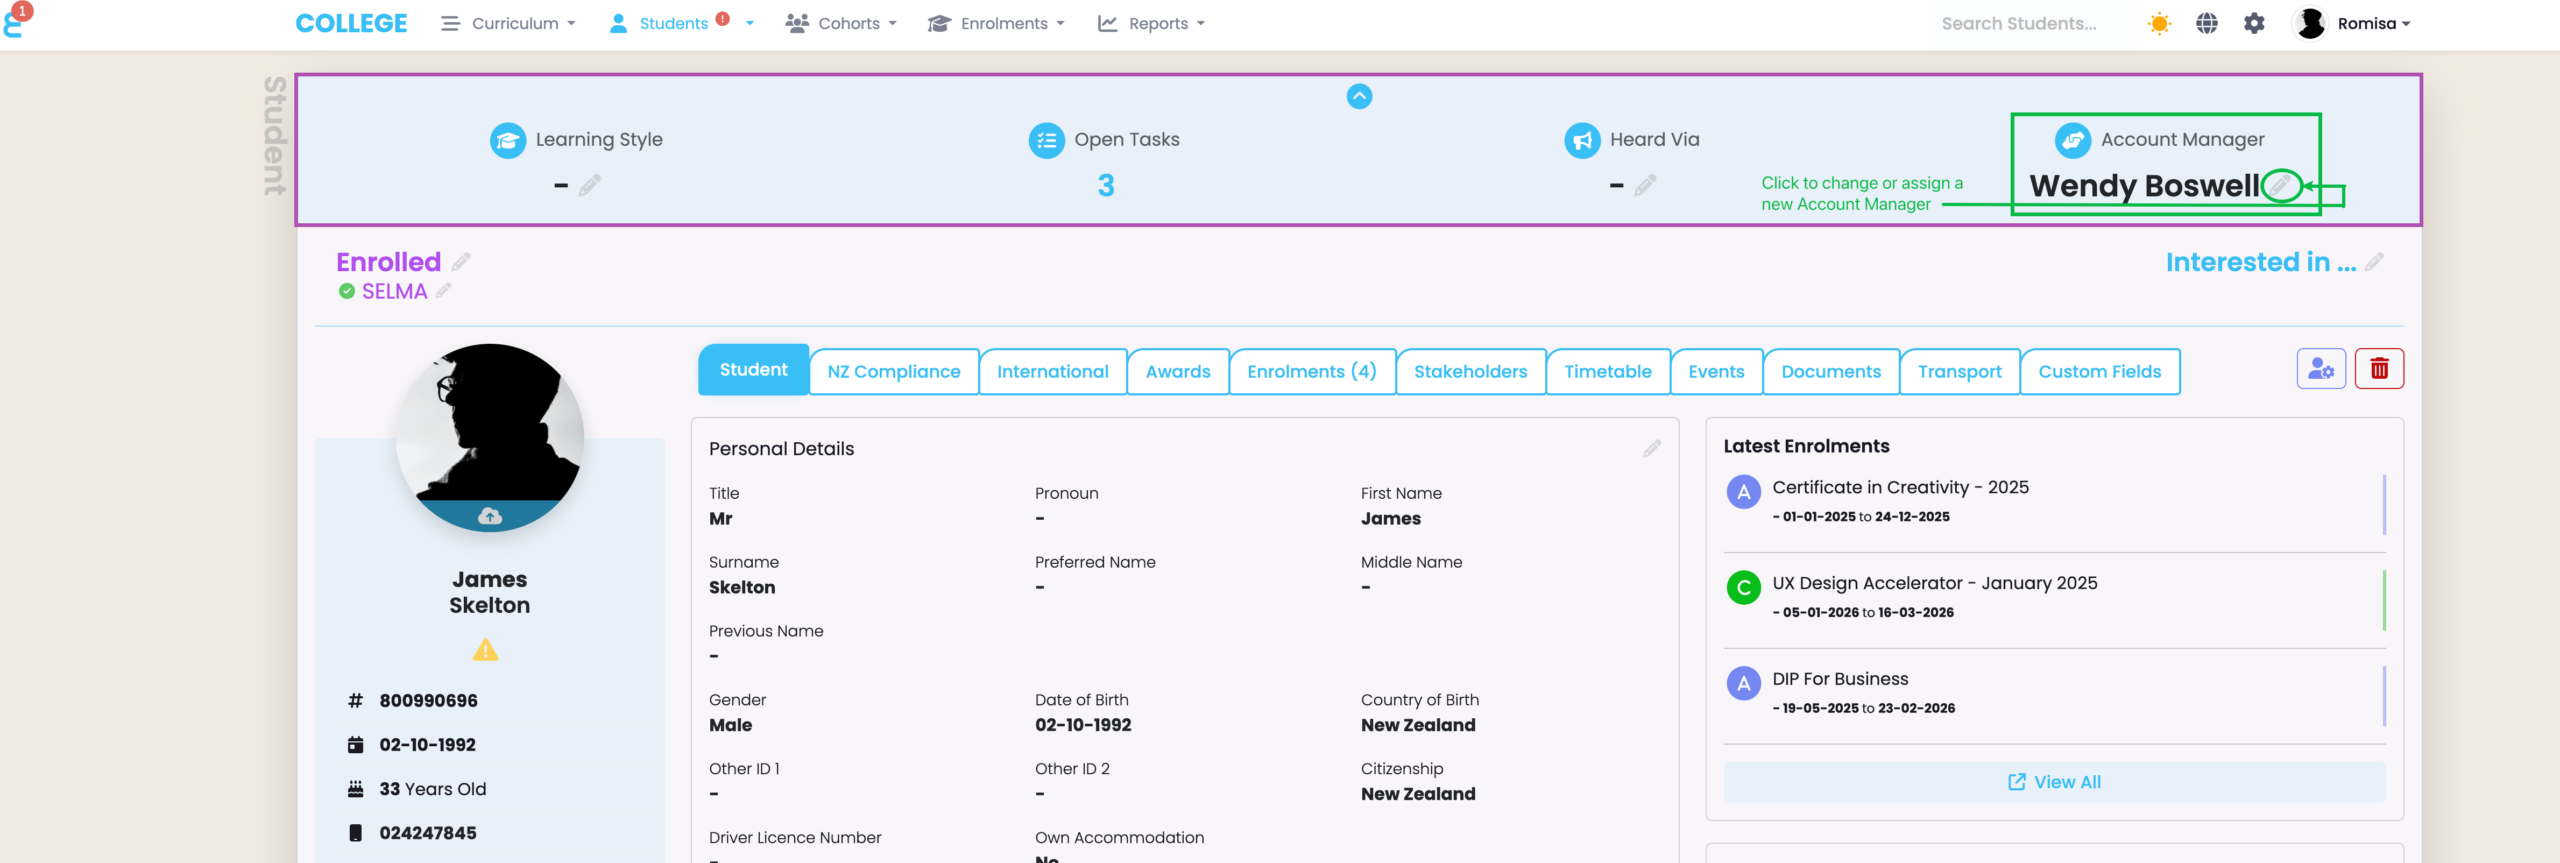
- An “Account Manager” association is assigned to a User to allow them access to a chosen Student profile.
- The User can be assigned an “Account Manager” by accessing the top bar on a Student profile (Figure 6ii.).
Figure 6i. View which Students this User is associated with. If they are an “Account Manager” they can view and edit a Student profile, or if they are a “Class User” they are a teacher. Click the eye icon beside a Student name (orange) to view their Student profile.
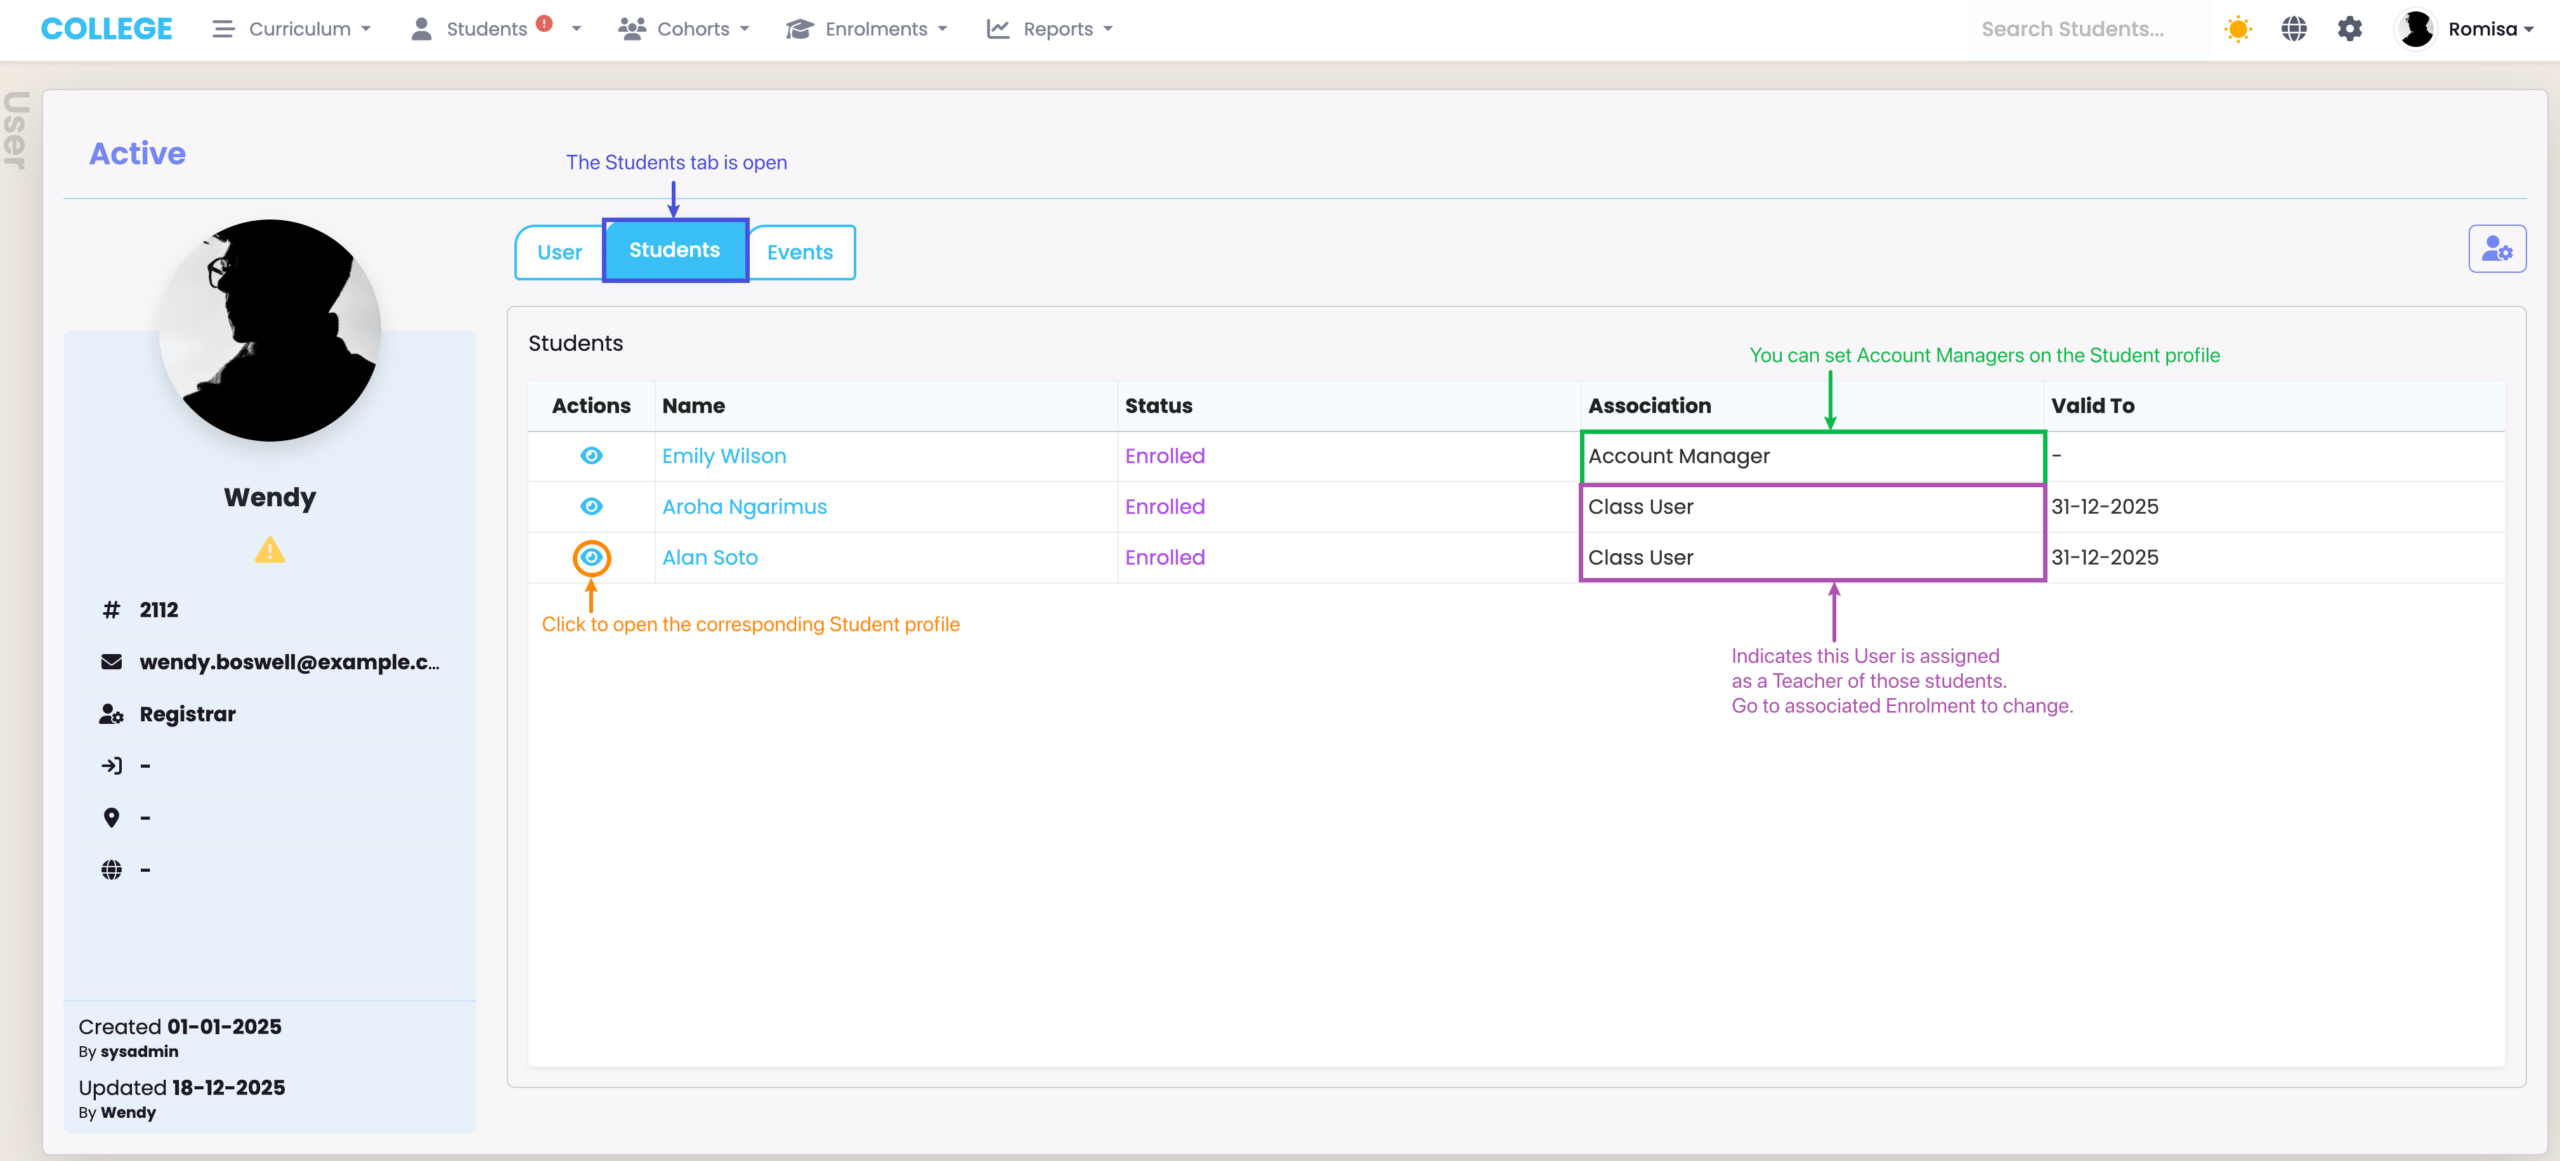
Figure 6ii. The top bar (purple) features a pencil icon button (green) which can be clicked to assign an “Account Manager” from a list of System Users.
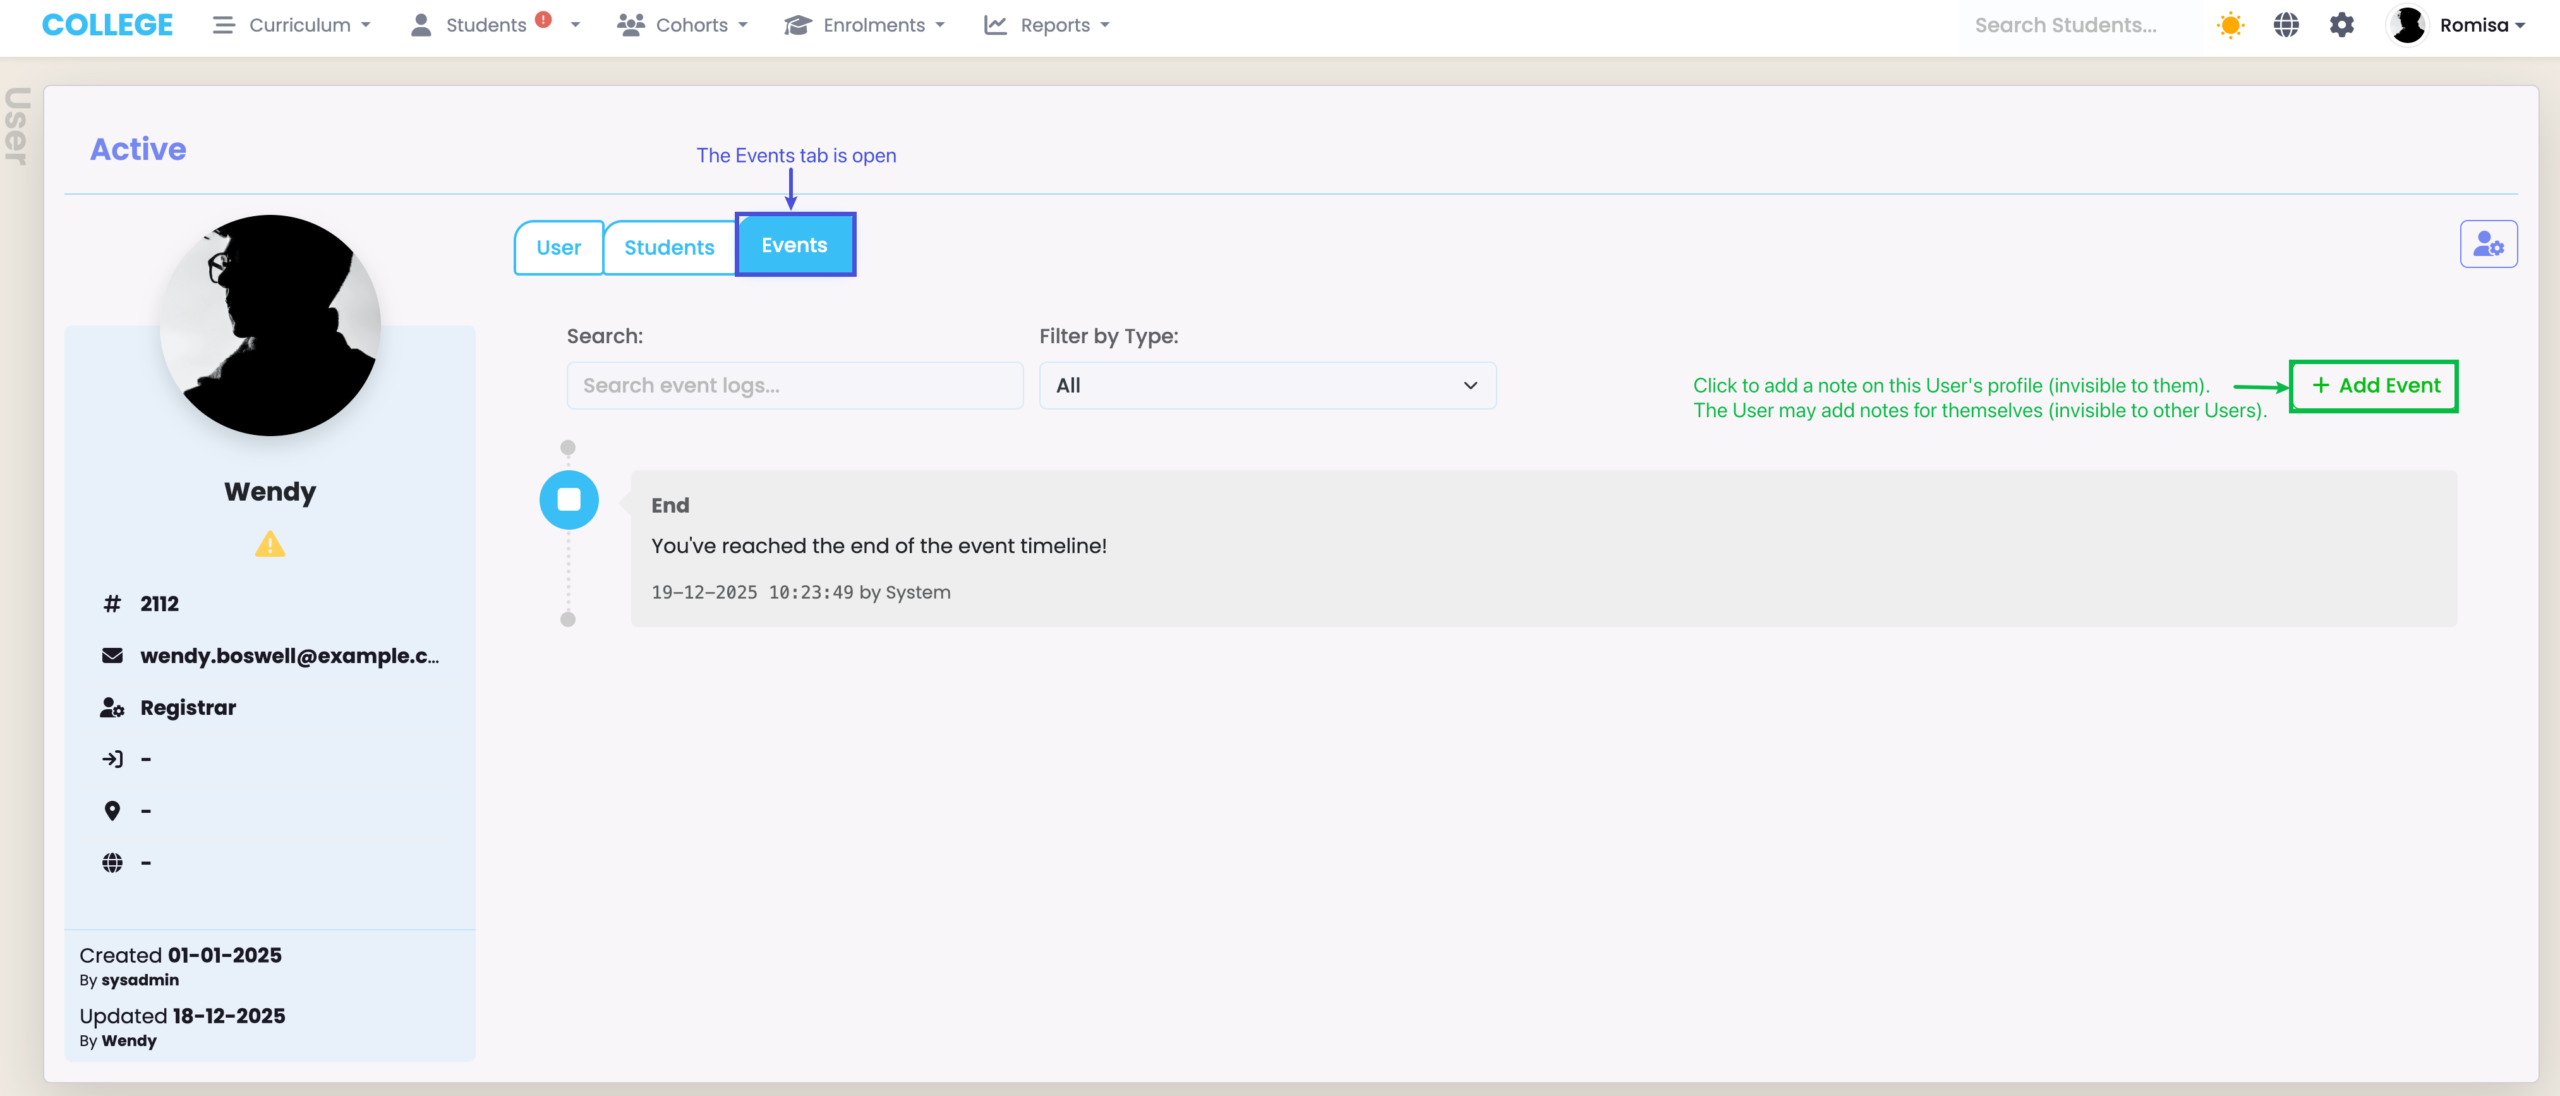
The Events Tab
The “Events” tab allows Registrar and Admin level Users to leave notes on a User profile, to communicate between each other.
Note: The User will not be able to see notes made by other Users on their profile. But they can add their own notes, which will only be visible by them.
Figure 7. Click the ” + Add Event” to add a note on this User profile.
Navigating the User Index
Search Features
Like other Indexes within SELMA, there are two types of search options in the User Index:
- The basic search
- The advanced search (Figure 2.)
Please refer to SELMA 101 – Tips and Tricks for Using SELMA Productively in this resource, for a further guide.