In this Section:
A price book is a saved set of fees you can apply to a student enrolment or application in one action, instead of adding fees one at a time.
Creating Price Books
- From the top navigation, go to Finance → Price Book.
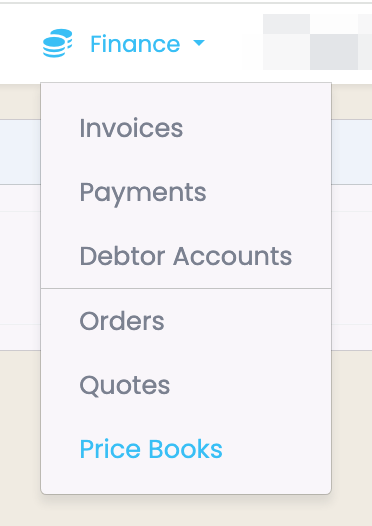
- Click New Price Book.

- Enter a Name for the price book.
- Set the book-level Fee Type and Fee Category. These are used only if you choose the aggregated single-line output (see generation modes below).
- Tick Tax Included if applicable.
- Set the three fee switches according to how you want fee lines to appear on the enrolment (see Fee Modes for what each combination produces).
- Add fee items by clicking Add Item. For each item:
- Enter a Label (this becomes the fee line description).
- Enter a Value (the unit price).
- Set the item’s own Fee Type and Fee Category.
- Choose a Multiplier (e.g. Flat Rate, Weekly, Monthly — see Part 5) or select a numeric Custom Field to drive the quantity. These two options are mutually exclusive.
[SCREENSHOT: Add Item row with fields visible]
- Repeat the step for each fee item needed.
- Click Save.

Fee Modes – How fee lines are laid out
The switches on the price book control how many lines are setup and created:
| Separate Fee Lines | Separate Fee Lines Per Component | Result |
|---|---|---|
| Selected | Selected | One line per item; component items get one line per component |
| Unselected | Selected | Component items get one line per component; all other items collapse into one aggregated line |
| Selected | Unselected | Every item gets its own line |
| Unselected | Unselected | One single aggregated line for all items combined |
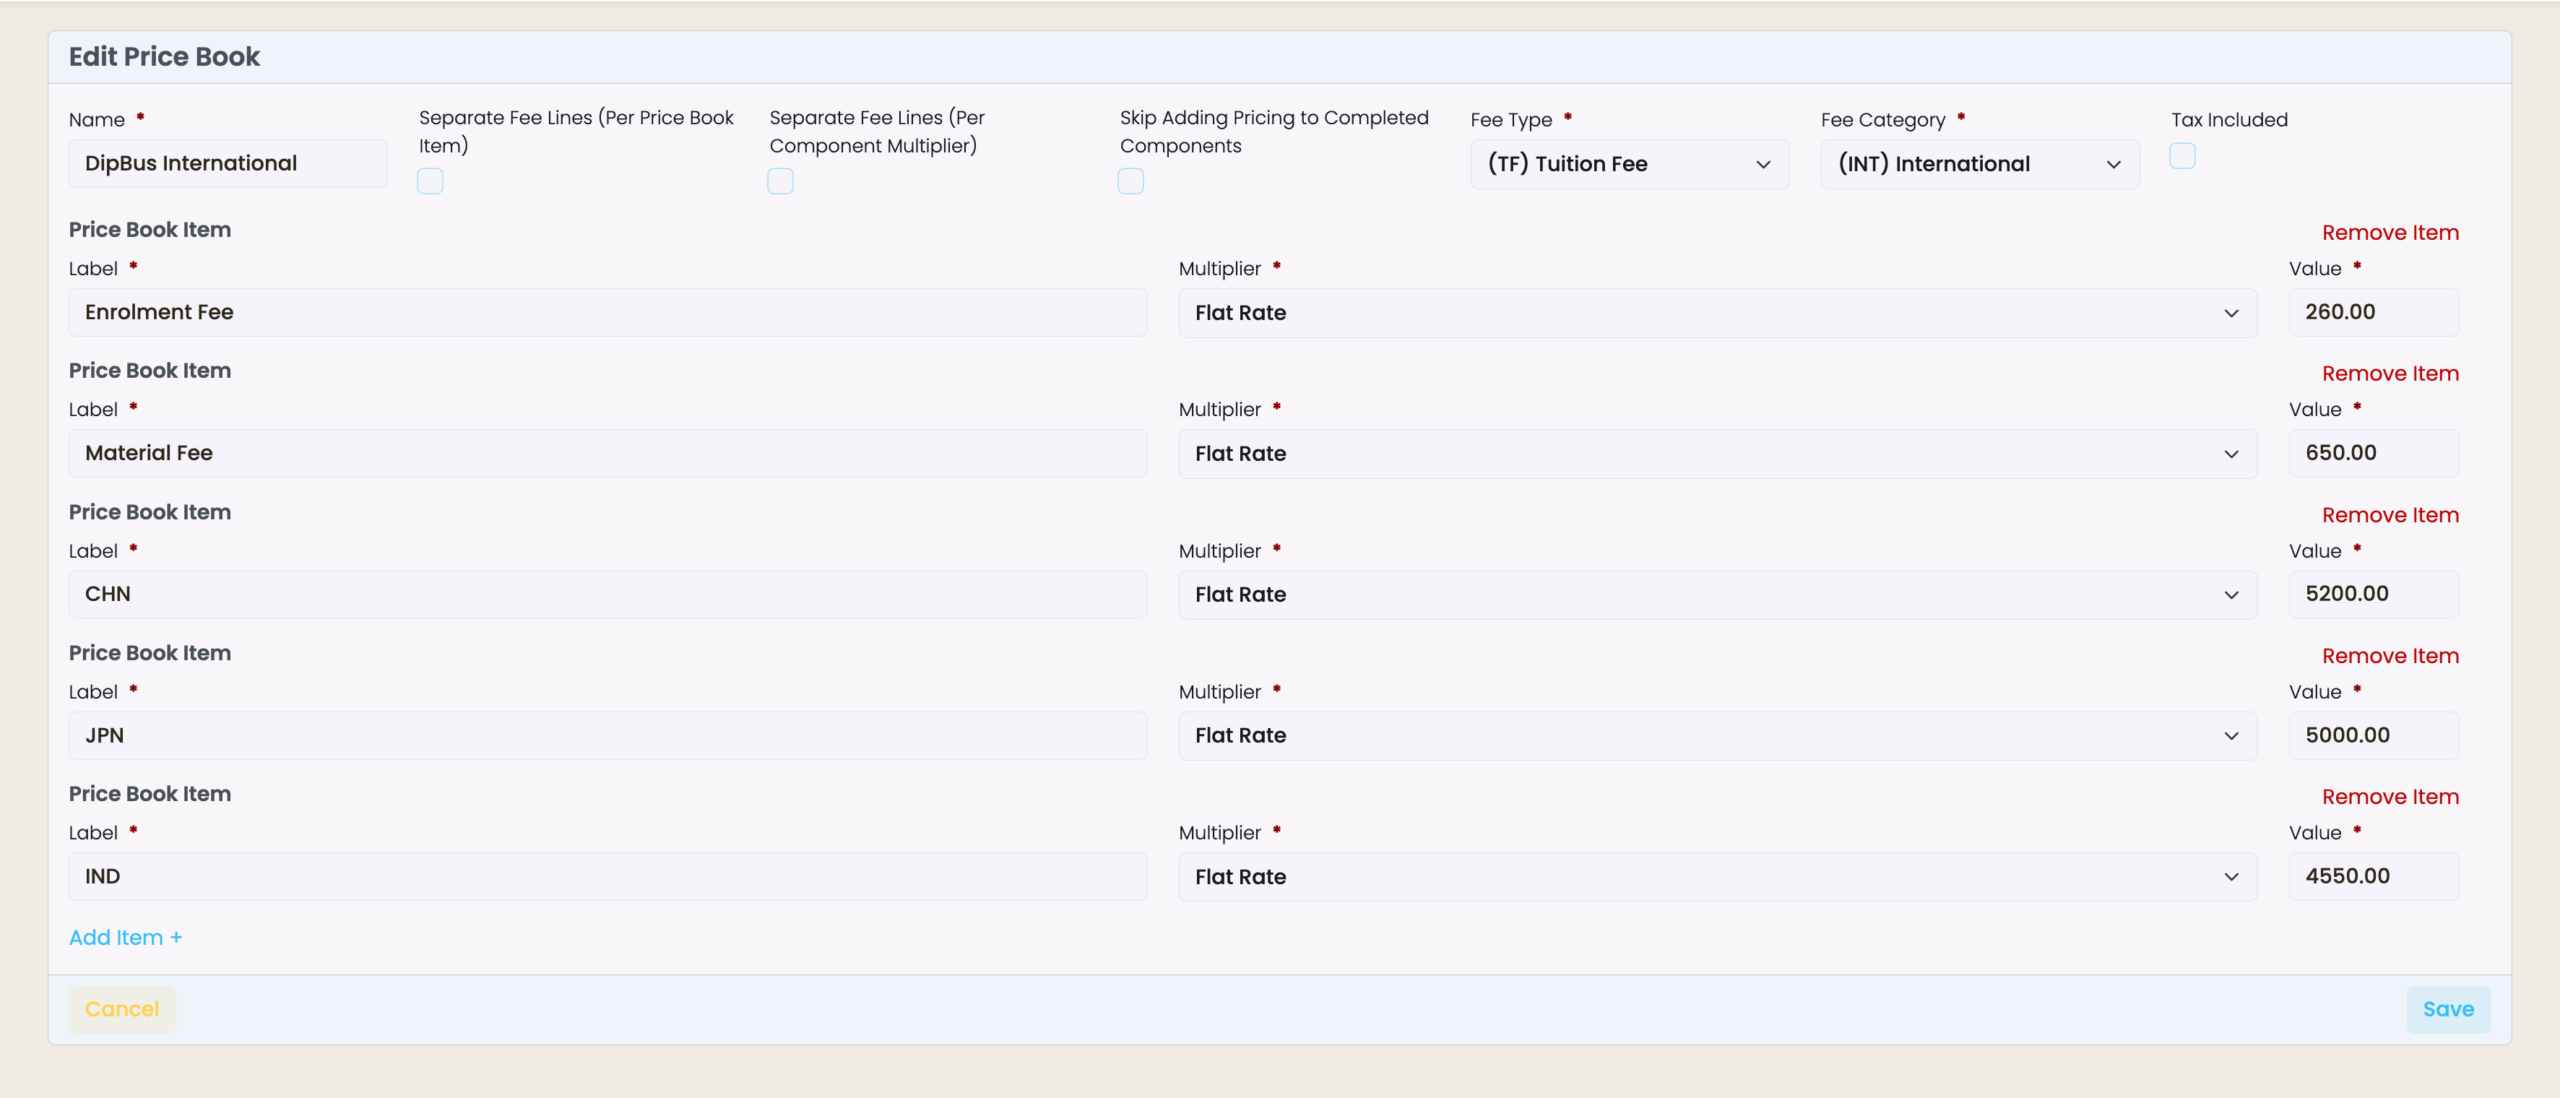
If Separate Fee Lines (Per Price Book Item) is unselected: Aggregated lines use the price book’s fee type and fee category for all items:
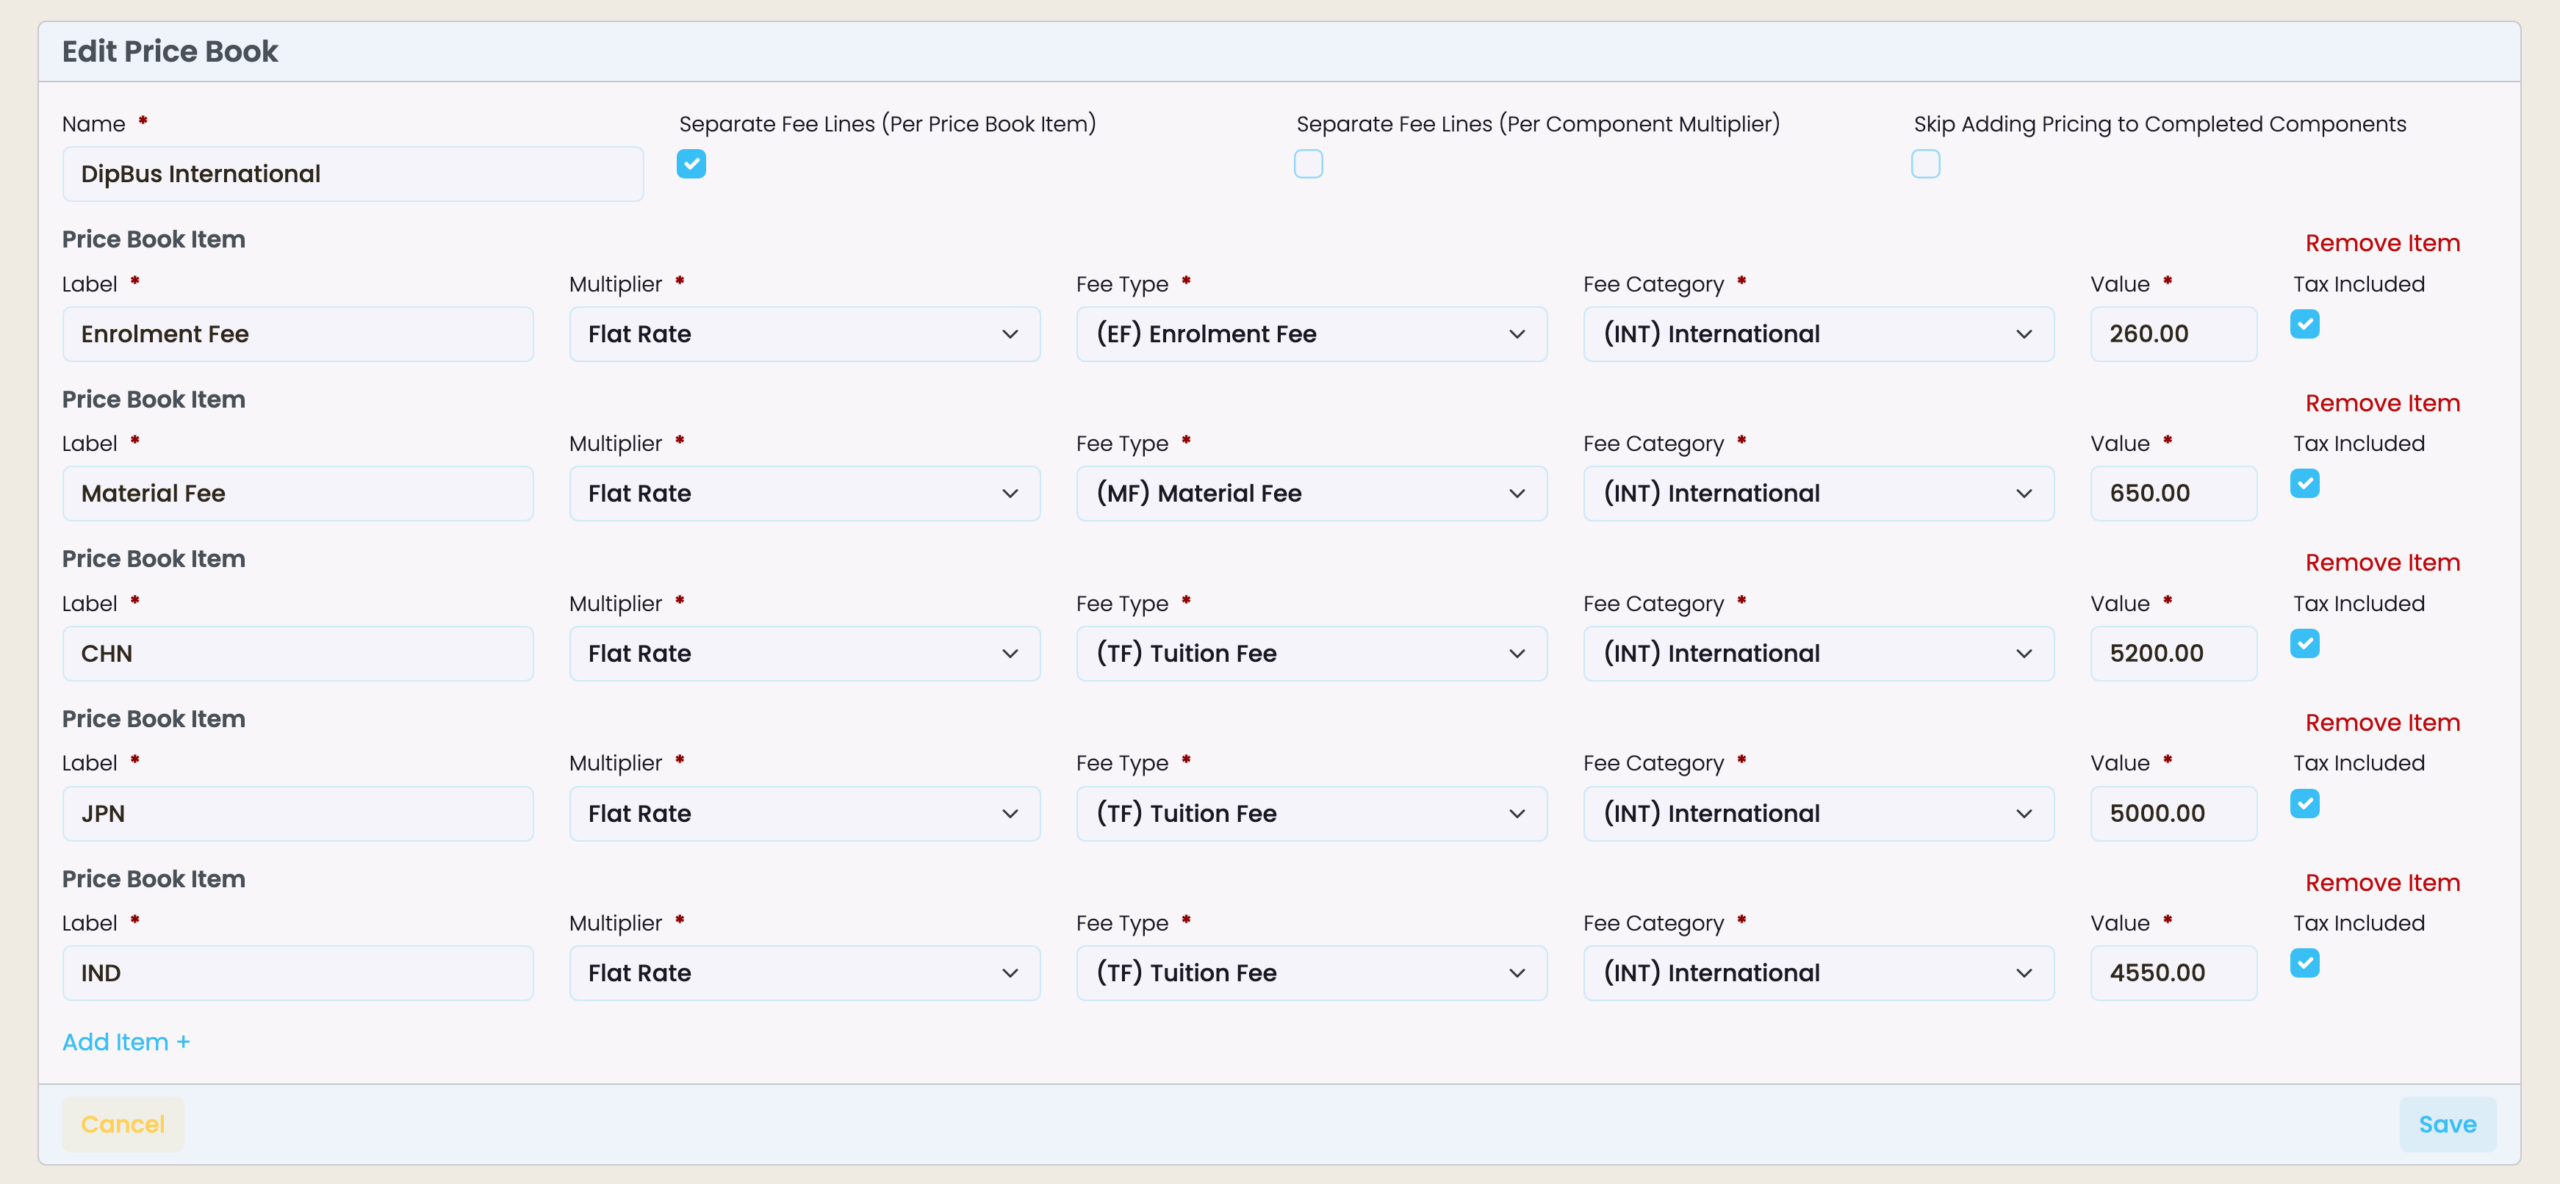
If Separate Fee Lines (Per Price Book Item) is selected: Item lines use each item’s own label, fee type, and fee category:
Fee Multipliers
The multiplier on each item decides the quantity used to calculate the charge.
| Name | Quantity used |
|---|---|
| Flat Rate | Always 1 (charges the exact value) |
| Weekly | Number of weeks between start and end date (rounded up) |
| Day | Number of days between start and end date |
| Monthly | Number of calendar months between start and end date |
| Component | Number of components on the enrolment or application |
| Nominal Hours – Component | Sum of nominal hours across components (Australia only) |
| Nominal Hours – Programme | Nominal hours from the programme (Australia only) |
Final amount = quantity × item value. Fractional quantities are rounded to the nearest whole number and never drop below 1.
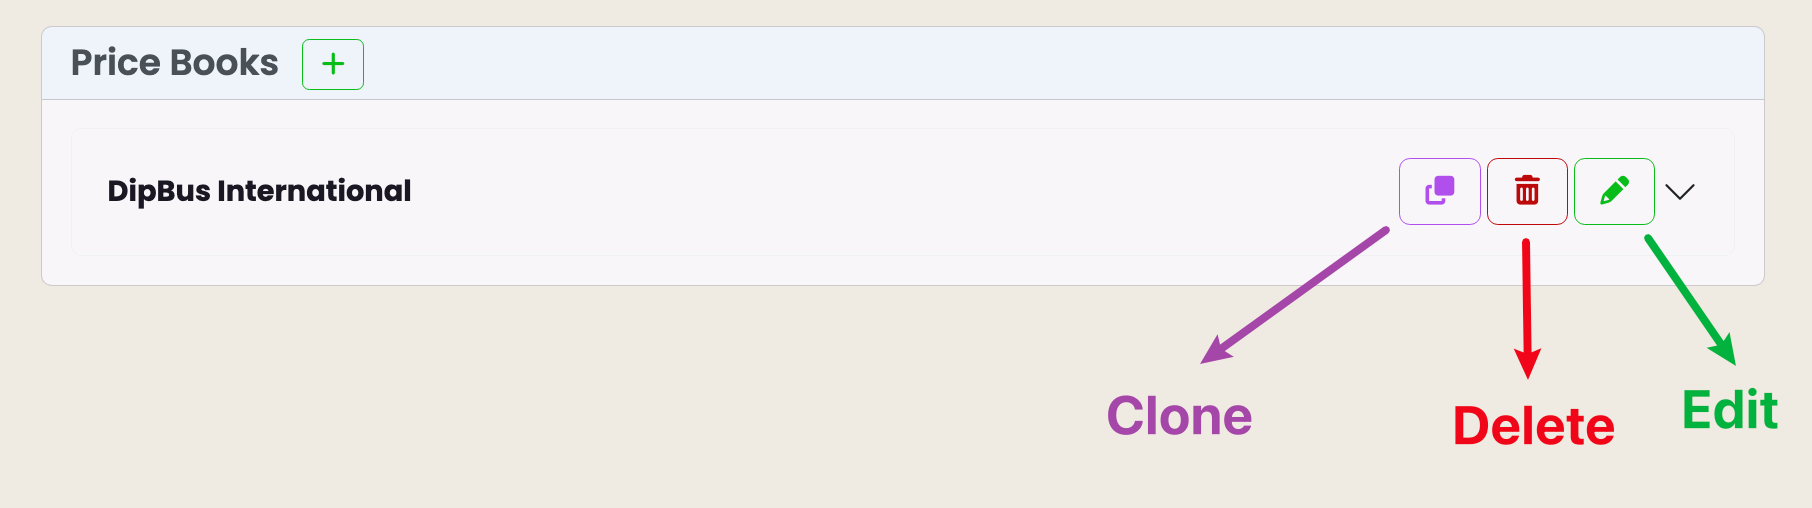
Cloning a Price Book
- Navigate to Finance → Price Book, find the book you want to copy.
- Click Clone.
- The copy is saved with the same items. Rename and adjust as needed.
Deleting a Price Book
- Navigate to Finance → Price Book, find the book.
- Click Delete.
Applying a Price Book to New Enrolment or Application
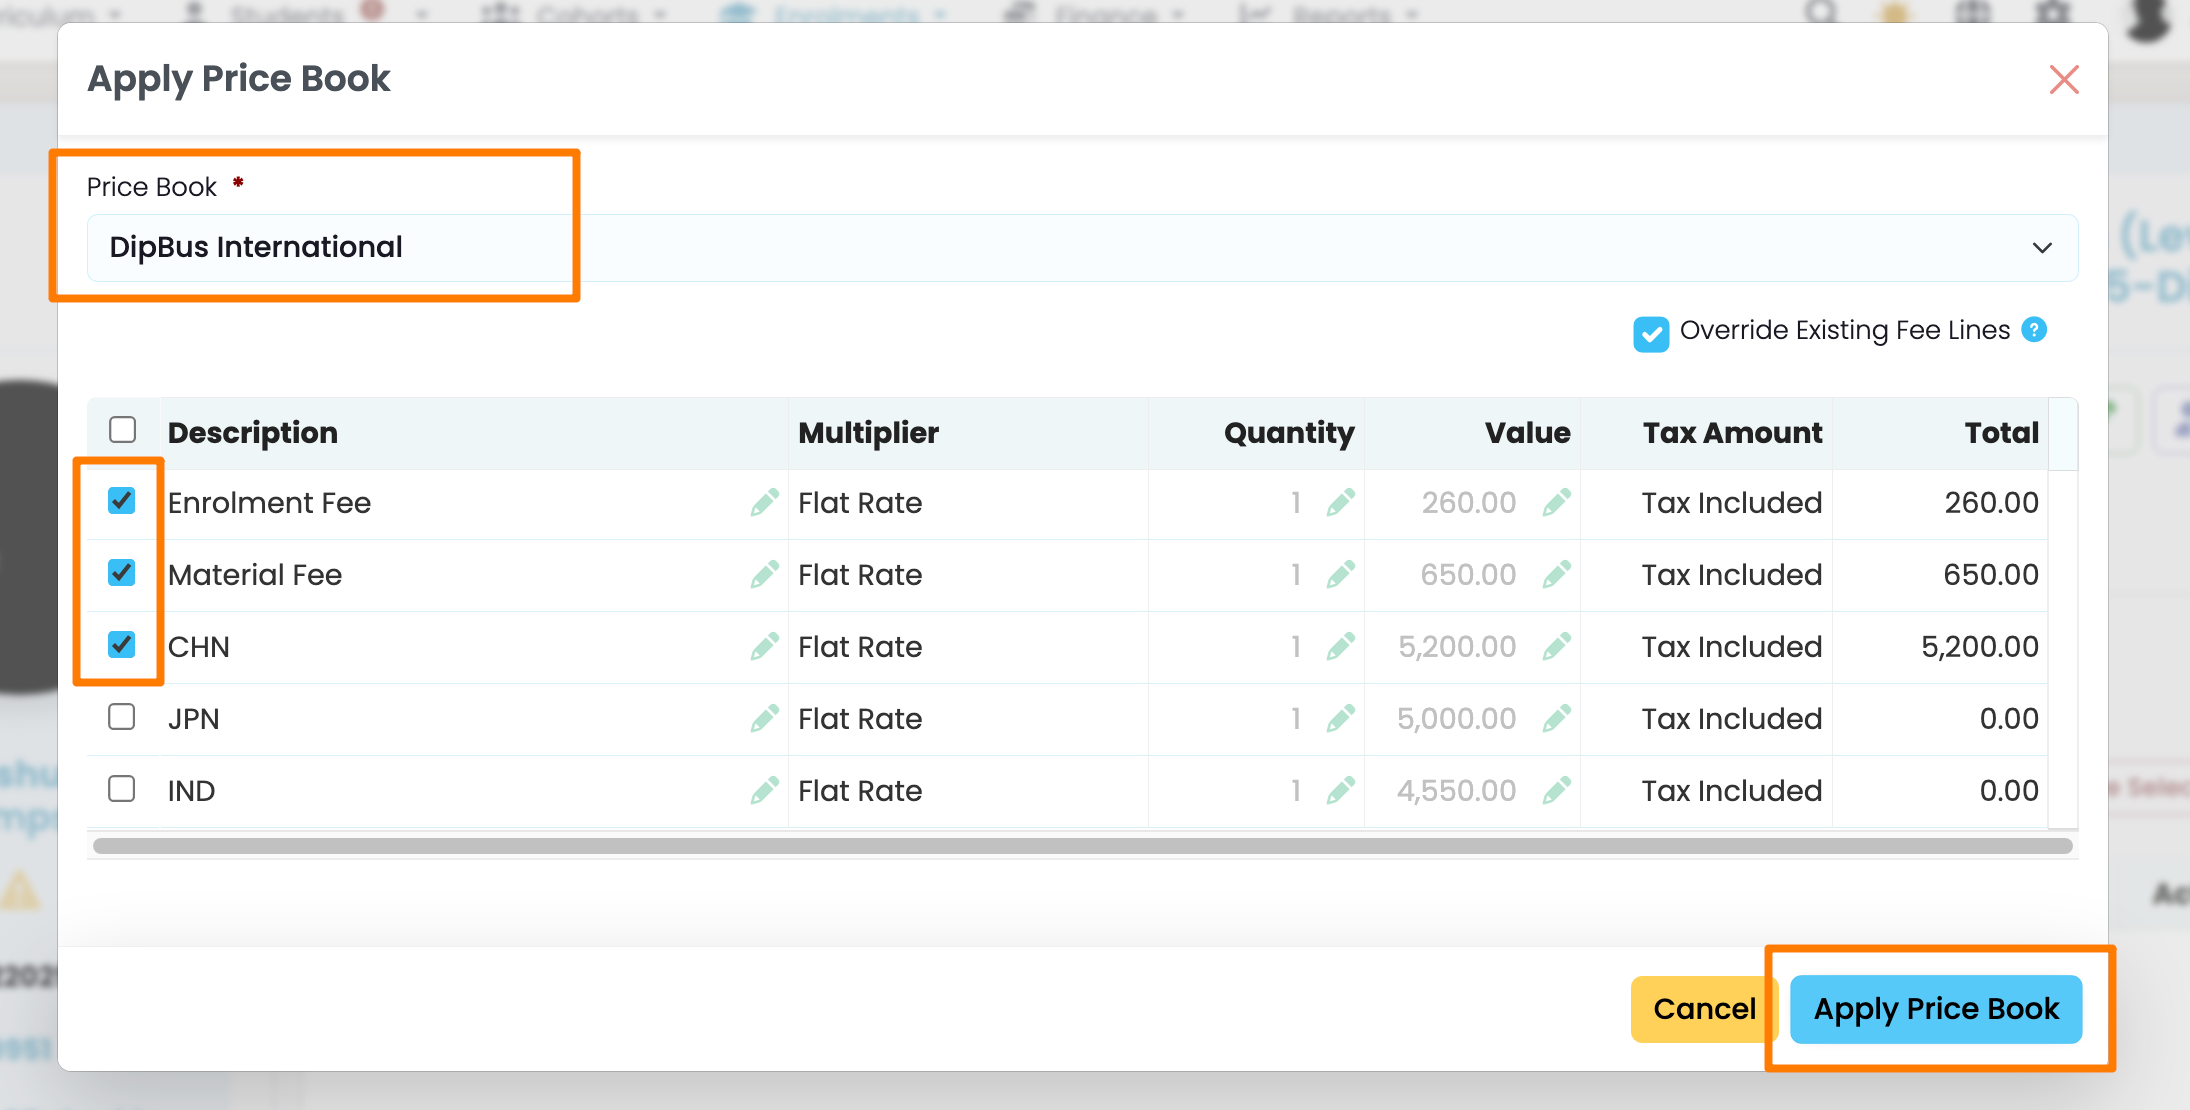
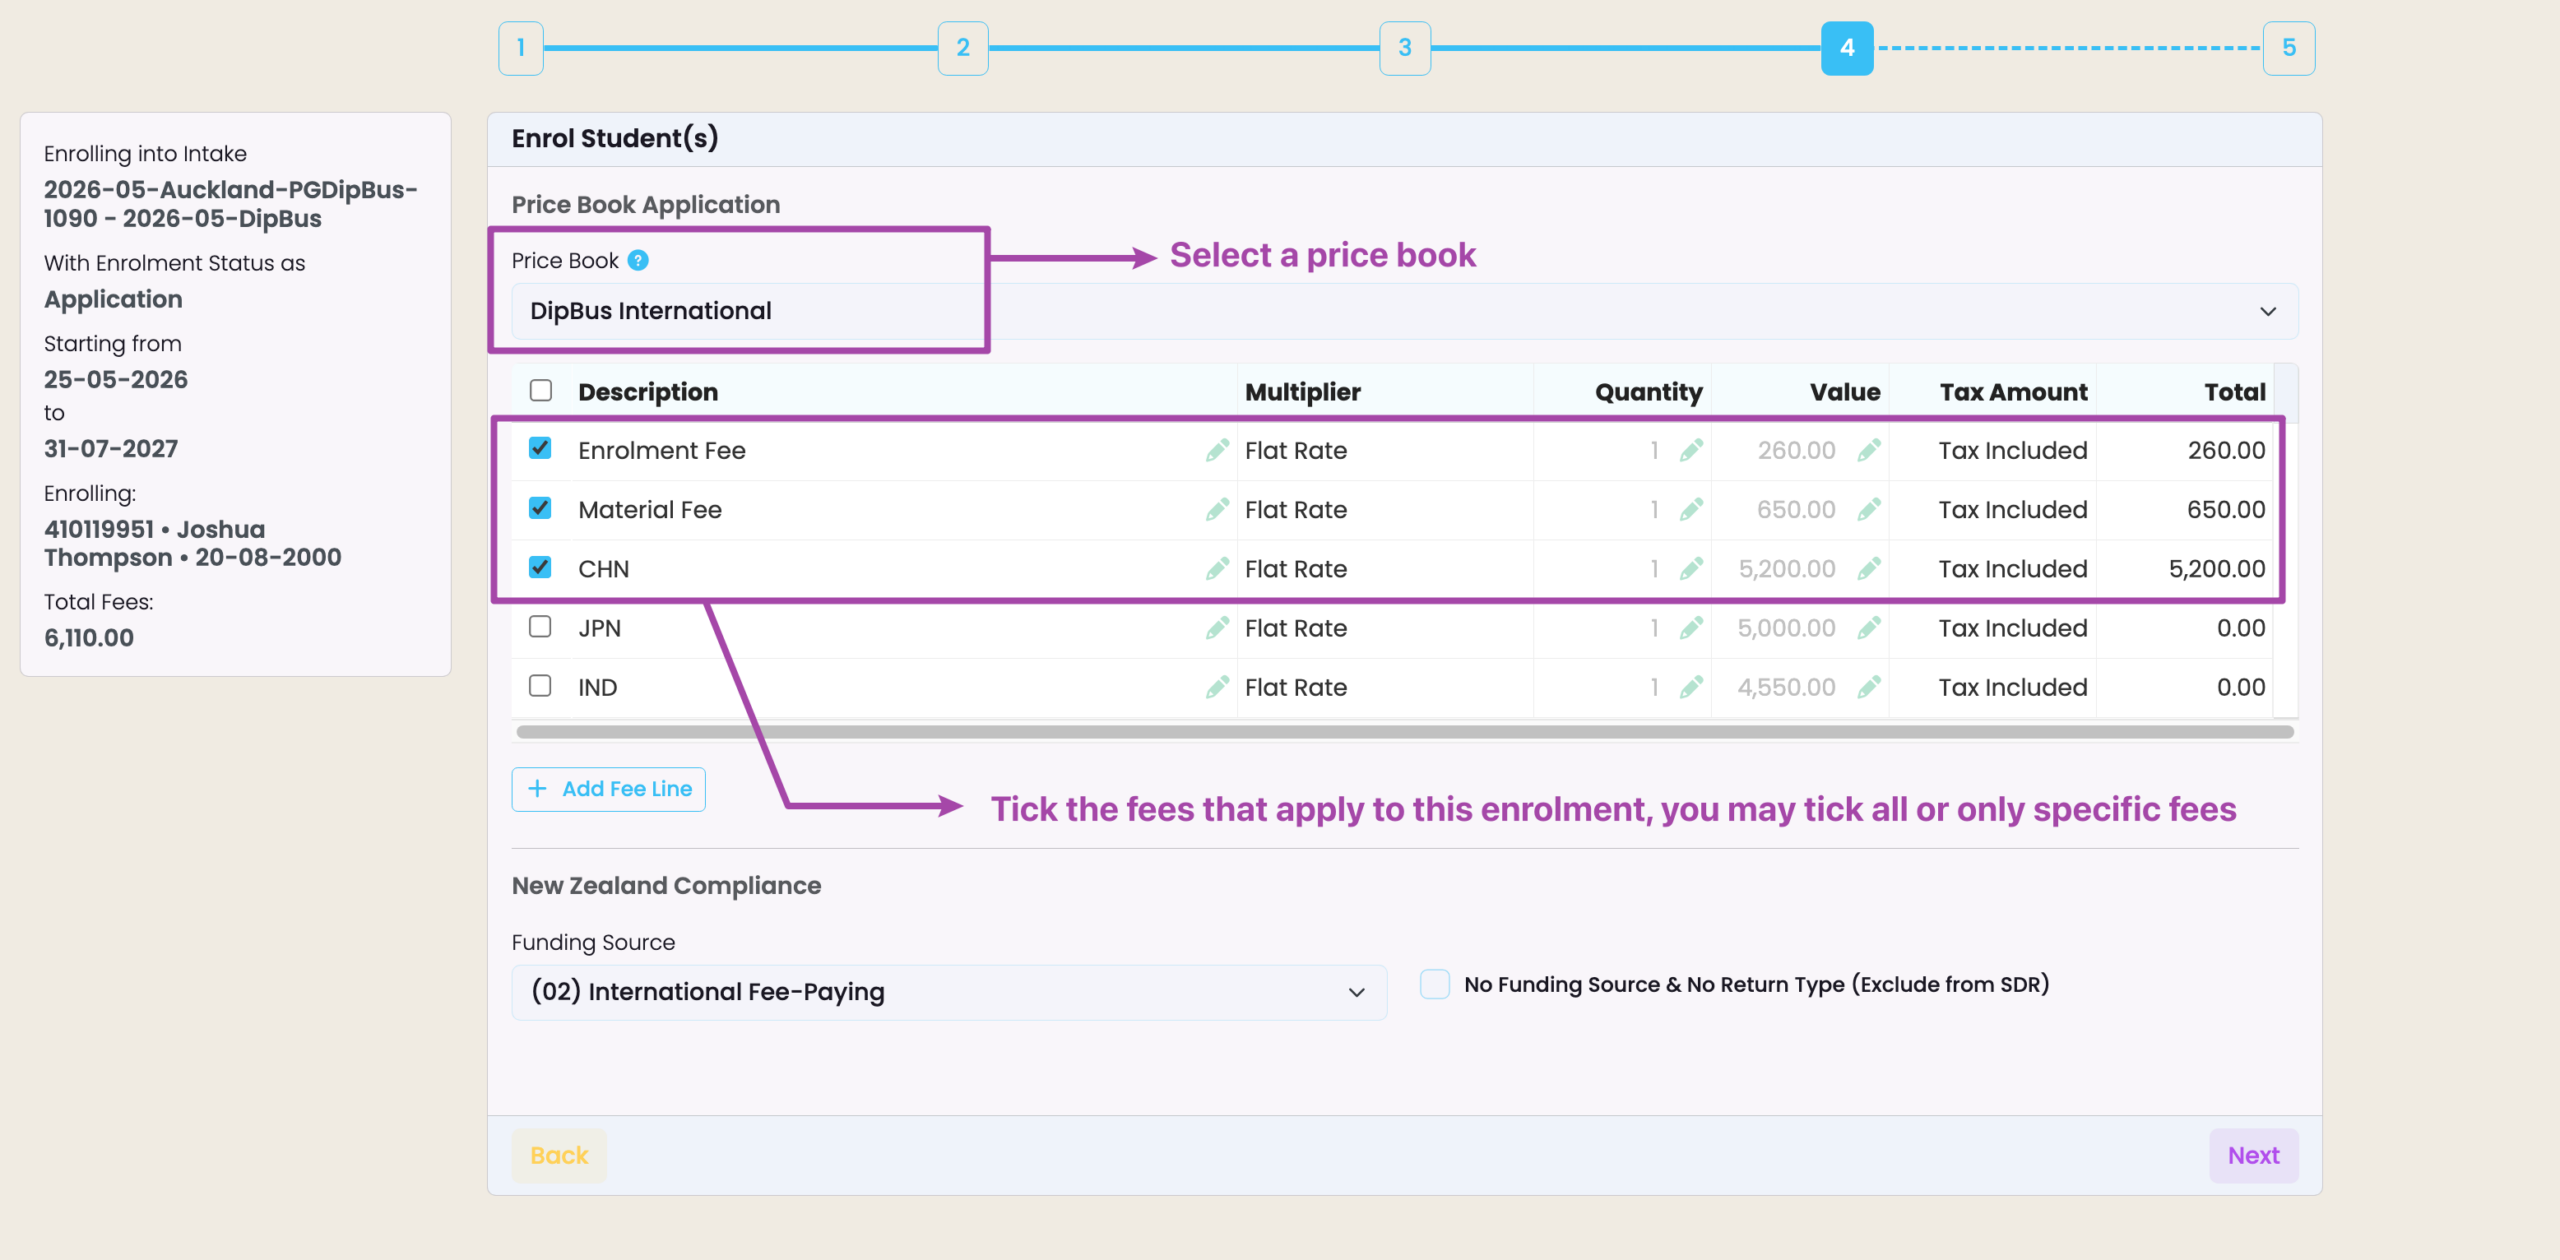
When you create a new enrolment or application through the wizard, you can select a price book on the fee settings step.
- Work through the enrolment/application wizard as normal until you reach the fee settings step.
- Select a price book from the dropdown. The item grid will load with a live preview of quantities and totals calculated from the enrolment dates and components.
[SCREENSHOT: Price book item grid with quantities and totals] - Review the items:
- Untick any items you do not want to apply.
- Where permitted, edit the quantity or description directly in the grid.
- To add a one-off fee not in the book, click Add Fee Line and complete the fields.
- Complete the rest of the wizard and click Save.
- Note: Fee lines appear a moment after the enrolment is saved — they are applied in the background. Refresh the enrolment’s finance tab if they are not immediately visible. When a price book is selected, the standard intake/component fee auto-add is skipped. All fees come from the price book only.
Applying a Price Book to an Existing Enrolment or Application
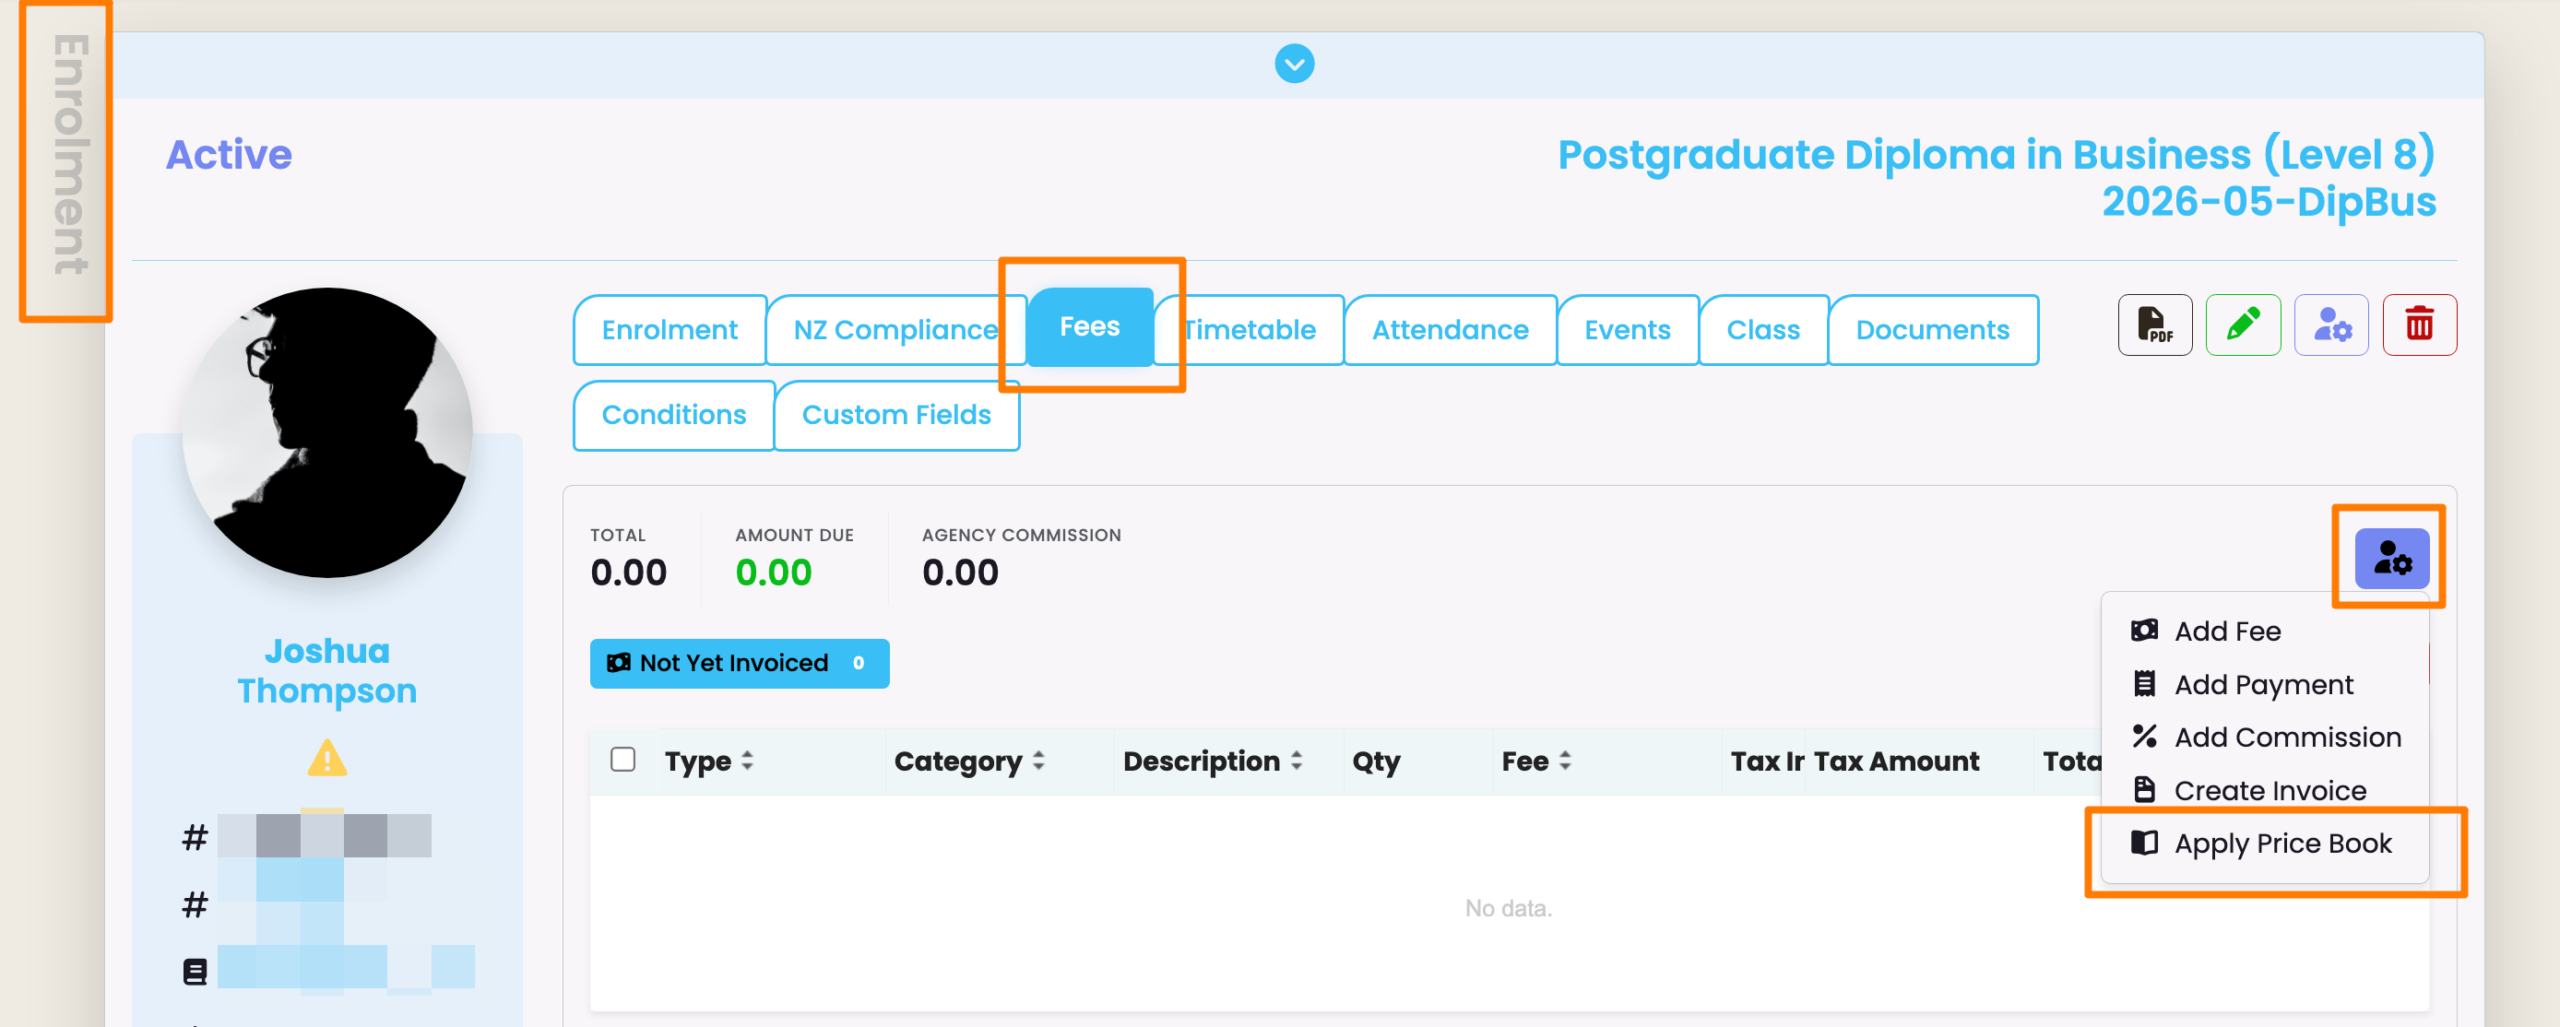
- Open the enrolment or application record.
- Navigate to the Fees tab on an Enrolment or Application.
- Click Apply Price Book.
- Select a price book from the dropdown.
- The item grid loads — review, untick, or edit items as needed.
- If there were fees already loaded, choose whether to tick Override Existing Fees:
- Ticked (default): removes existing uninvoiced fee lines before adding the new ones. Fee lines previously attached to an invoice, or payment lines are not affected.
- Unticked: adds the new fee lines alongside existing fees already on the enrolment or application.
- Click Apply Price Book.