On this page:
What is Role-Based Access Control (RBAC)?
Role-Based Access Control (RBAC) is the mechanism by which SELMA assigns Roles to System Users, which each have their own levels of access and permissions.
System Roles
You can create and manage your own Roles and permissions, however, there are default Roles which you should be familiar with:
Default System Roles and Permissions
- Registrar (highest access level): Can access all System Settings and create new Users or activate/deactivate Users.
- Admin (medium access level): Can access some System Settings, but can’t create new Users or activate/deactivate Users.
- Teacher (lowest access level): restricted access to assigned Intakes, Classes and Enrolments
Creating a Role
To create a new Role, navigate from Settings > Roles and Permissions (Figure 1i-ii.).
Then click the “Add New Role” button to define a name and description for your new Role (Figure 2i-ii.).
You will then be taken back to the “Manage Roles” screen where you should click to edit the Role, if you wish to set-up RBAC (Figure 2iii.).
Figure 1i. Access System Settings by clicking the cog icon in the top right corner of the navigation bar.

Figure 1ii. Click “Roles and Permissions” in the Settings Panel.
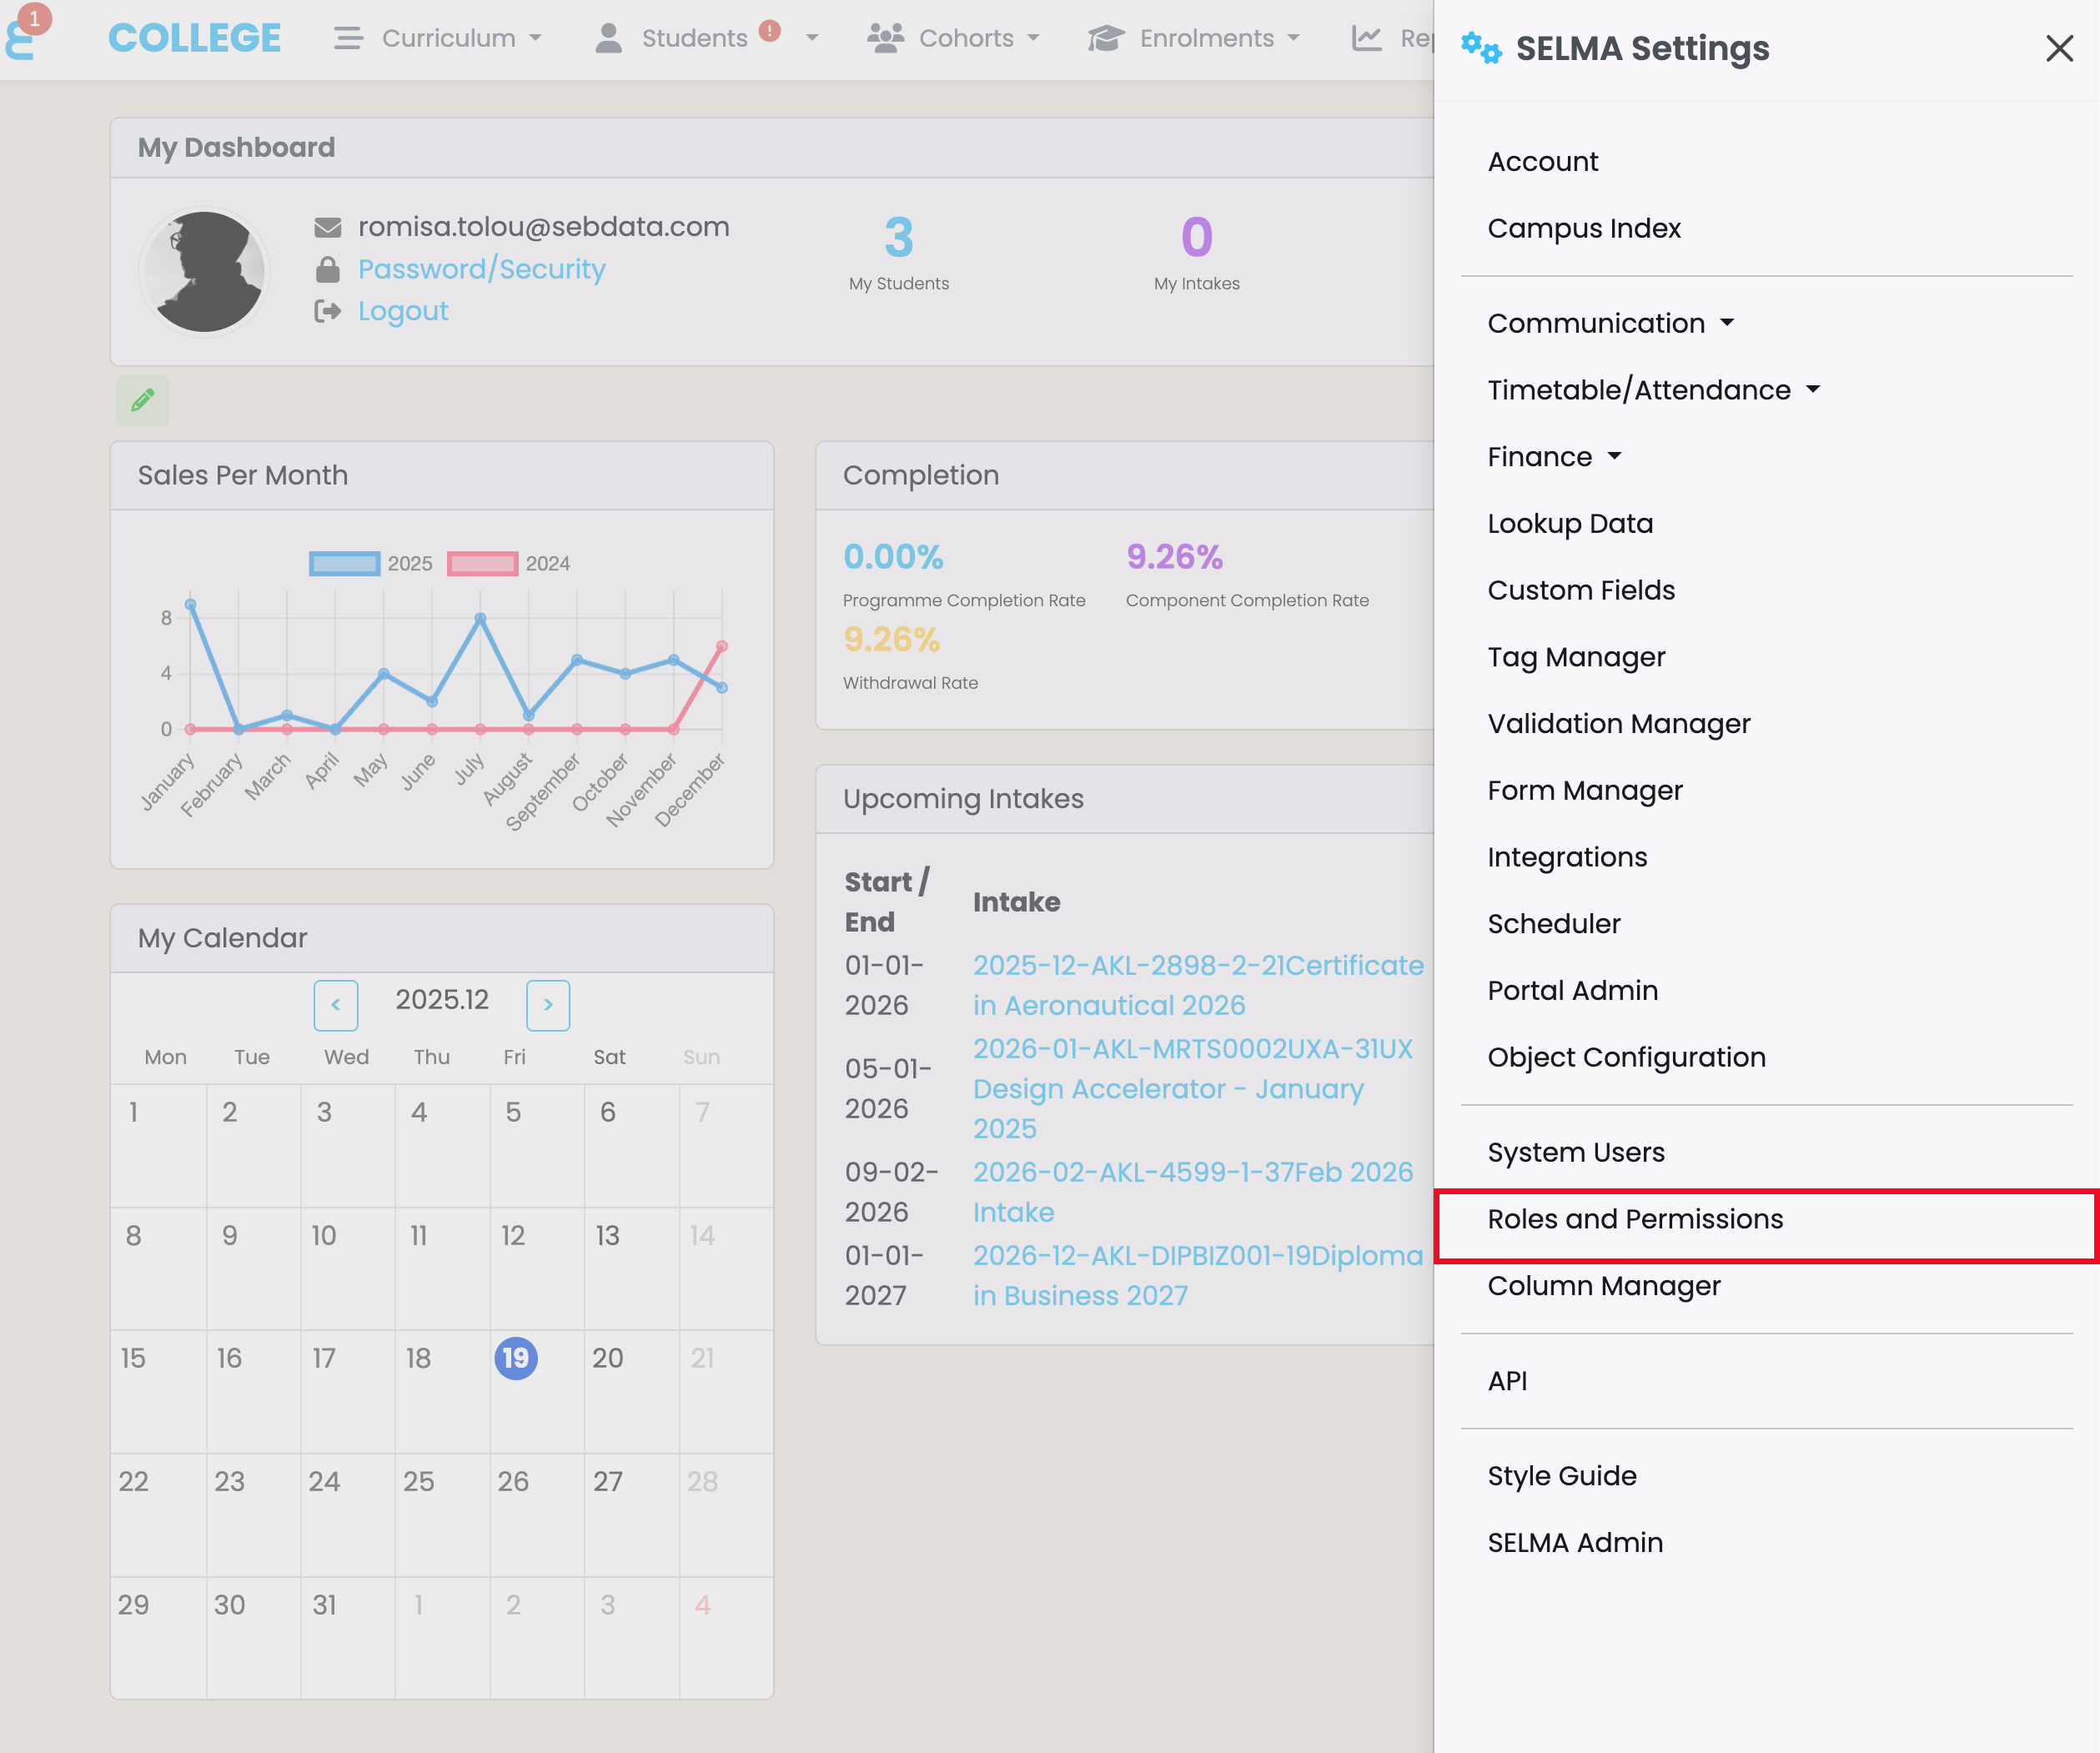
Figure 2i. Existing Roles are managed on this screen (orange), where you can also add your own defined Role (red).

Figure 2ii. Fill out the required fields, as indicated by red asterisks, and click the blue “Create” button.
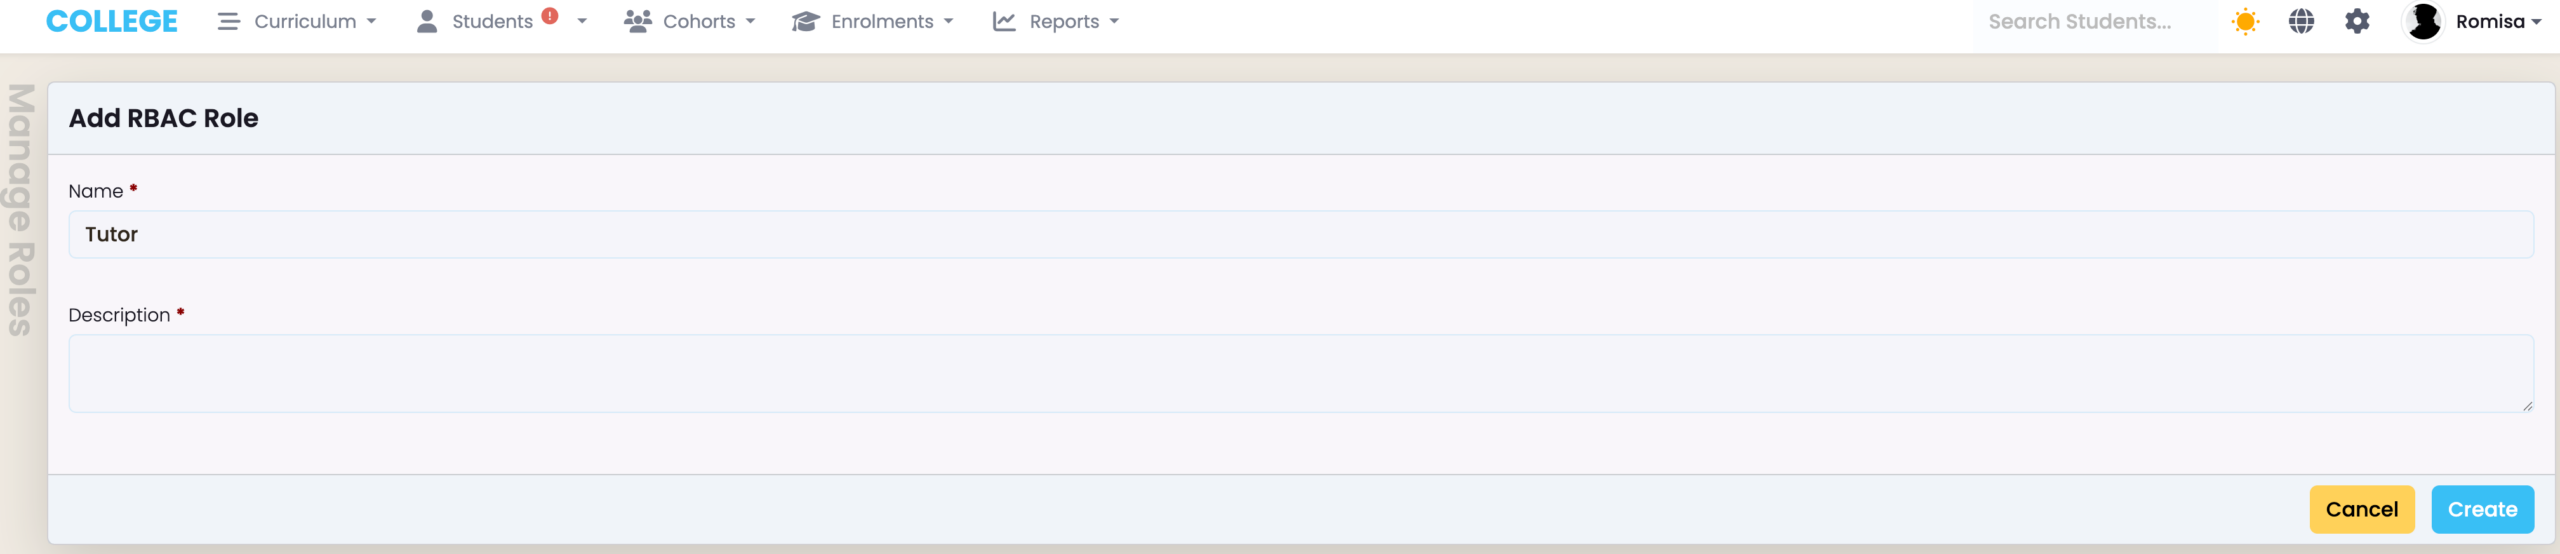
Figure 2iii. Click to set RBAC for your new Role.

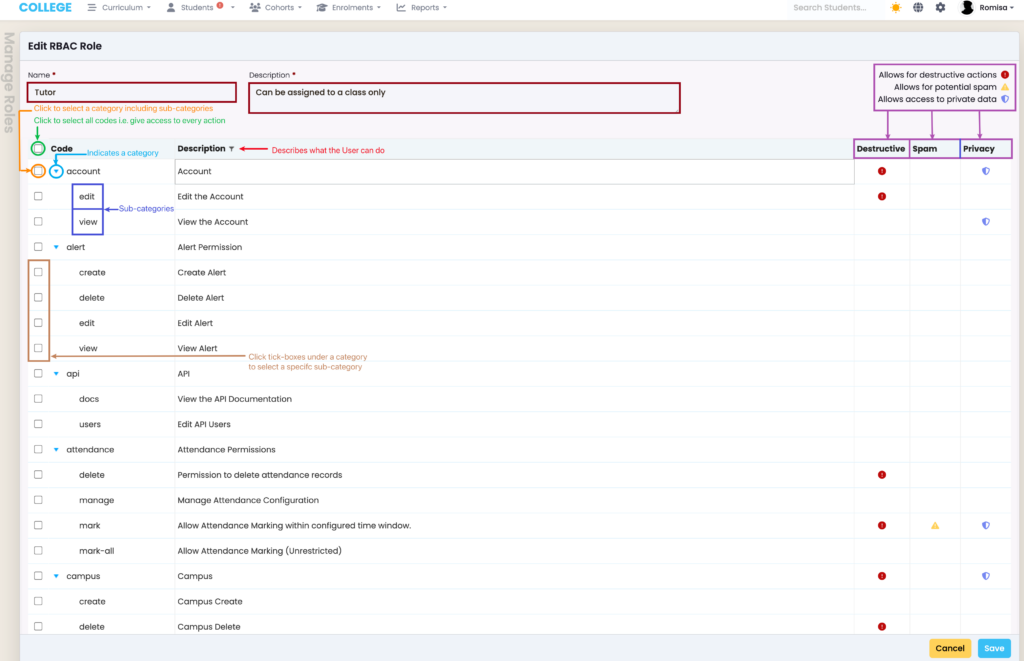
Managing Permissions for Roles
To set-up RBAC, you must edit your Role from the “Manage Roles” screen (Figure 2iii.).
On the editing screen, you can select which actions the Role is permitted to perform e.g. they can edit an Account or profile.
Remember to click the blue “Save” button, at the bottom right of the screen, to commit these permissions to the Role. You may then assign Roles to Users, with dedicated access permissions.
Figure 2iv. Click the “Name” and “Description” fields to make changes (burgundy), and read the annotations for select tick-boxes to understand how to make permission selections. Fields with arrows indicate categories (light blue) which have sub-categories nested beneath them (dark blue). The “Description” column shows the actions that would be enabled for a User (red). Note: If some permissions have icons linked to them, please review the legend in the top right (purple).