You can create an Invoice to send to an Organisation, at an Intake level. This can be done once the Quote has been sent and accepted.
Read the following steps to create Quotes and send Invoices.
In this Section:
Create a Quote
Figure 1i. Navigate to Settings > Account
Enable Quotes in the “Account Configuration” tab.

Figure 1ii. Navigate to the Fees Tab
Select one or multiple fee lines and click “Create a quote”.
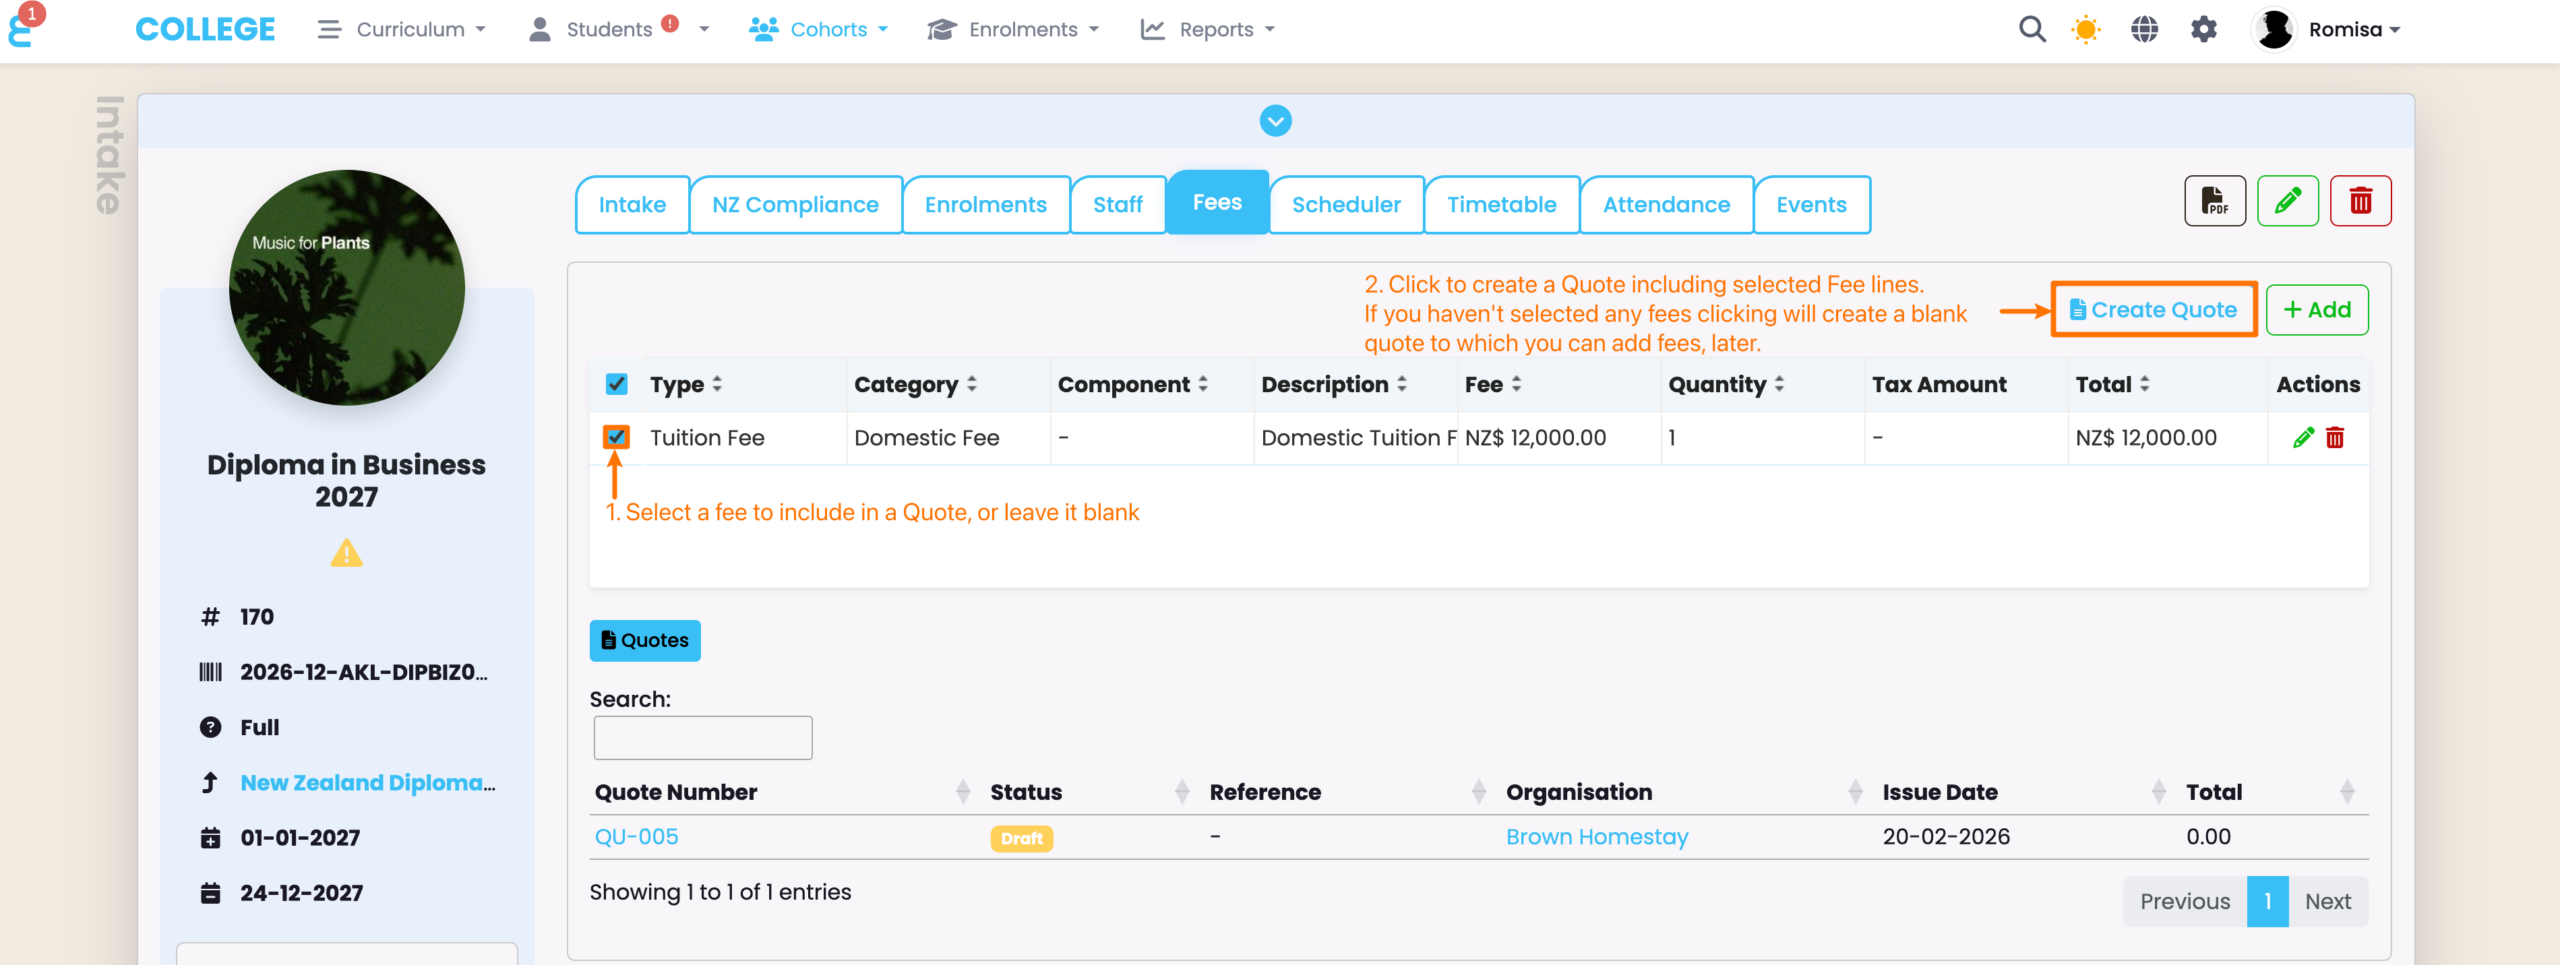
Figure 1iii. Add Quote Details and Save
Provide the required details, as indicated by red asterisks.
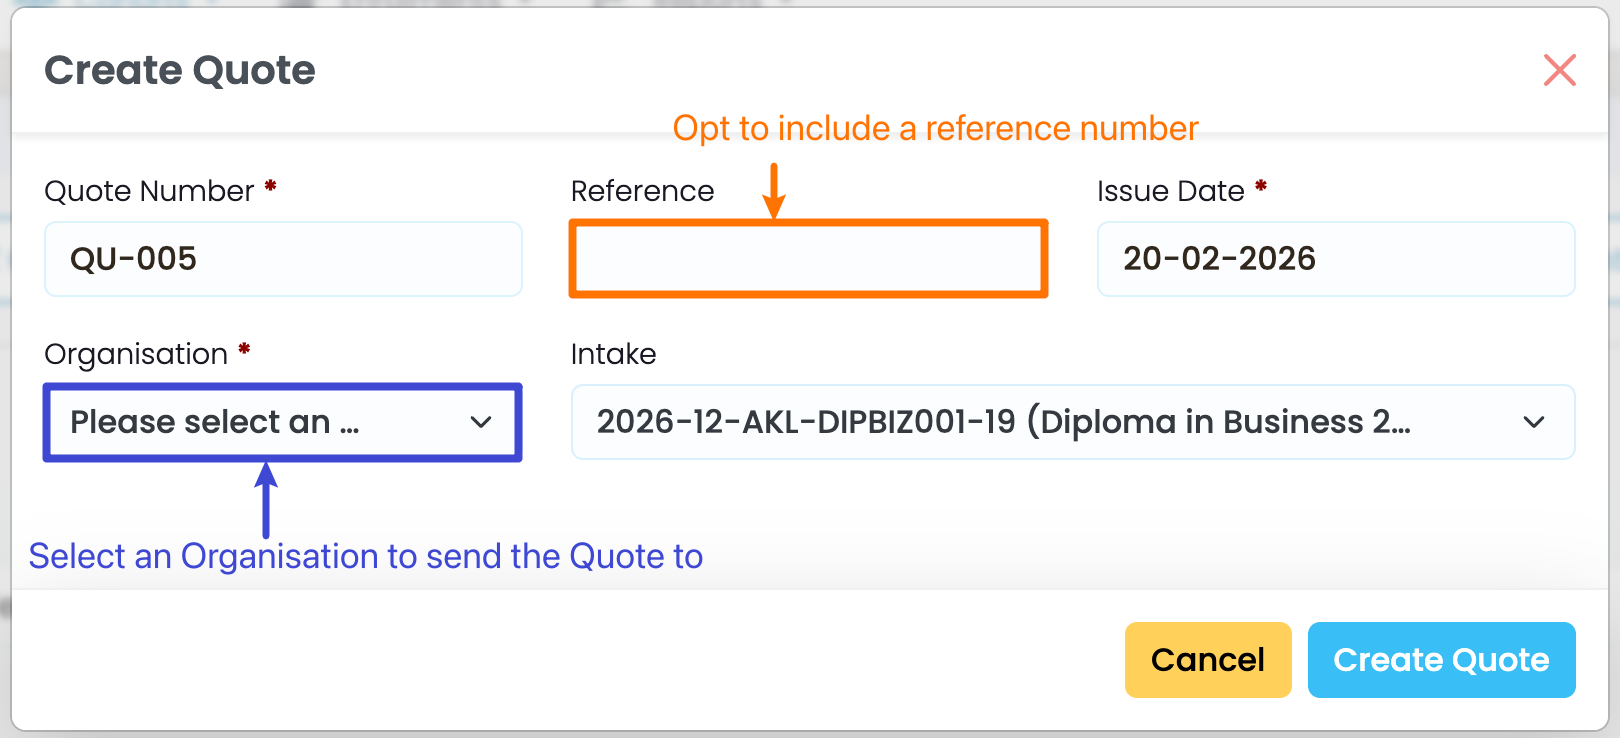
Figure 1iv. View Quote Line in the Fees Tab
Once you have created a Quote, you will be taken back to the Intake – Fees tab, where it is saved. Click the blue highlighted text to go directly to the Quote.
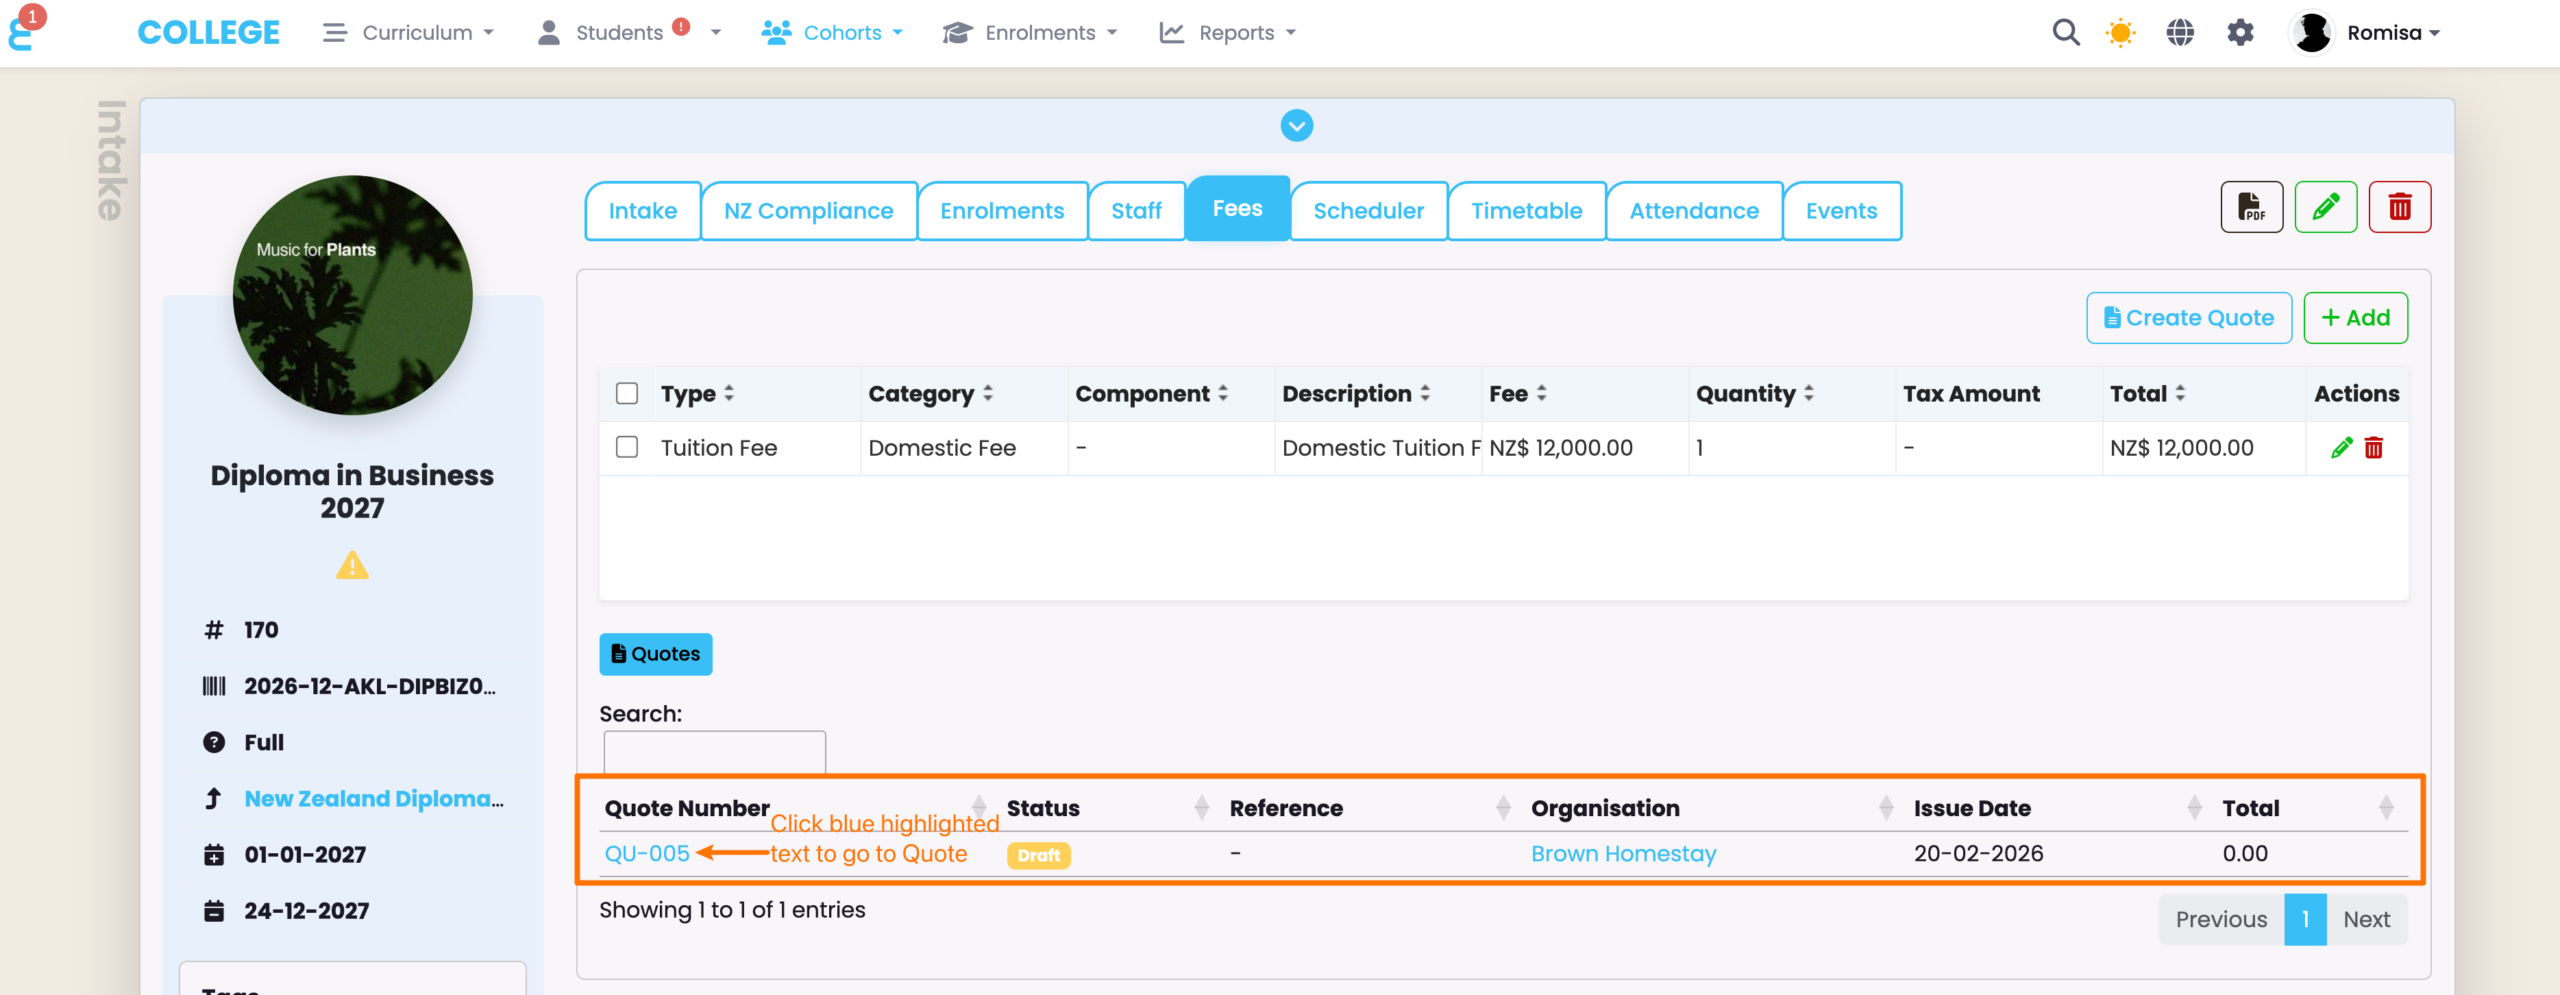
Figure 1v. Send the Quote to the Organisation
You must send an email to the Payer via the mail button (orange), which will automatically change the Quote Status to “Sent”.
- NOTE: The PDF icon includes a default Quote template you can download and send via your own email, however, emailing from SELMA allows you to choose from a communication template you have customised, previously.
- Please see Settings – Communication Templates for more.
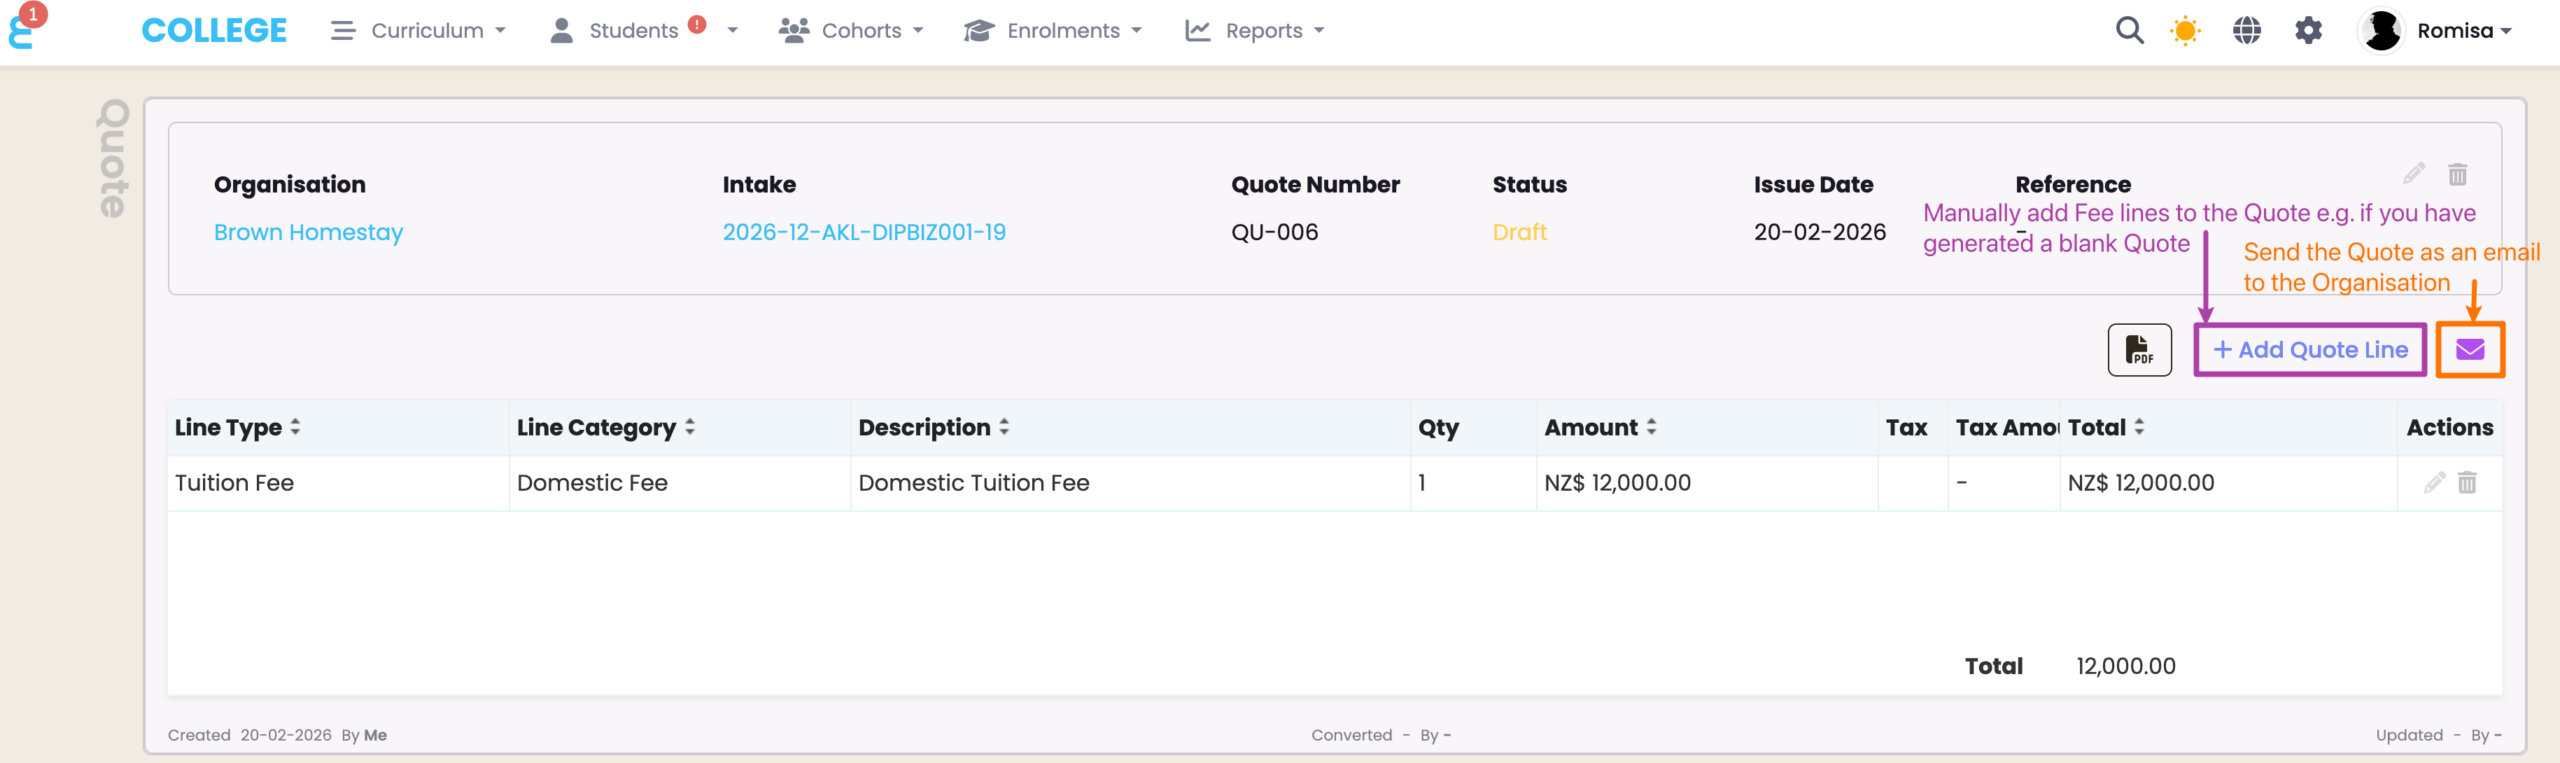
Figure 1vi. Status Change From “Draft” to “Sent”
Once you’ve sent the email, the Quote Status will automatically change to “Sent”. Once the Organisation accepts the Quote, you should come back and change the Quote status to “Accepted”, manually.

Create and Send an Invoice
Please make sure you have followed the steps in the previous section, Create a Quote, sequentially, before proceeding.
Figure 2i. Create an Invoice
The “Create Invoice” button will be revealed once you have manually updated the Quote Status to “Accepted”.
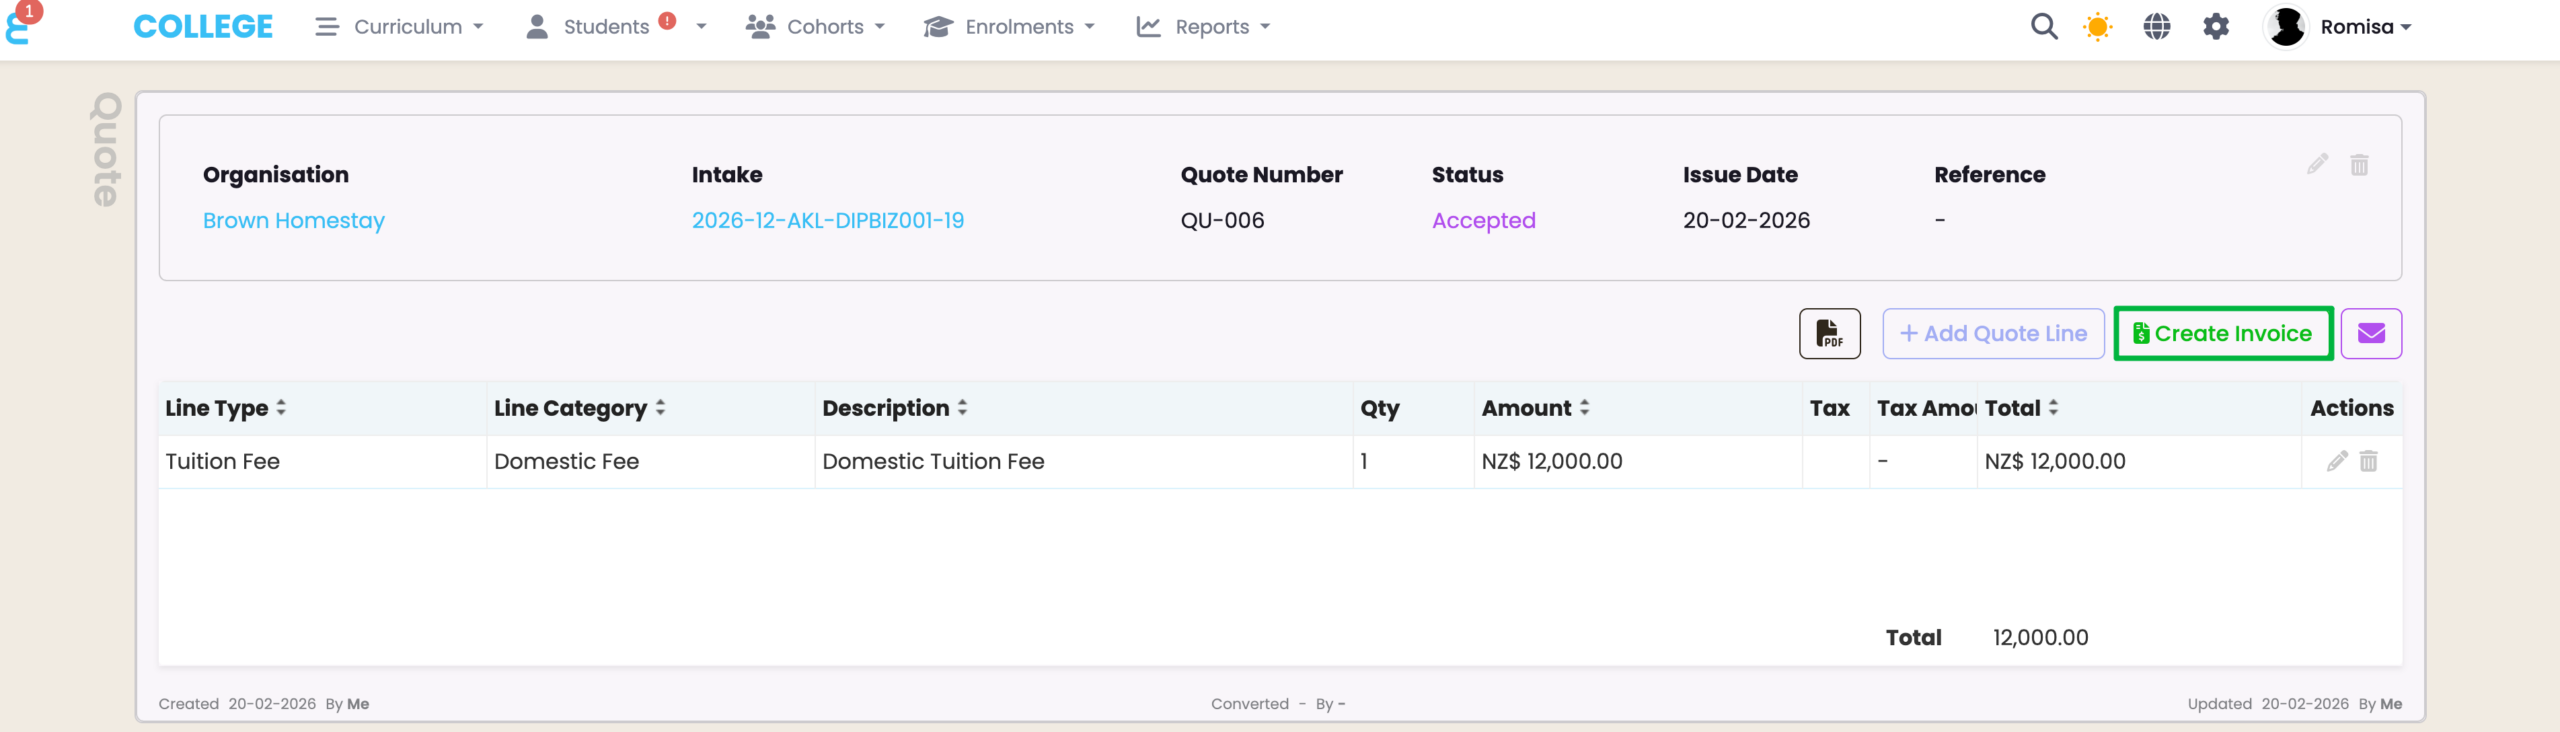
Figure 2ii. Add Invoice Details and Save
Provide the required details, as indicated by red asterisks.
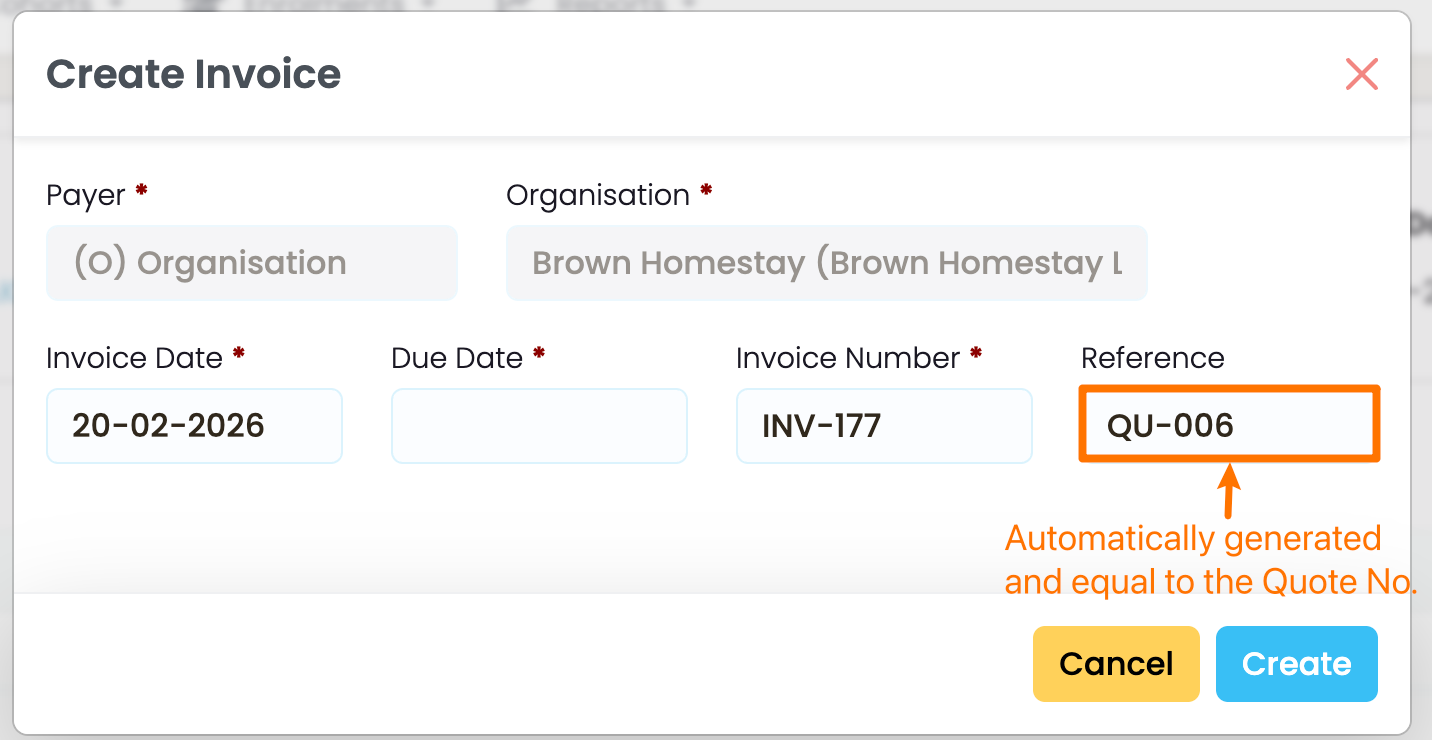
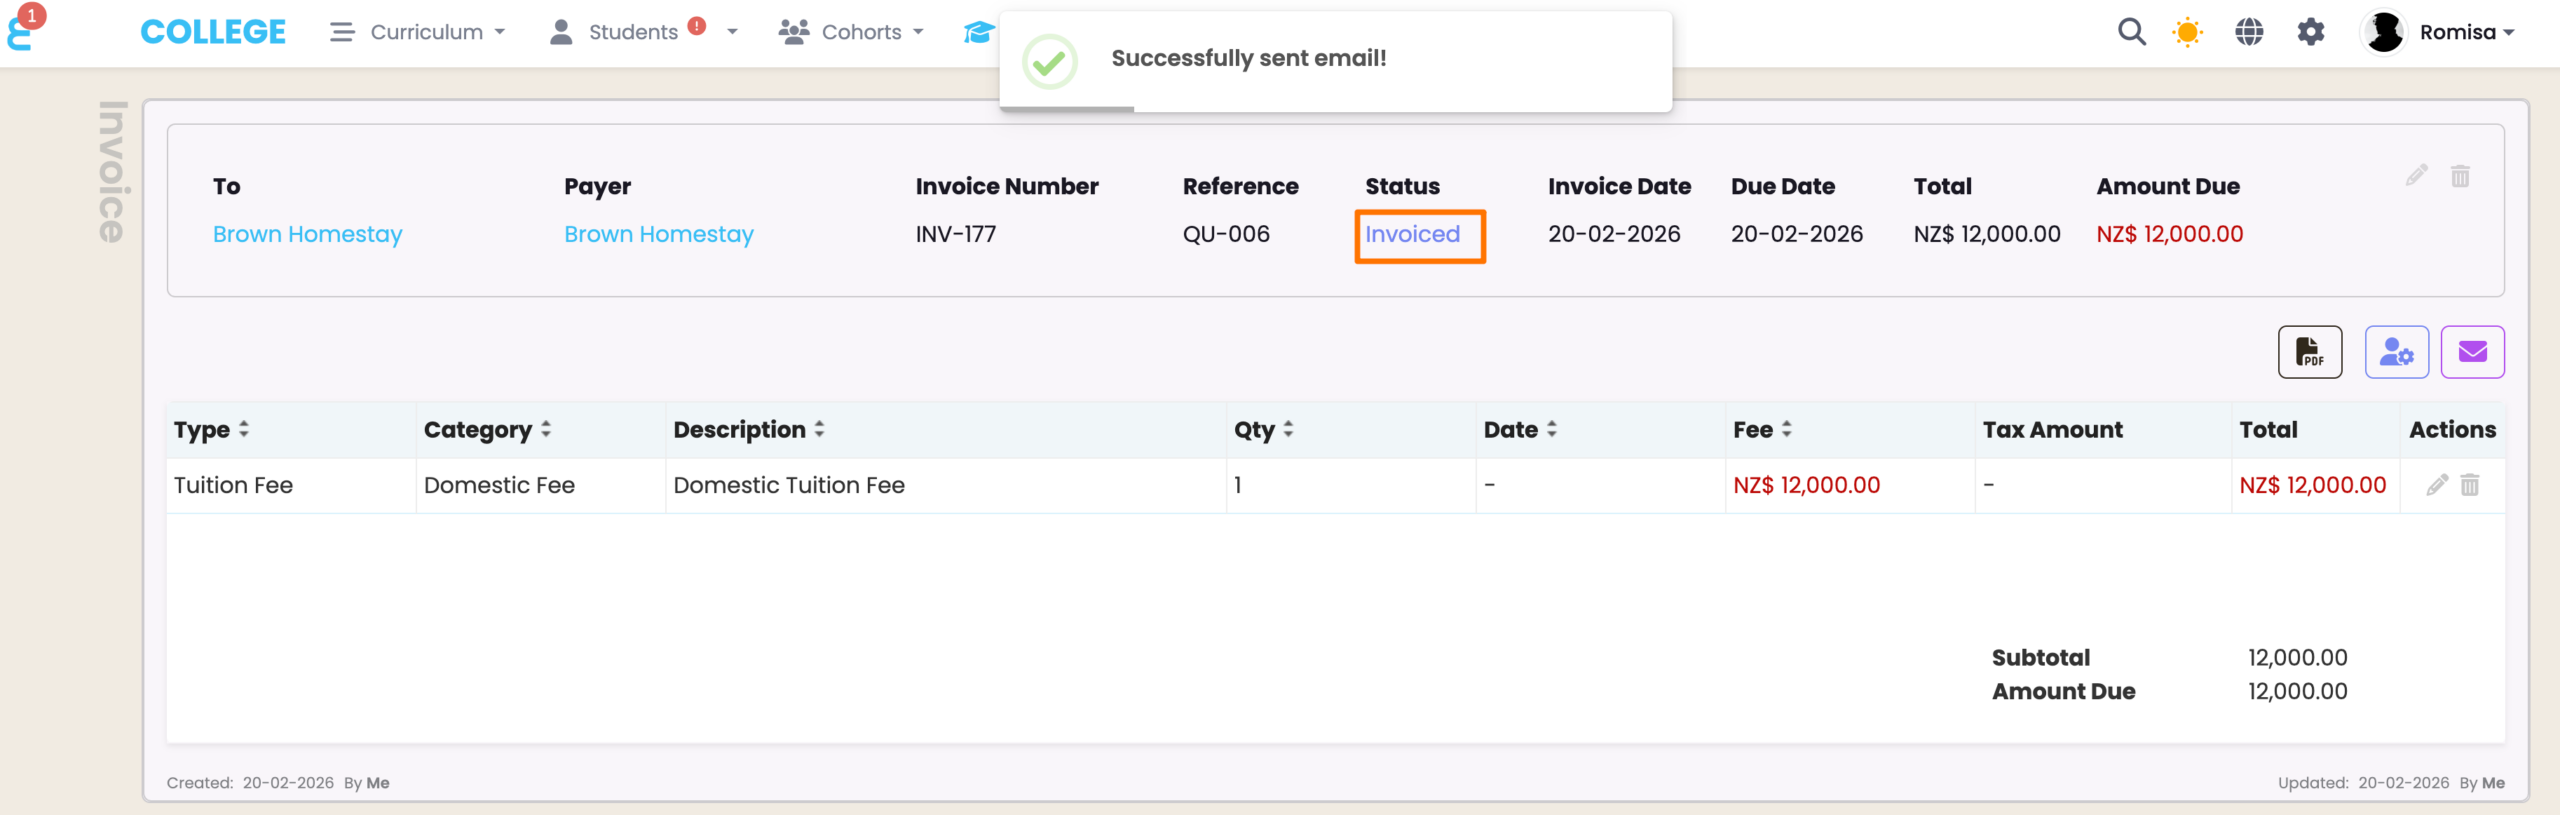
Figure 2iii. Send the Invoice to the Organisation
On saving the Invoice, it will be set as Status: “Draft”. Again, send an email from SELMA using the mail button (orange), or download an Invoice template to send one from your email account (PDF button).
- Note: There is a default invoice template, accessible through the PDF button, however, you can request SELMA support to create a custom one for you.
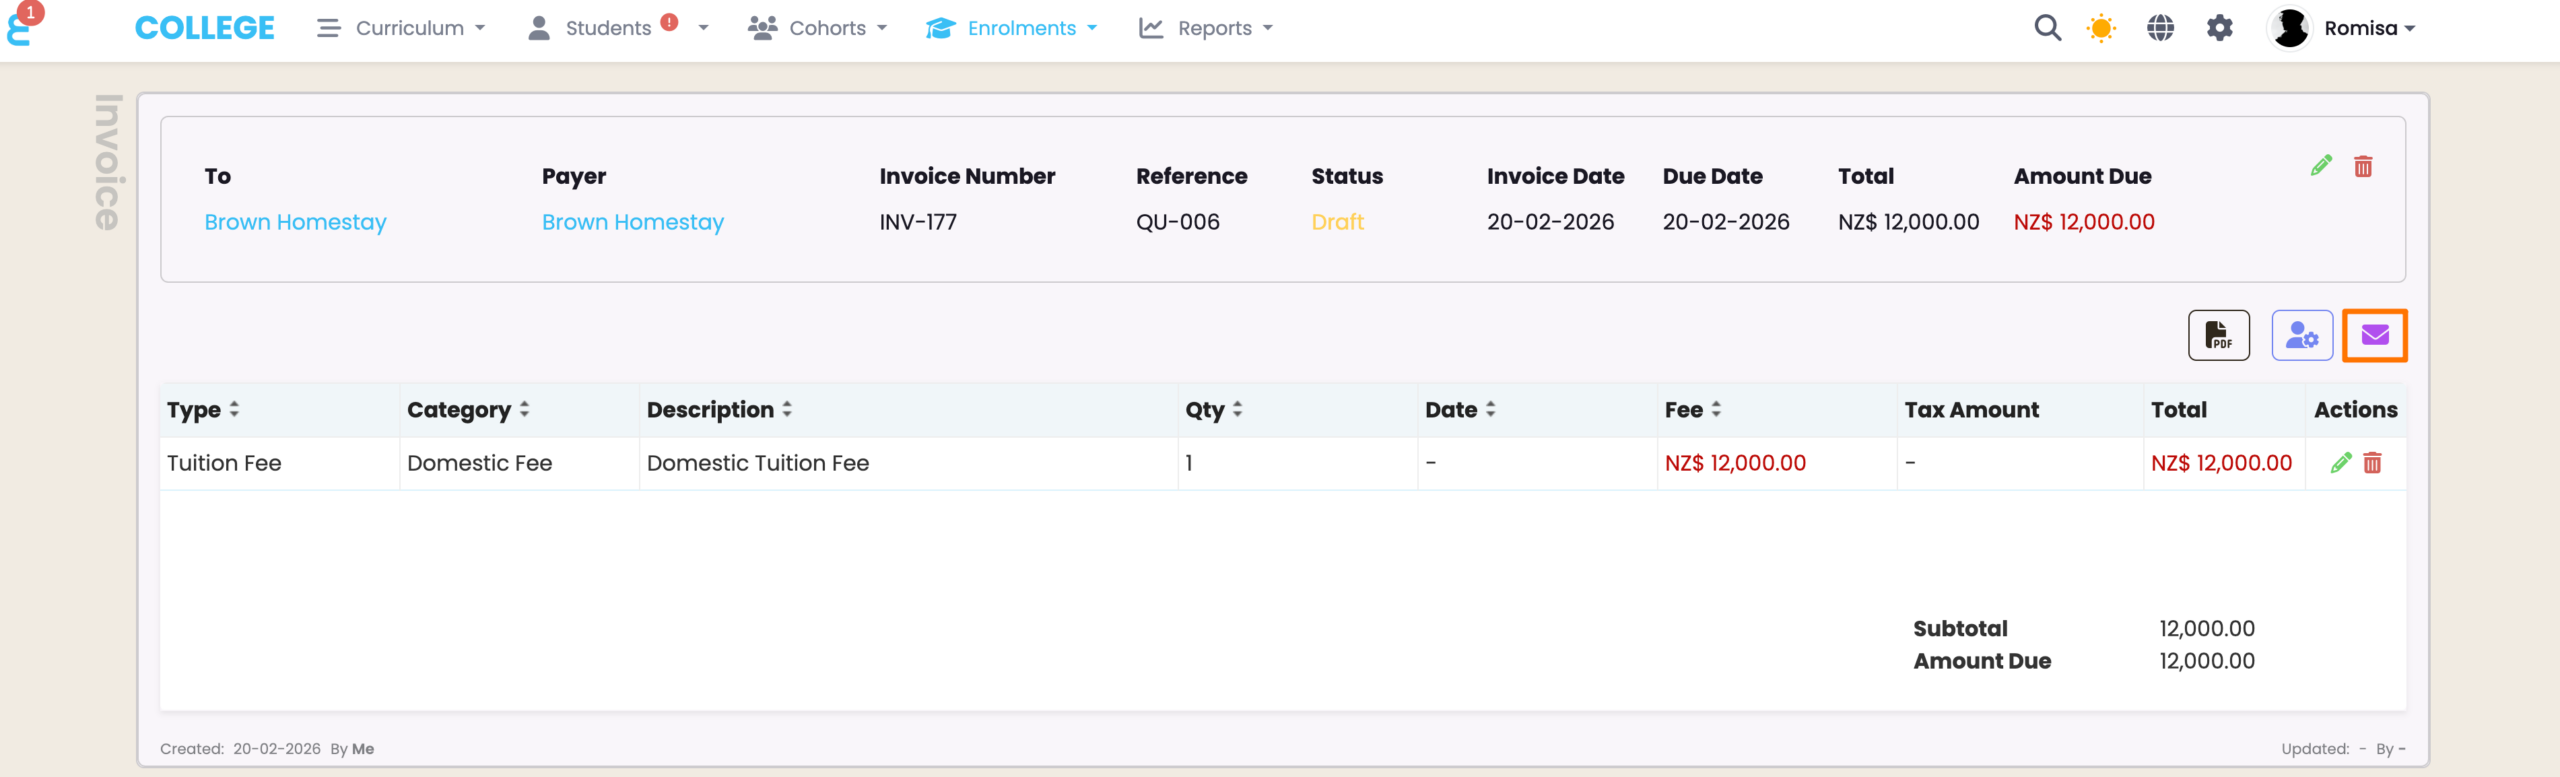
Figure 2iv. Status Change From “Draft” to “Invoiced”
Add Payments to Invoices
Once a Payment has been made, you can record it in SELMA.
- NOTE: The Xero Integration is an additional paid feature, which allows you to post Invoices, including Fees and Payments, from SELMA to Xero.
- Please refer to Integrations – Xero Integration Setup for more.
- Please refer to Integrations – Xero Integration Setup for more.
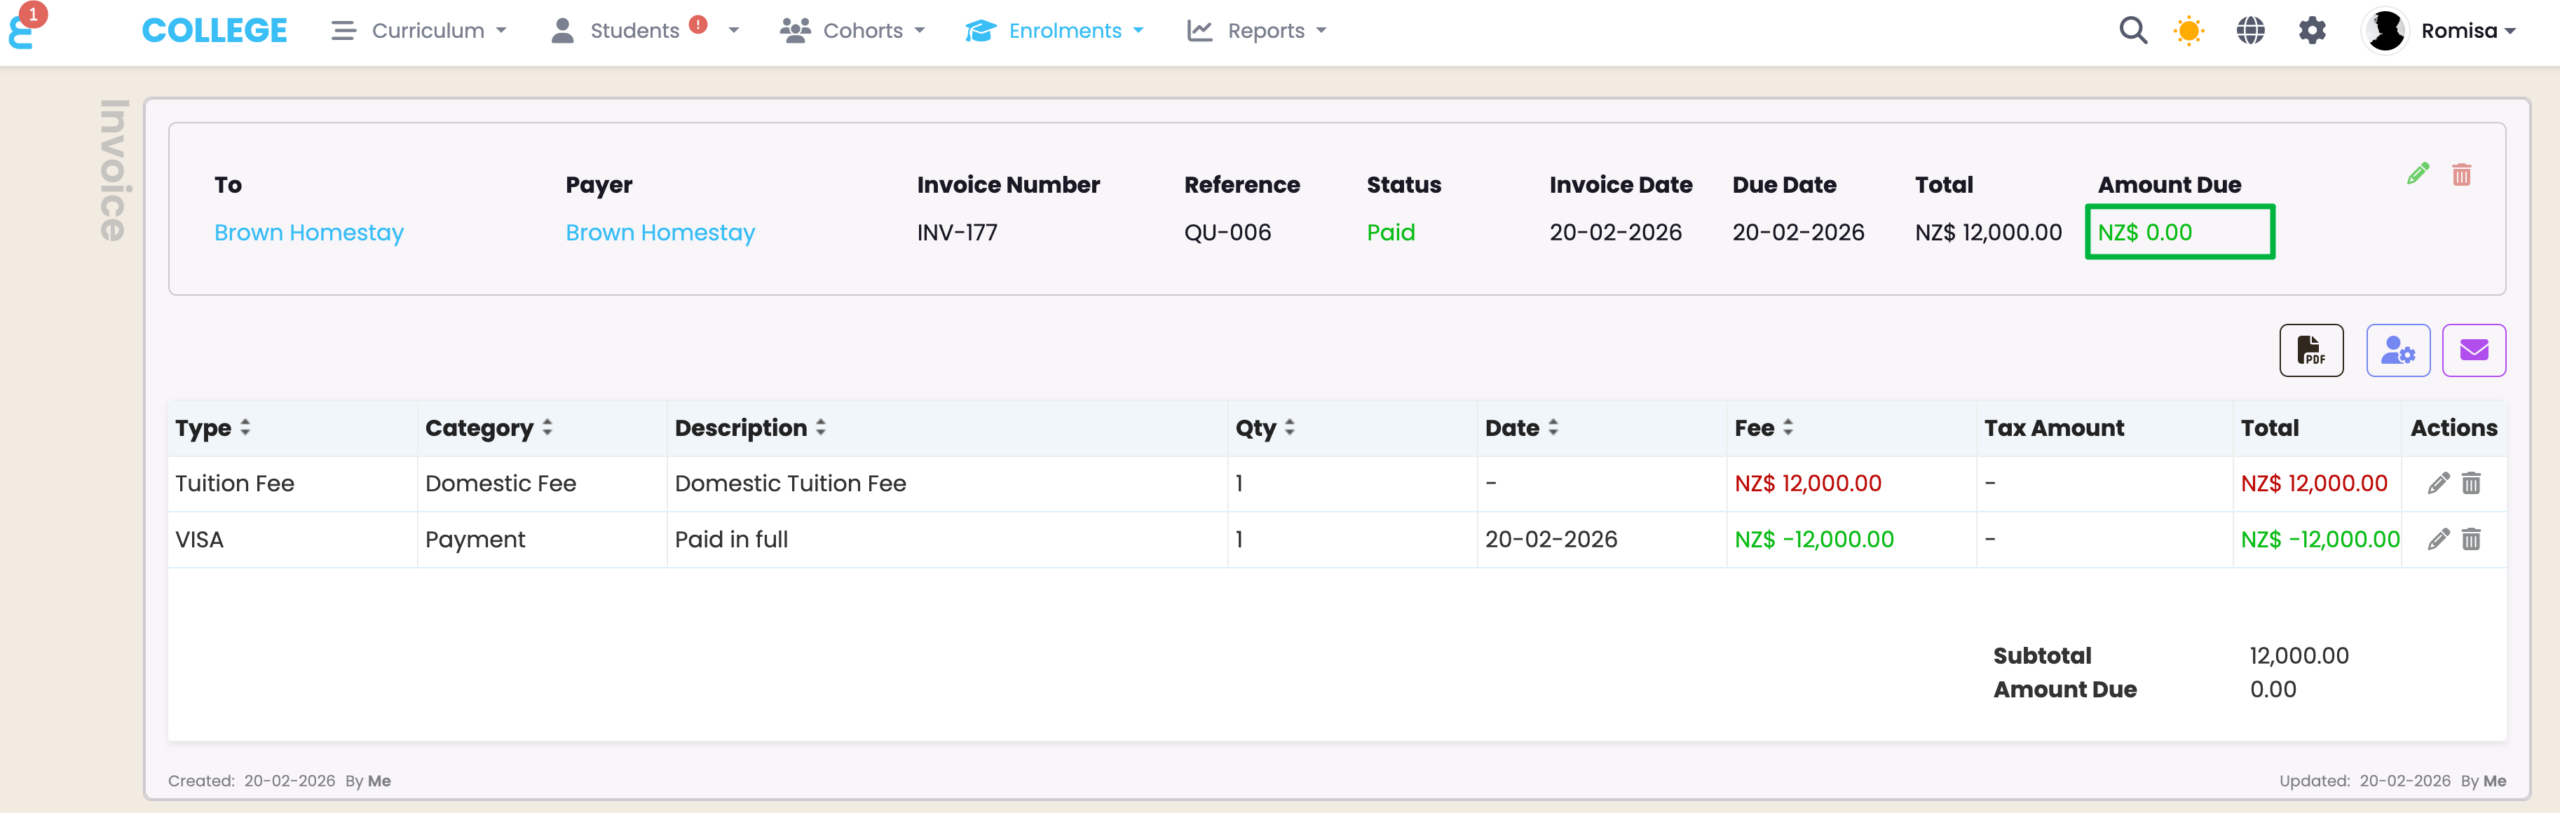
Figure 3i. Add Payment Line
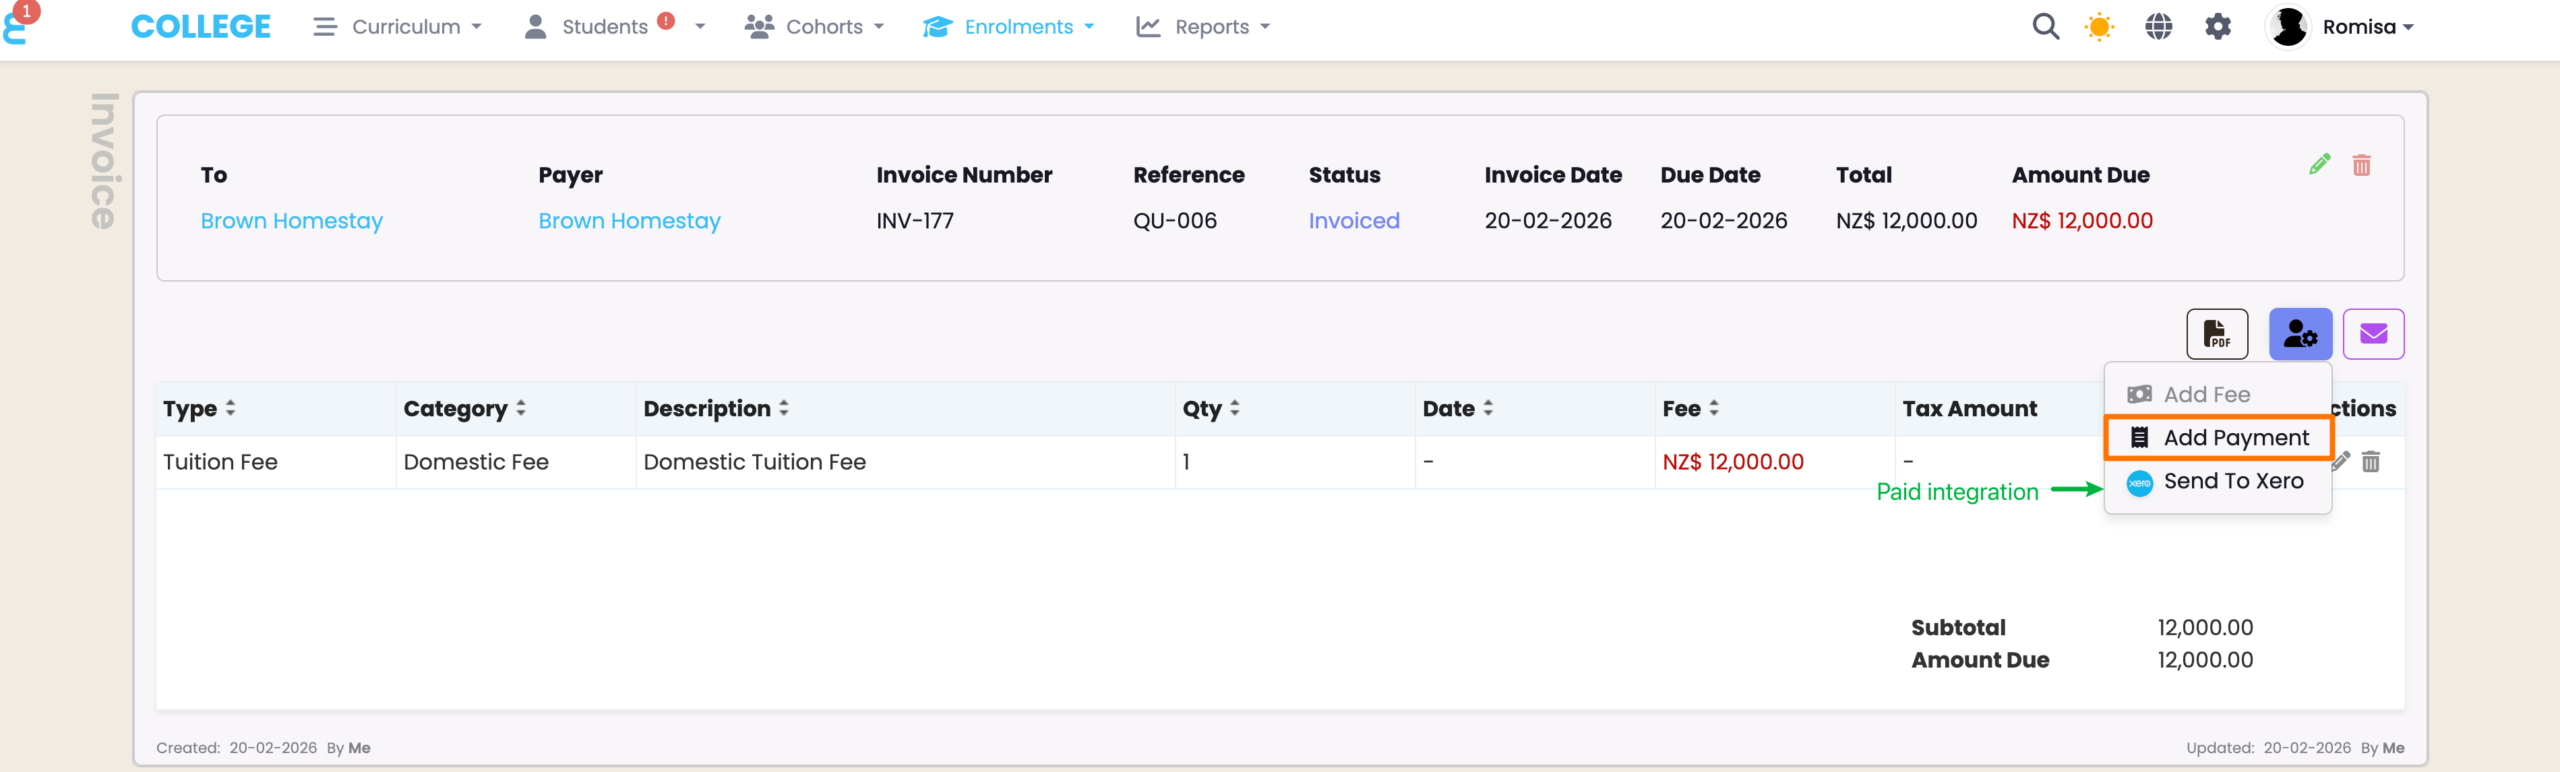
Figure 3ii. Provide Required Details and Save
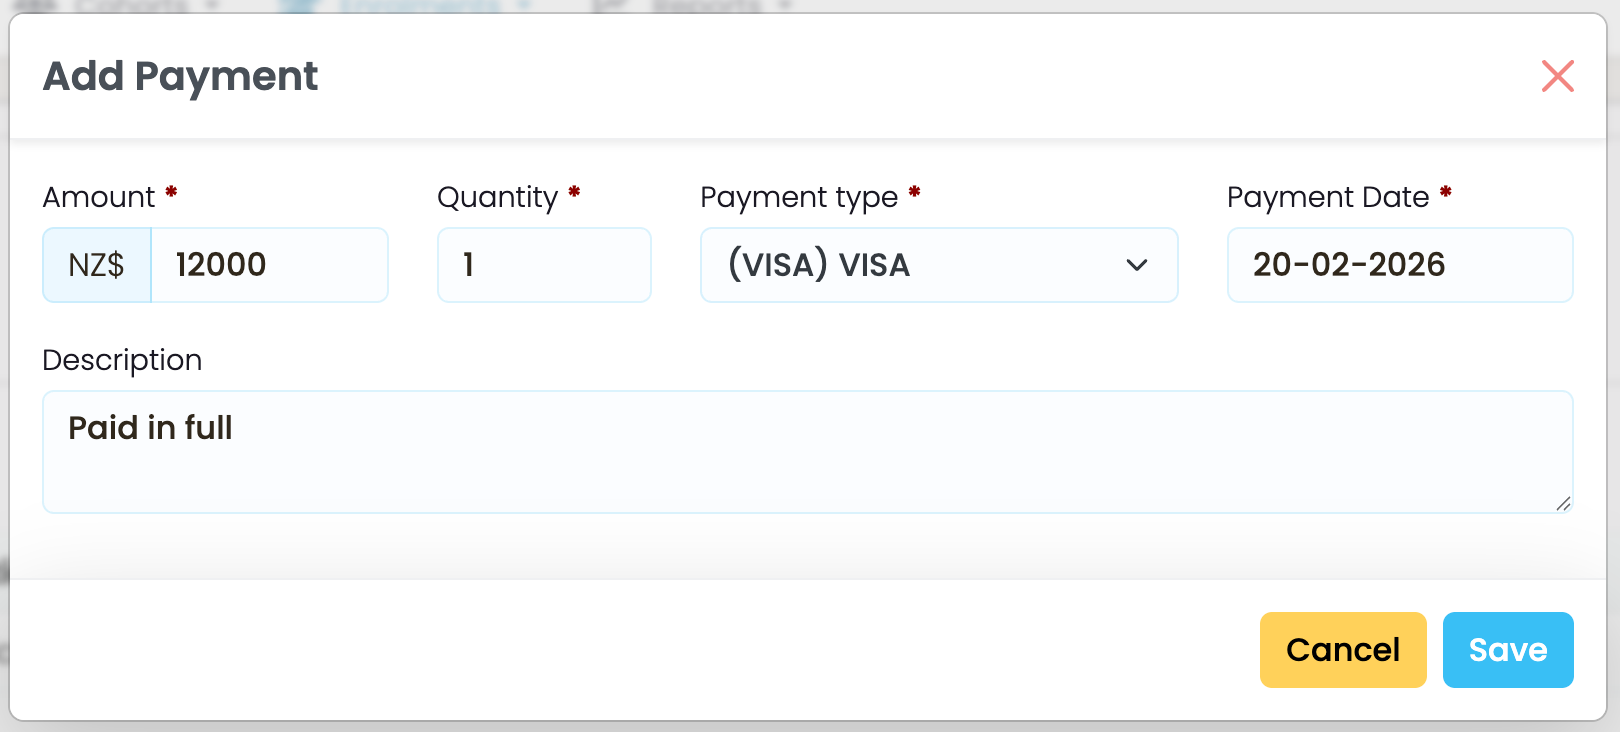
Figure 3iii. View Payment Lines
A Payment line is added under the Fee line, and the “Amount Due” is deducted by the paid amount.