The SELMA-WordPress integration uses a WordPress plugin to display Programmes and Programme Campuses on your website. Students can select their preferred option, and are then directed to your SELMA enrolment form to complete their application.
Note: Please contact SELMA Support to include this paid feature in your subscription plan.
In this Section:
Upload the WordPress Plugin
Before you proceed with the following steps, please contact SELMA Support to provide you with the relevant WordPress zip file.
Figure 1i. Add Plugin
On the left-hand panel, navigate to “Plugins” and select “Add Plugin”.

Figure 1ii. Upload Plugin
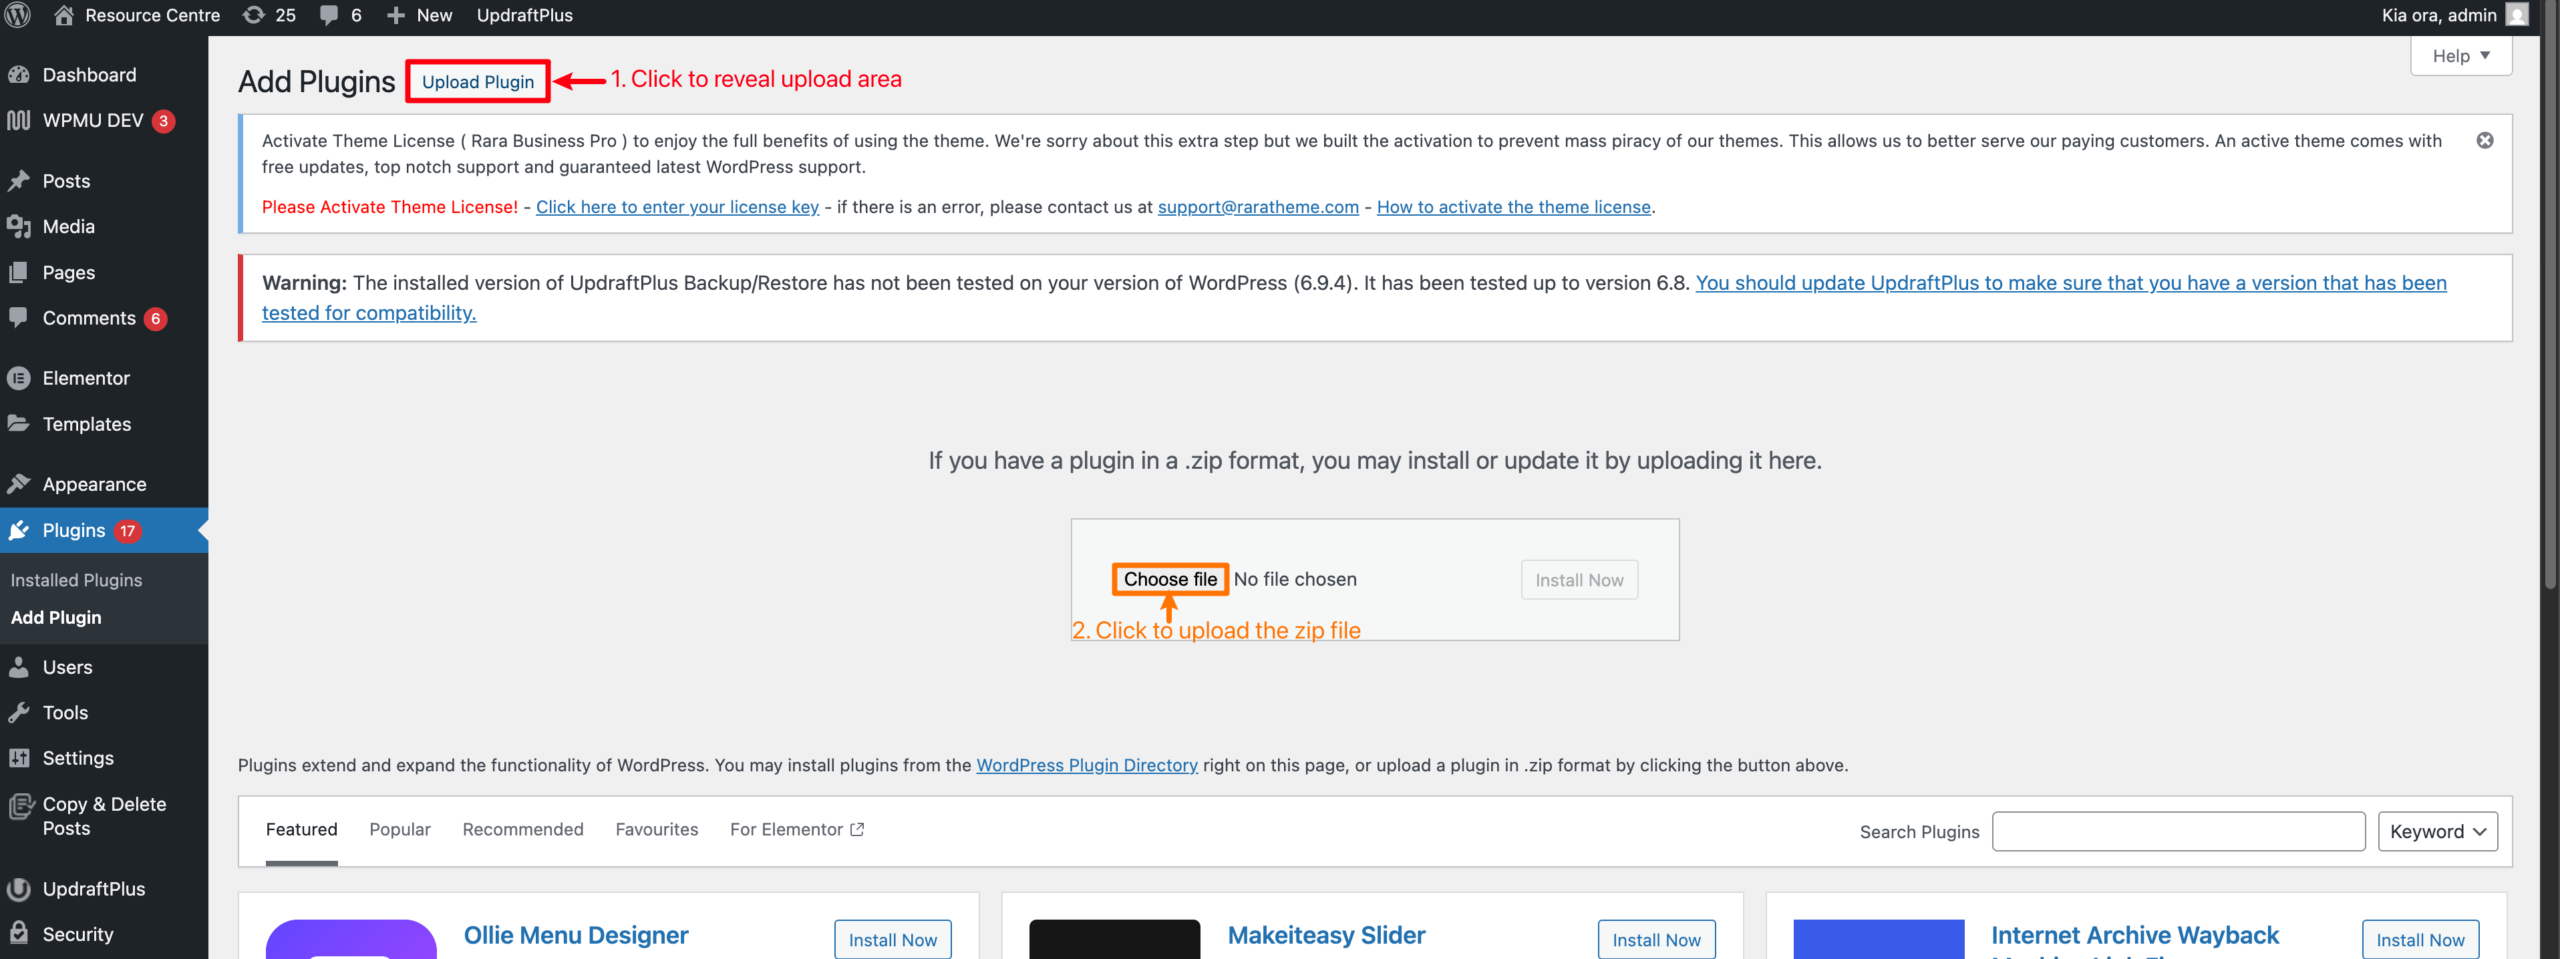
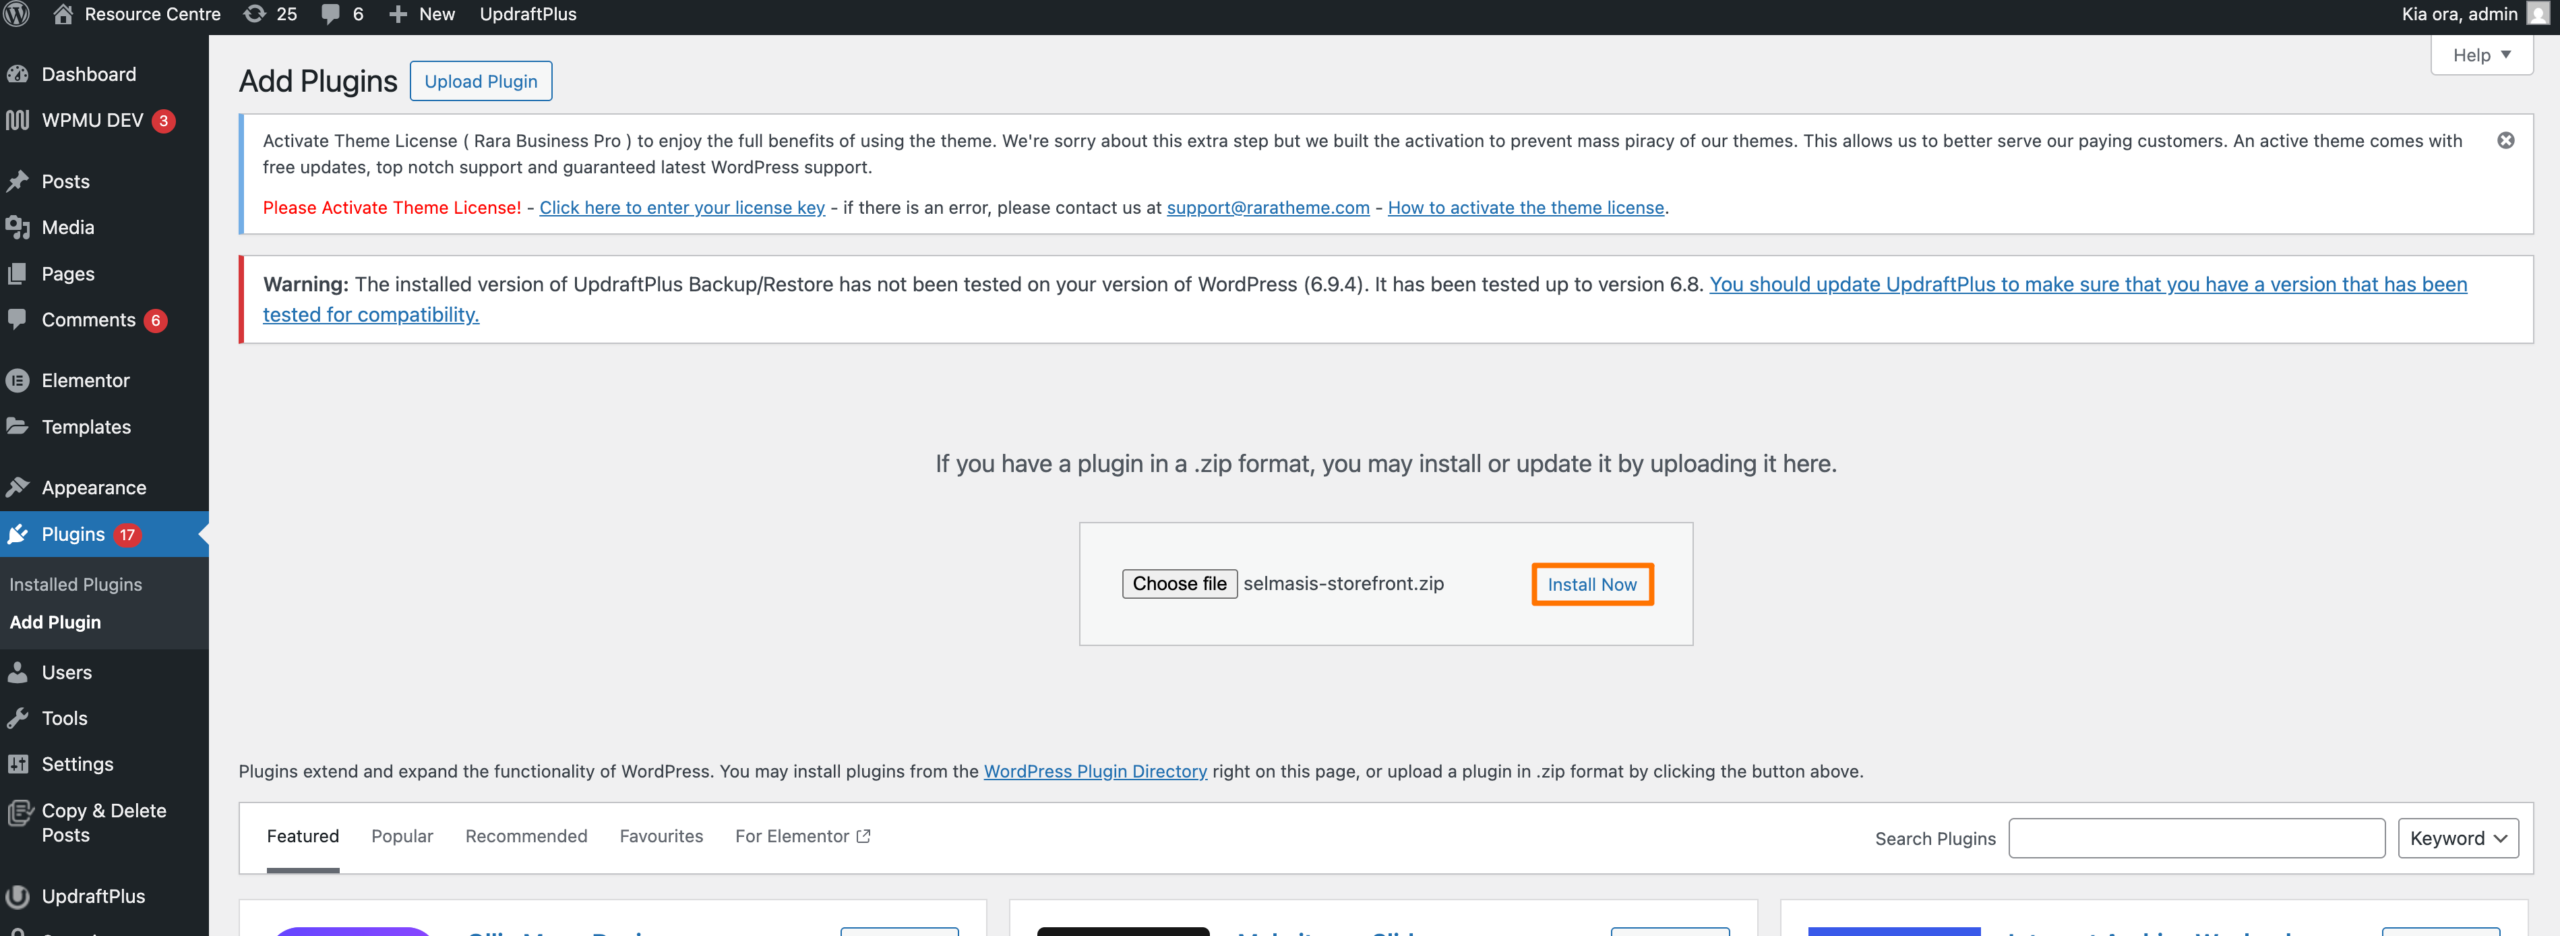
Figure 1iii. Install WordPress Plugin
Click the “Install Now” button once you’ve uploaded the zip file.
Fetch API User and API Key
Navigate back to SELMA and follow the steps, below:
Figure 2i. Navigate to Settings > API
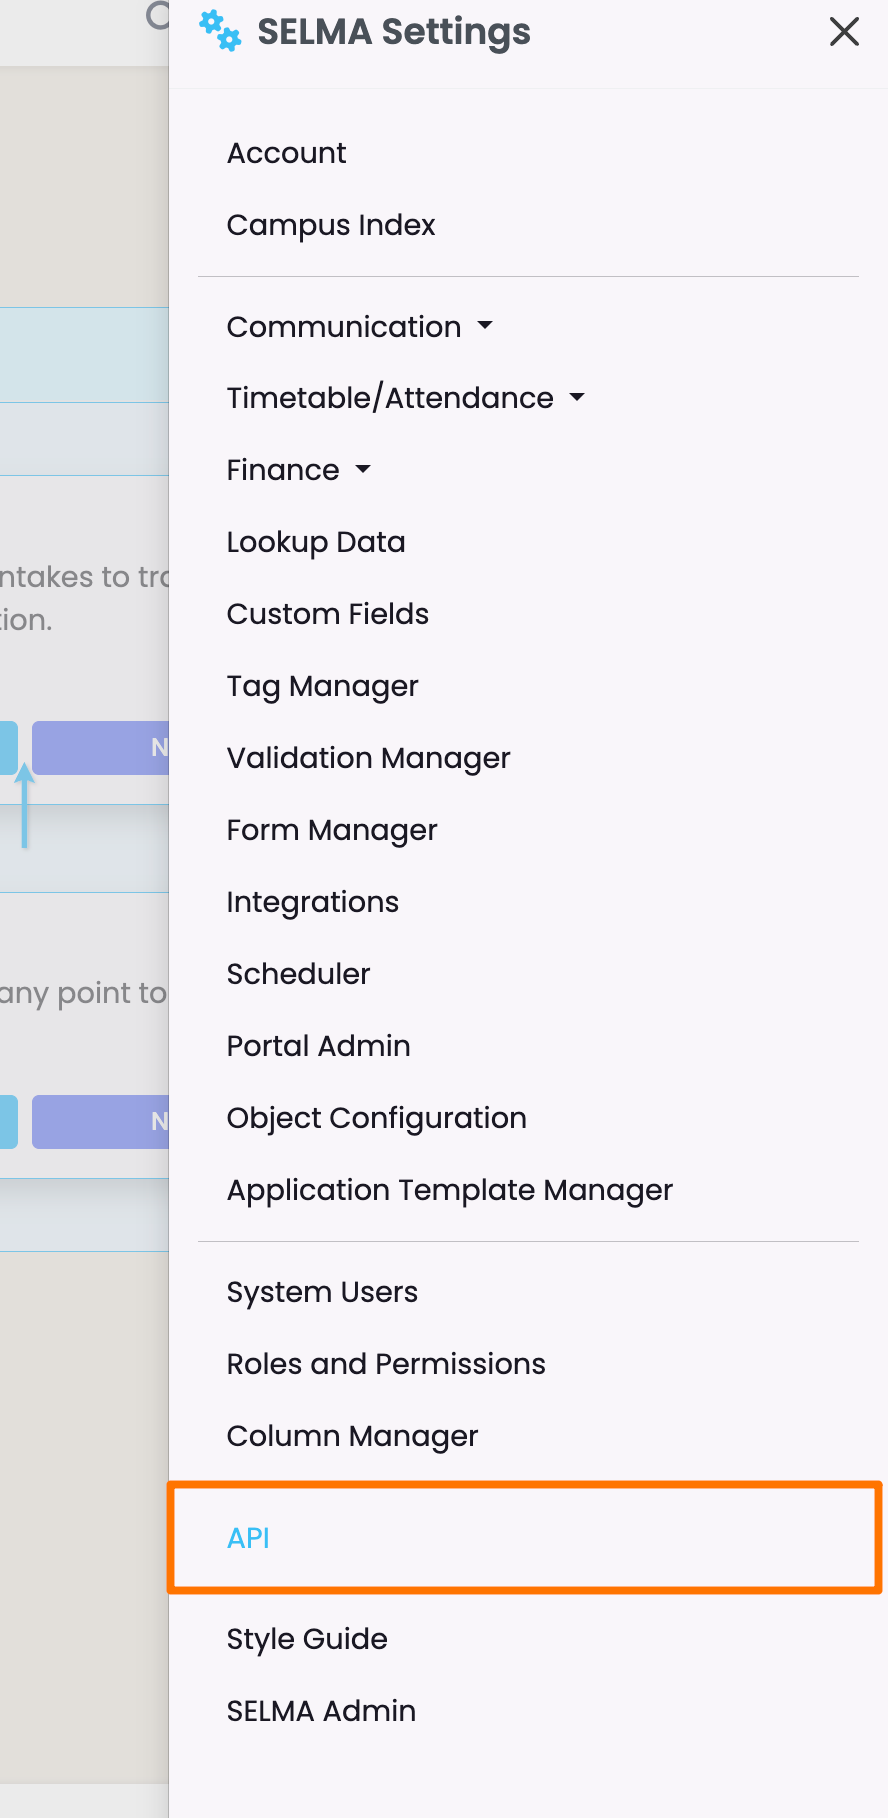
Figure 2ii. Add an API Account
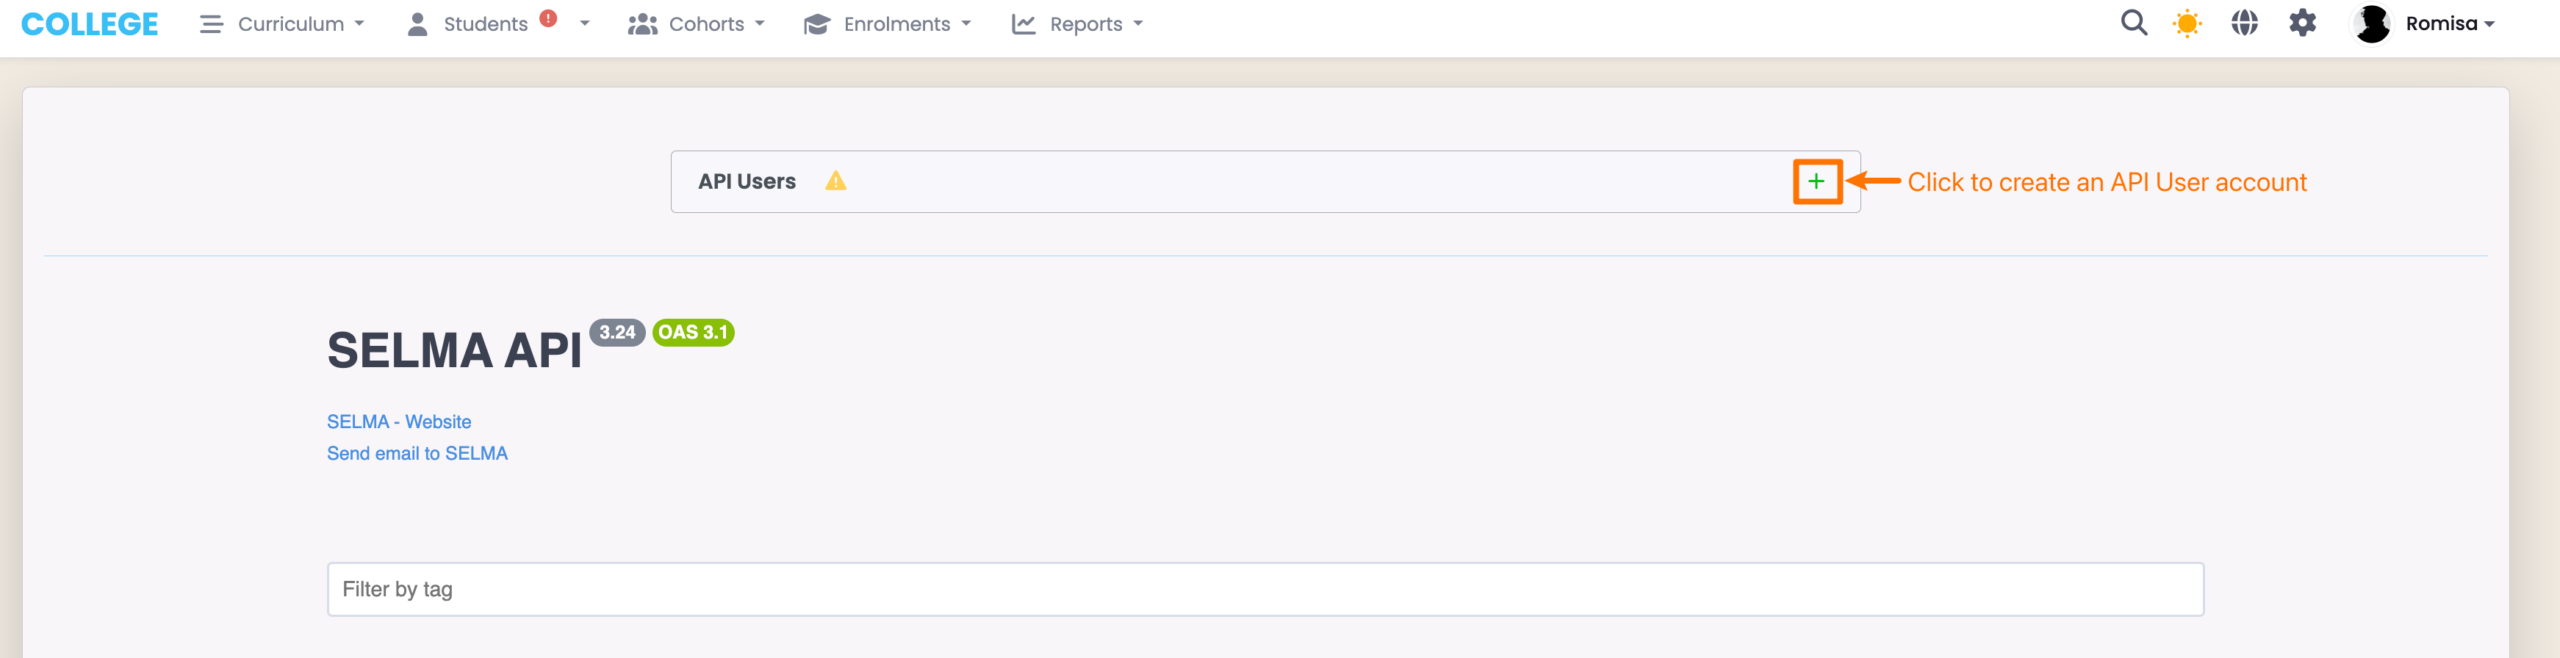
Figure 2iii. Select Environment and Create User
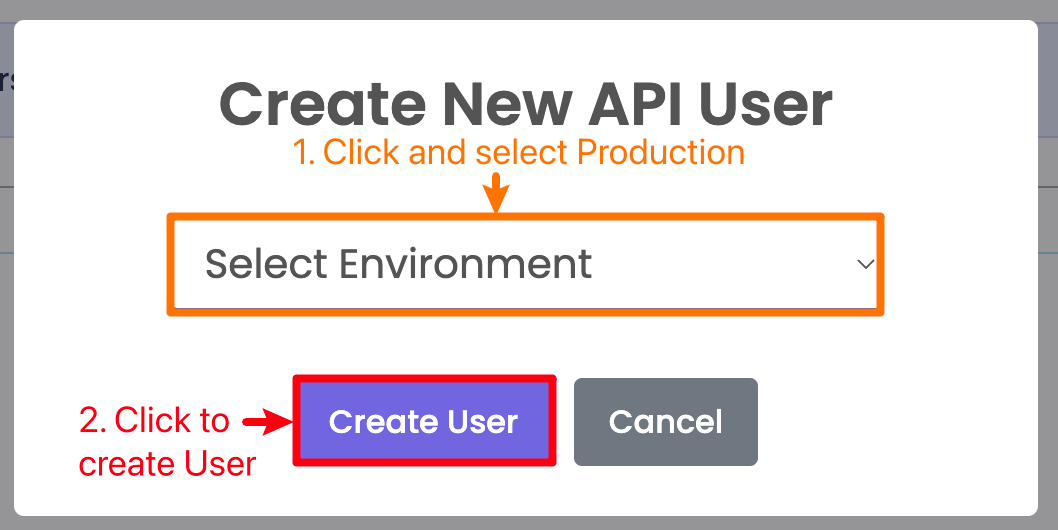
Figure 2iv. Copy API User and Generate API Key
Copy and save your API Username somewhere secure (orange), and follow the steps in the screenshot to generate an API key.
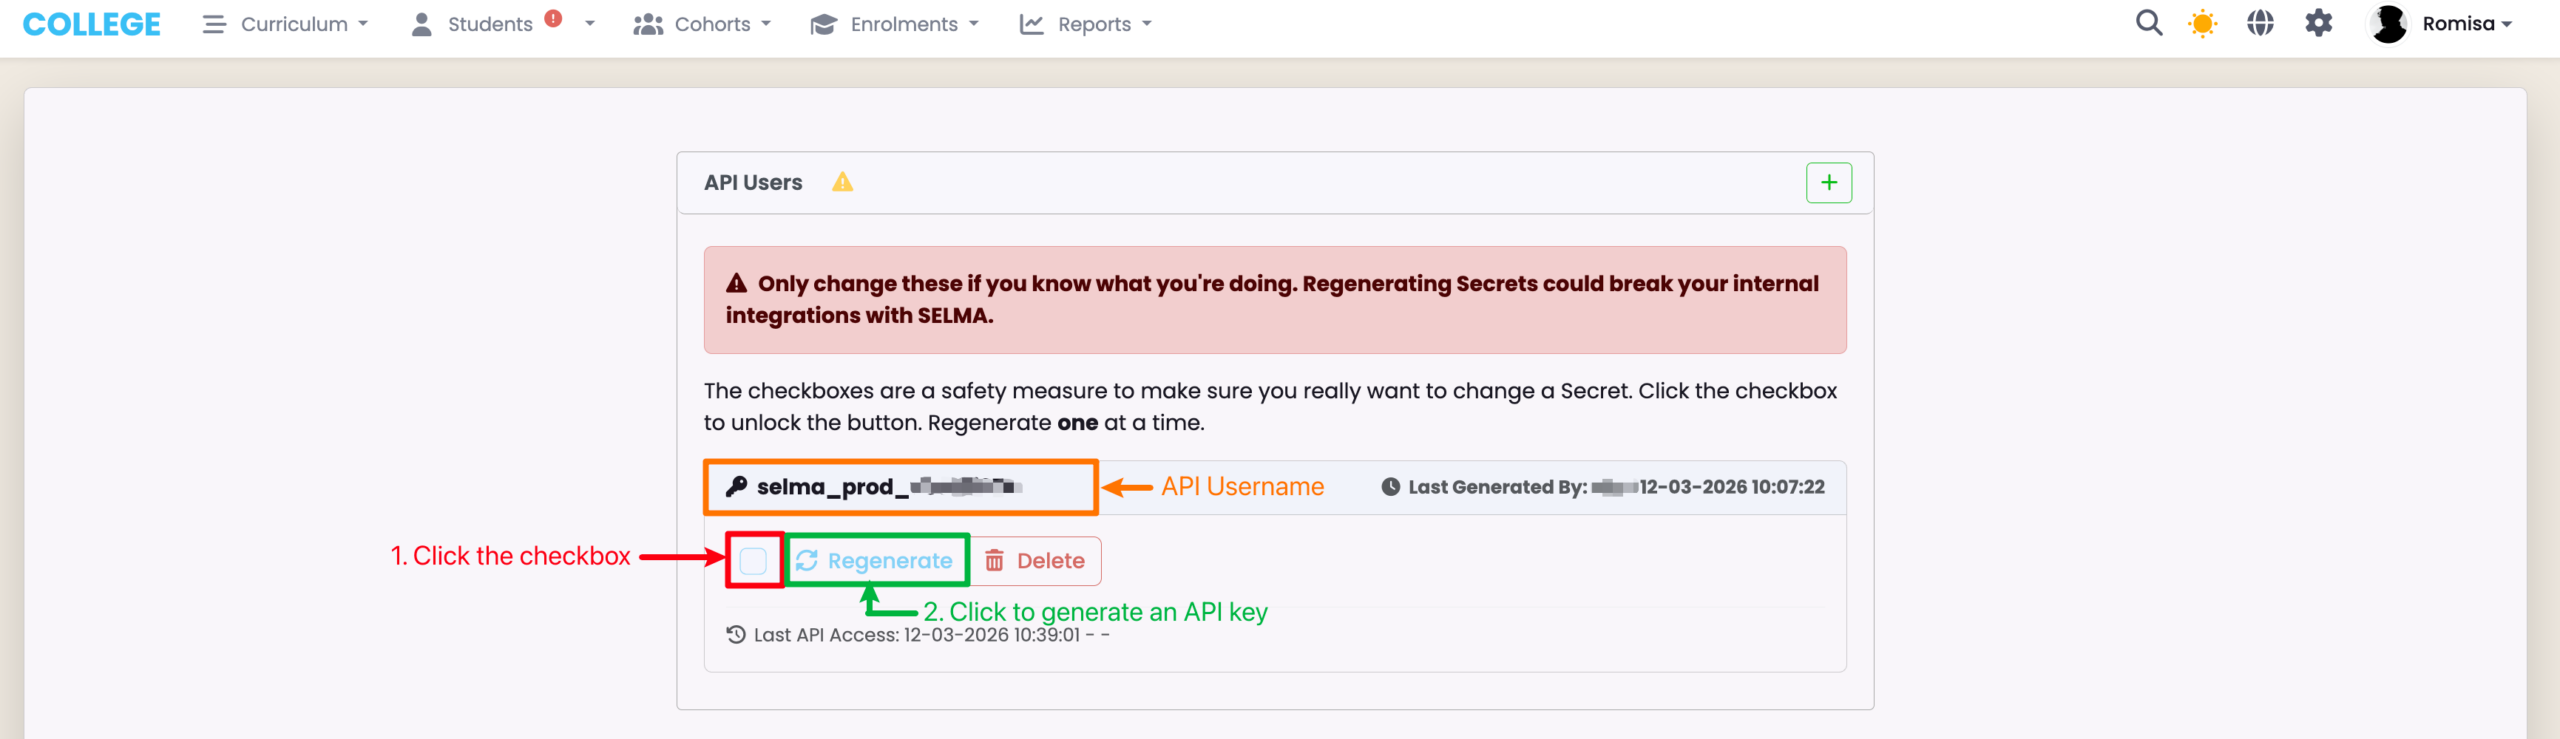
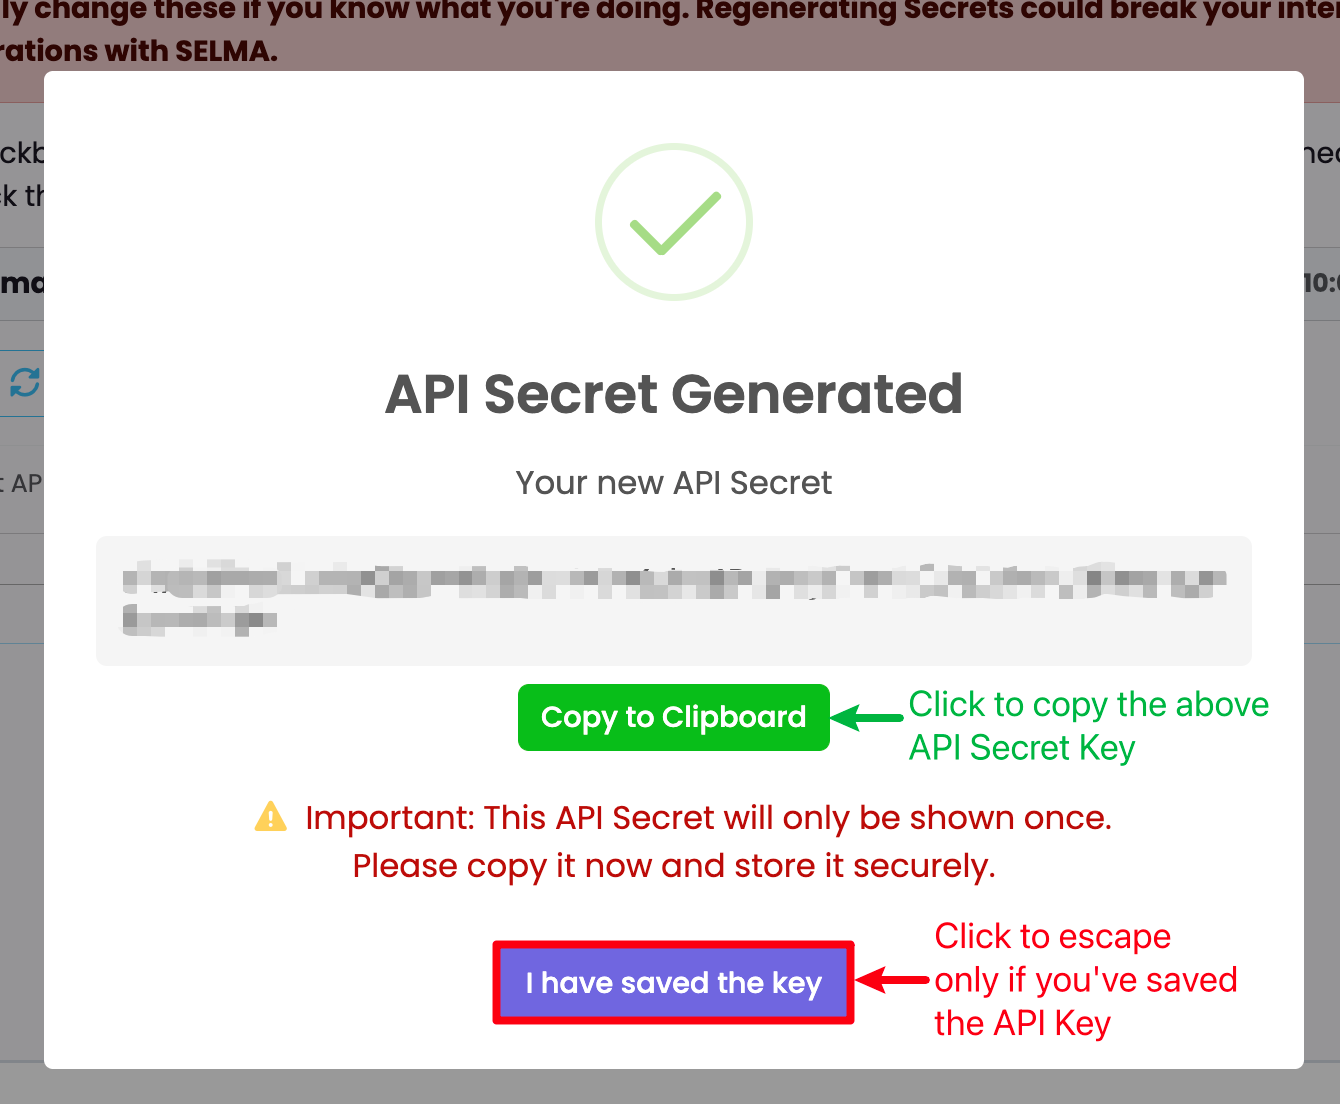
Figure 2v. Copy API Key
Copy the API Secret Key to your clipboard (green), and store it somewhere secure.
WordPress PlugIn Configuration
Figure 3. Navigate to Plugins > Installed Plugins
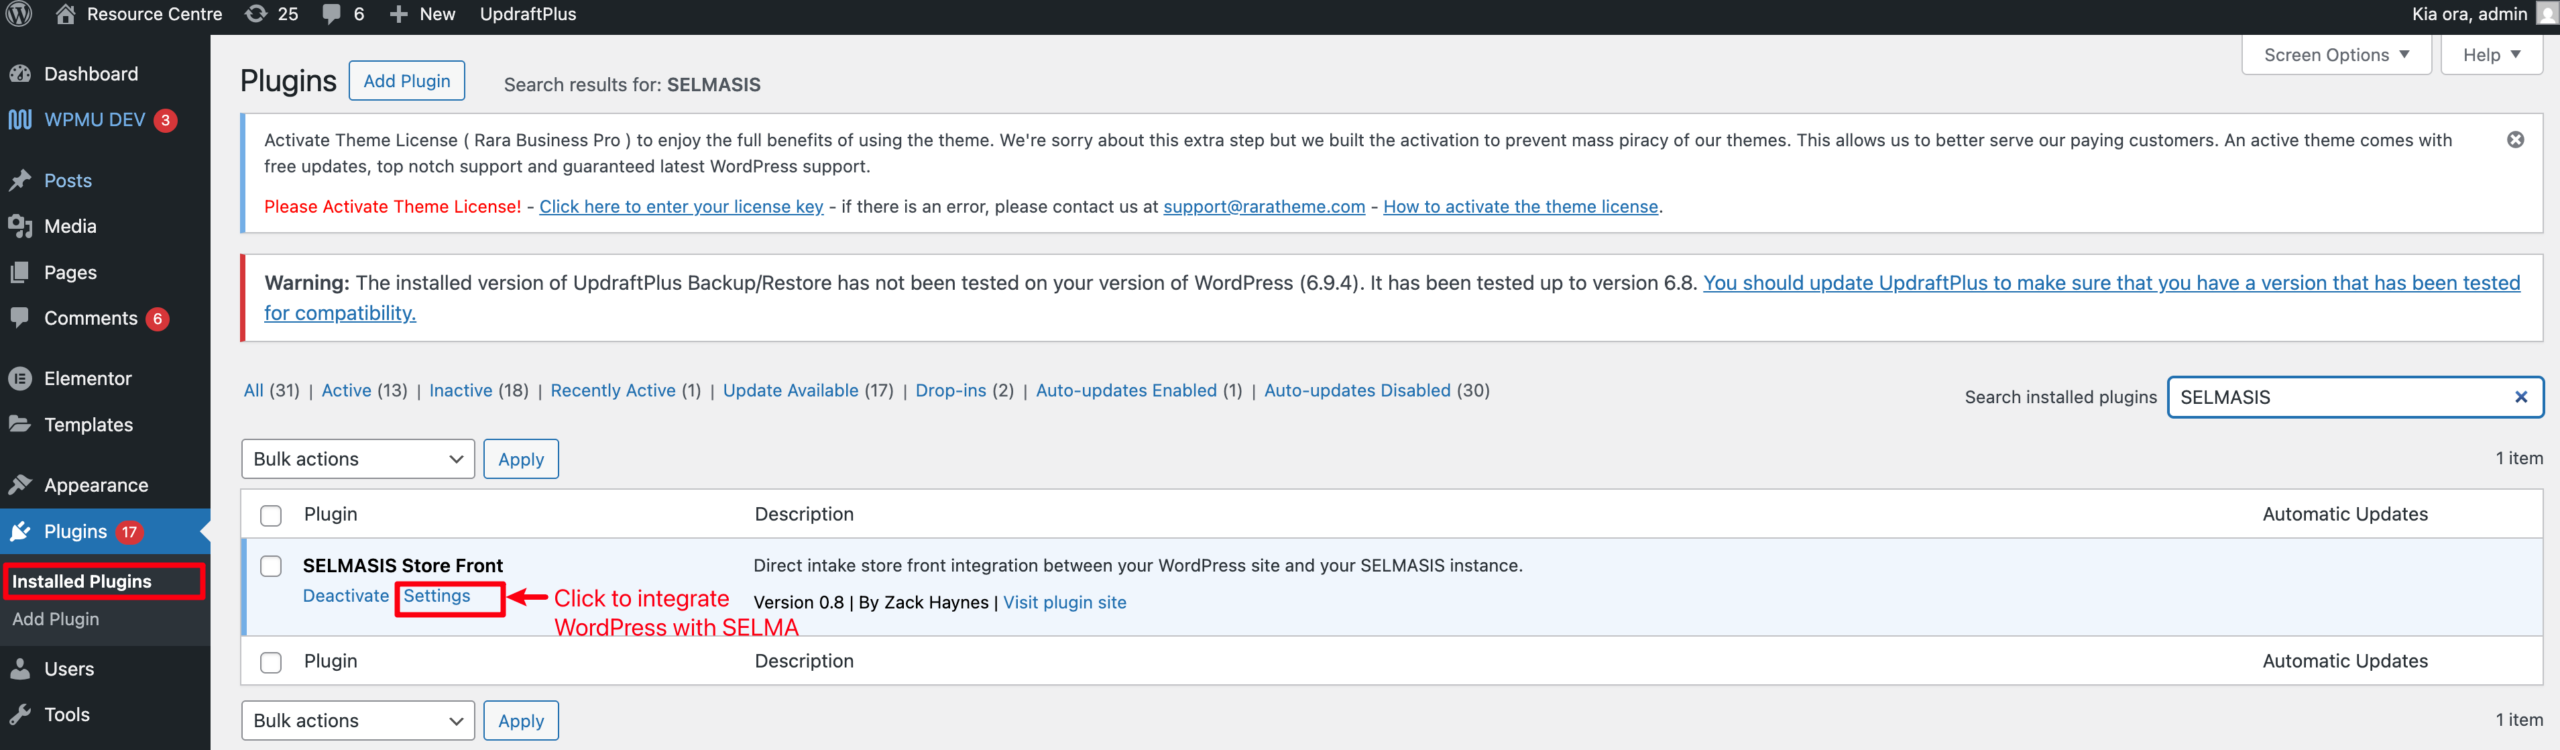
Figure 4. Enter API User and API Key
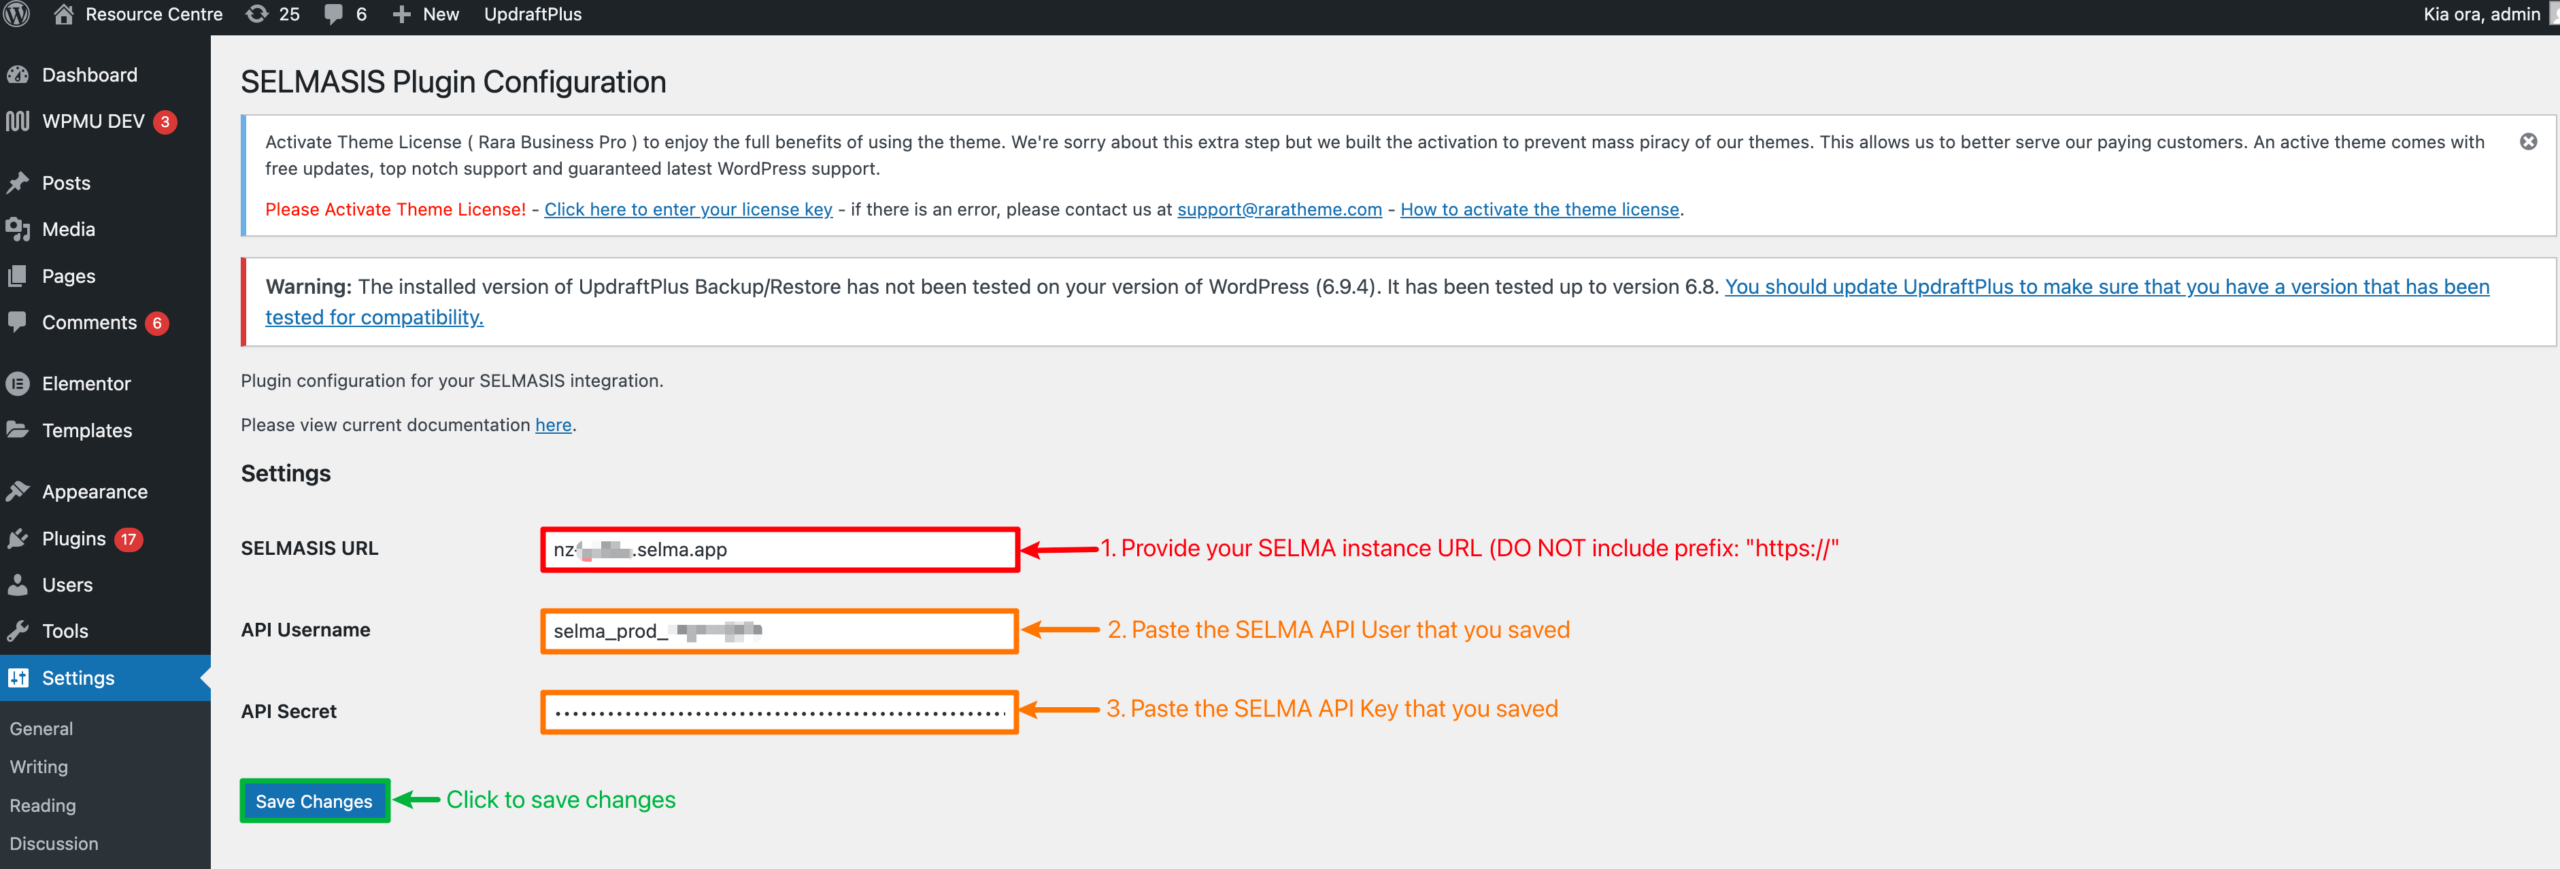
Figure 5. Enter Short-Code/s on a Post
Navigate to a WordPress post which constitutes your website. Then past the following Short Code parameters to render the appropriate SELMA Intakes onto your website:
- To show all available Intakes:
[selmasis]
- To show Intakes with a specifc Campus ID (e.g. 12) and Programme ID (e.g. 76)
[selmasis campus=12 programme=76]
- To show Intakes with a specific Programme ID (e.g. 76)
[selmasis programme=76]
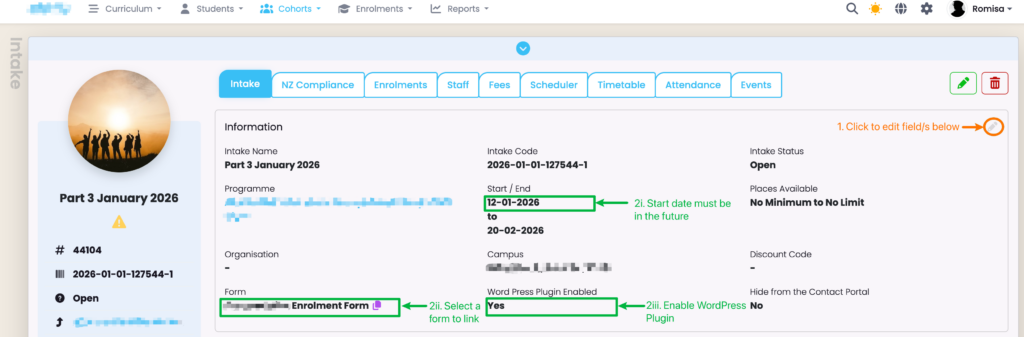
Link Intakes to WordPress Site
Navigate back to SELMA and fill out the following fields on the Intake tab of the Intake profile page.
Figure 6. Update Intake Tab Fields
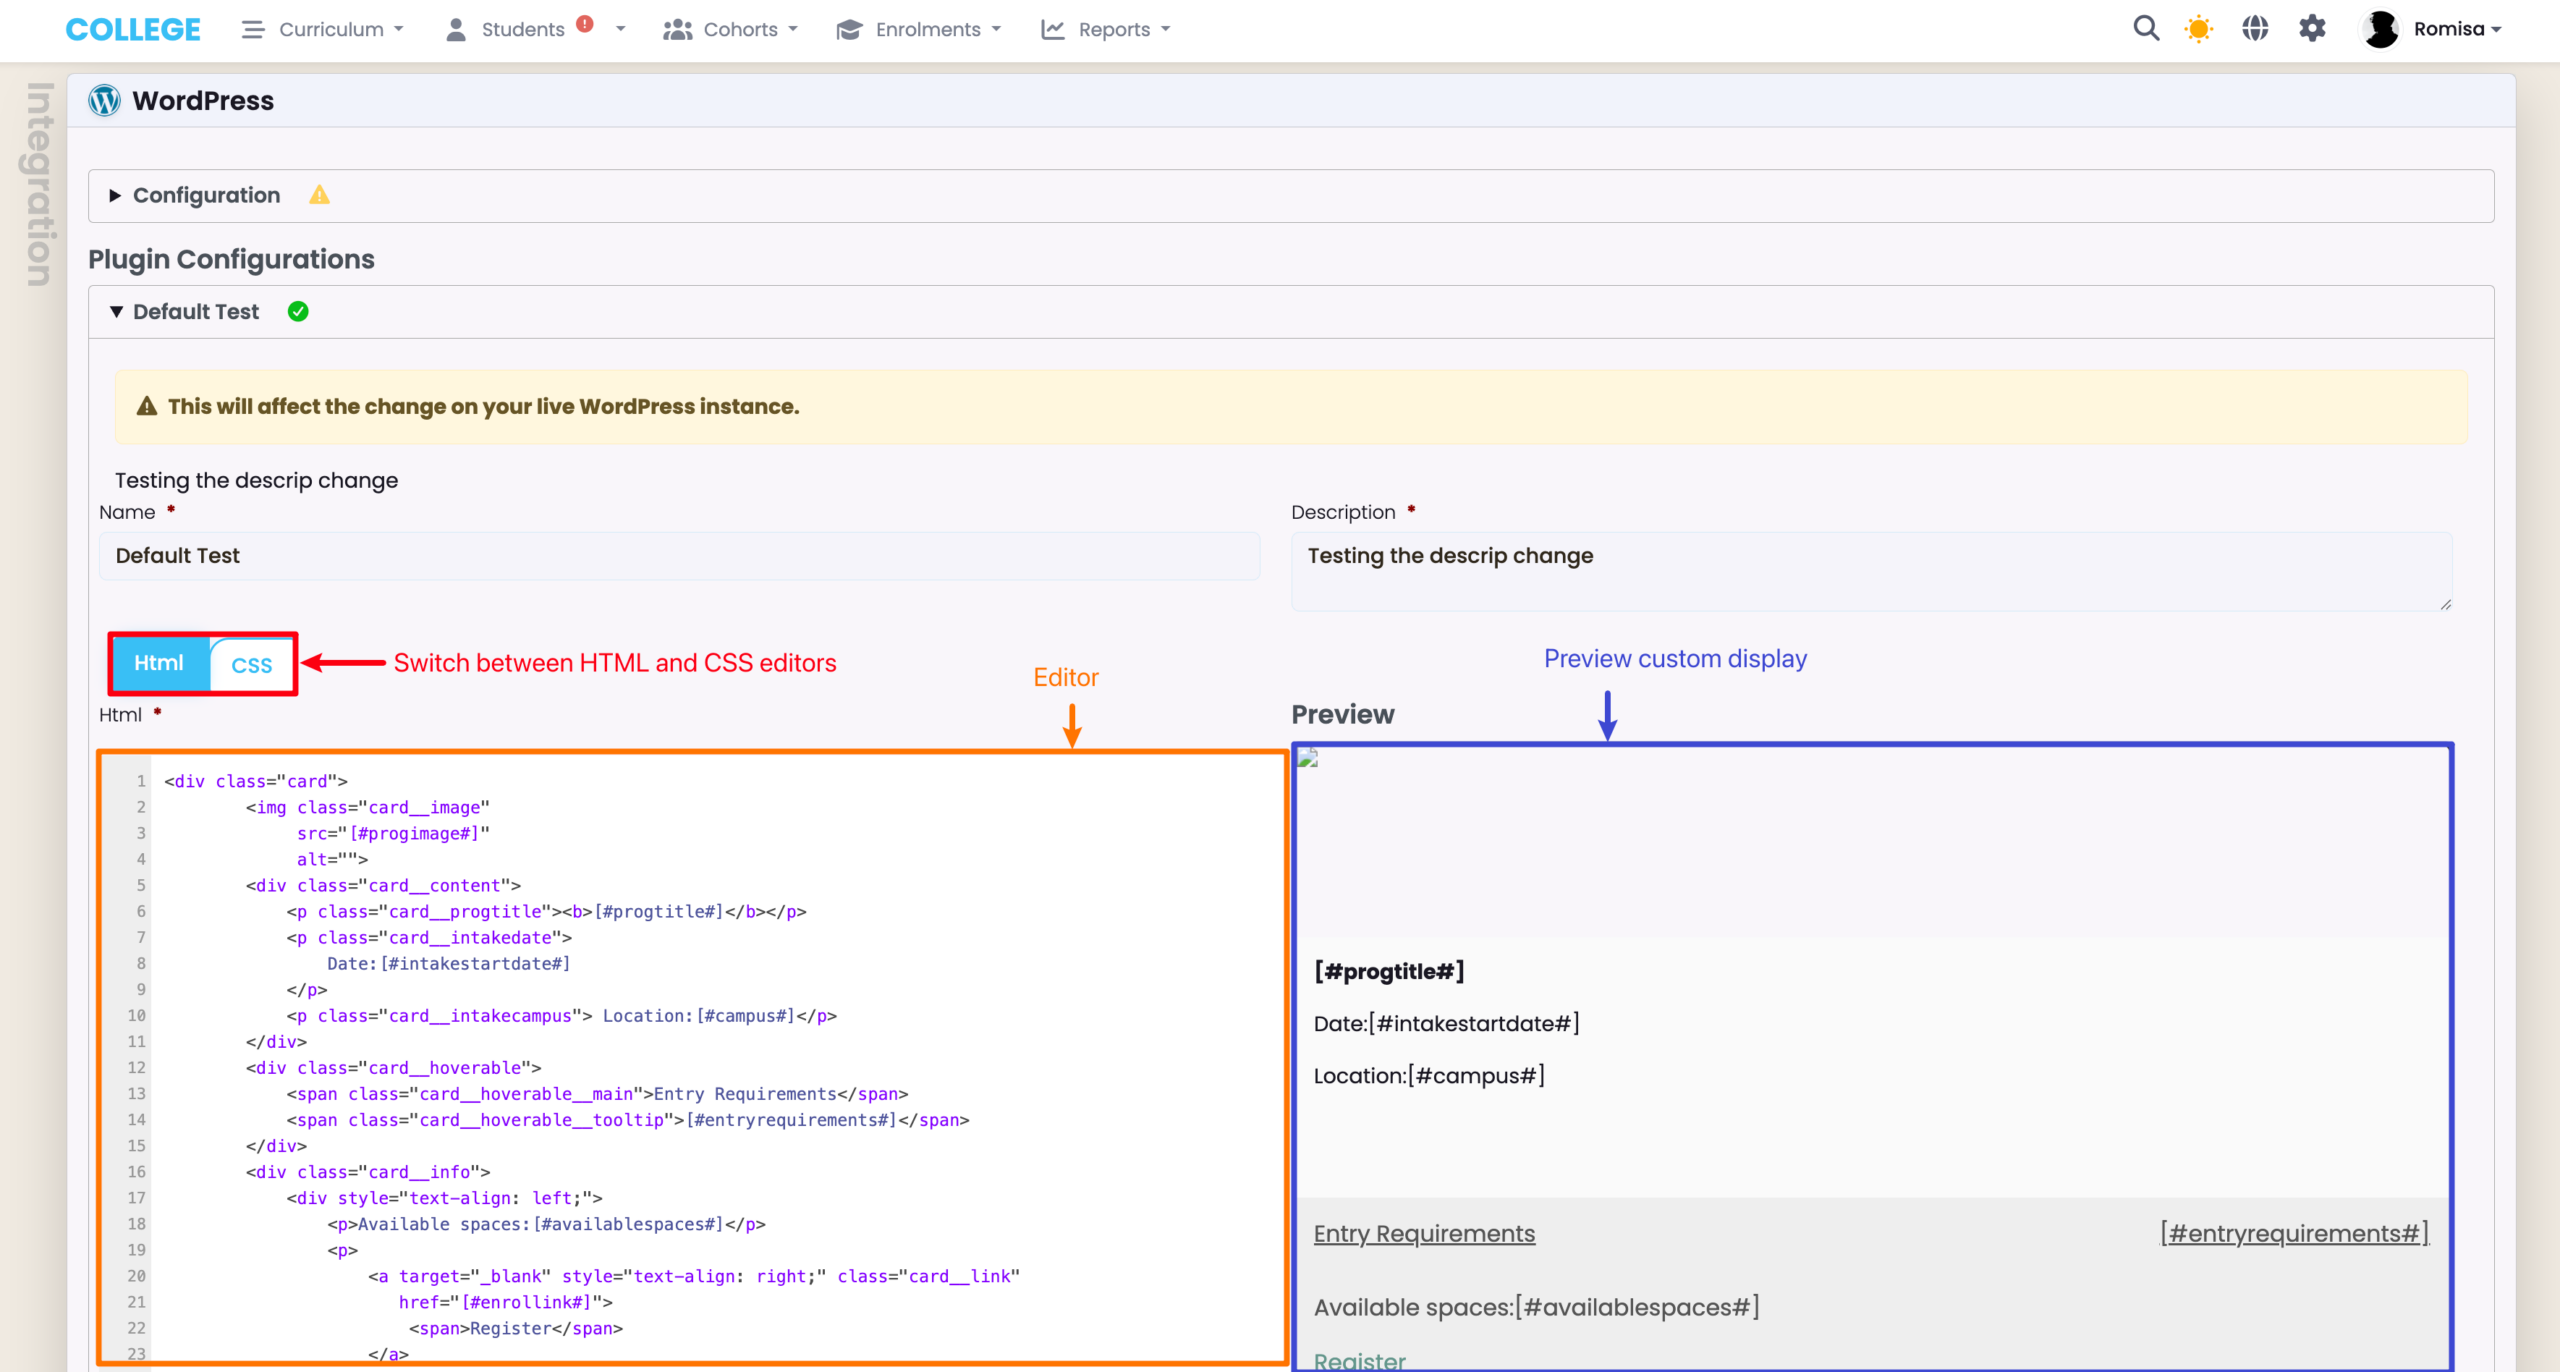
Customise Website Display
The WordPress Integration has a default HTML script and CSS.
If you wish to customise the display follow the steps, below:
Figure 7i. Navigate to Settings > Integrations
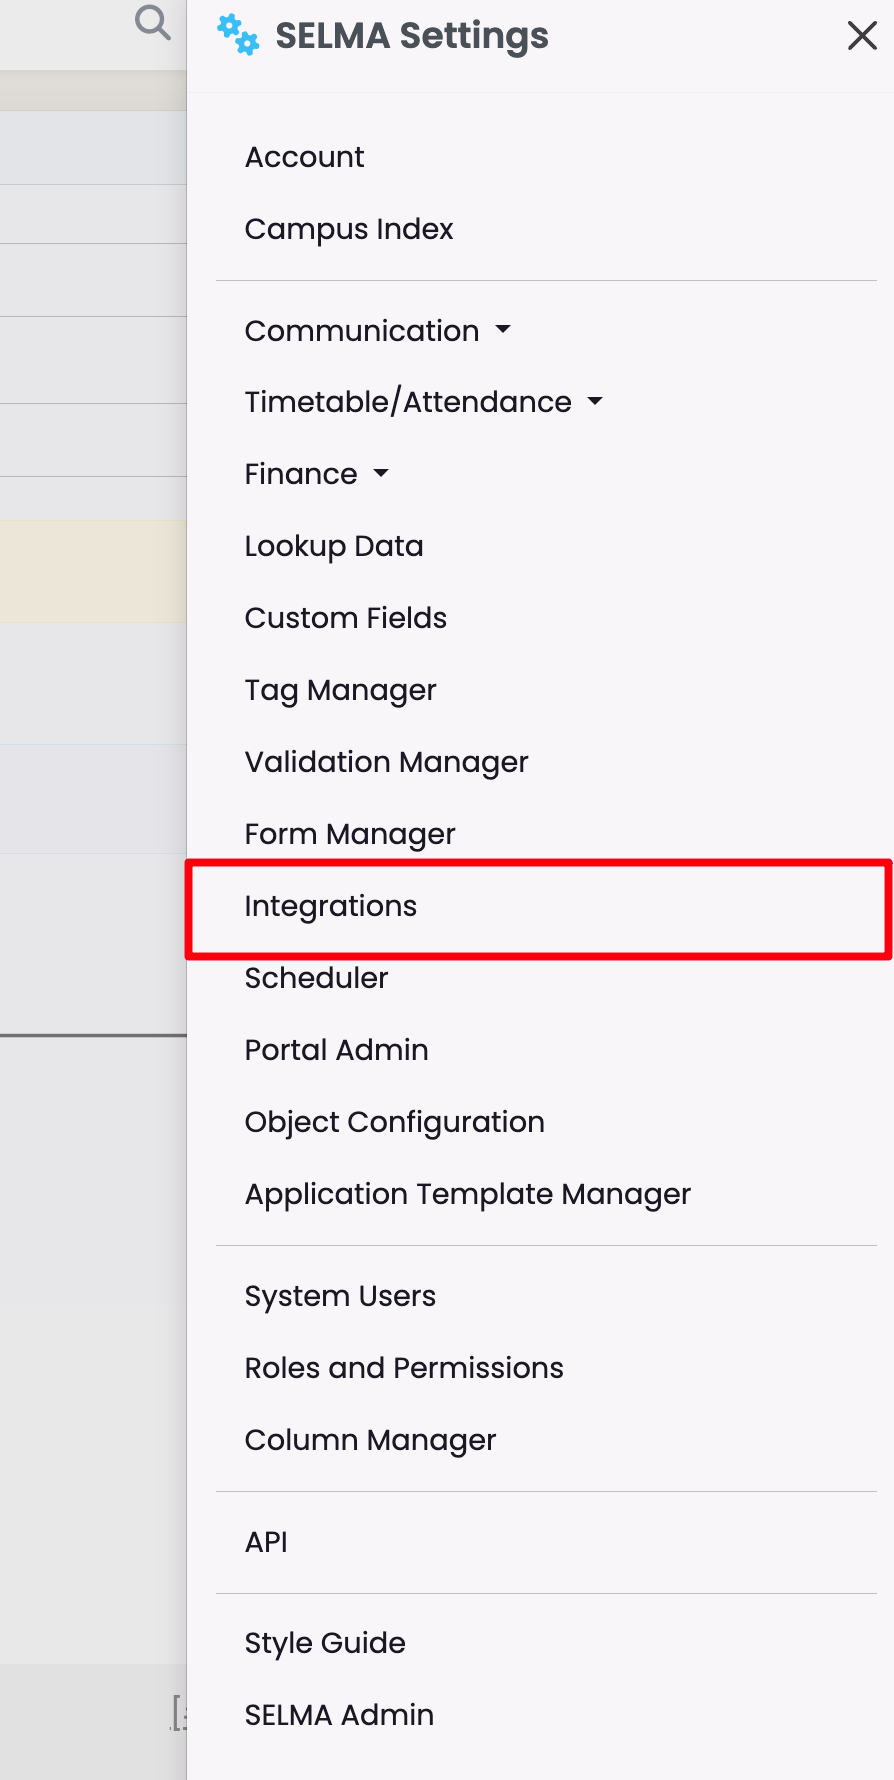
Figure 7ii. Select WordPress Configuration
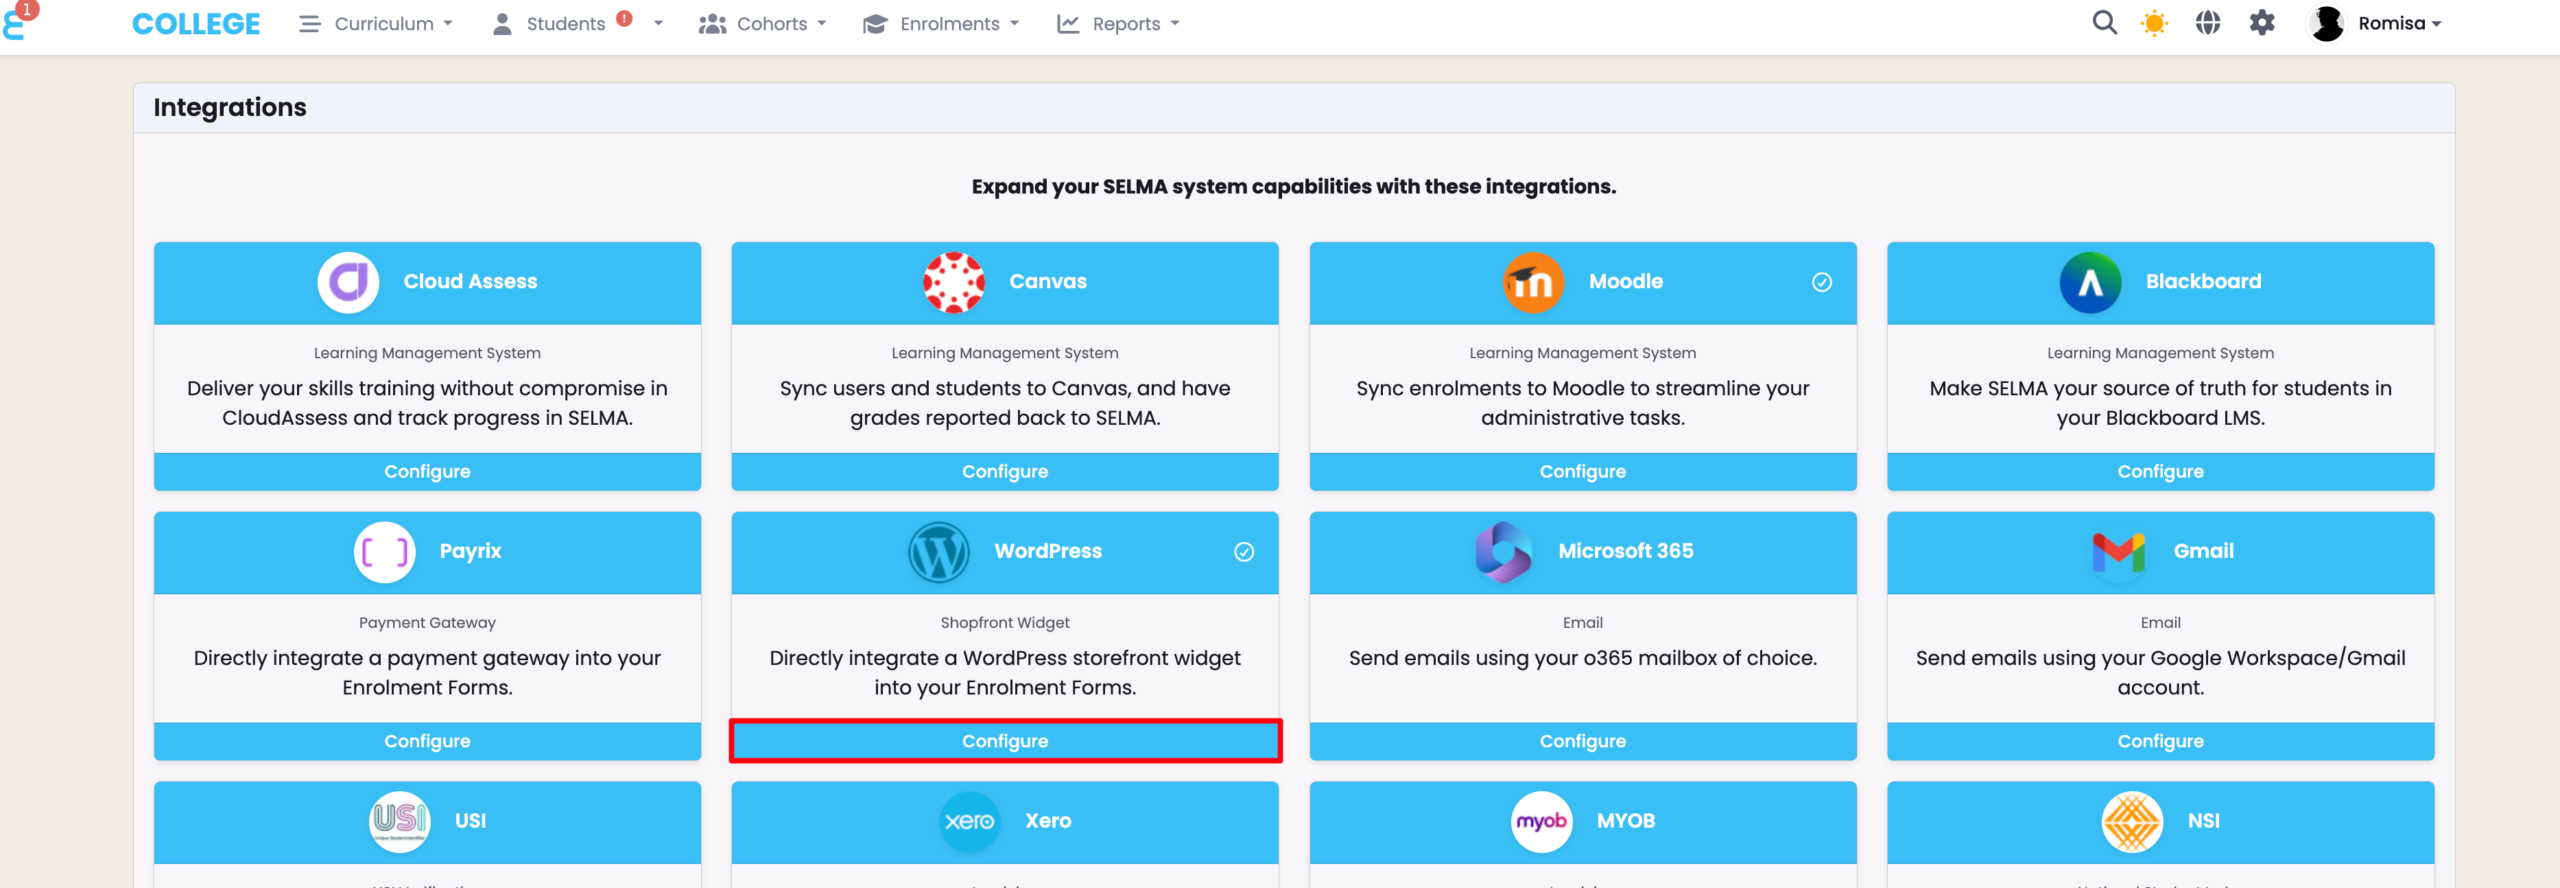
Figure 7iii. Edit Default HTML and CSS