A student record must adhere to a series of rules, set by the Validation Manager, to establish an enrolment.
Create a Validation Type
- Access the Validation Manager via the System’s Settings and add a new Validation Type (Figure 1-2.)
- You will then be taken to a screen to select specific Validation rules for your Validation type (Figure 3.).
- View and edit your Validation rules on the Validation Manager page (Figure 4.).
Figure 1. Click the cog icon in the top navigation bar (red) to access Settings. Navigate to the “Validation Manager” (purple).
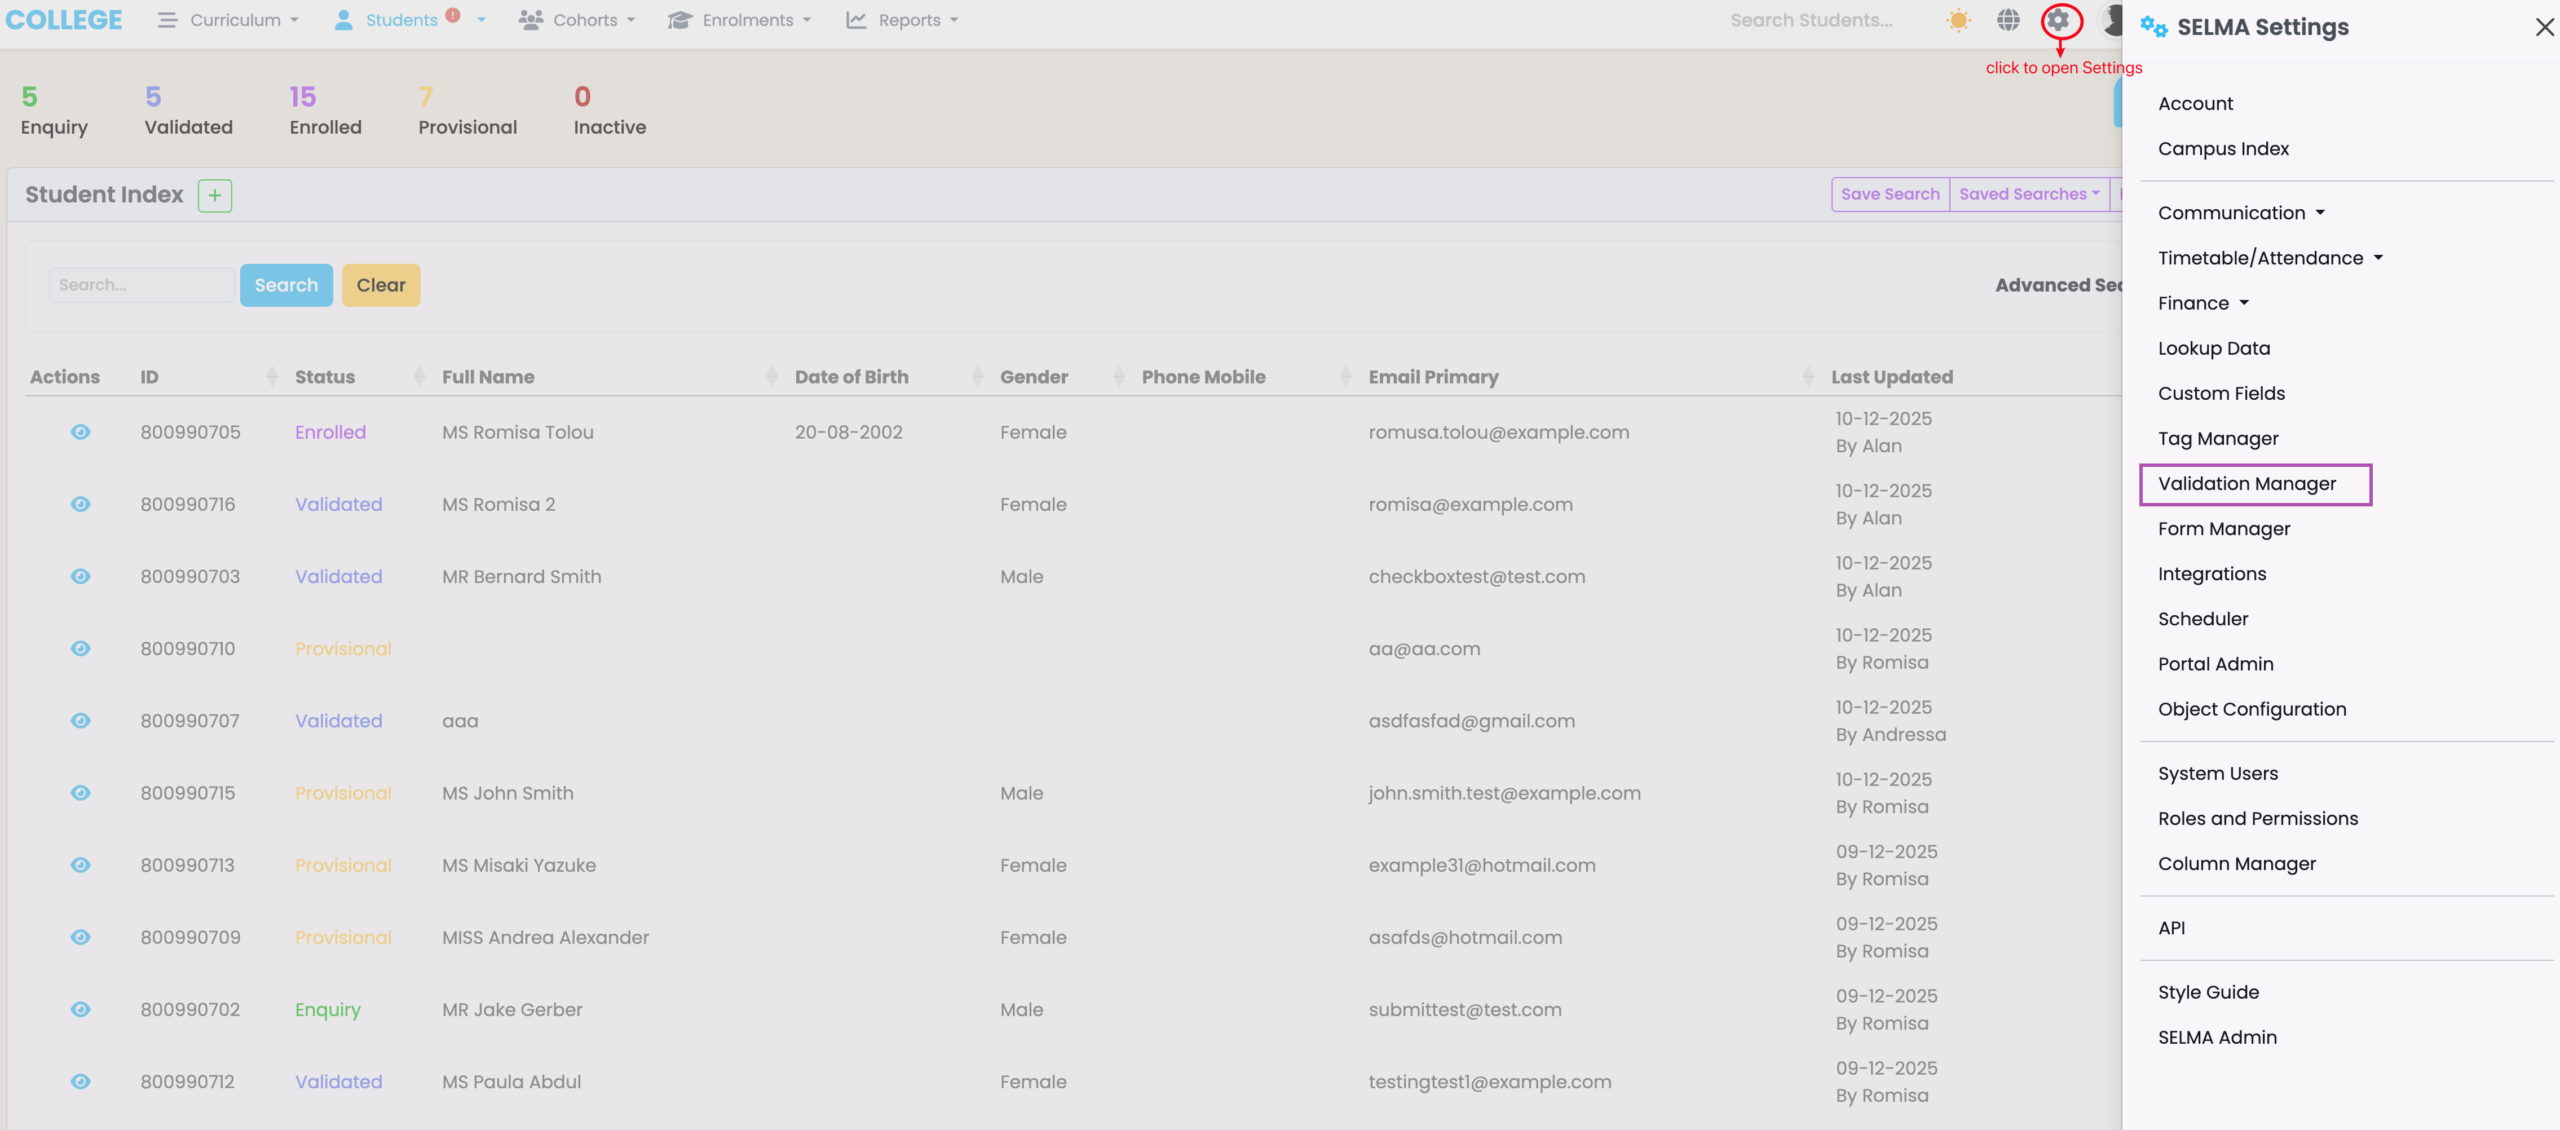
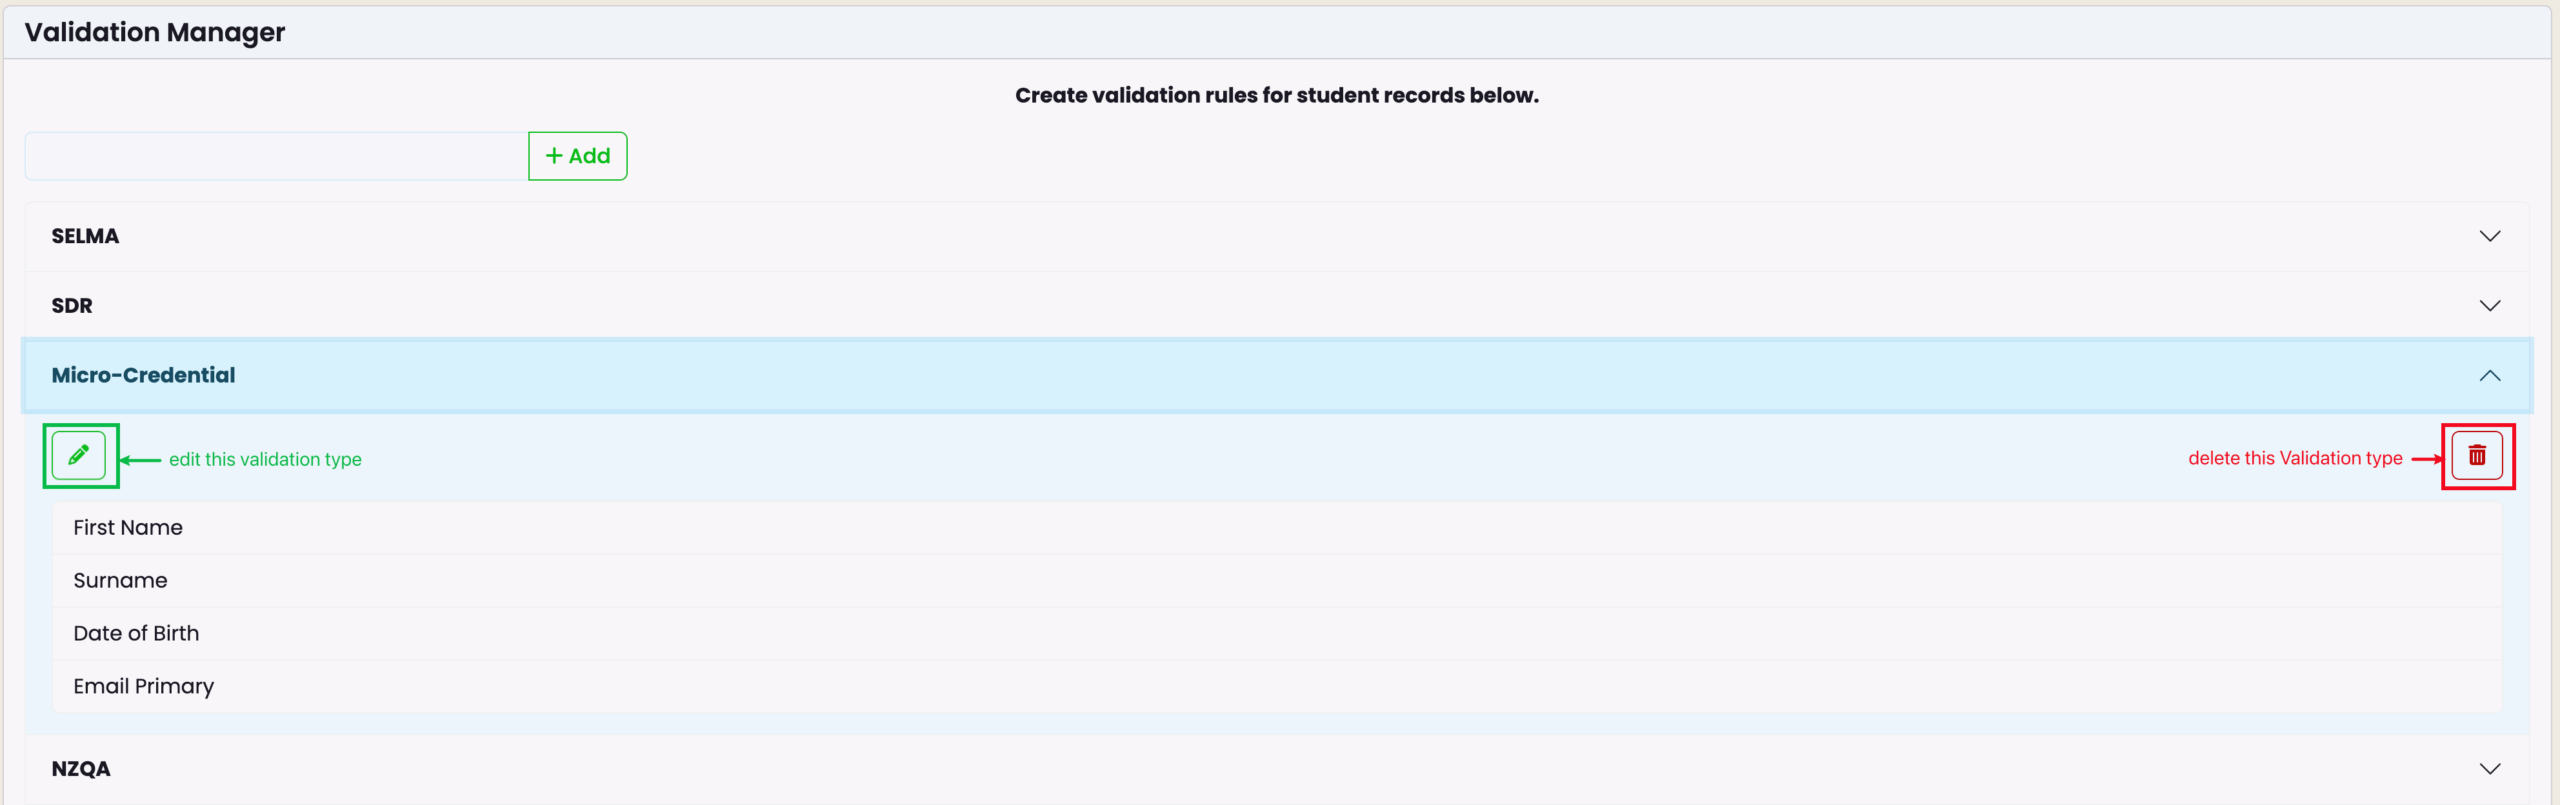
Figure 2. Enter a name for your new Validation type (orange), and click on existing Validation types to view their list of Validation rules (red). Note: “SELMA” is a default Validation type (blue) and can not be edited or removed.
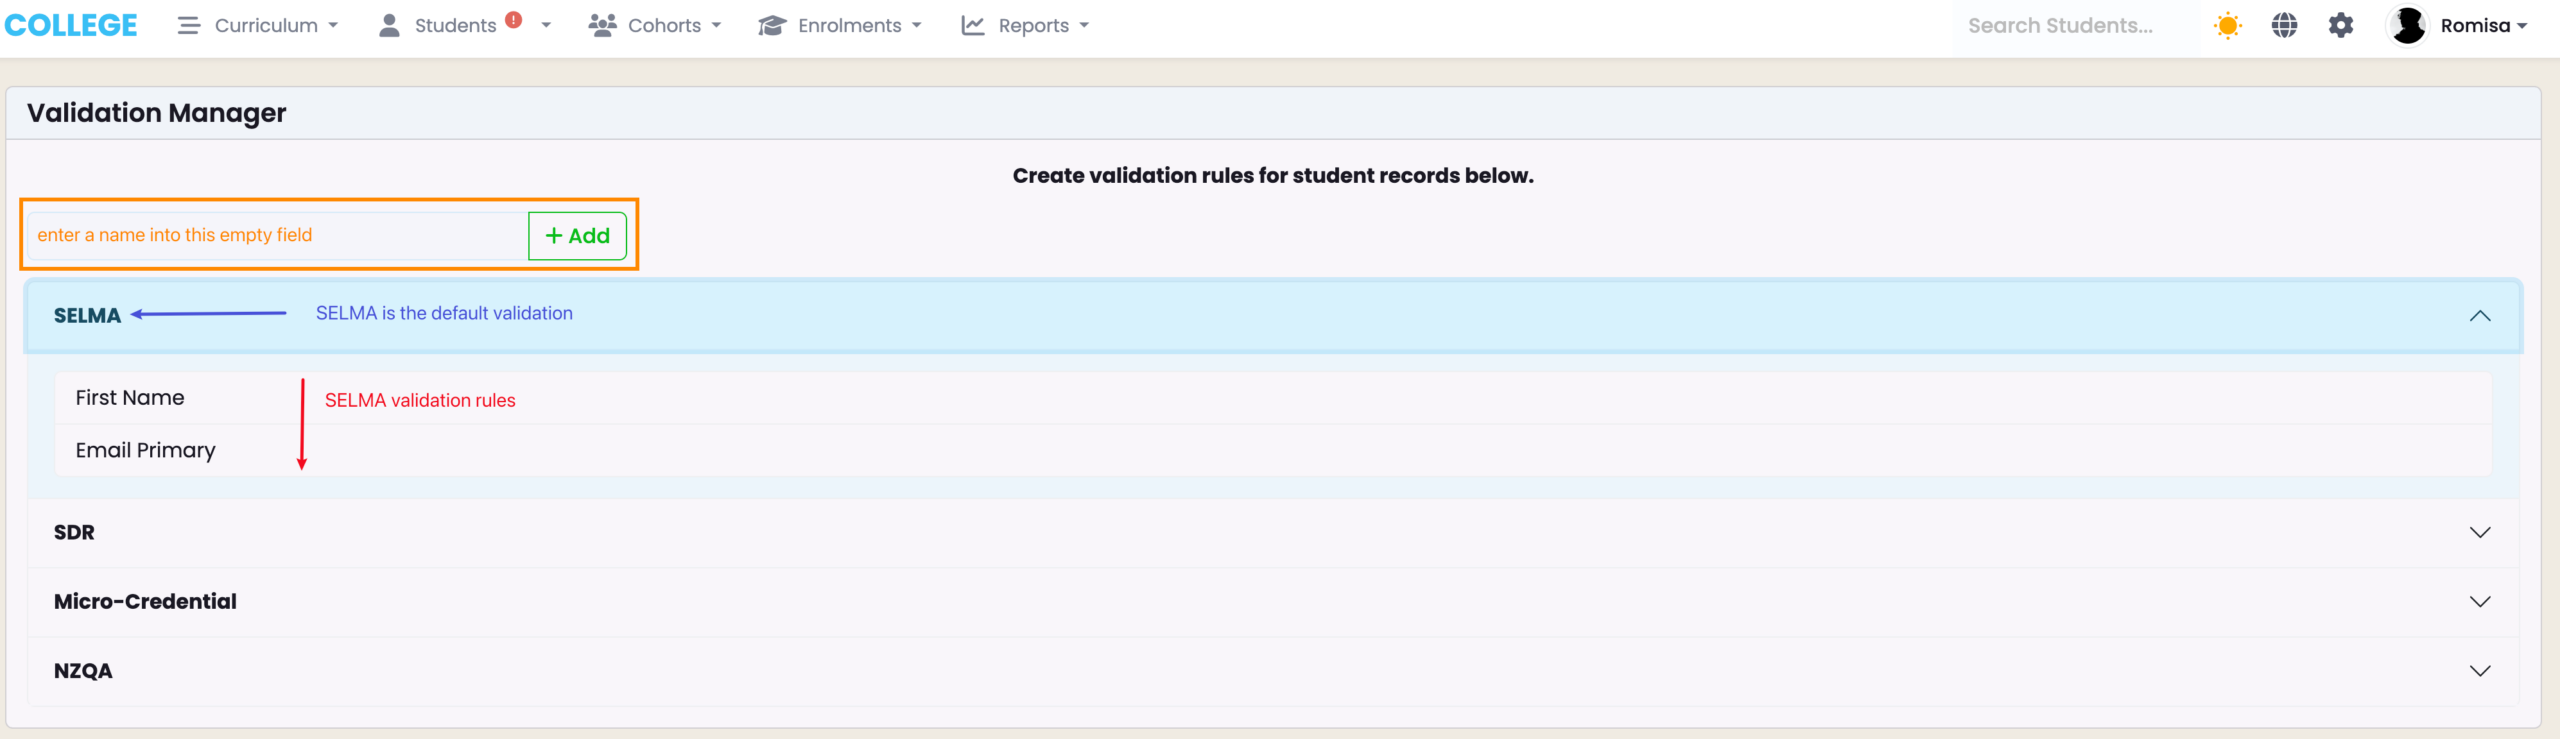
Figure 3. Click the tick-boxes of fields you require for a record to be validated (red), and click the “Save” button to save your Validation rules.
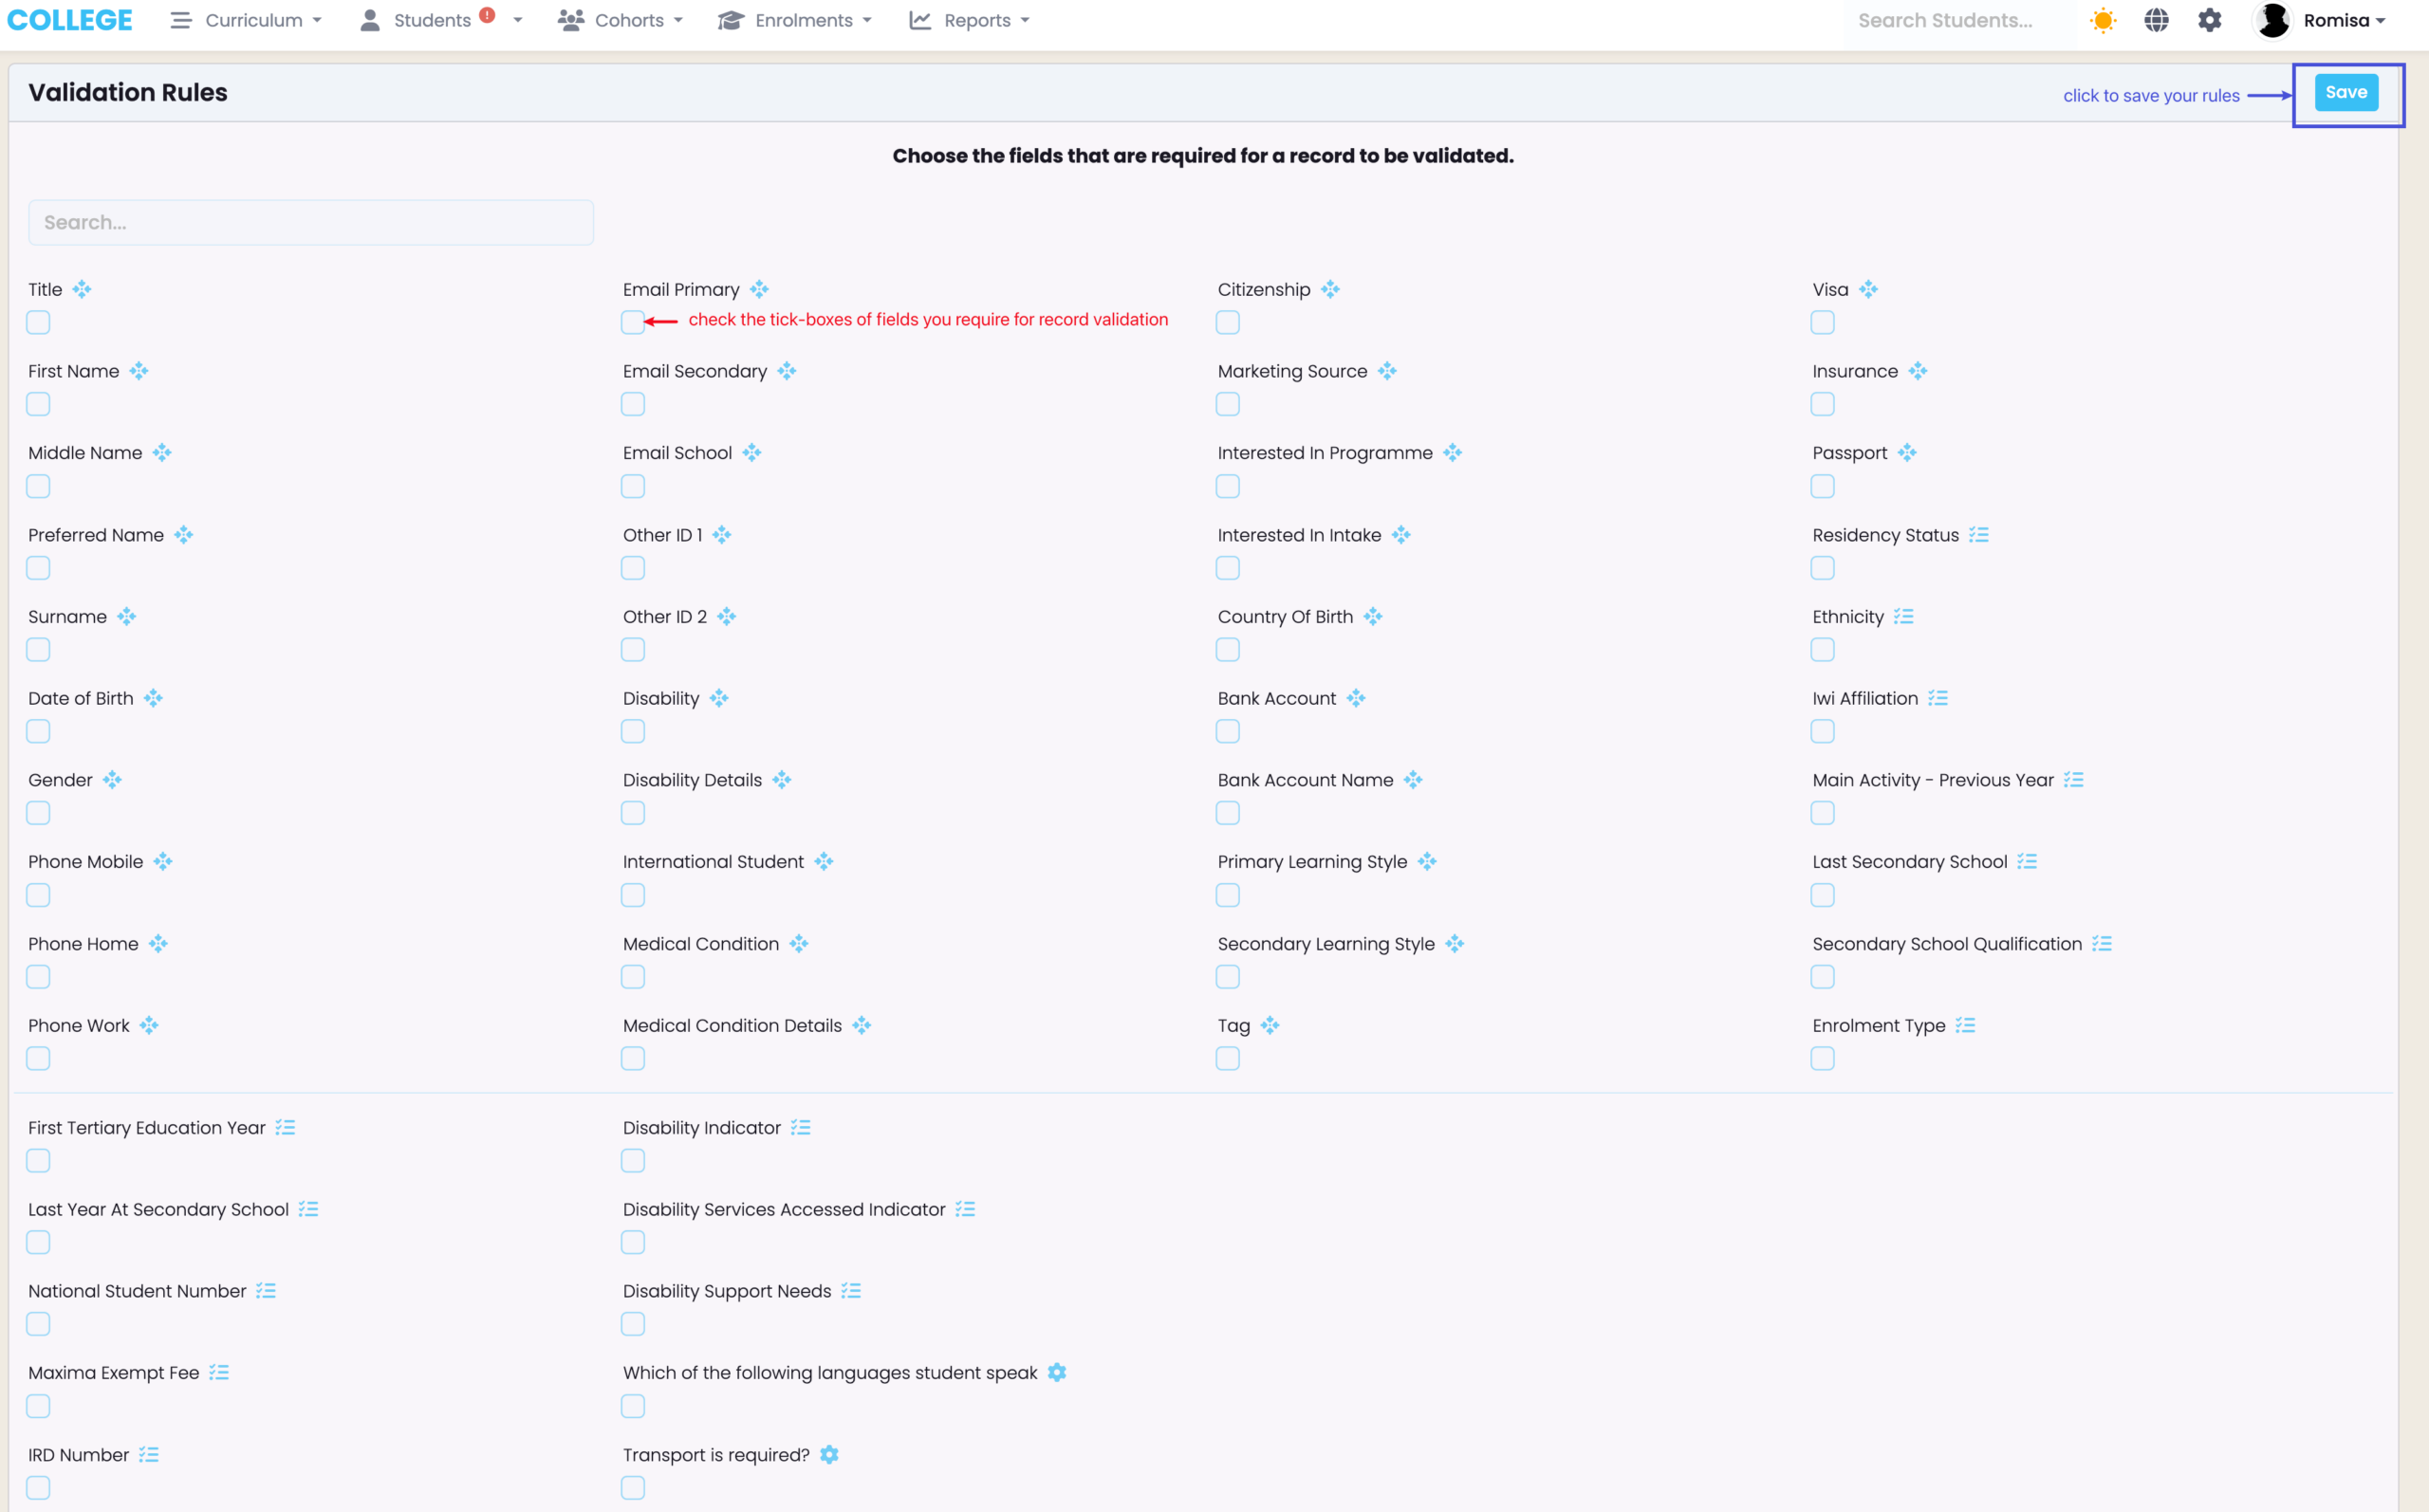
Figure 4. View your new Validation type on the Validation Manager page. You can click on the pencil icon (green) to edit Validation rules or click the bin icon to delete the Validation type entirely (red). Remember: “SELMA” is a default Validation type and can not be edited or removed.
Validate a Student
When a student record is created in SELMA, you can set its Validation type and check if it meets corresponding Validation rules via Validation failure messages (Figure 5. & 6i-6ii).
Figure 5. On a Student profile, you can see the current Validation type (red) and whether it is validated i.e. meets Validation rules (green tick icon, shown) or not (red ‘X’ icon, not shown). Click the pencil icon (blue) to select a different Validation type.

Figure 6i. Clicking the blue “Save” button saves the Validation type, but doesn’t show a Validation failure message if the change fails. Clicking “Save and Validate” may show a Validation failure message, if the change fails, and displays the unmet Validation rules.
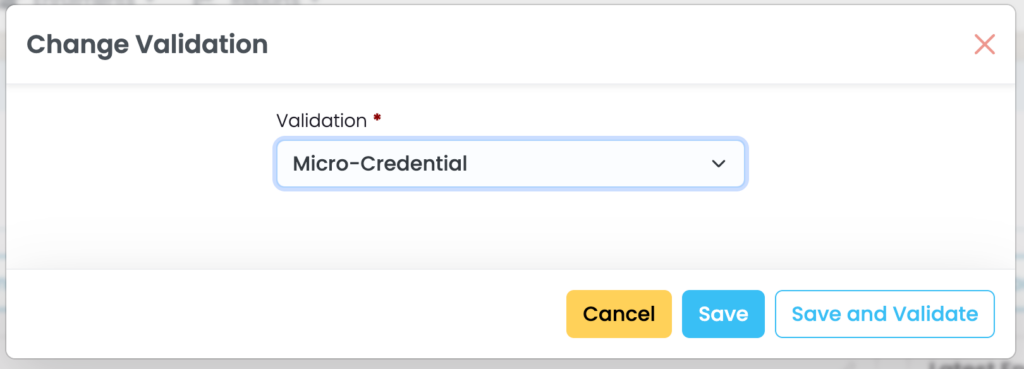
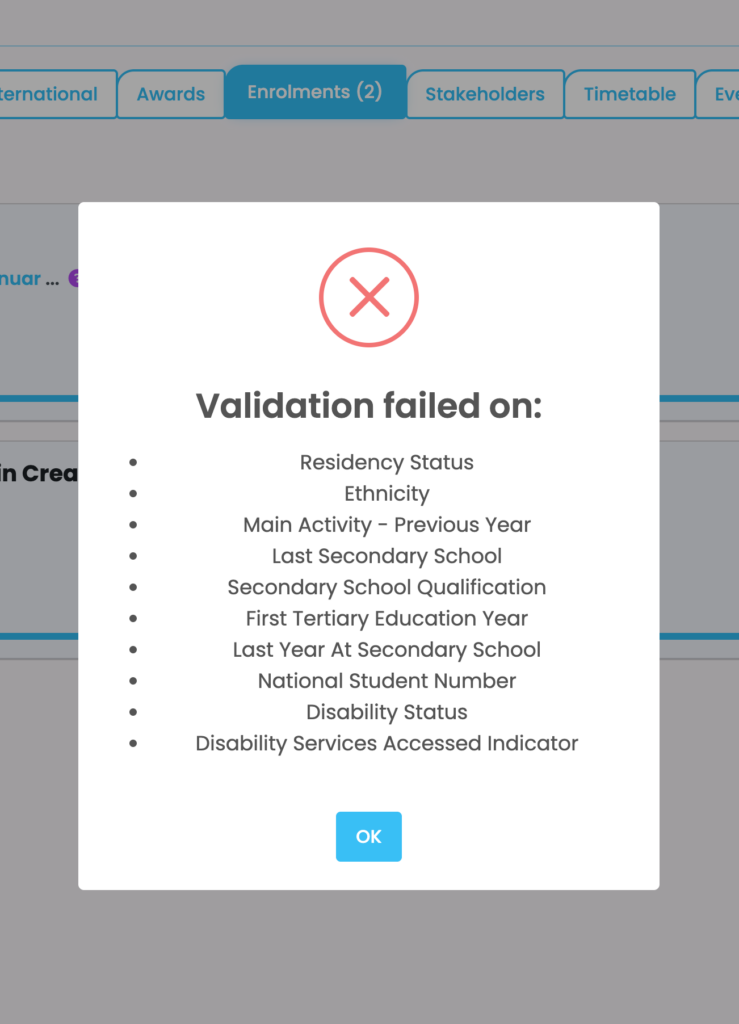
Figure 6ii. Validation change failure shows a pop-up message listing unmet Validation rules.
Enrol a Student
Once the Student has been validated, you may then enrol them into an intake associated with a Programme.
See Enrolments – Enrol a Student in this resource for a guide.
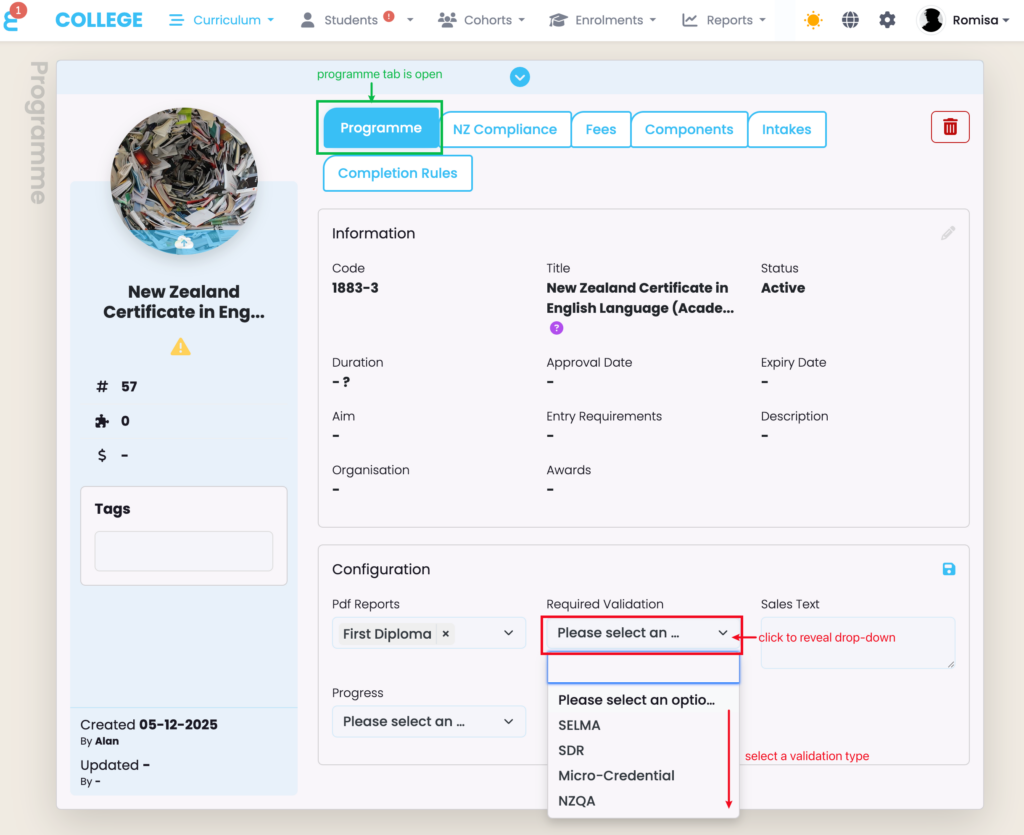
Remember: Changing the “Required Validation” field under the “Configuration Section” of a Programme influences whether or not Students can be enrolled into the Programme (Figure 7.).
Figure 7. Configuring a Validation Requirement for a Programme dictates the Validation type Students must have to enrol into that Programme (red).