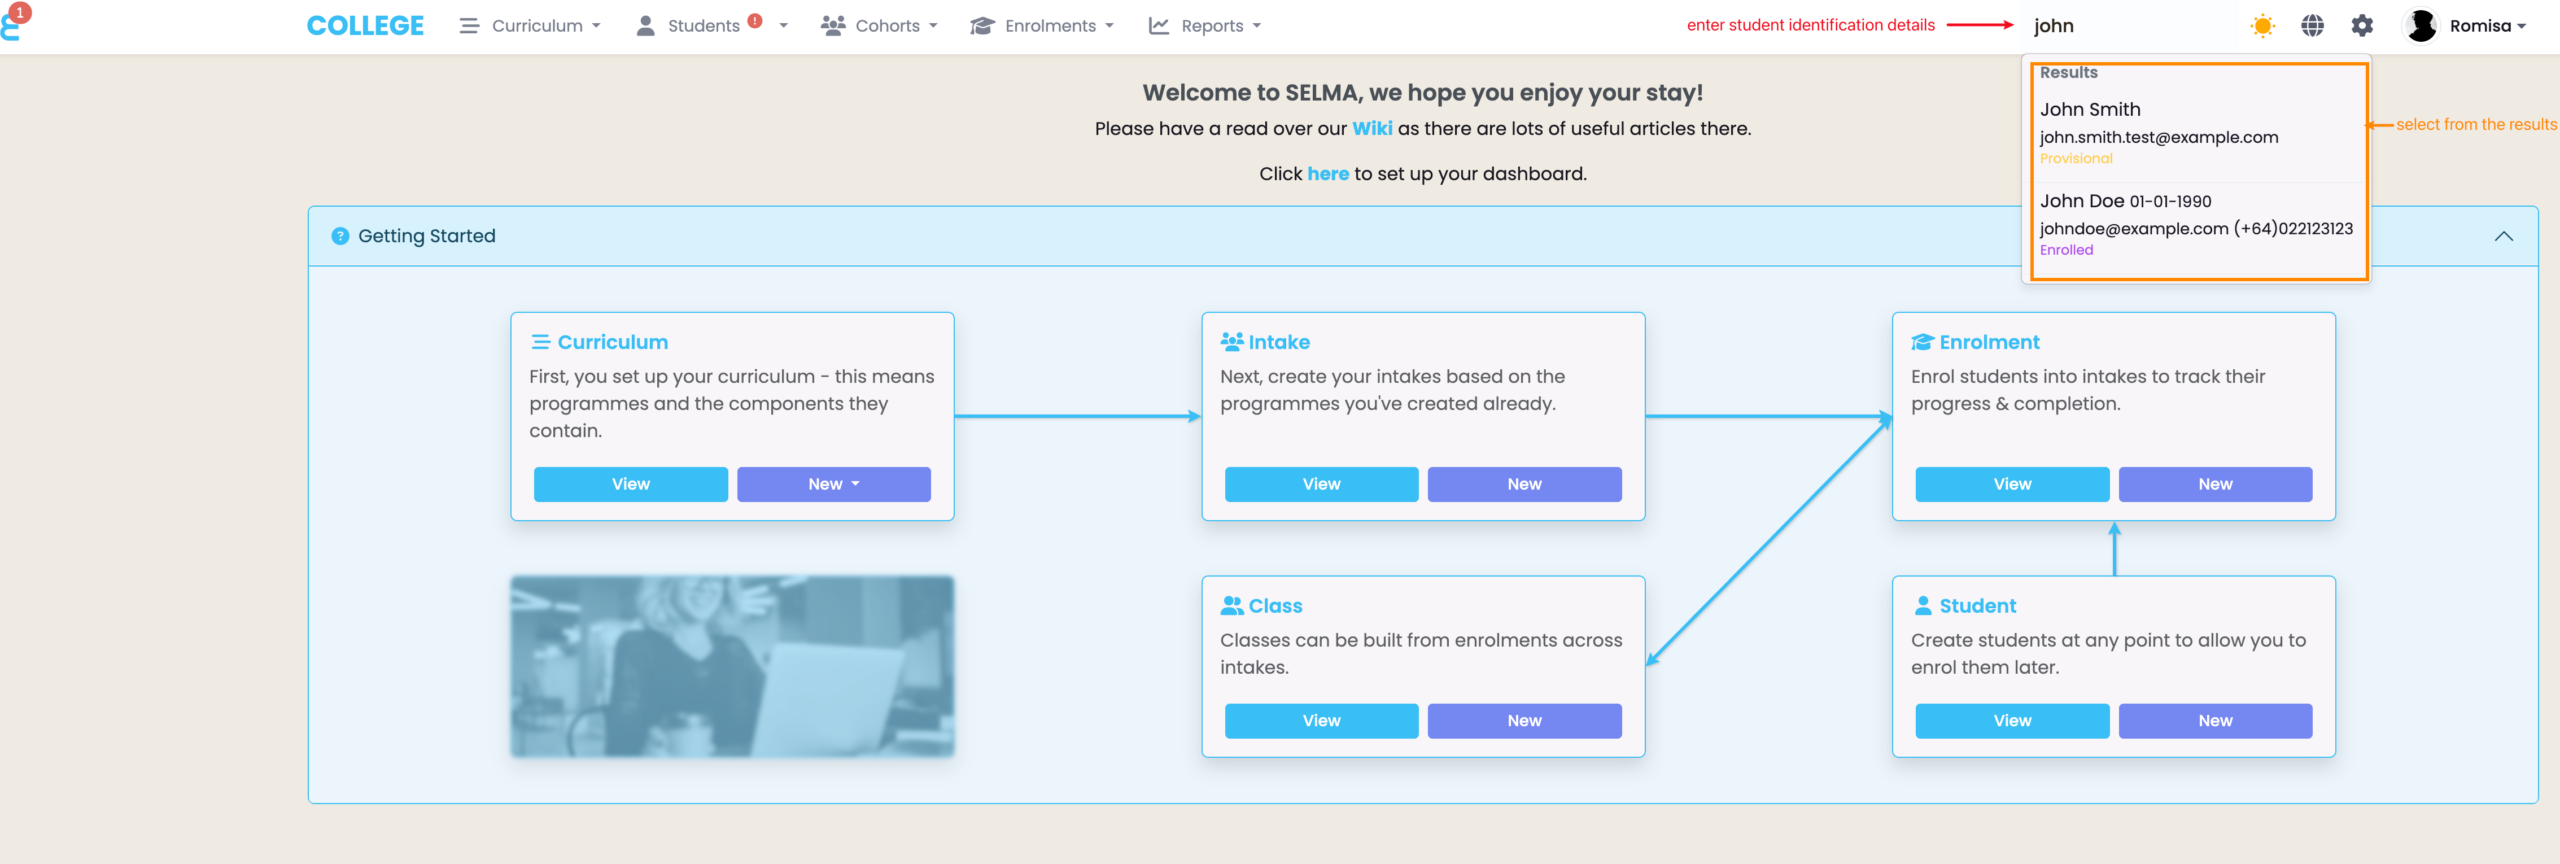
Page Search
To search for a student quickly, type the students name/email/DoB, USI/NSN etc. into the page level search, and click on the relevant result to open the Student profile (Figure 1.).
Figure 1. Enter Student details into the quick search field (red), and select from the results to open the Student profile (orange).
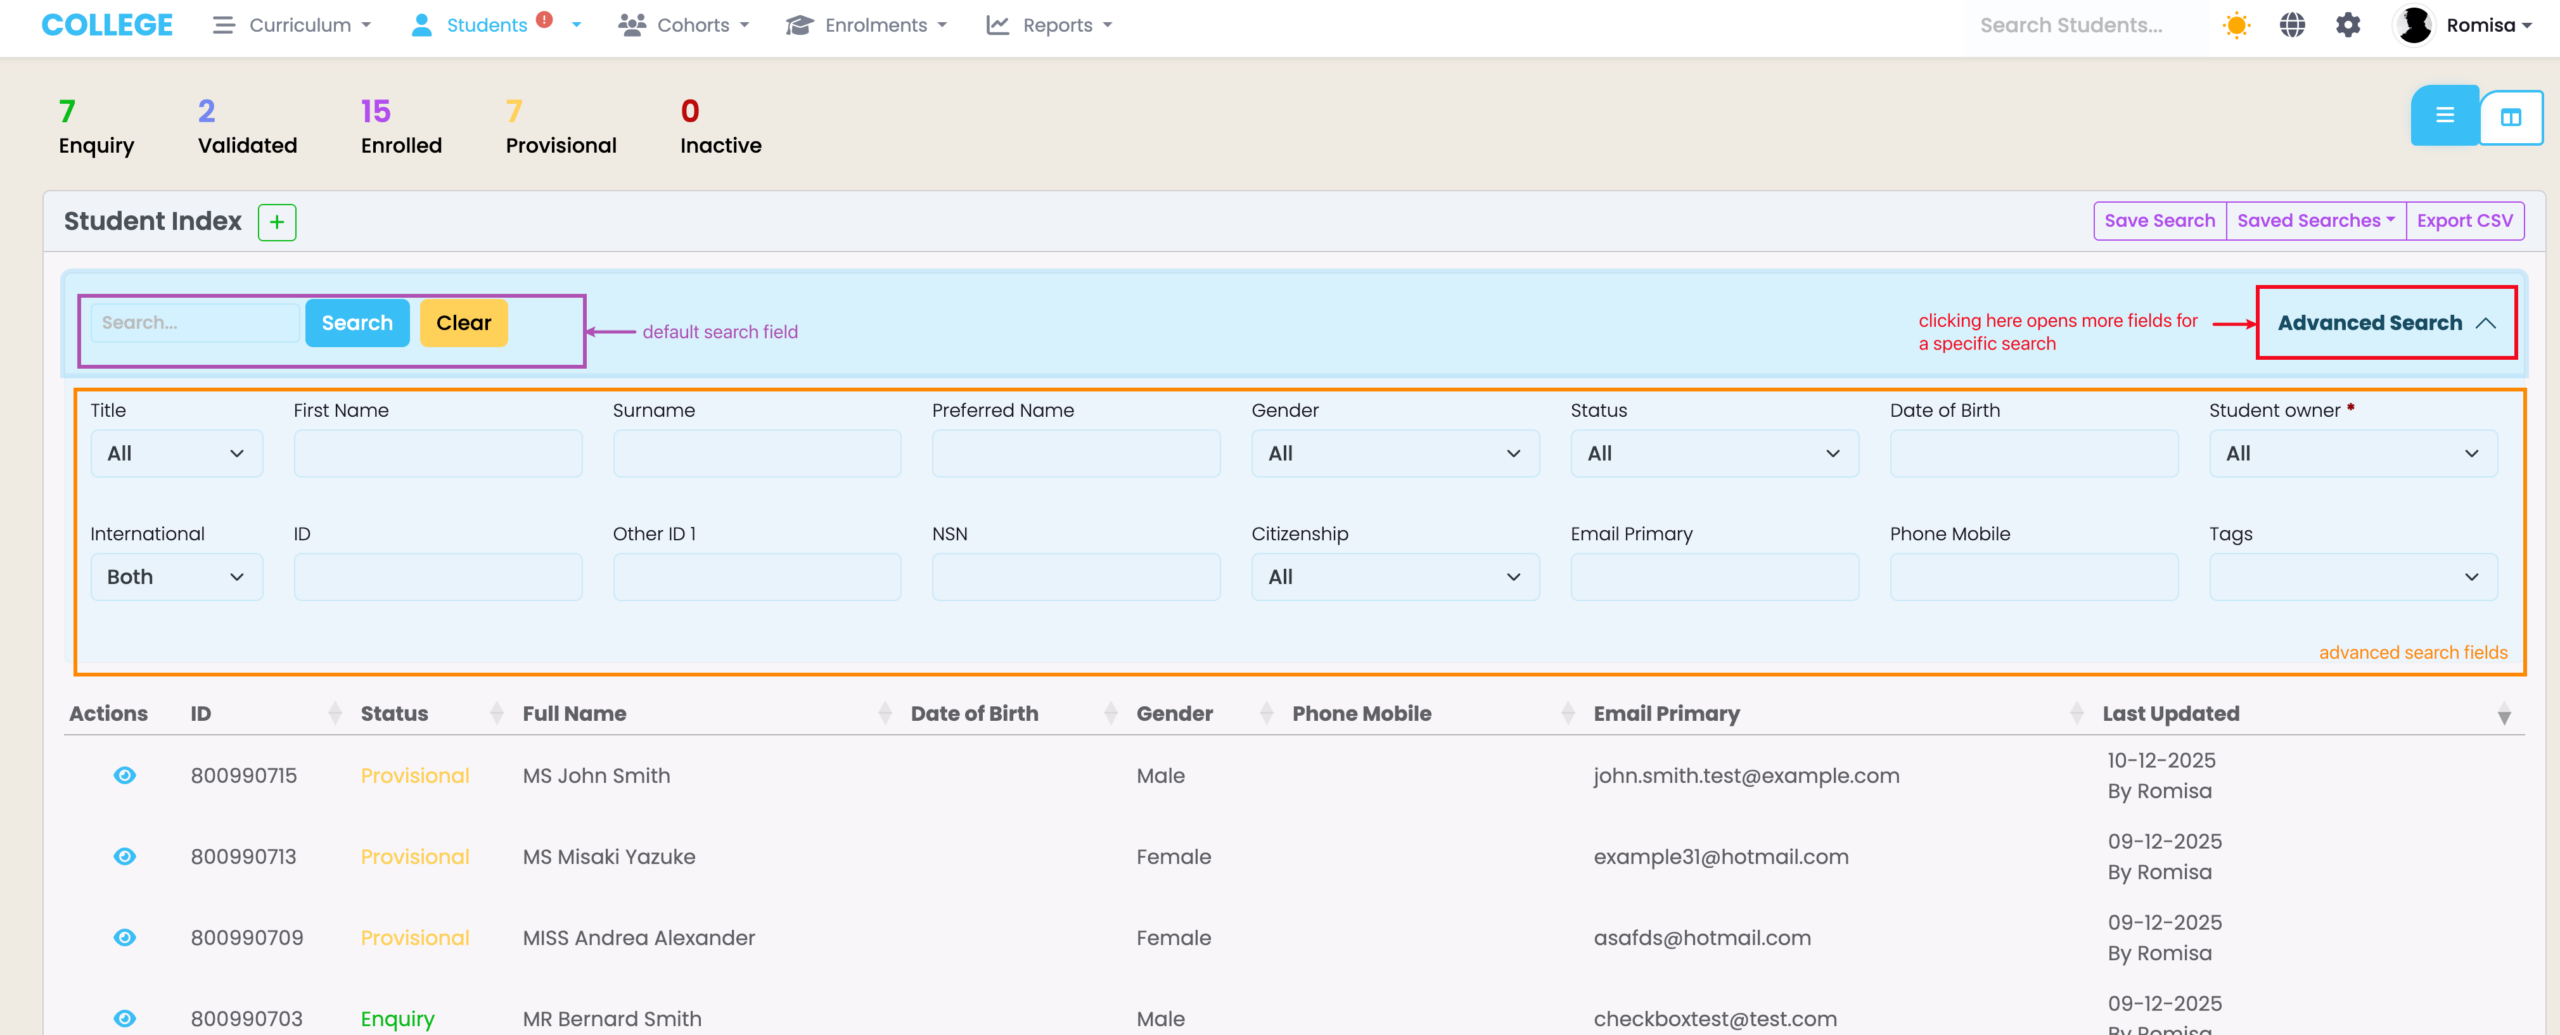
Saved Searches
The Student Index, like other indices, has a “Saved Search” feature where you can immediately access specific search criteria you have used in the past (Figure 2.).
For a step-by-step guide to use the “Saved Search” feature, see SELMA 101 – Tips and Tricks for Using SELMA Productively.
Figure 2. The default search (purple text) allows you to search for a student ID (partial or full)/status/name/gender/email ONLY, while the “Advanced Search” includes additional search fields to filter for multiple criteria (orange). Use the purple “Save Search” button so Save your Search.
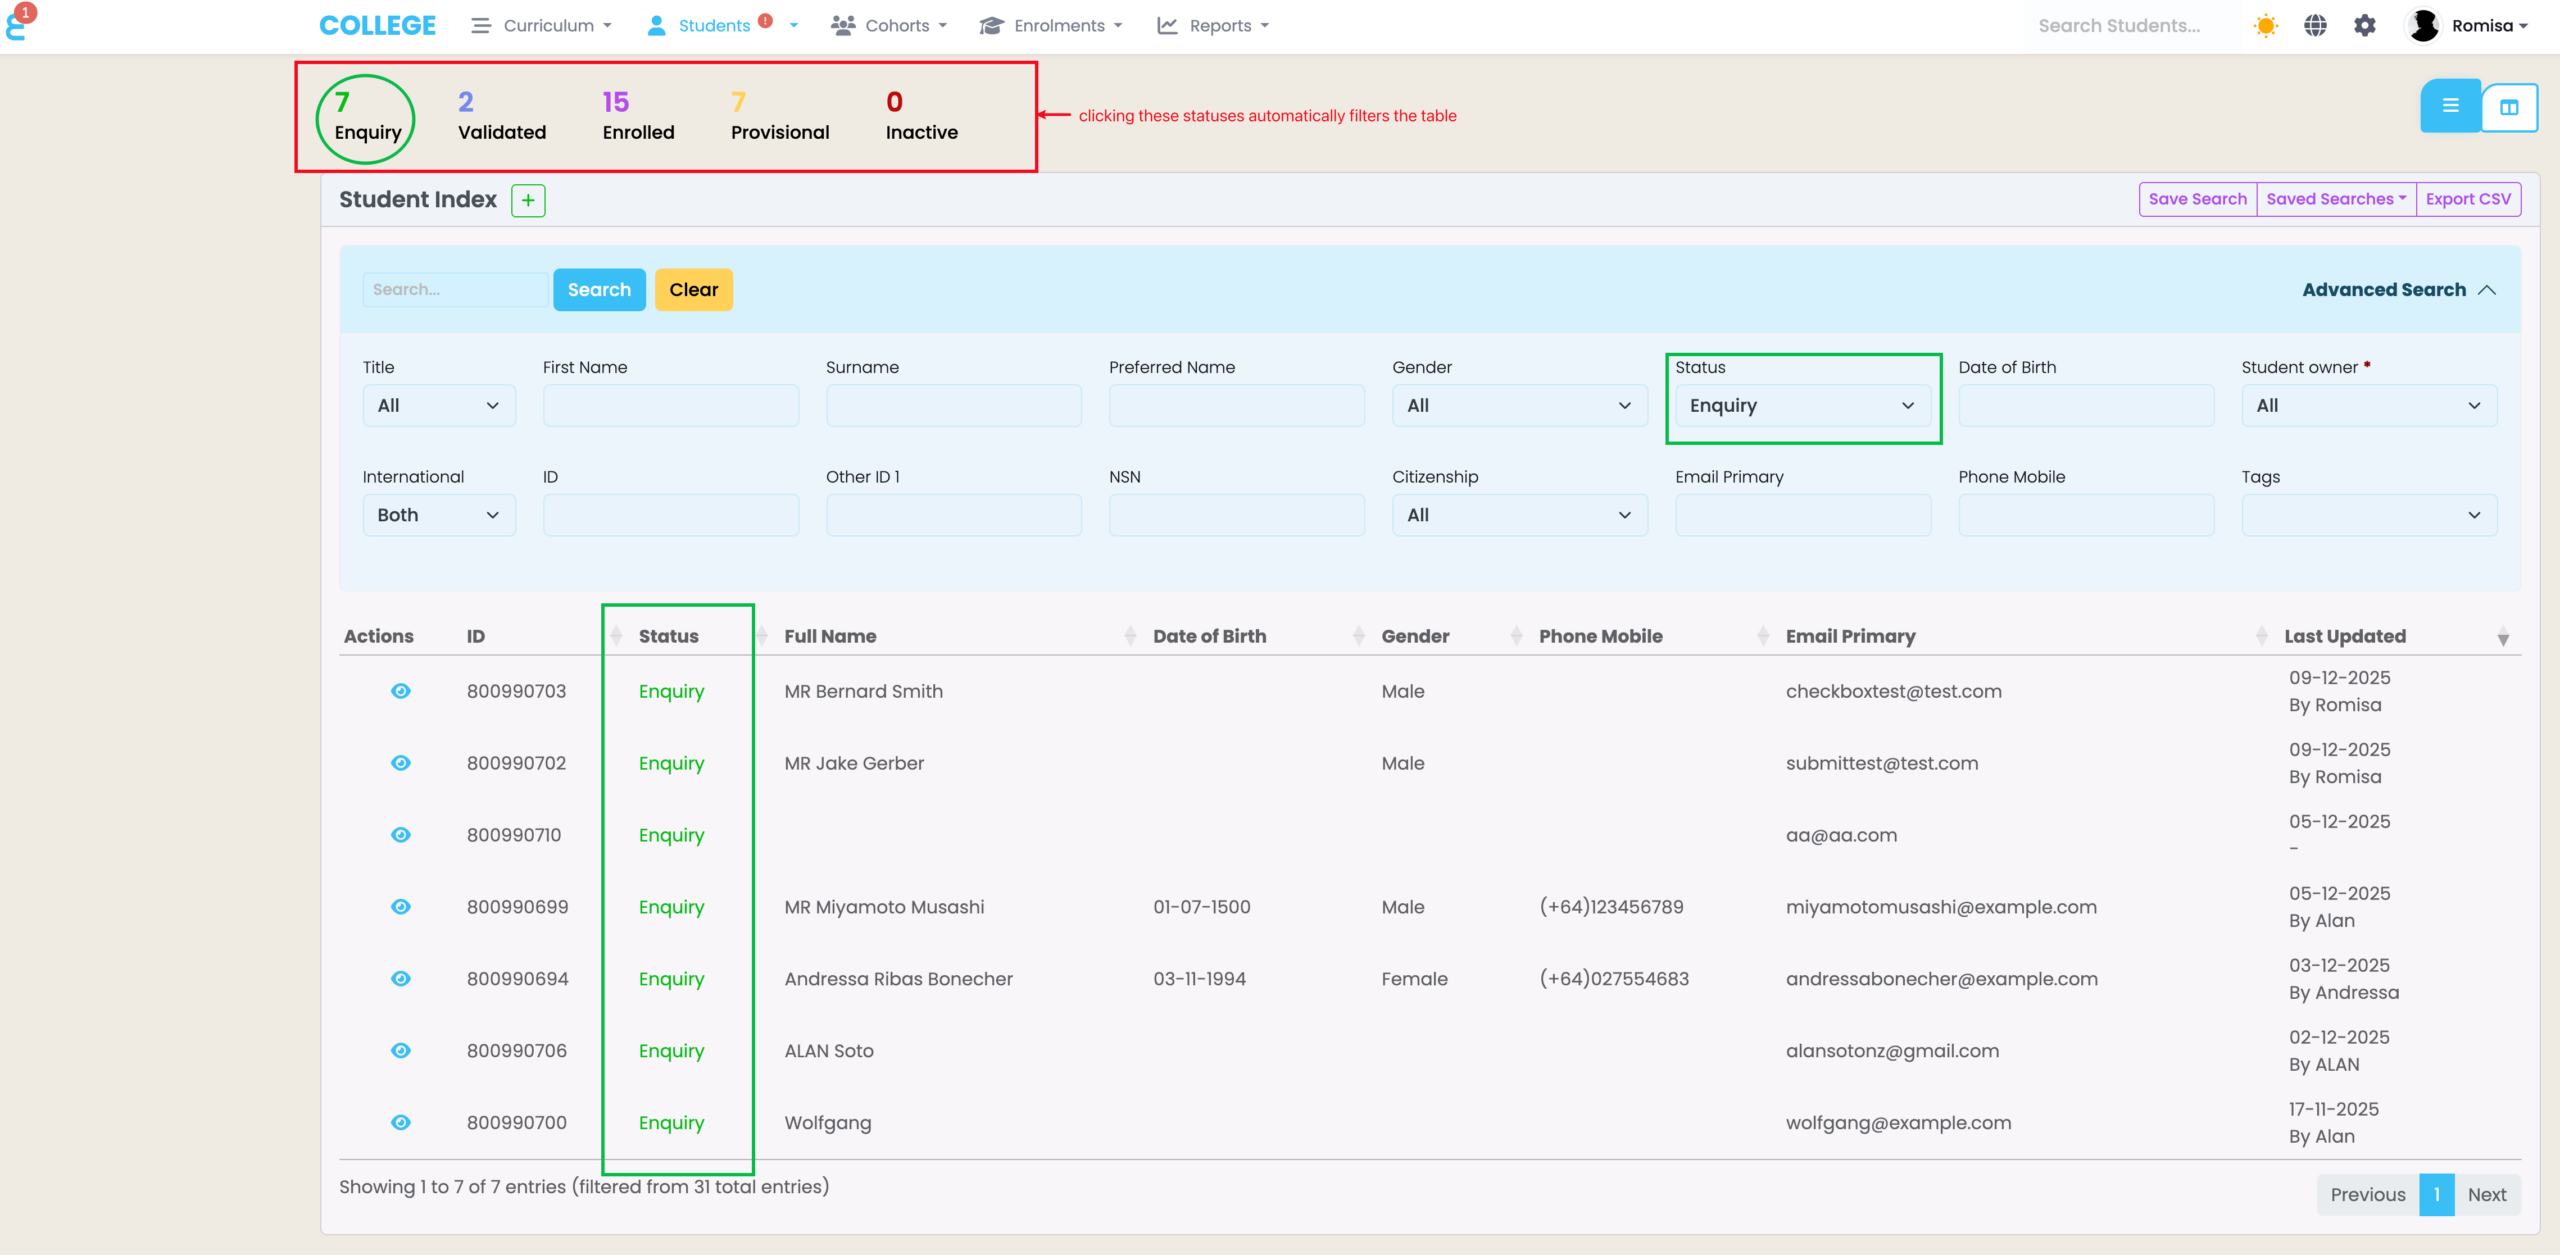
Filter by Status
The Status Count overview on the Student Index is interactive. Clicking a Status type will automatically filter the table to display results with that Status type (Figure 3.).
Figure 3. The Status counts can be clicked to filter for a specific Status type in the table (red). You can see that clicking “Enquiry” opens the Advanced Search reflecting this Status, and the results table changes to show only Students with this status (green).
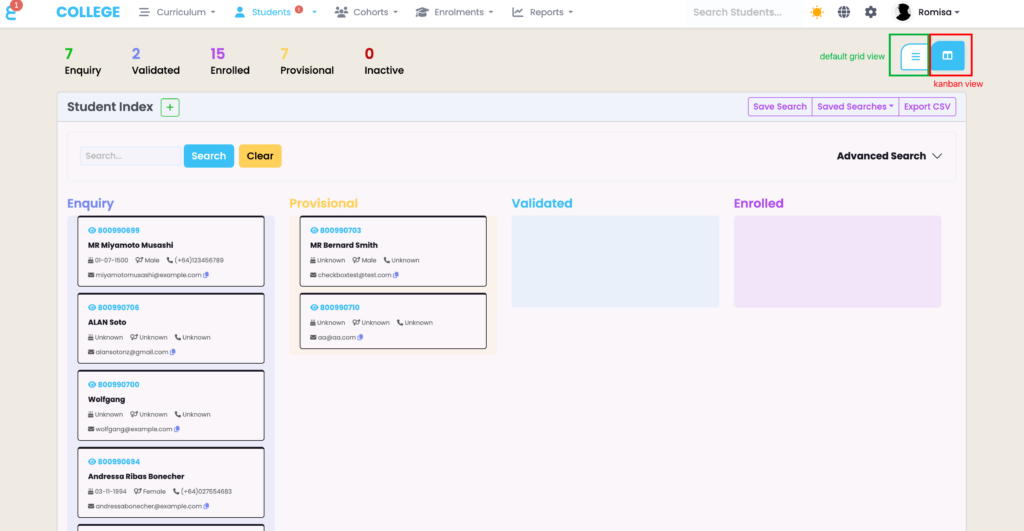
Change the Index View
You can change the table display in the Student Index dashboard, easily (Figure 4.).
When in the Kanban View, click, hold and drag tiles to relocate them between columns.
Note: Students with Status types “Enquiry” or “Provisional” can not be moved into the “Validated” or “Enrolled” columns from this view. Please update their validation statuses manually to change their columns (see System Settings – Validation Manager in this resource for a guide).
Figure 4. Click to switch between the default table grid view (green) or the kanban view (red).