Stripe is a payment gate-way that you can integrate with your SELMA Enrolment form. This integration allows Student applicants to make payments, seamlessly, as they record their details with SELMA.
In this Section:
Stripe Configuration
Figure 1. Navigate to Settings > Integrations
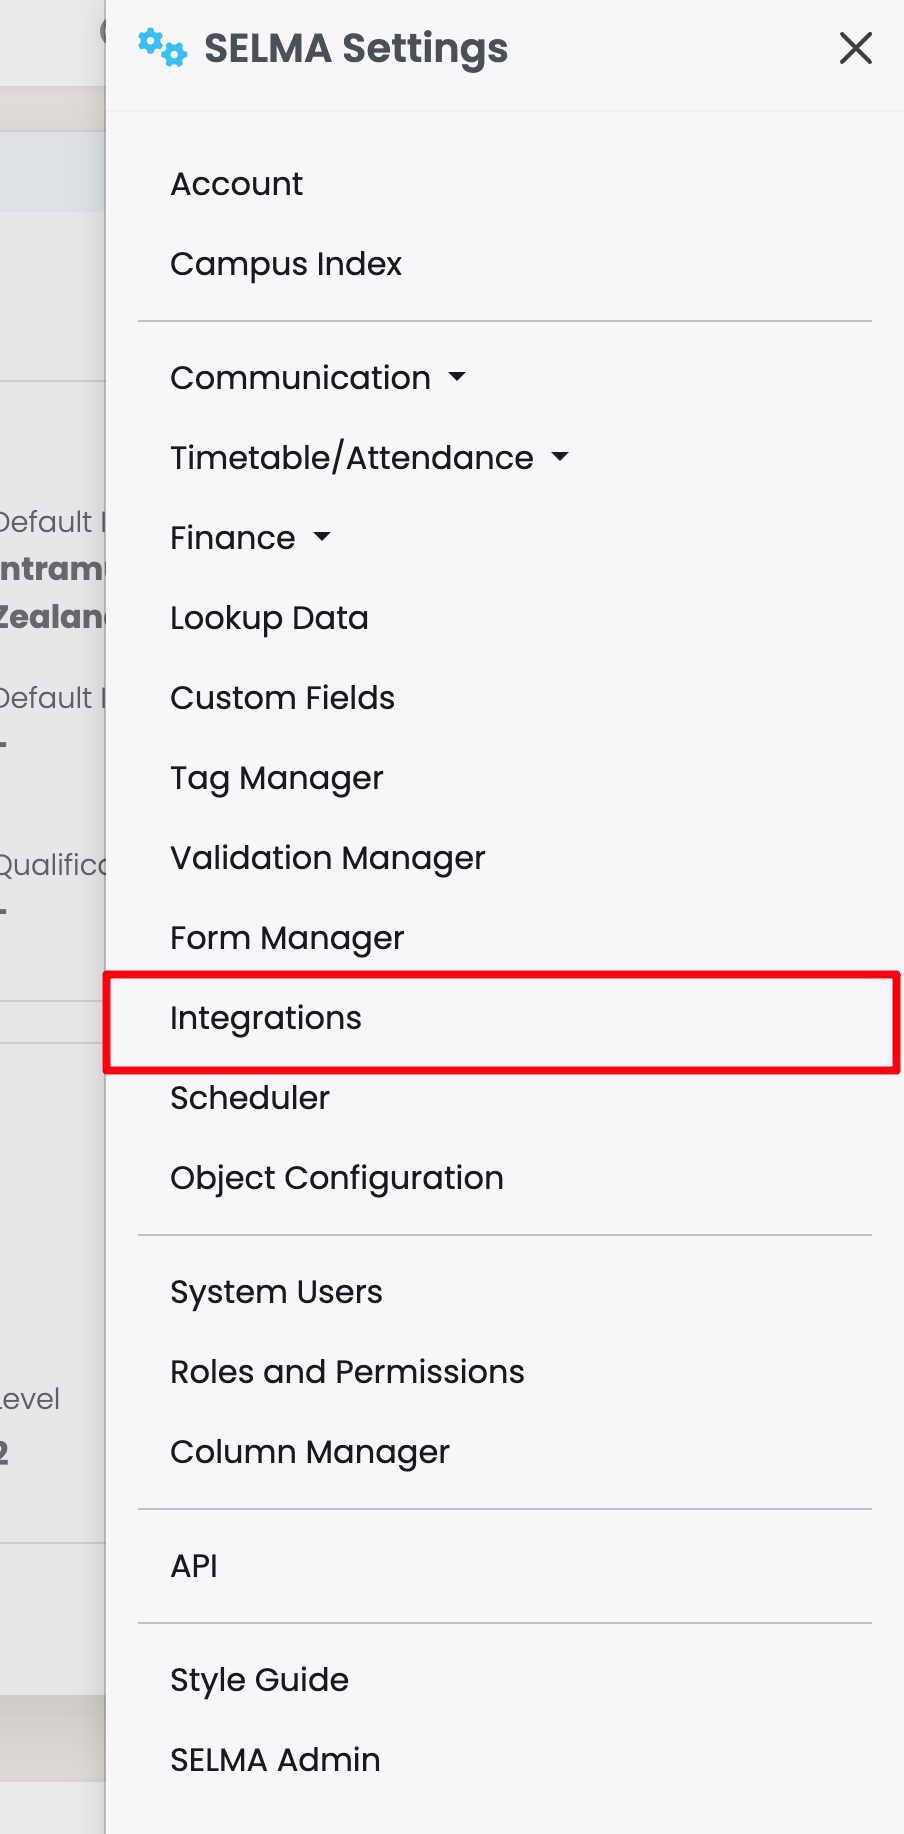
Figure 2. Select the Stripe Integration
Scroll to find the “Stripe” Integration, and click “Configure” to select it.
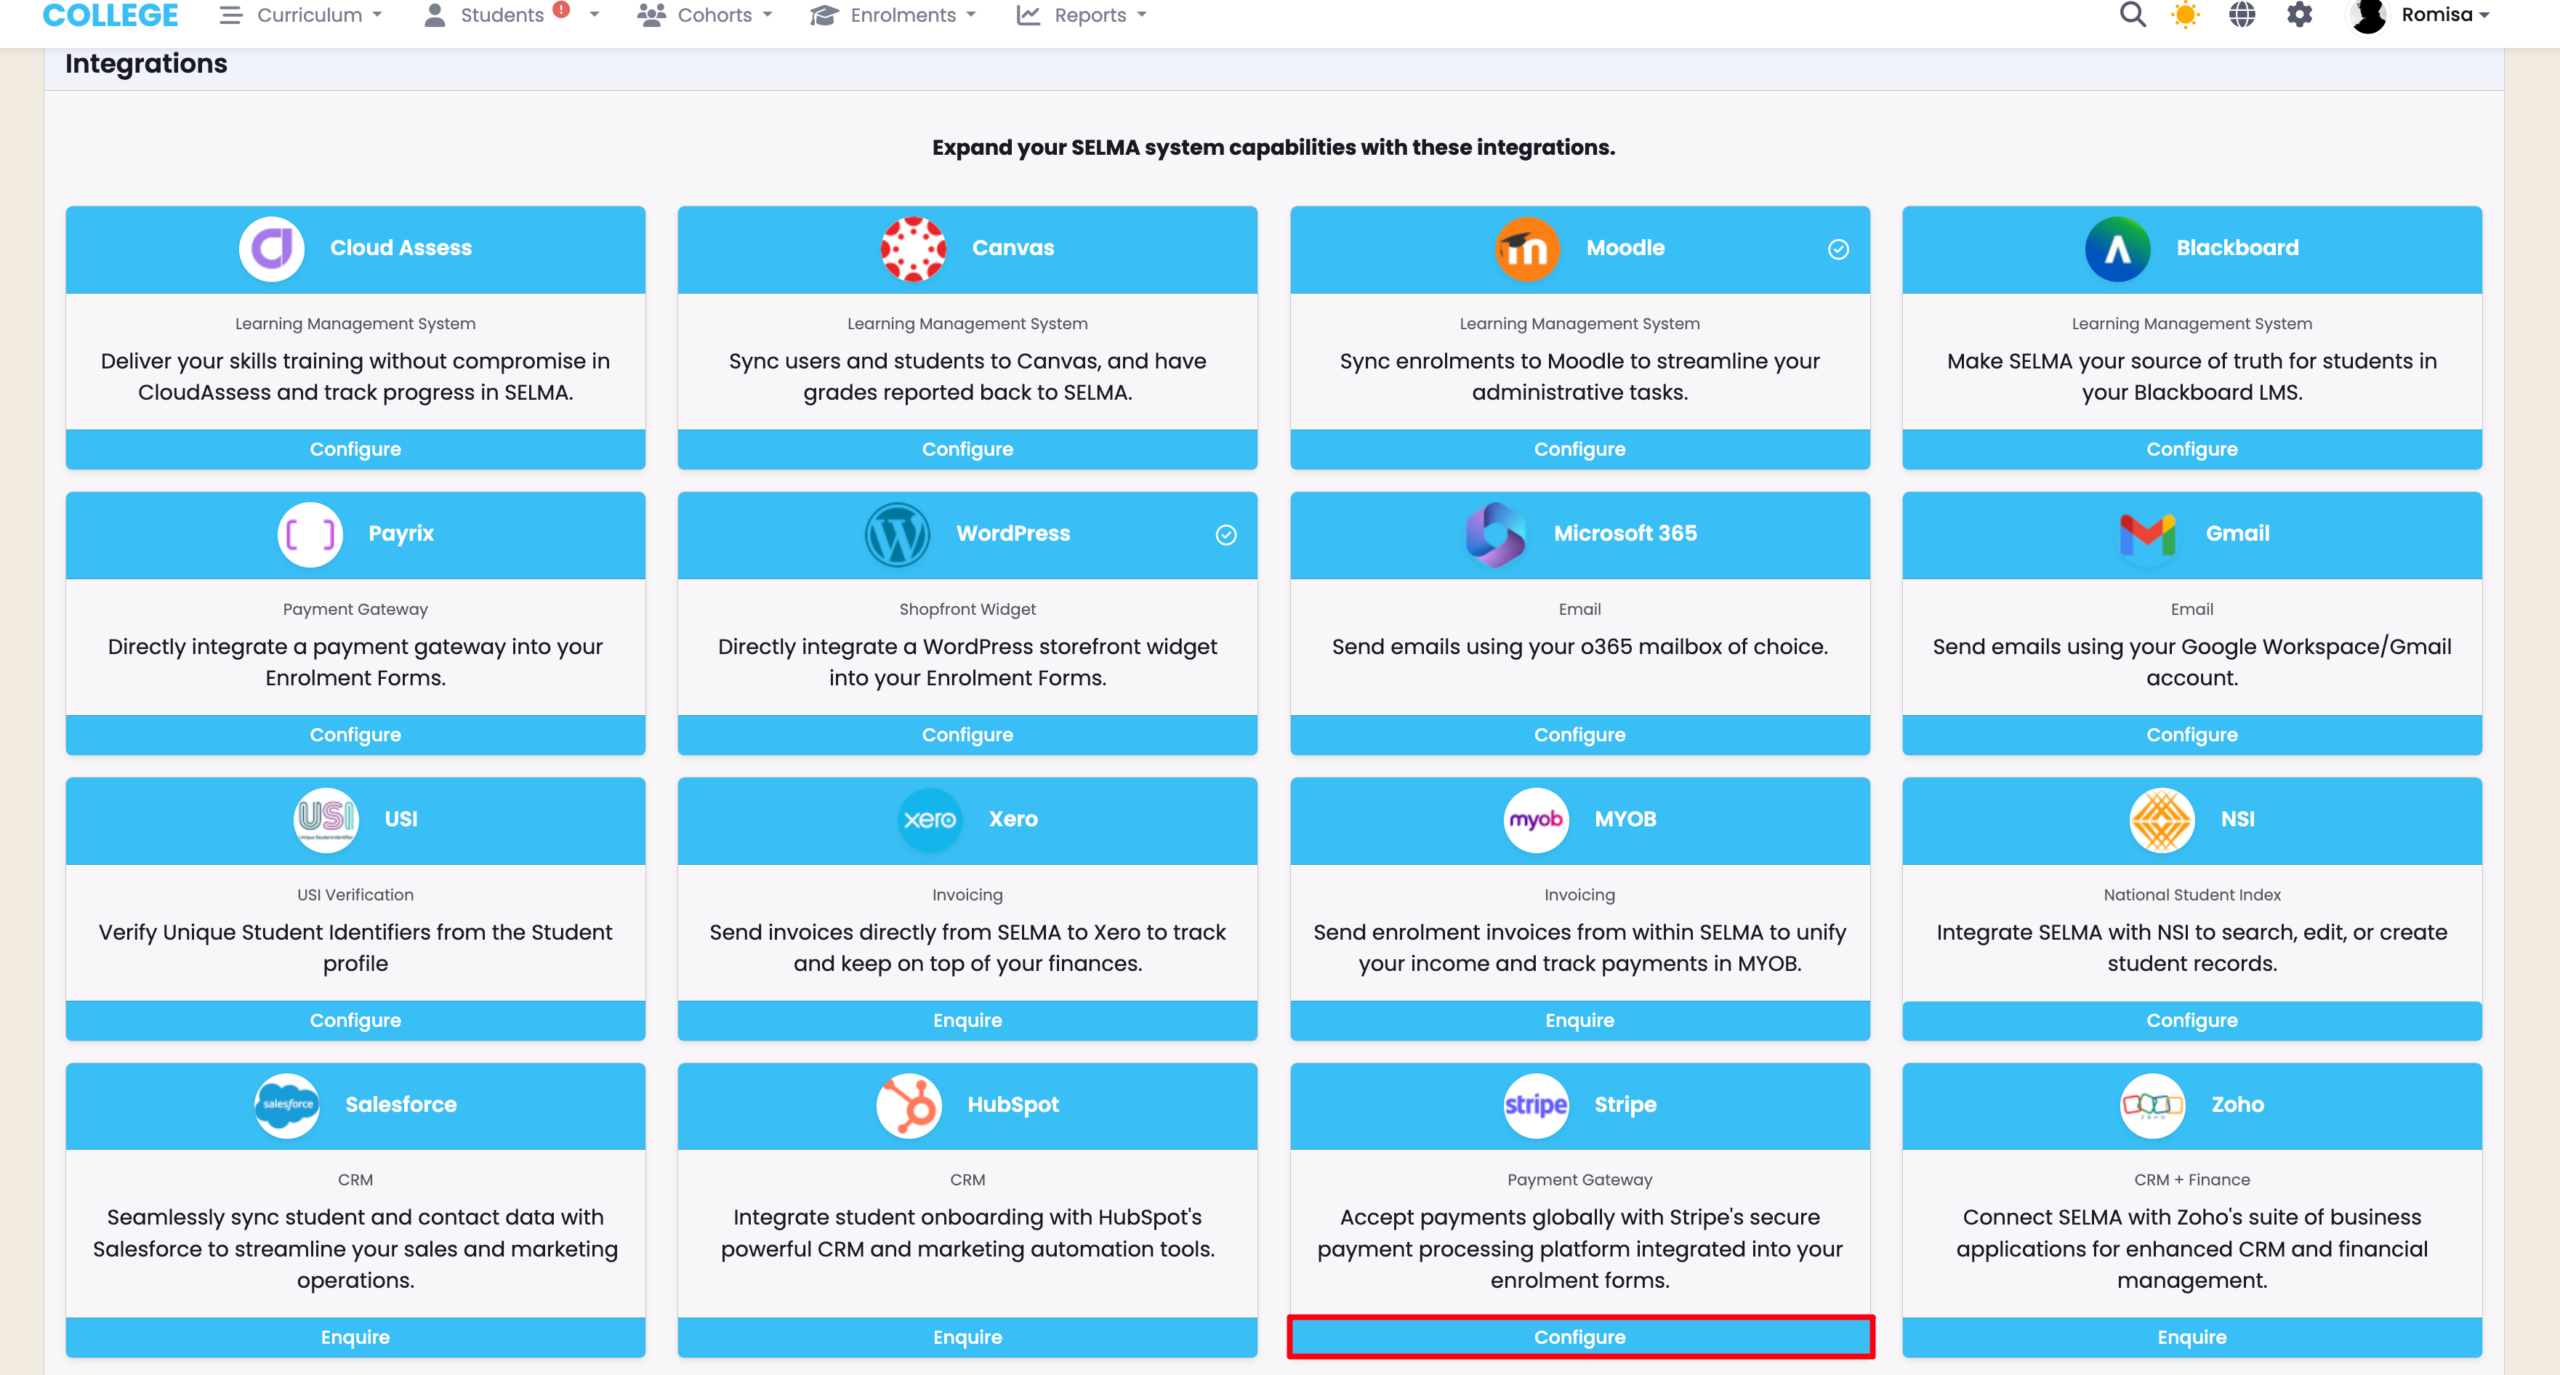
Figure 3i. Navigate to Stripe Dashboard
Please navigate to your Stripe Account, and click “Developers” on the bottom left of your dashboard screen.
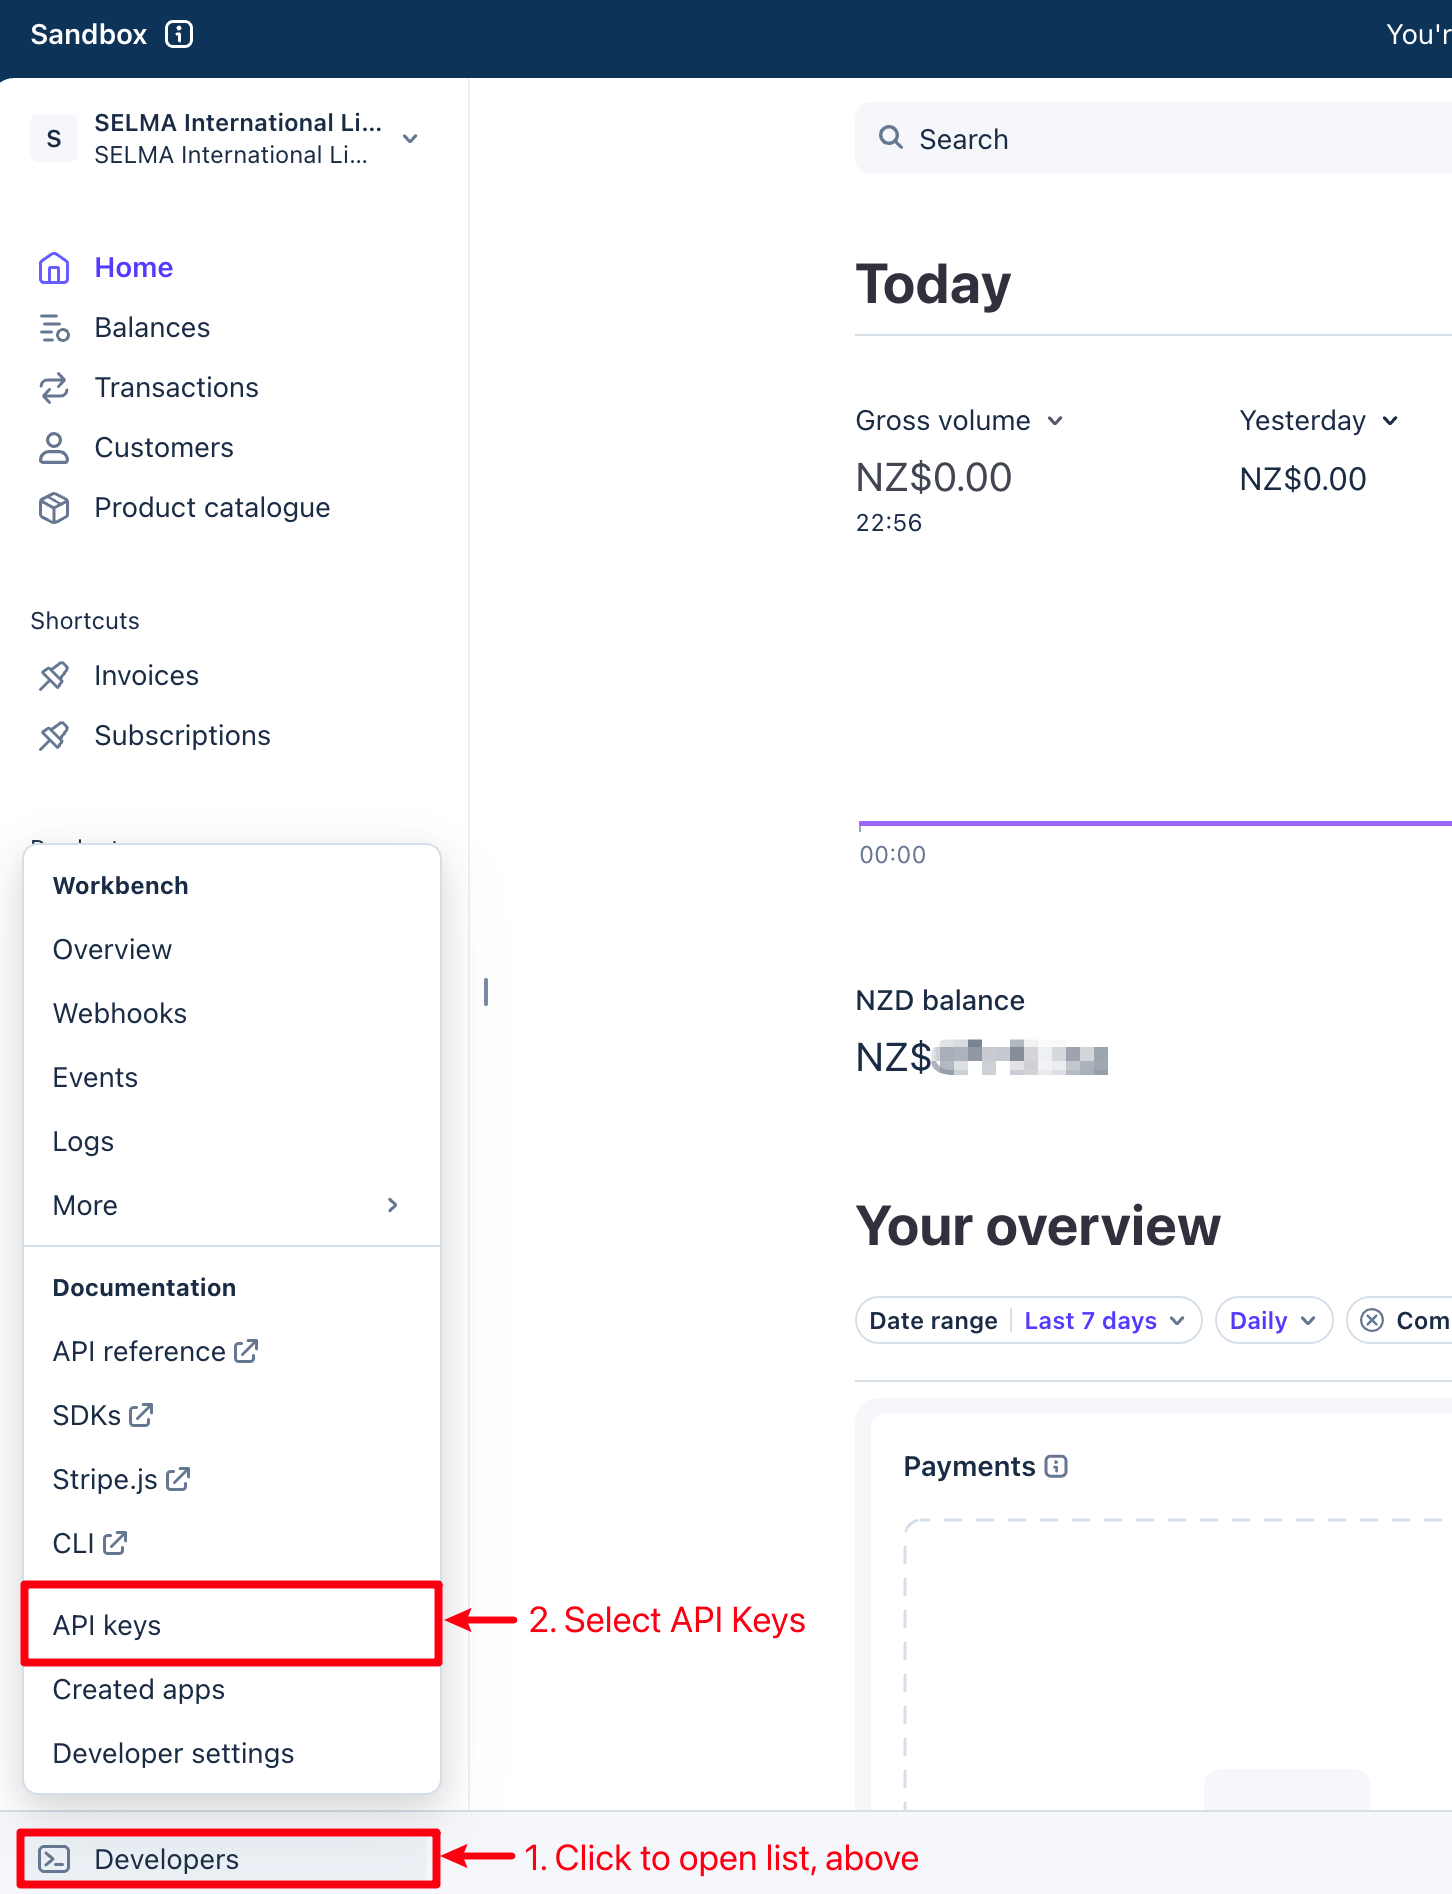
Figure 3ii. Copy API Keys
Copy the indicated API keys to paste into SELMA, in the subsequent step.
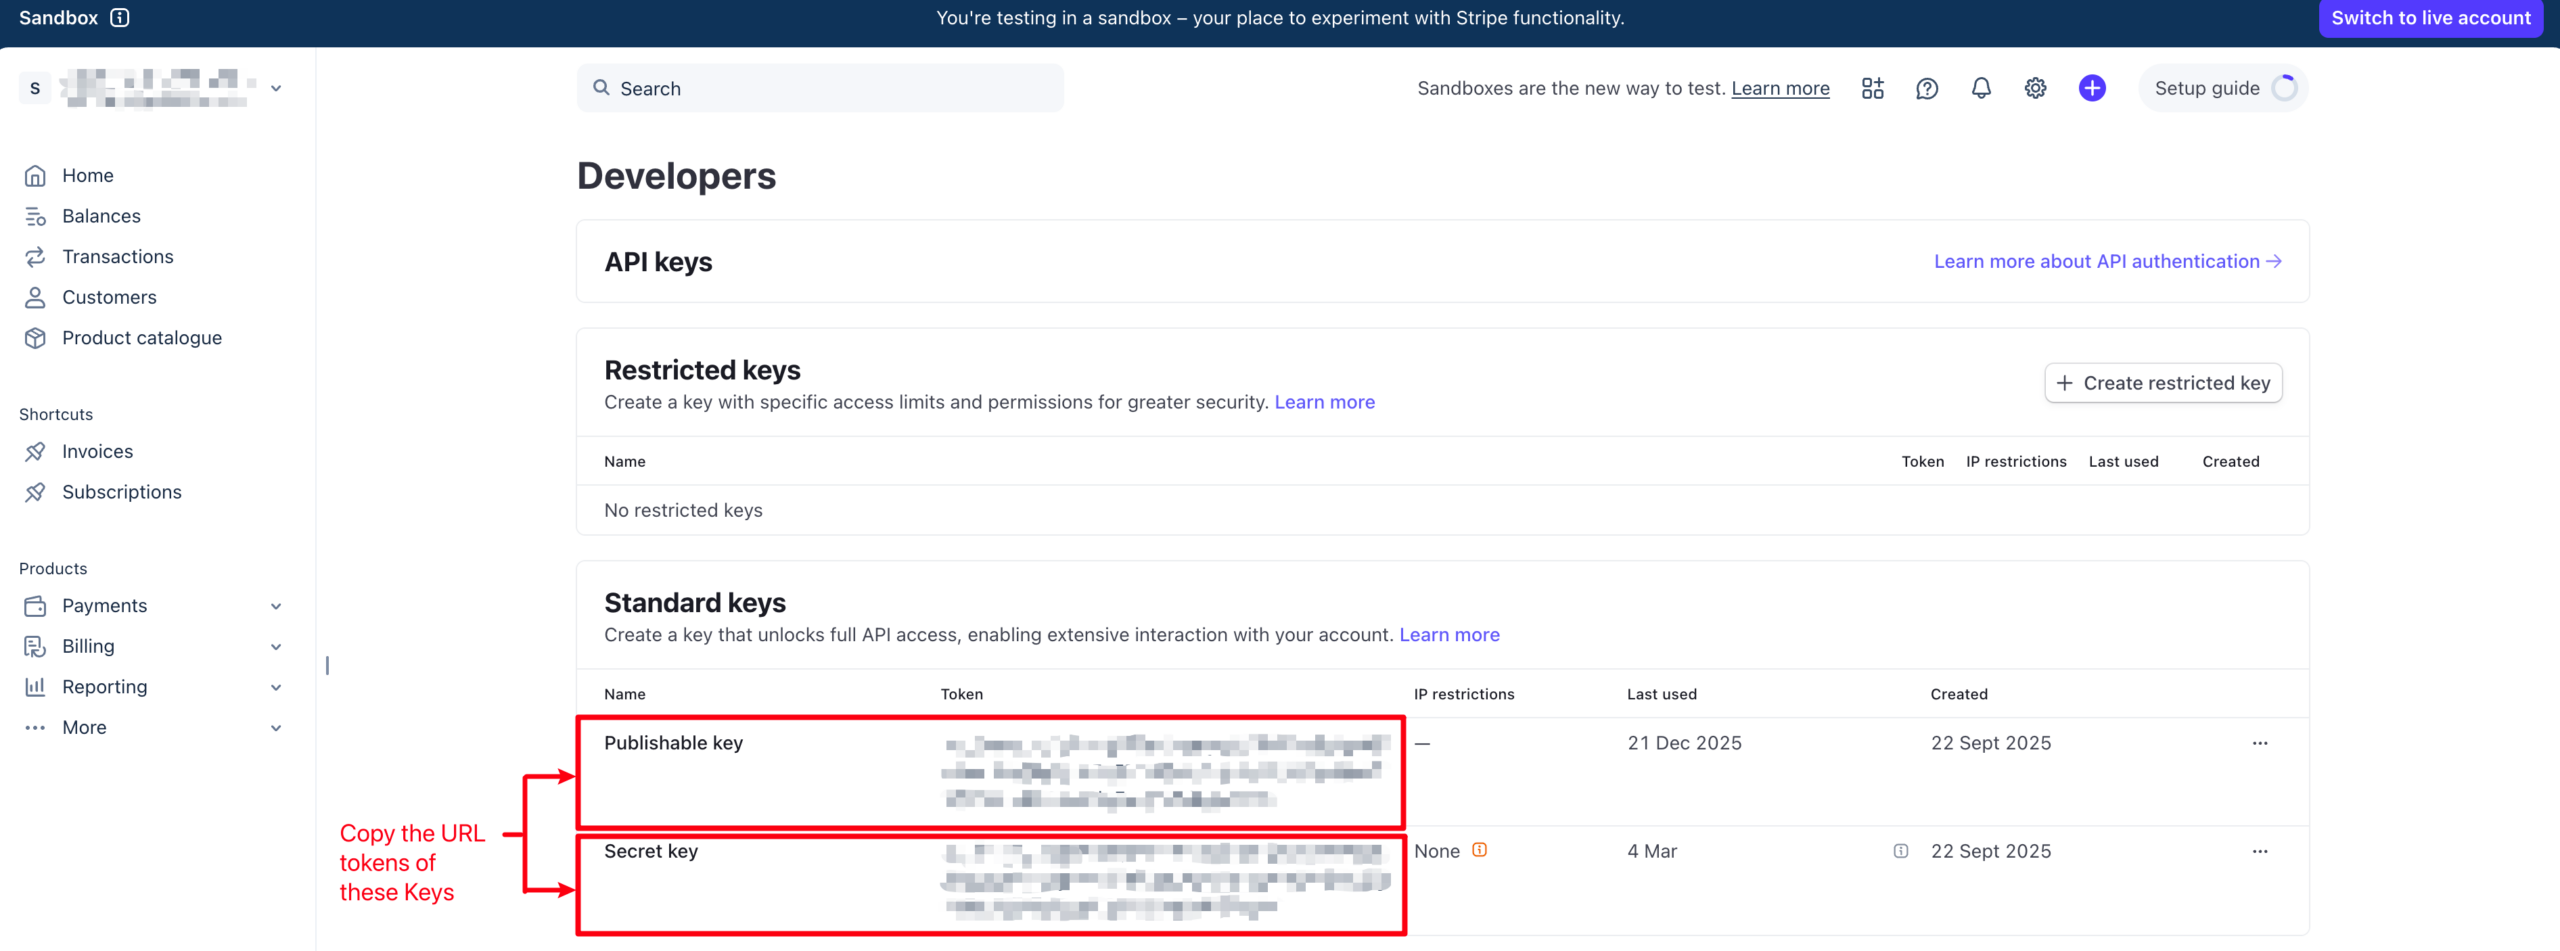
Figure 3iii. Add API Keys
Paste the Publishable Key and Secret Key URL tokens from Stripe into SELMA. You will need to click “Change” to edit the page, first.
- Note: Once you have pasted the API Keys into SELMA, remember to click “Save”, (this button appears after editing).
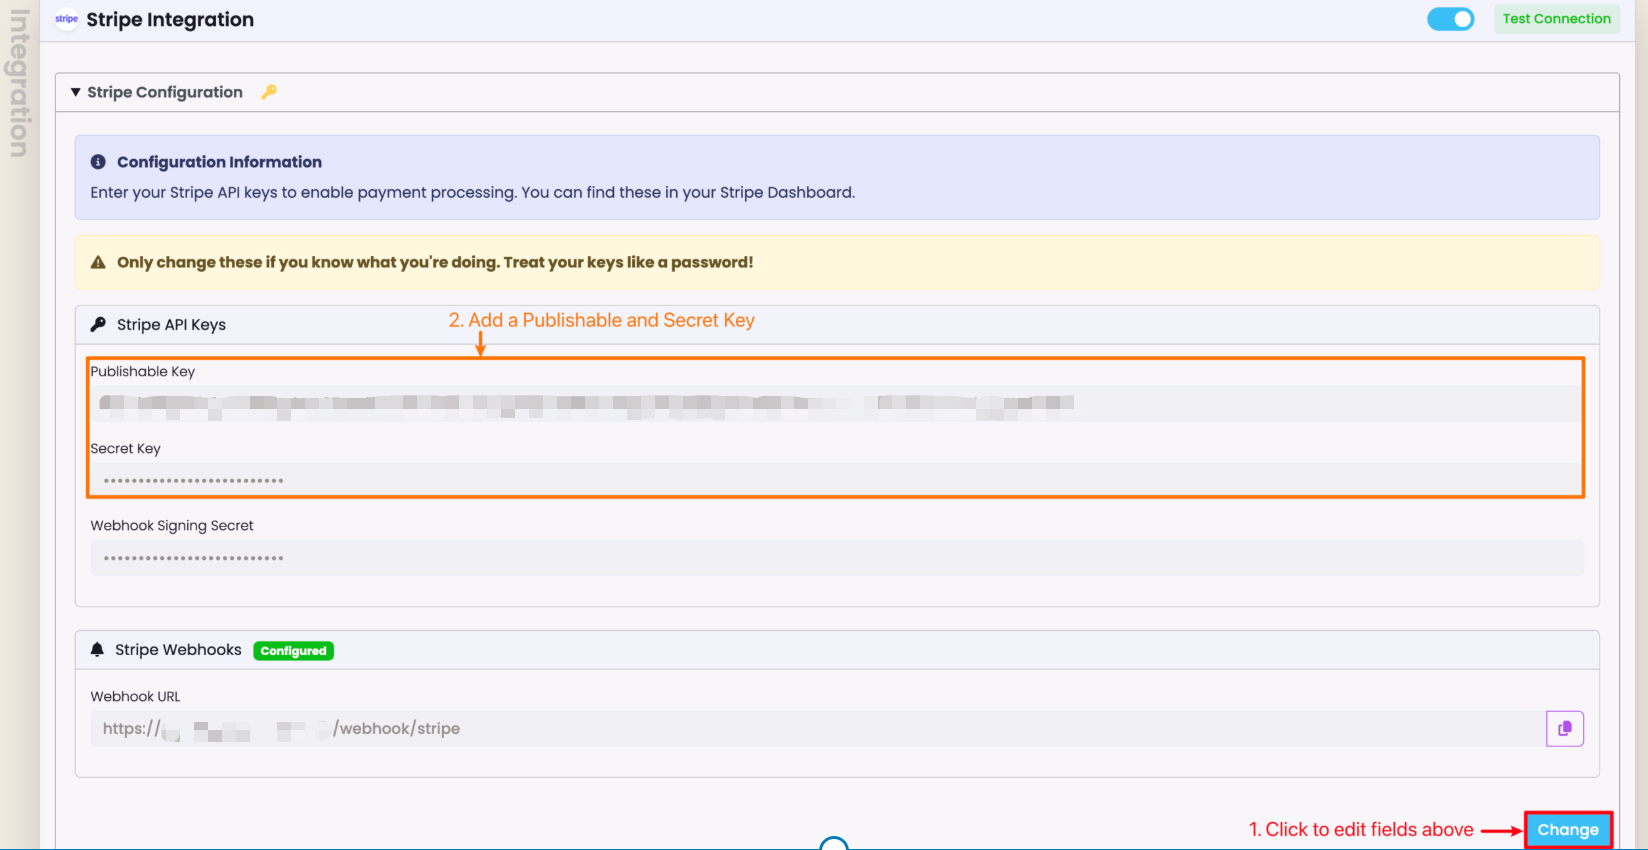
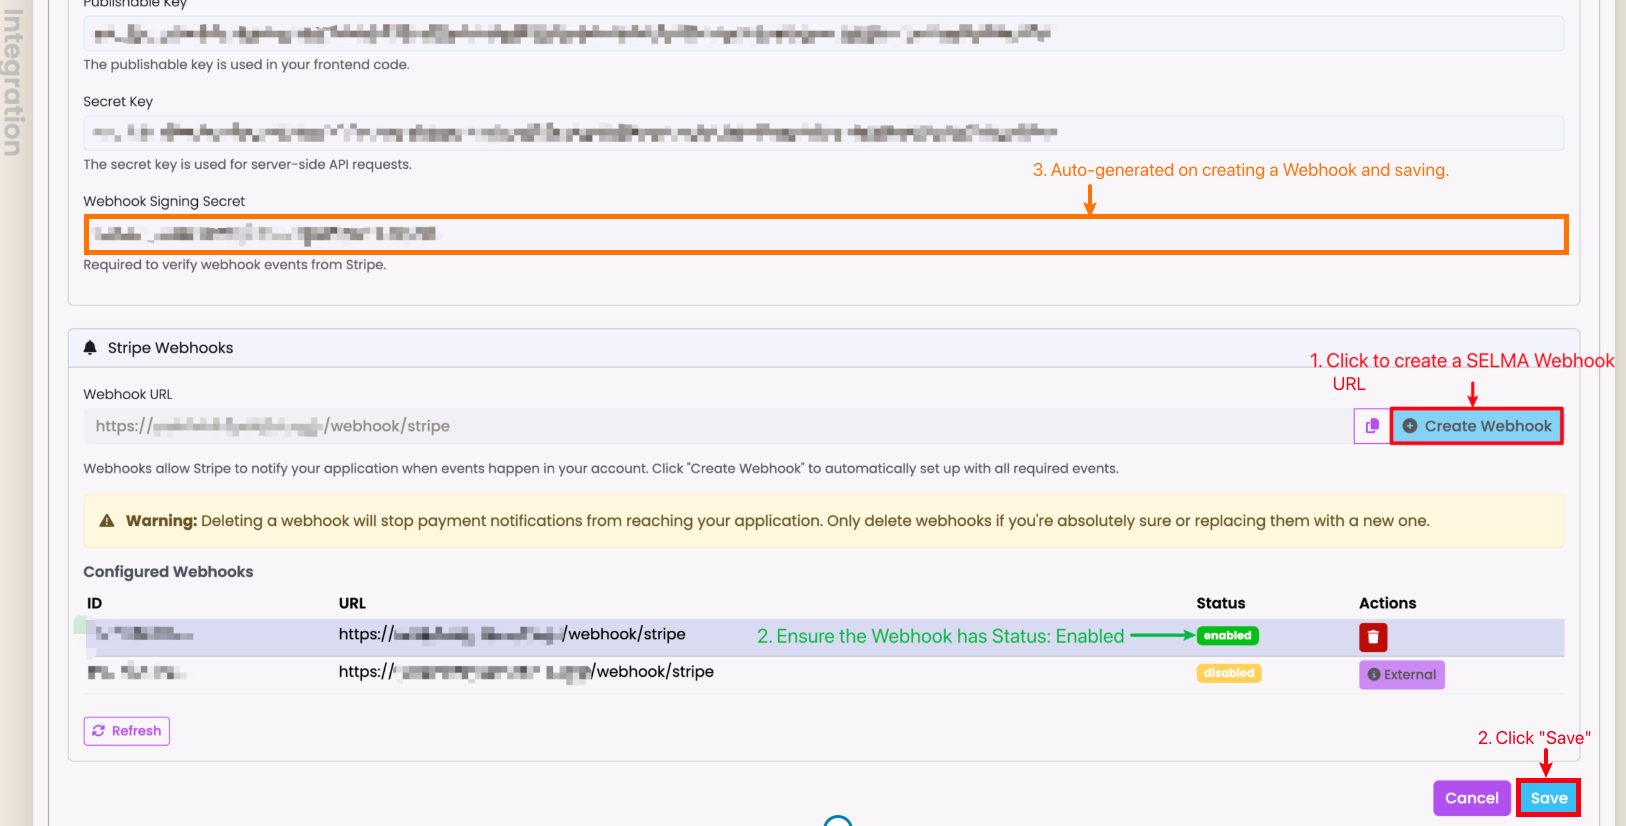
Figure 4. Configure SELMA Webhook URL
Create a SELMA Webhook URL. This will be the Endpoint URL you enter into Stripe.
- Note: The Webhook Signing Secret Key will be auto-generated when you click “Save”.
Stripe Activation – Form Manager
The following identifies how the Stripe Integration works on the Form builder:
Figure 5i. Navigate to Settings > Form Manager

Figure 5ii. Select an Enrolment Form
Click to edit an Enrolment form, and access the Form Builder.
Note: Only an Enrolment form can be embedded with a payment gateway, such as Stripe.
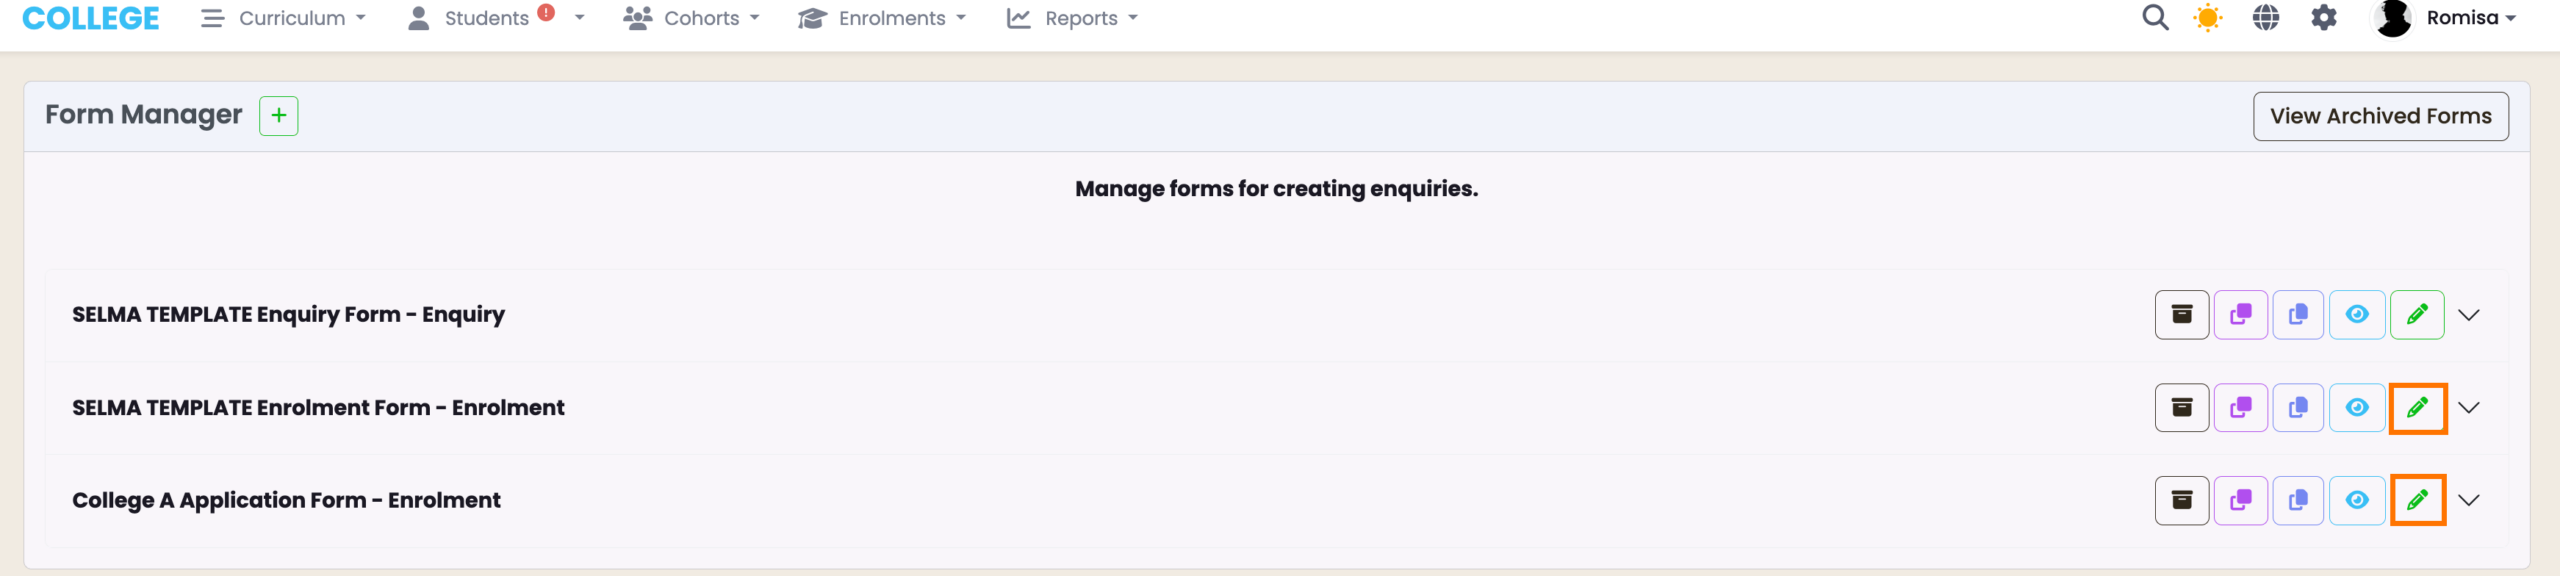
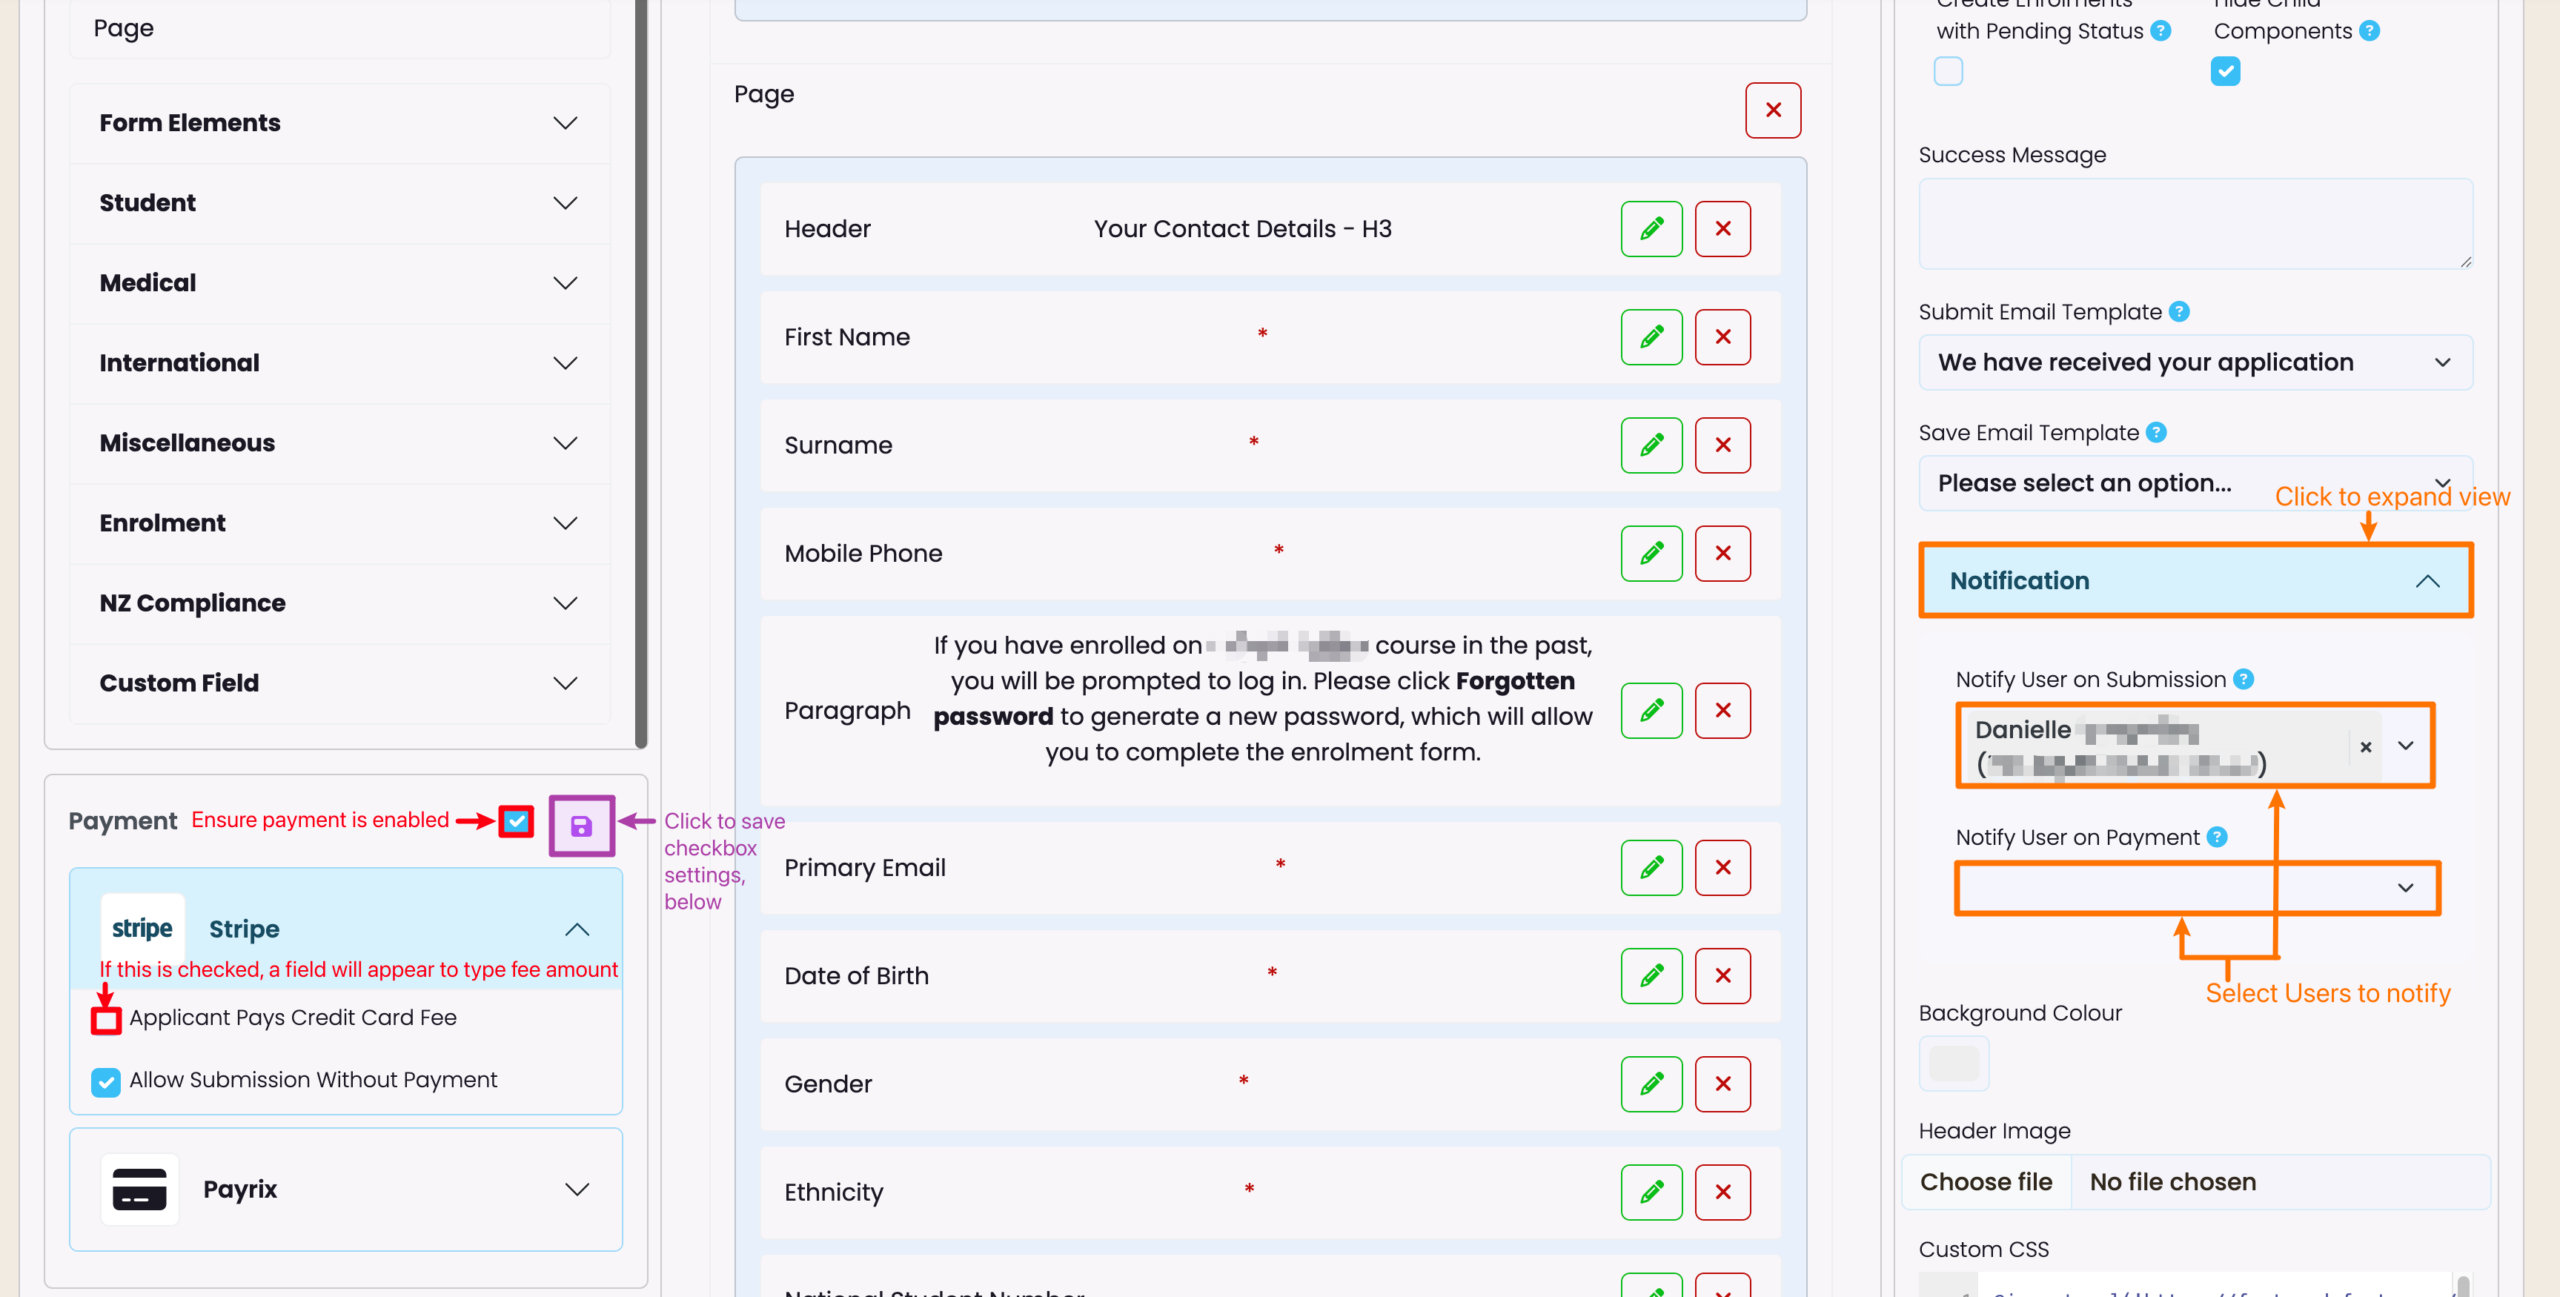
Figure 5iii. Payment and Notifications
Configure the Stripe Payment settings on the left, making sure that you activate the payment (top, red), and save your changes (purple). Select the Users you want to send notifications to, on form submission or payment, on the right (orange).
Discount Codes
Intake tutition fees can be discounted if Student applicants are given a valid discount code to use on payment, before submission.
Figure 6i. Navigate to Settings > Finance > Discount Code
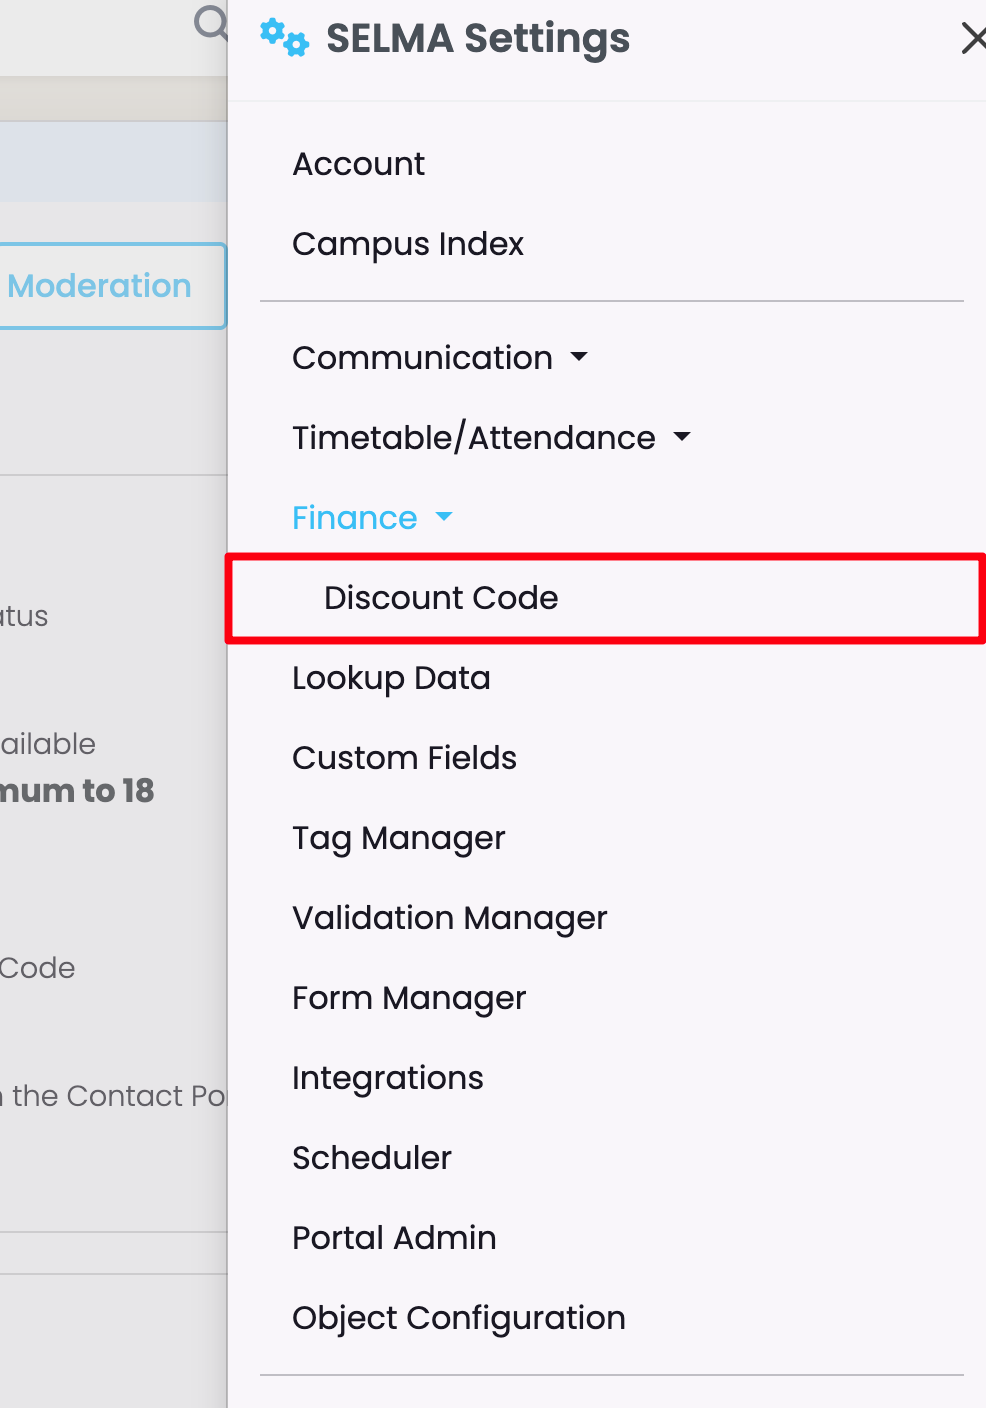
Figure 6ii. Create a Discount Code
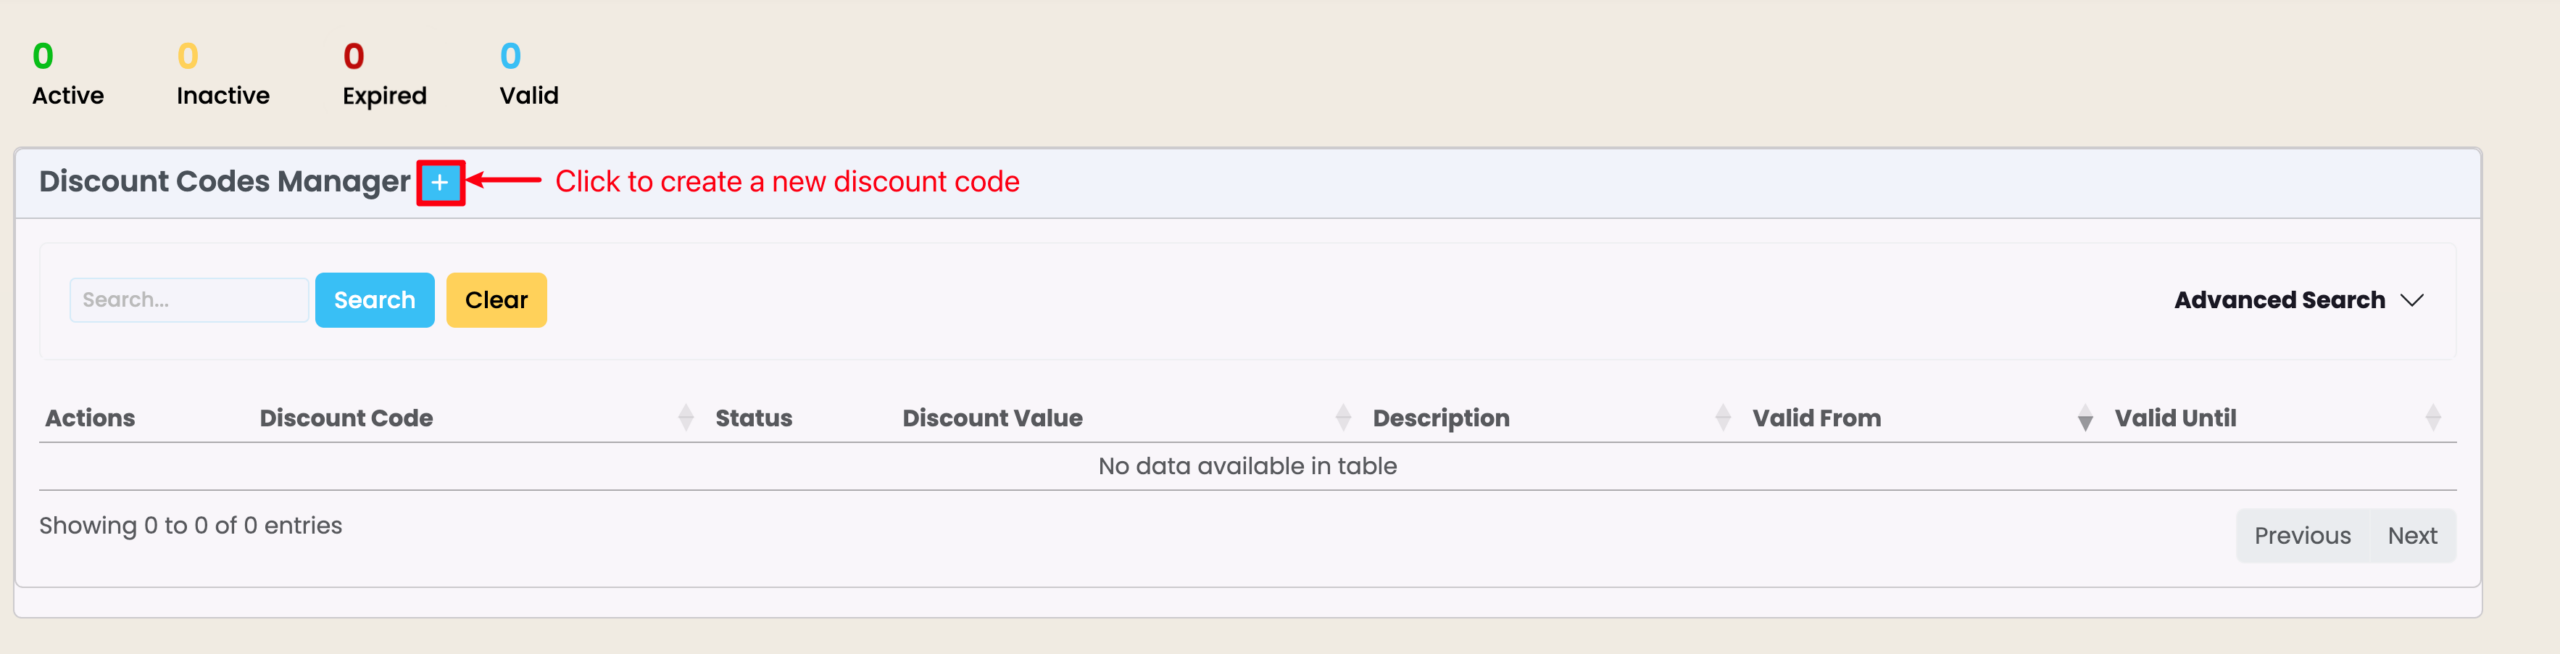
Figure 6iii. Provide Details and Activate Code
Fill in the required fields, as indicated by red asterisks, and make sure to activate the Discount Code, if you want it to be used by applicants.
Note: The Discount Code is only valid (functional) during the period you indicate, here.
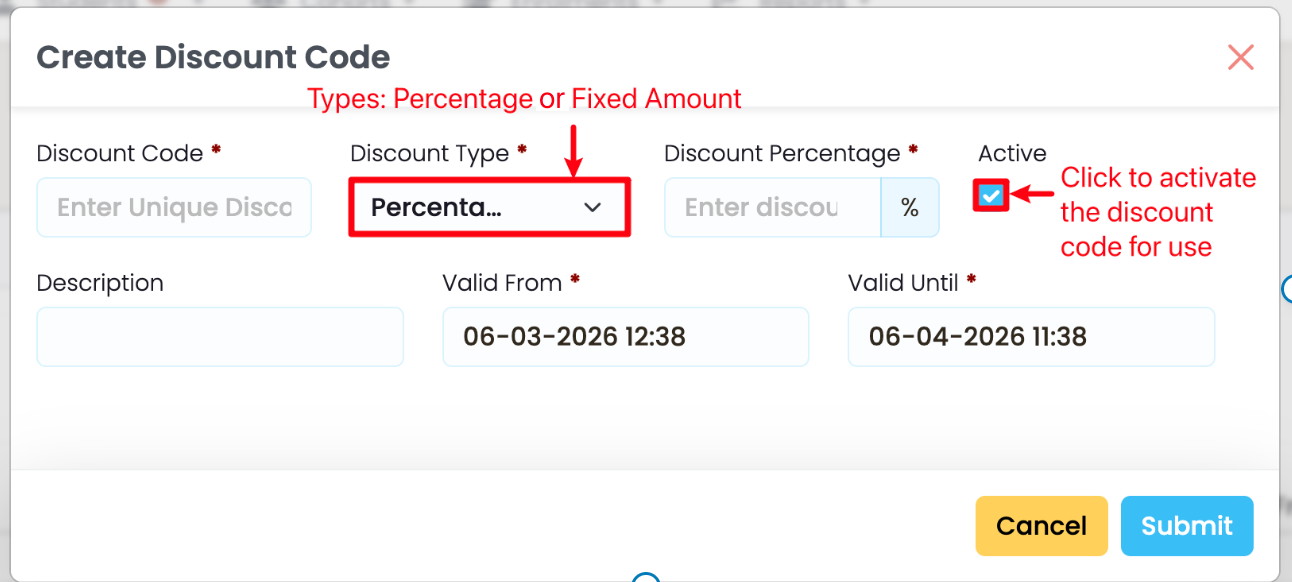
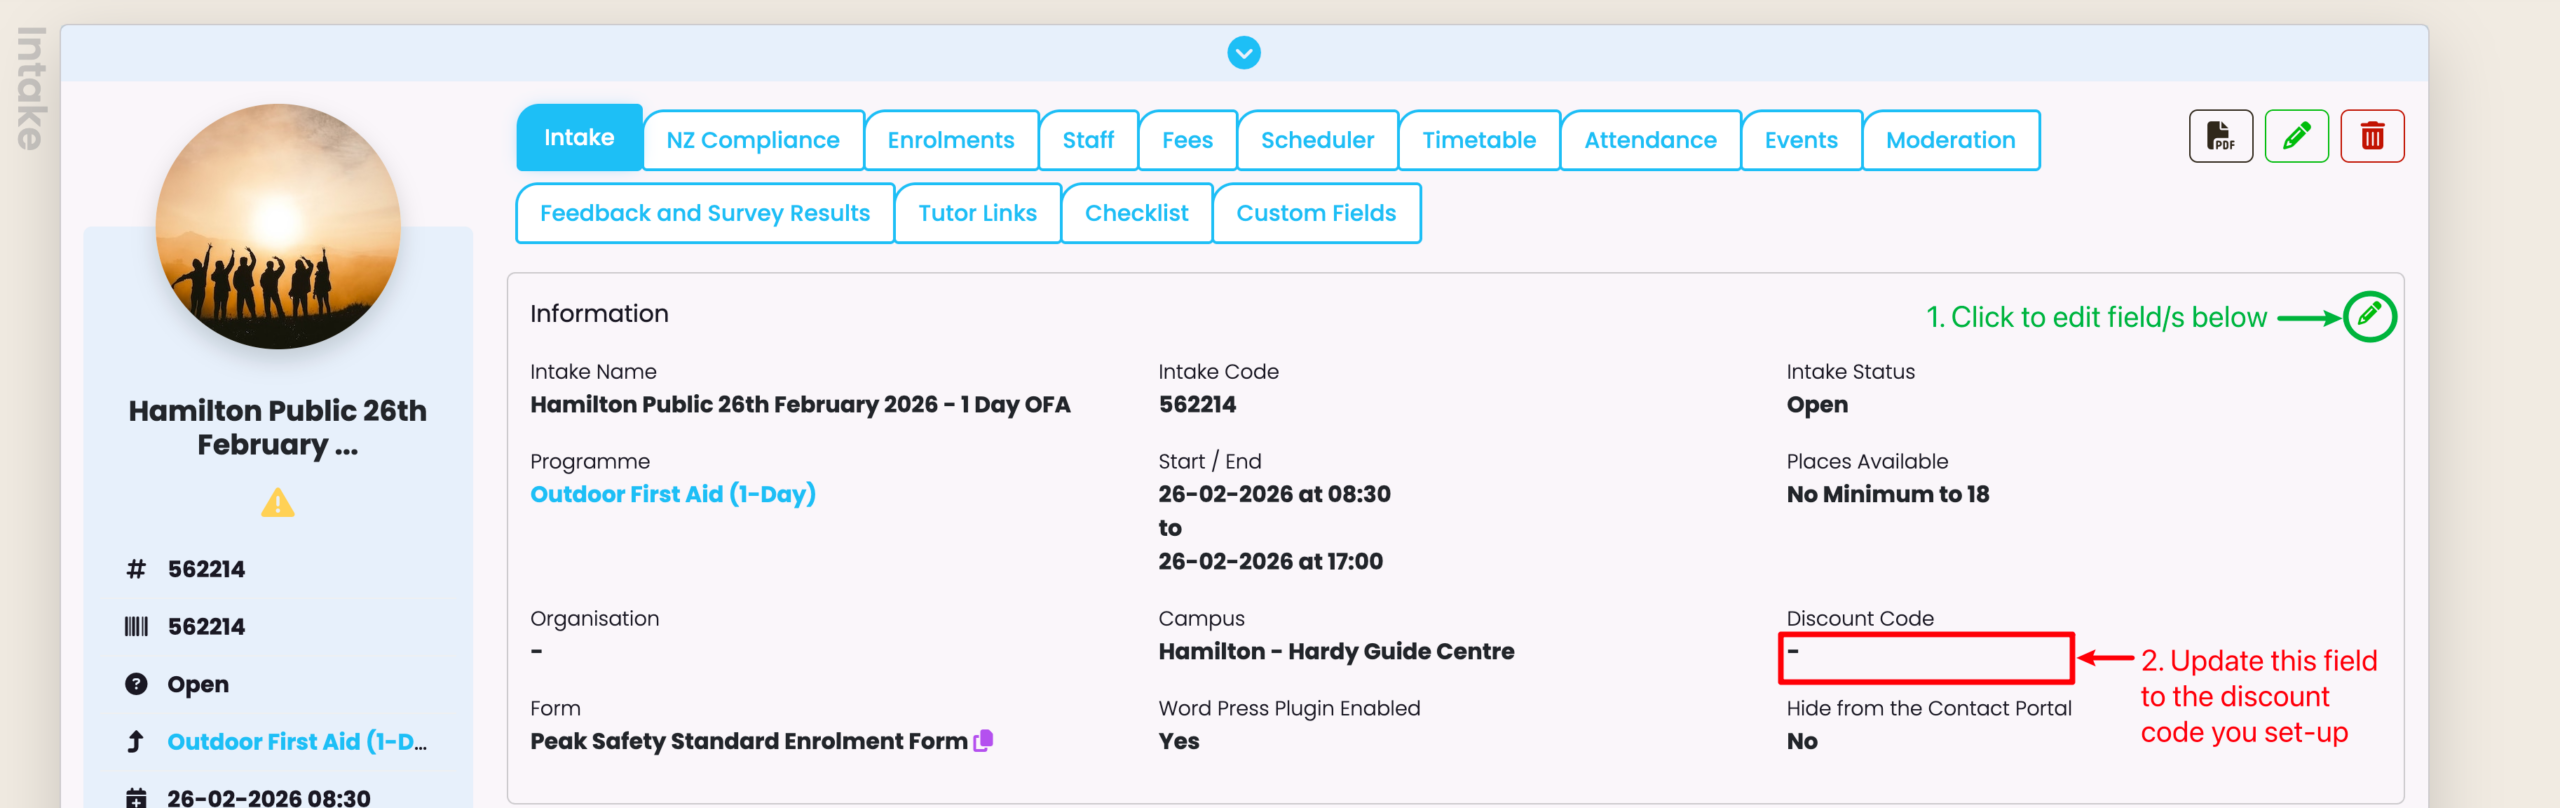
Figure 6iv. Navigate to the Intake