
On this page:
- Create Enquiry Form
- Edit Form
- Form Fields
- Form Editor
- Form Configuration
- Activating and Publishing the Form
- Viewing the Form
- Testing the Form
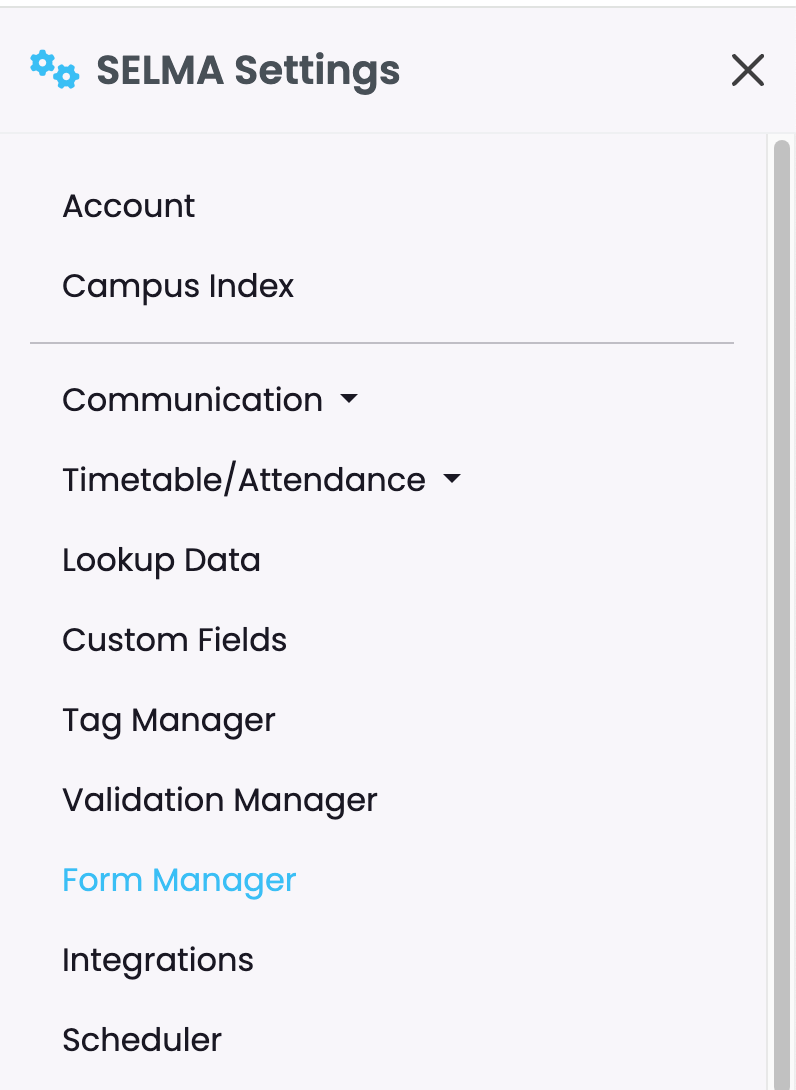
If your account subscription includes access to Forms, navigate to Settings (Cog) -> Form Manager
Create Enquiry Form
| Enquiry form: • Minimum required fields: First Name and Primary Email. • Submissions from new applicants: a unique student record is created with status “Enquiry”. • Submissions from returning students: the existing student record is updated. • Allows selection of Programme and/or Intake, however these fields are not mandatory. • Can be setup as a short “contact us” form to gather basic information from interested applicants, or handle long complex scenarios such as a complete expression of interest application. |
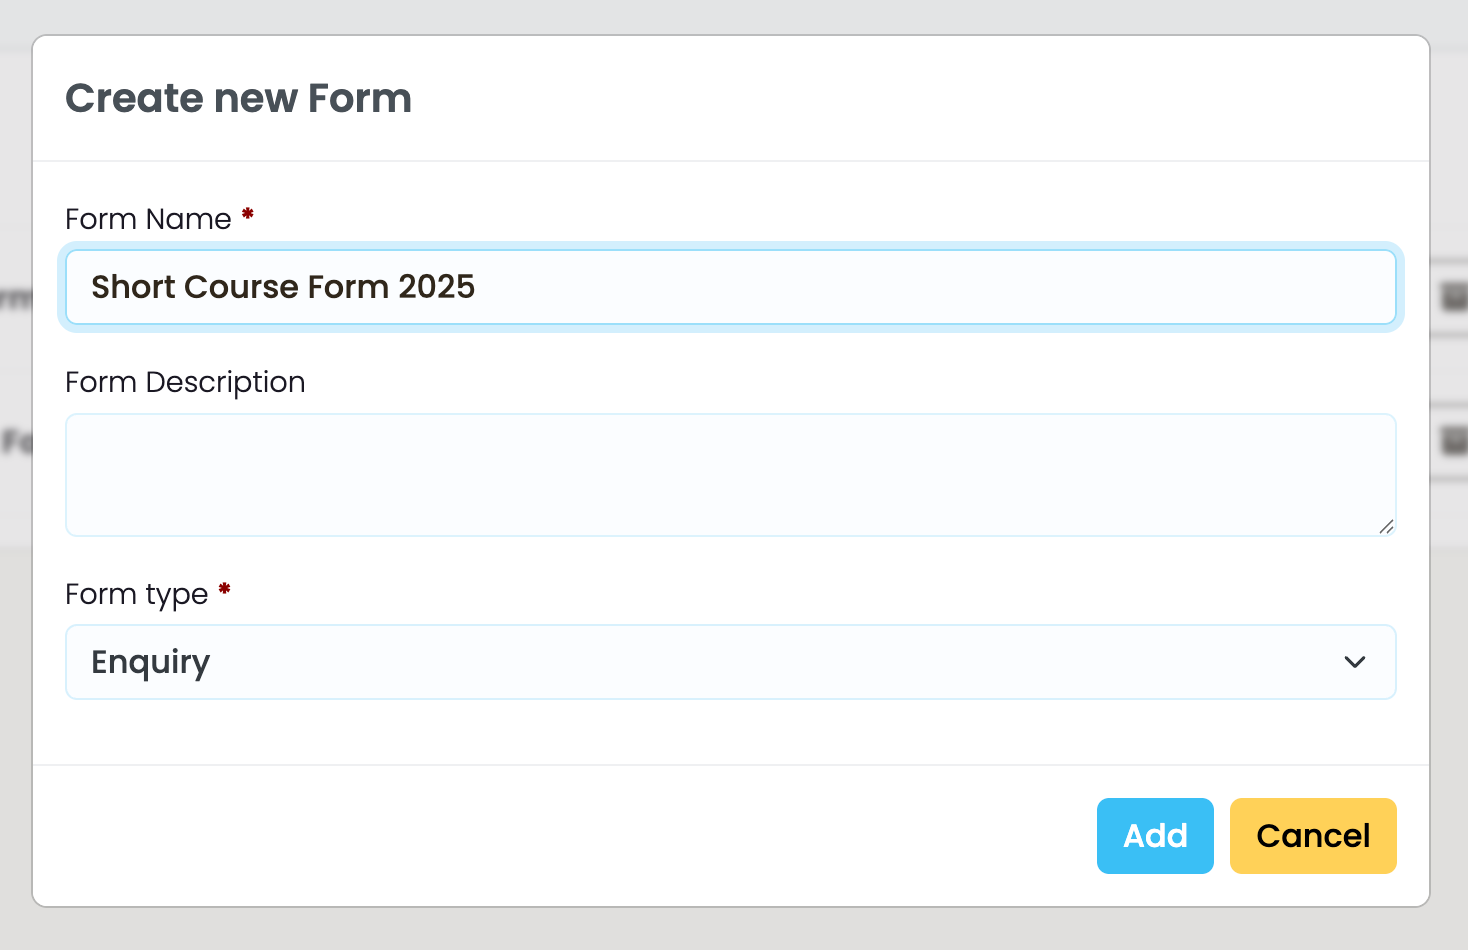
To create a new enquiry form, click on the green ‘ + ‘ plus icon at the top of the Form Manager.

Assign a name to the form and make sure to select Form type: Enquiry.
IMPORTANT: Once a form has been created, it is not possible to change its type.
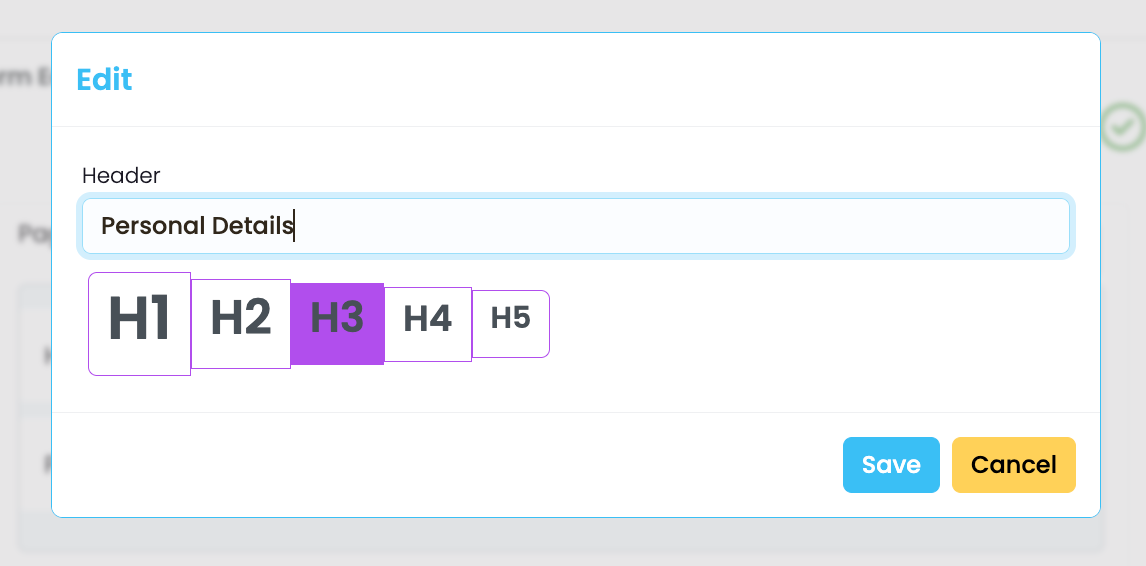
Edit Form
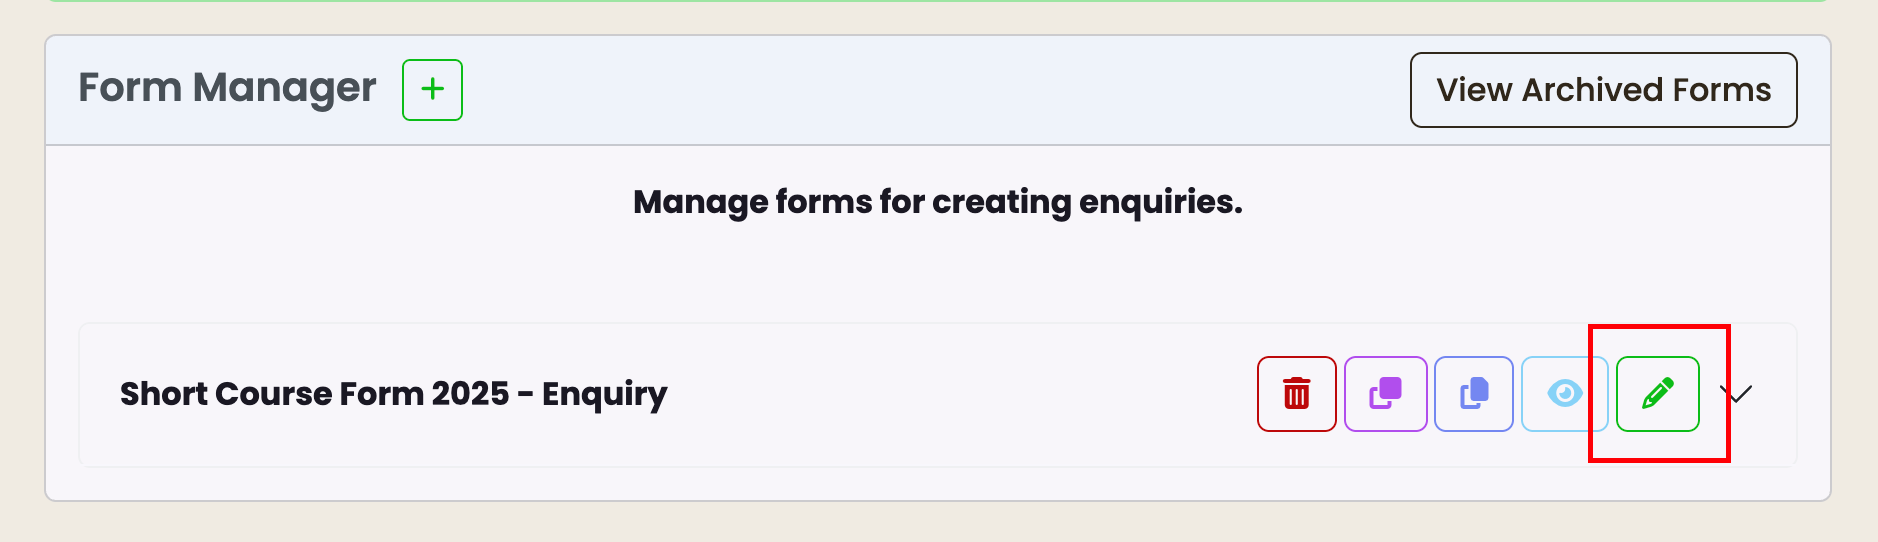
Once created, the form will appear under Form Manager. Click on the green pencil icon to open in editing mode.
This is the default view of the form editor:
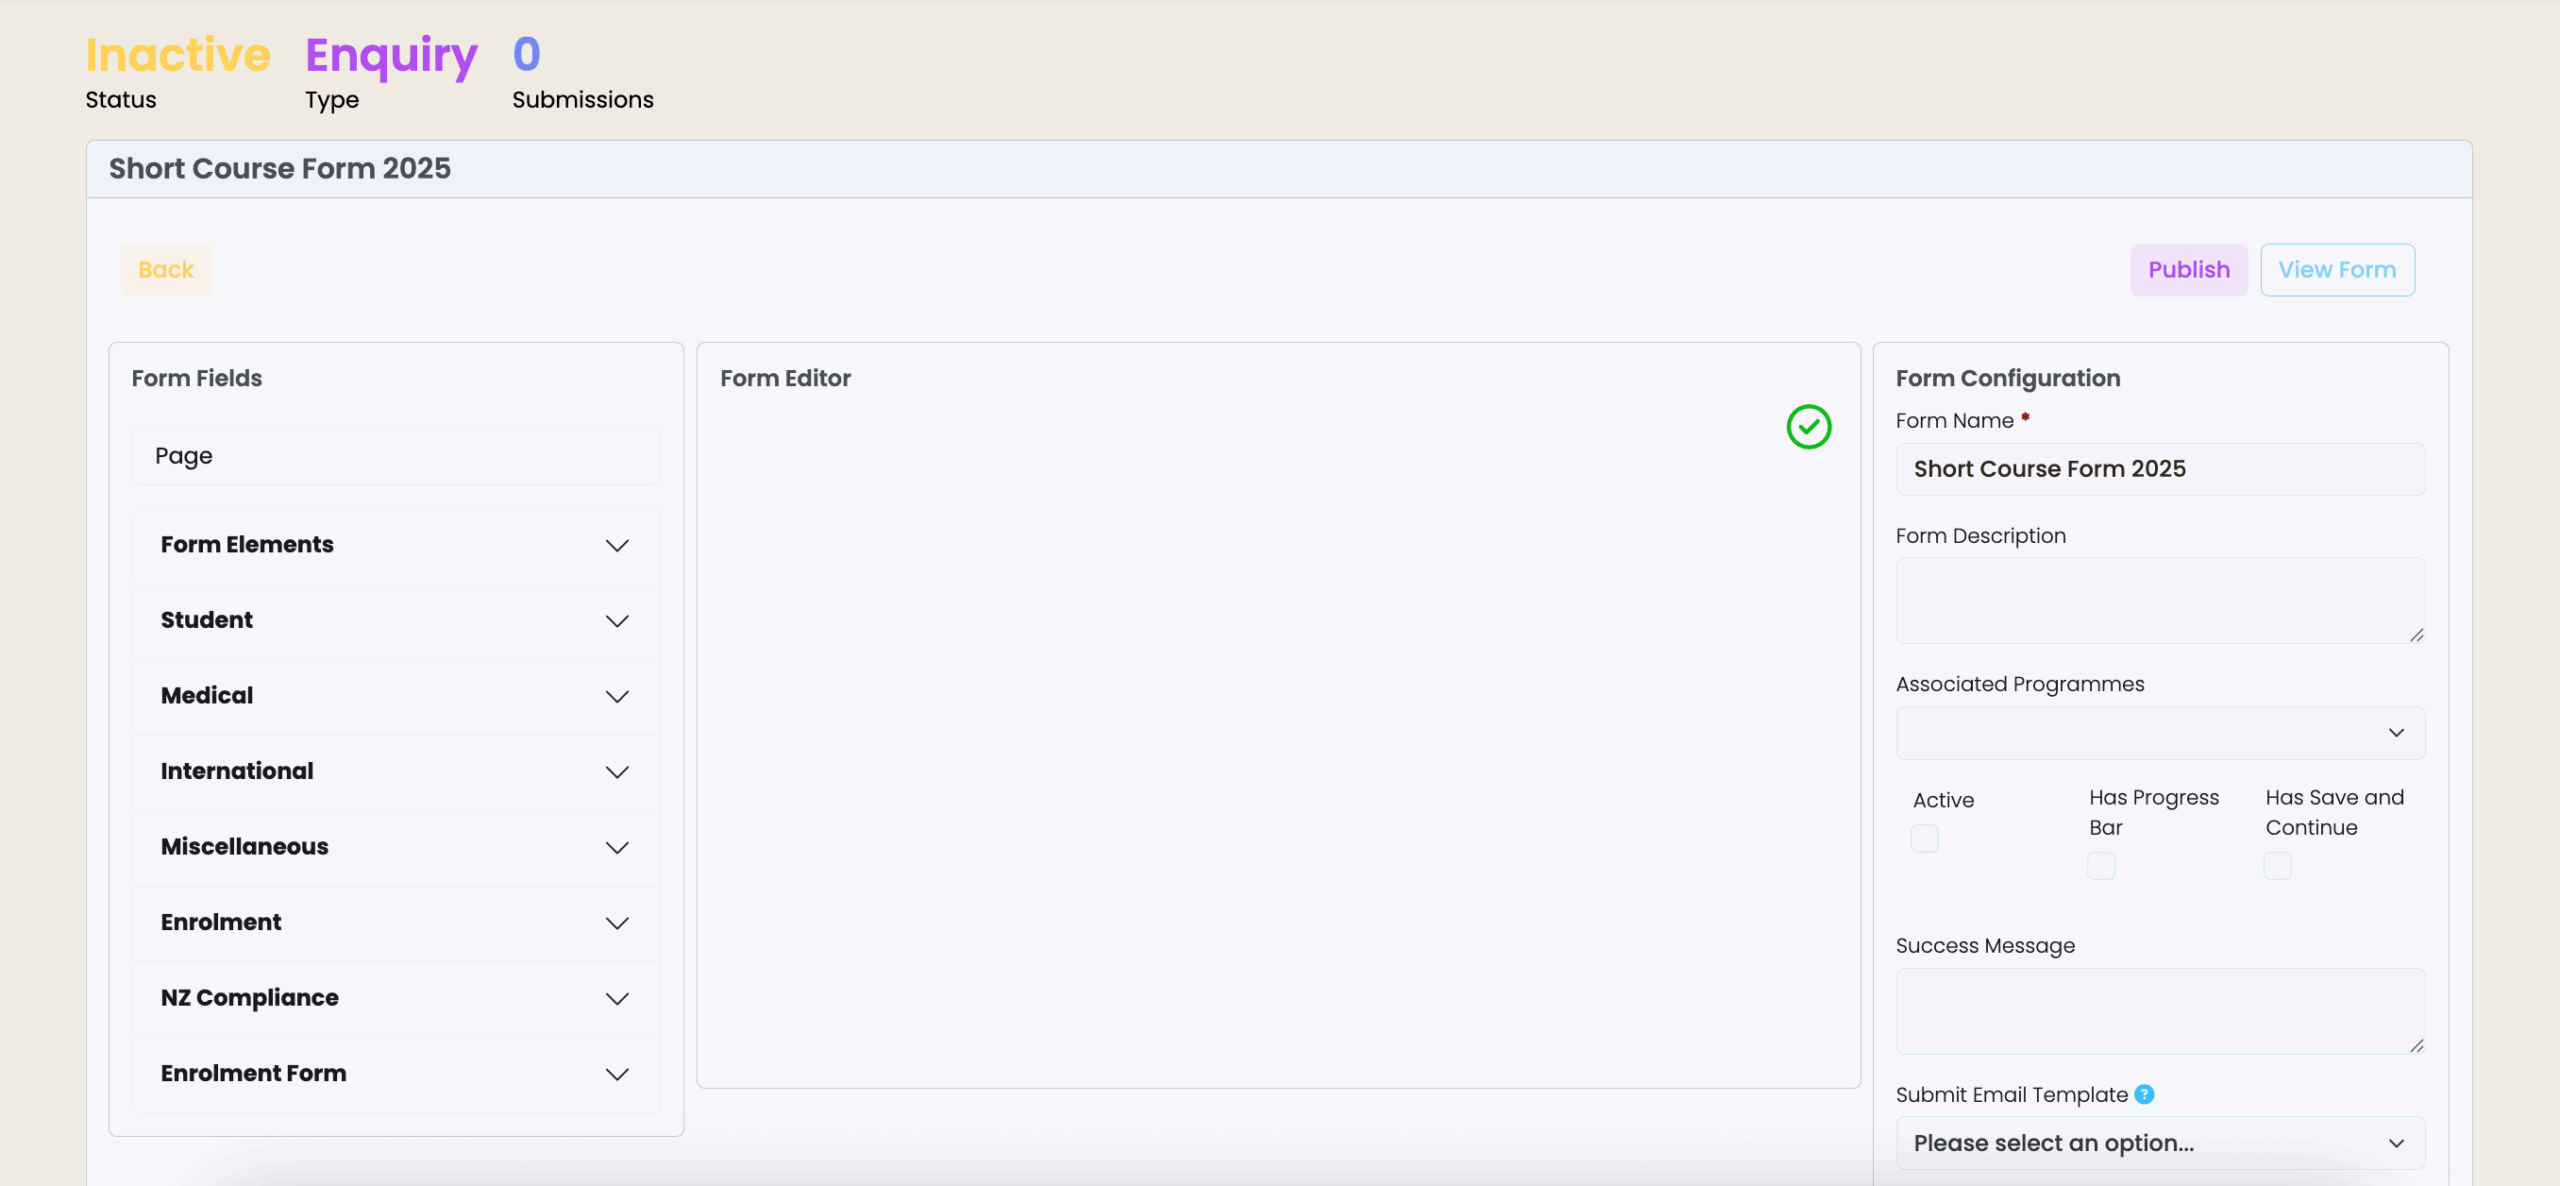
Form Fields
The Form Fields panel contains a series of menus where you can choose the fields to build your form.
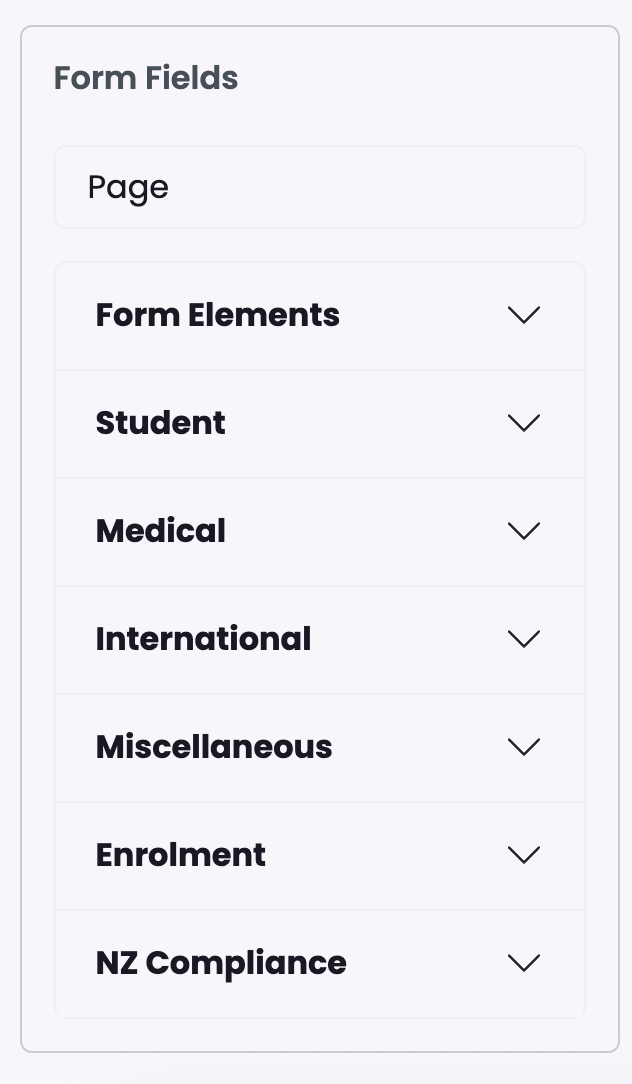
Here’s a breakdown of the fields you will find under each menu:
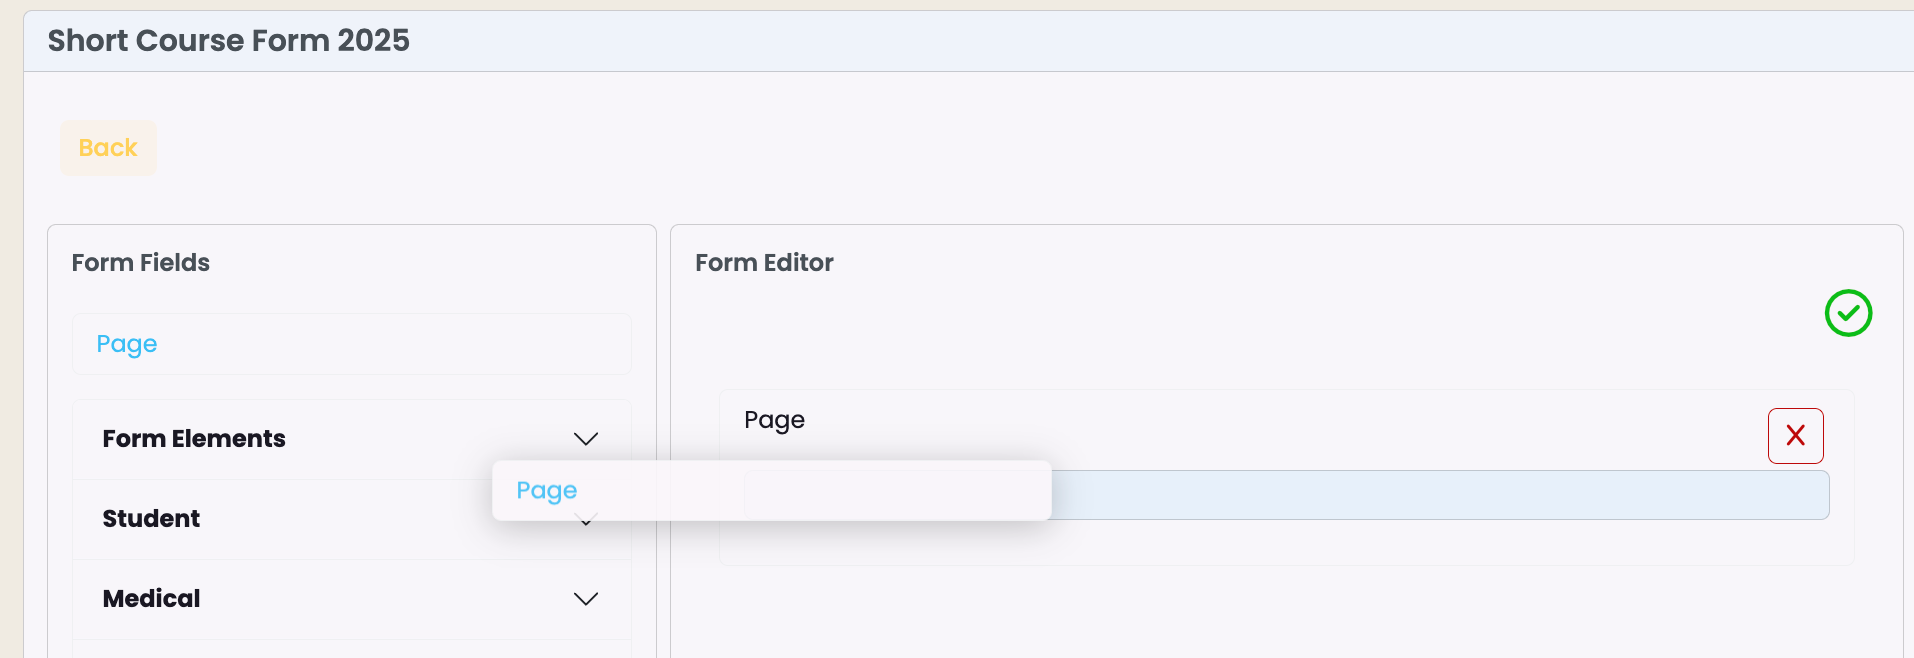
Page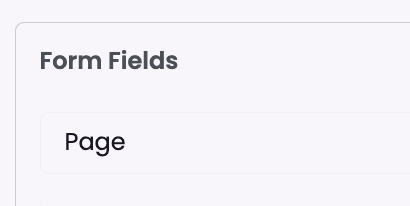 | Use pages to build and organise the structure of your form. When creating a form from scratch, the first thing you need to add to the editor is a page. Multiple pages can be added on a form. |
Form Elements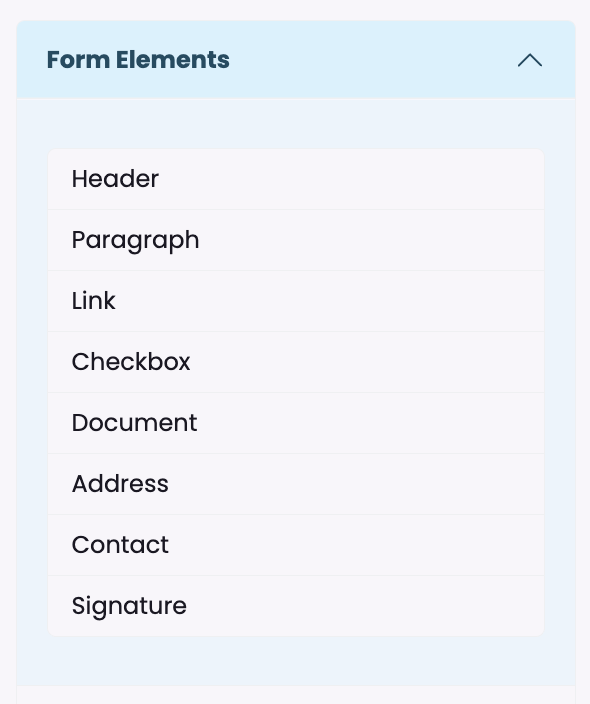 | Form Elements menu offers essential building blocks for creating forms, including Header and Paragraph for content structure, Link for external references, Checkbox for selectable options, Document for file attachments, Address for location data, Contact for communication details, and Signature for digital authorisation. Form Elements fields are always visible on the menu and can be added multiple times across the form. |
Student | The Student menu contains fields specifically designed to capture comprehensive student information for educational institutions. Two fields on this list must be included in every enquiry form: First Name and Primary Email. These essential fields ensure basic student identification and enable the creation of a user when an applicant submits their details. Each of these fields can only be added once on the form, ensuring the information is not duplicated. |
Medical | The Medical menu contains supplementary fields that capture health-related information on the student record. Use these optional fields to document disability details and special accommodation requirements, medical conditions that may affect academic participation, and medical insurance details including coverage dates and policy numbers. Each of these fields can only be added once on the form, ensuring the information is not duplicated. |
International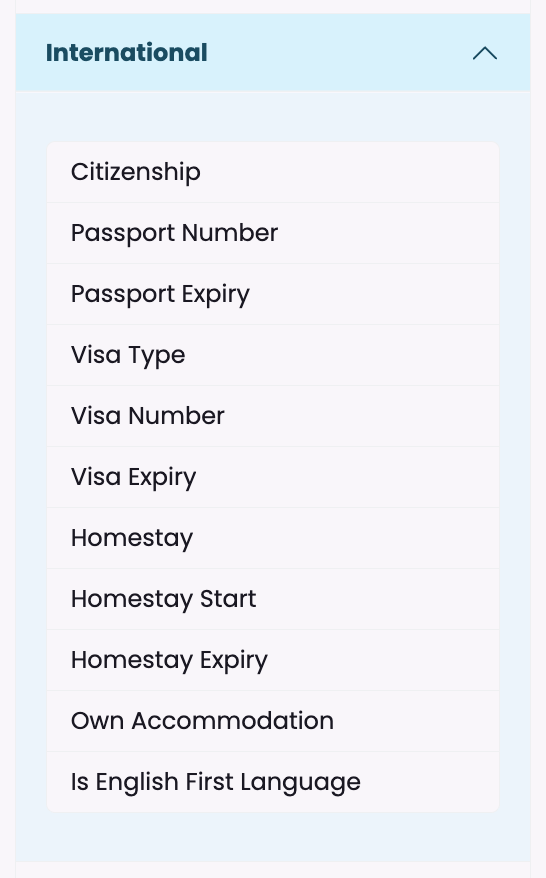 | The International fields enable essential information to be captured for international students, such as country of citizenship, passport and visa details including expiration dates, and accommodation arrangements such as homestay programs with their duration. Additional fields address housing preferences and language proficiency to help institutions provide appropriate support services and ensure compliance with international student requirements. Each of these fields can only be added once on the form, ensuring the information is not duplicated. |
Miscellaneous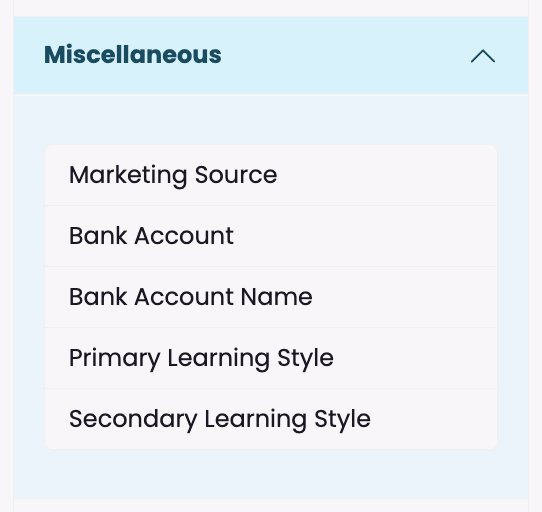 | Miscellaneous fields can be used to record supplementary information such as bank details and preferred learning styles. Each of these fields can only be added once on the form, ensuring the information is not duplicated. |
NZ Compliance | NZ Compliance fields capture important SDR required information. Use these fields to enable applicants to provide crucial details such as Disability Status, Previous Activity, NSN and more. Each of these fields can only be added once on the form, ensuring the information is not duplicated. |
AUS Compliance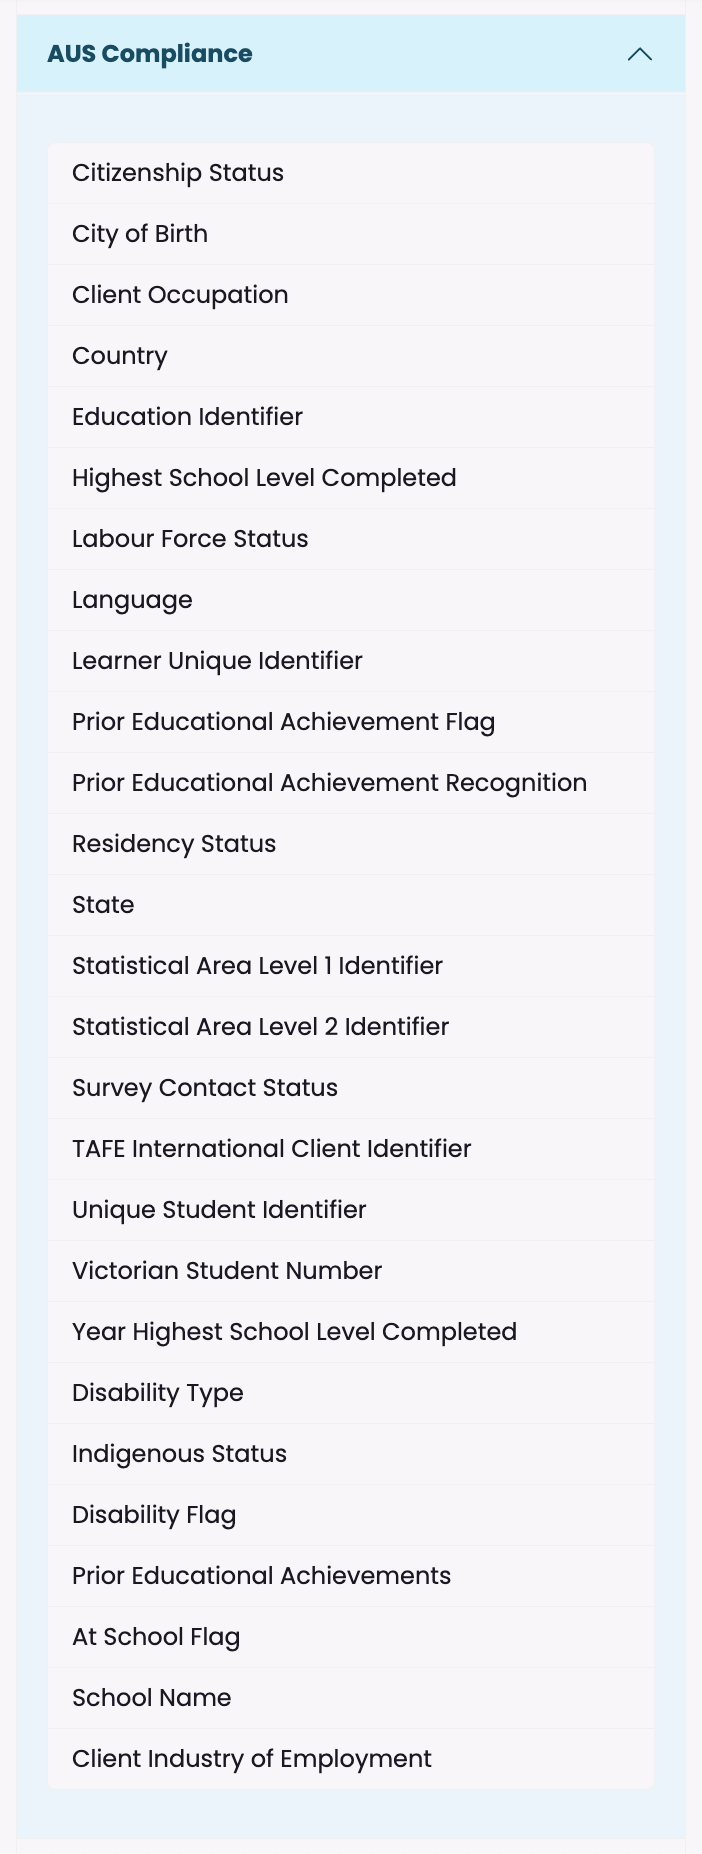 | AVETMISS relevant information such as Citizenship Status, Residency Status, Indigenous Status and more can be captured from applicants and may be applicable to organisations that abide by Australian educational reporting systems. Each of these fields can only be added once on the form, ensuring the information is not duplicated. |
| Custom Fields (Student) | Additional fields can be setup as Student Custom Fields, and if available, will appear at the bottom of the Form Fields list. Each of these fields can only be added once on the form, ensuring the information is not duplicated. |
Form Editor
When you first enter a new form, the Form Editor area will be blank. To get started:
1. Add the first PAGE by clicking and dragging from the Form Fields panel.
2. Open any form field menu, for example Form Elements, and start building the form by dragging elements into a page.
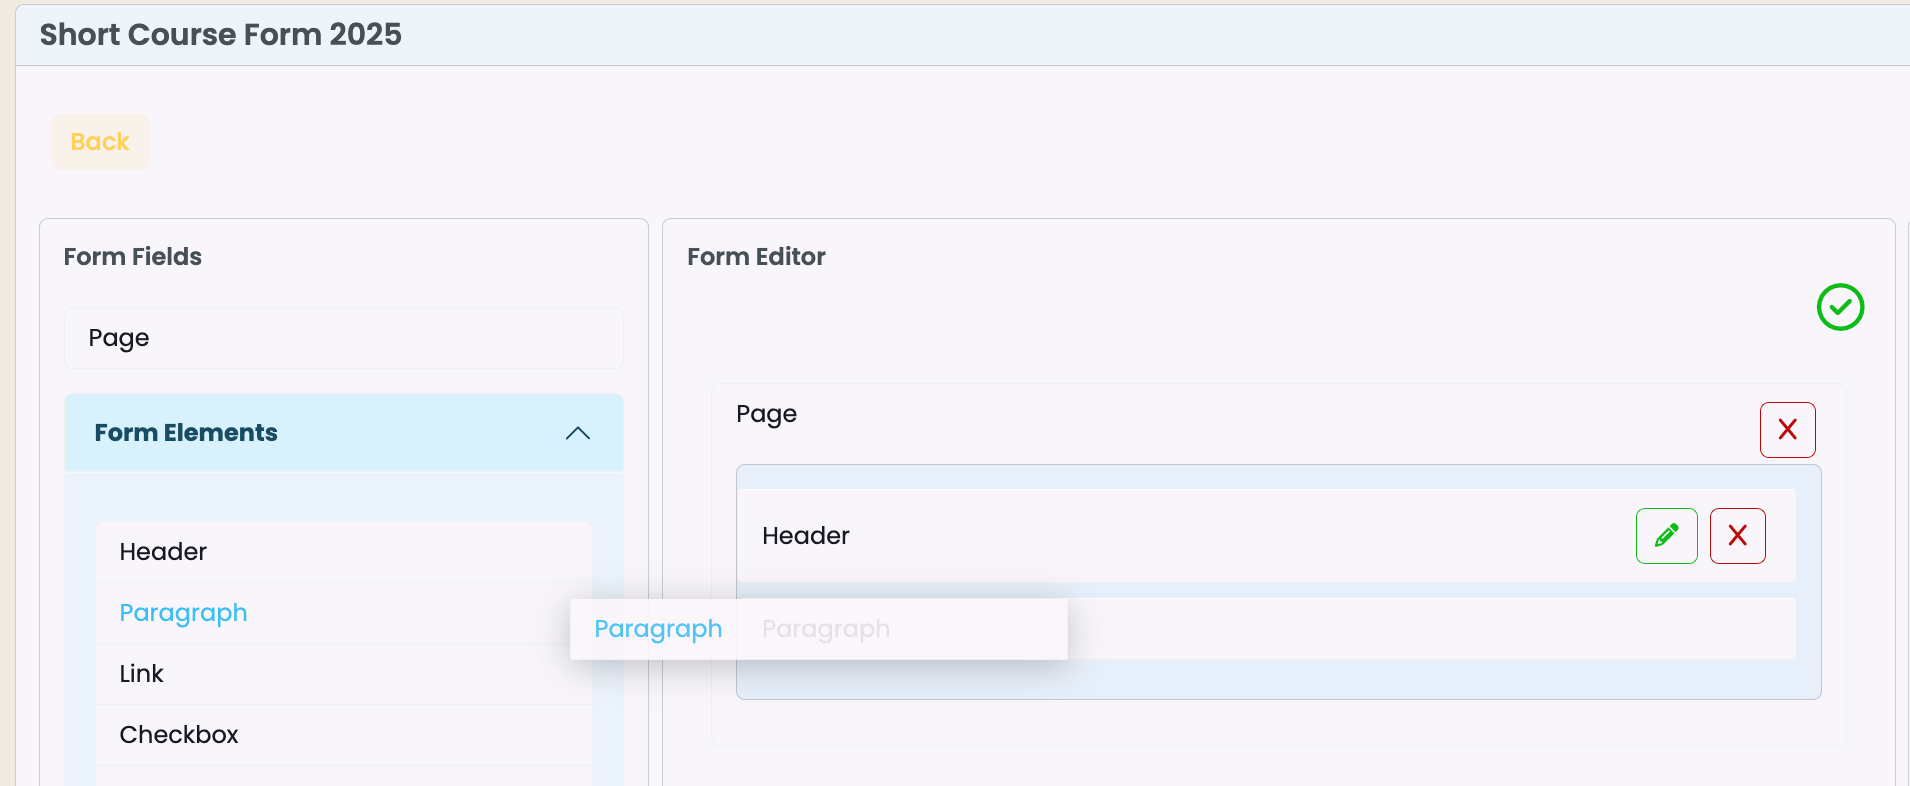
3. To add content to the elements, click on the green pencil icon and edit each element, then click Save.
4. Add as many fields as you like. To enable creation of student records and enquiry submissions in the system, make sure to include the mandatory fields for Enquiry Forms:
- (Student) First Name
- (Student) Primary Email
Form Configuration
The Form Configuration interface enables customisation of form functionality and appearance, including essential options like form name, description and activation, alongside user experience features such as progress tracking and option to save before submitting.
Default email automation is available, and can also be handled through customisable email templates.
Visual customisation options include background colour, header image and custom CSS styling for advanced design modifications.
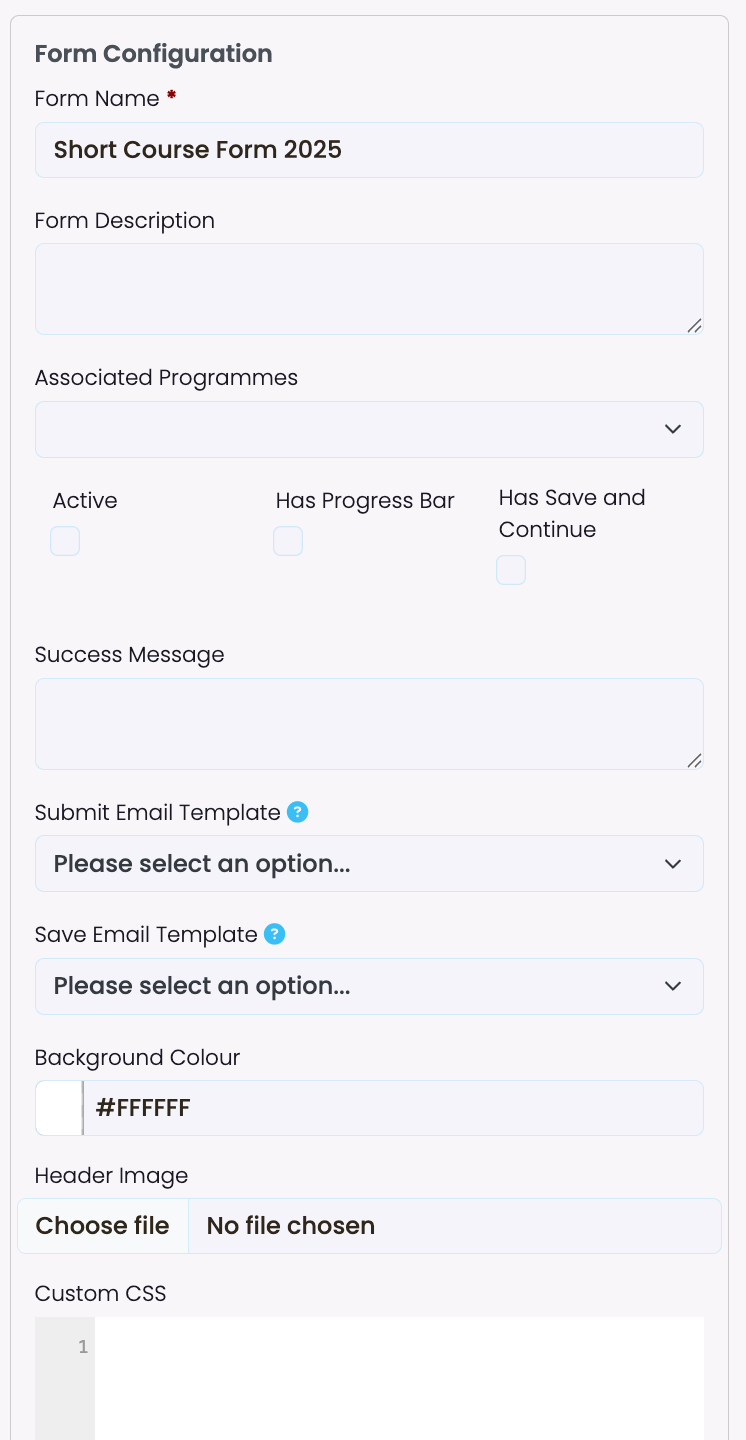
Here’s a breakdown of available settings:
- Form Name: Required – form name is also displayed to applicants.
- Form Description: Optional – form description is not displayed to applicants.
- Associated Programmes: If you require applicants to fill out “Interested in Programme” and/or “Interested in Intake“, make sure to link all relevant programmes to the form to enable the selection.
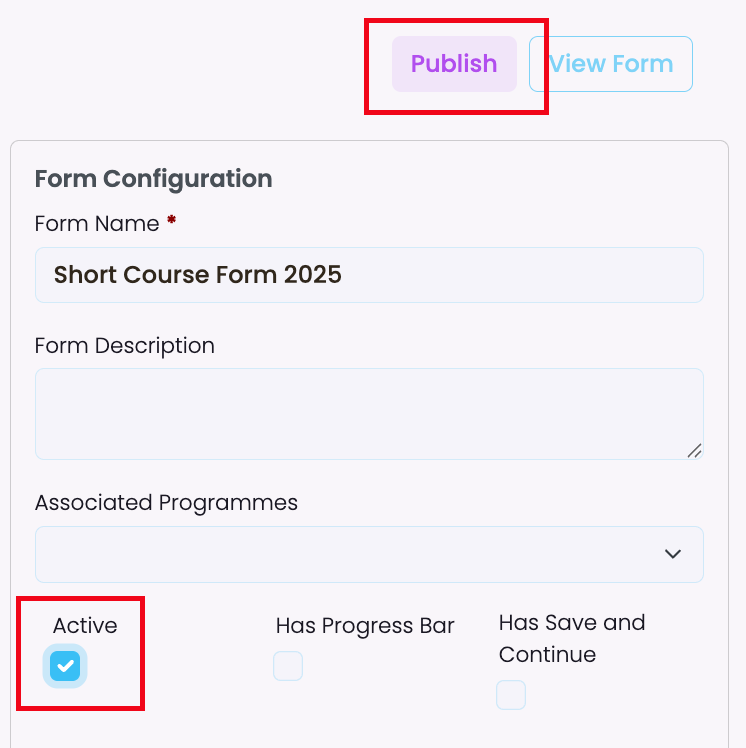
- Active (checkbox): Tick this box to activate the form and to enable “publish” and “view” options.
- Has Progress Bar (checkbox): Tick this box to display a progress bar to applicants, on forms with multiple pages.
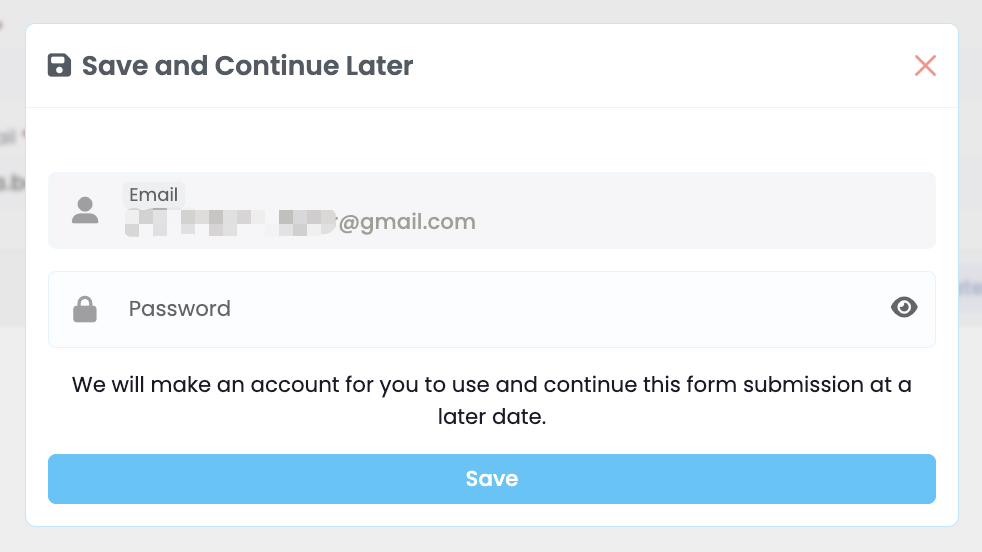
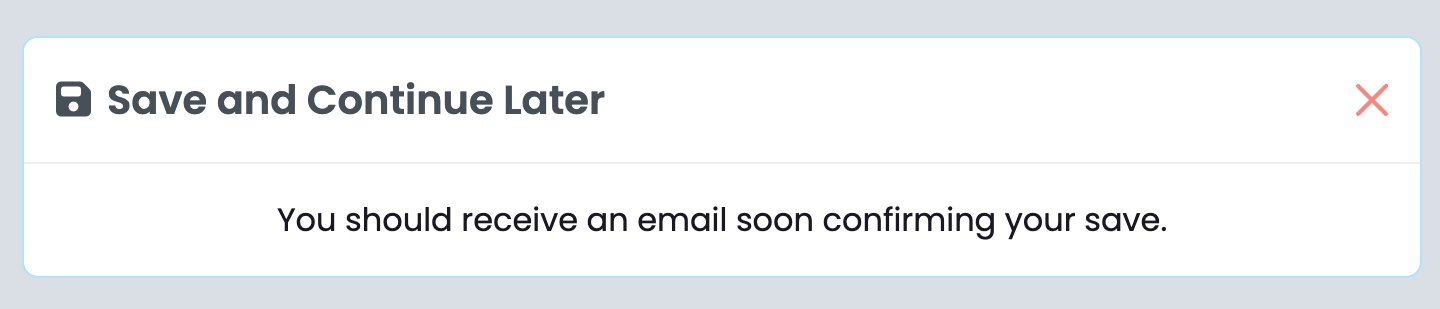
- Has Save and Continue (checkbox): Tick this box to enable applicants to save their details before a final submission is made, on forms with multiple pages.
- This option adds the button “Save and Continue Later” to the bottom of the form, after a primary email address has been filled out, if there’s multiple pages.
- Applicants are required to set a password, a user is created on the database enabling the applicant to return to the form later. At the same time, a submission with status “Pending” is created in SELMA.
- Applicants see the following instructions:
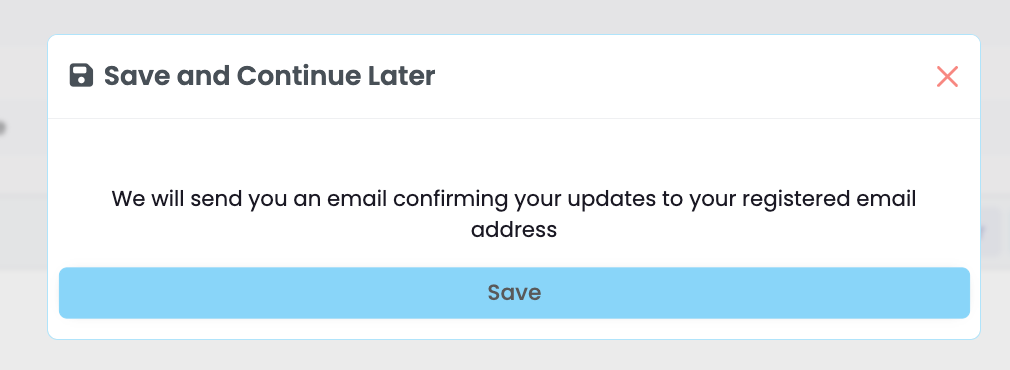
-
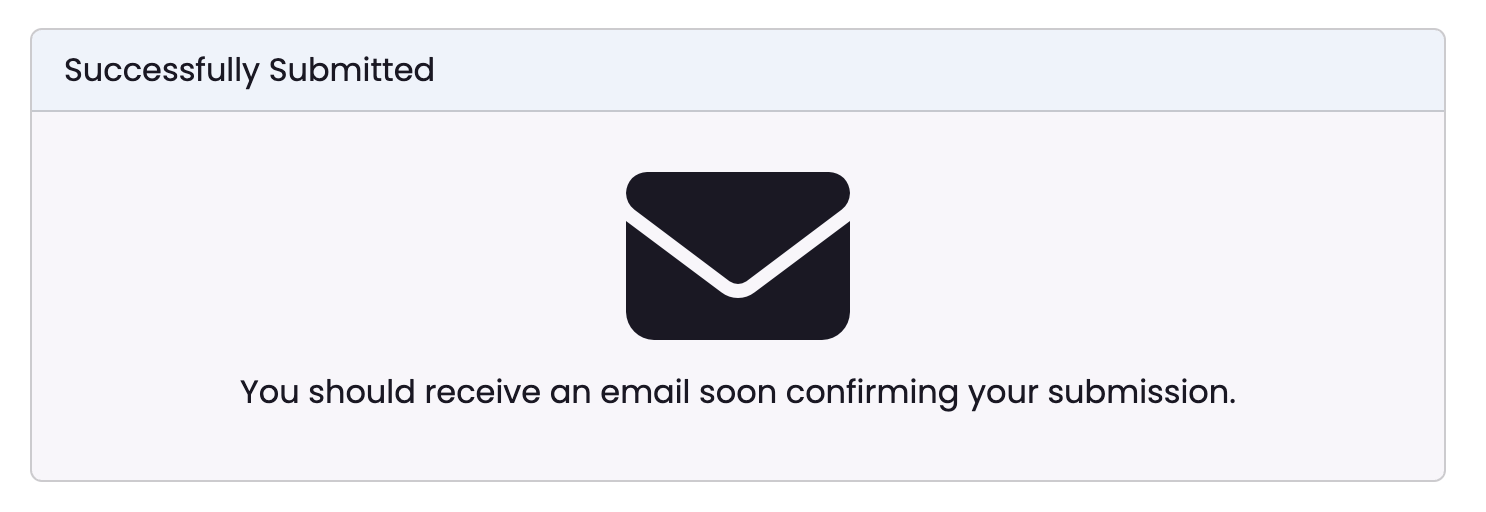
- Upon saving, applicants see the following message:
- Success Message:
- Customise a message that applicants see when a submission is made.
- Or leave blank to display the default success message as shown below (applicant view):
- Submit Email Template:
- Select a form email template that applicants receive when submission is made.
- If left blank, a default email with the following text will be sent: ” Hi [First Name], thank you for your form submission, please find attached a PDF for your reference. ” + PDF file attached containing information submitted.
- Save Email Template:
- Select a form email template that applicants receive when a submission is saved.
- If left blank, a default email with the following text will be sent: ” Hi [First Name], You can continue your submission anytime from [link]. Thanks, [School name]. “
- Background Colour: Customise the form appearance by choosing a background colour to be displayed around the form.
- Header Image: Upload a logo or appropriate image to be displayed above the form. Prefer using .png files with transparent background.
- Custom CSS: For advanced design modifications.
Activating and Publishing the Form
Select “Active” in the form configuration and click “Publish” to save your changes.
If you edit the form after it has been activated, also make sure to click “Publish” to apply any new changes.
If your enquiry form does not contain First Name and Primary Email Address, you may see an error message when trying to publish:

Viewing Form
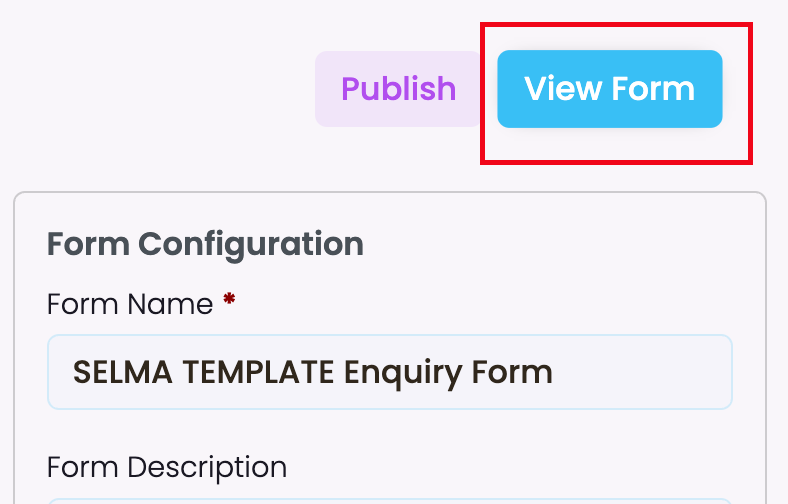
In order to view the form, make sure it has been marked “Active” and the latest changes have been published.
View form via editing screen:
View form via Form Manager:

Testing the Form
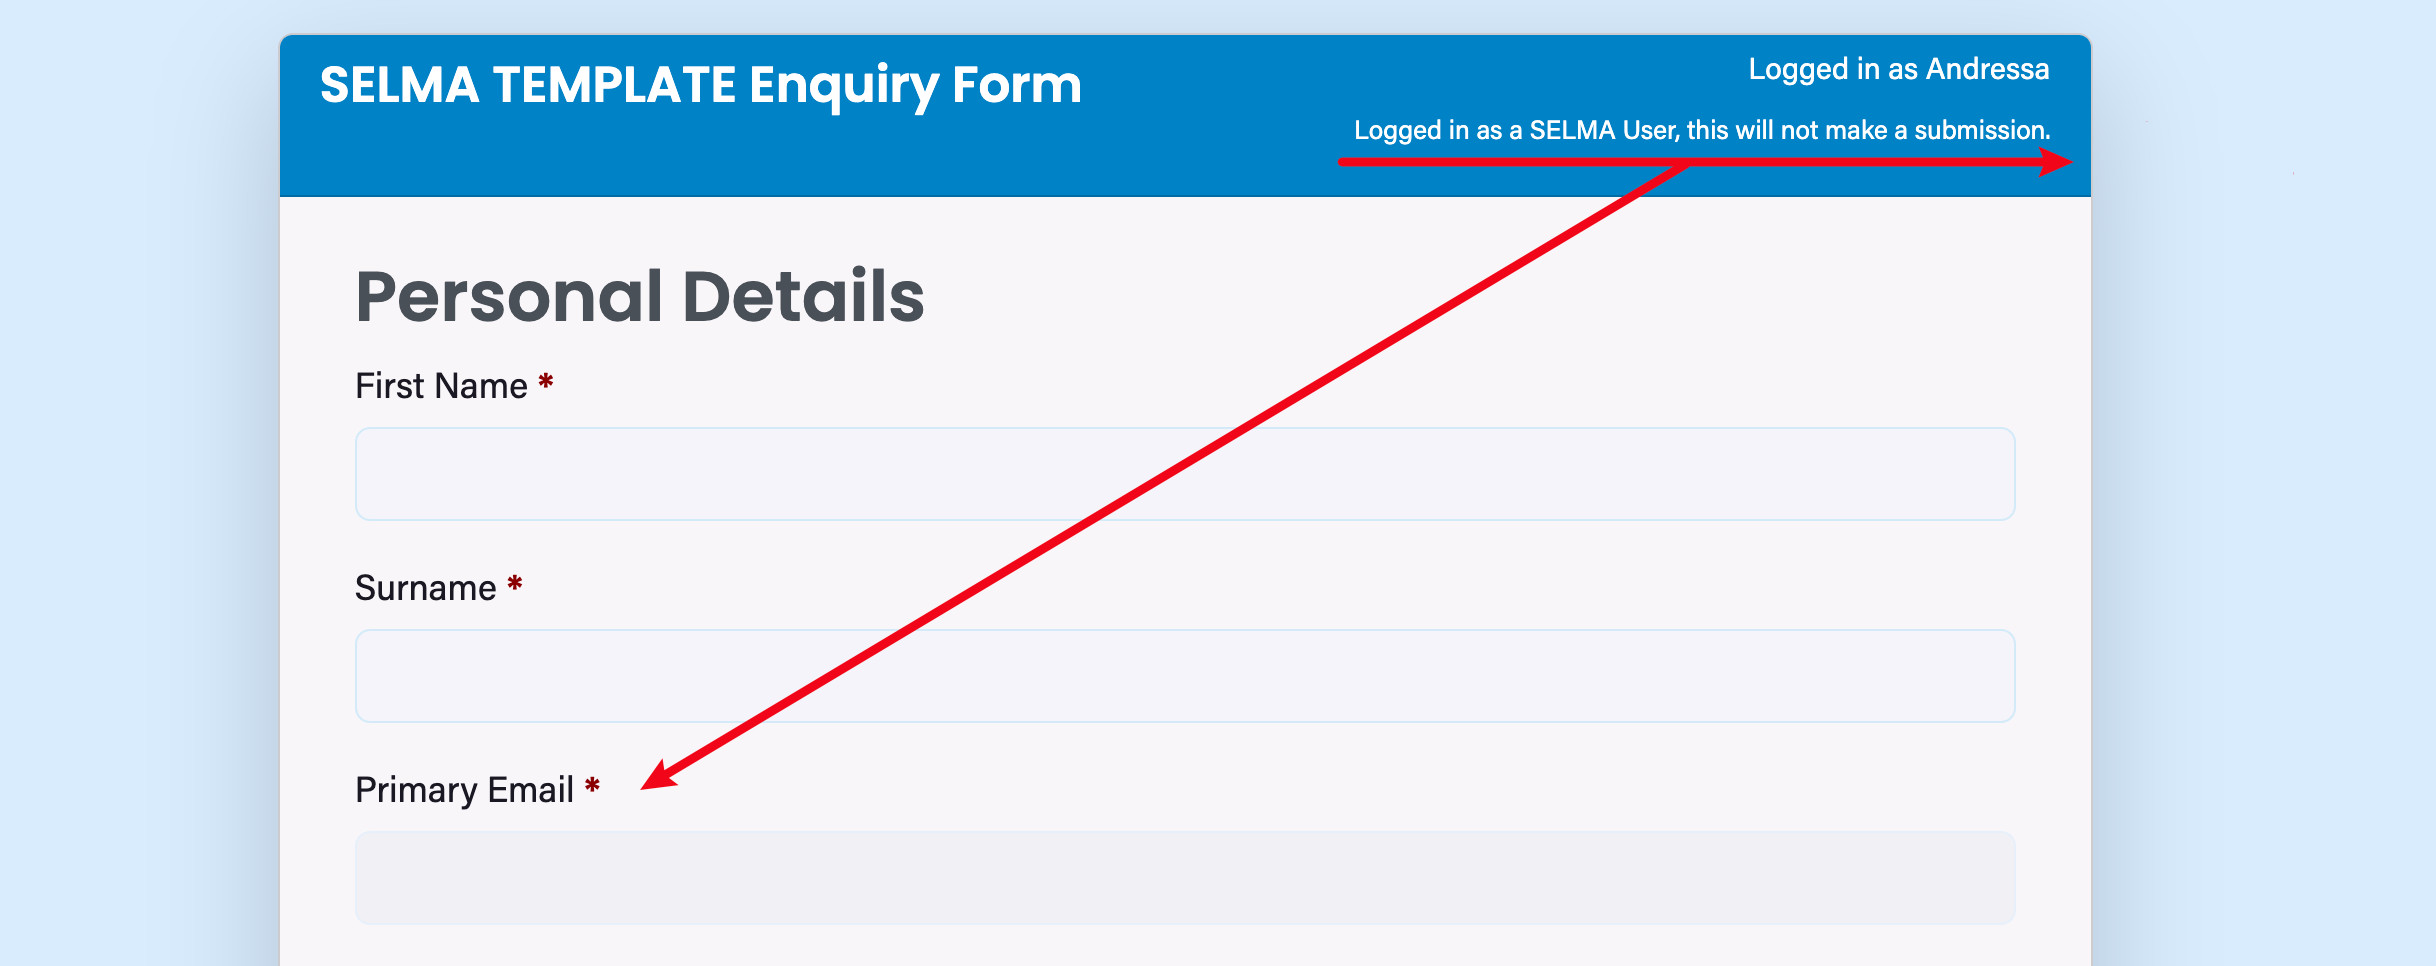
If you wish to send a test submission, please make sure you are logged out of your SELMA account OR open in incognito window – otherwise the form will pick up your account details and prevent the creation of a student.
Receiving Form Submissions
Please refer to this article: Receive Form Submissions
.