The NSI and NSN
The NSI is New Zealand’s national database of student identity data, and the way in which a unique identifier, termed the National Student Number (NSN), is created and allocated to students across all education levels.
The NSI allows education providers registered with the Ministry of Education (MoE) to:
- Search for and modify information about their students
- Request for duplicate student records to be merged
- Issue a NSN to any student without one
In this Section:
NSI Integration with SELMA
NSI Integration Pre-Requisites
Once your education provider is registered with the MoE, you will have an individual user account created. However, you must use that account to request for a Machine Account from them, which enables NSI integration with SELMA.
Notes:
- Please inform the MoE that you wish to integrate the NSI with your Student Management System (SMS).
- Ensure you request to enable Batch and REST interfaces, especially if you are creating a new Machine Account.
Configuring NSI Integration with SELMA
Navigate from Settings > Integrations to select the NSI Integration (Figure 1.).
Then, use your Machine Account Username and Password to save as Configuration information, and test that the NSI integration works (Figure 2.).
Figure 1. Click the cog icon (red) to access Settings, and navigate to “Integrations”
Select “NSI” by clicking the corresponding “Configure” button (orange).

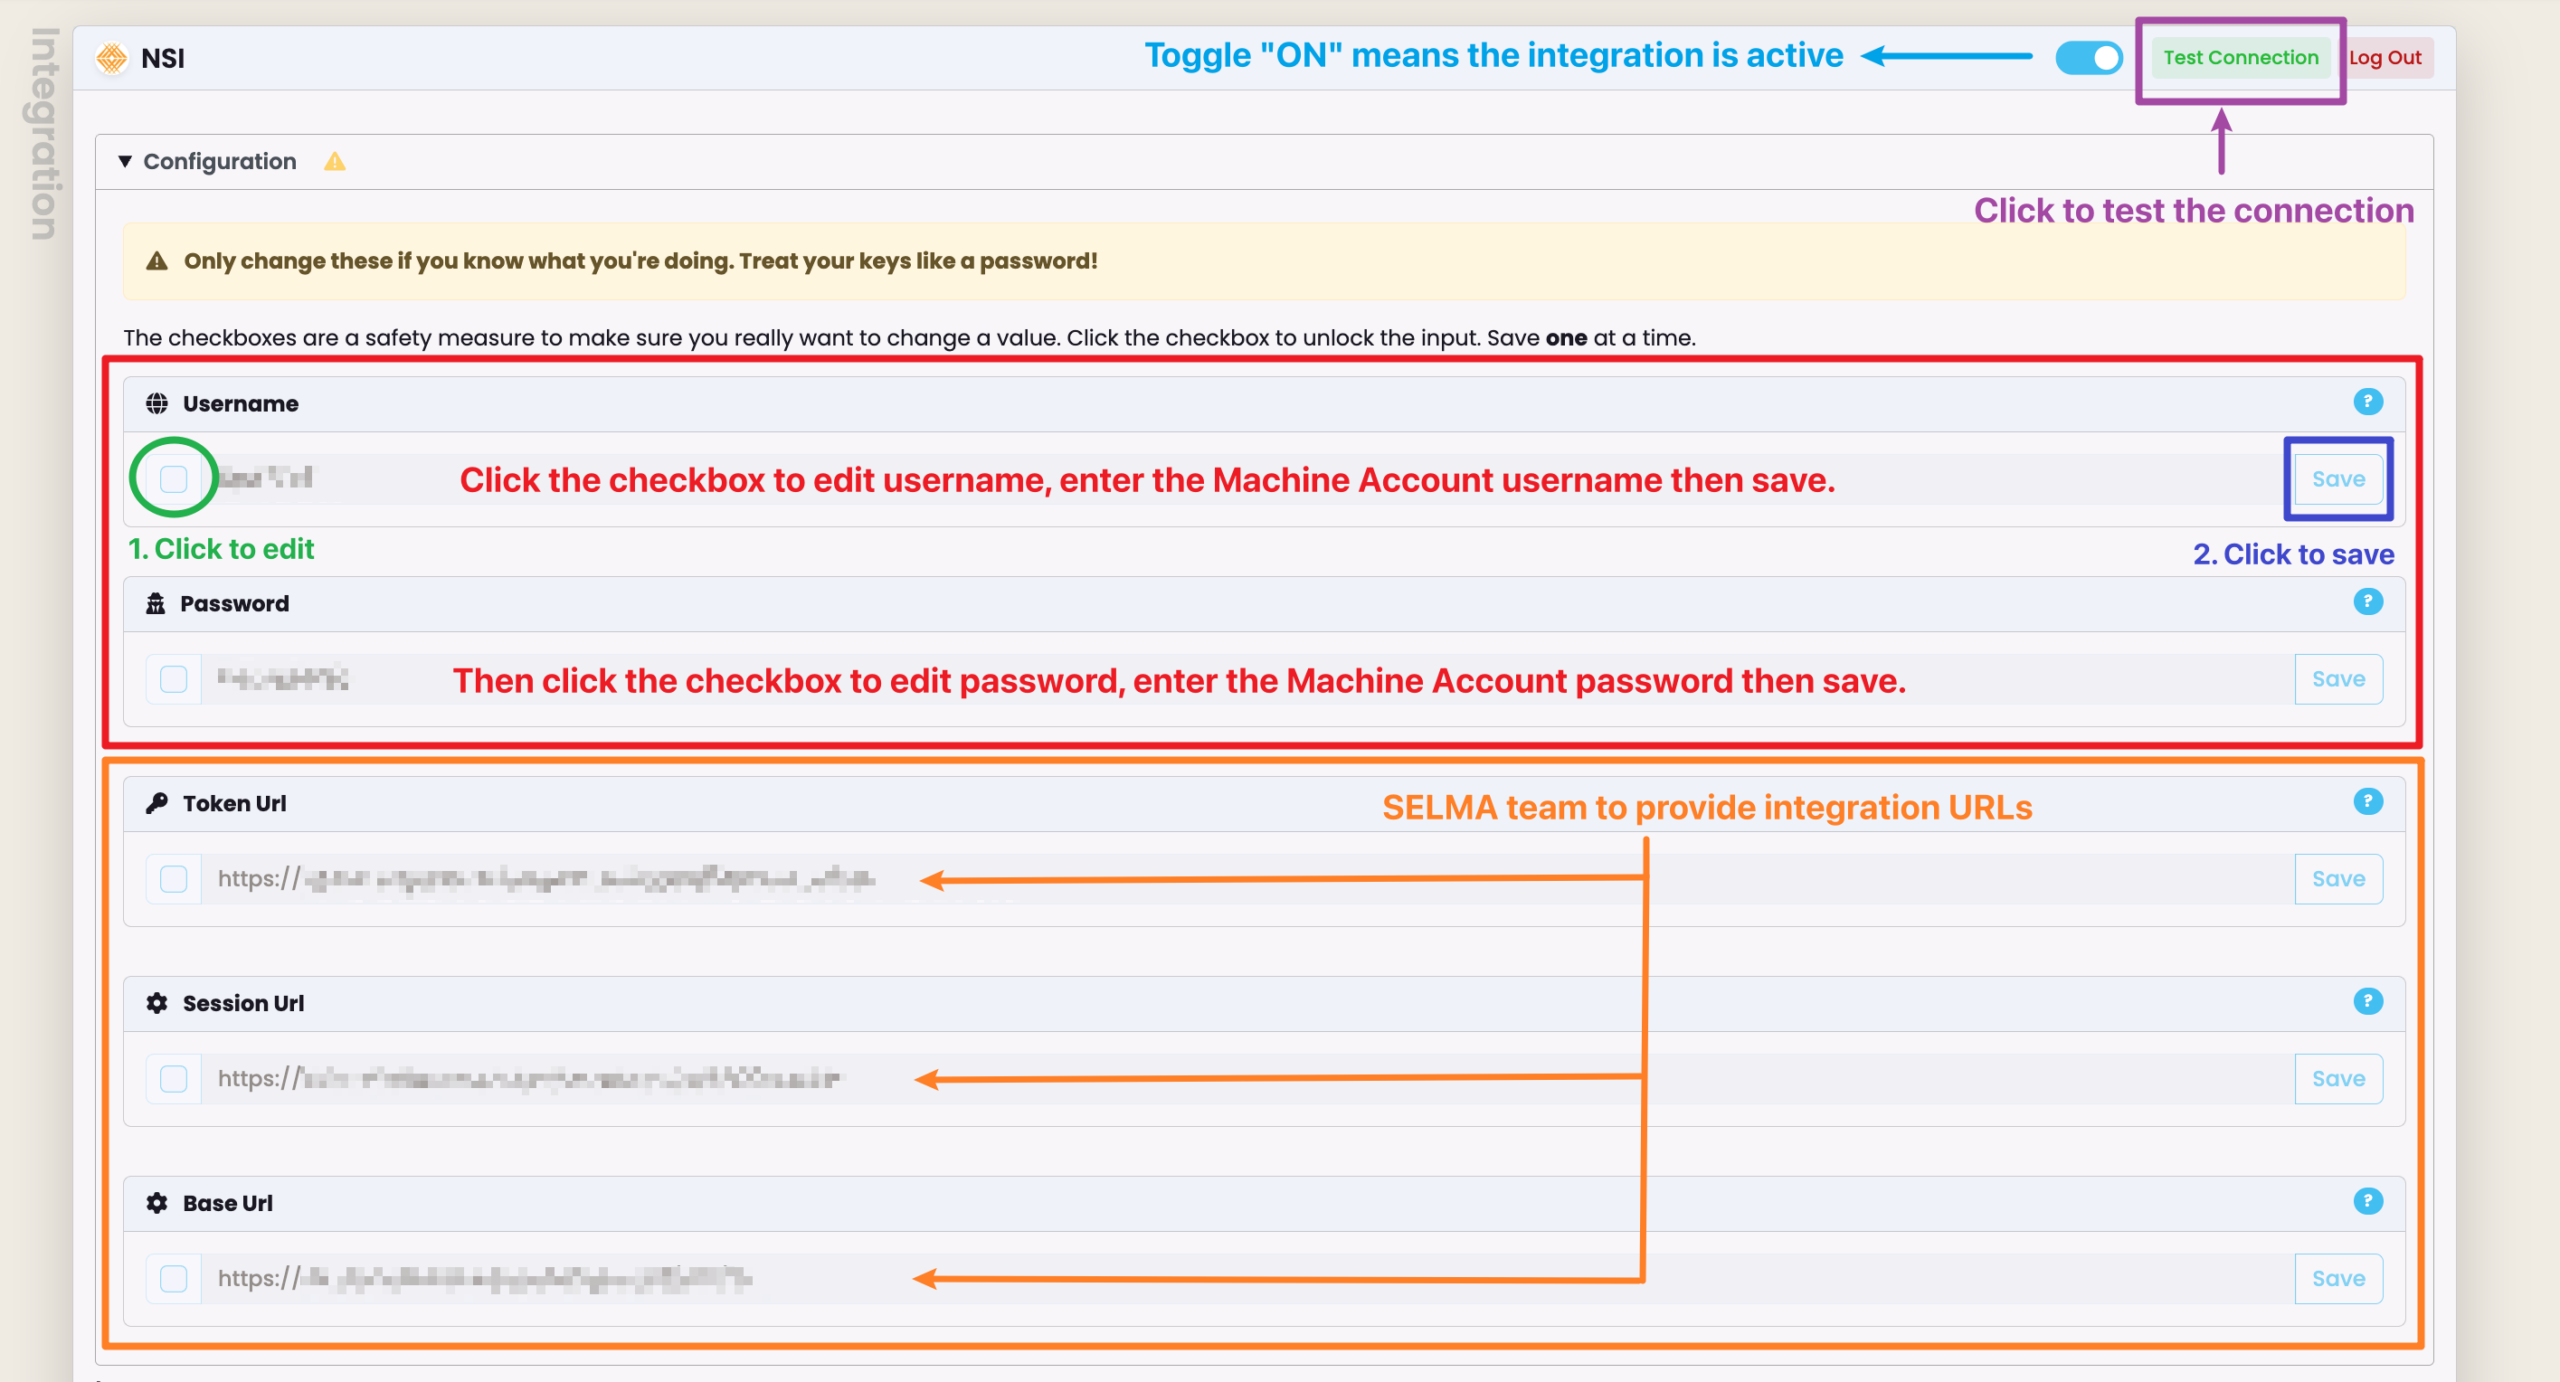
Figure 2. Enter your Machine Account credentials and test the connection
Open the drop-down list by clicking the heading “Configuration” and enter your Machine Account’s Username and Password (red). To “Save” the Username/Password, select the tick-box under each corresponding heading (green), then click the “Save” button for each field (blue). Ensure the toggle is “ON” (blue), and click the toggle if not. You can then confirm that the Integration works by clicking “Test Connection” (purple).
Using the NSI Integration
There are two ways to use the NSI Integration in SELMA:
- When creating a new Student Record, where you can “Search NSI” (Figure 3.).
- When editing the Student Profile Overview Panel, where you can edit the NSN field (Figure 4.).
Both methods will open the same pop-up, which allows you to search by a Student’s NSN or other criteria, such as their names and Date of Birth (DoB) (Figure 5.).
NOTE: There is an option to create a new Student in the NSI (Figure 5.). Please select the related button ONLY if you are sure they don’t exist in the NSI already. Creating duplicate data may result in the MoE revoking your provider’s access to the NSI.
Figure 3. You can populate fields in a new Student record, by using the “Search NSI” function
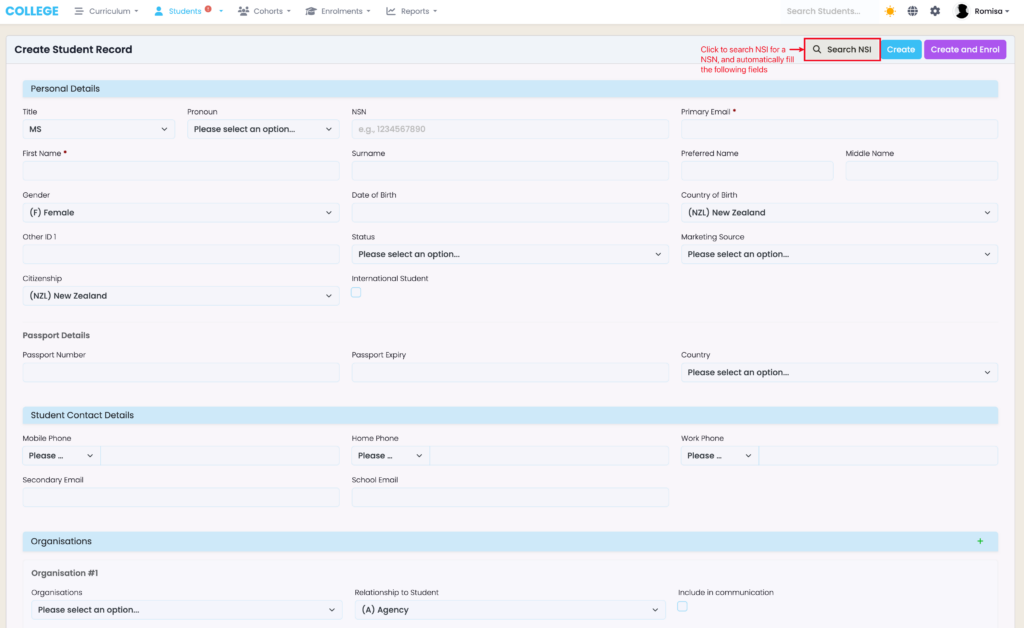
Figure 4. If NSN Integration is enabled, click the eye icon to edit an existing NSN using the NSI (orange)
If NSN Integration isn’t enabled, click the same area to free-type a known NSN.
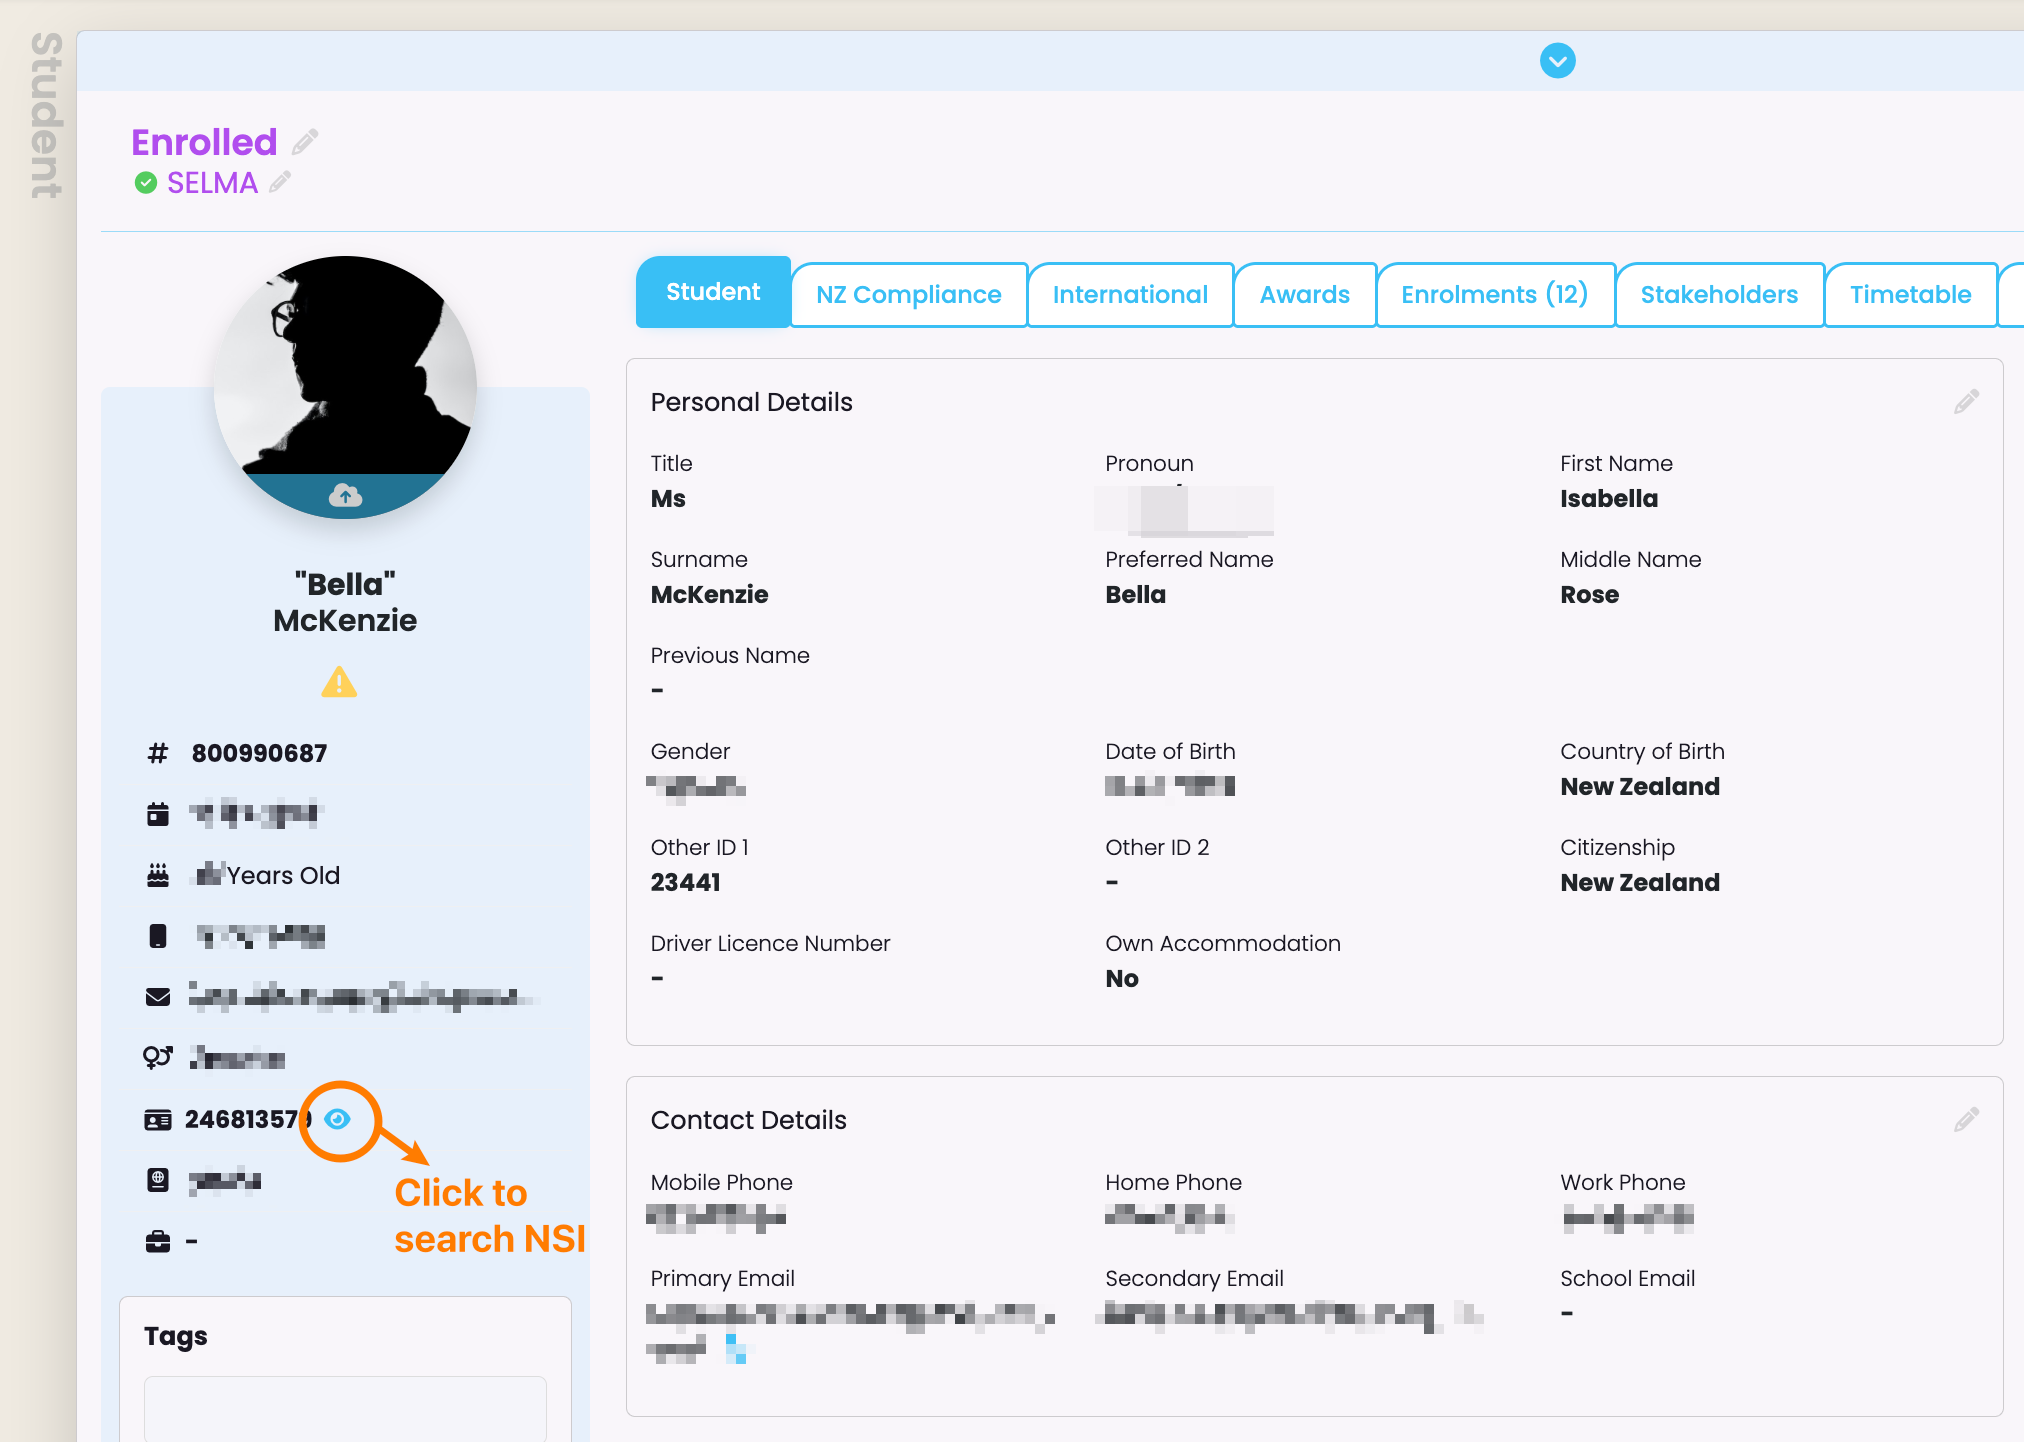
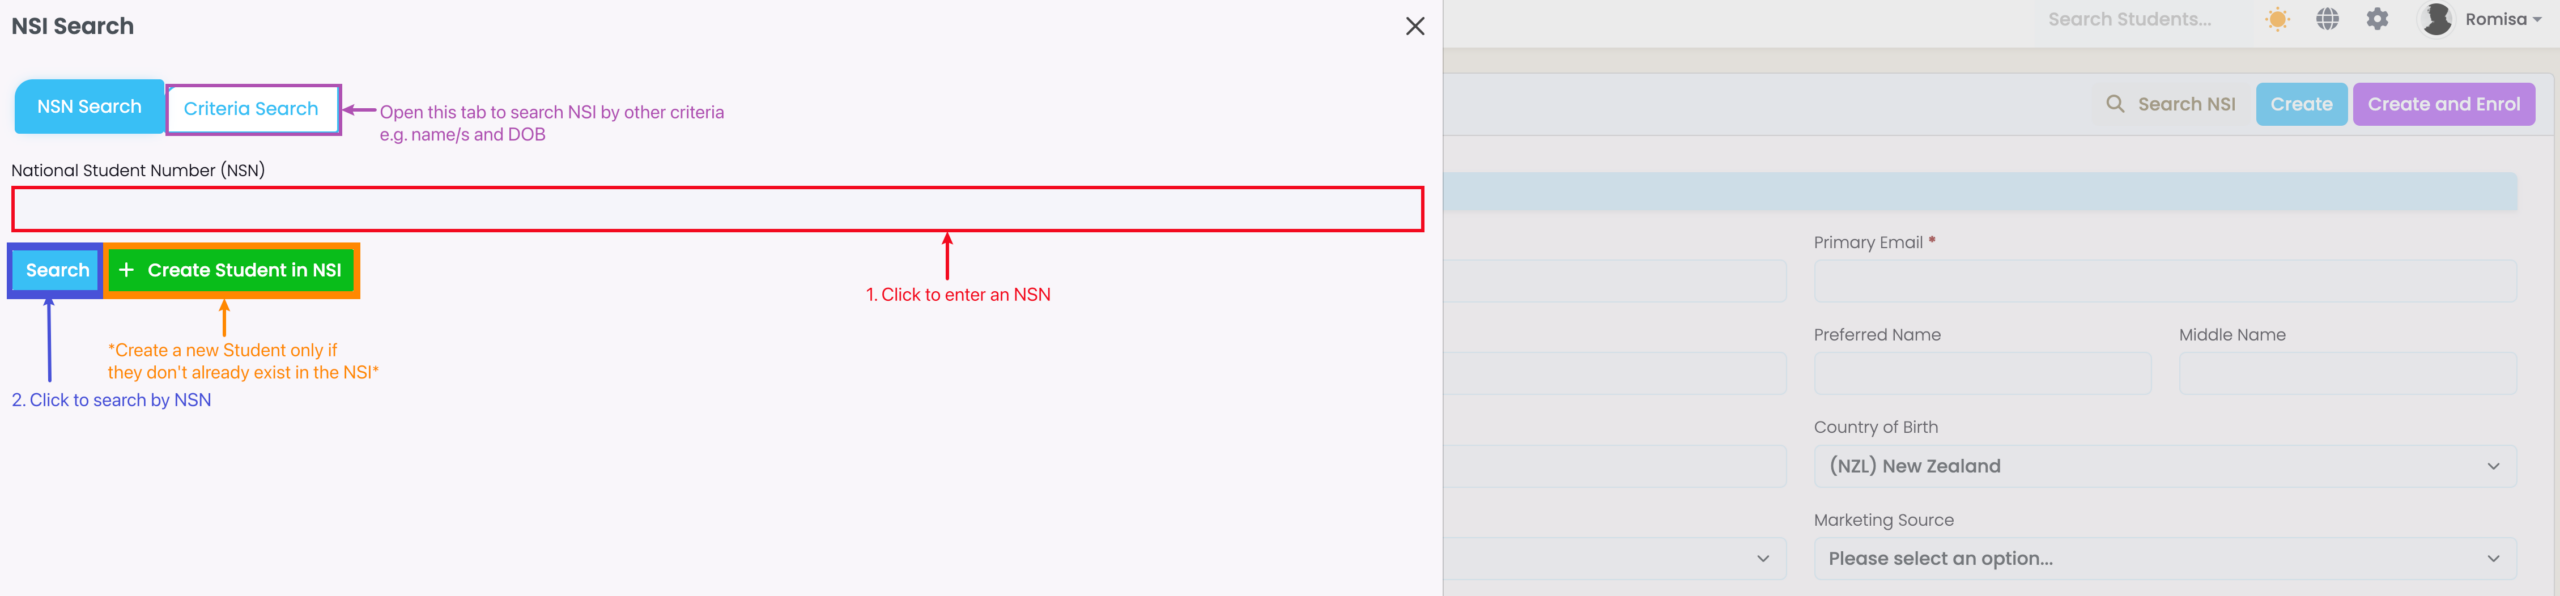
Figure 5. The NSI Search tab allows you to enter an NSN to find a Student
Click the “Search” button to process results. You can also create a new NSN by clicking the “Create Student in NSI” button.
Updating NSI or SELMA Student Information
When doing an NSI Search you will be able to click to view a Student Record (Figure 6.). Otherwise editing an existing NSN takes you to the Student Record, directly.
In the Student Record, you will see Student information from the NSI and SELMA, separately. You can choose to update each side by clicking either “Edit NSI” or “Edit SELMA” (Figure 7.).
Remember to click the appropriate “Update” button when you have finished editing (Figure 8.).
Note: Click the green “Select this NSN” button to populate a field/s, depending on the path you have taken. E.g. To populate fields when creating a new Student, or to edit an existing Student’s NSN on their Student Profile (Figure 7.).
Figure 6. Click “View Details” to open the NSI student details
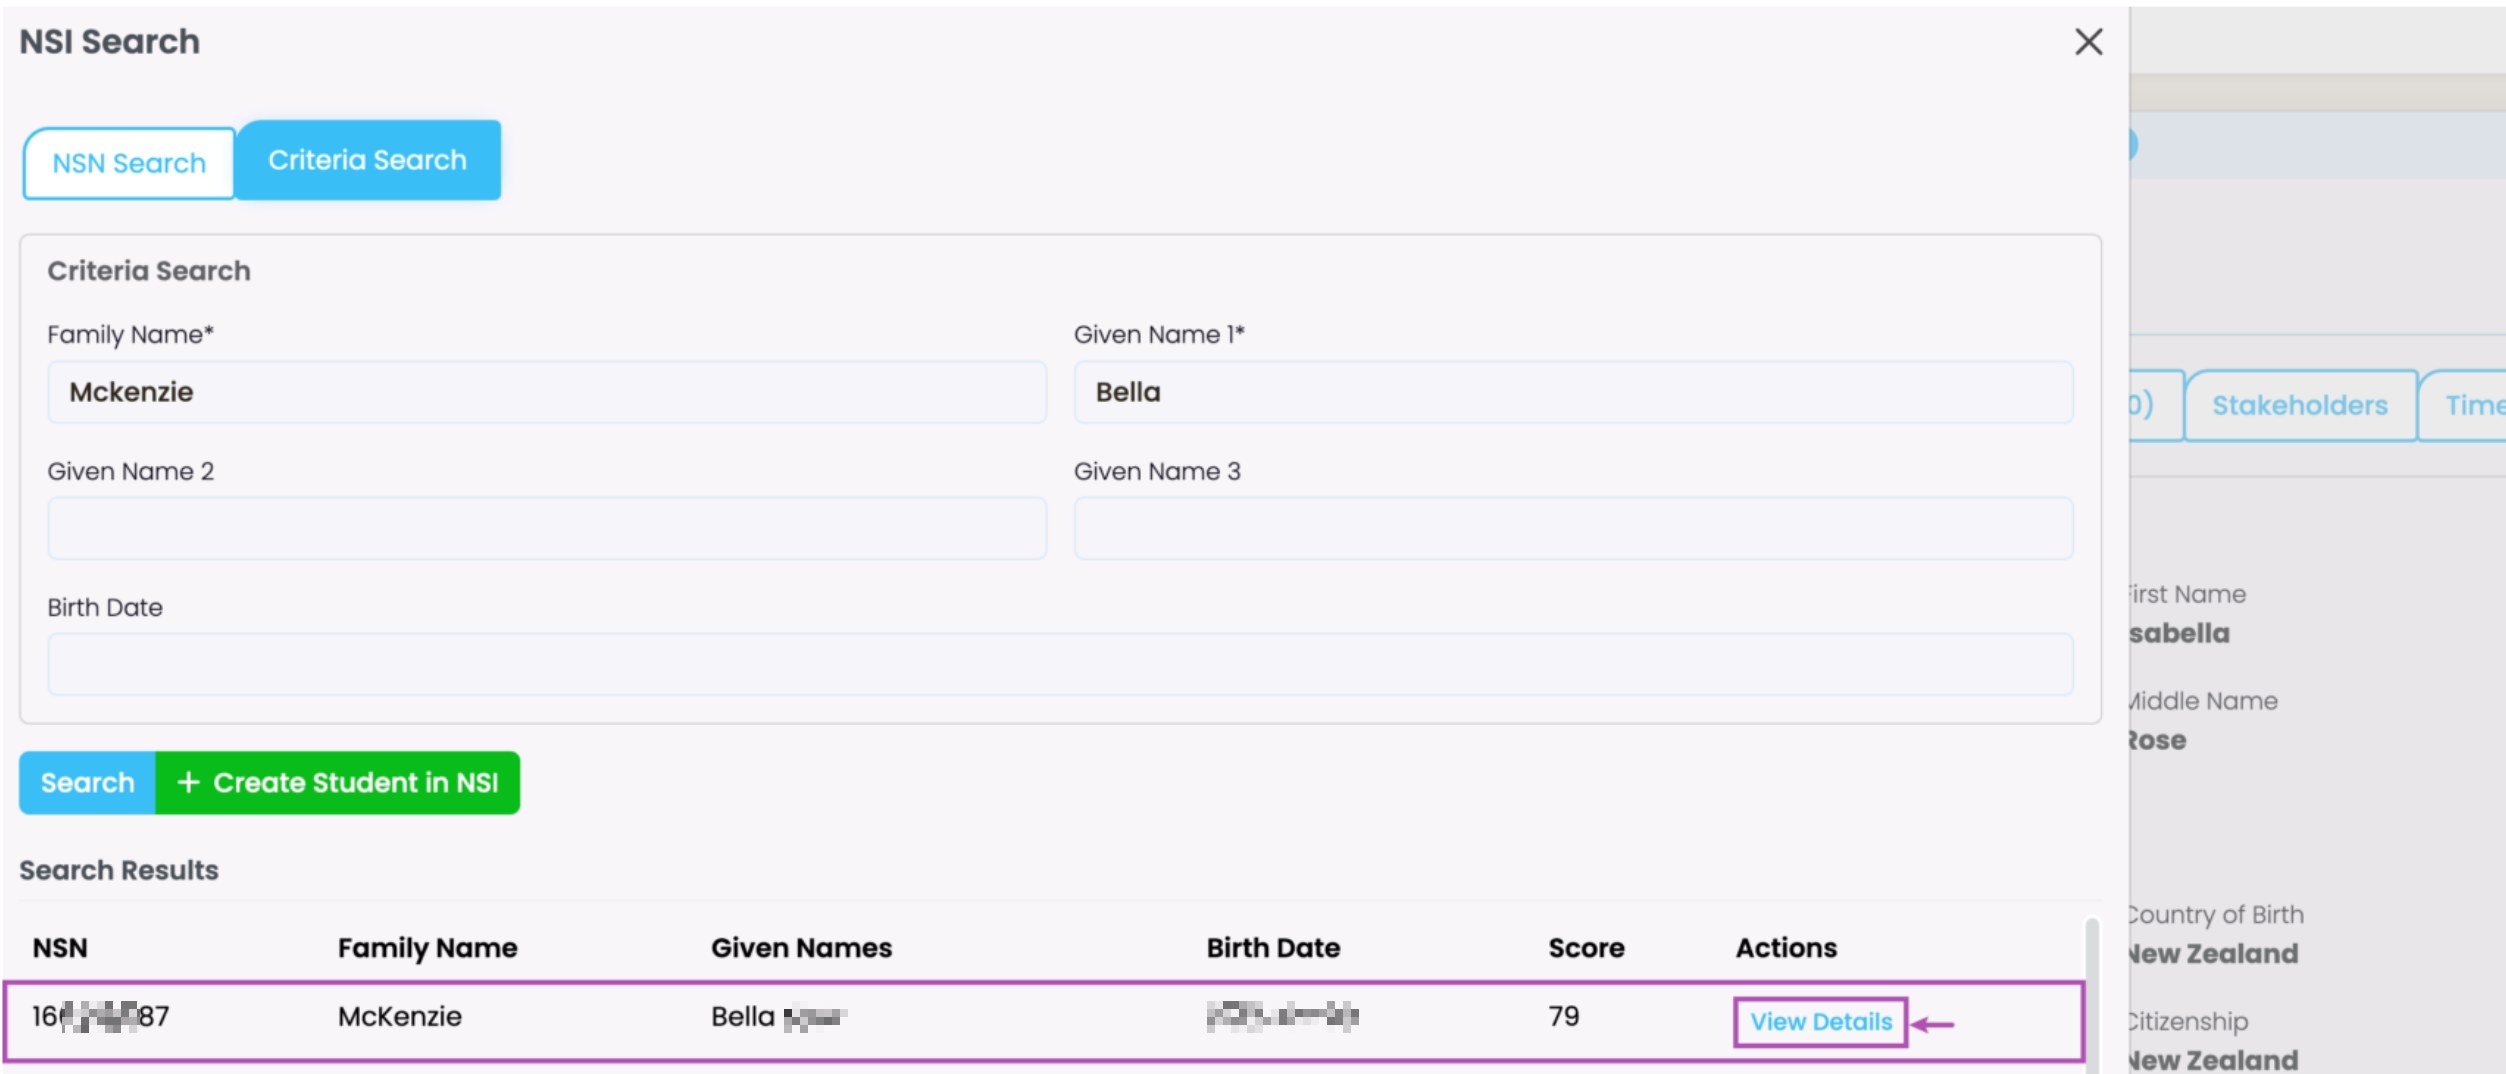
Figure 7. Two columns in the Student Record separate the NSI Student information (orange) from the SELMA Student information (burgundy)
Click “Edit NSI” (red) or “Edit SELMA” (grey), to update the appropriate fields. The green button “Select this NSN” populates fields with that NSN.
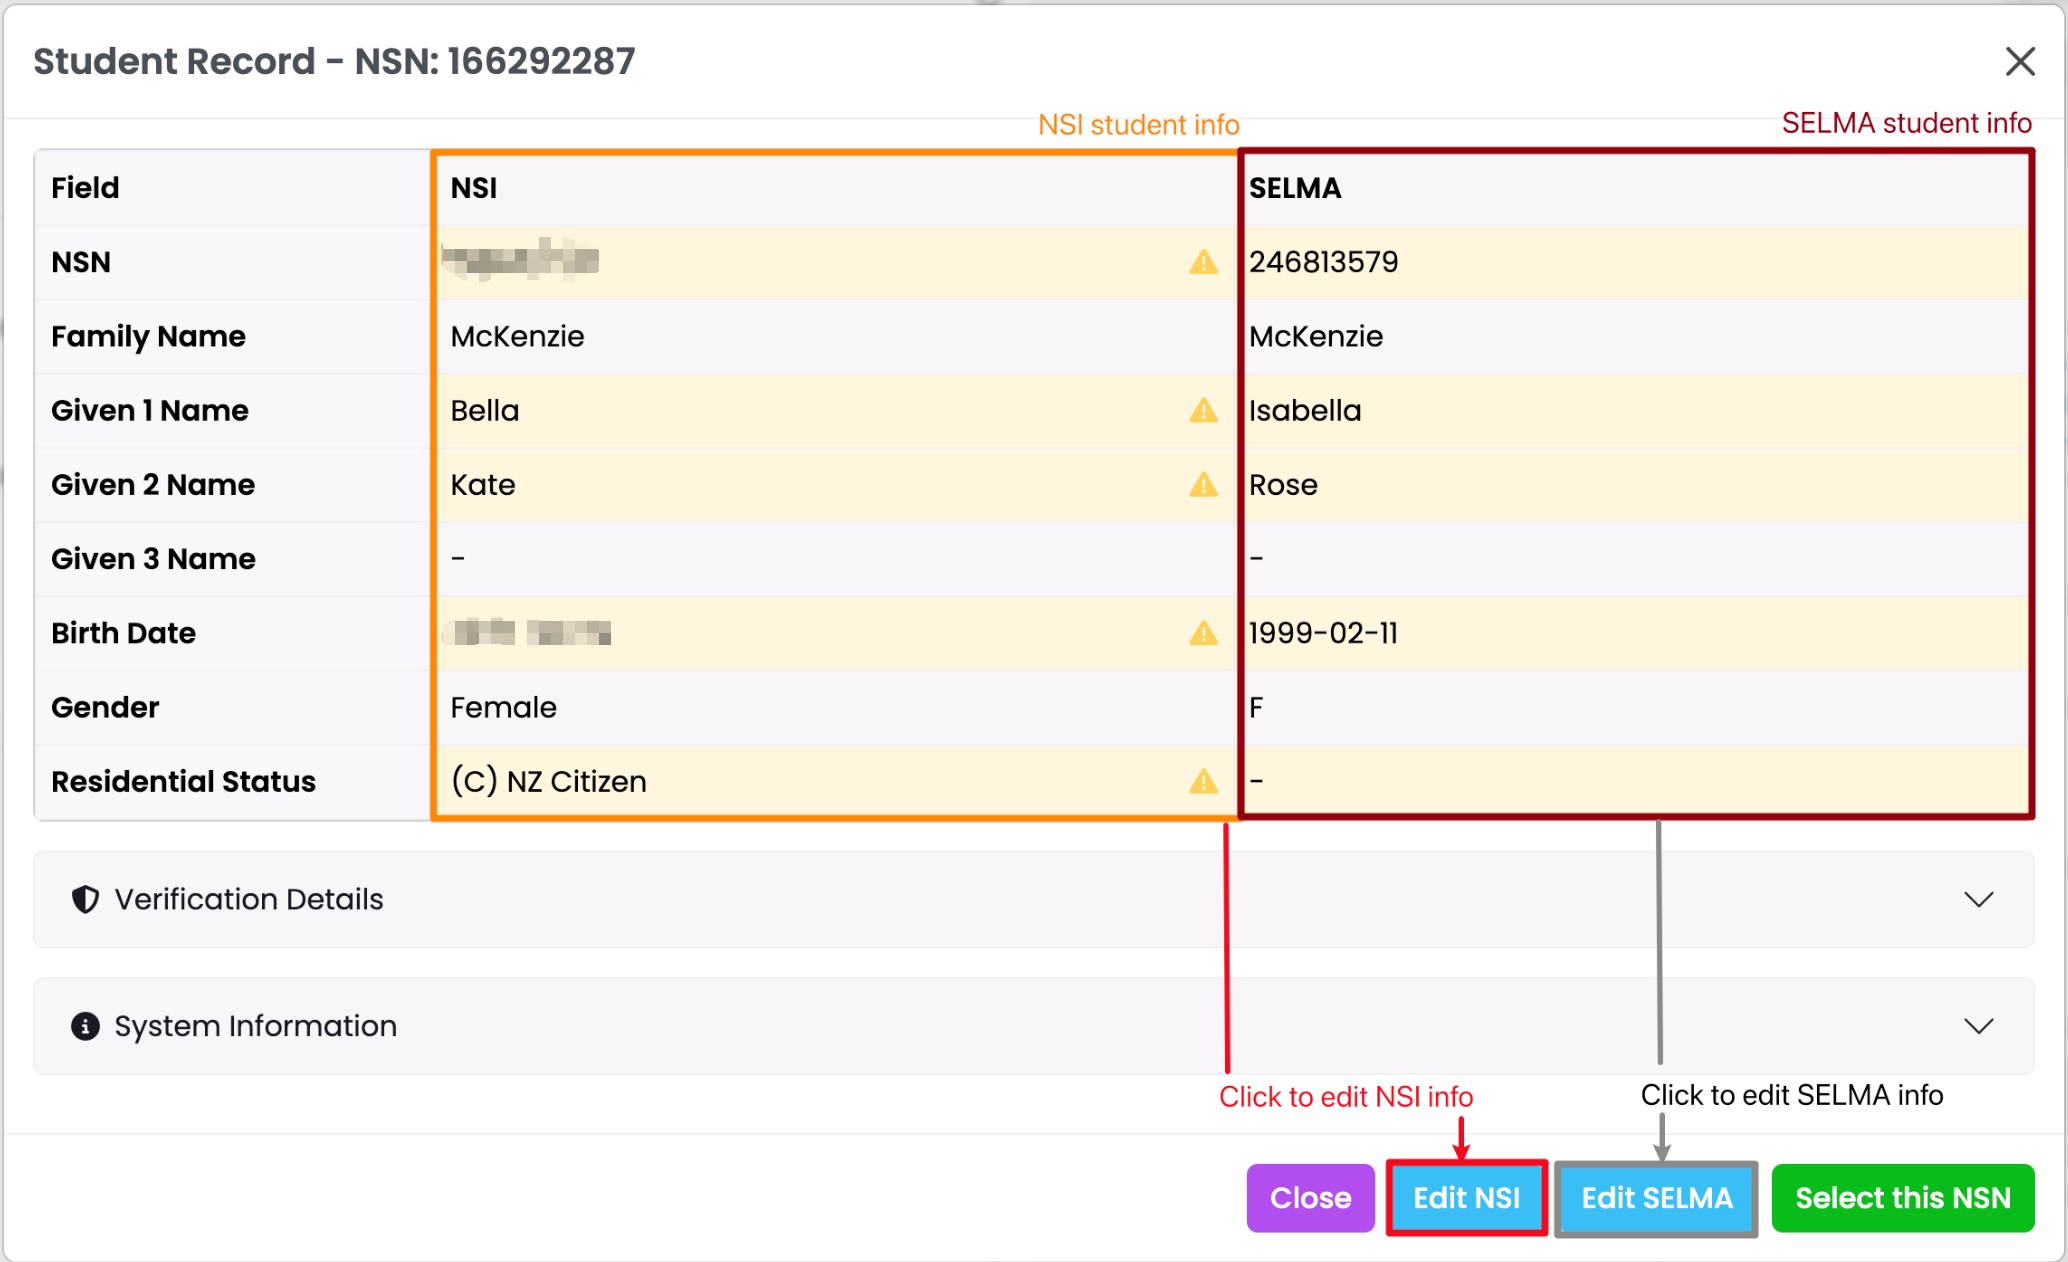
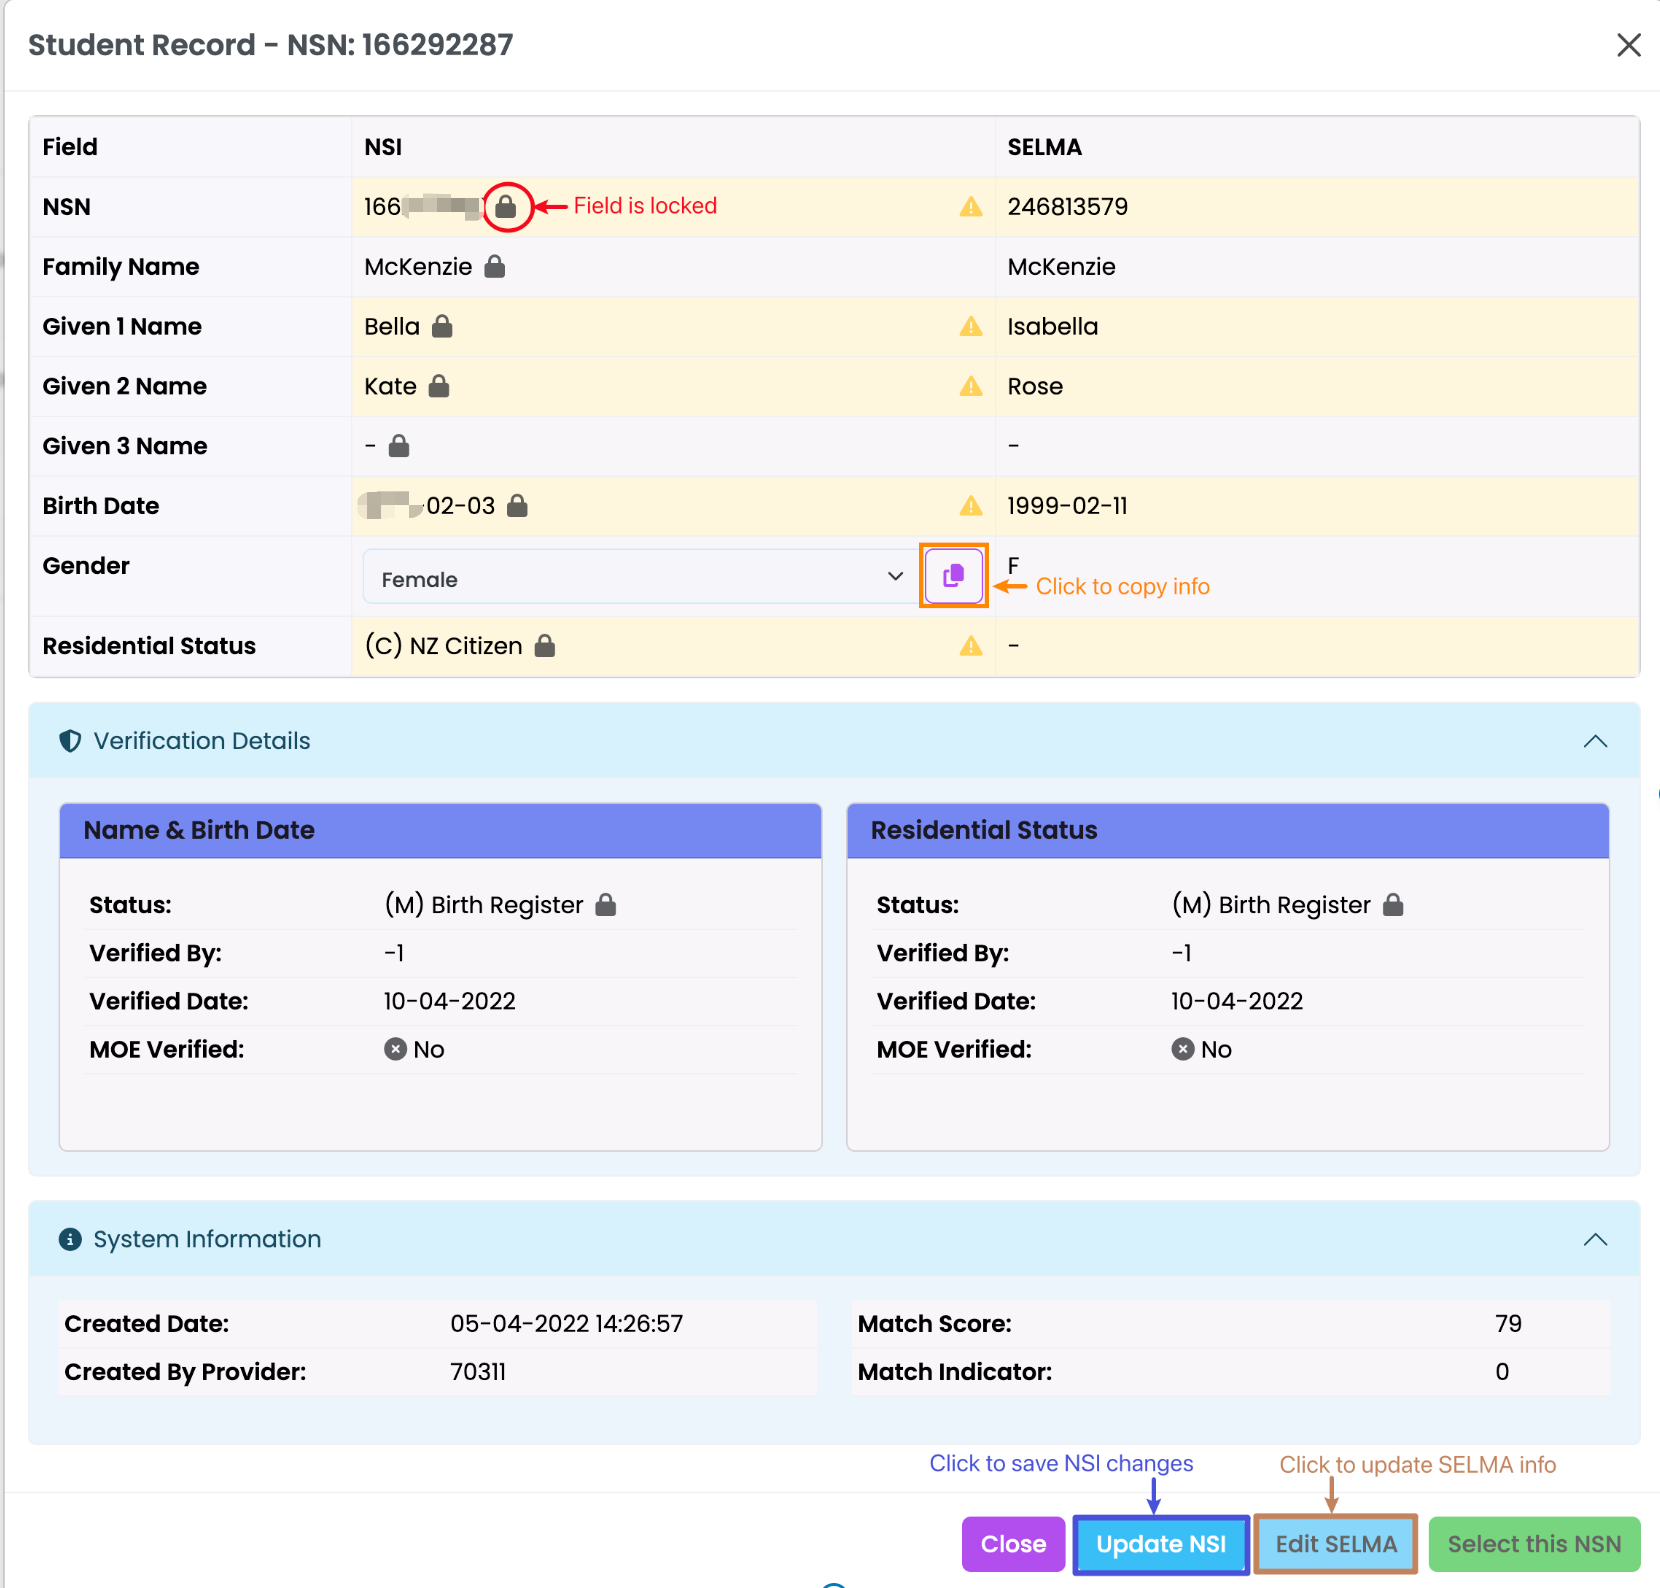
Figure 8. This screen shows the screen when editing the NSI column of information
The padlock icon (red) shows that a field is NSI-verified and locked, and the clipboard icon (orange) allows you to copy field data to paste between columns. Remember to save your changes by clicking “Update NSI” (blue) or “Update SELMA”, if editing the SELMA column of information.