Enabling the Microsoft 365 integration in SELMA allows you to use your organisation’s Microsoft mailbox(es) to send emails directly from SELMA. Emails sent within SELMA are also stored in the mailbox’s Sent folder.
Note: Individuals with administrator access to your Microsoft tenancy should follow the steps below.
In this Section:
Setting up the integration involves four stages:
- Stage 1 — Register an Application in Microsoft Entra
- Stage 2 — Add a Client Secret
- Stage 3 — Redirect URL
- Stage 4 — Configure API Permissions
- Stage 5 — Connect the Integration in SELMA
- Set-Up Complete
- Two-Way Communications
Stage 1 — Register an Application in Microsoft Entra
Figure 1i. Navigate to Homepage > App Registrations
Go to the Microsoft Entra portal homepage: https://entra.microsoft.com/#home
Then, add a new registration.
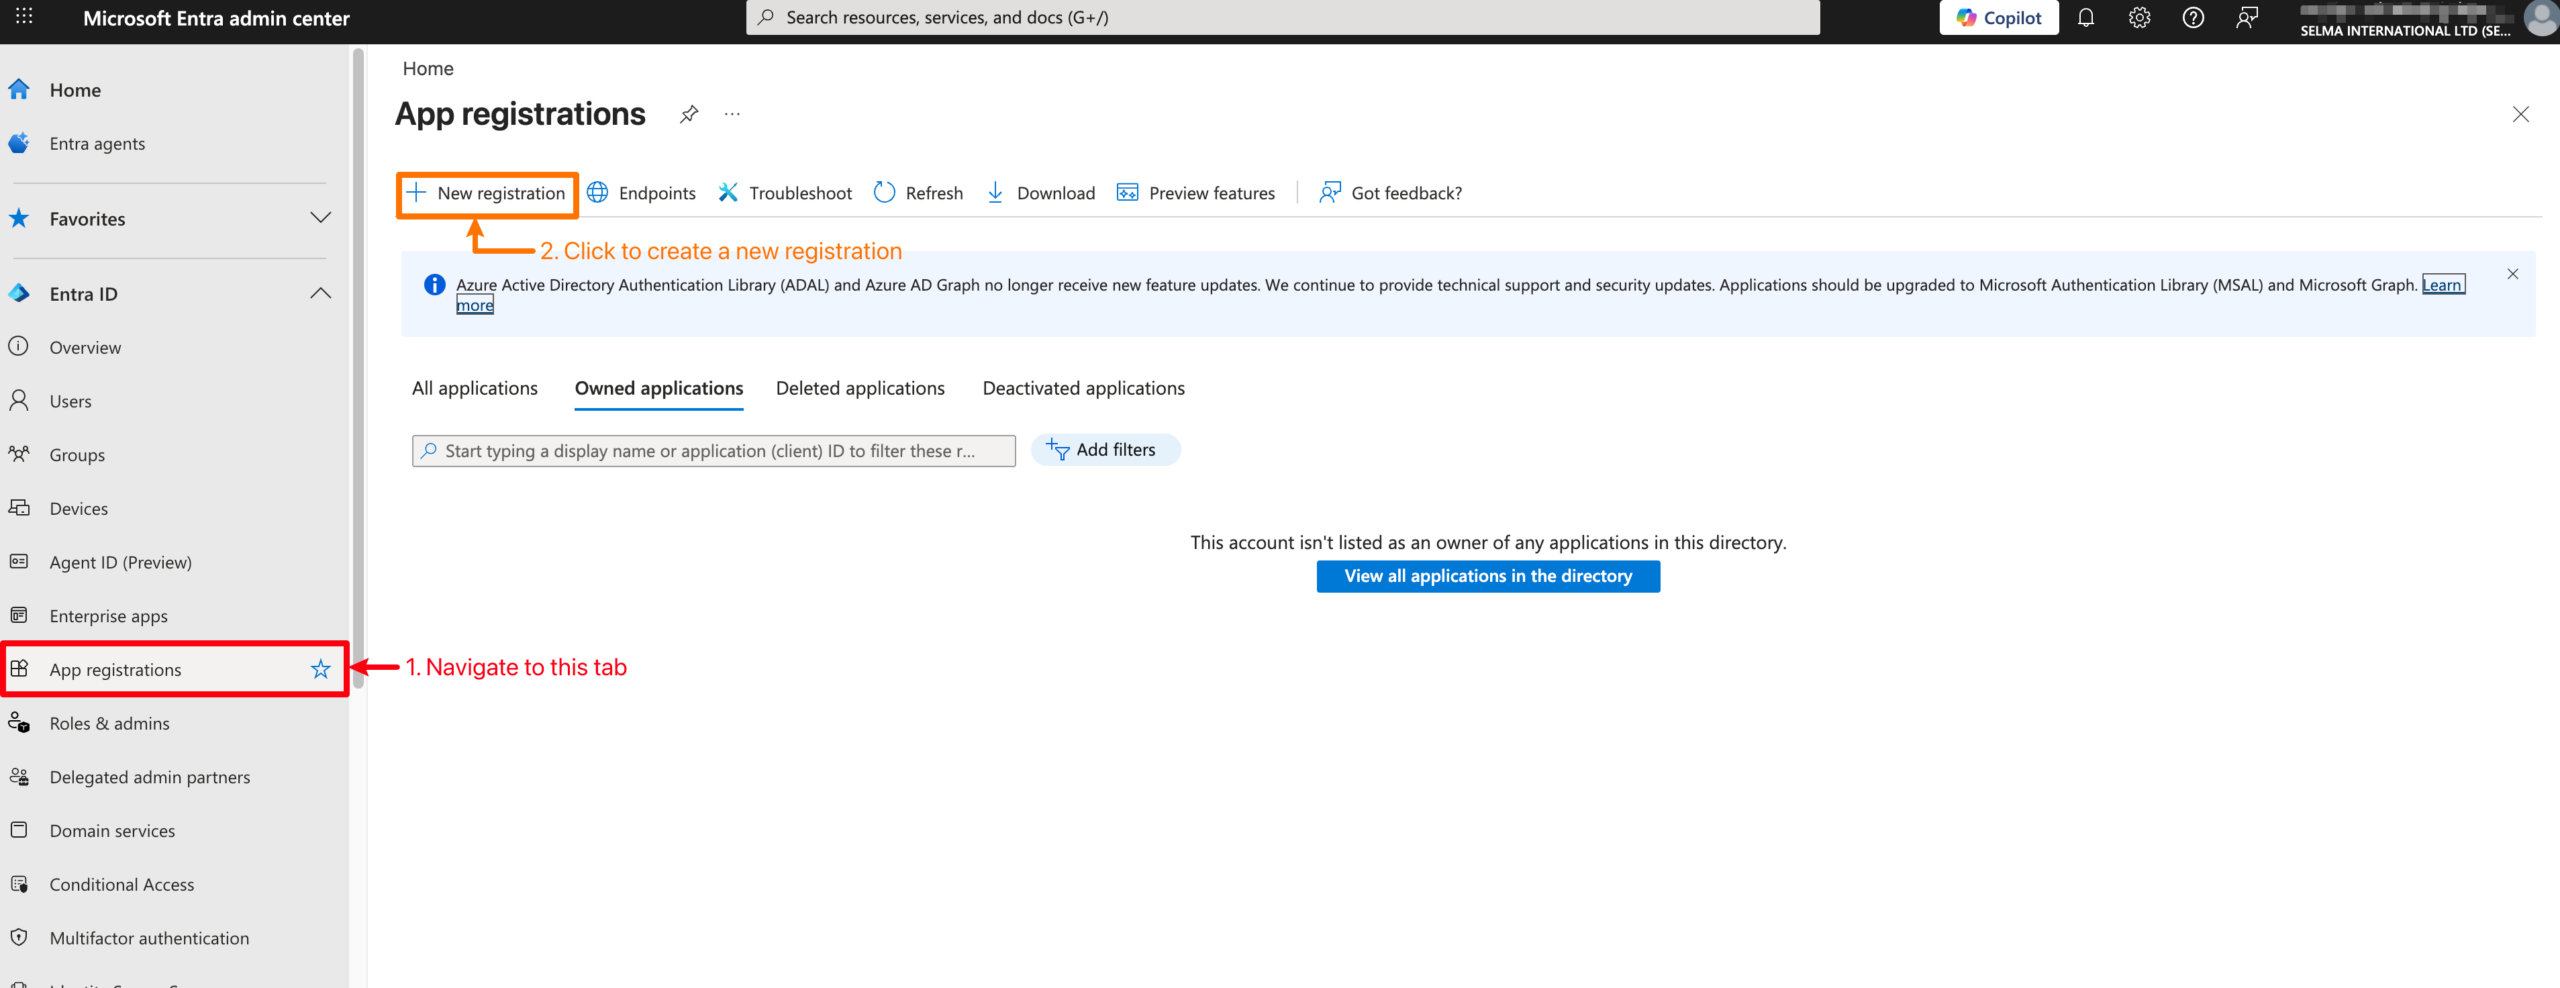
Figure 1ii. Add a Name and Link an Account Type
Name the application something identifiable, such as “SELMA M365 Integration”. All remaining fields can be left at their default values. Click Register.
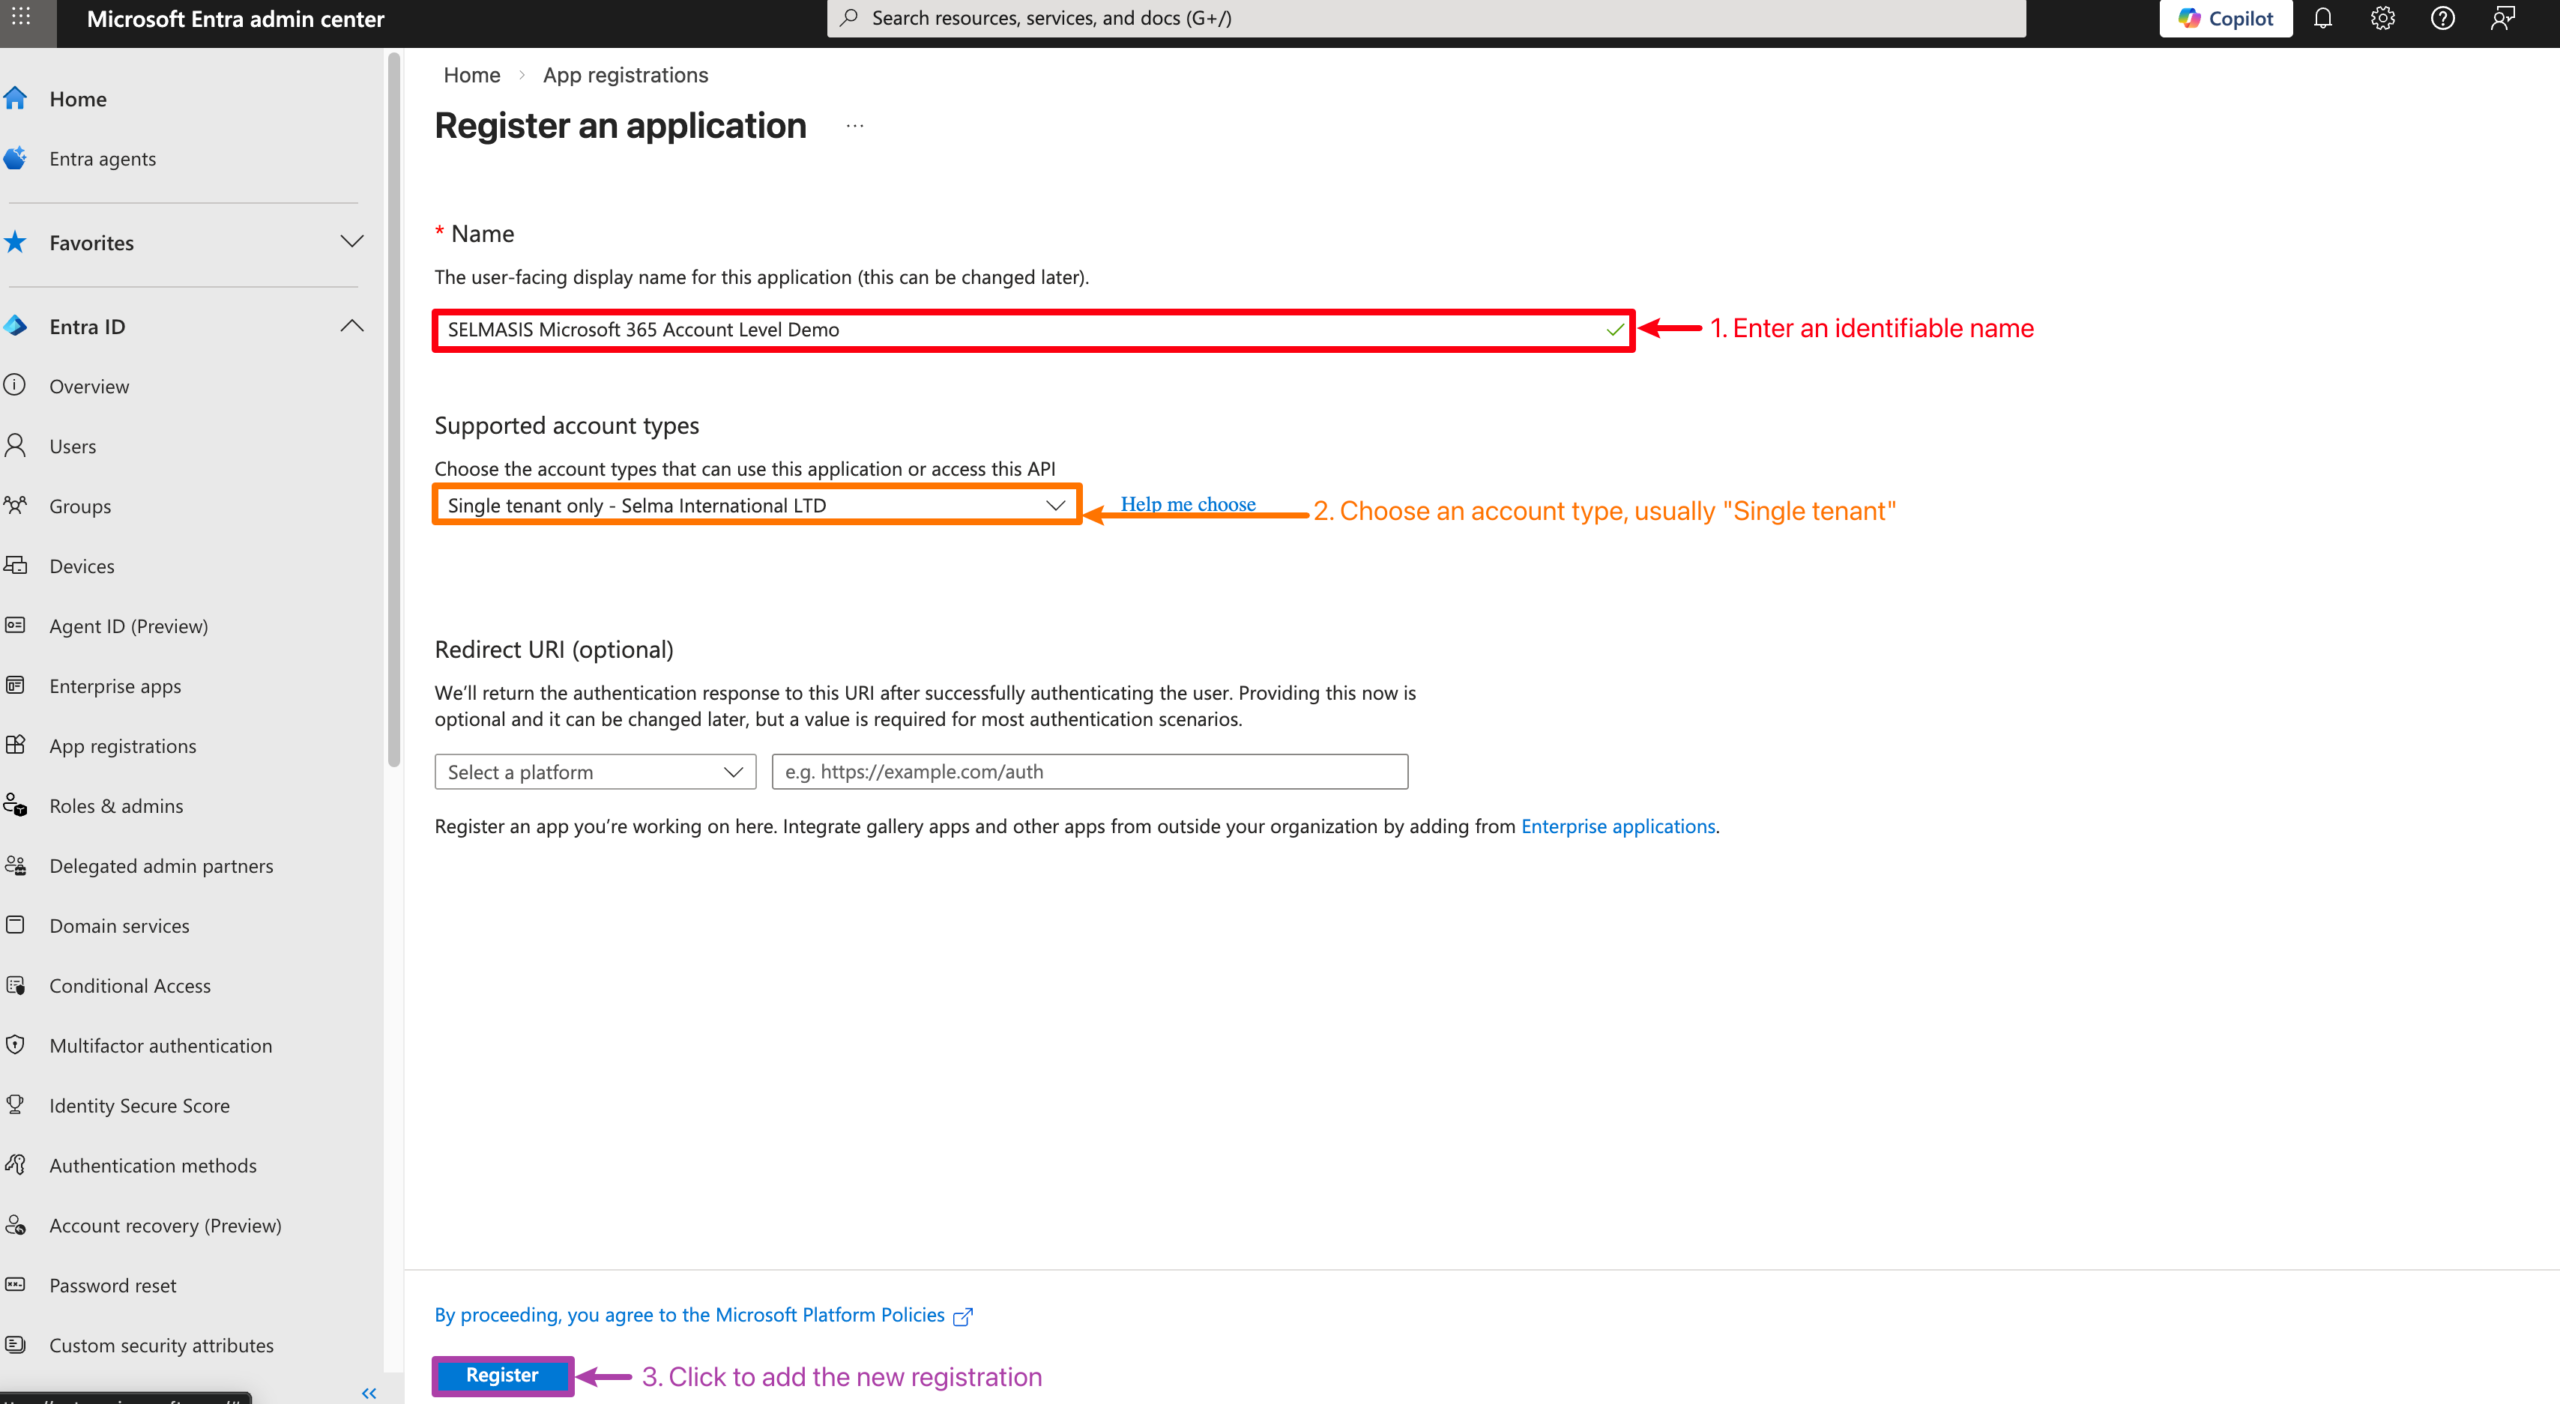
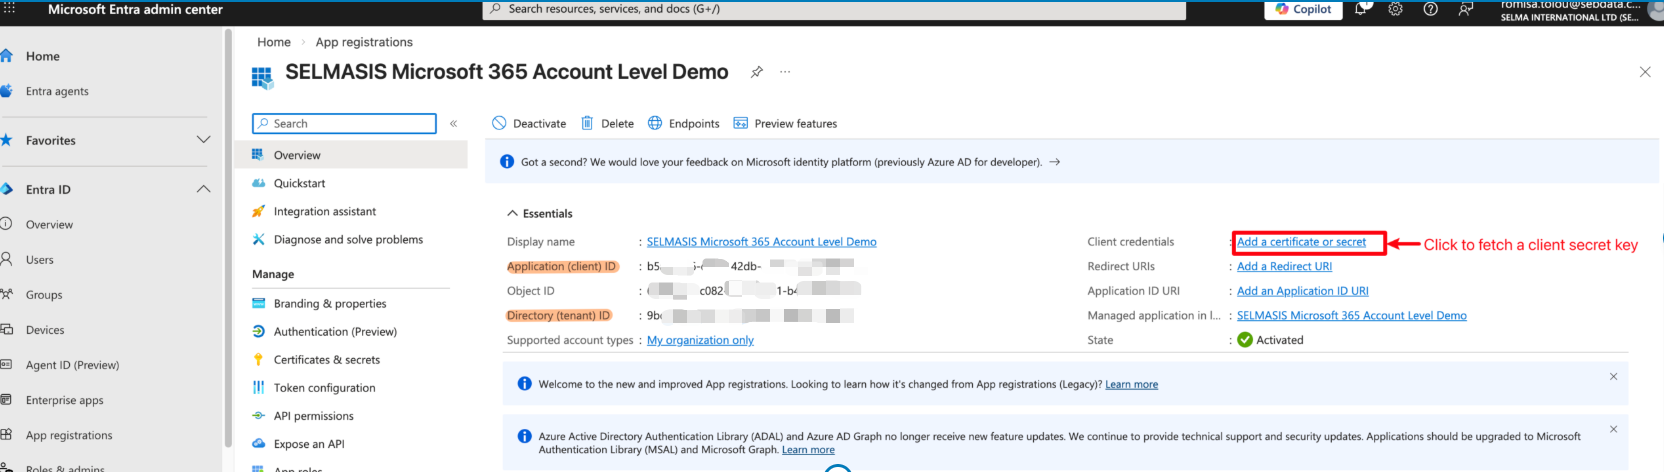
Figure 1iii — Save IDs and Fetch Client Secret Key
Once you have added a new registration, you will be taken back to the App Overview page, where you should note the Application (client) ID and Directory (tenant) ID. You will need these in Stage 4.
Note: you will need to fetch a client secret key (red), which will be explained further in the next step.
Stage 2 — Add a Client Secret
Figure 2i. Navigate to the Certificates and Secrets Page
Click the button “+ New client secret”.
Note: You will have reached this page from the last step.
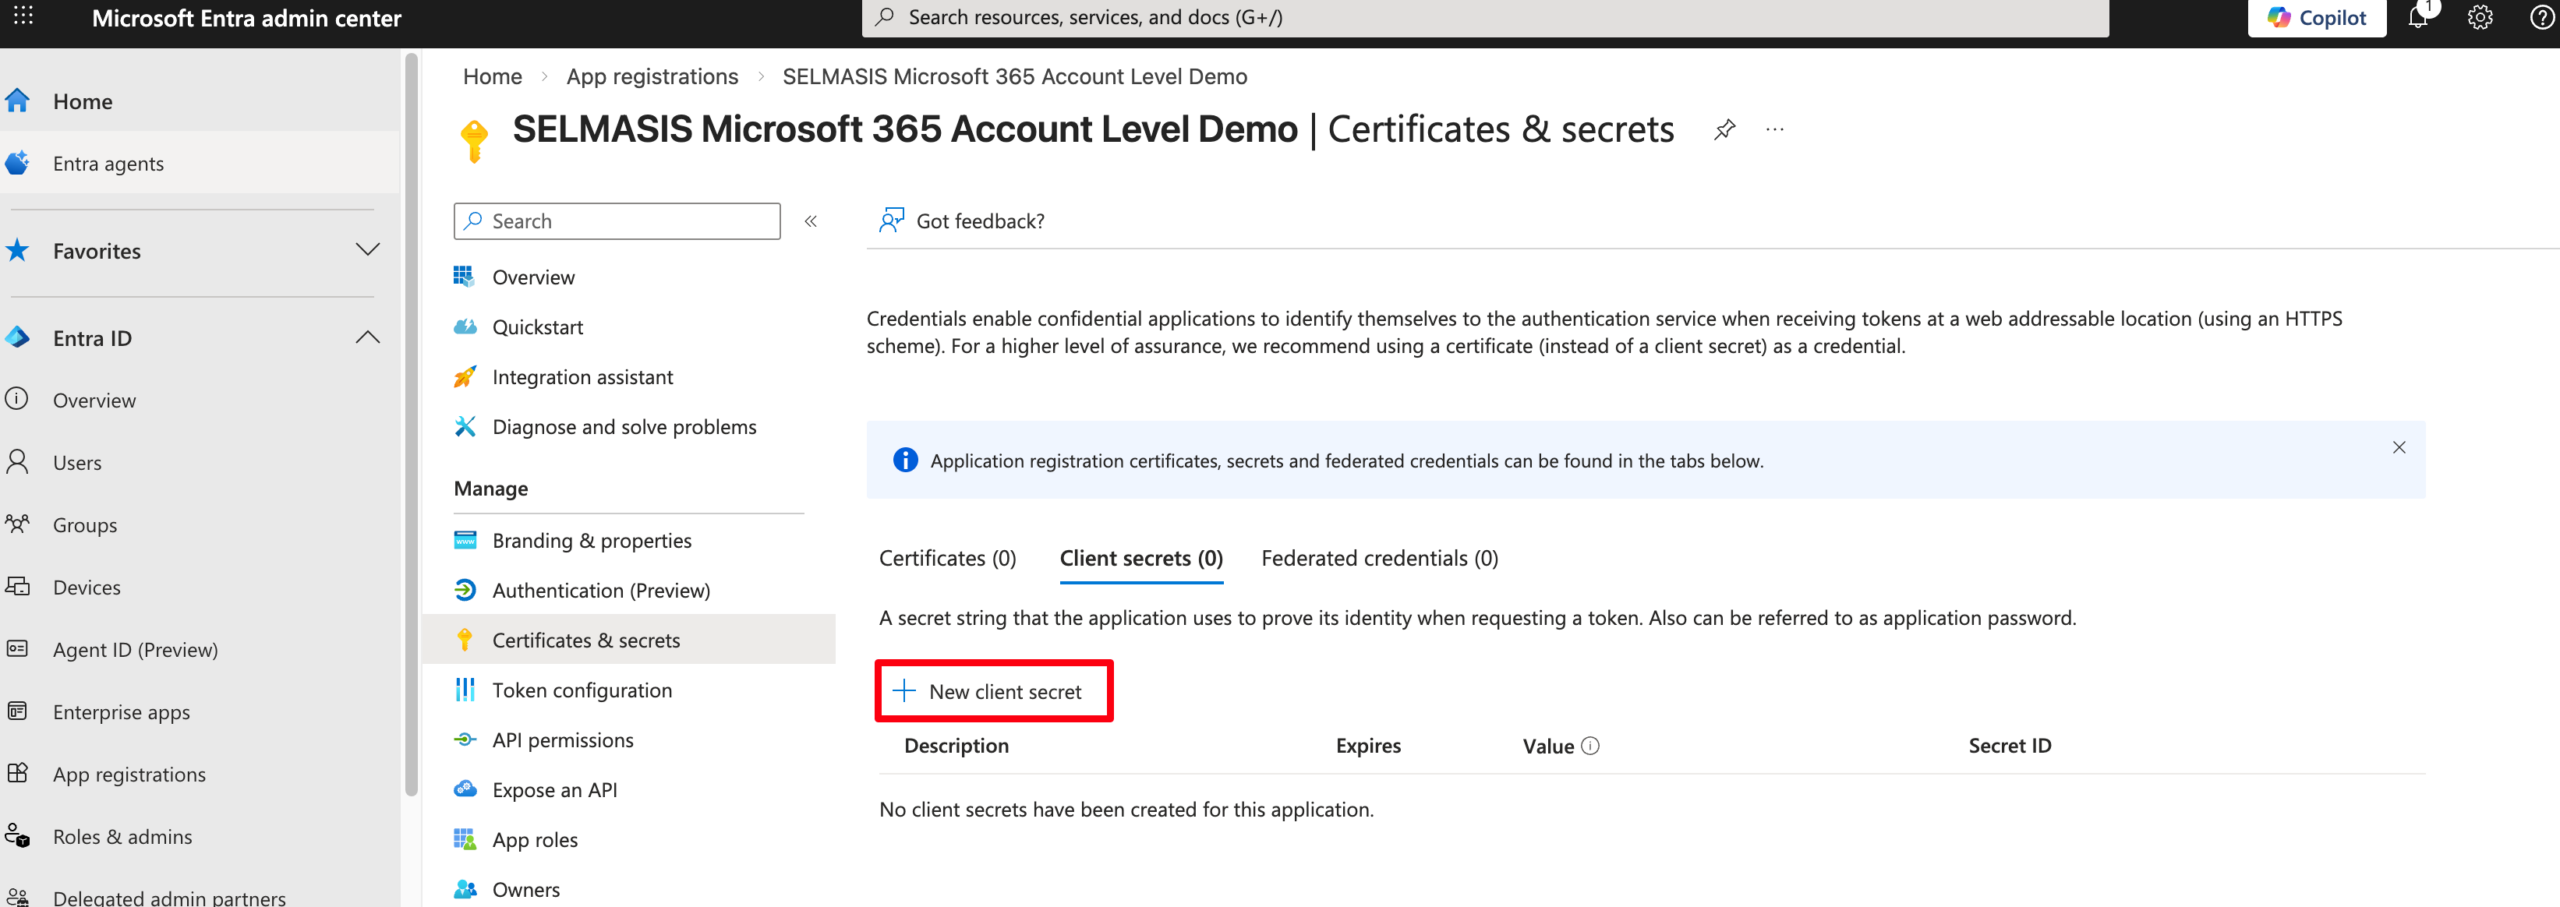
Figure 2ii. Define the Client Secret
Enter a name and set an expiry duration, then click Add.
⚠️ Important: Set a reminder to create a new secret before it expires. Update the secret in SELMA before the expiry date to avoid any disruption.
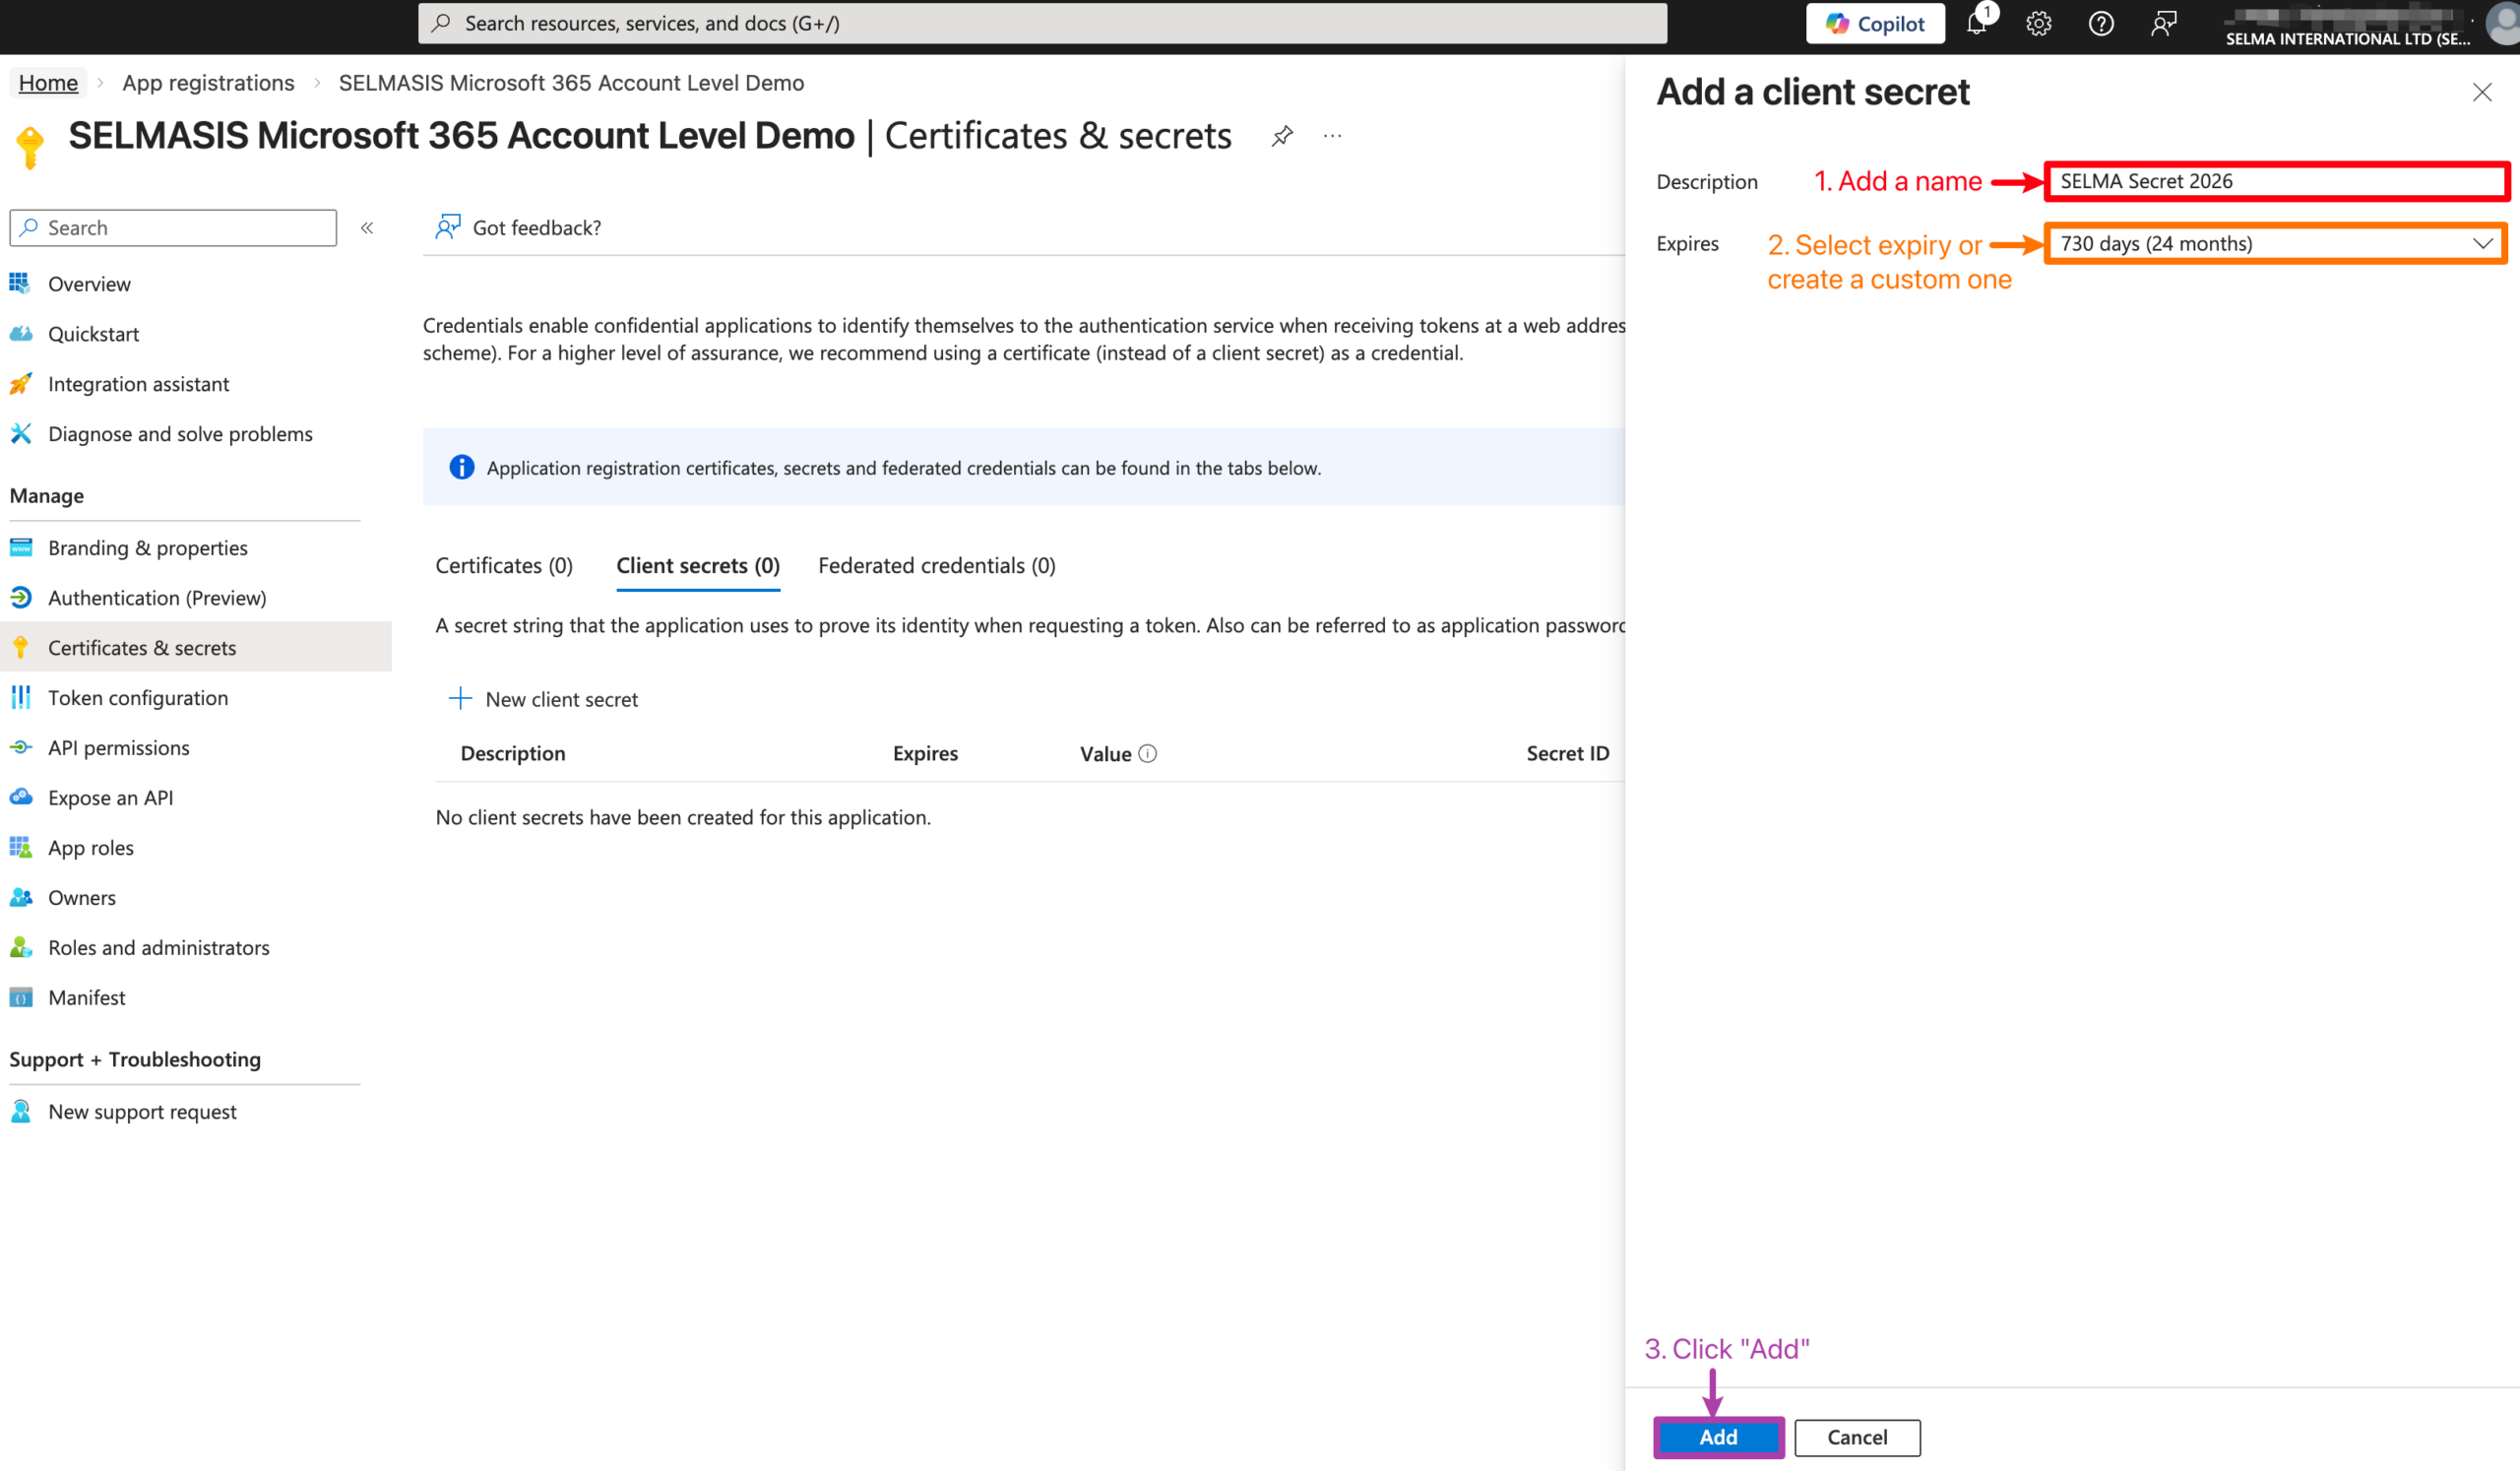
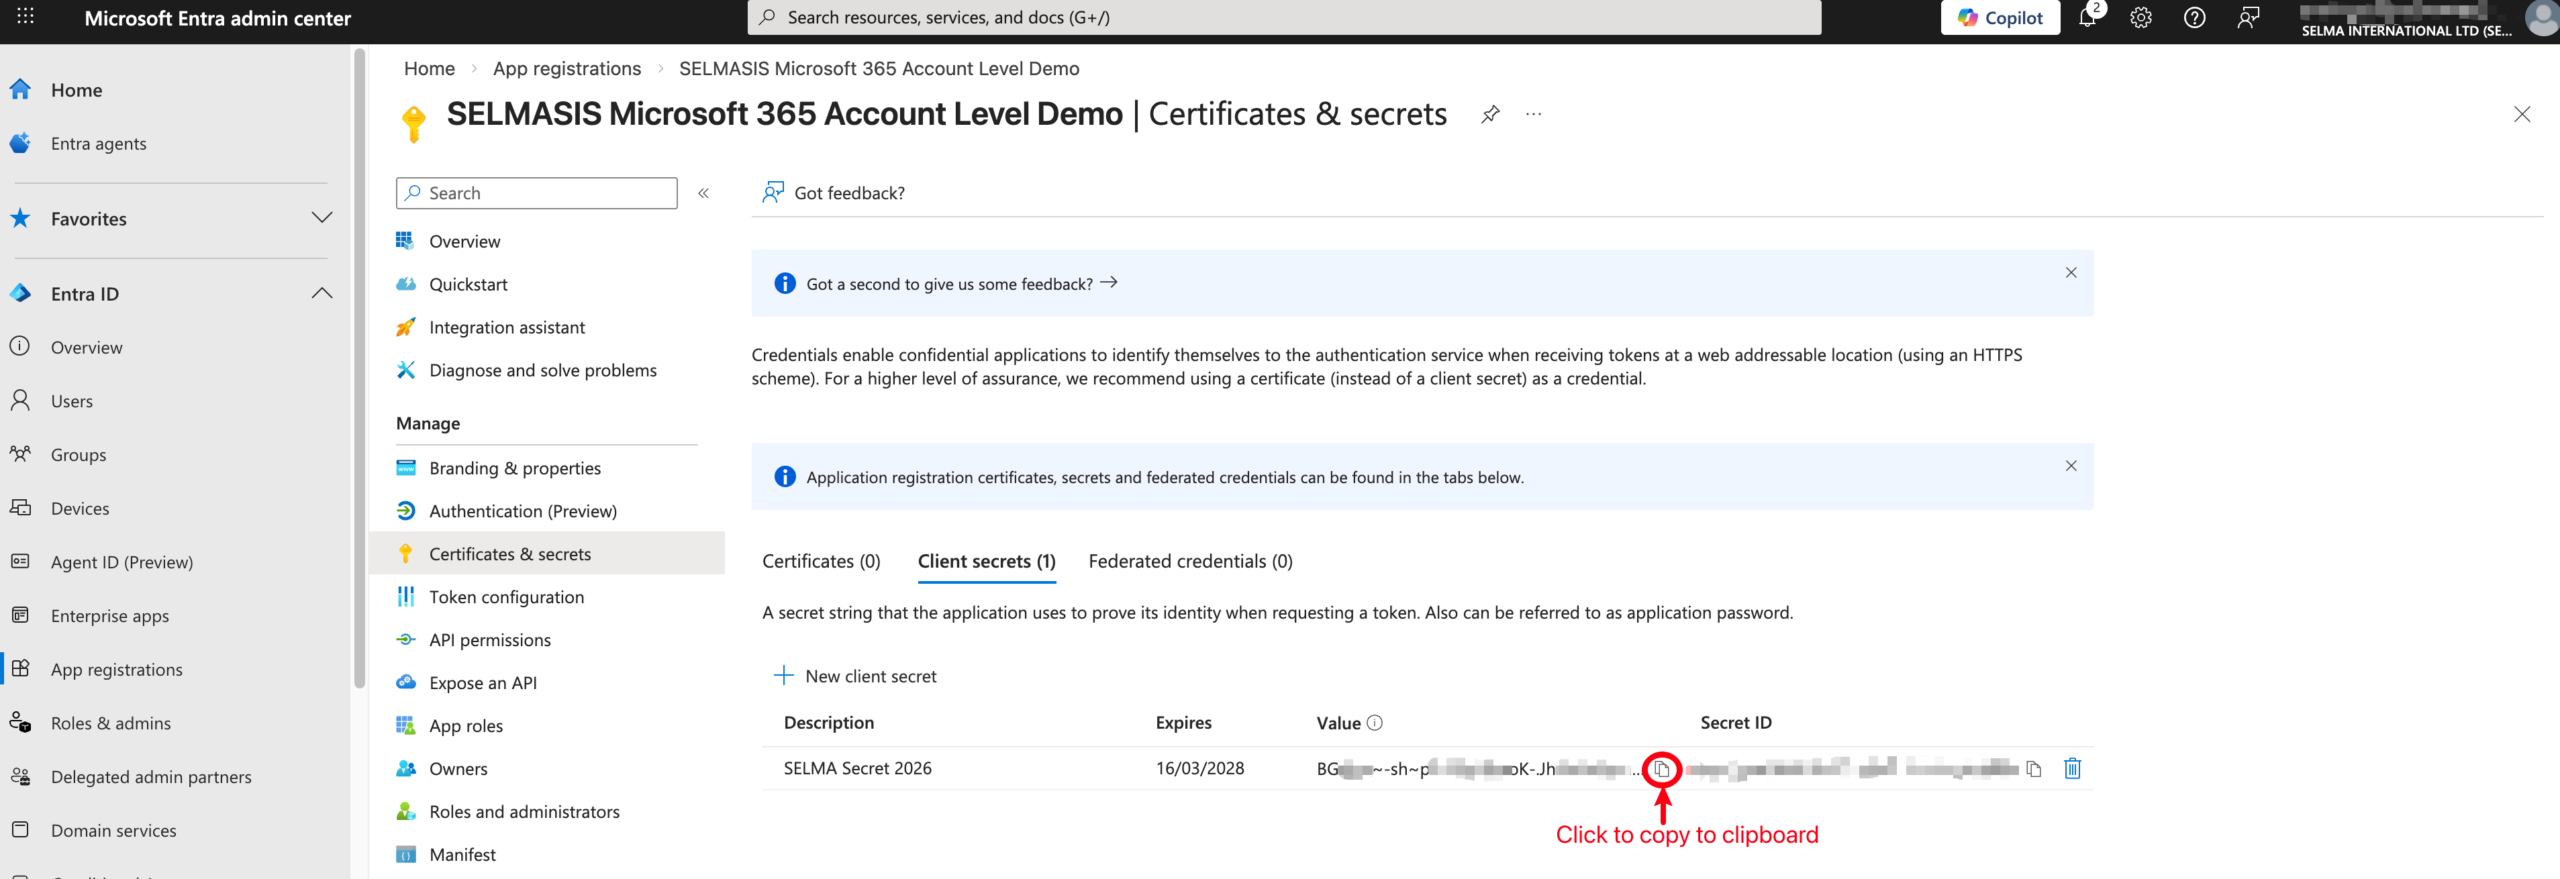
Figure 2iii. Save the Client Secret Key
Copy the secret value immediately — it will not be displayed again after you navigate away or refresh the page. You will need this value in Stage 4.
Note: If you can no longer copy the secret value, delete it and repeat Stage 2 from the beginning.
Stage 3 — Redirect URL
Figure 3i. Navigate to the Overview Page and Add Redirect URL
Return to the “Overview” page and click “Add Redirect URL“.
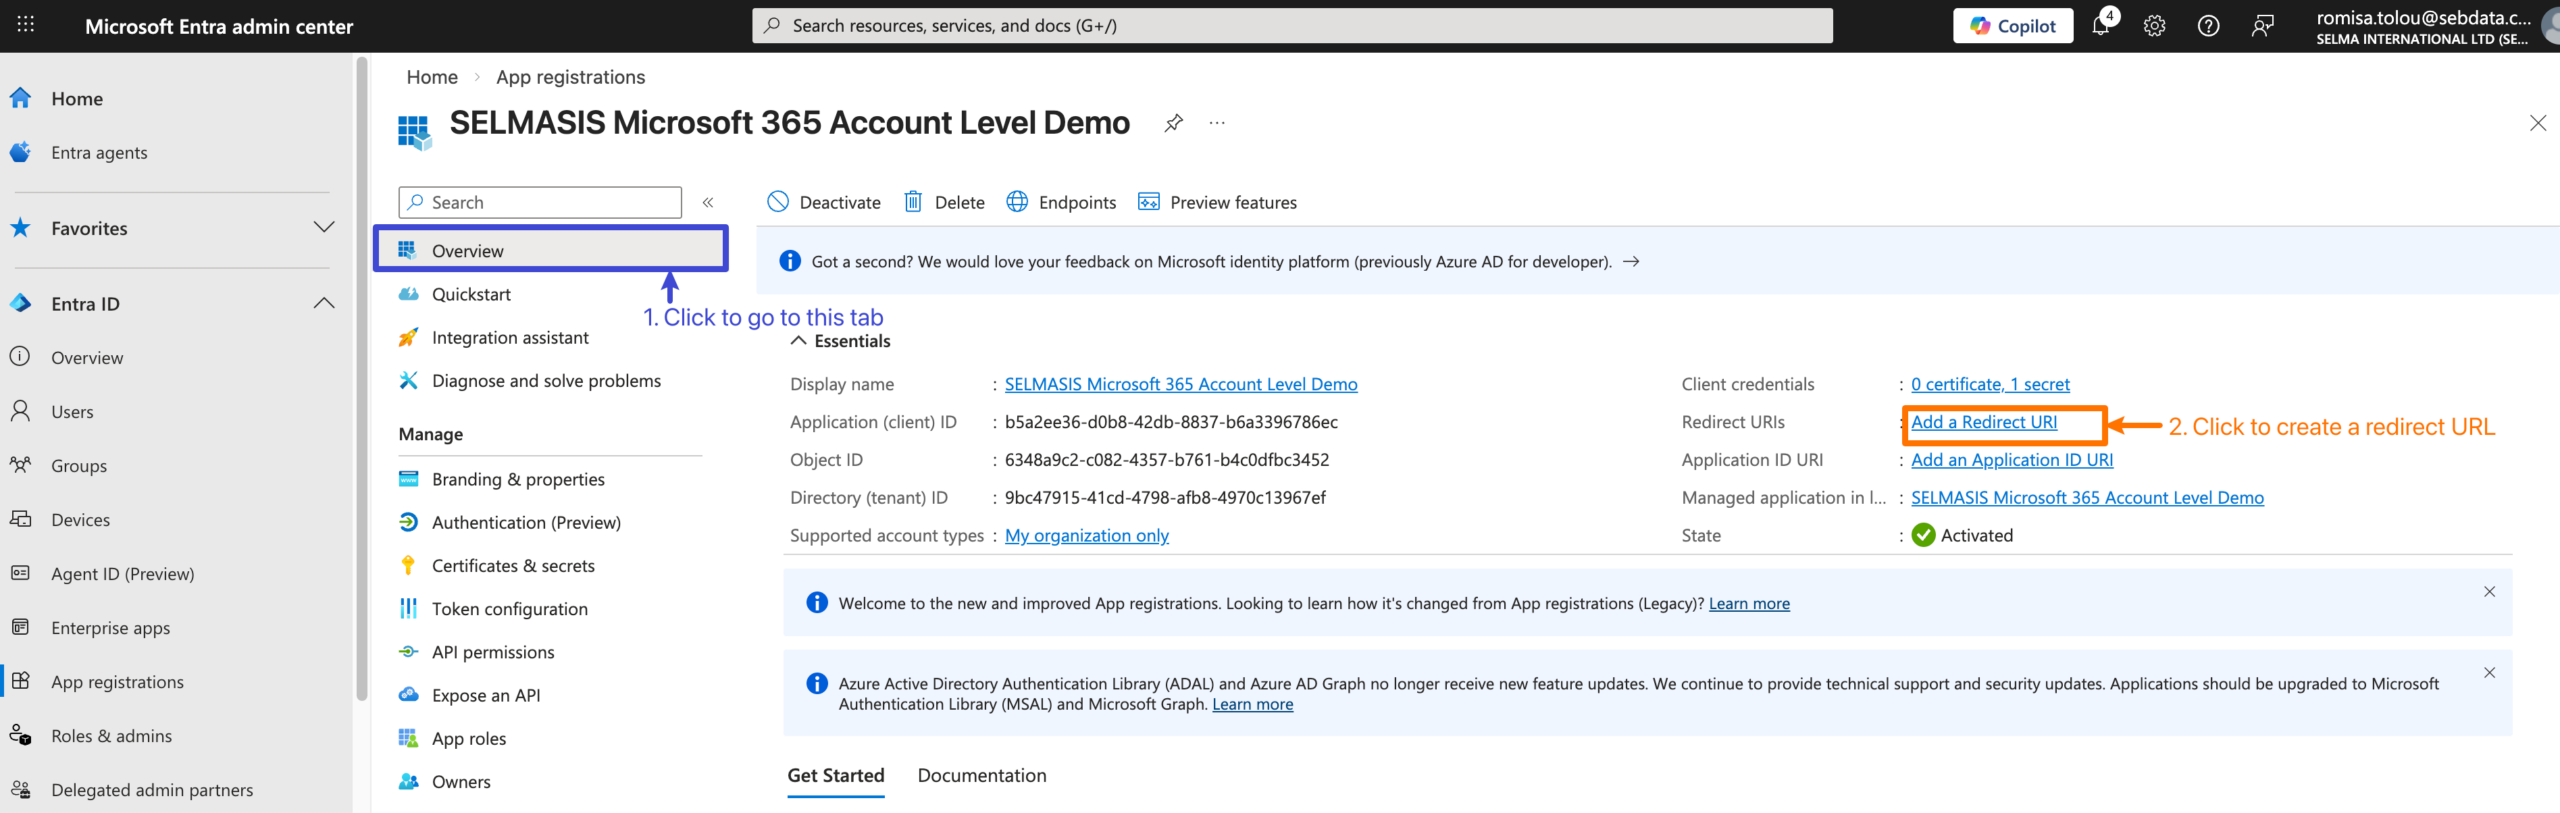
Figure 3ii. Select a Platform
Click “Add Redirect URL” and select the “Web” option.
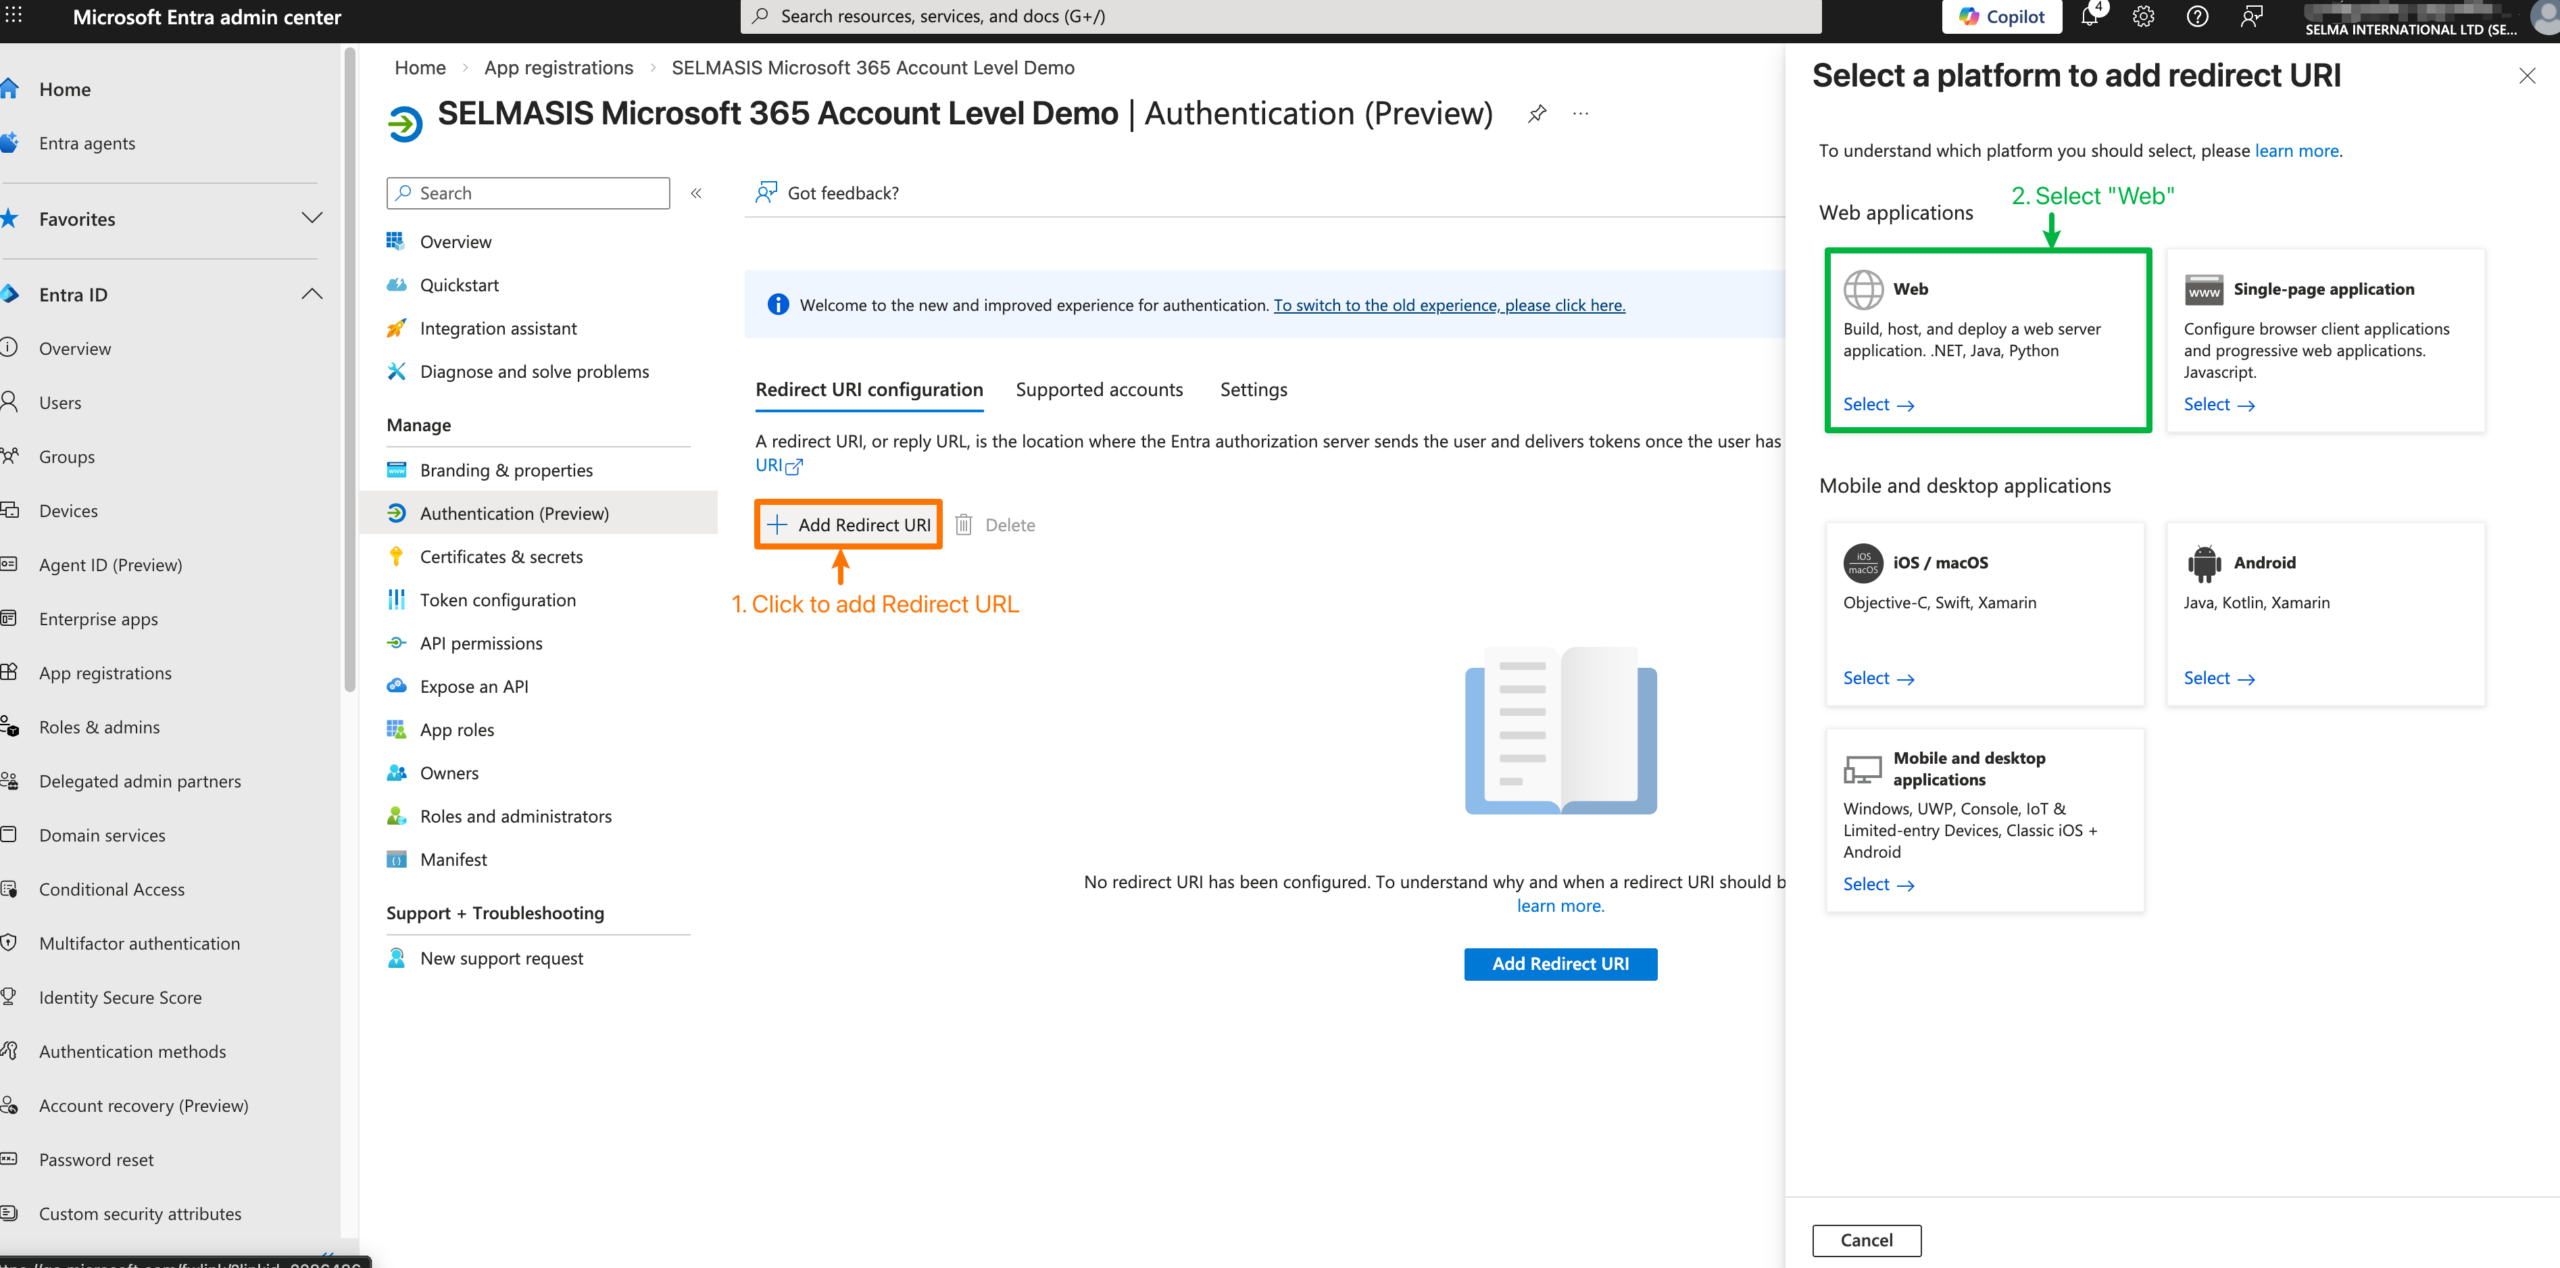
Figure 3iii. Provide the Redirect URL and Click “Configure”
You’ll be asked to enter the Redirect URL now. Back in SELMA, you can copy the Redirect URL from the Integration Configuration page (please see the next step).
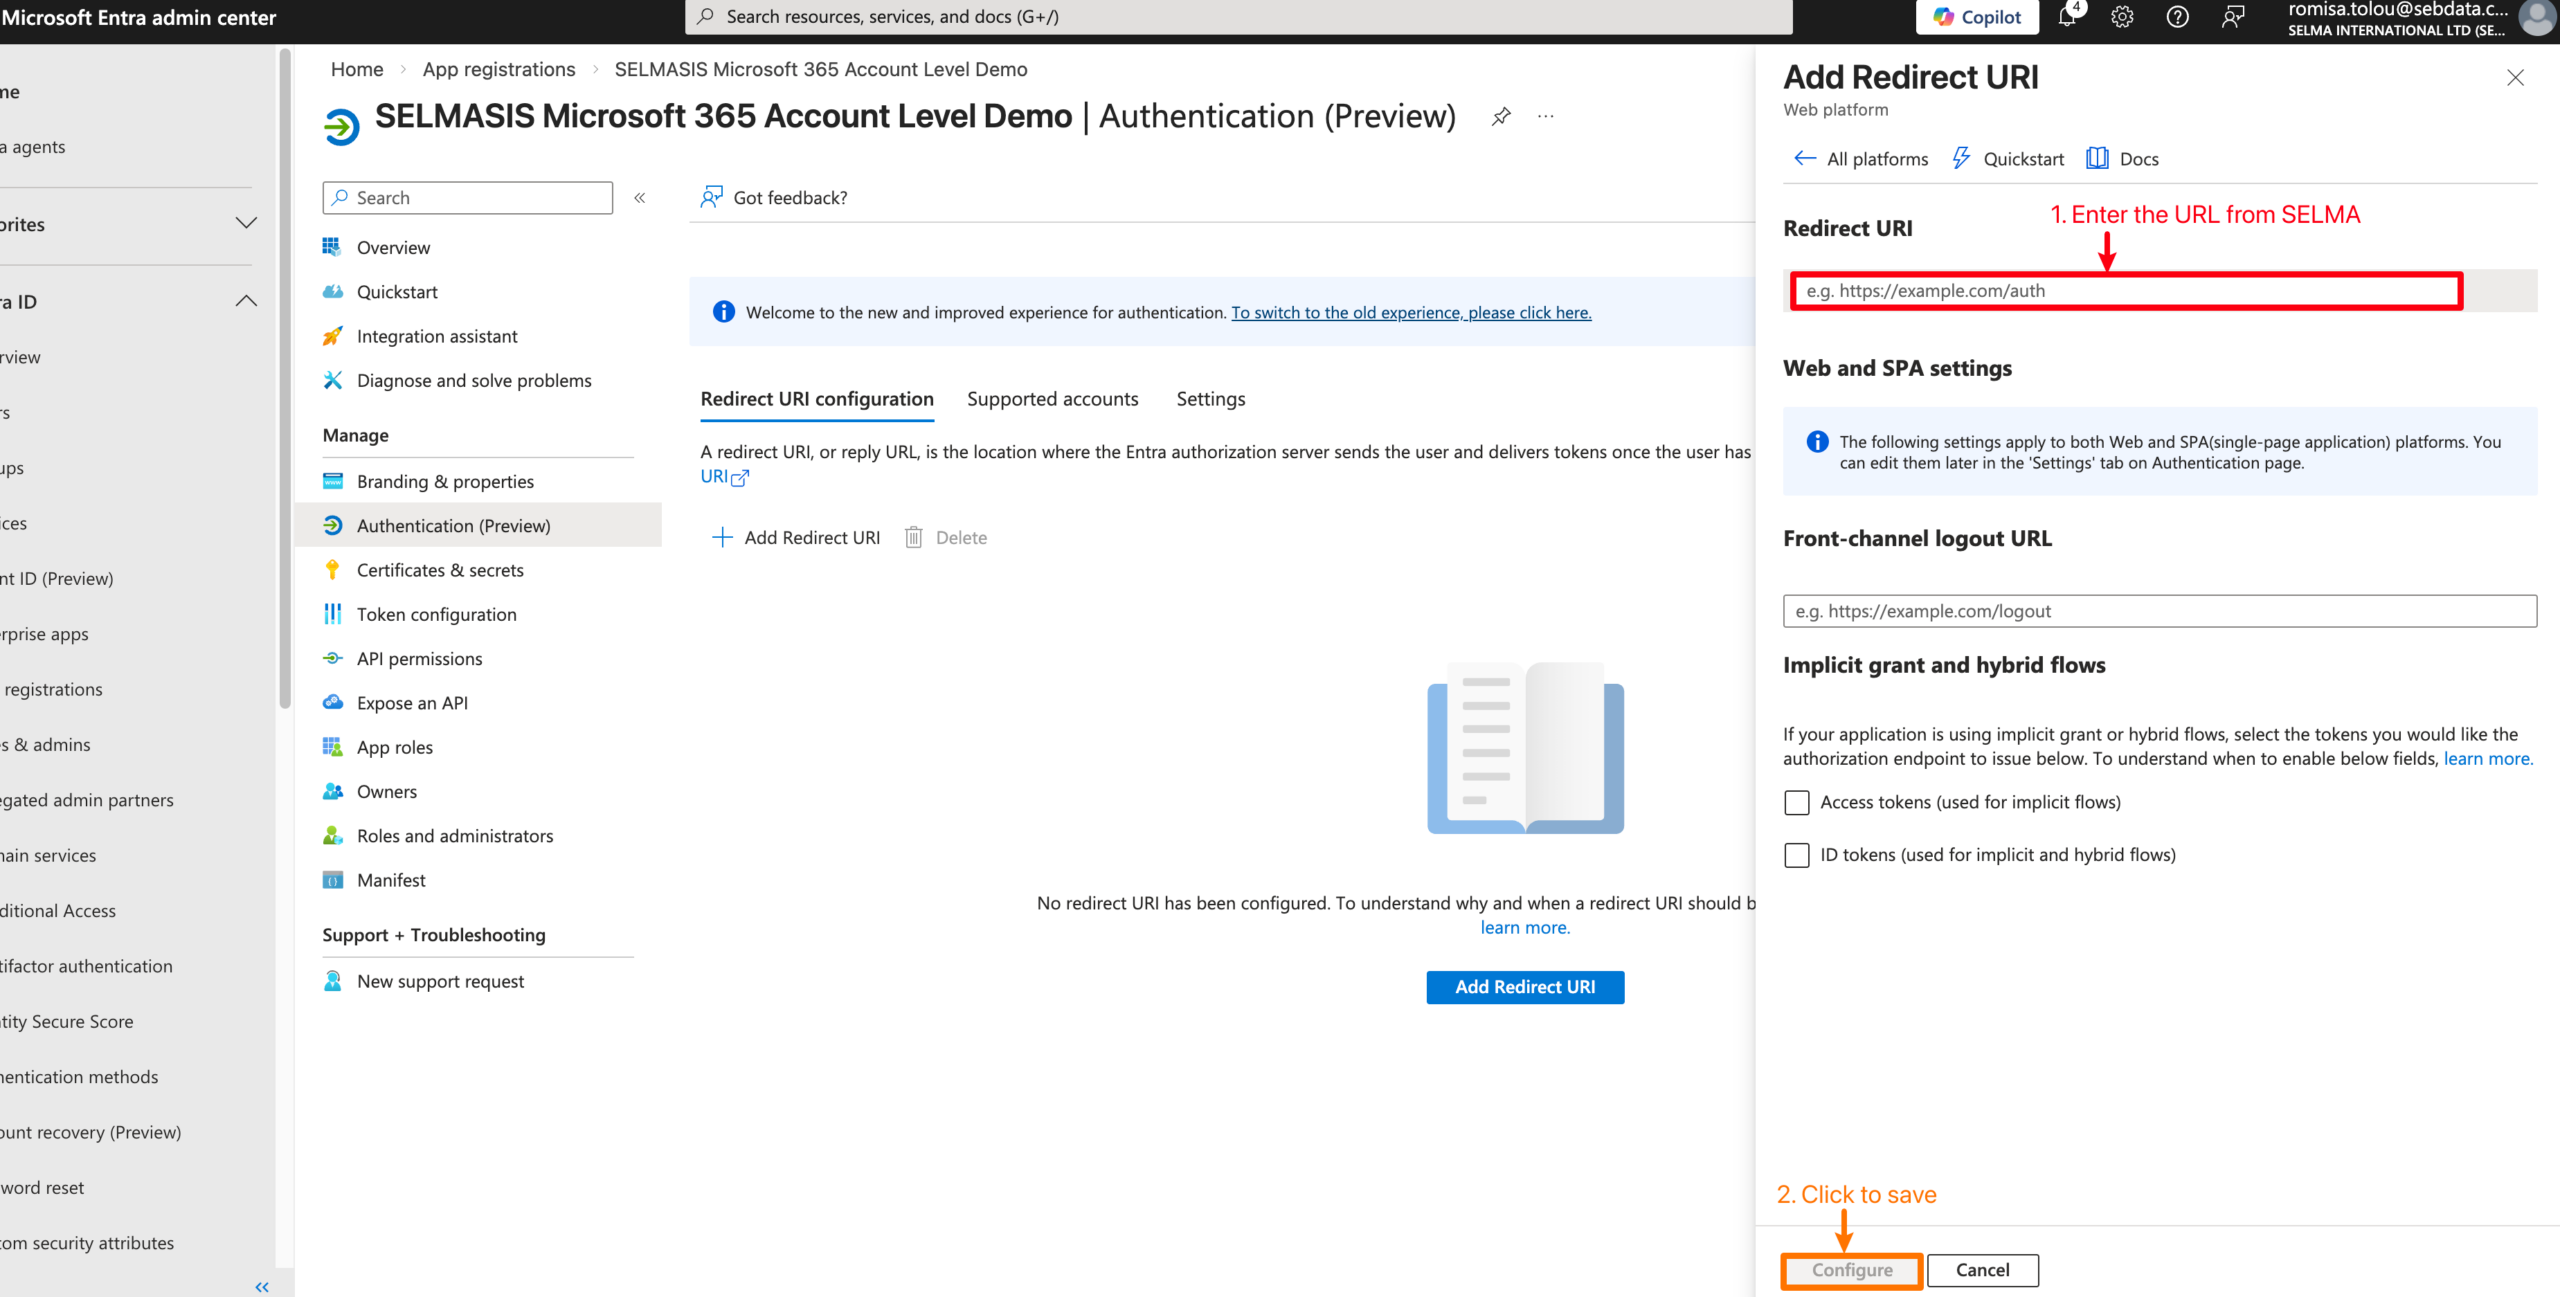
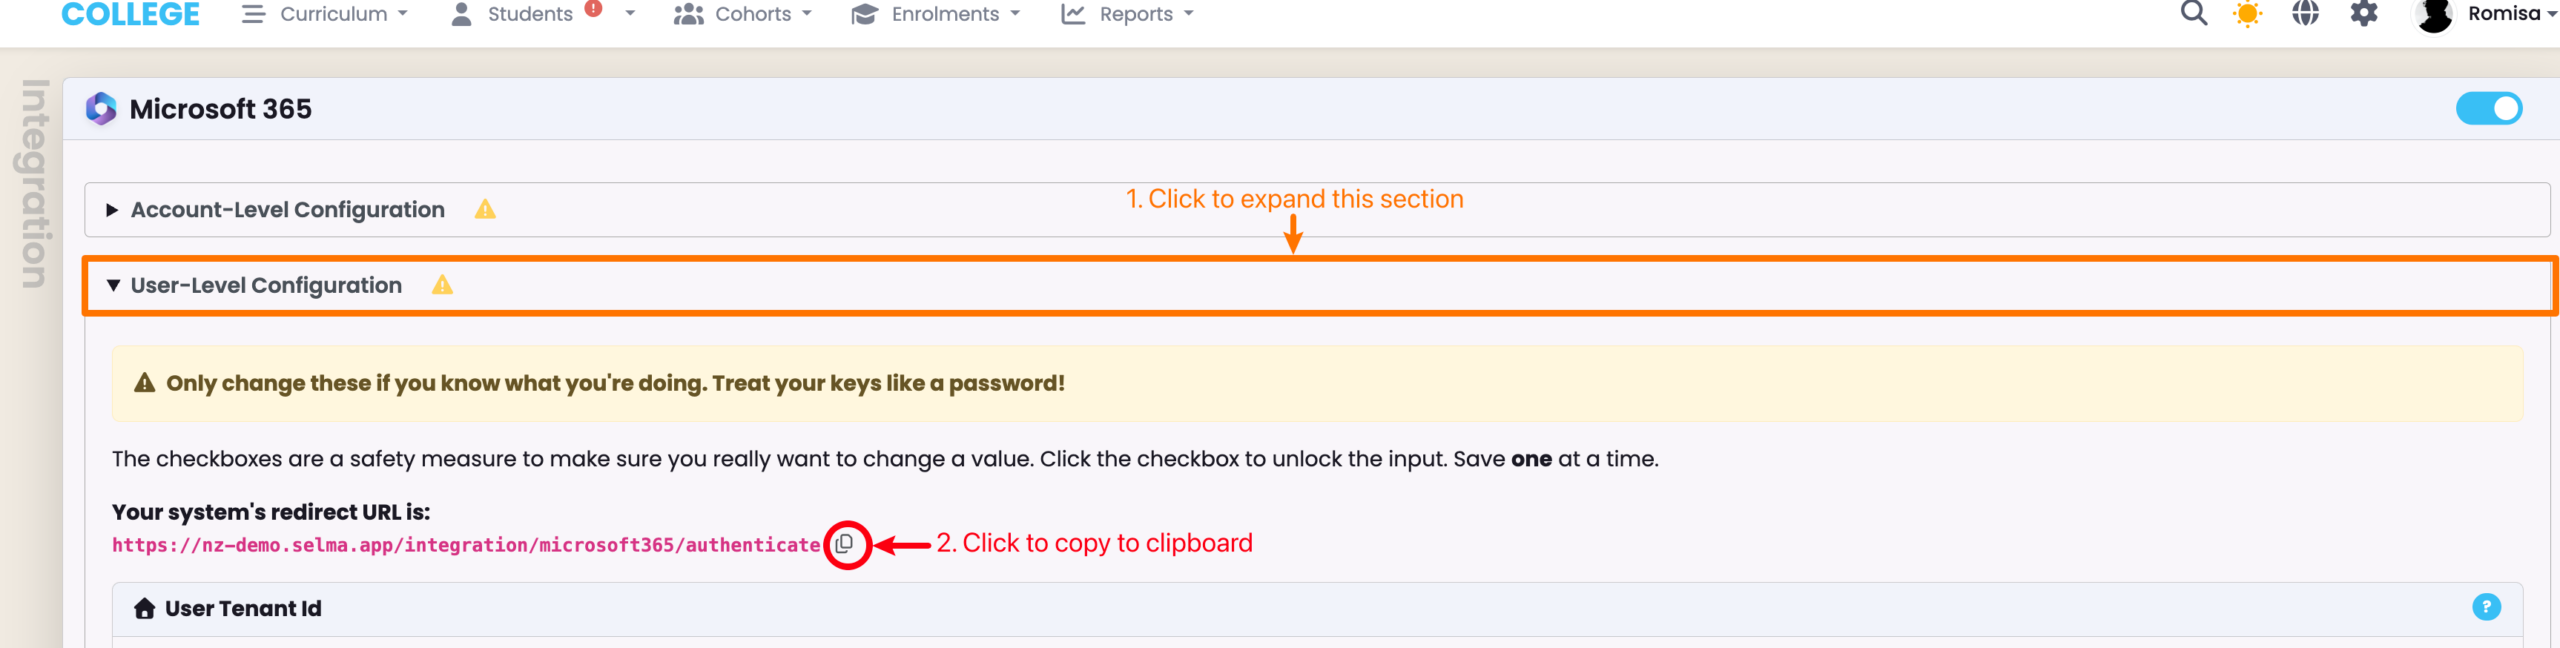
Figure 3iv. Copy the Redirect URL from SELMA
Navigate to Settings > Integrations > Microsoft 365, and expand the User-Level Configuration section. Then, copy the Redirect URL to paste back in your Microsoft account.
Stage 4 — Configure API Permissions
Figure 4i. Navigate to Microsoft Graph
Within the same app, click API Permissions → Add a permission → Microsoft Graph.
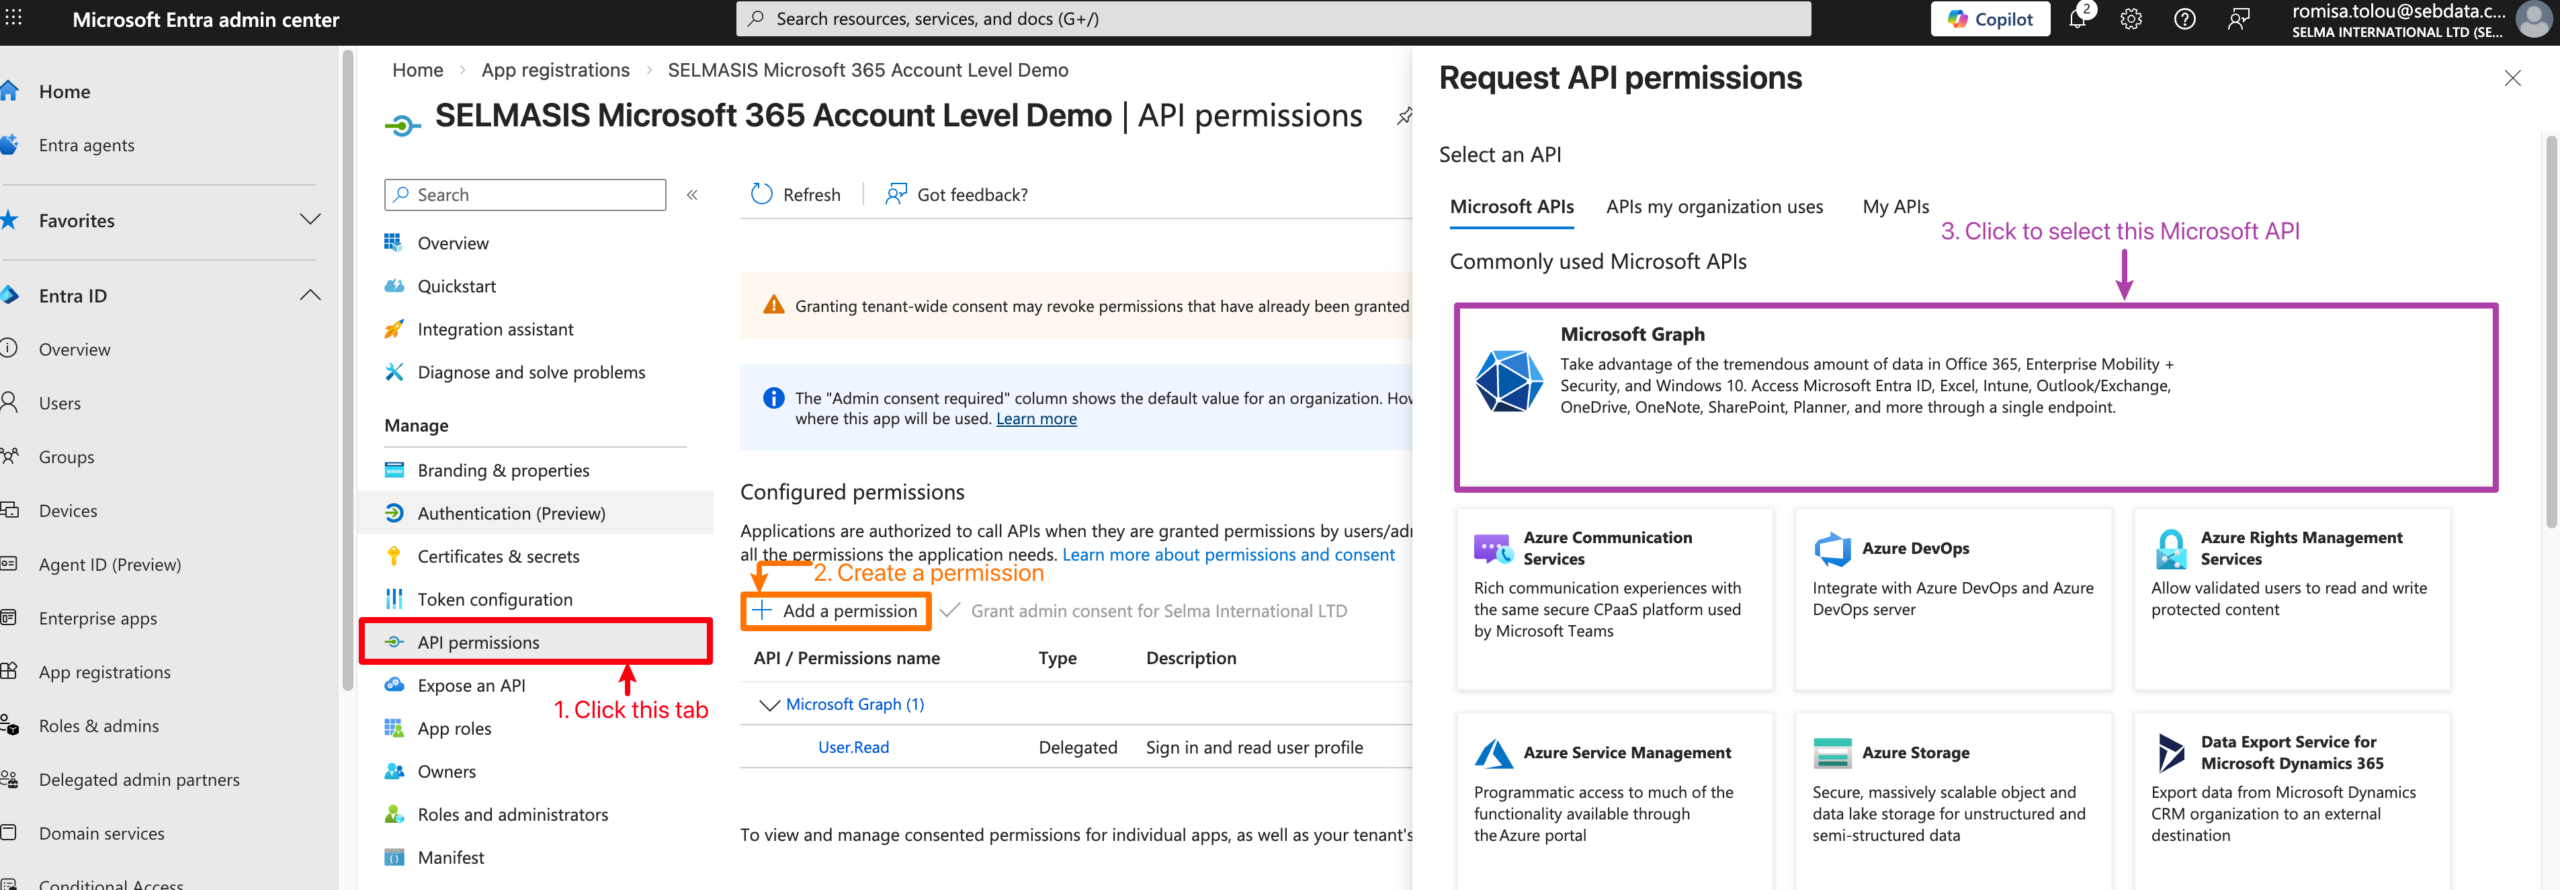
Figure 4ii. Select the User.ReadBasic API Permission
Select Application permissions (this allows the integration to send emails on the users behalf). Then, search for and add User.ReadBasic.All permission. This validates access to your designated mailbox.
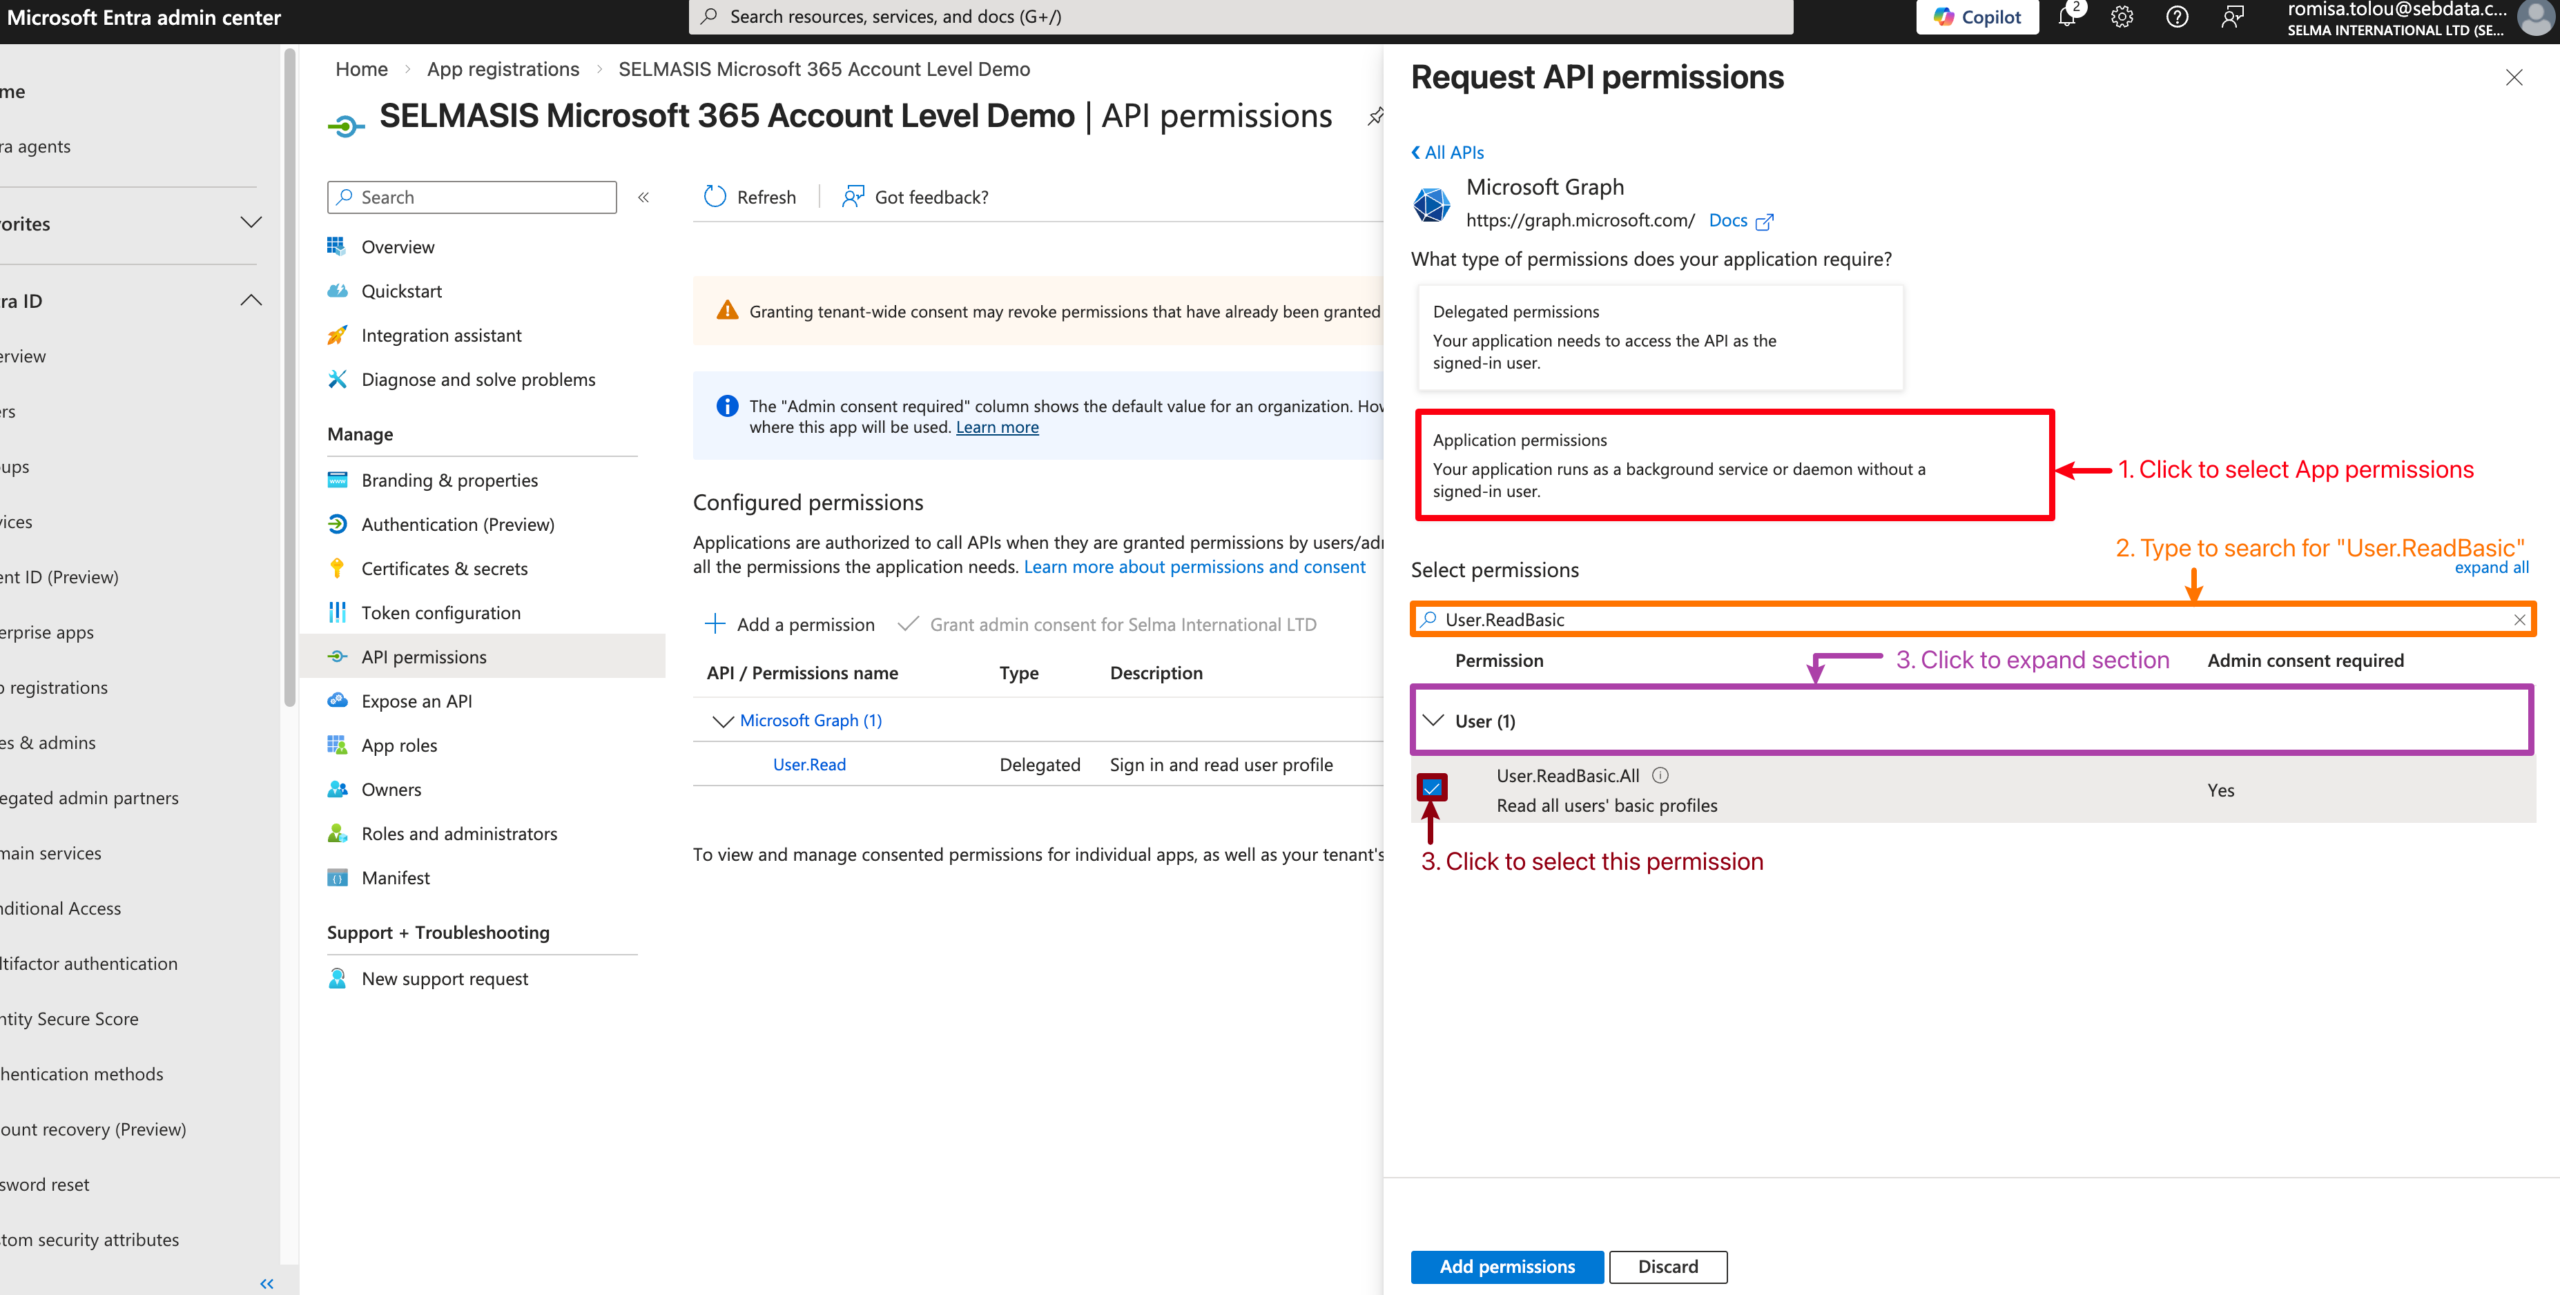
Figure 4iii. Select the Mail.Send API Permission, and Add All
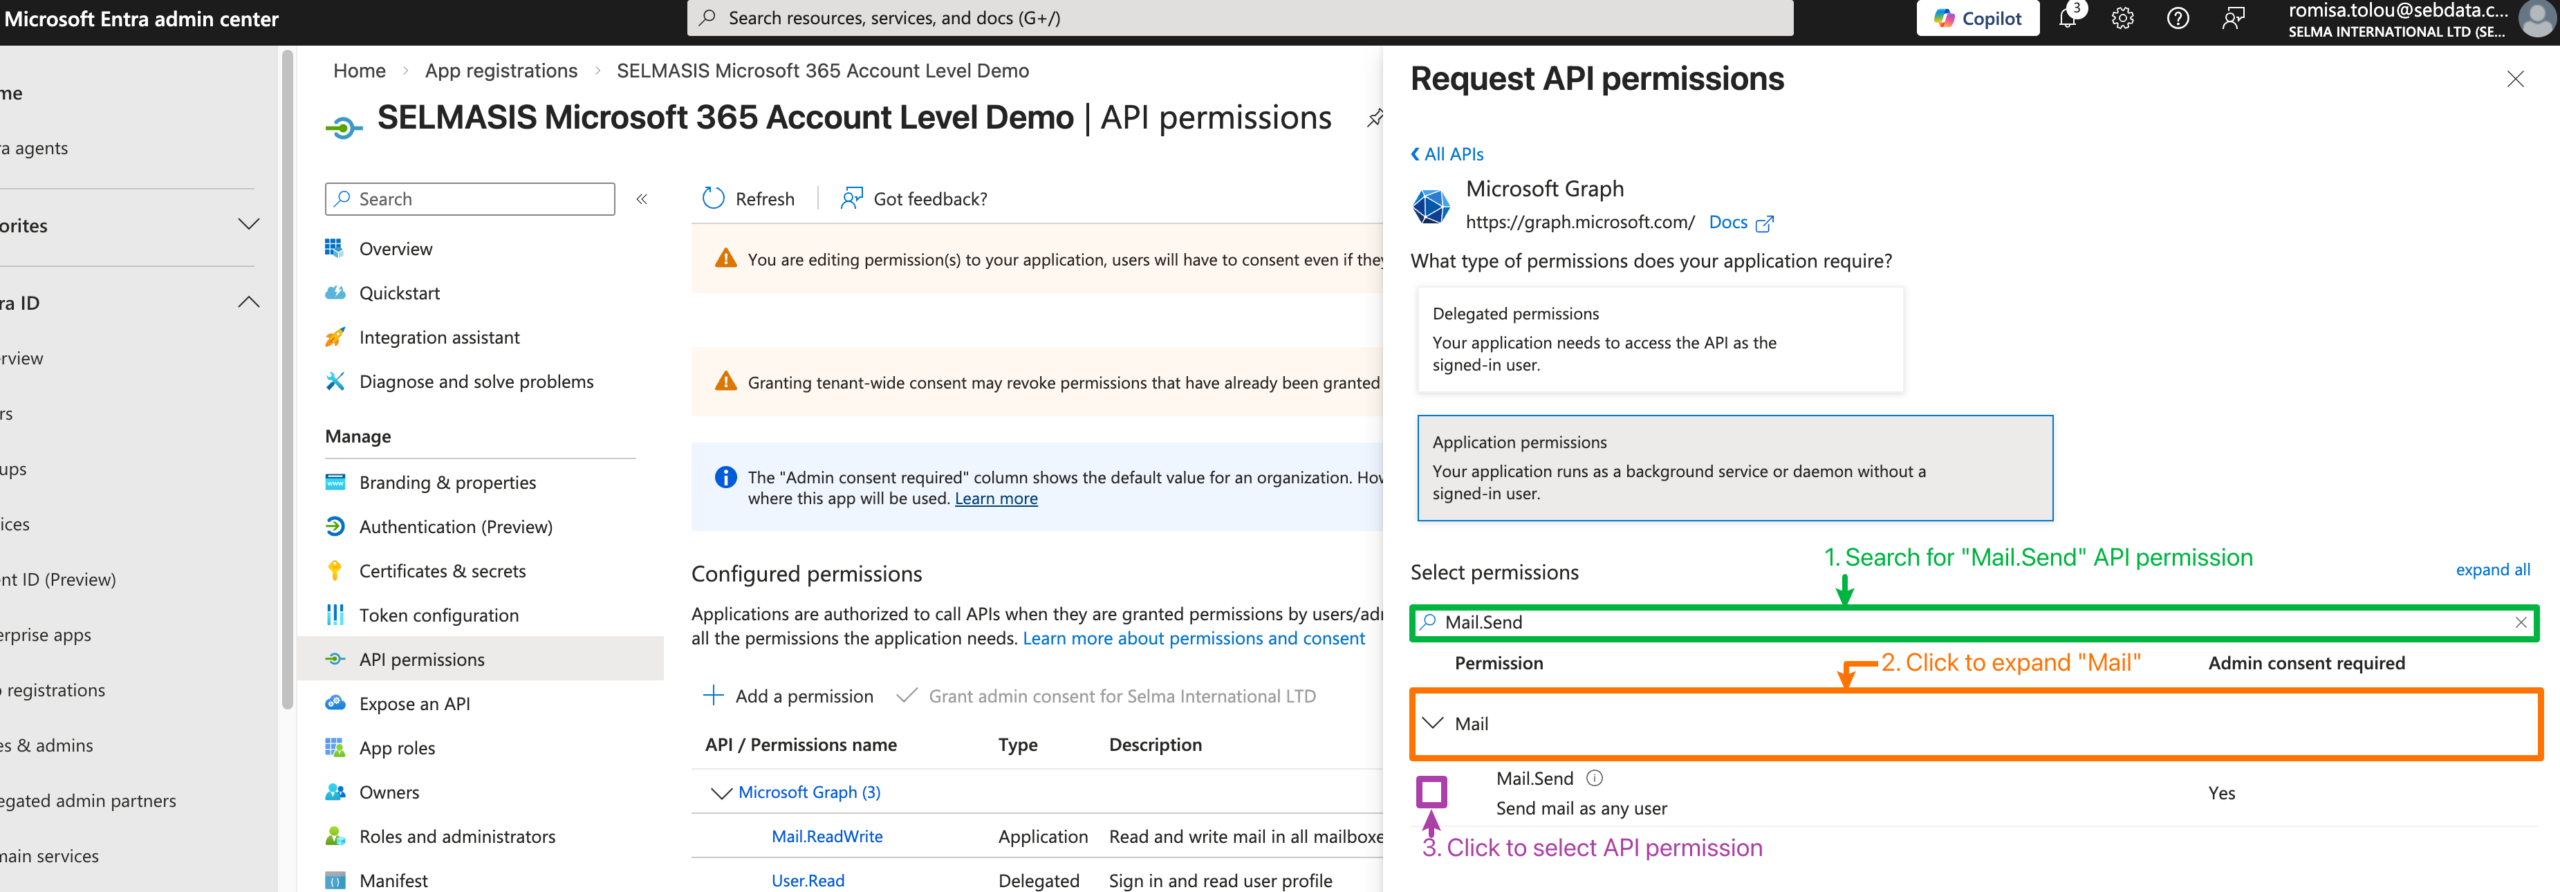
Figure 4iv — Select the Mail.ReadWrite API Permission, and Add All
Search for and add the Mail.ReadWrite permission. This enables replies to emails leaving SELMA to appear in SELMA. Finally, add all permissions (green).
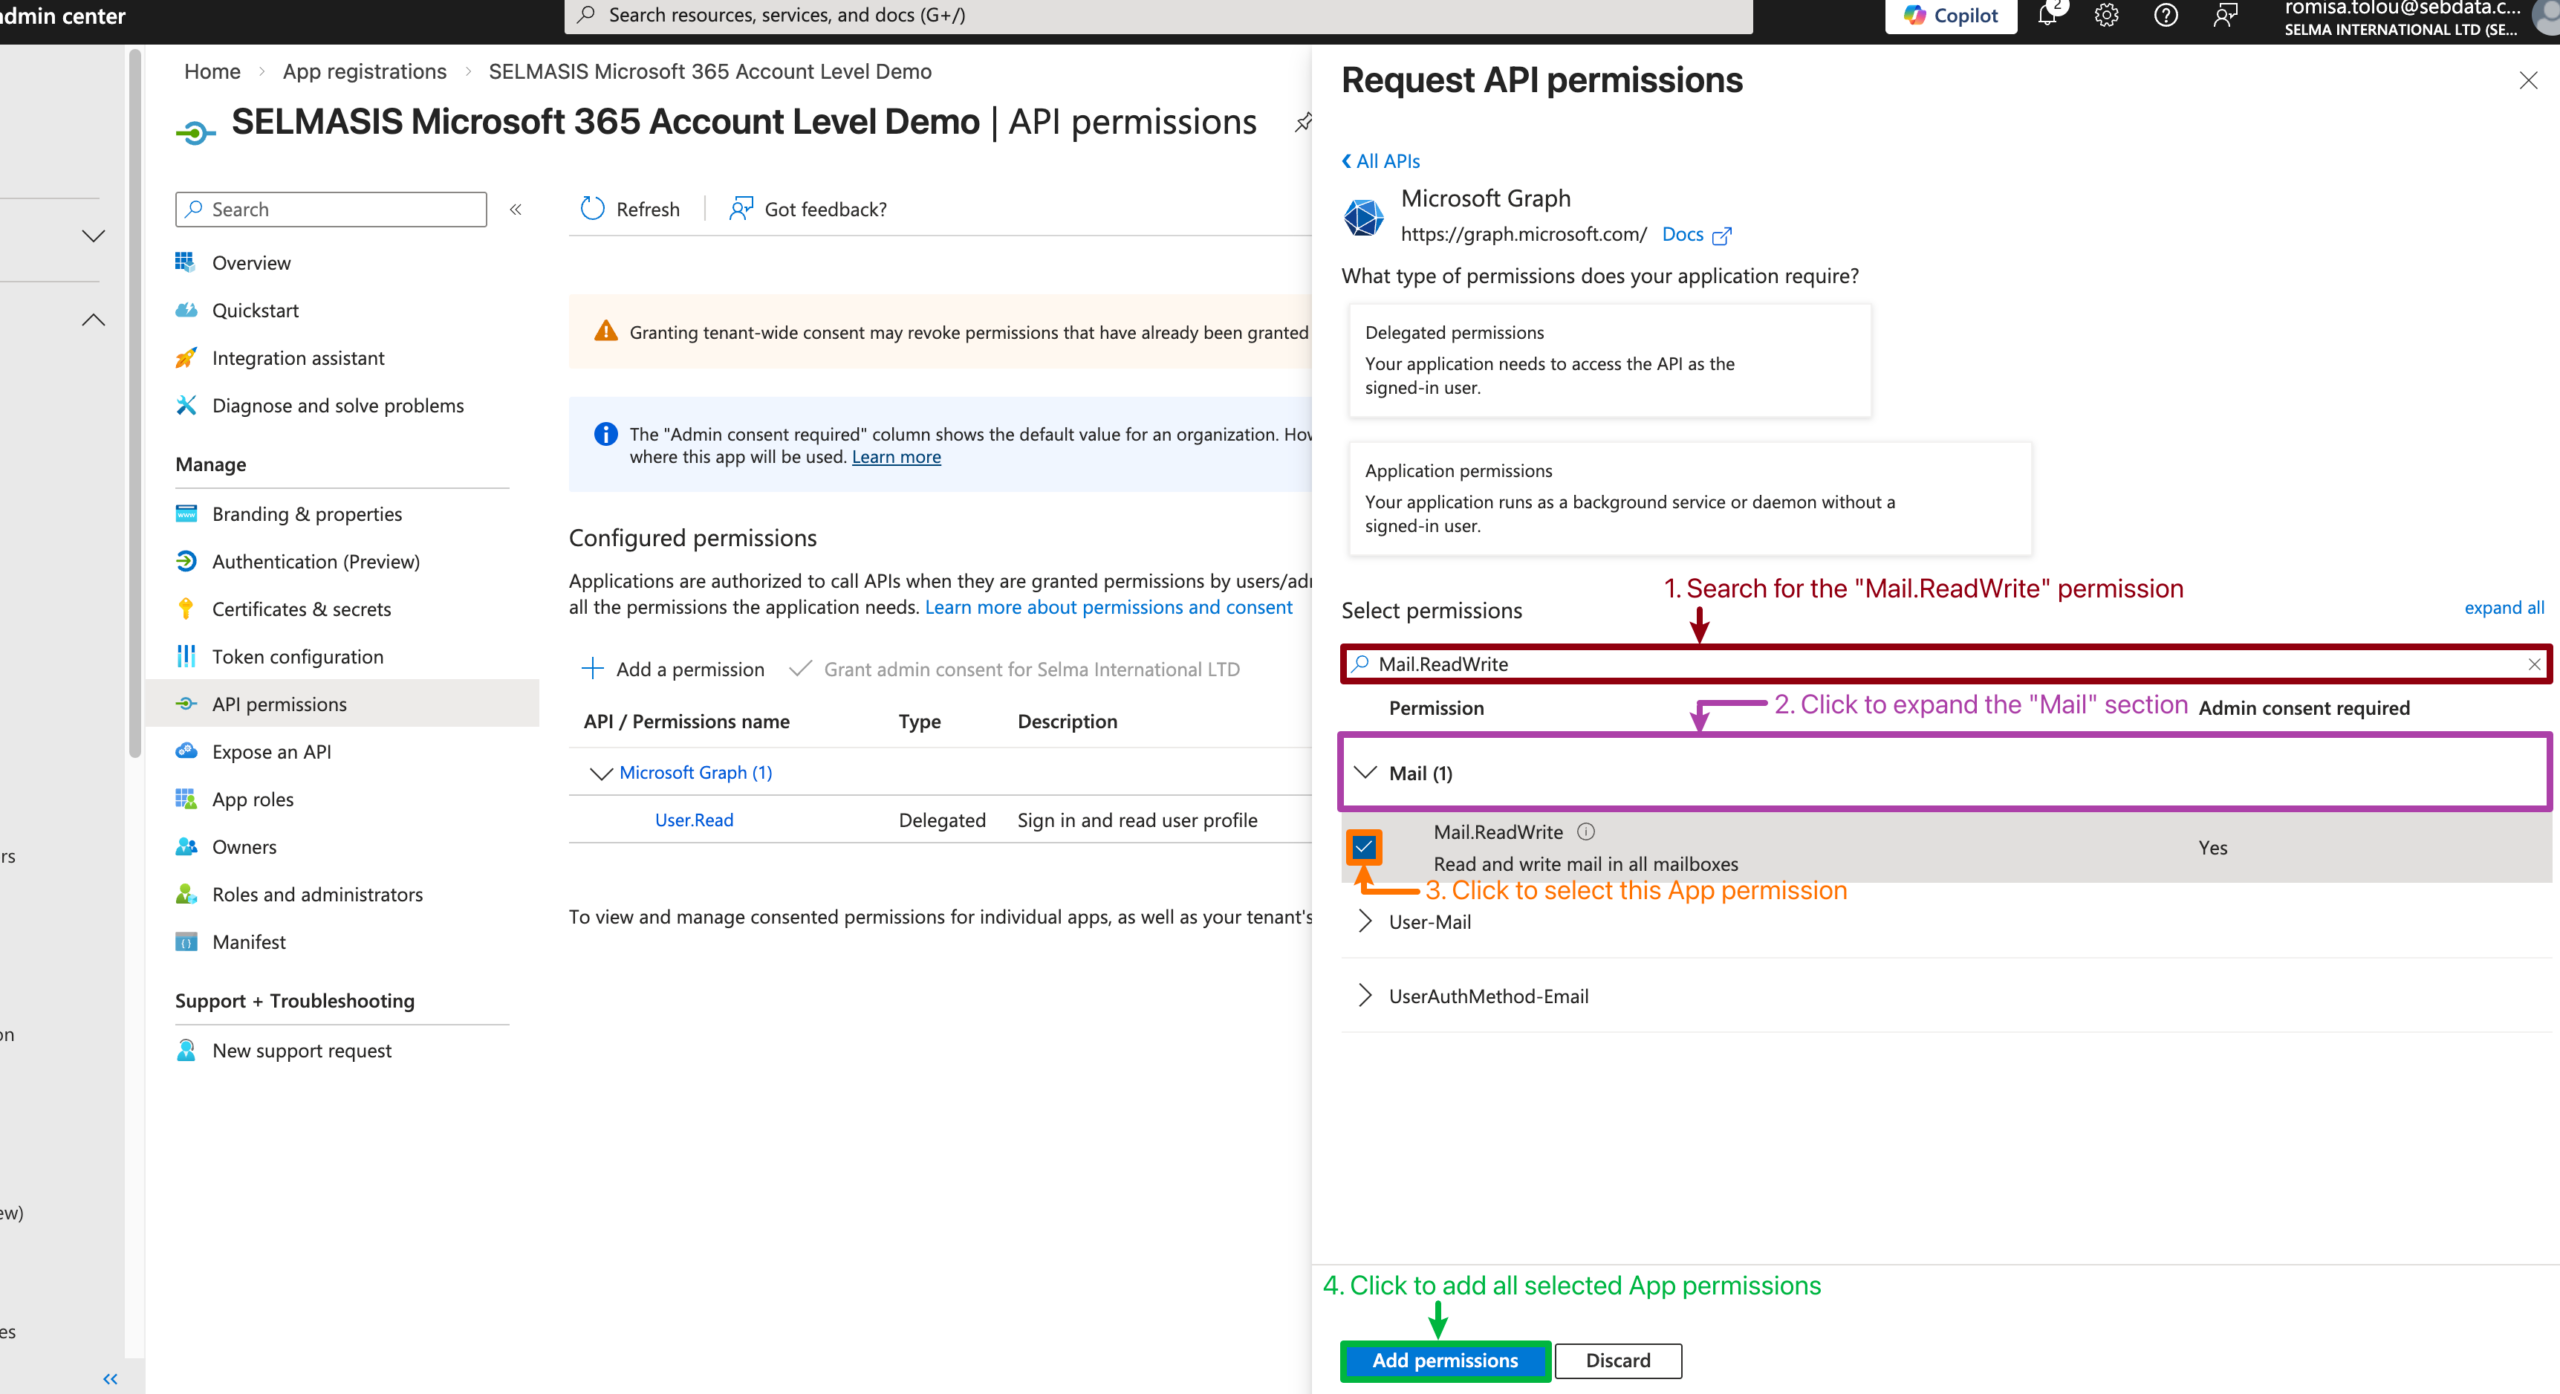
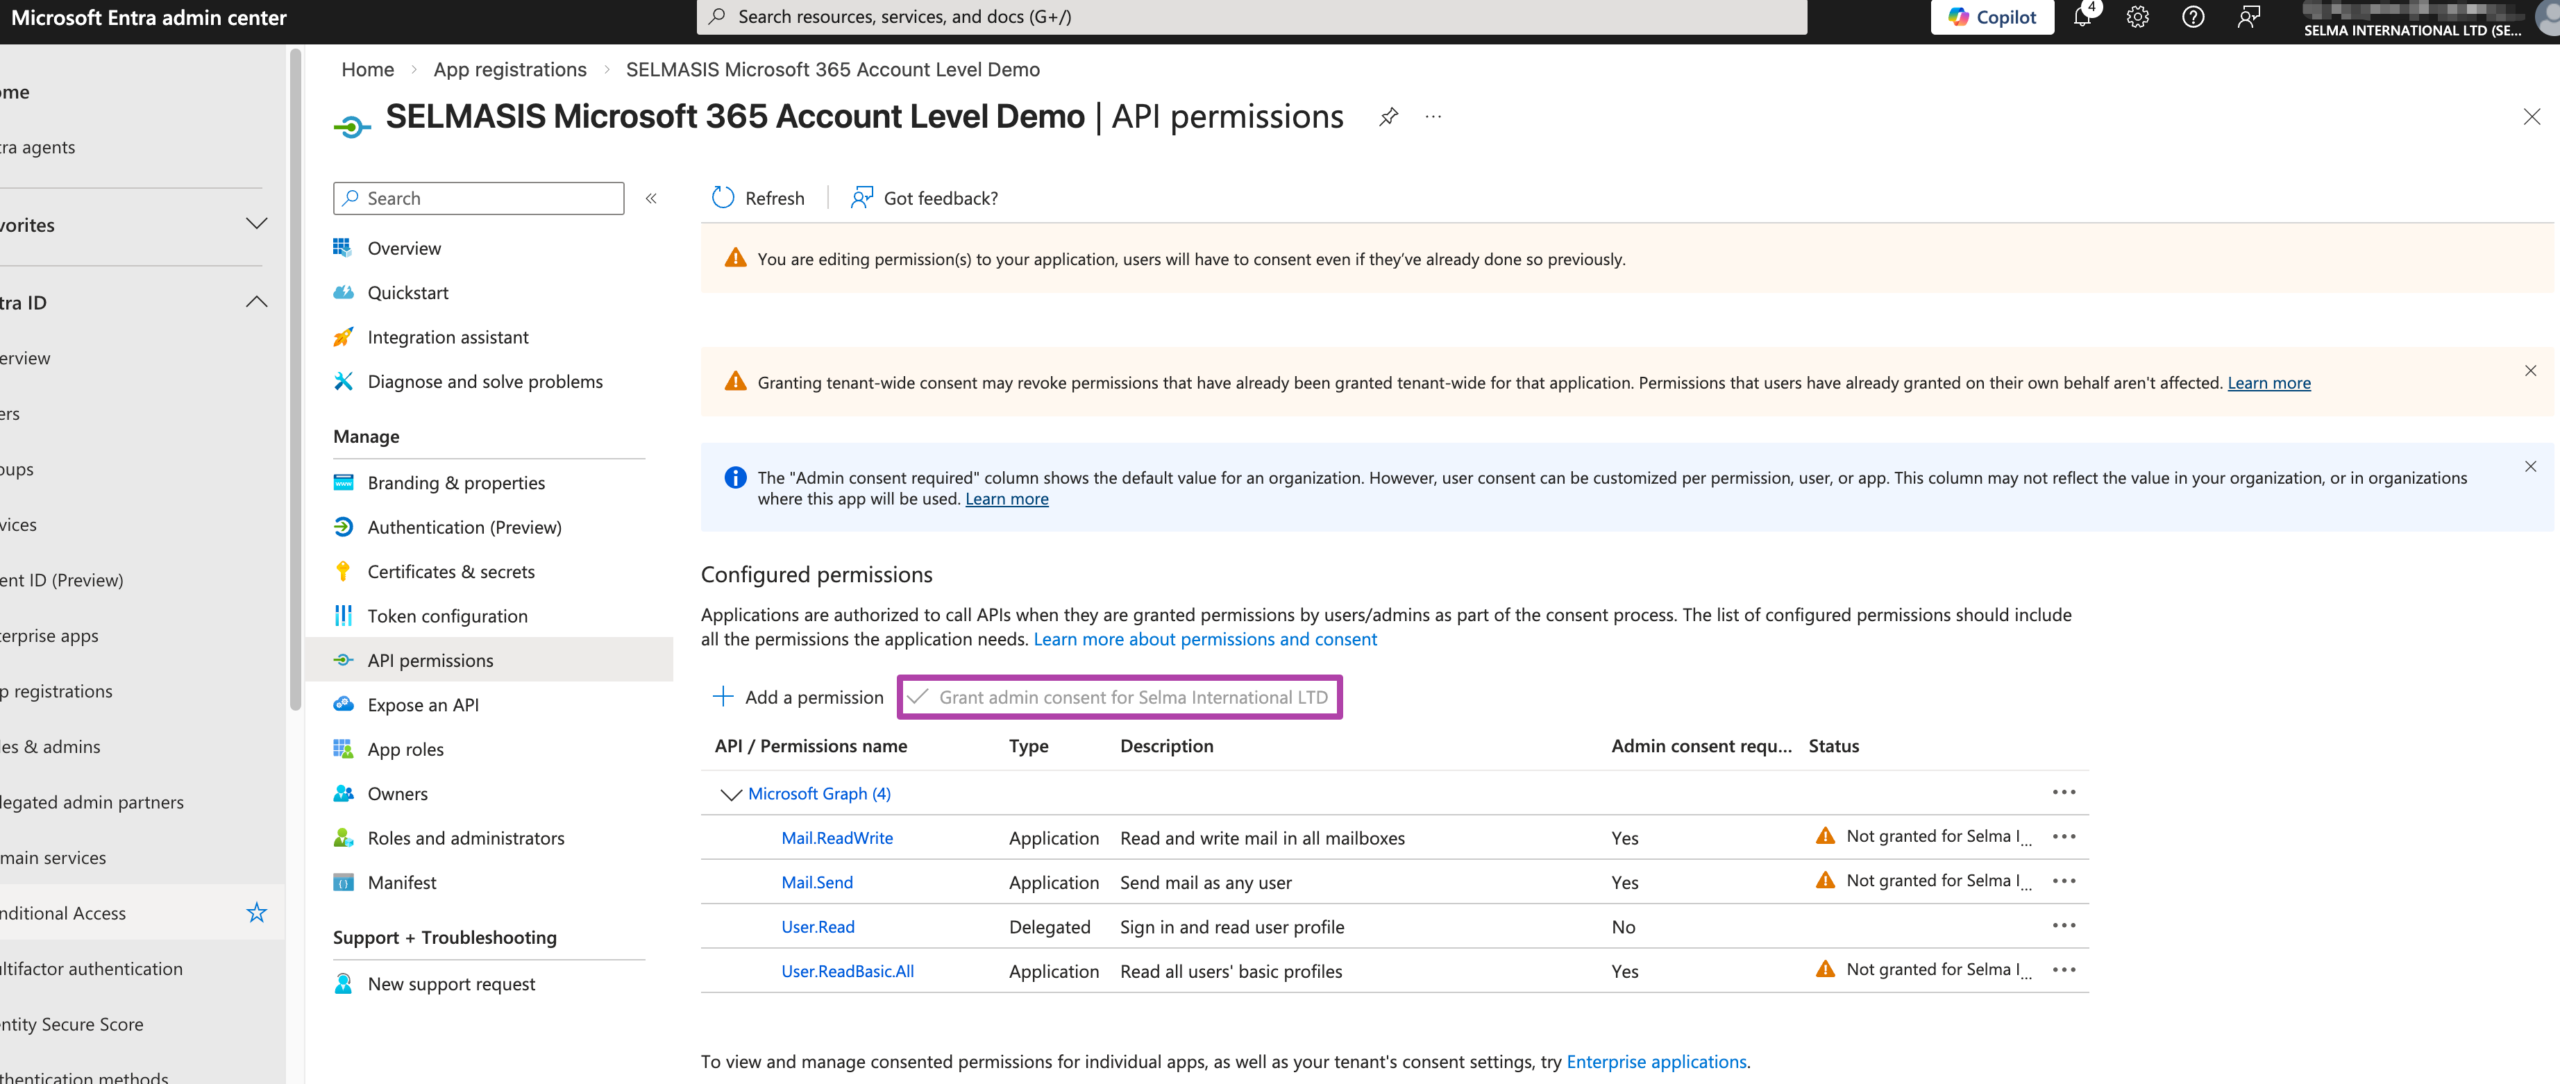
Figure 4v. Grant Admin Consent
Once all permissions are added, click Grant admin consent to approve them for your organisation.
Note: You will only be able to click this button if you are an admin or have the correct permissions, which is managed by your IT team.
Stage 5 — Connect the Integration in SELMA
Figure 5i. Navigate to Integrations > Settings
On your SELMA instance, go navigate to Settings (cog icon, top-right) > Integrations.
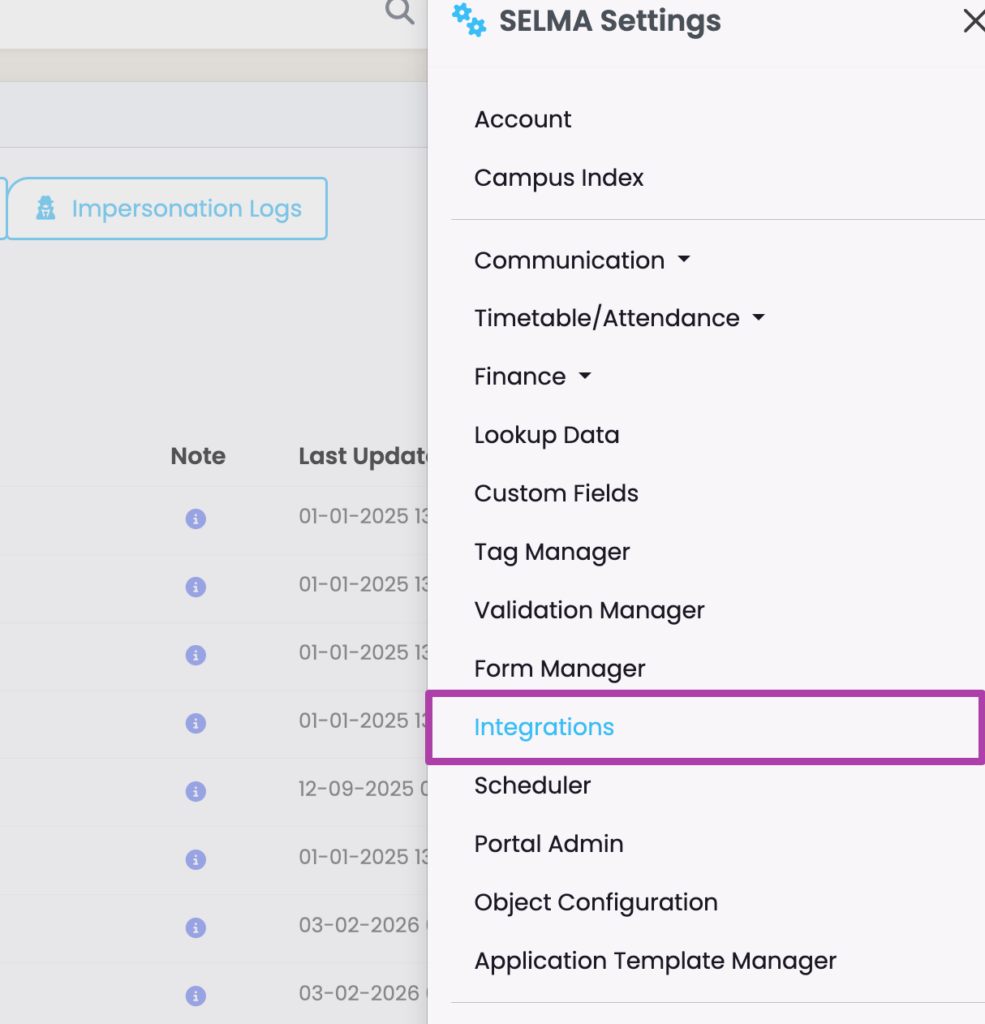
Figure 5ii. Select Microsoft 365 Integration
Click the “Configure” button, below Microsoft 365.
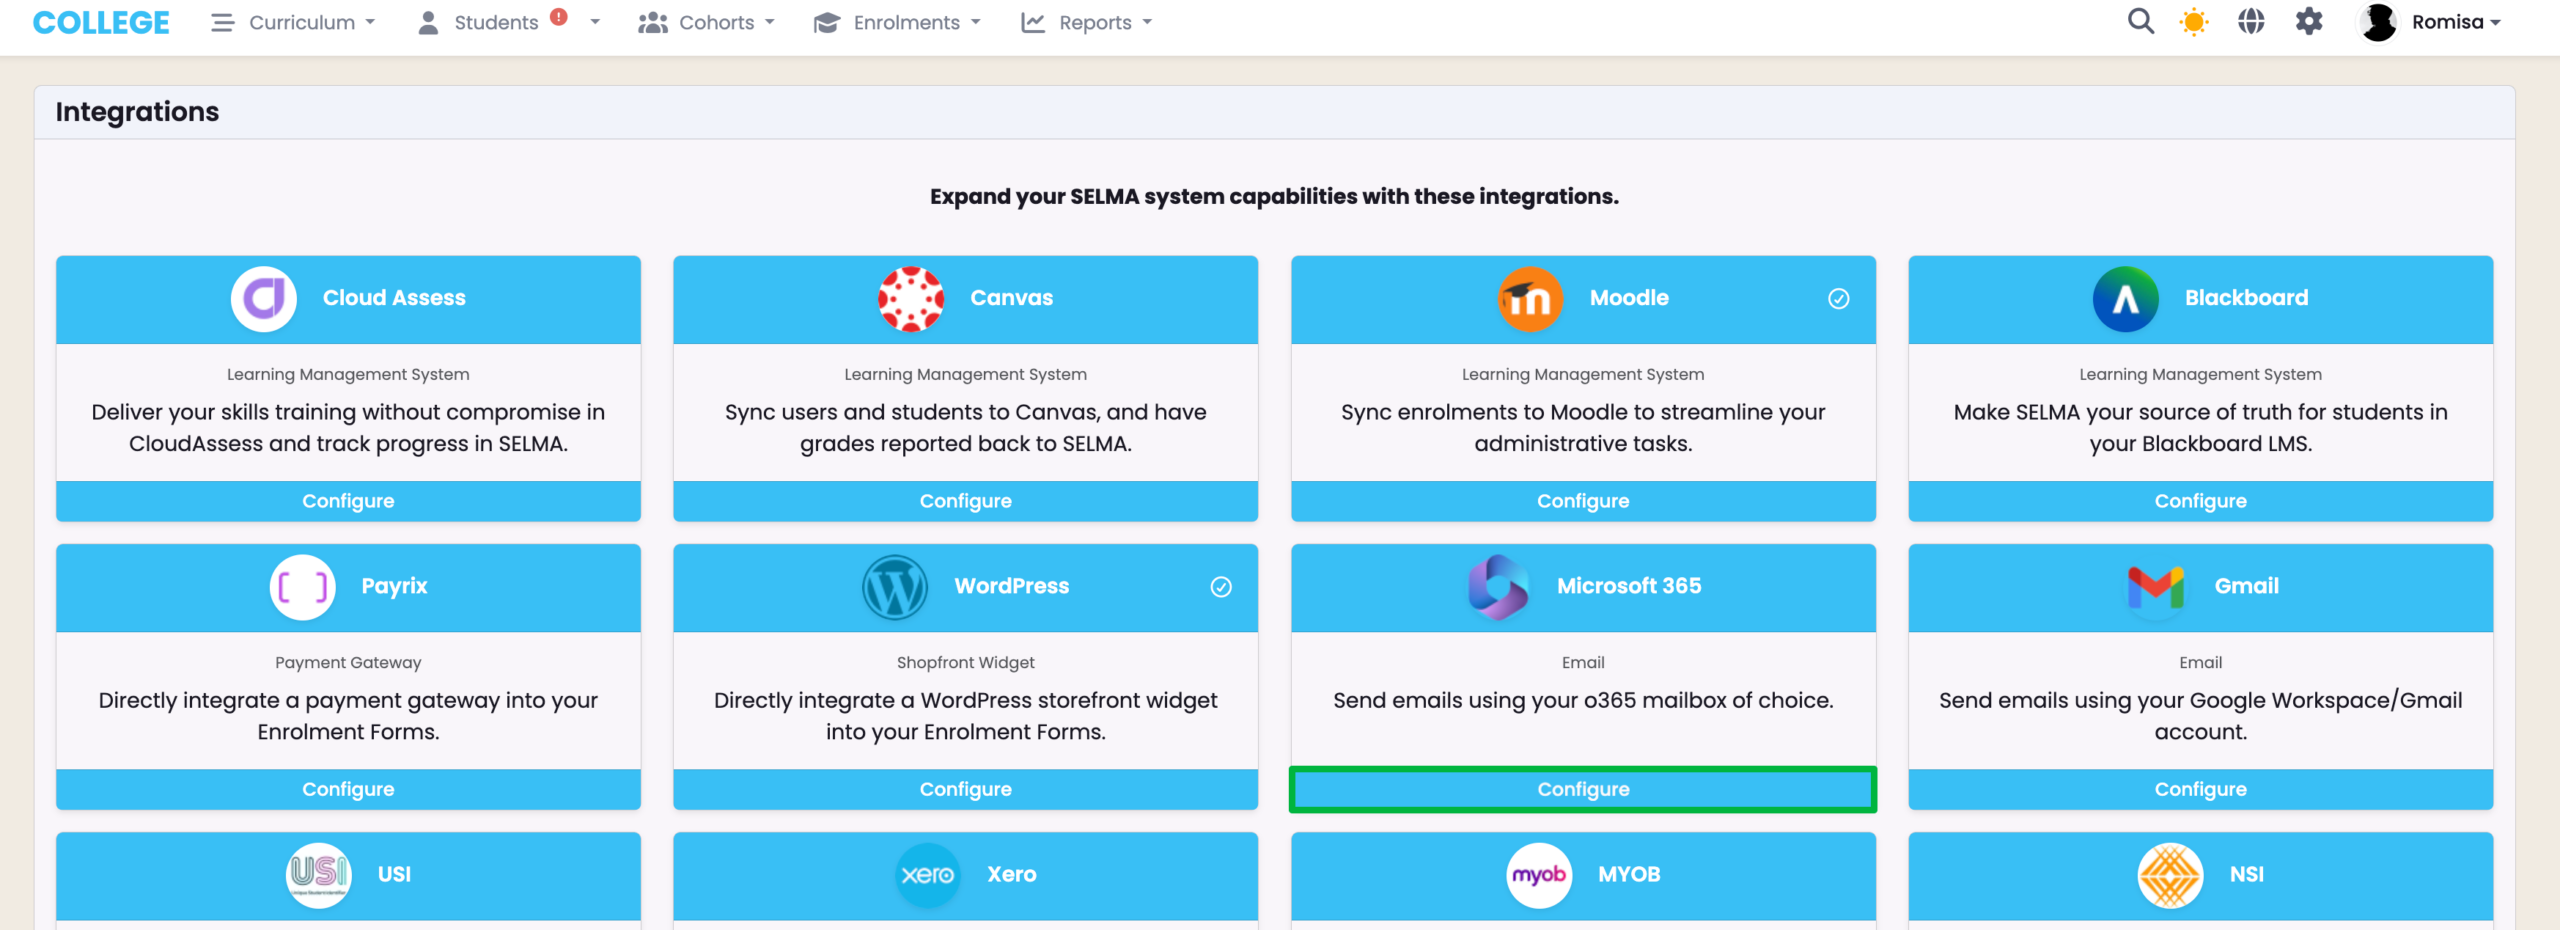
Figure 5iii. Update User-Level Configuration
Click to expand the User-Level Configuration section, and enter the three values saved from Stages 1 and 2: Tenant ID and Client ID – Figure 1iii, and Client Secret Key – Figure 2iii.
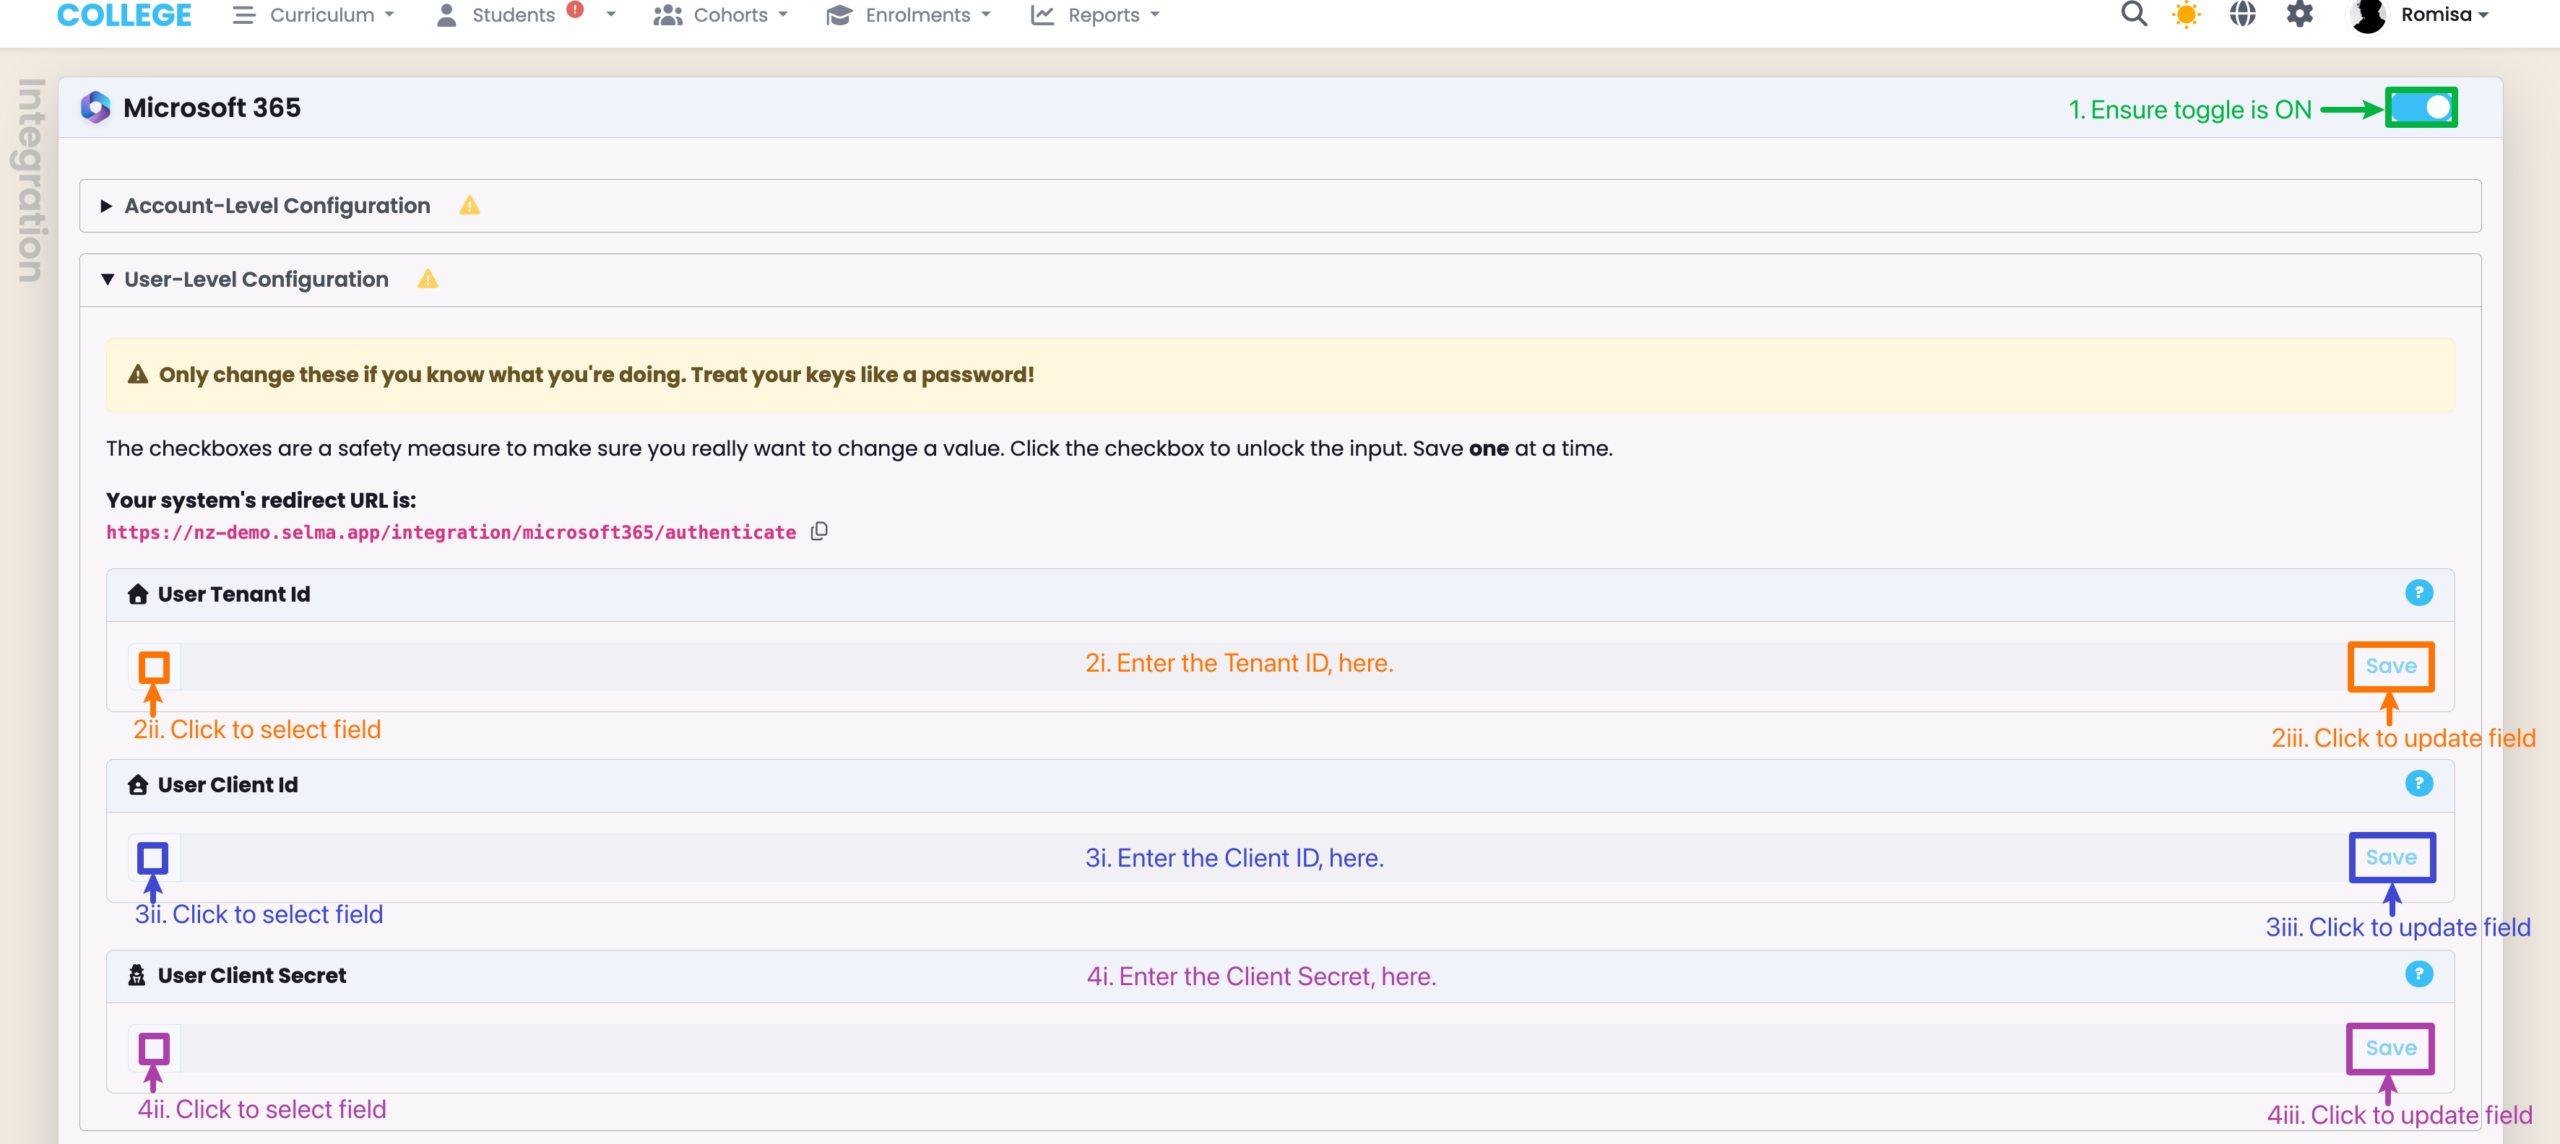
Figure 5iv. Link Microsoft Integration to your Profile
Navigate to your Profile (click the top-right profile picture icon), and click the “Link Microsoft 365” button (orange). This will guide you through your usual Microsoft login process, and ask you to authorise the requested permission. Once authorised, you’ll be redirected back to SELMA, where you will see a success message.

Set-Up Complete
The integration is now fully configured. This means you can send emails within SELMA from your validated mailbox address.
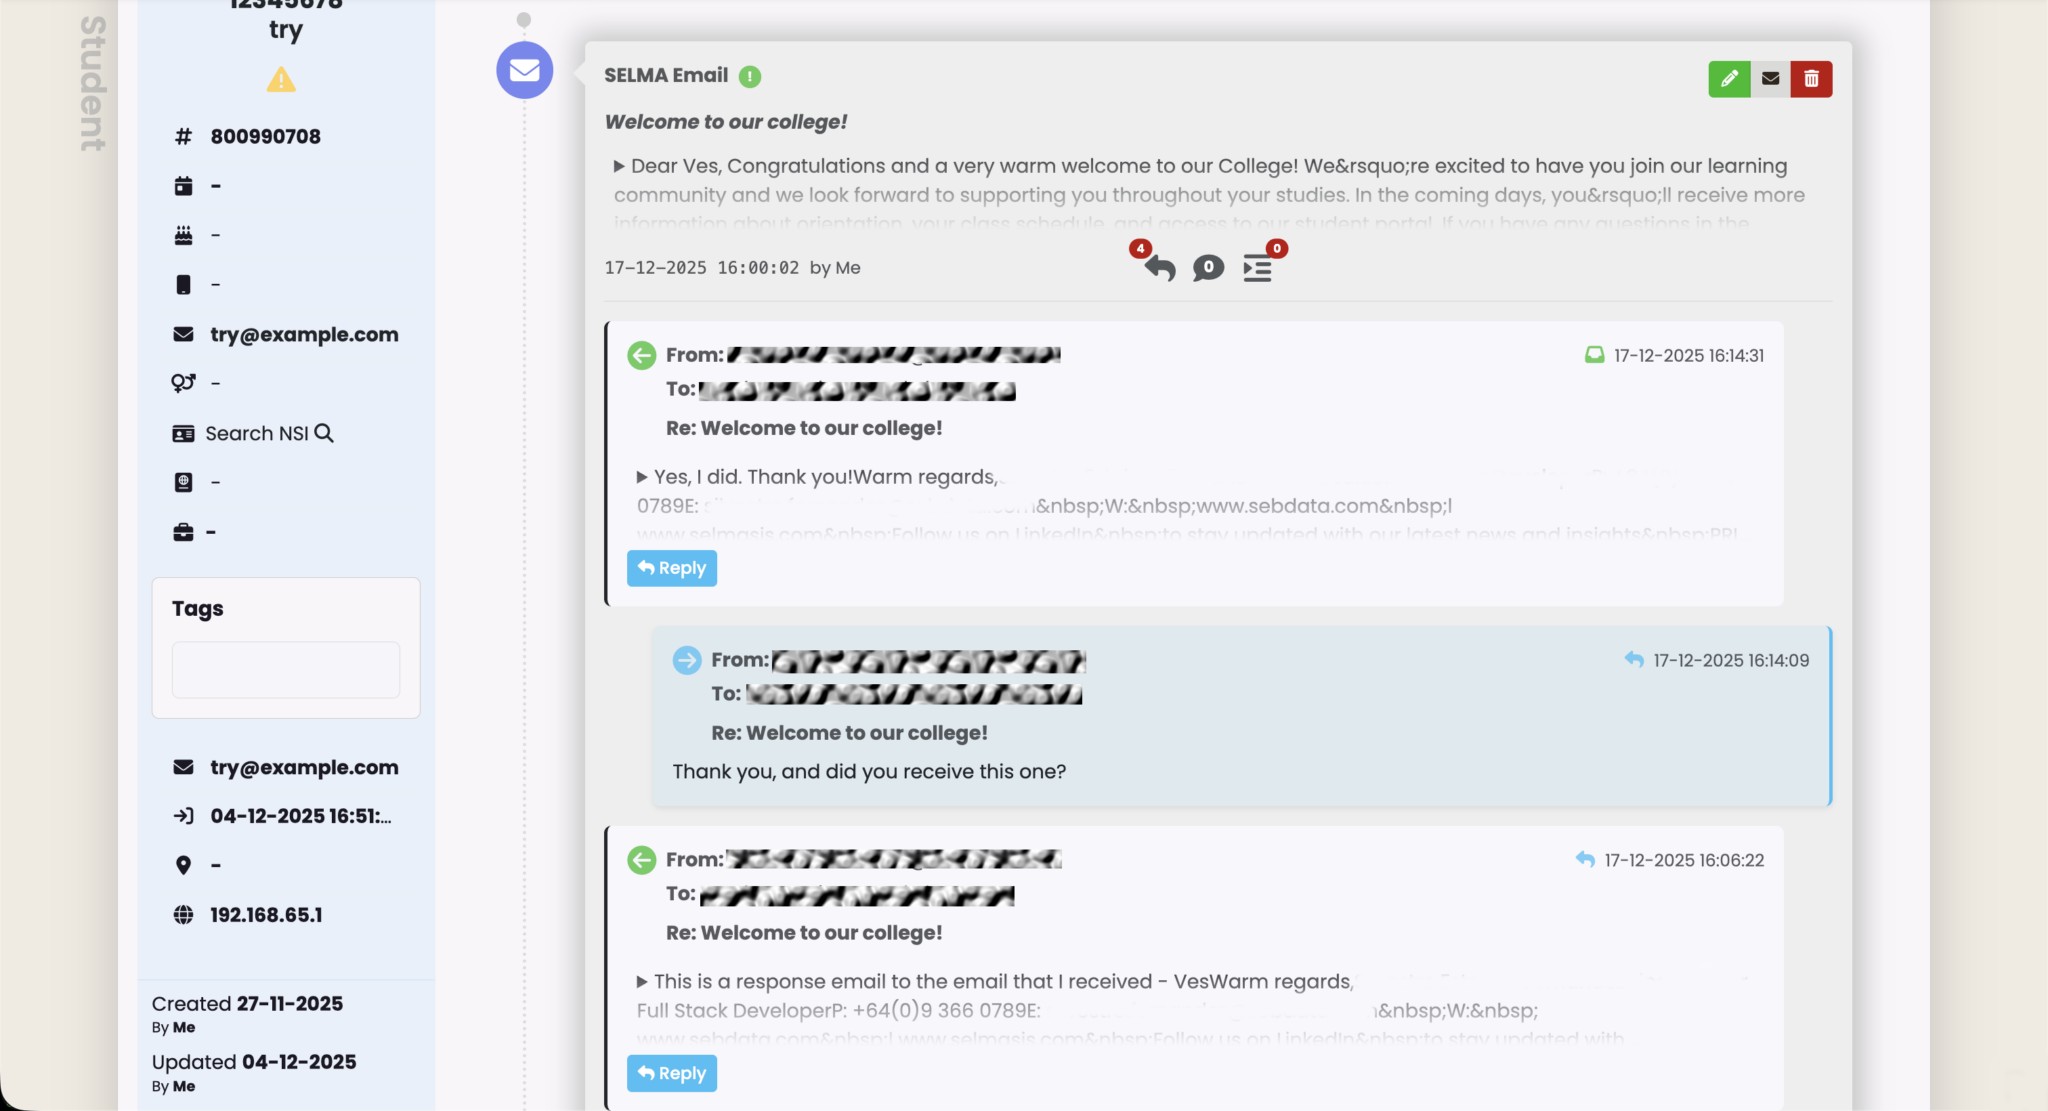
Two-Way Communications
This feature allows you to see an email thread of correspondence within SELMA, which can be accessed from the Student Profile > Events tab.
- Please contact SELMA Support to enable this feature as part of your Microsoft Integration Plan.
Figure 6. Navigate to Students > Events Tab