In this Section:
Link Existing Contact to Student
You can link any Contact with an “Active” status to a Student.
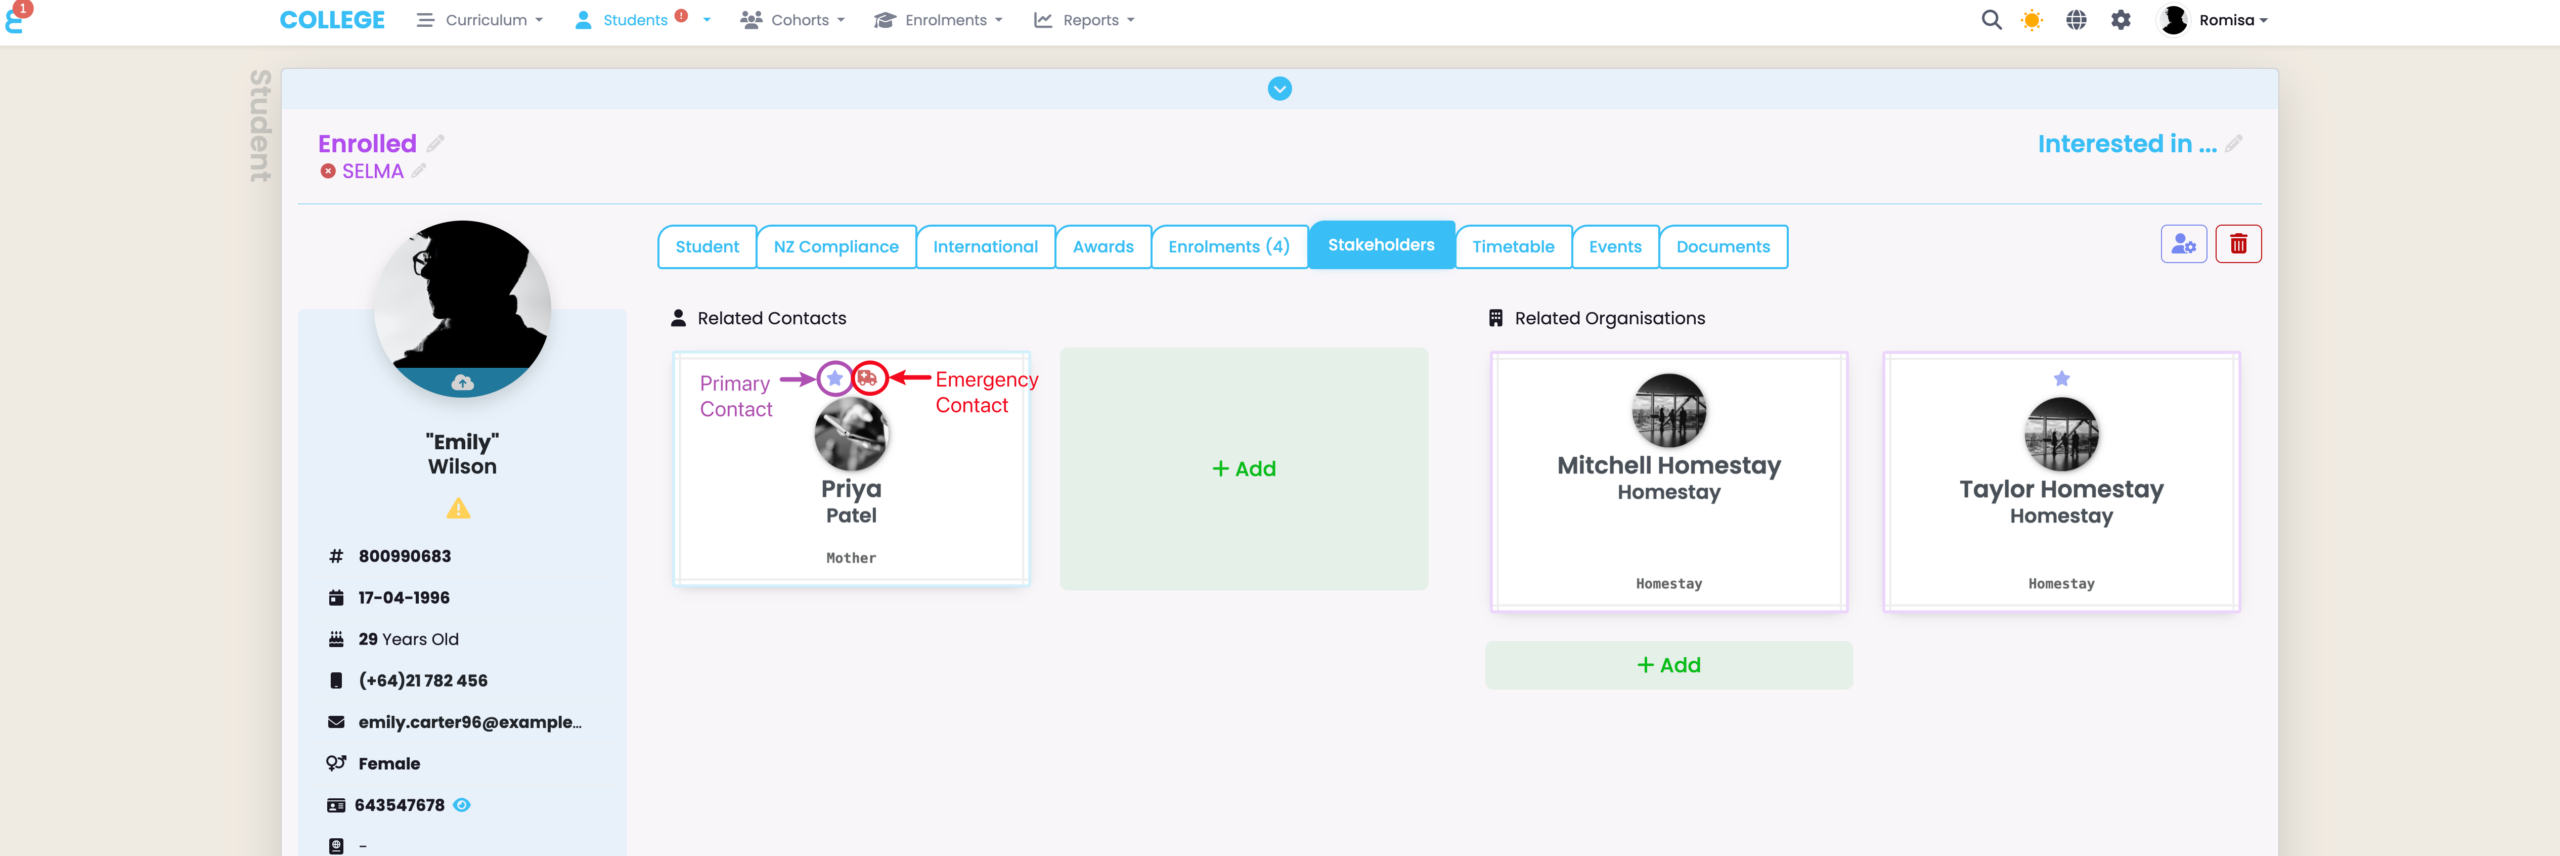
On the Student profile, go to the “Stakeholders” tab. You’ll see two groups: Related Contacts and Related Organisations.
Figure 1: Stakeholders Tab

Figure 2: Add Related Contact
In Related Contacts, click the green “+Add” box to open a pop-up dialog.
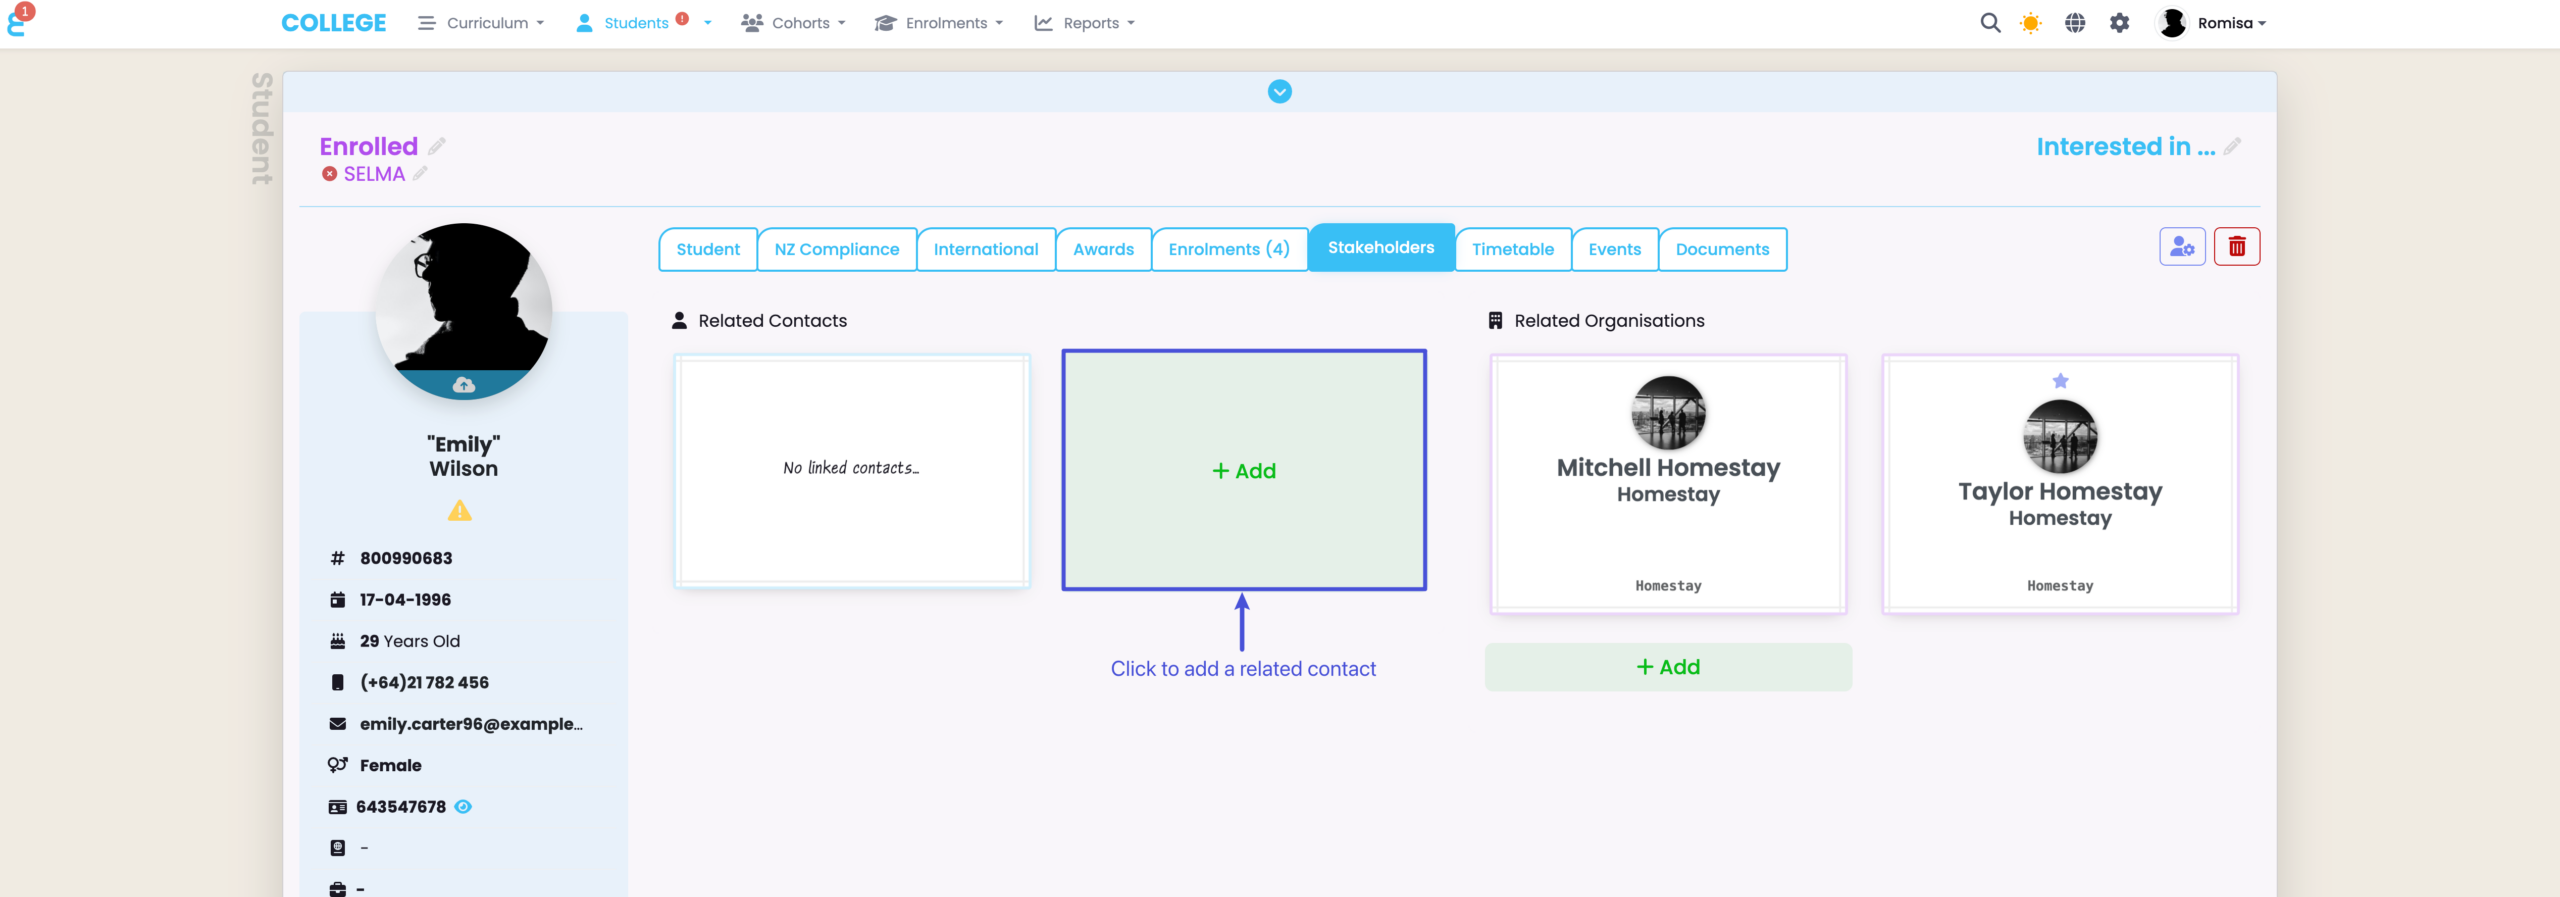
Figure 3i: Contact Form
Fill out the required contact details, marked by red asterisks, and other necessary information.
NOTE: The Contact field displays only “Active” Contacts.
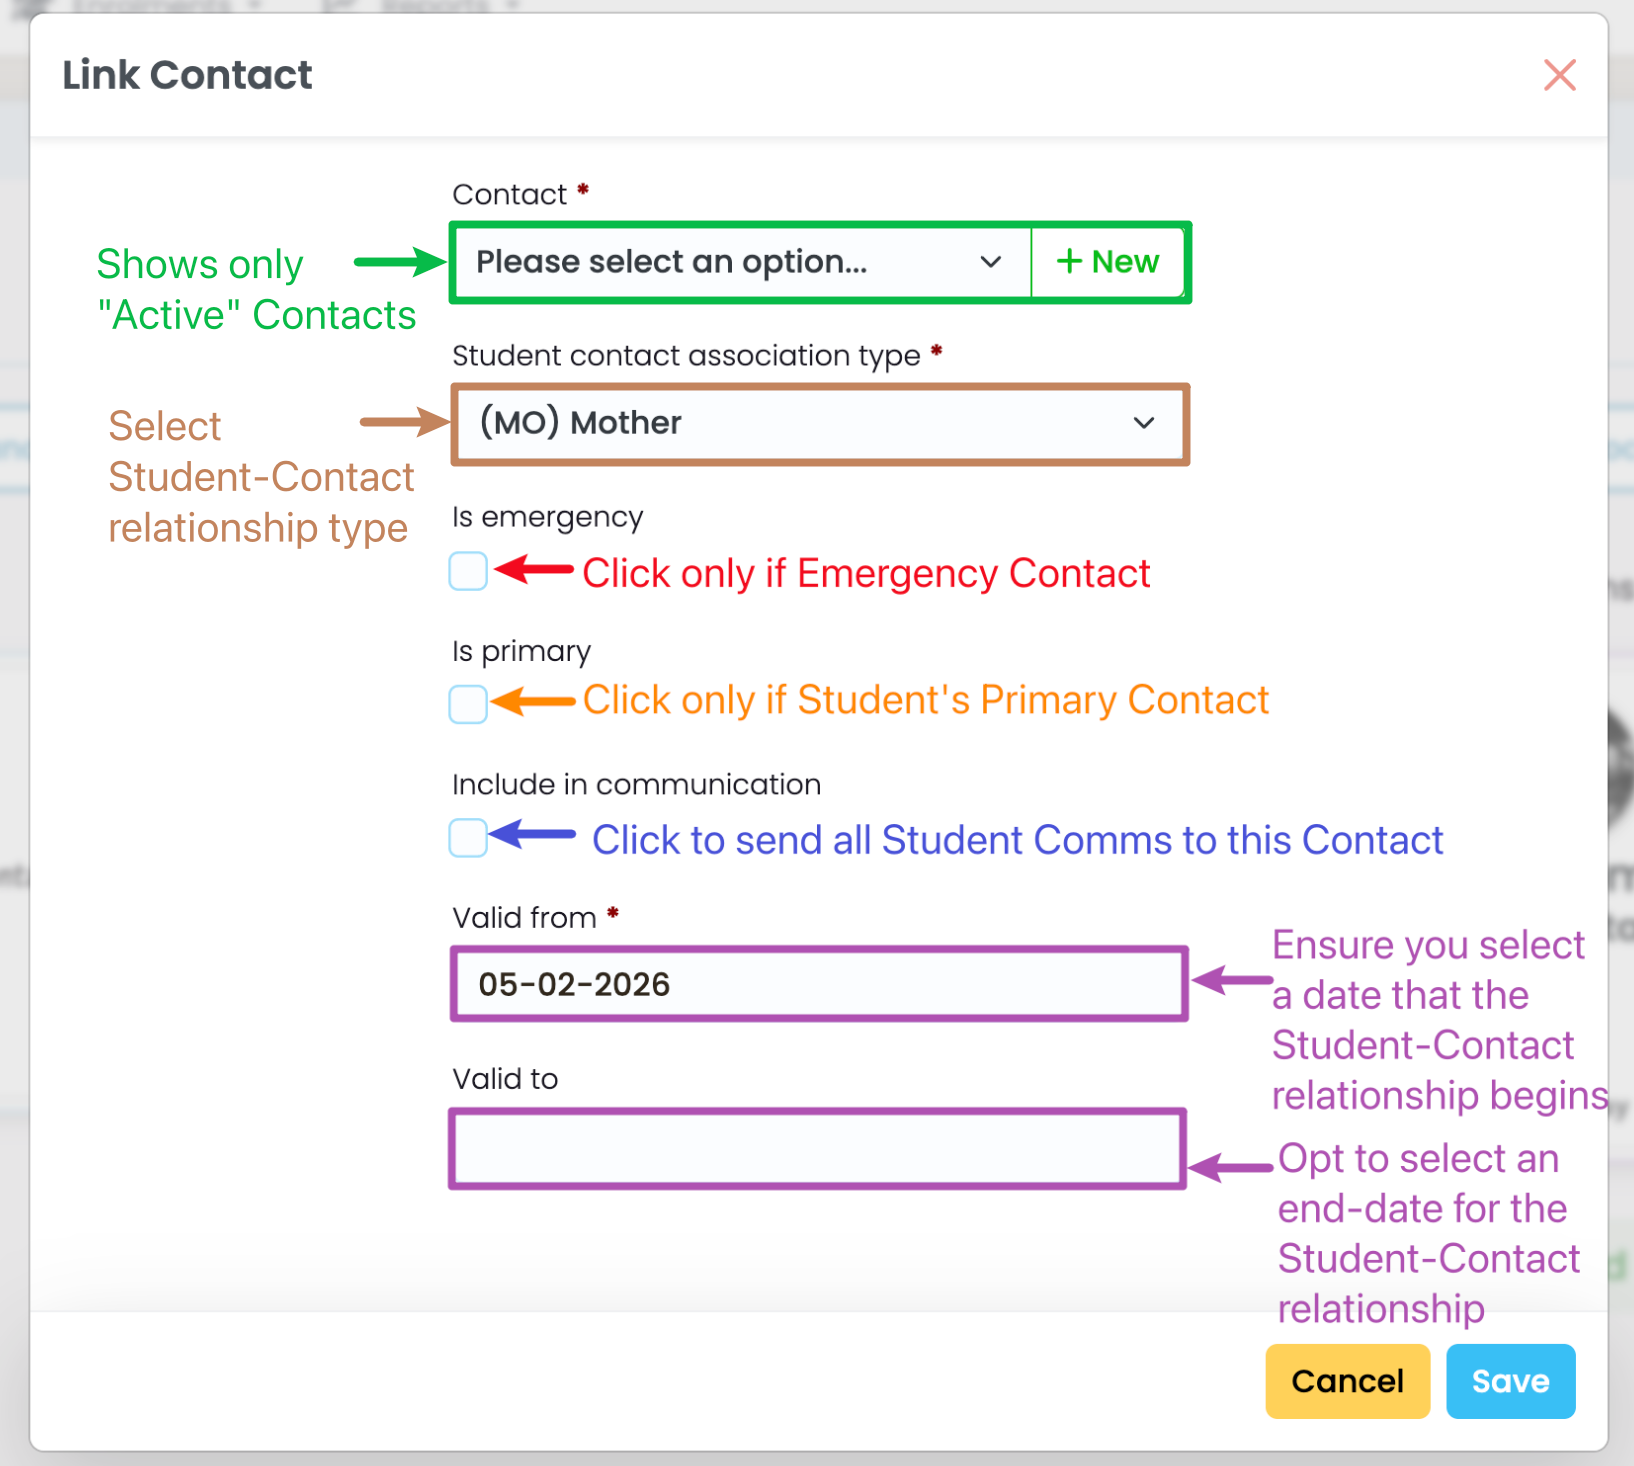
Figure 3ii: Search Active Contacts
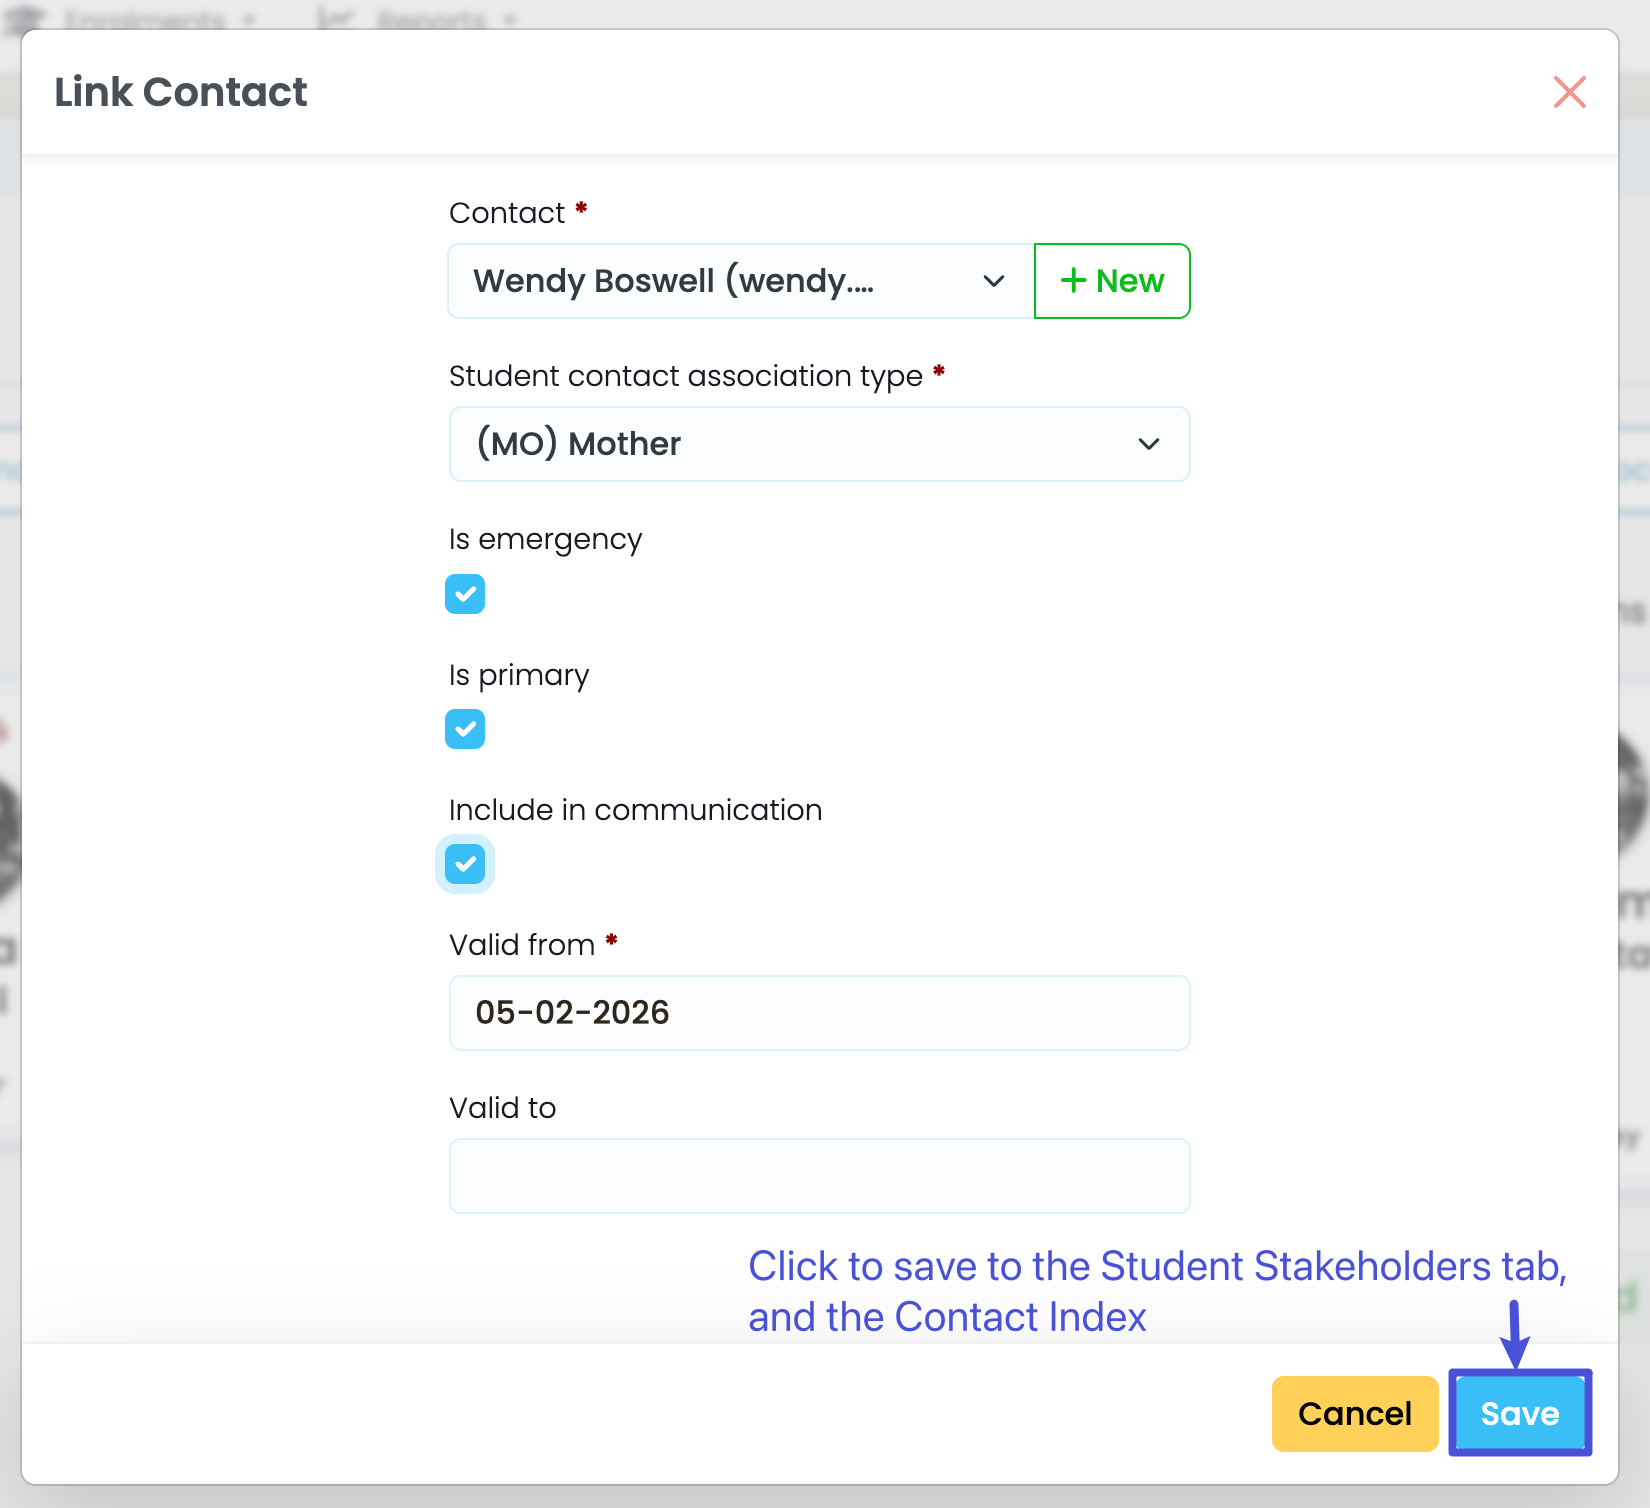
The number of “Active” Contacts that is shown in the “Contact” drop-down list is limited. Type a Contact name to search, and display matching contacts. If the type you need doesn’t exist, jump to Add New Association Type.
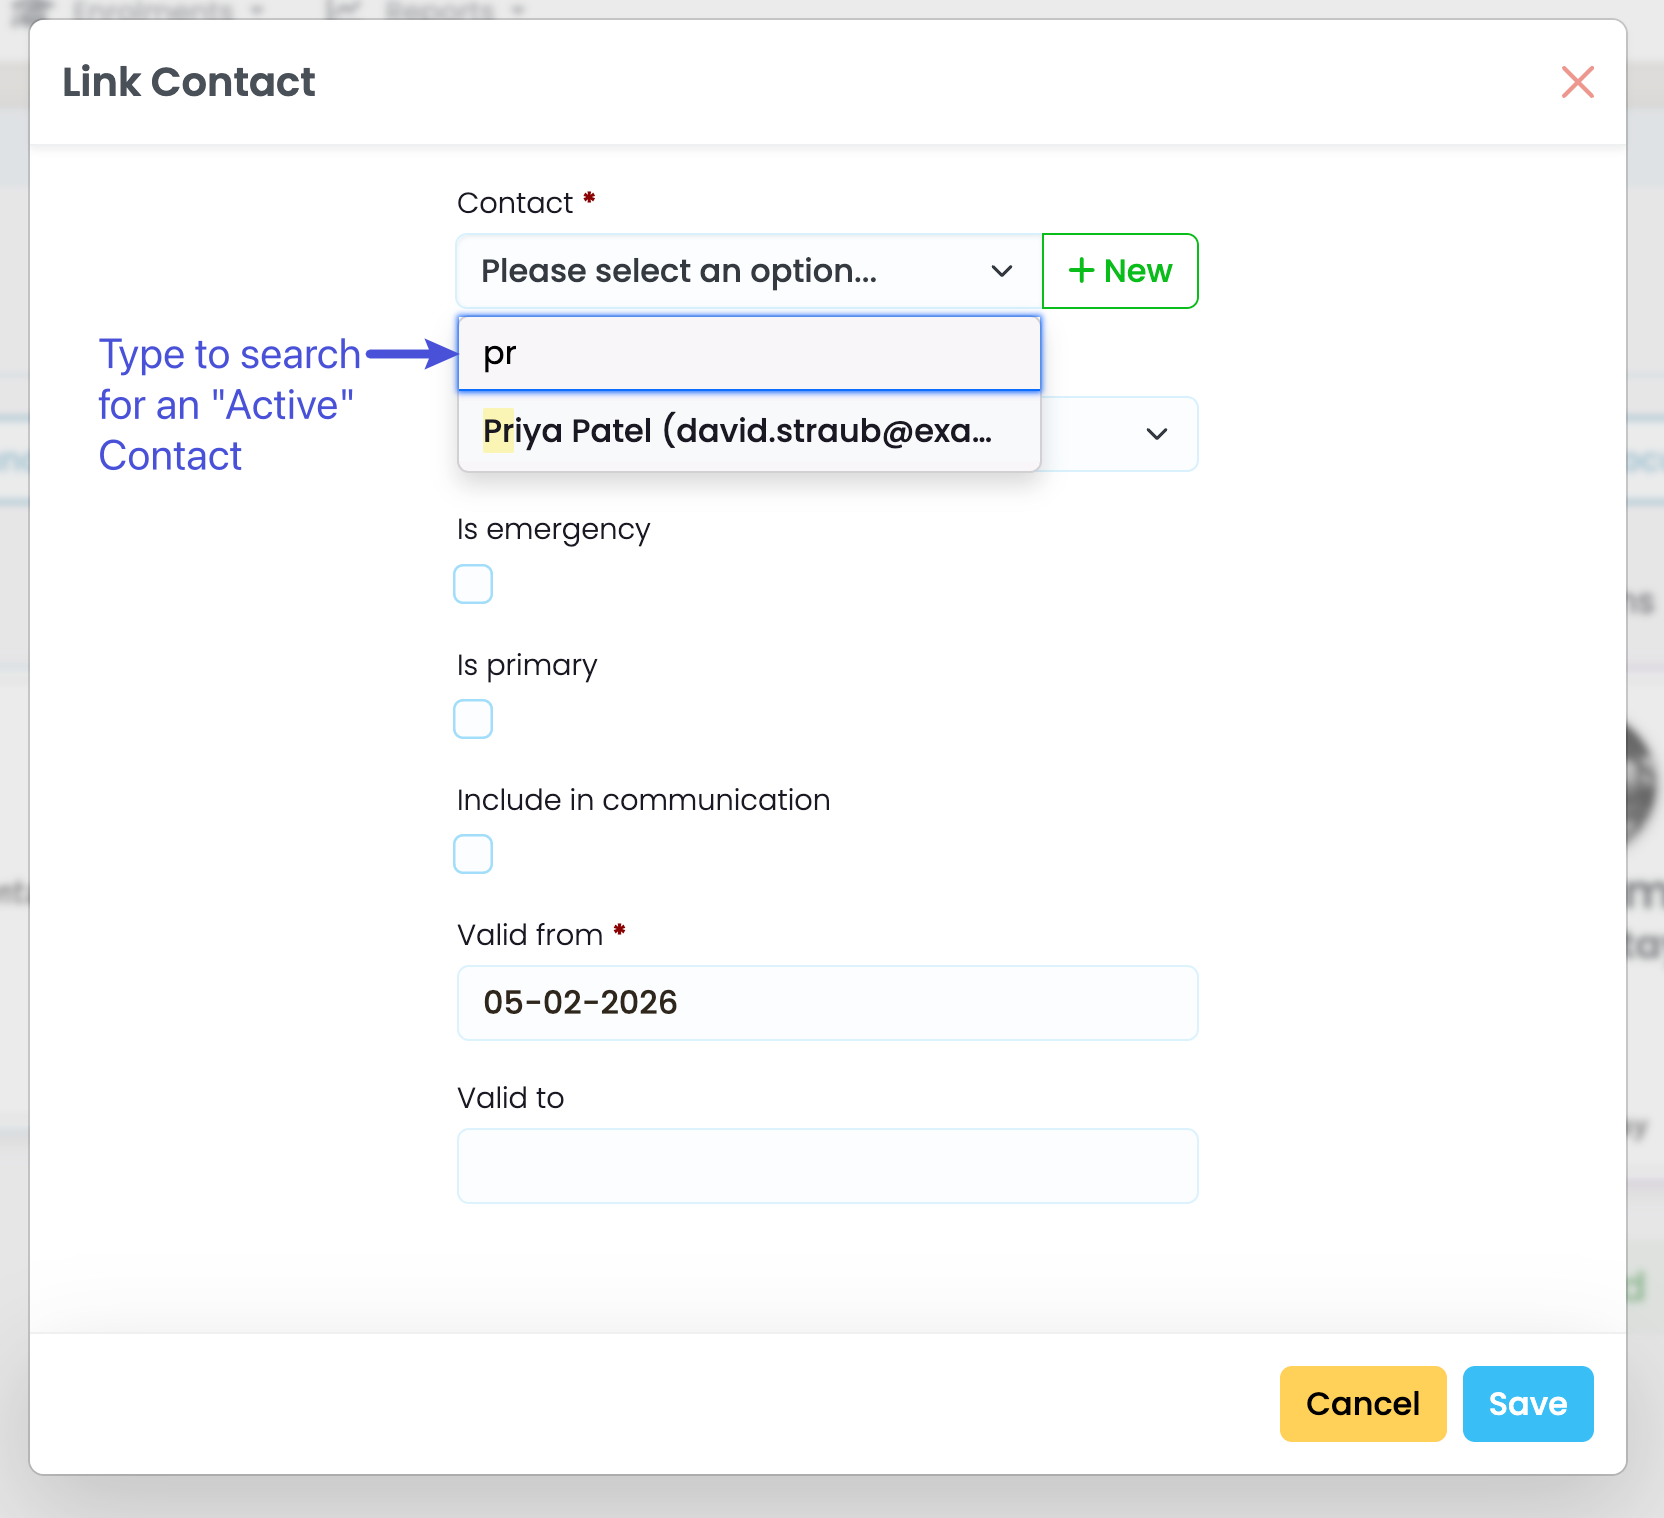
Figure 5: Linked Contact Display
When a new contact has been saved, you will see a purple star icon which indicates the Primary Contact, and/or a red ambulance icon which indicates the Emergency Contact.
Link New Contact to Student
There are two ways to link a new Contact to a Student:
- Create a new Contact from the Contact Index, then link them via the Student’s Stakeholders tab.
- See Link Existing Contact to Student, above.
- Create a new Contact from the Stakeholders tab, directly.
- Continue reading to see how to use this method.
Figure 6i: Add a Related Contact
Figure 6ii: Click the “+New” Button
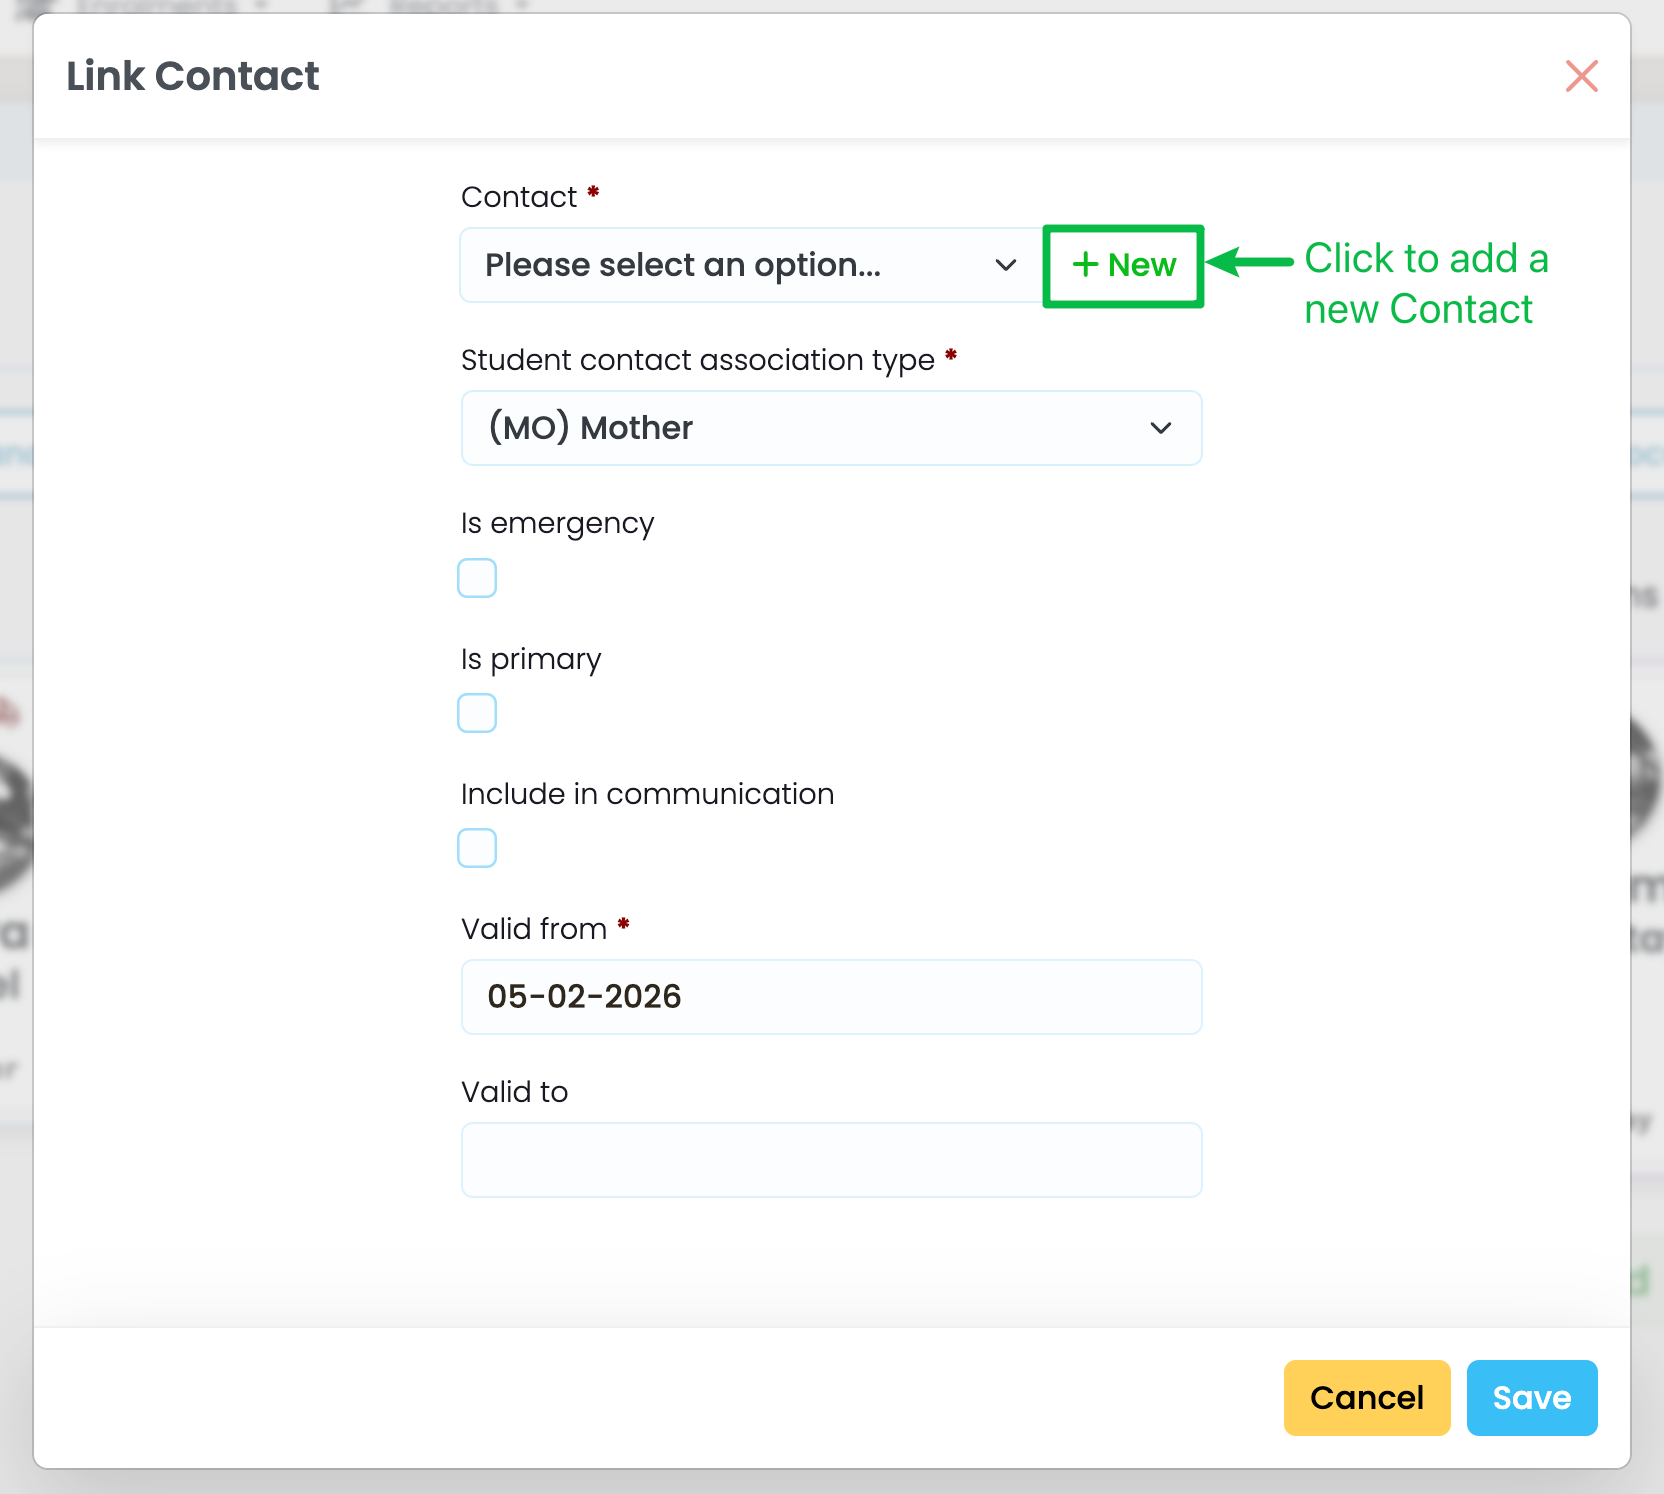
Figure 6iii: New Contact Form
Enter basic Contact information. When you click “save”, the Contact is automatically linked to the Student and will appear in the Contact Index for editing later.
Add New Association Type
You can add unlimited Student Contact Association Types in SELMA.
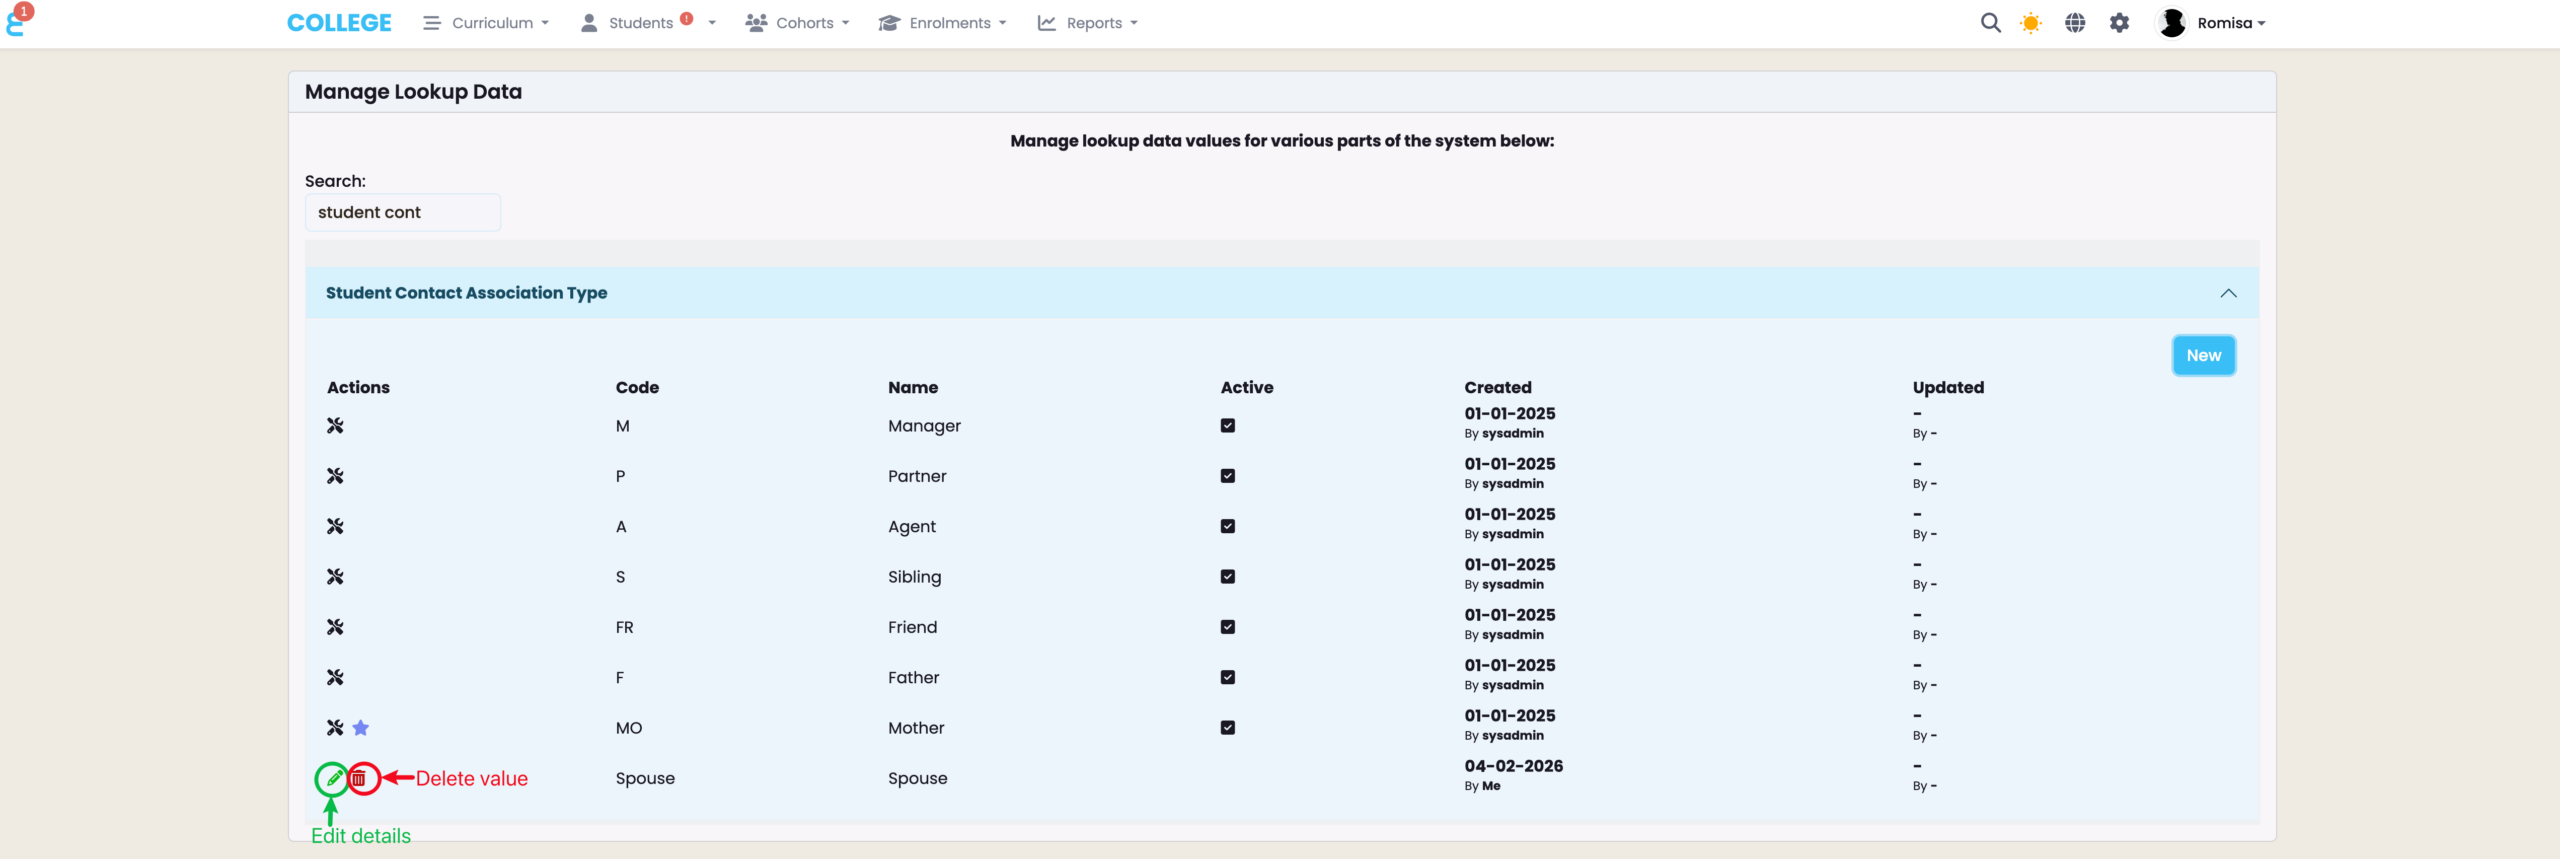
Figure 7i: Navigate from Settings > Lookup Data
Click the Settings icon in the navigation bar. From the expanded menu, select Lookup Data.
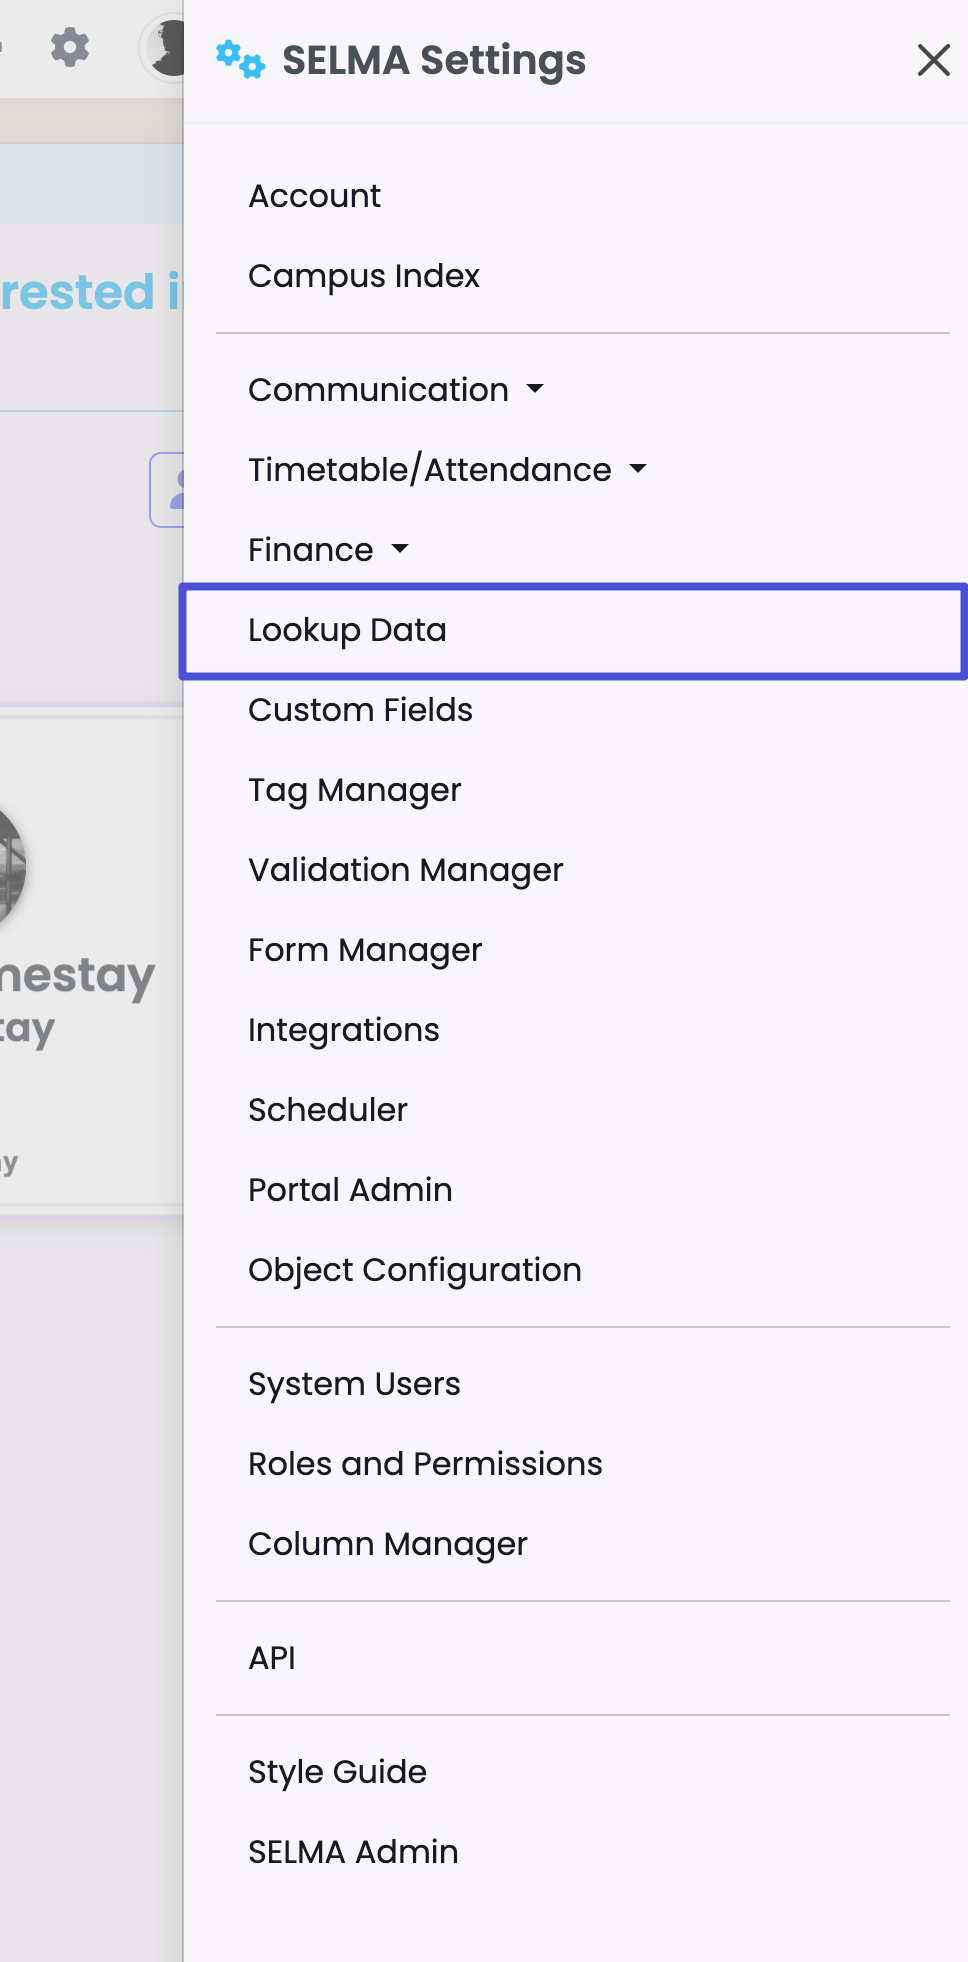
Figure 7ii: Create a Student Contact Association Type
Find the heading “Student Contact Association Type” and click to expand it. You can deselect a value to mark it as “Inactive”, or create a new value entirely clicking the blue “New” button.
Note: System default values cannot be edited.
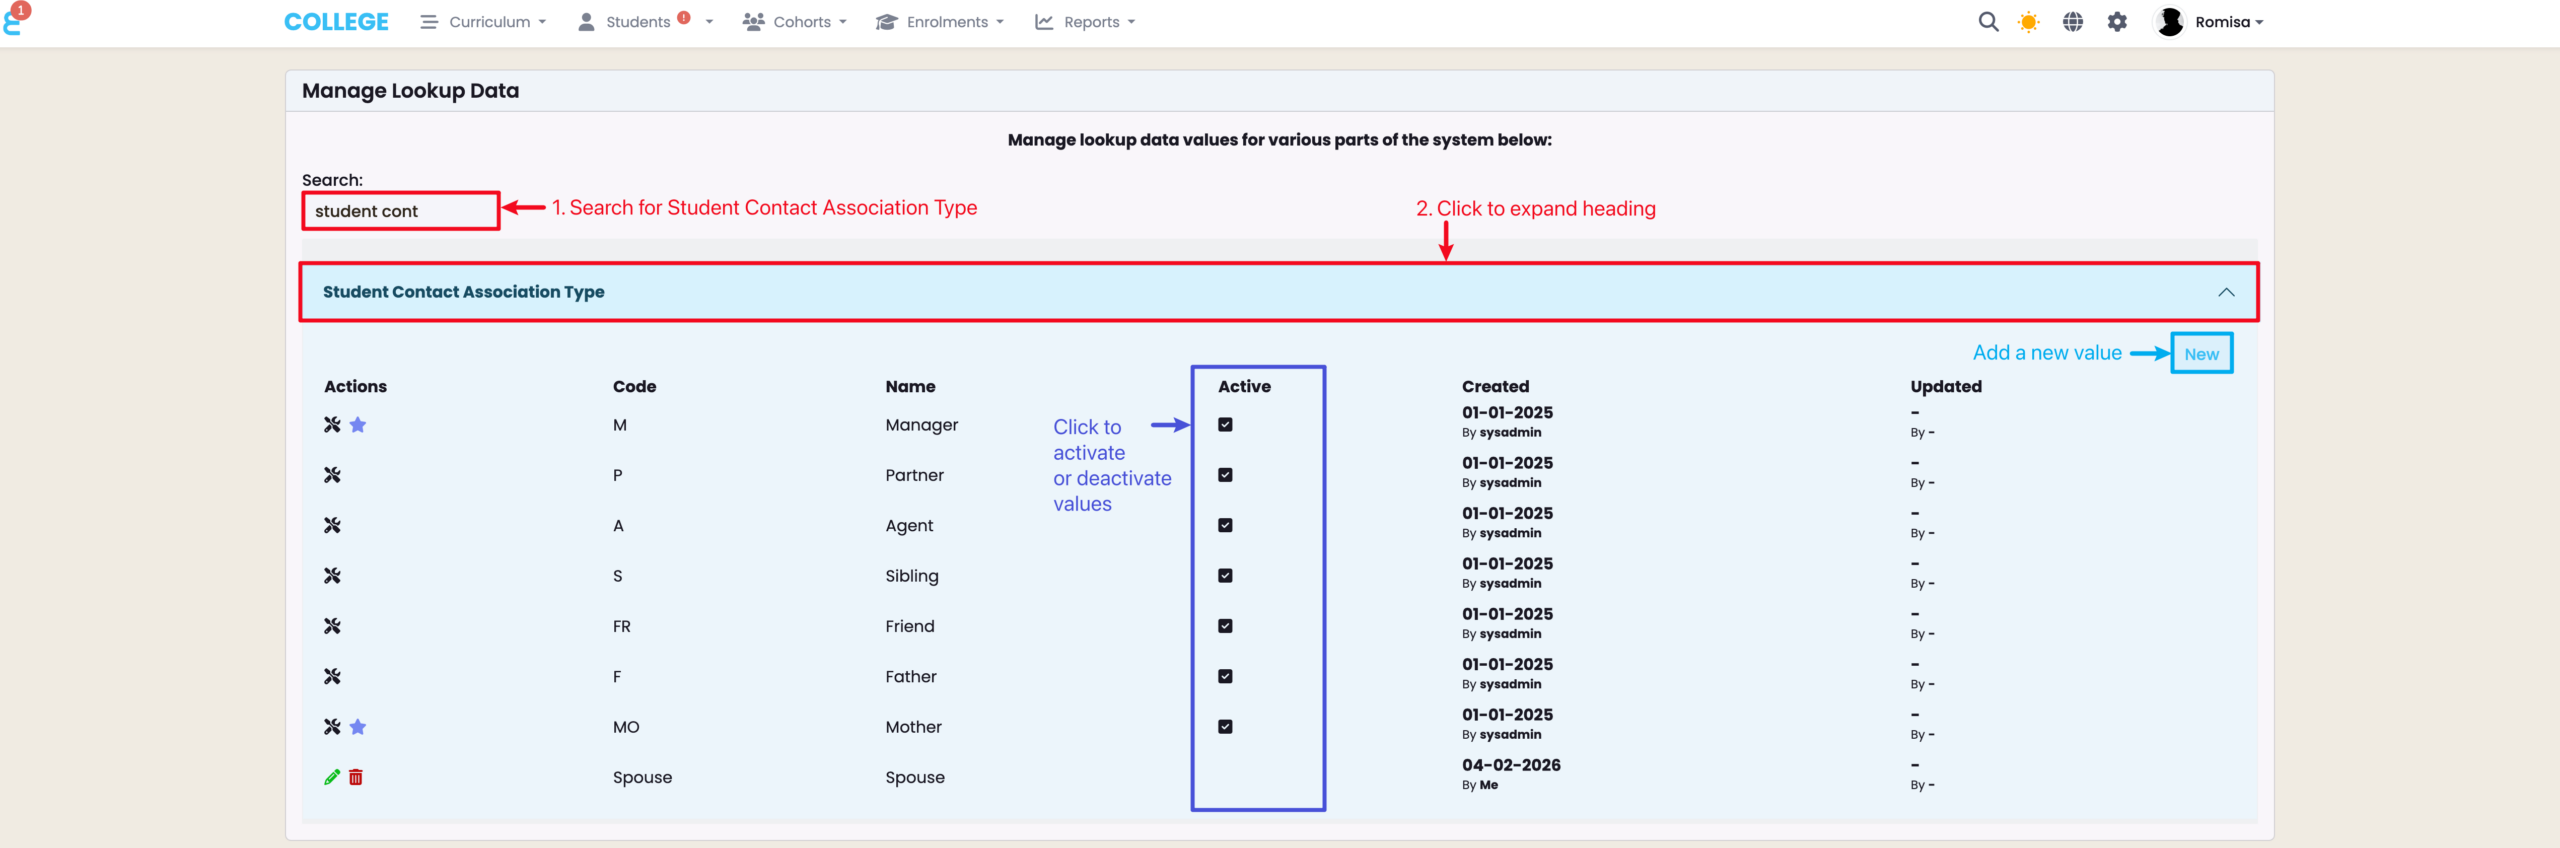
Figure 7iii: Add Details
When you choose to add a new value, you will see a pop-up form where you can add a simple code in the “Code” field, and add a name in the field “Label“. Click the “Active” check-box to ensure the data value shows up for use as a Student Contact Association Type in SELMA.
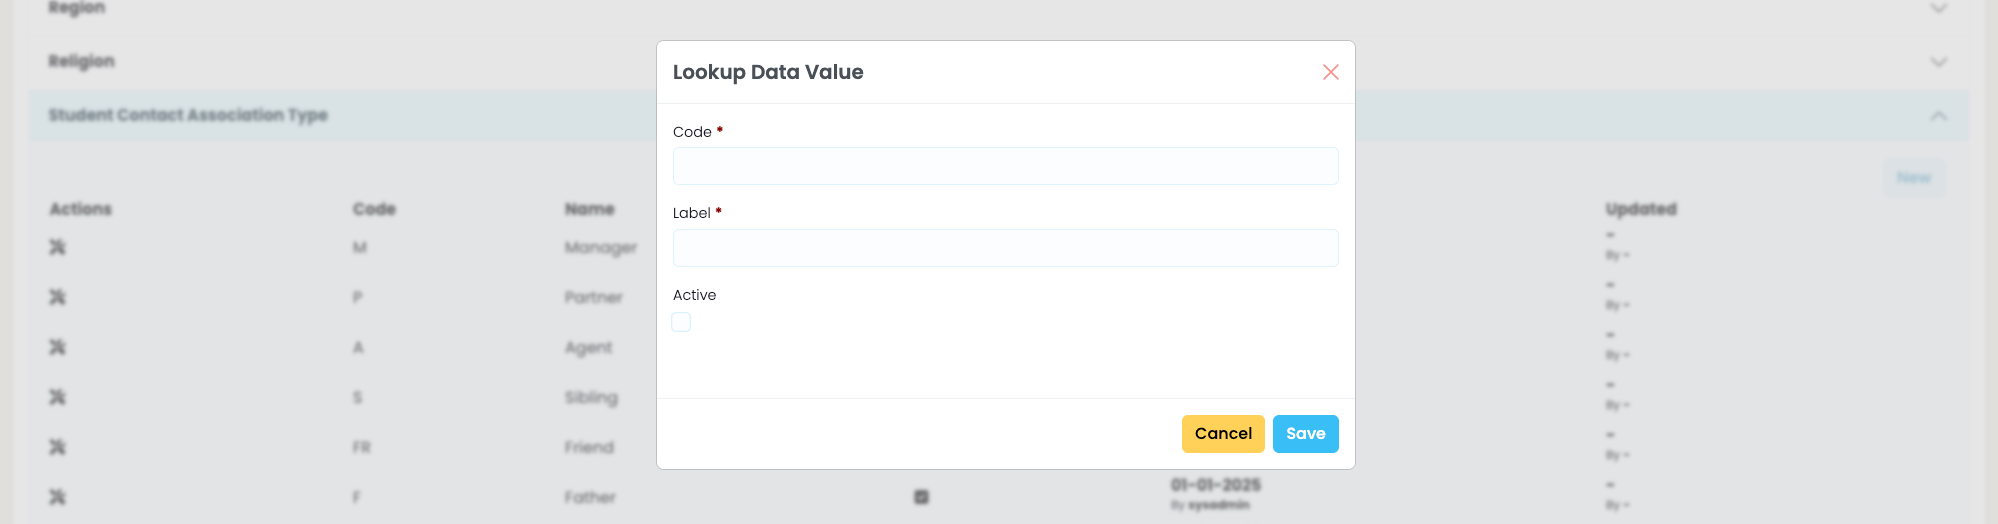
Figure 7iv. Edit Student Contact Association Type Value
While system default values can not be removed or edited, you can edit or delete Student Contact Association Type which you have created.
NOTE: Do not delete any value currently in use by student-contact links.