This section covers the process of managing and creating intakes.
Managing Intake(s)
Intakes are cohorts of students enrolled in the same programme. Key programme-level information set up at the intake level is inherited by all enrolments created within that intake.
Typically, intakes are created based on an institution’s academic structure—commonly by semester, quarterly, or annually—depending on how enrolments are managed throughout the year.
Students within the same intake will generally undertake the same set of components (courses). However, in certain cases, some enrolments may include Ad Hoc components that differ from the standard structure.
Staff members can be assigned to an intake. Based on their permissions, they may be restricted to viewing or managing only the data related to the specific intakes they are assigned to.
Intake Index
To access the Intake Index, use the navigation bar at the top of the page:
- Select Cohorts.
- Then click on Intake.
As with any other grid view in the system, you can:
- Search and open existing intakes.
- Save your searches for future use.
- Export the intake list to a CSV file.
To create a new intake, click the ➕ (plus) button.
For detailed steps on setting up a new intake, see Creating a New Intake.
Intake Profile
Once you have selected an intake, you will be directed to its information page.
The intake profile contains several tabs:
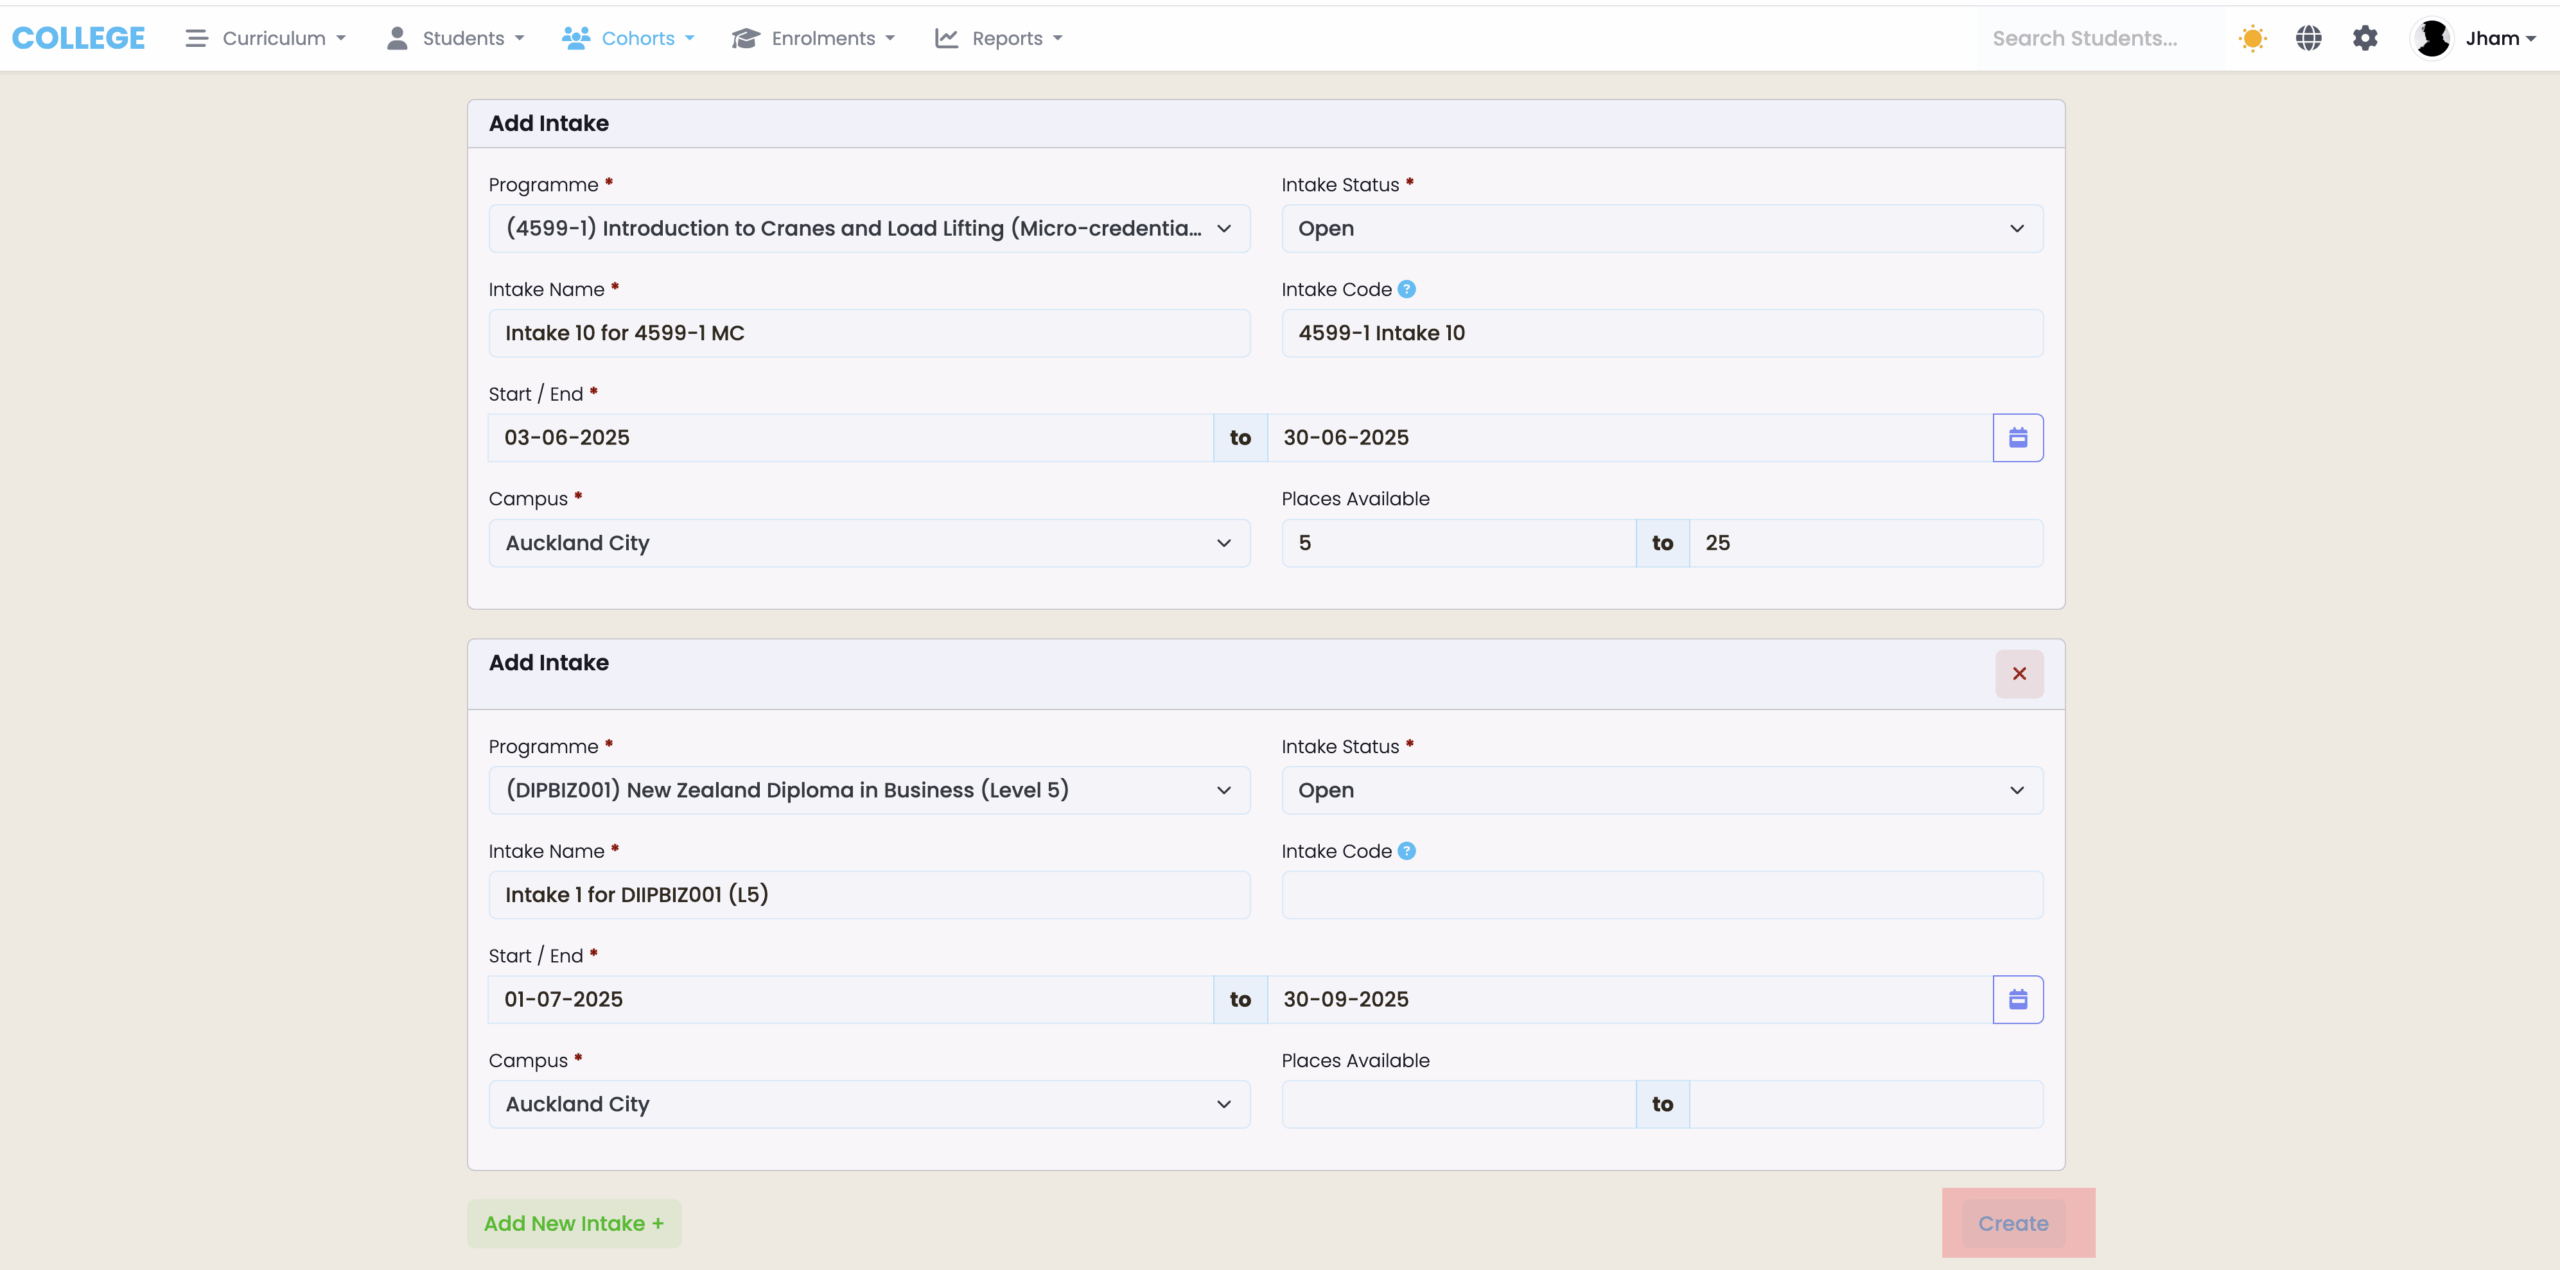
- Intake – Basic information such as name, code, start and end dates, available places, campus, and the components attached.
- NZ/AUS Compliance – Stores default compliance values related to SDR and AVETMISS reporting.
- Enrolments – Lists all enrolments under this intake. You can also perform bulk updates here.
- Staff – Assign staff members responsible for this intake.
- Fees – Any fees associated with this intake. These fees will be inherited by all enrolments.
- Scheduler – Allows you to set up automated actions. Click here to learn more about the Intake Scheduler.
- Timetable – Set up events that students enrolled in this intake need to attend. These events will reflect under the Attendance tab overnight.
- Attendance – Generates attendance sessions for each enrolment in this intake to be marked.
- Event – A space to store notes related to the intake.
- Custom Field Tabs – You can add custom tabs here. These will appear after the Event tab.
Creating New Intake
Creating an intake in SELMA is quite straightforward. As long as the information at the curriculum level has been set up correctly, minimal to no editing should be required at the intake level. Intakes inherit the information configured at the curriculum level.
There are multiple ways to create an intake: it can be done from the programme level, the intake index, or the New Intake section.
Programme Level
Creating the intake this way allows the system to automatically link the intake you are creating to the programme from which it is being created.
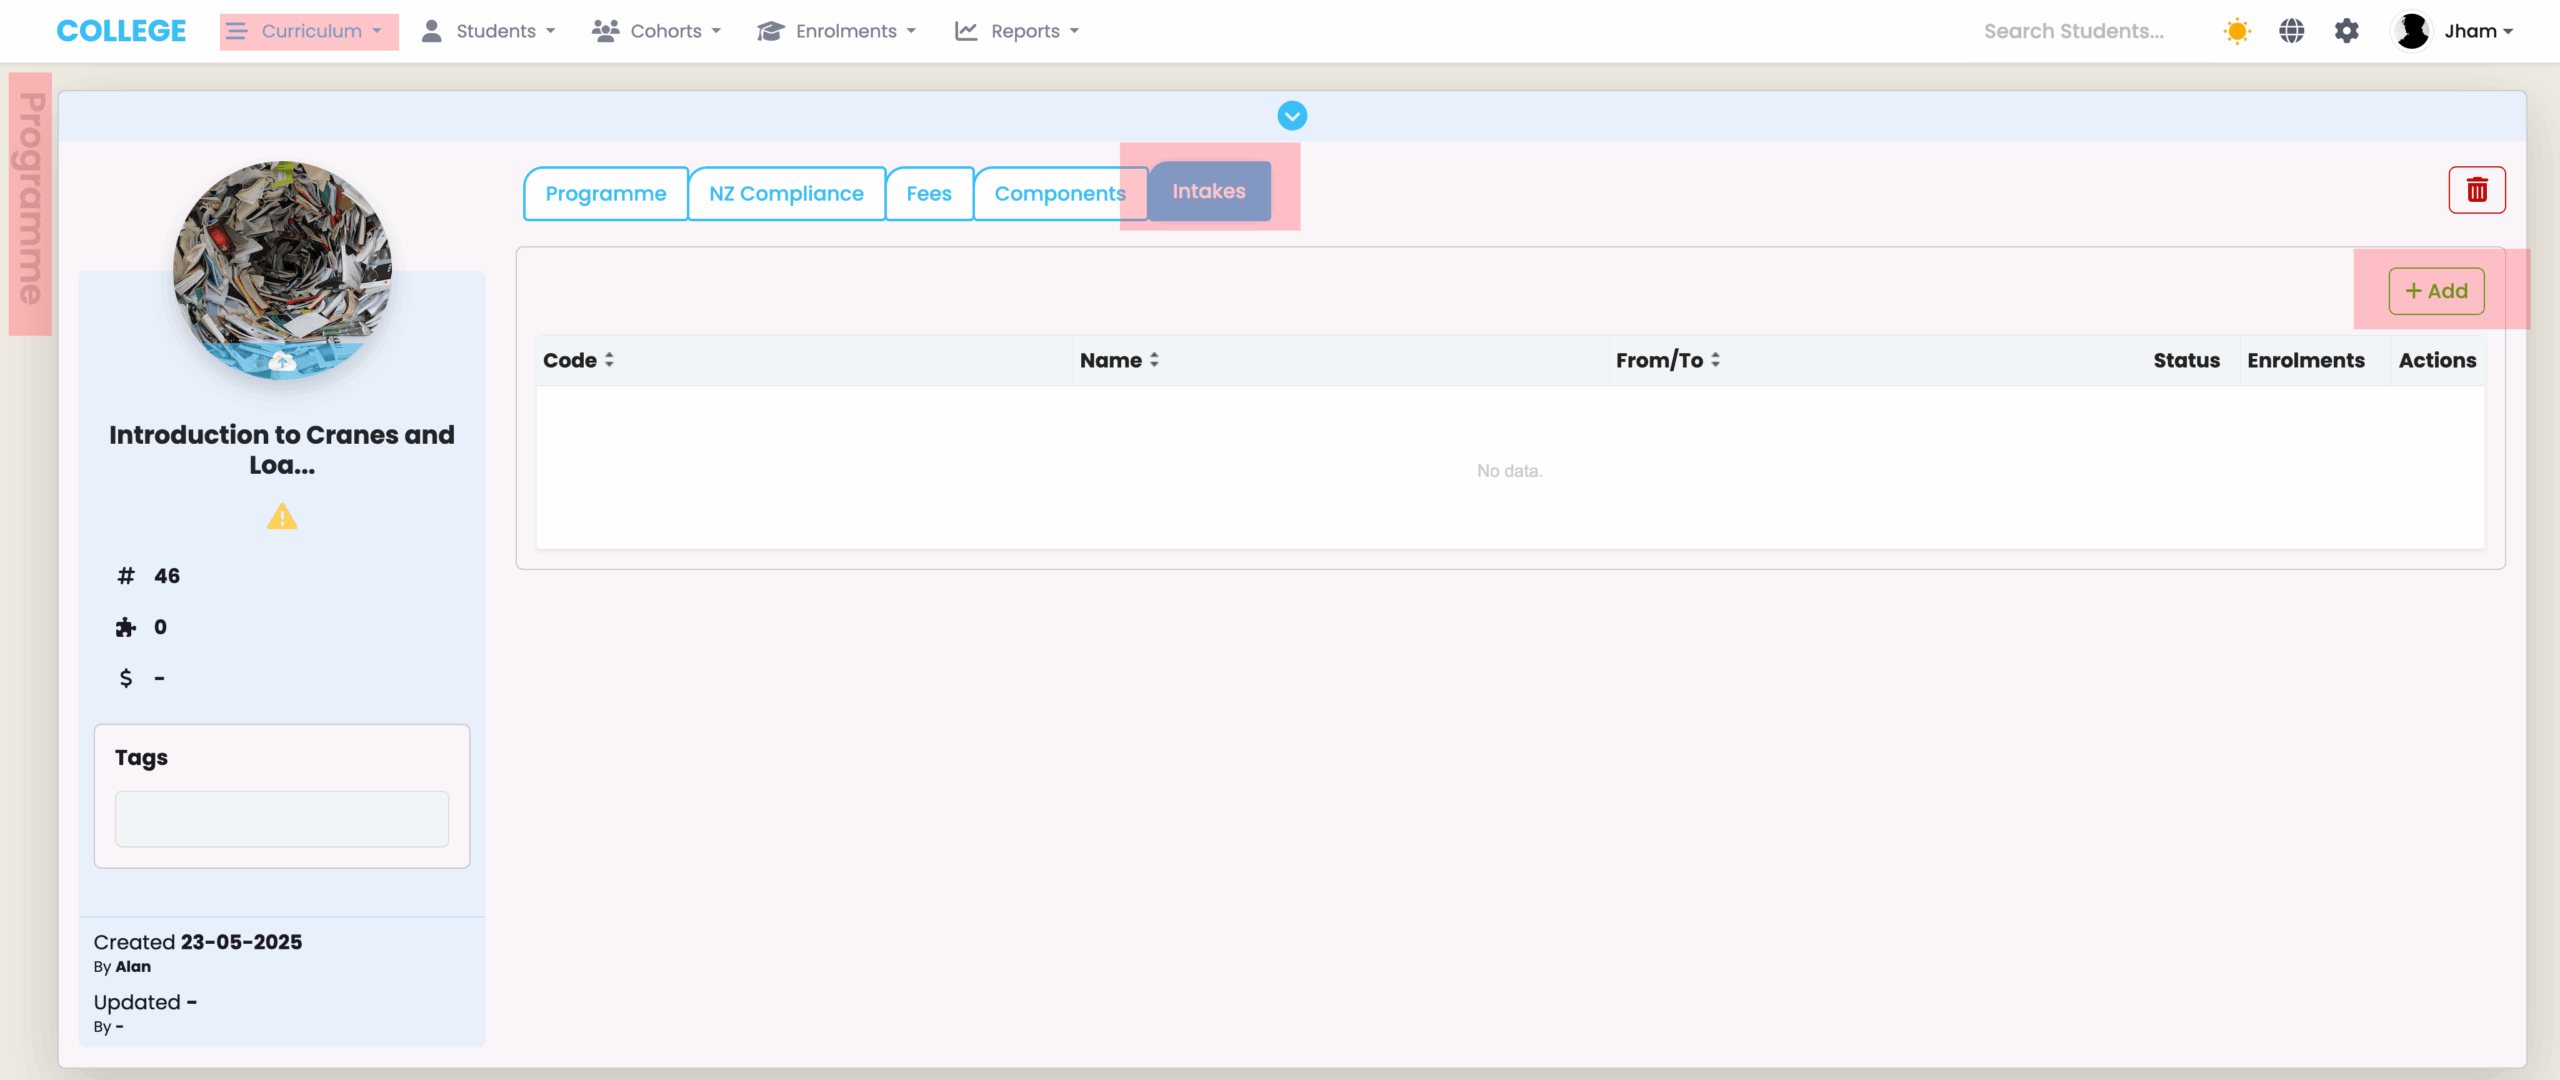
To create an intake at the programme level, navigate to the Intake tab of the specific programme. From there, click the green + Add button.
Intake Index
If you navigate to the Cohort object and then to the Intake Index, you will find a green + button next to the title Intake Index. Clicking this button will take you to the intake creation page.
Please note that this method does not automatically link the intake to any programme—you will need to manually select the appropriate programme for the intake.

New Intake Section
When creating an intake via the programme level or the intake index, you are essentially taken to the New Intake page. Creating an intake via the intake index is exactly the same as using the New Intake page directly.
However, creating an intake from the programme level is slightly different, as the programme will be pre-selected for you.
On the New Intake page, you have the option to create either a single intake or multiple intakes at once.

To create an intake, simply fill in all the required fields on the page, such as Programme, Intake Status, Intake Name, Start/End Date, and Campus.
If left blank, the Intake Code will be automatically generated by the system based on the programme, intake name, start/end date, and campus.
If you have a specific code for your intake, we recommend entering it manually. However, if you do not have one at the time of creation, you can either leave it blank (to use the auto-generated version) or update it later once a specific code is available.
Setting up Basic Intake Information
Getting into more detail on intake creation—as mentioned previously, you can create either a single intake or multiple intakes at once.
By clicking the green ‘Add New Intake +’ button below the Add Intake card, a new card will be added where you can begin entering the details for another intake.

Intake Creation – Field Descriptions
- Programme * – Displays the programme code in parentheses, followed by the programme name. Only active programmes will appear in this list.
- Intake Status * – Only intakes with the Open status will allow you to enrol students. Any other status will prevent enrolments.
Use Draft status if you are preparing intakes but are not yet ready to begin enrolment. - Intake Name * – This can be any meaningful name that will help distinguish the intake from others.
- Intake Code – As mentioned earlier, this can be left blank to allow the system to auto-generate it. However, in most cases, it is recommended to create a meaningful and unique intake code.
- Start Date * – Must be entered manually.
- End Date * – This can be entered manually, or you can calculate it automatically using the programme length set at the programme level. To auto-calculate the end date, click the purple calendar icon. Note: This feature only works if a programme length has been set.
- Campus * – All active campuses from your Campus Index will be available for selection here.
- Places Available – This includes a From and To value. These fields help track whether the number of enrolled students has reached the target or maximum limit. If the maximum number of places is reached, the intake status will automatically be flagged as Full.

Click on Create to finalise the intake you have set up. If you’ve created multiple intakes, the next page will display a list of all the intakes. If you’ve only created one, you will be taken directly to that intake’s page.
From there, you can begin enrolling students into the intake and make changes to any default values if needed.