Upload CSV files of different types, using our file importers, which will then be saved as a SELMA record.
Read on to find the information you need to upload valid CSV files.
In this Section:
The Importer: Explained
You can import CSV files for the following data types:
- Student
- Grades
- Class
- Enrolment Class Link
- Timetable
The figures in subsequent sections will show the Student Importer, as it is widely used, but the principles can be generalised and applied to all importing types.
Download Templates
Download the following templates for each import you require:
Student
Grades
Class
Enrolment-Class Link
Timetable
Pre-Requisites and Upload
Please take note of the following steps, before filling out your CSV template.
- Note: Required CSV columns are provided to you within the provided template.
Figure 1. Navigate to Reports > Import
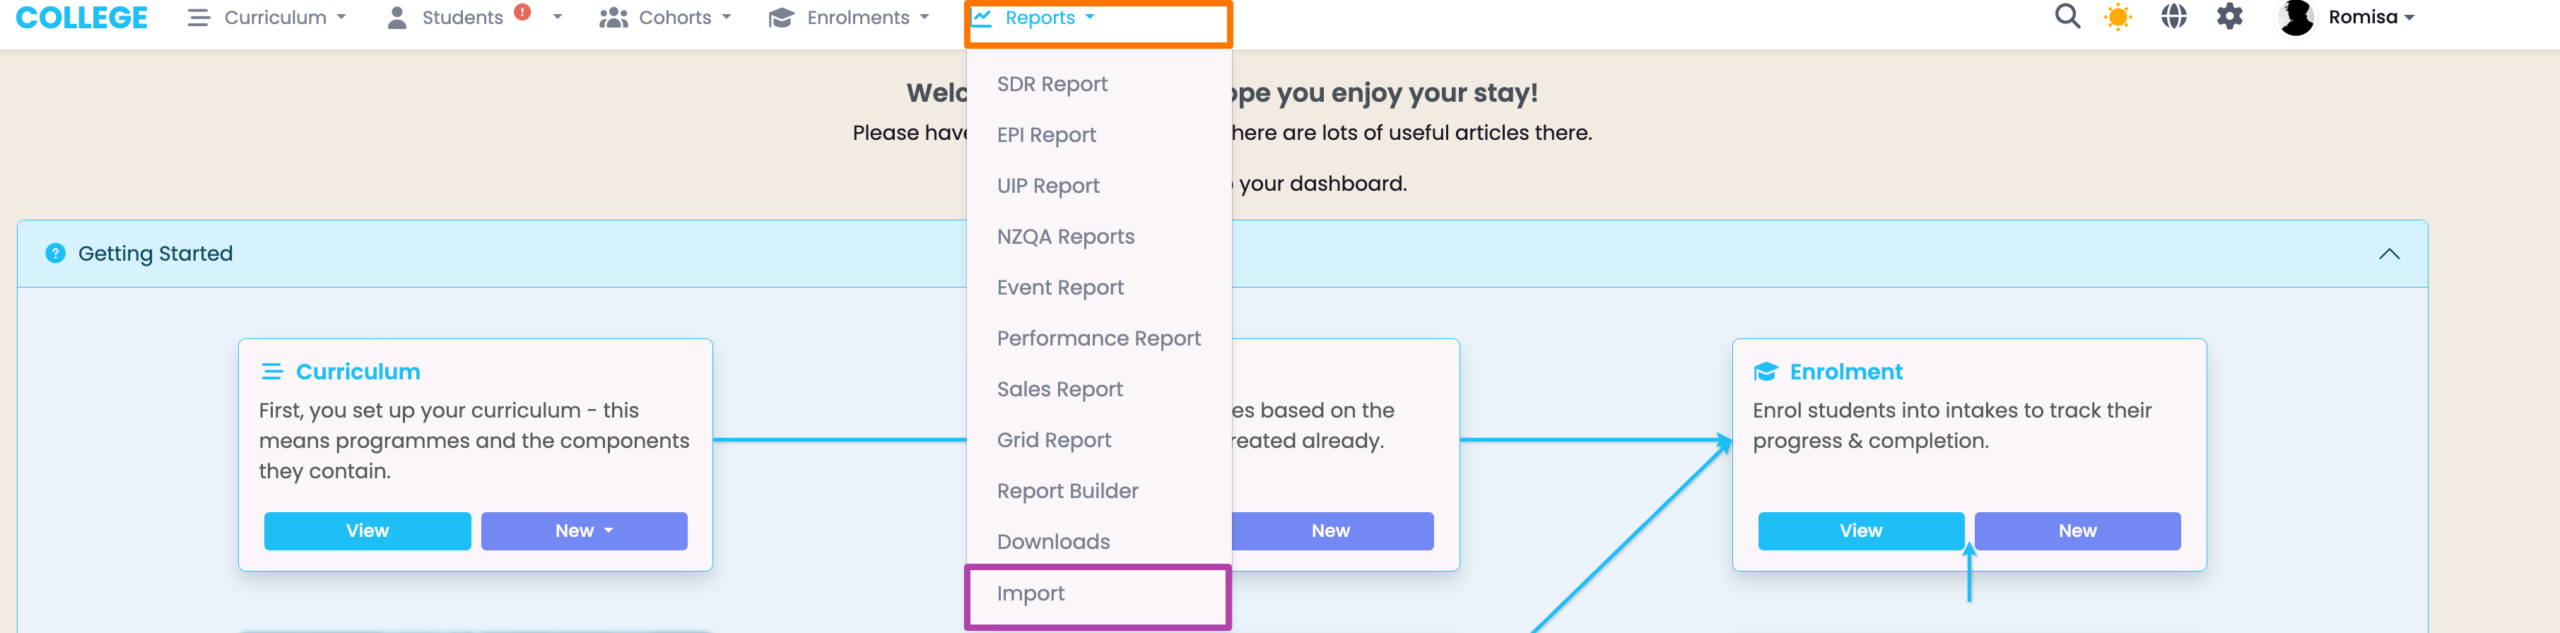
Figure 2. Select an Import

Figure 3. Create New Records or Update Existing Records
Please download the appropriate template (above) and read the following notes before filling it out. Then, upload the CSV file to the Importer.
Important Notes:
All dates must be in YYYY-MM-DD format. Please make sure your user preferences are updated if you are using Microsoft Excel.
Status Codes: E – Enquiry | V – Validated | N – Enrolled | P – Provisional | I – Inactive
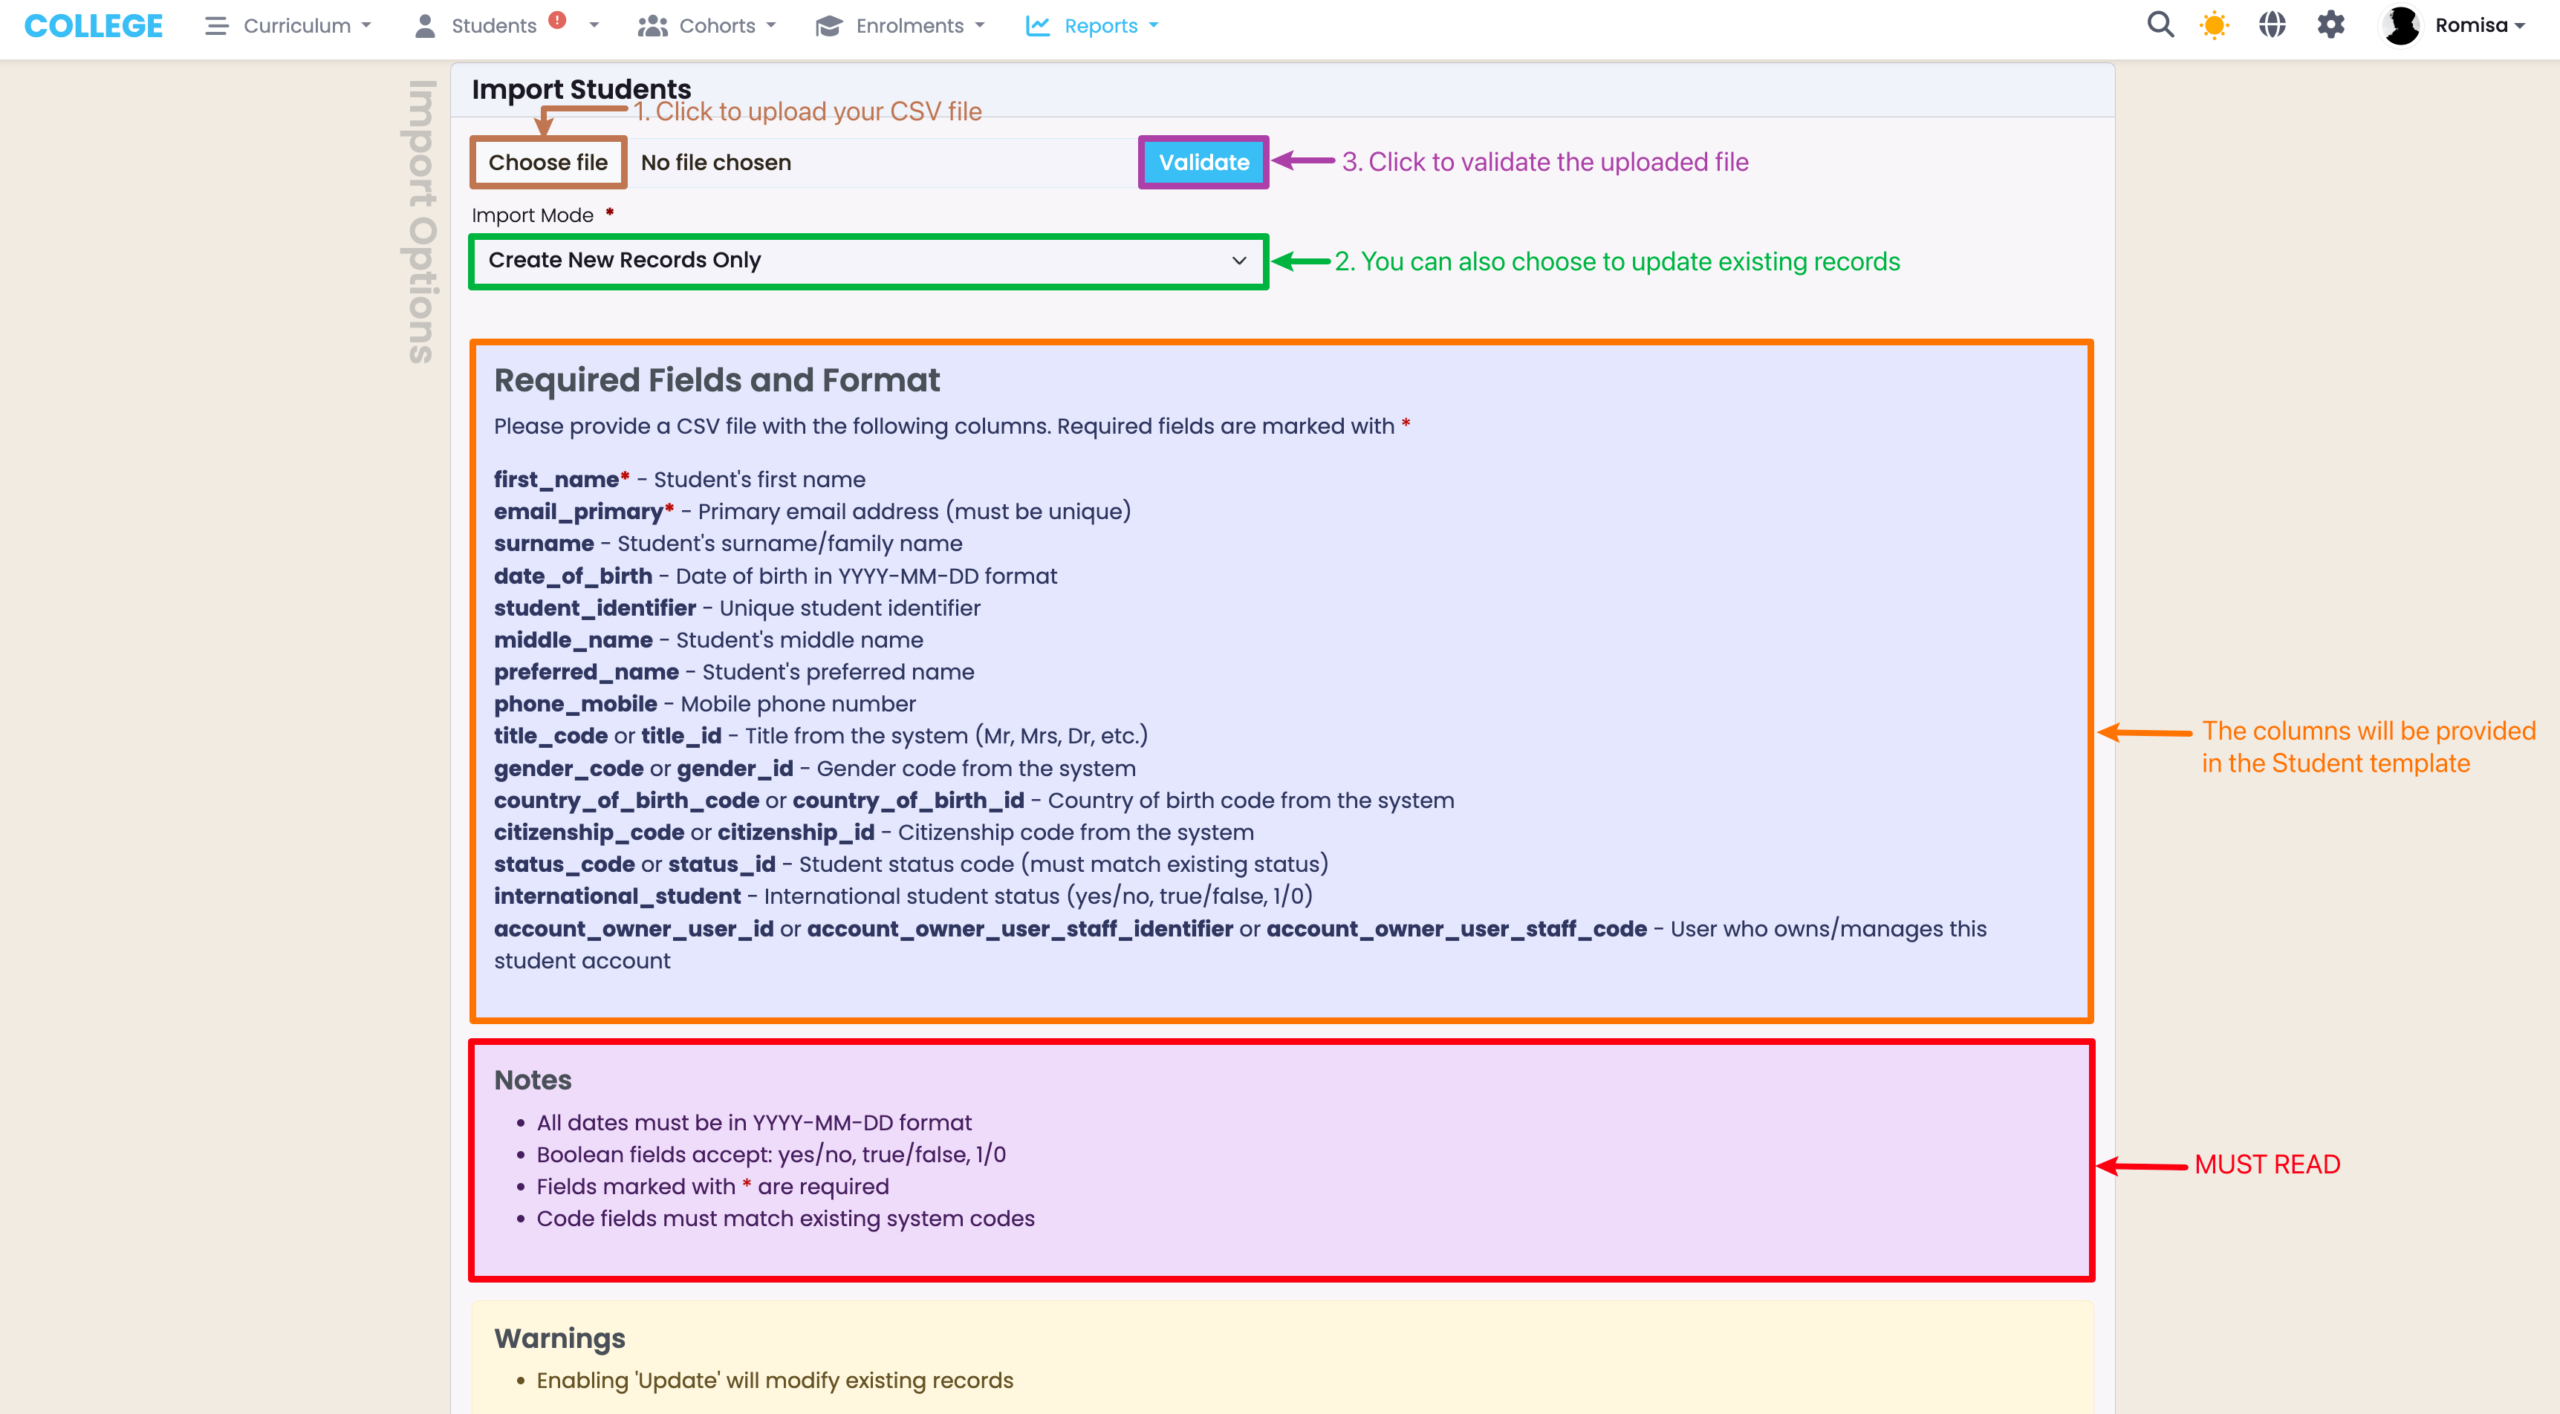
Figure 4. Start Import
If your validation hasn’t picked up on any errors in your CSV file, you can proceed to import it into SELMA by clicking the green “Start Import” button.
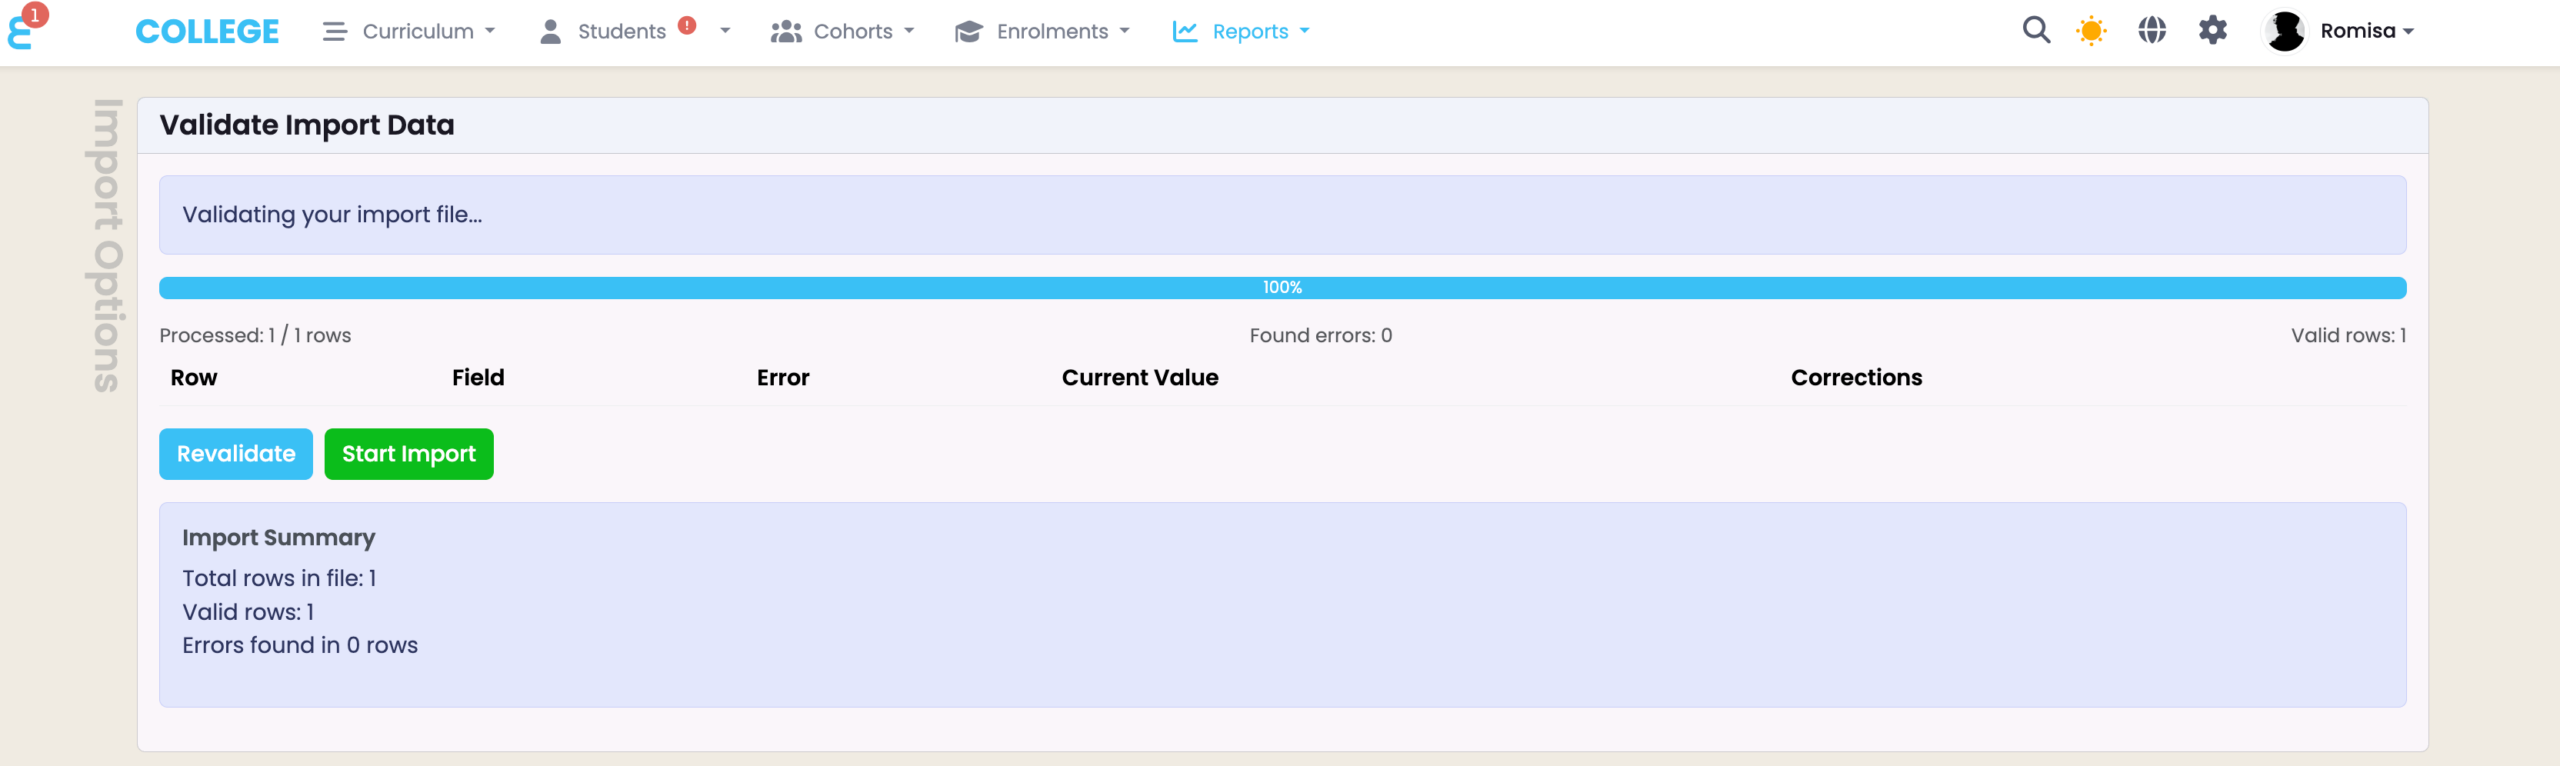
Figure 5. Success Message

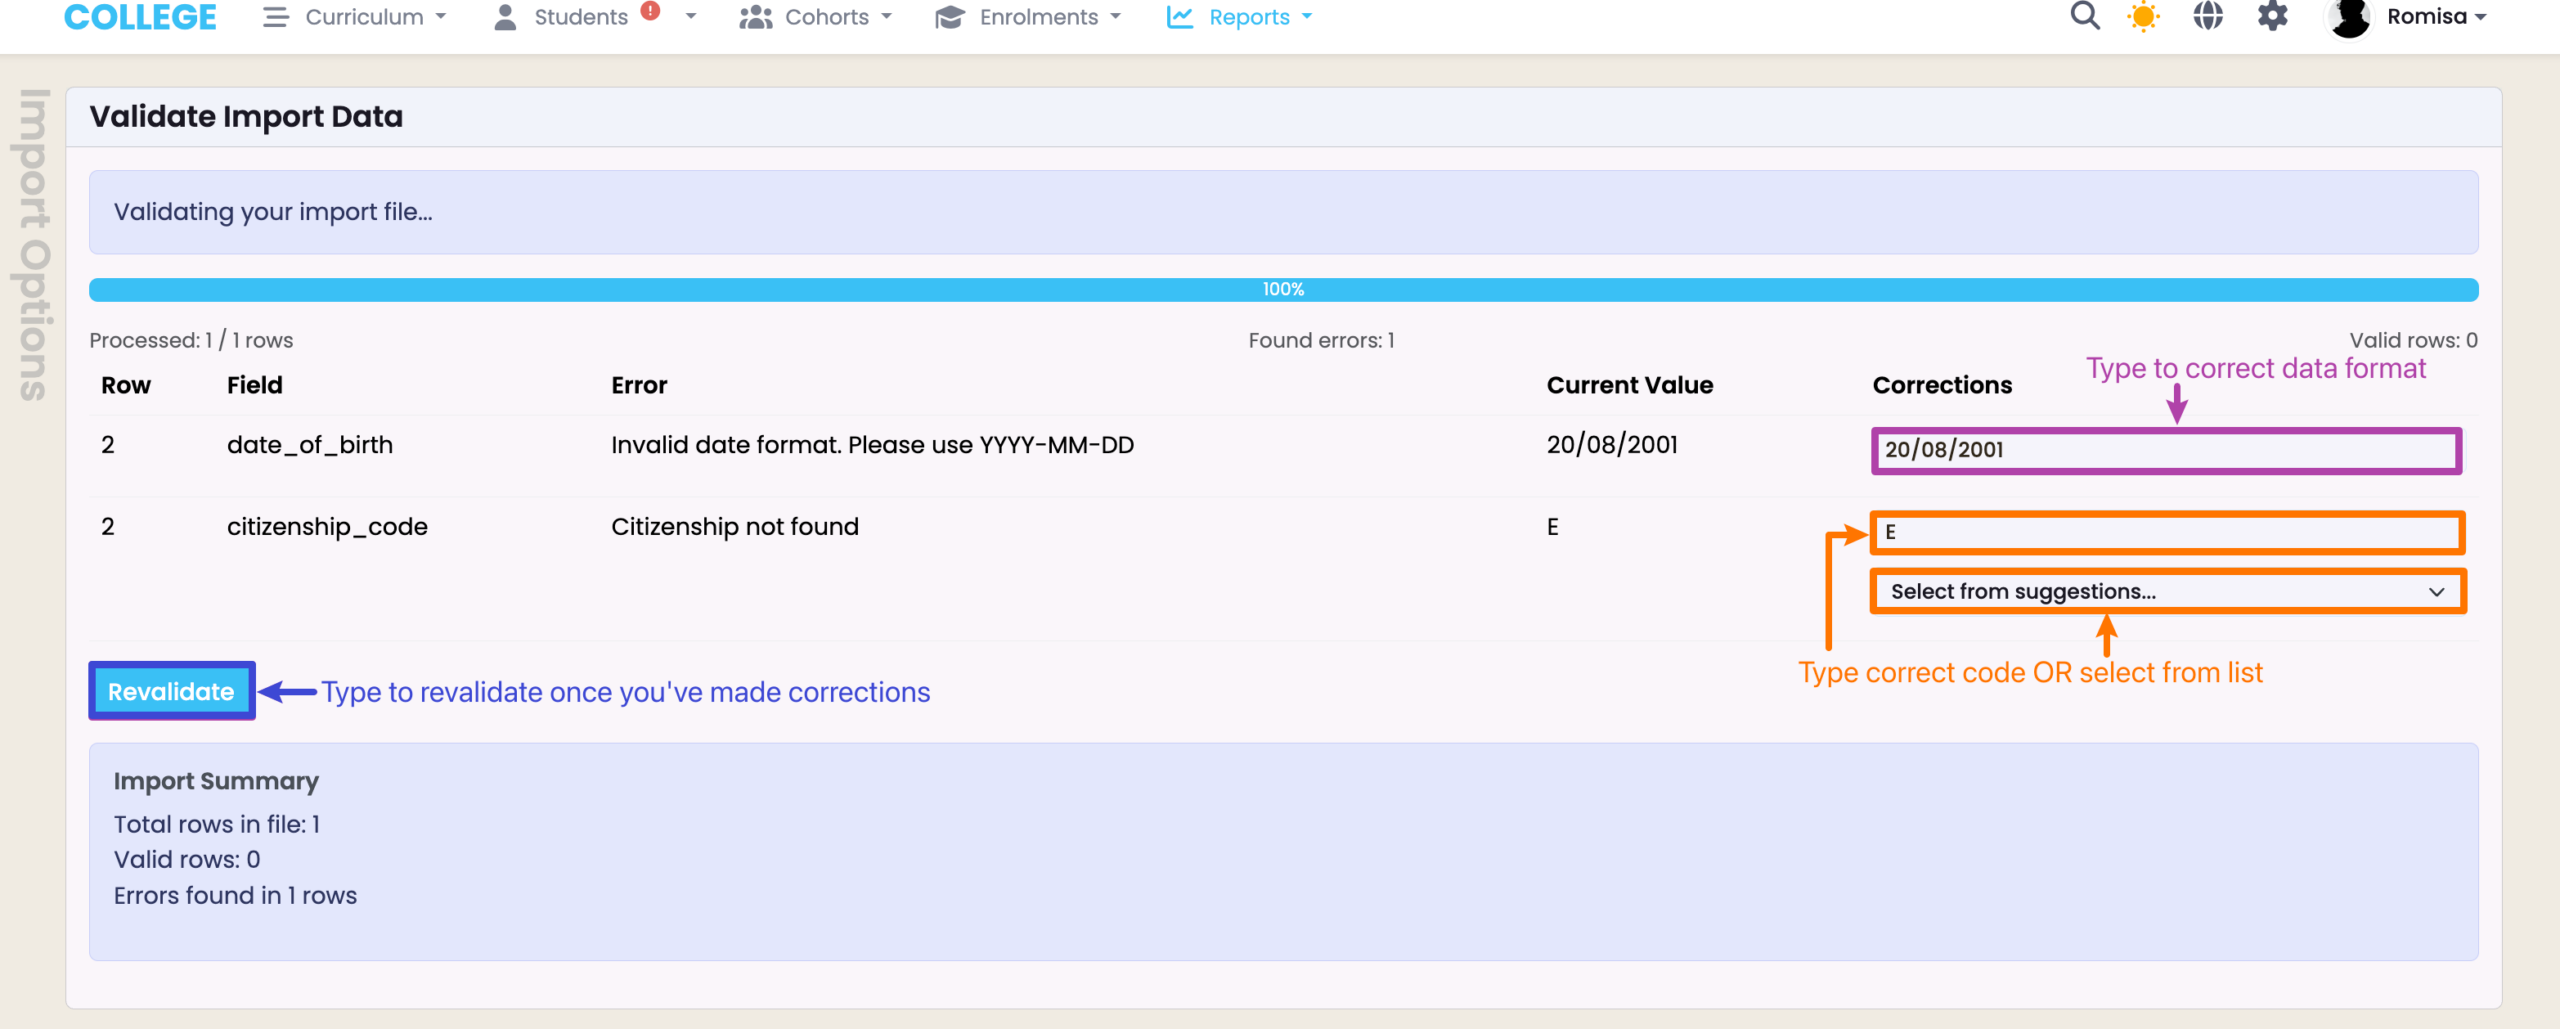
Validation Errors
When you validate your CSV file, you may get validation errors which you can correct, directly.
You must resolve these errors before you can complete the importing process.
Figure 6. Validation Errors
If you have any validation errors, you can correct them directly, and revalidate the file.