In this Section:
Create a Contact
Figure 1i. Navigate from Students > Contact
In the Contact Index, click the green “+” button to create a new Contact.
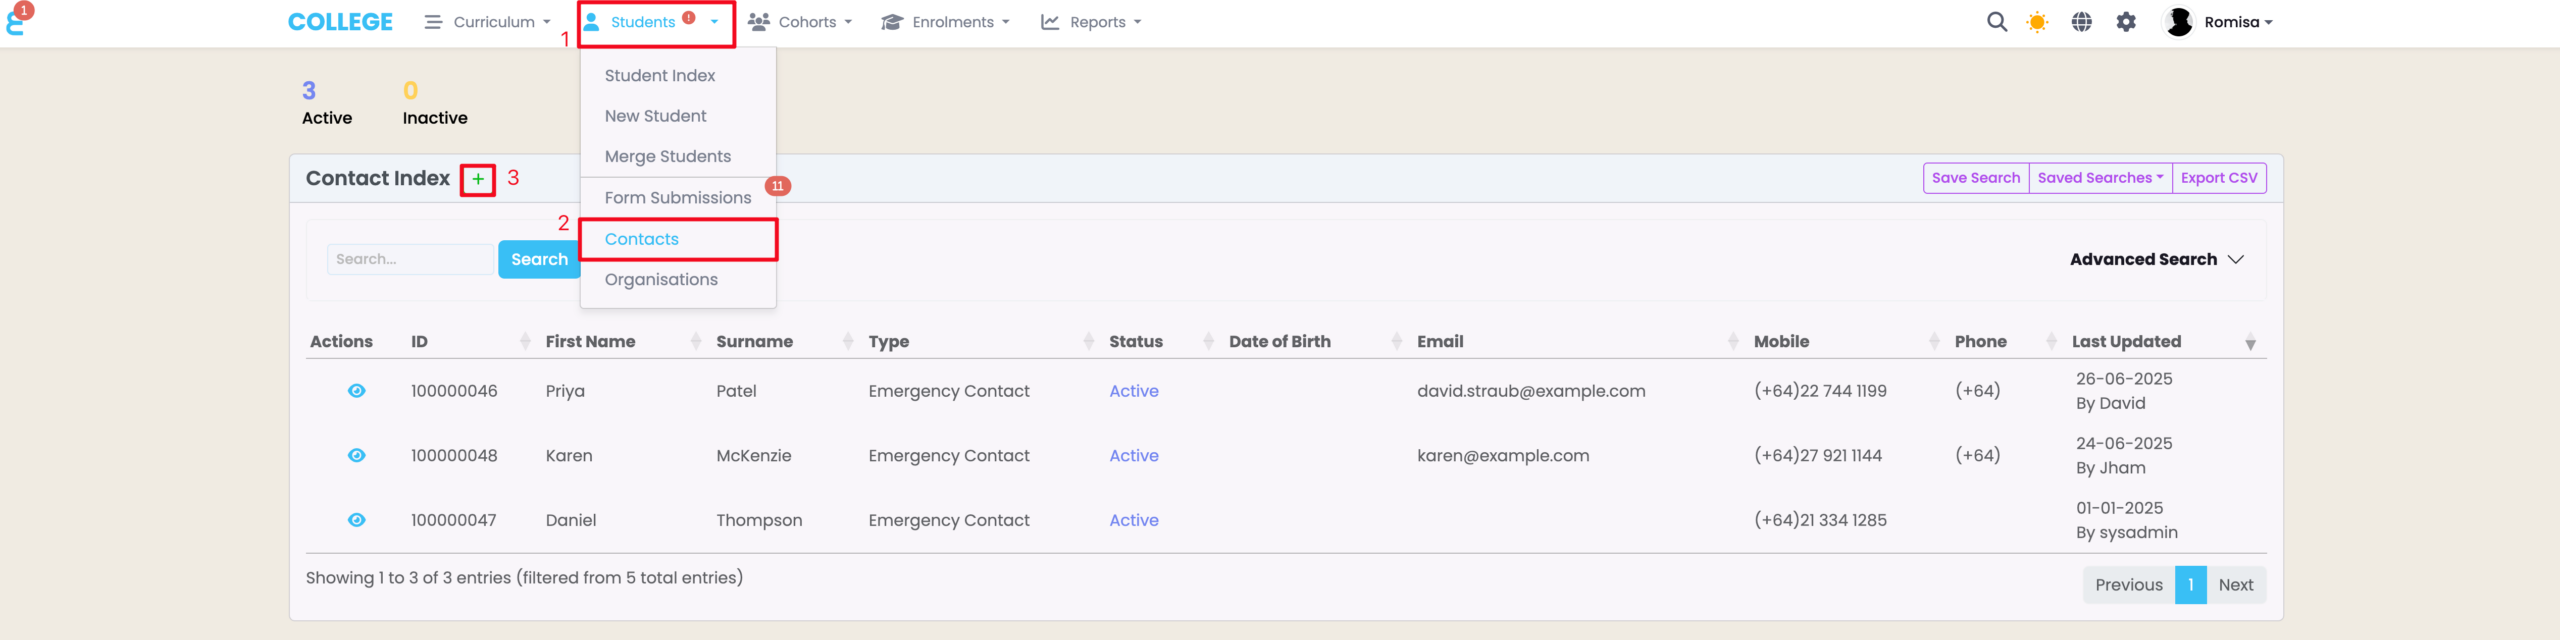
Figure 1ii. Fill Contact Details, and Add to Contact Index
Fill in the required details, as marked by red asterisks.
NOTE: The Contact Types readily available are system defaults. To add custom ones, jump to Add New Contact Types.
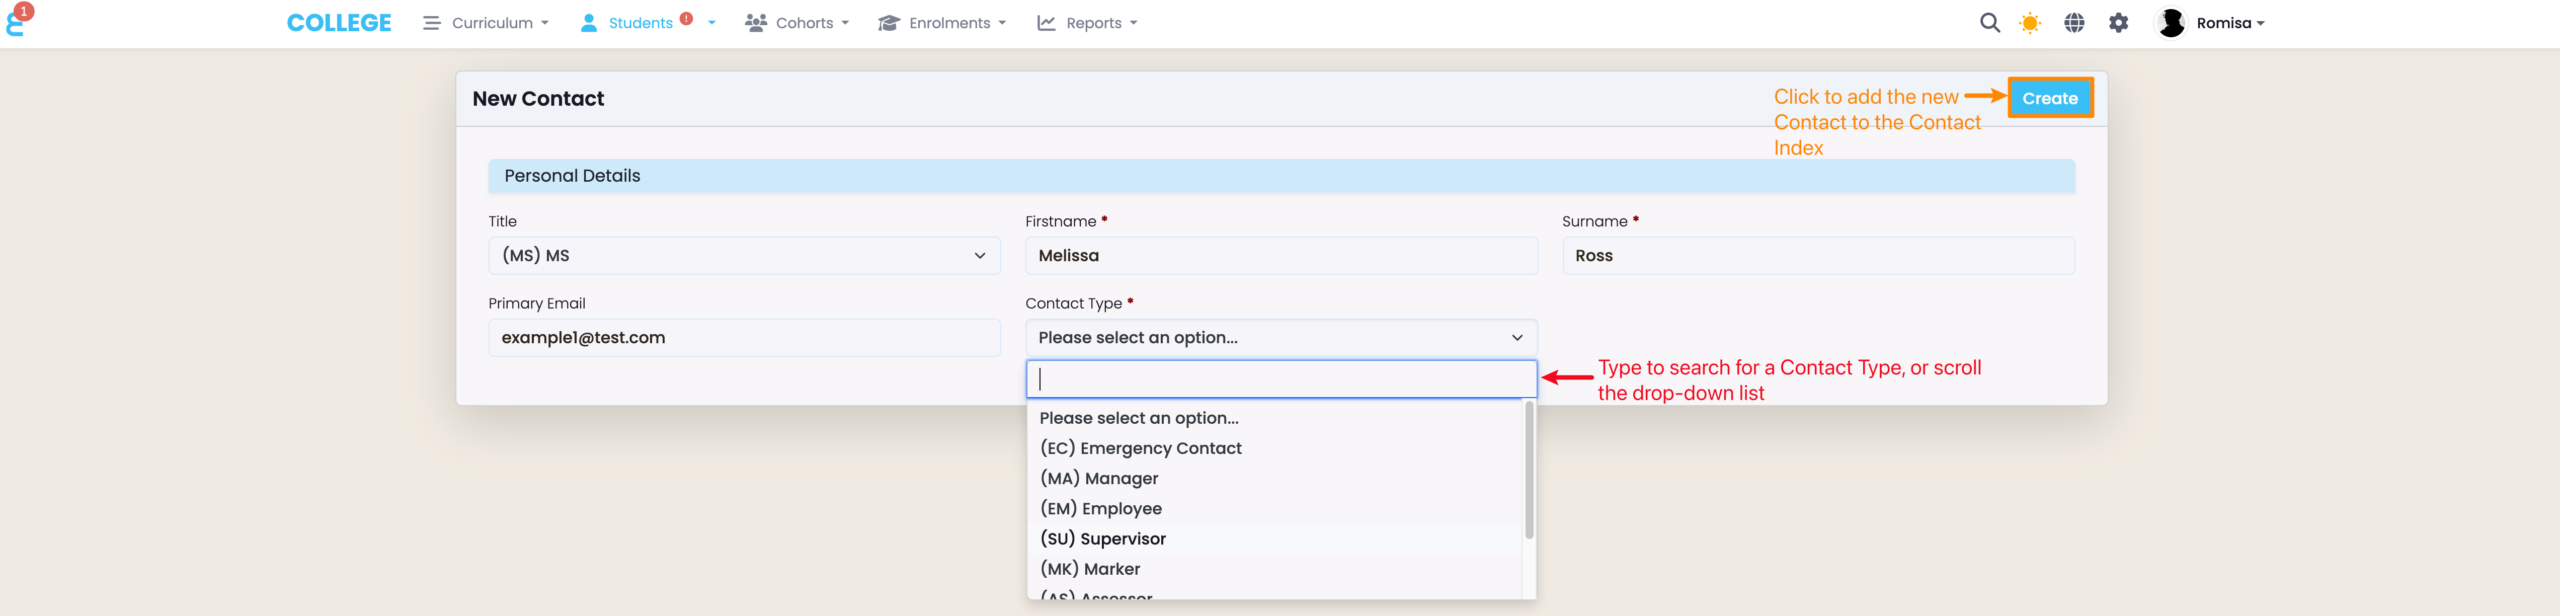
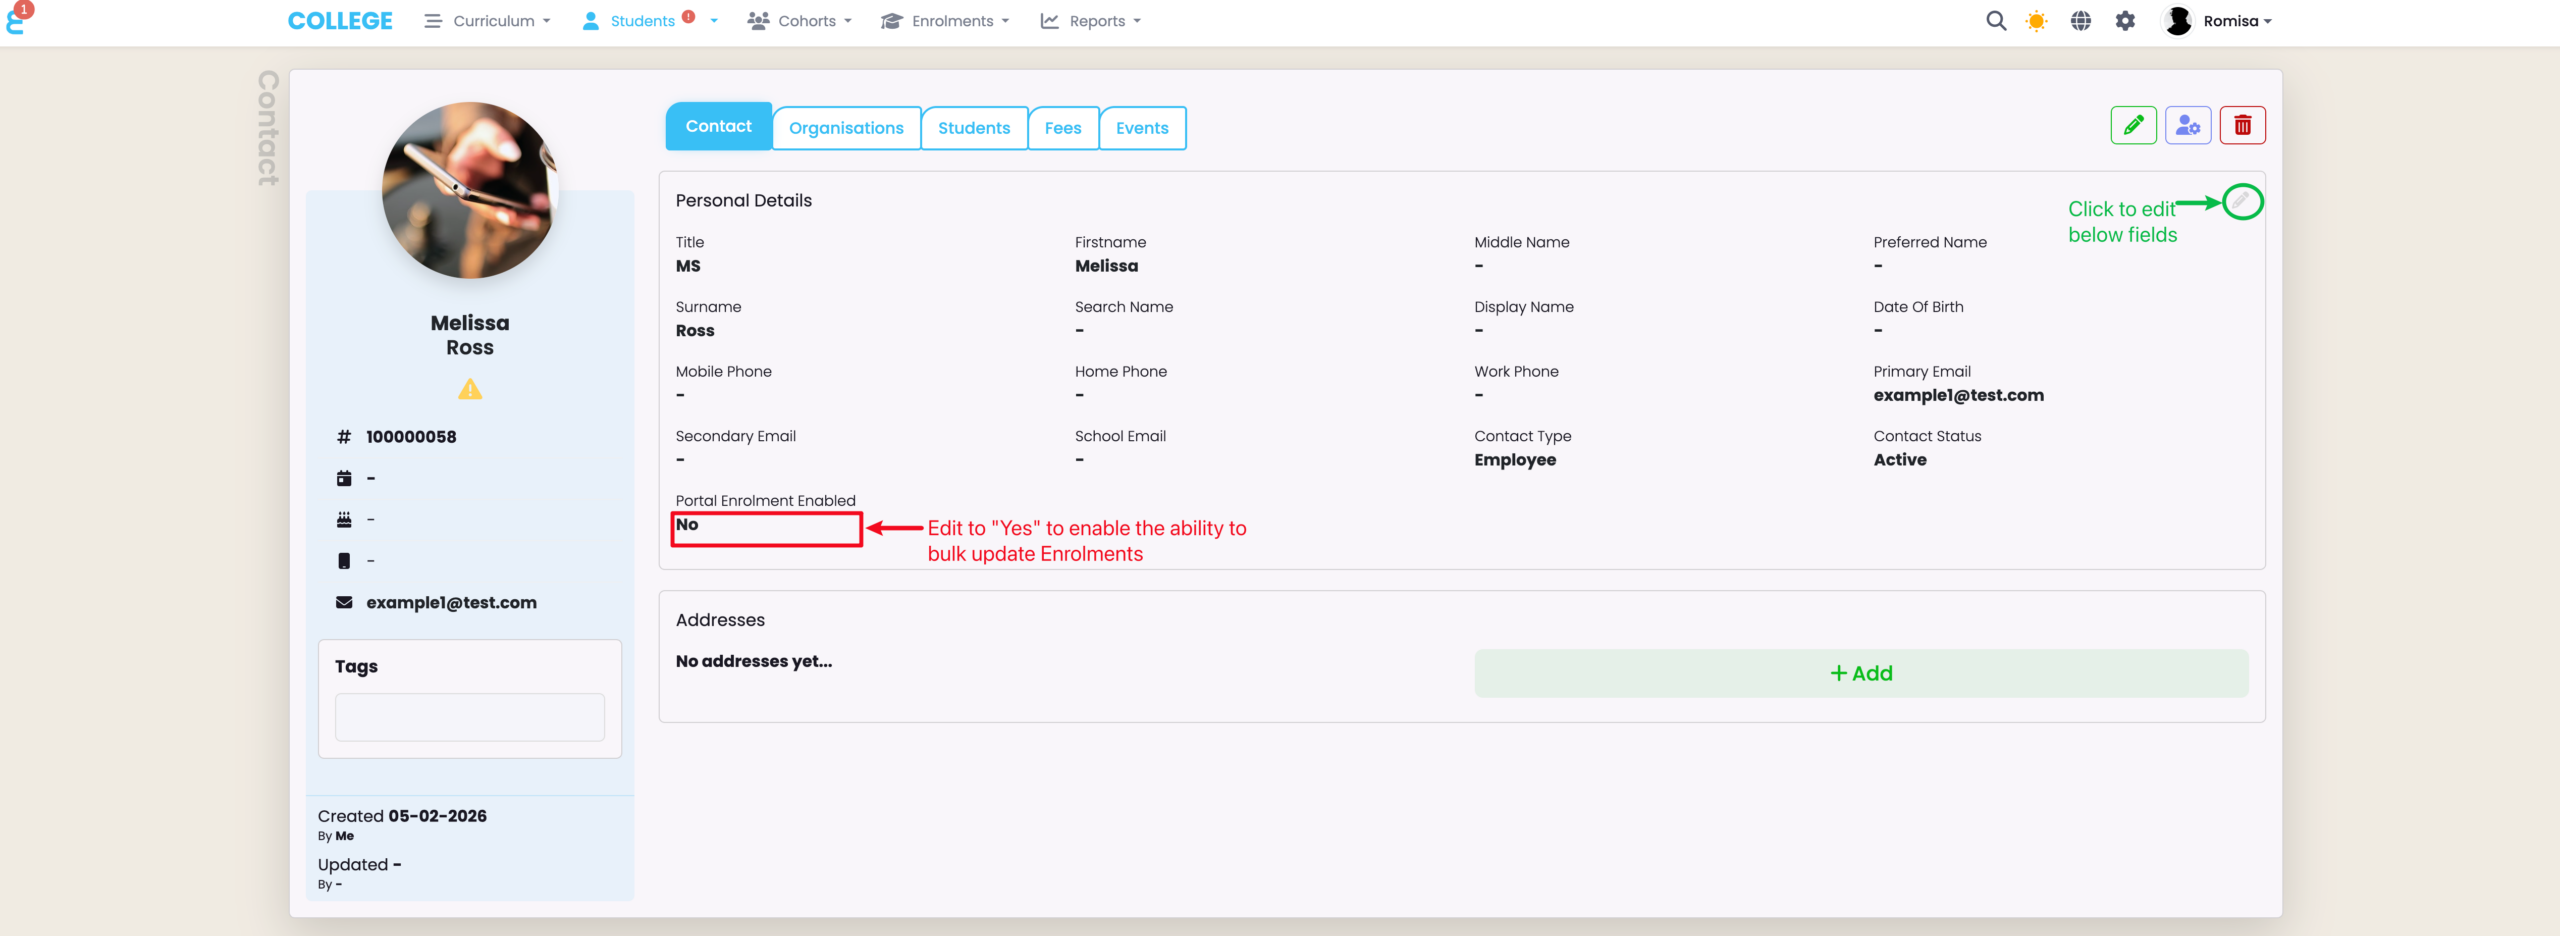
Figure 1iii. Edit Additional Details
Click the pencil icon to edit and/or add further details to the Contact profile (green). Make sure you select “Yes” under the field “Portal Enrolment Enabled” to allow the Contact to bulk update Enrolments.
Manage the Contact Profile
You can use the Actions button on the Contact tab to perform two separate actions:
- Send an email to the Contact
- NOTE: You can use an email template you have set-up in SELMA.
- Invite the Contact to the Contact Portal
- NOTE: This sends an automated email to the Contact to set-up their account (Figure 2iii).
Read on to see how you can navigate and use each of the aforementioned features of a Contact profile page.
Actions
Figure 2i. Actions Button
Choose to Send an Email to the Contact, and invite them to the Contact Portal for the first time.
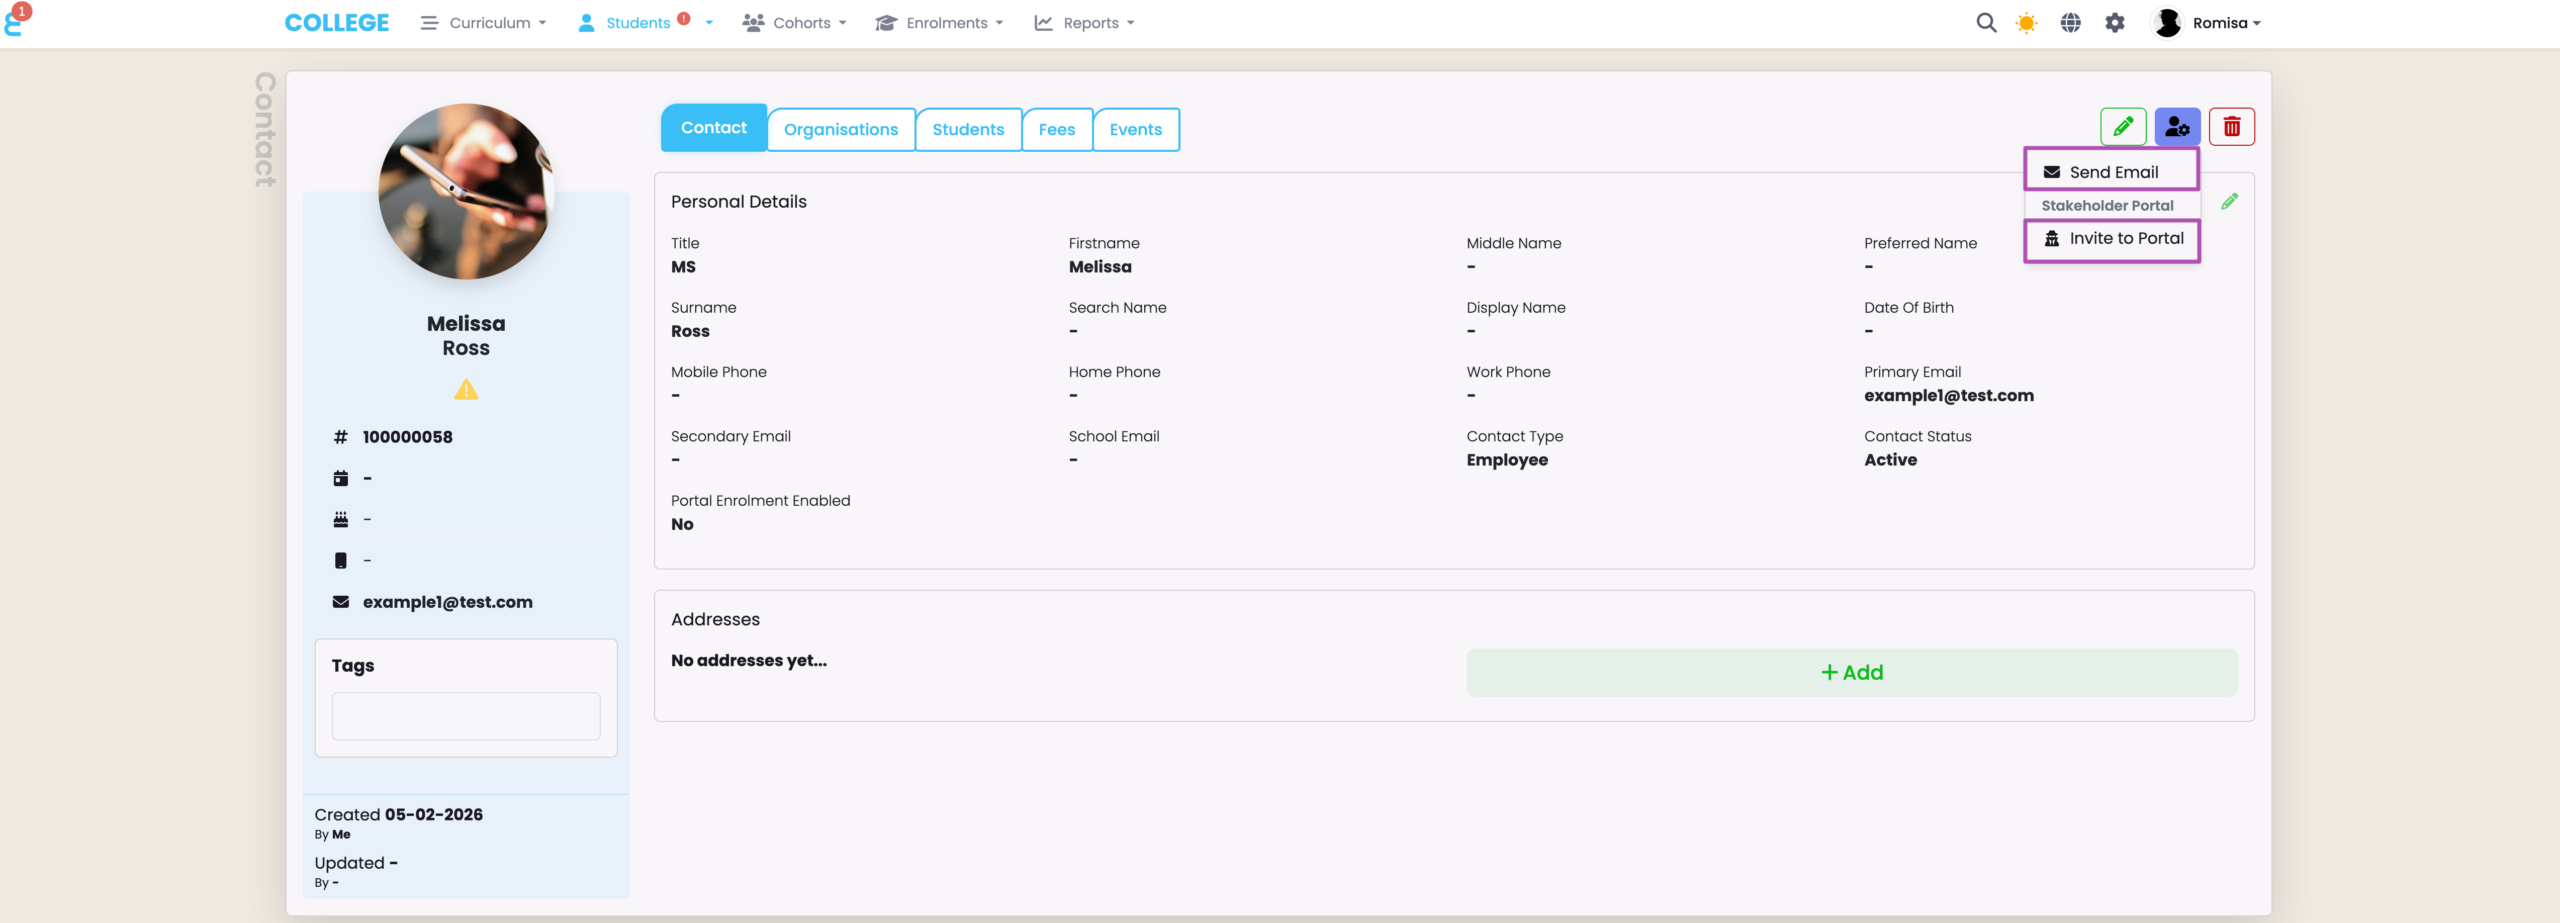
Figure 2ii. Send Email
You can free-type an email, or add an email template you have already created. If you wish to create a new email template for use later, please refer to System Settings – Communication Templates.
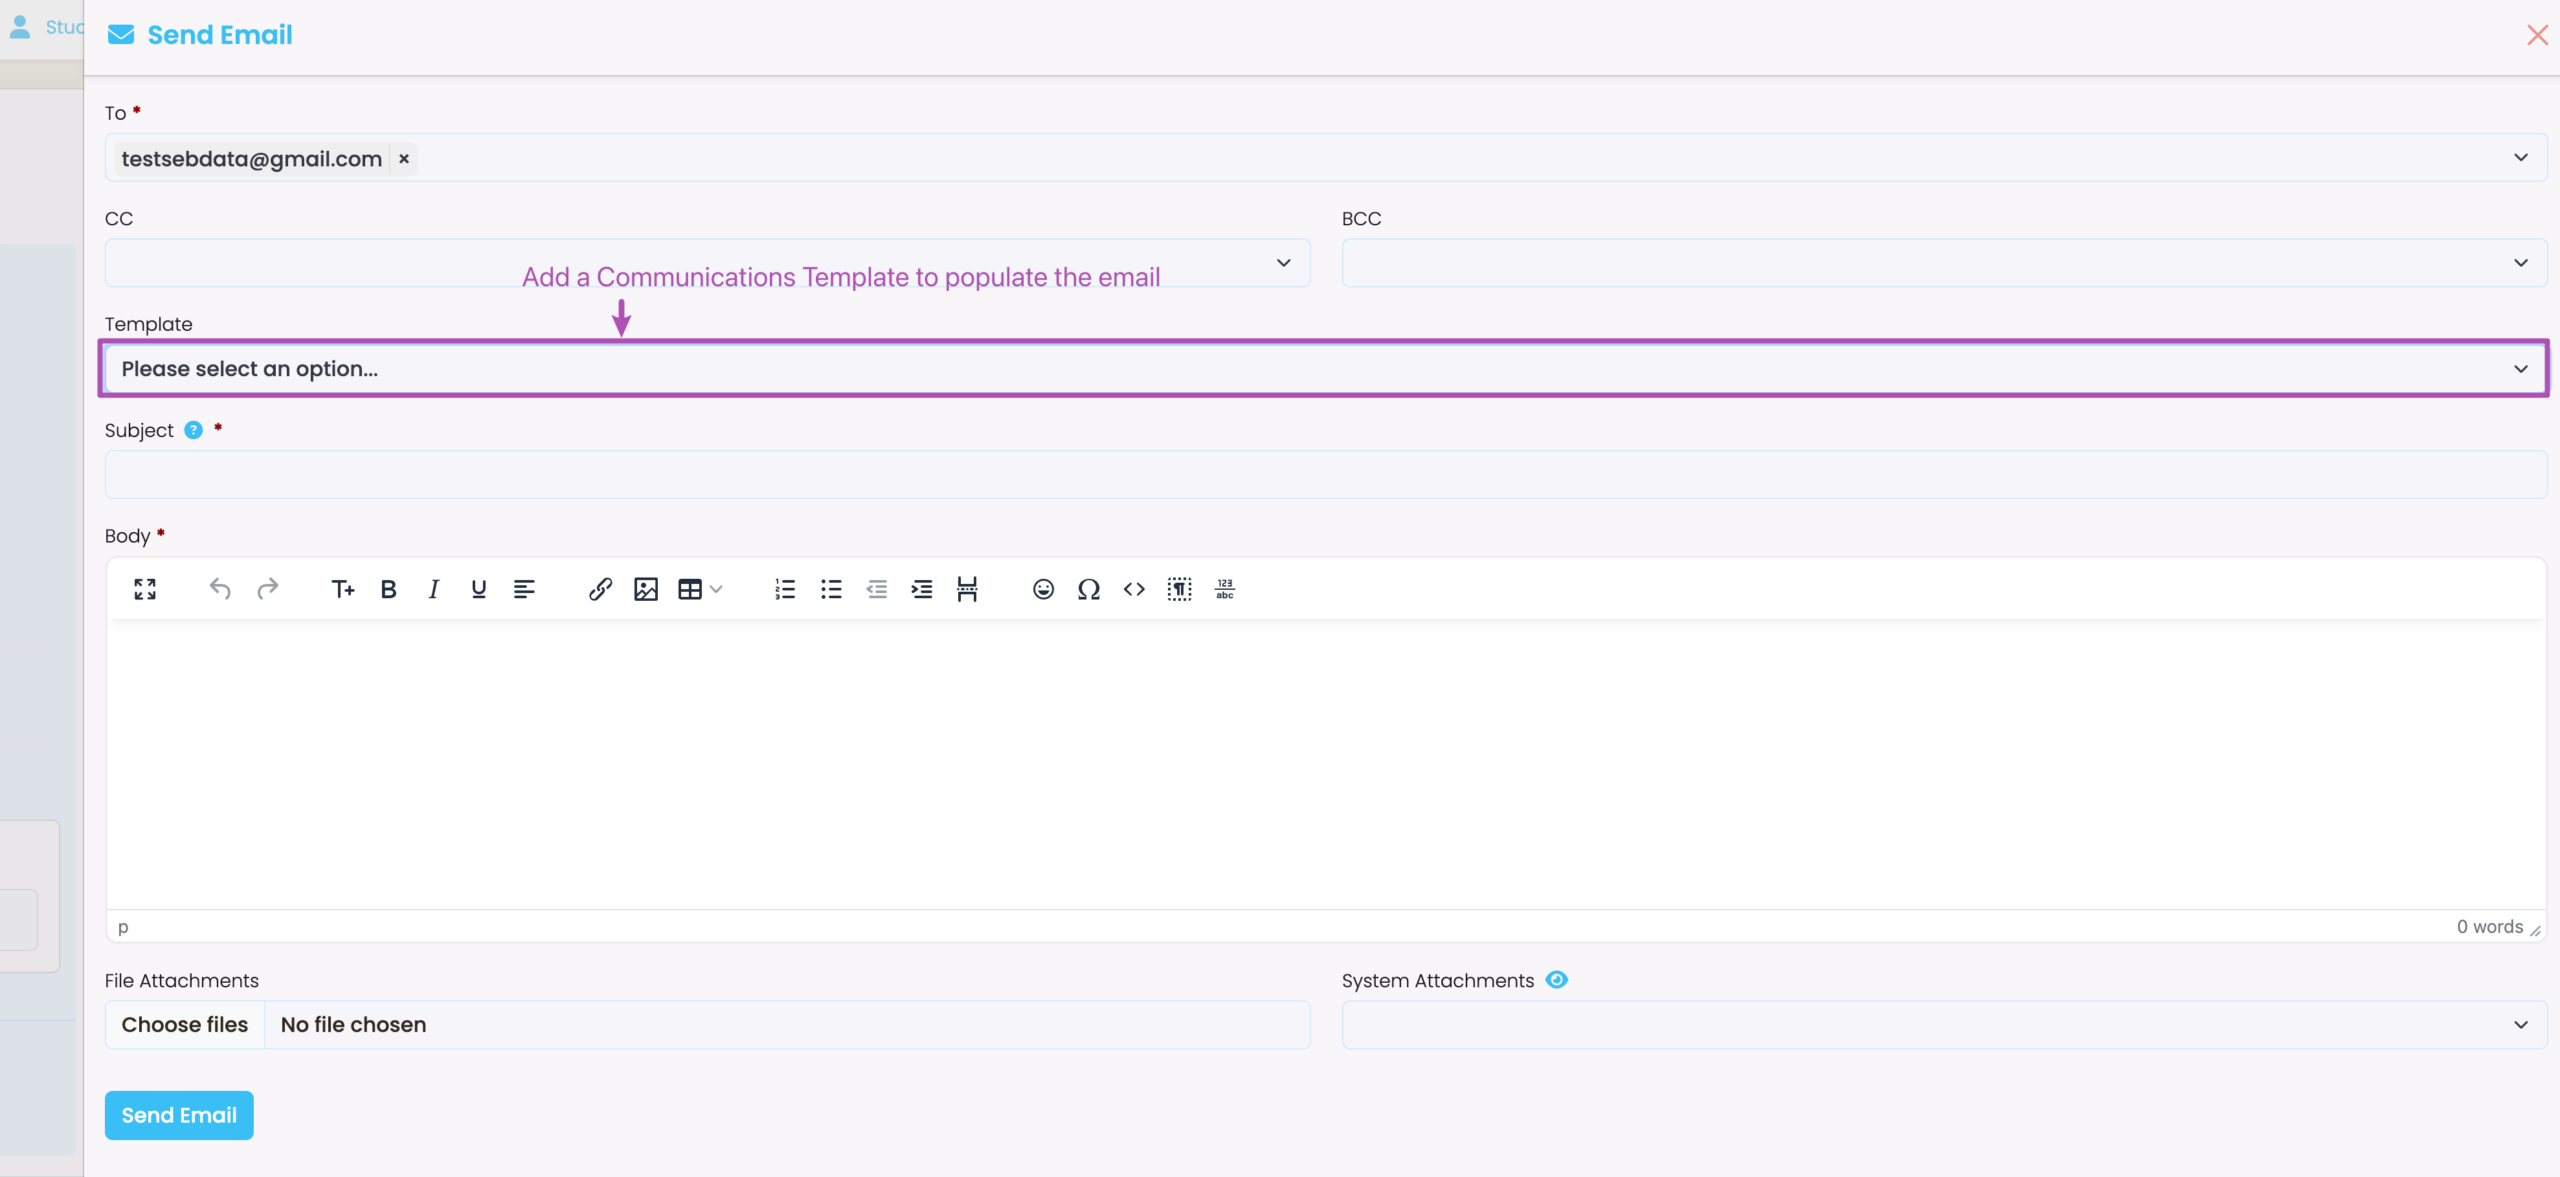
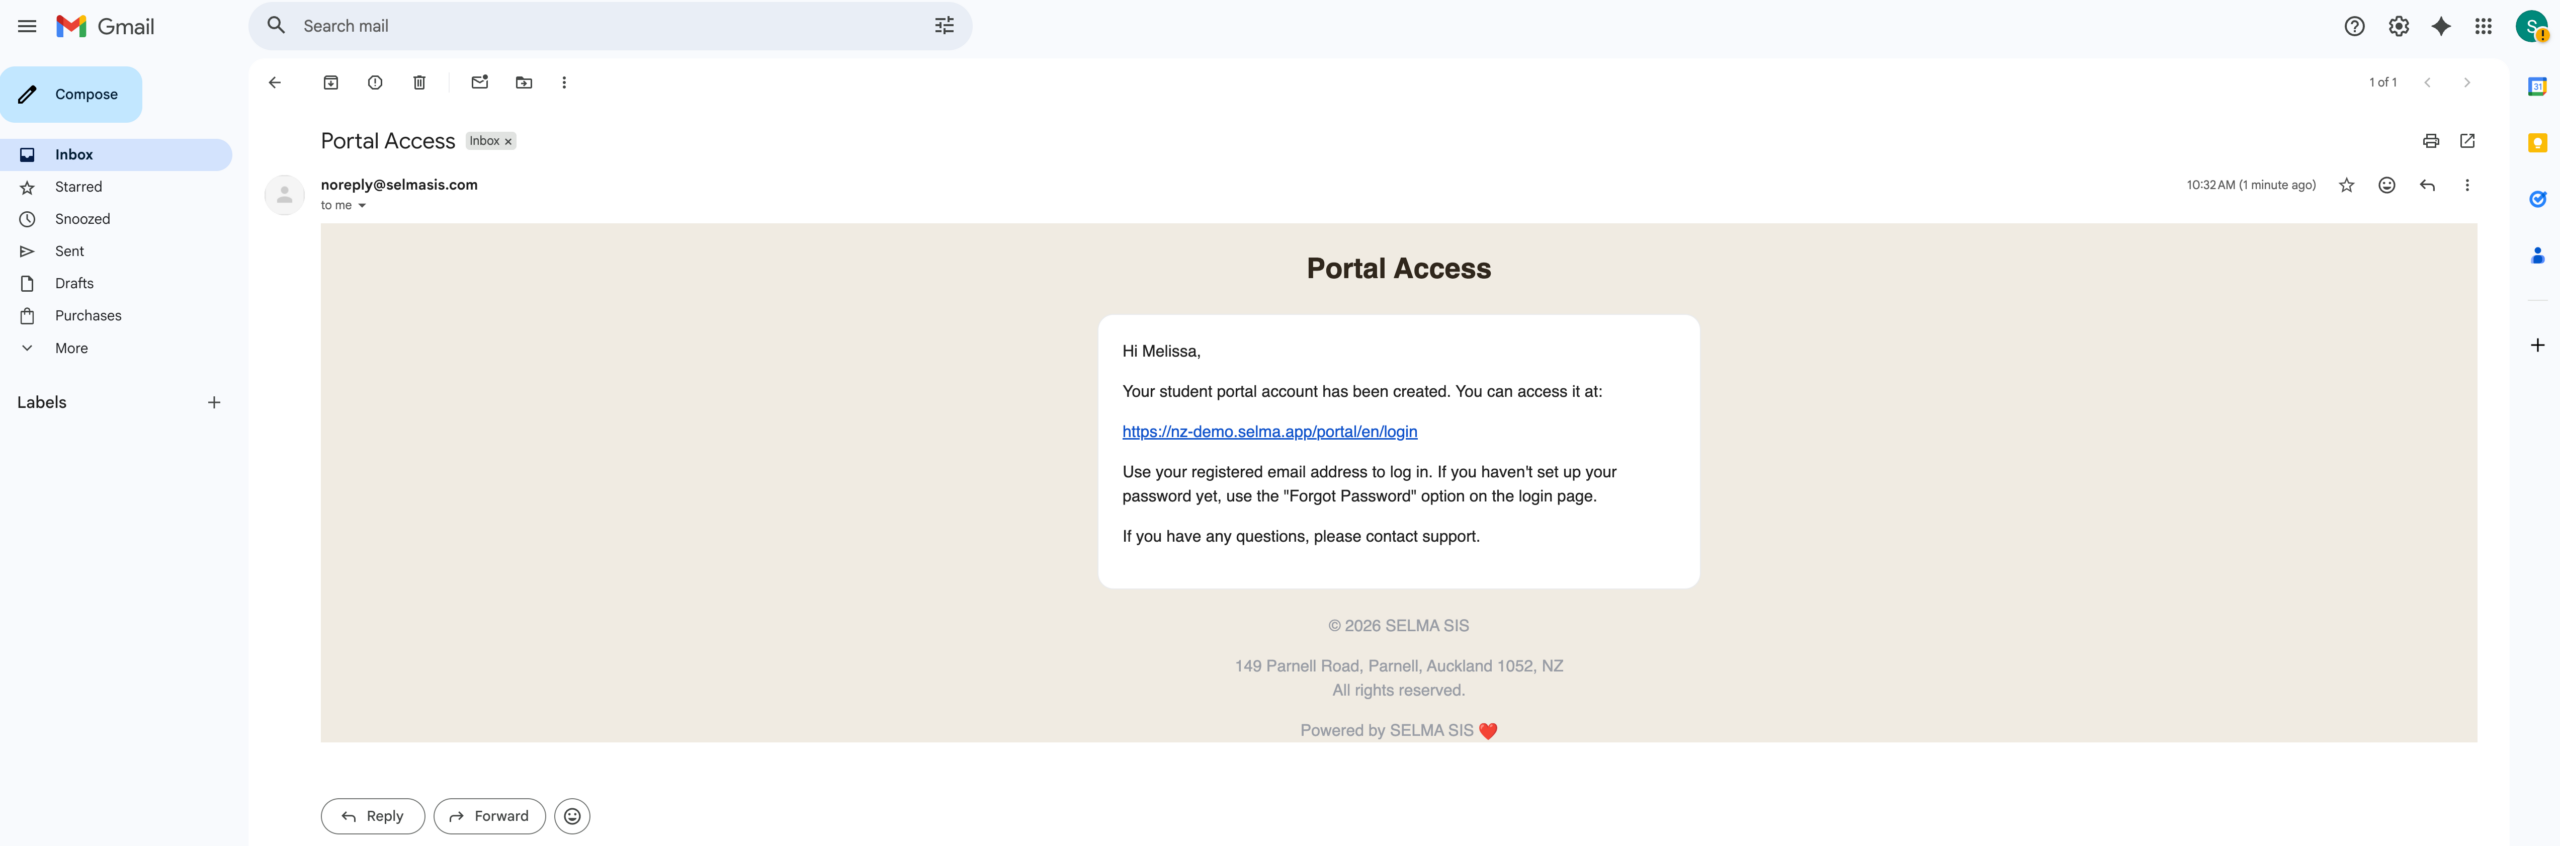
Figure 2iii. Invite to Portal
This is the email that the Contact will receive at their Primary Email address, when you invite them to the Contact Portal. They will need to follow the instructions, and set up a password via the “Forgot Password” option on their Portal URL link.
Impersonation
Only Primary Users can use the impersonation mode.
- Please contact SELMA Support if you require Primary User access permissions.
Figure 3i. Select Action Button
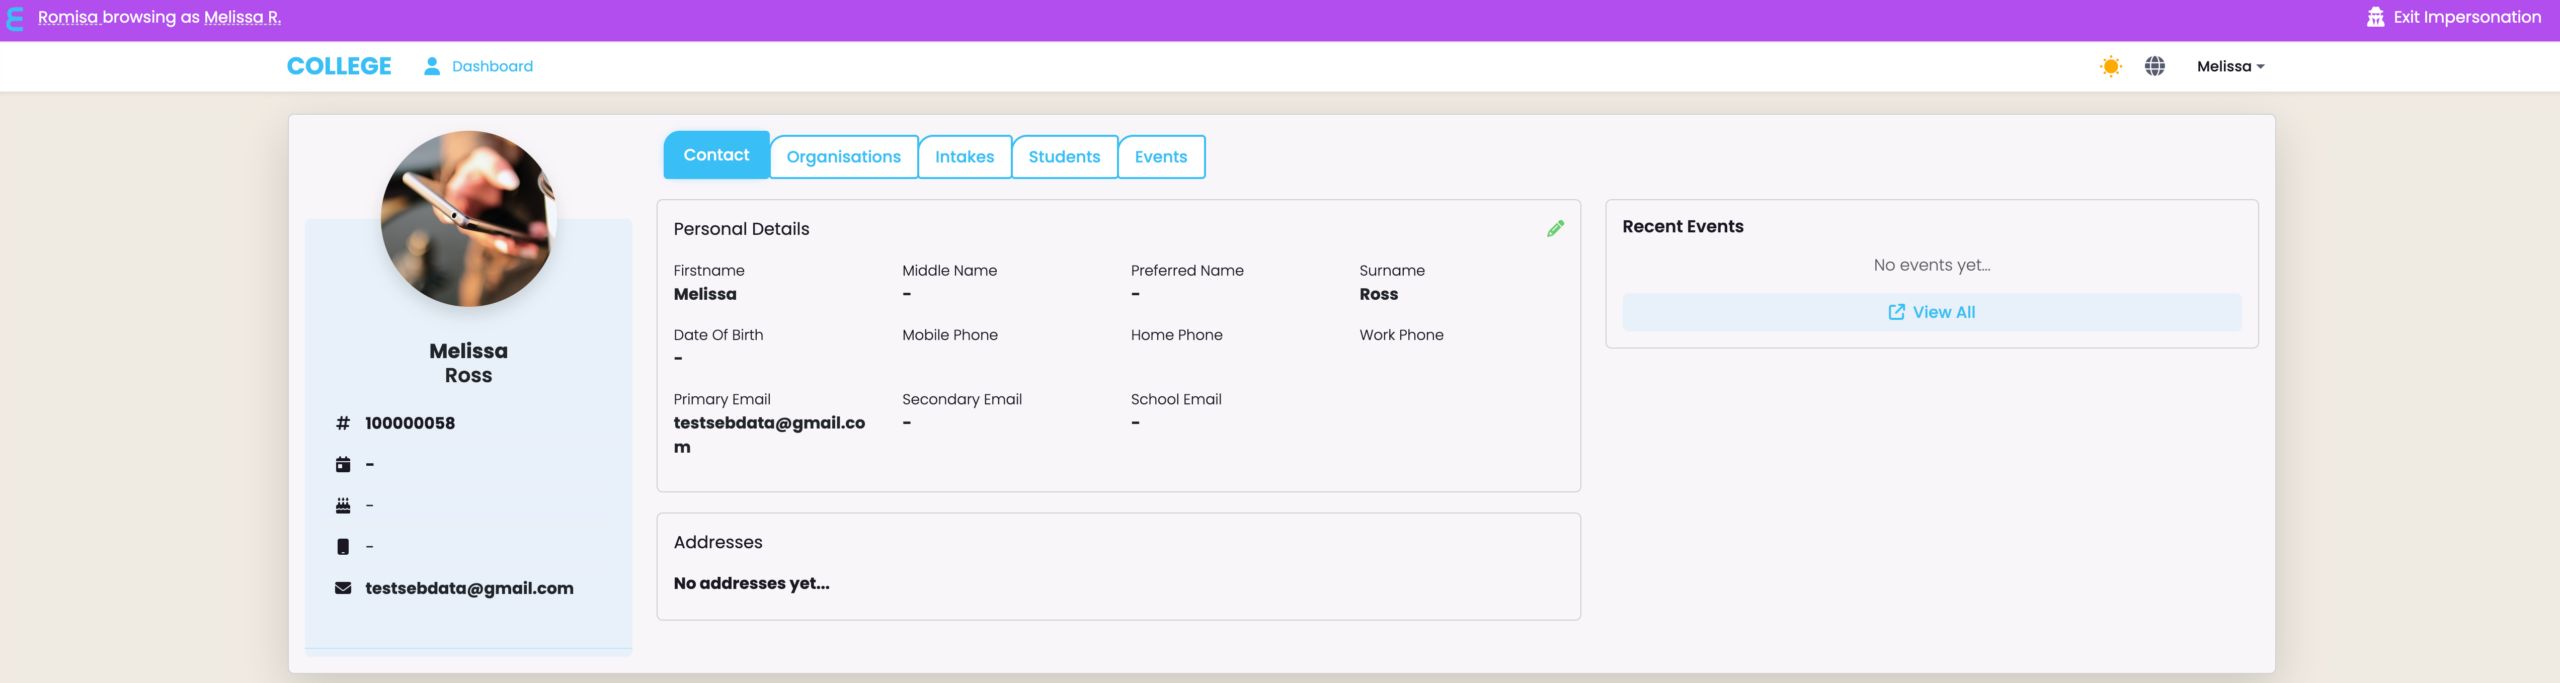
Once you’ve invited a Contact to the Contact Portal, you will be able to impersonate them and see what they would see.
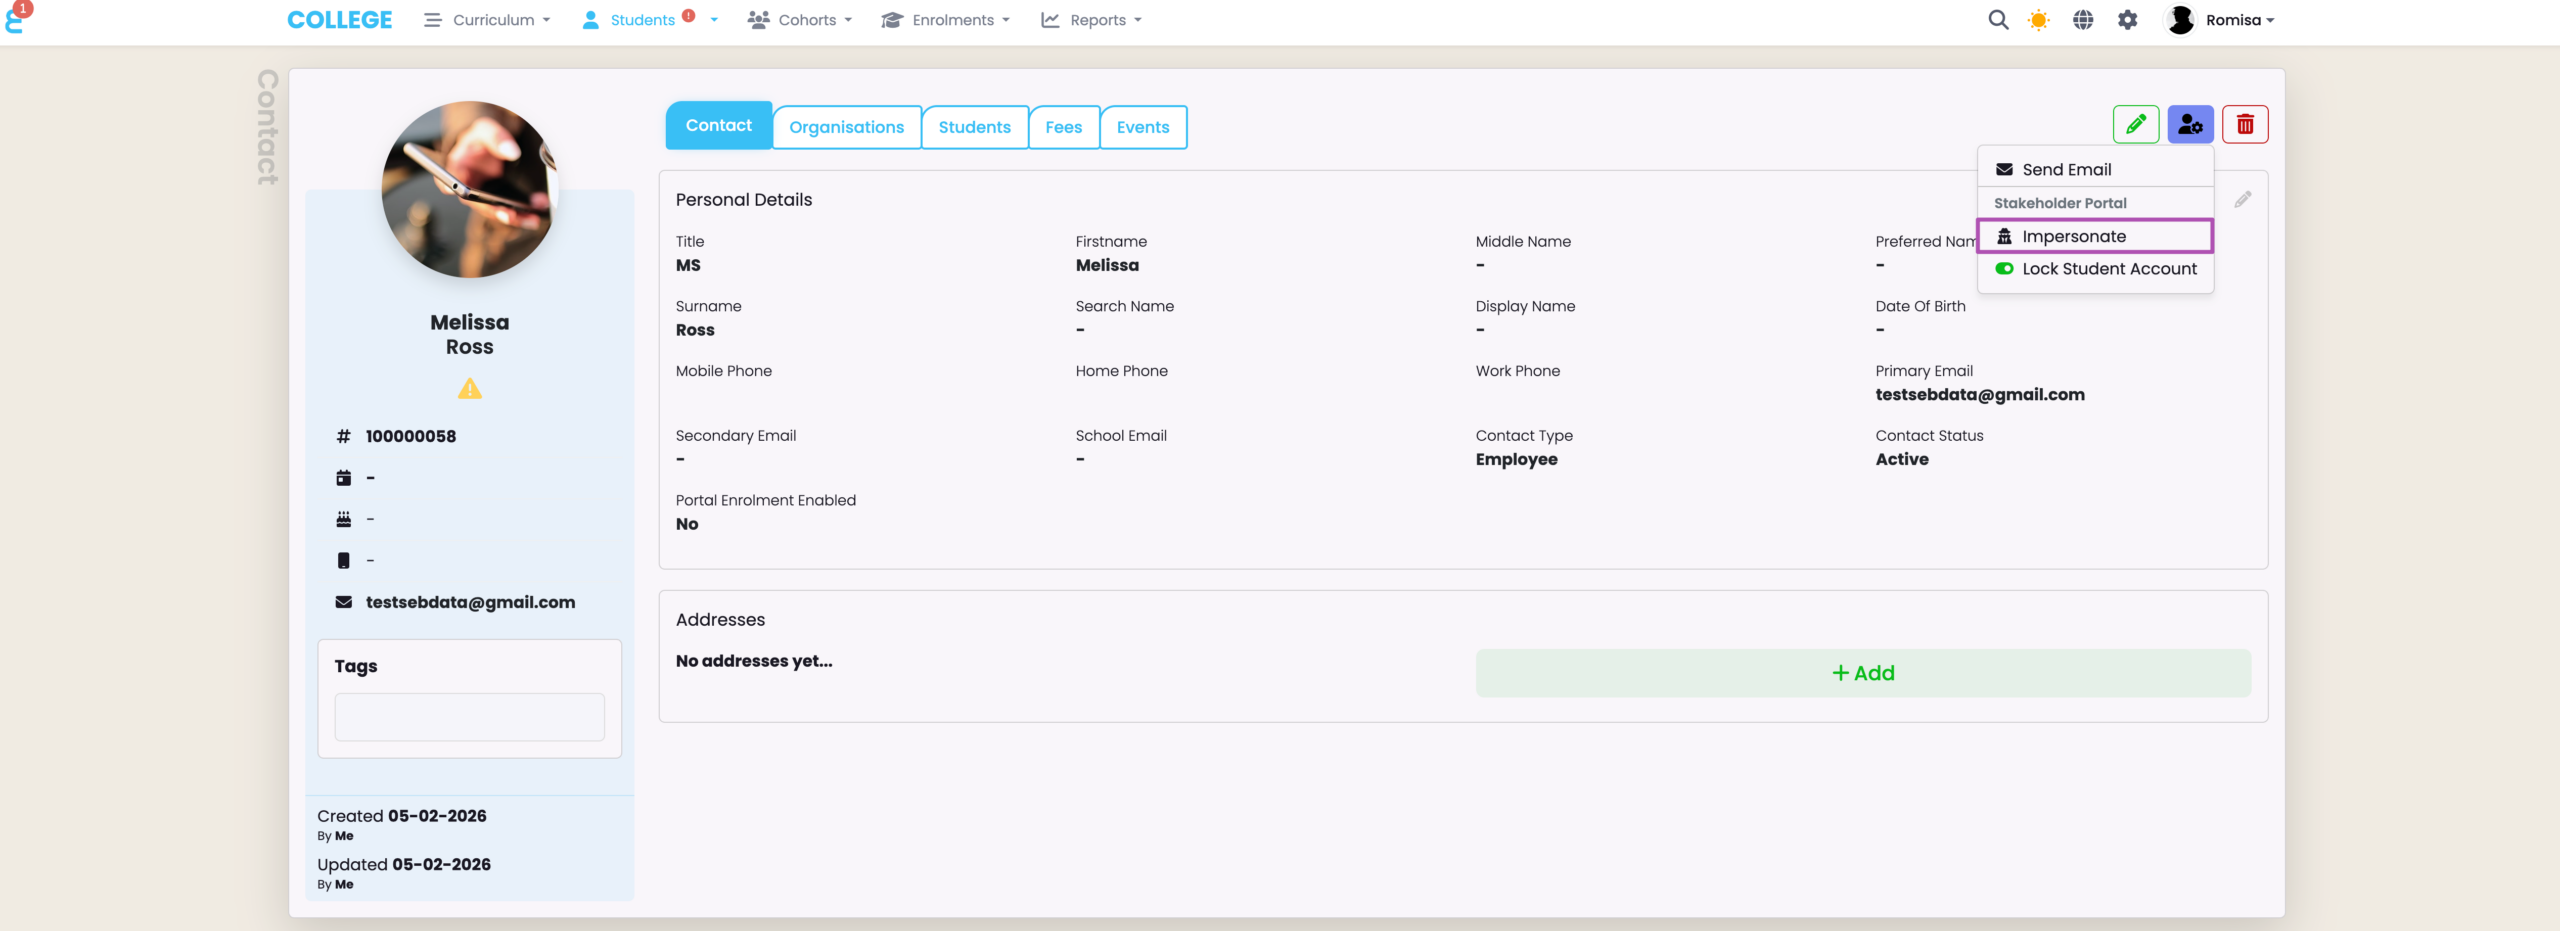
Figure 3ii. Impersonate Contact
The purple top banner indicates that you are in impersonation mode, and seeing your screen through the eyes of the selected Contact.
Organisation Tab
To see Organisations reflected on the Contact profile page, you must first set-up a Contact-Organisation relationship at the Organisation level.
Figure 4i. Navigate from Students > Organisation
Select the “Contacts” tab on a select Organisation profile page, and link a Contact.
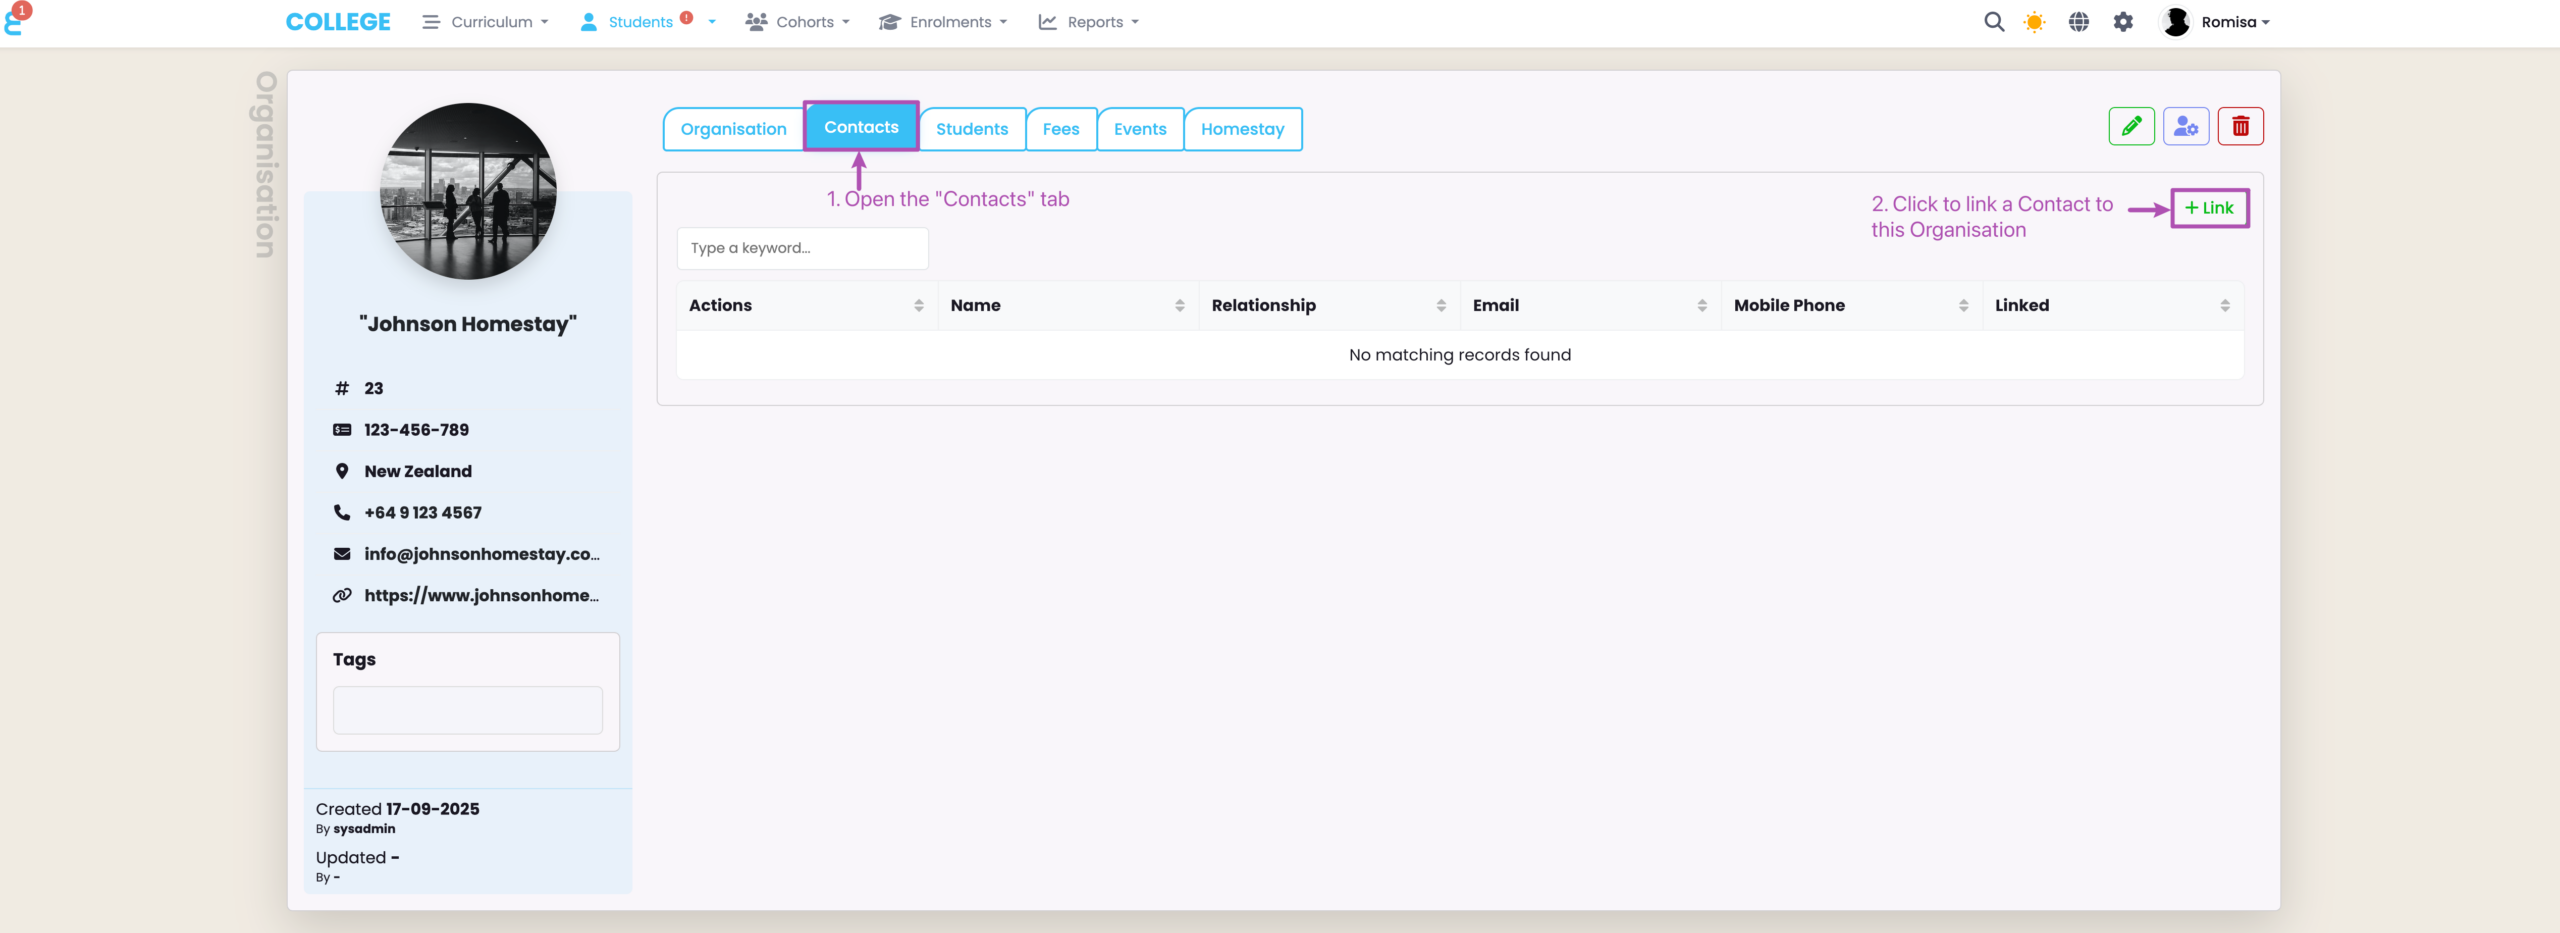
Figure 4ii. Add Required Details and Save
Specify the Contact you are linking, as well as the Contact-Organisation relationship. You can opt to add a note, too. Click “Save” to add the Student-Contact link.
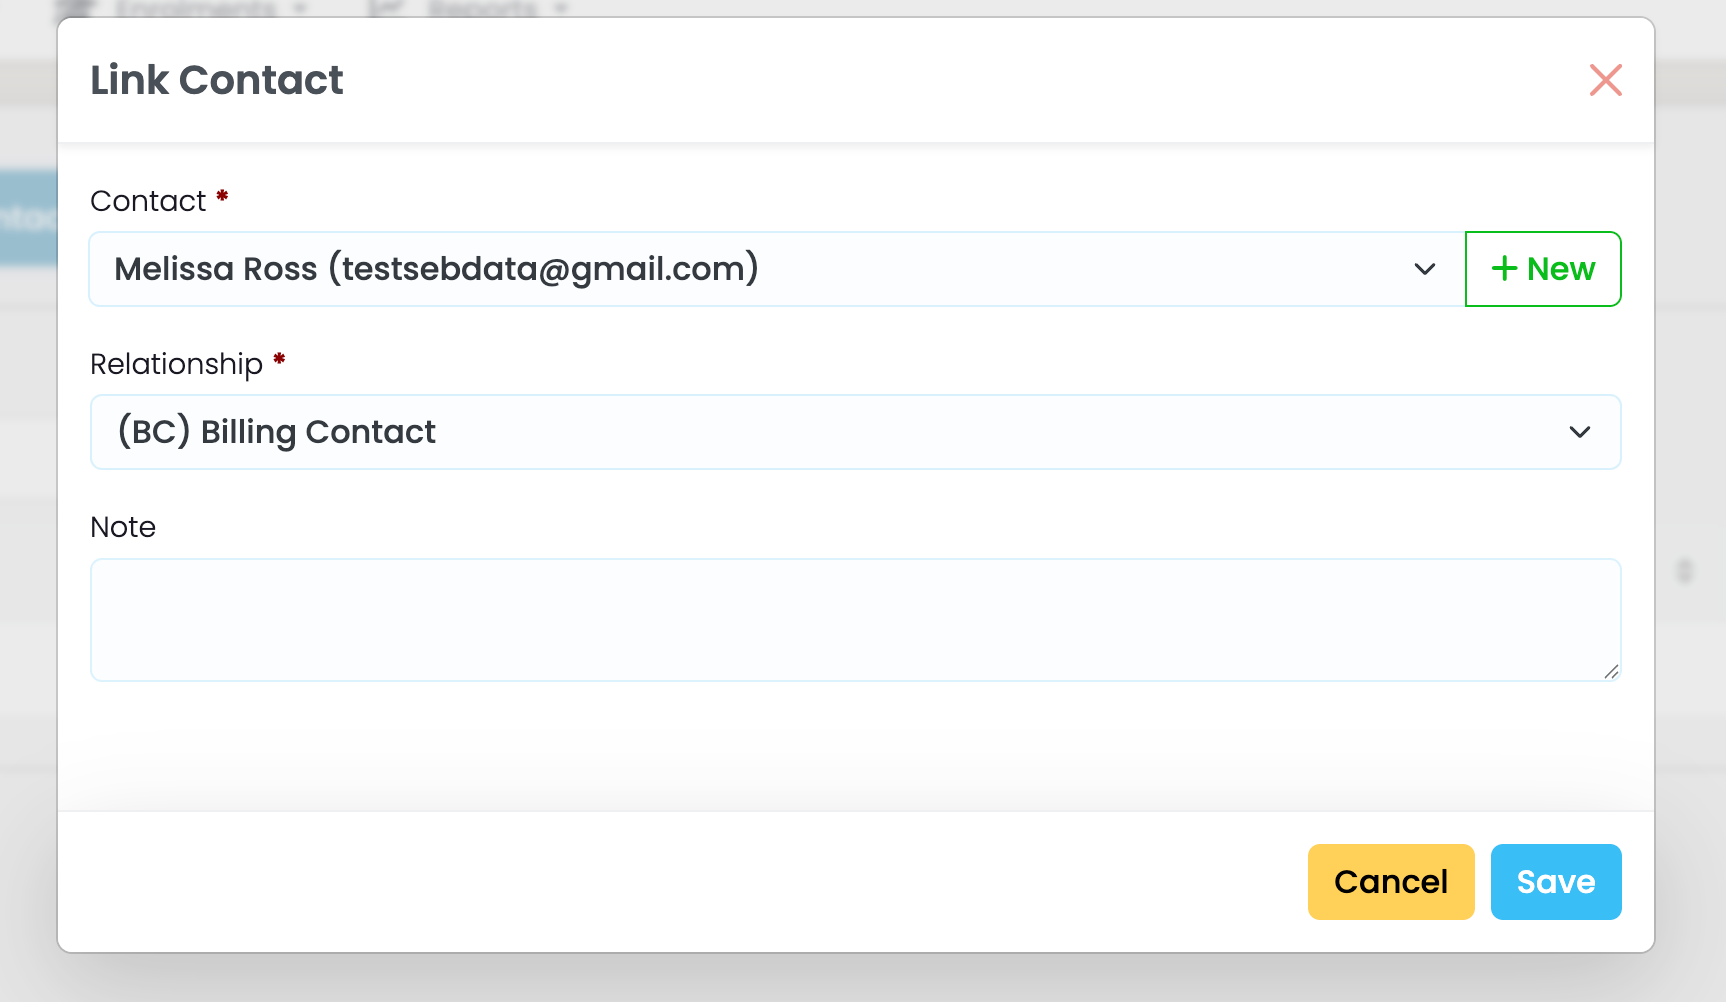
Figure 4iii. See the Contact | Organisation Tab
Click the green pencil icon to edit a Contact-Organisation relationship, or remove (unlink) the relationship entirely (red).

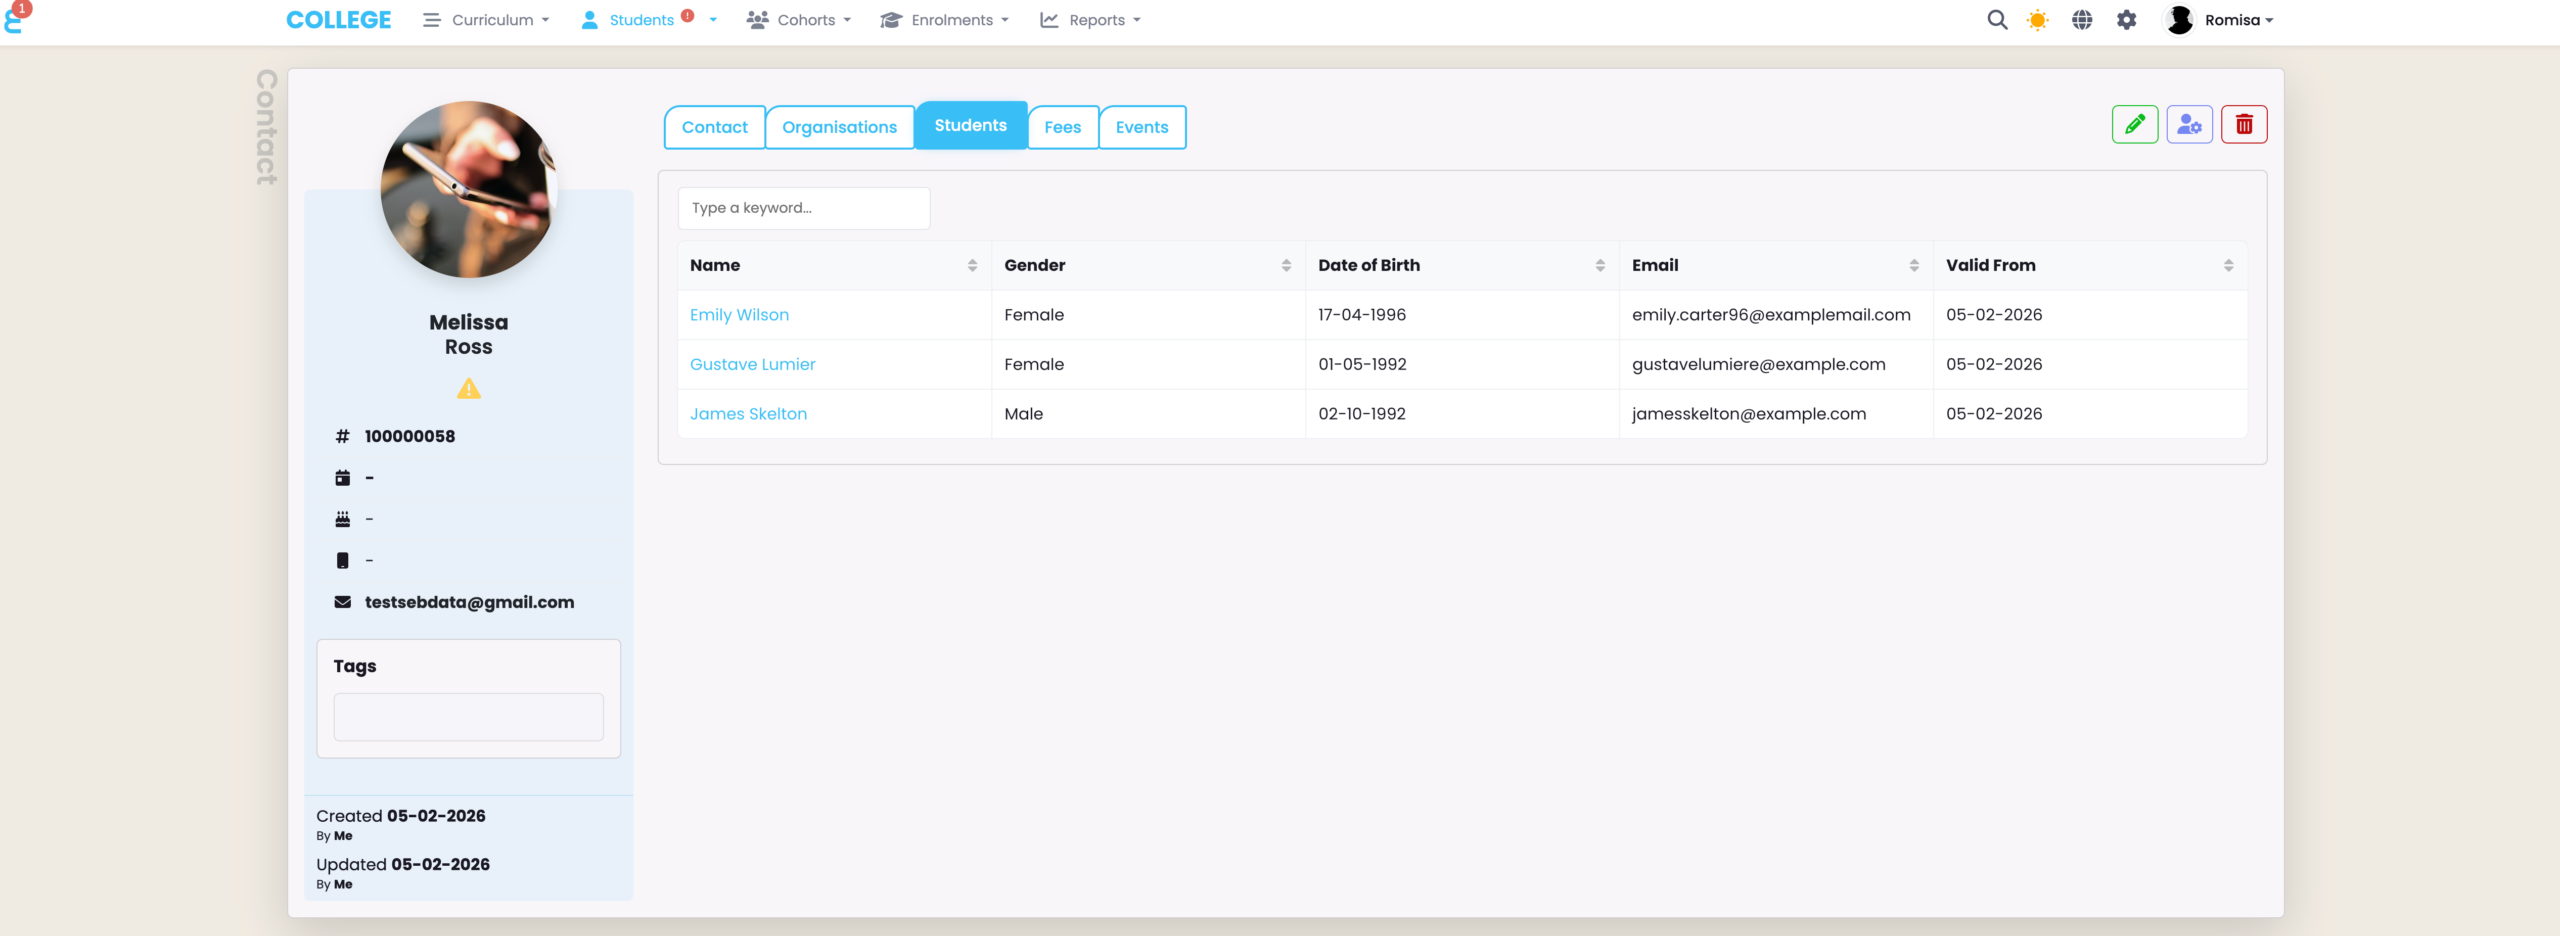
Students Tab
To see the appropriate Students reflected on the Contact profile page, you must first enable a Contact-Programme connection at the Programme level.
Figure 5i. Navigate from Curriculum Index > Programme
Edit the “Show in Contact Portal” field on the Programme tab, to “Yes”. In doing so, you are propagating the Students enrolled into the Programme Intakes to the Contact’s list of Students.
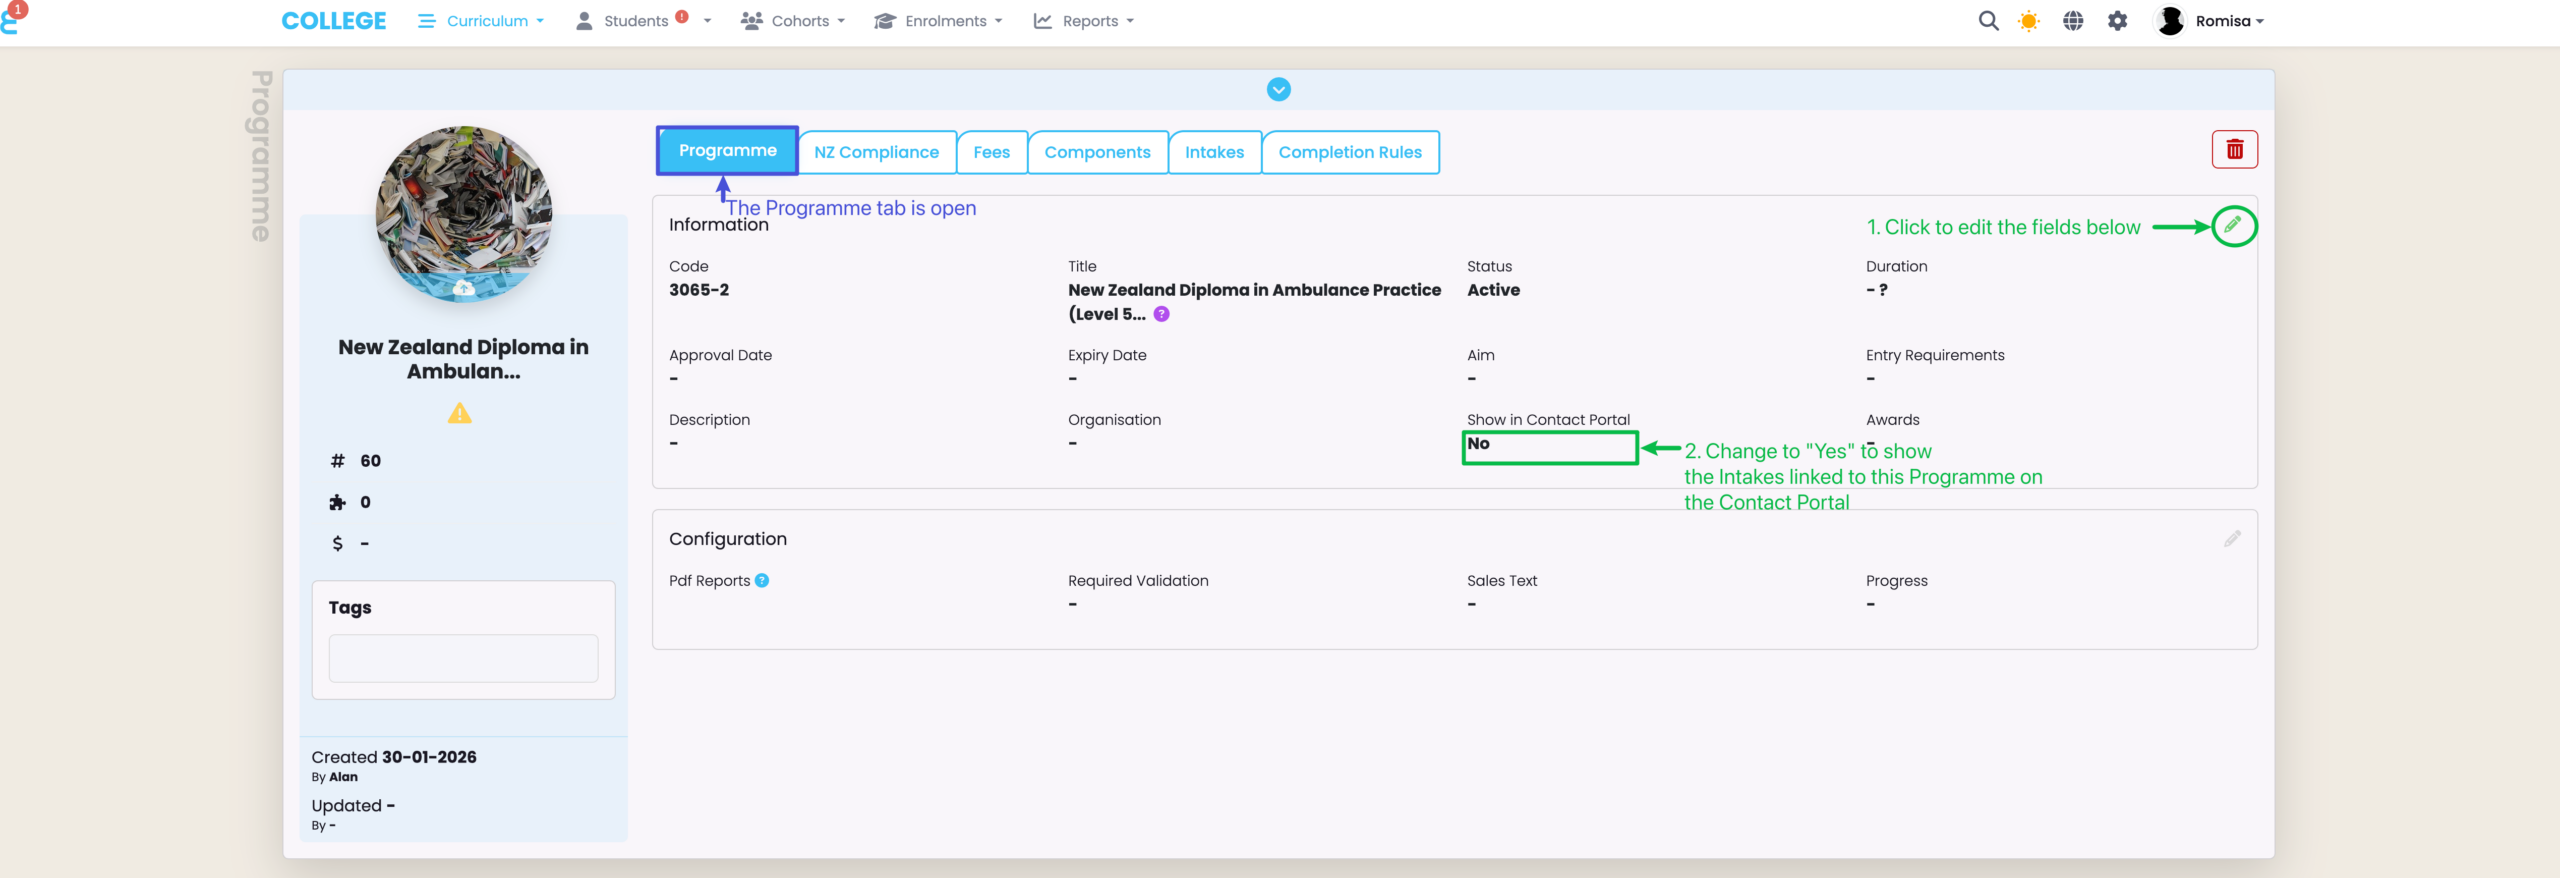
Figure 5ii. See the Contact | Students Tab
The Contact can now see a list of the Students who are linked to them.
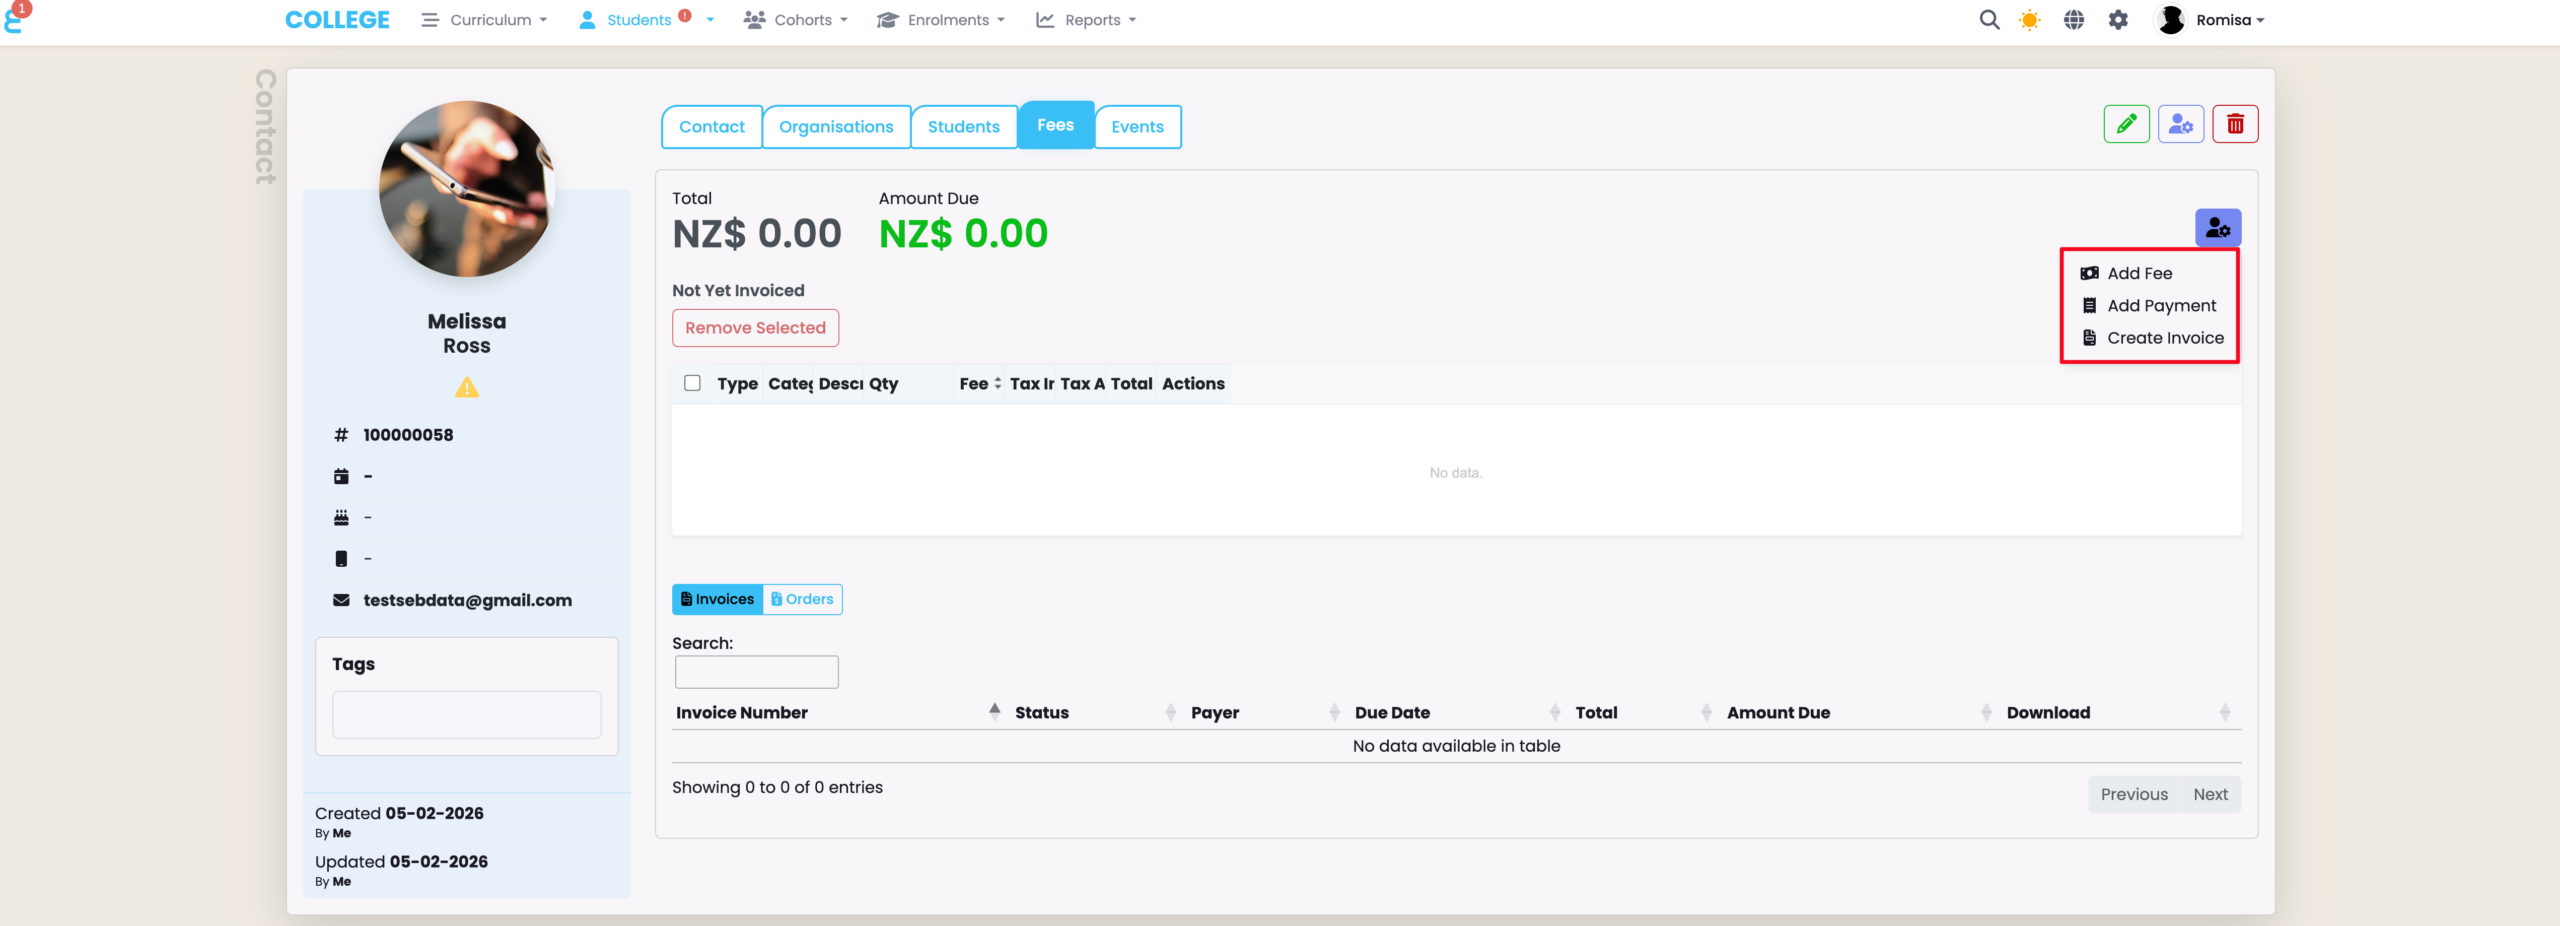
Fees Tab
The Contact will see the sum of all Enrolment fees on this tab, including Students enrolled into multiple Programmes.
Figure 6. Add Financial Records
Add fees, payments and create invoices from this tab, using the Actions button on the grid (red).
Events Tab
You can communicate with the Contact by setting up notes from the Events tab.
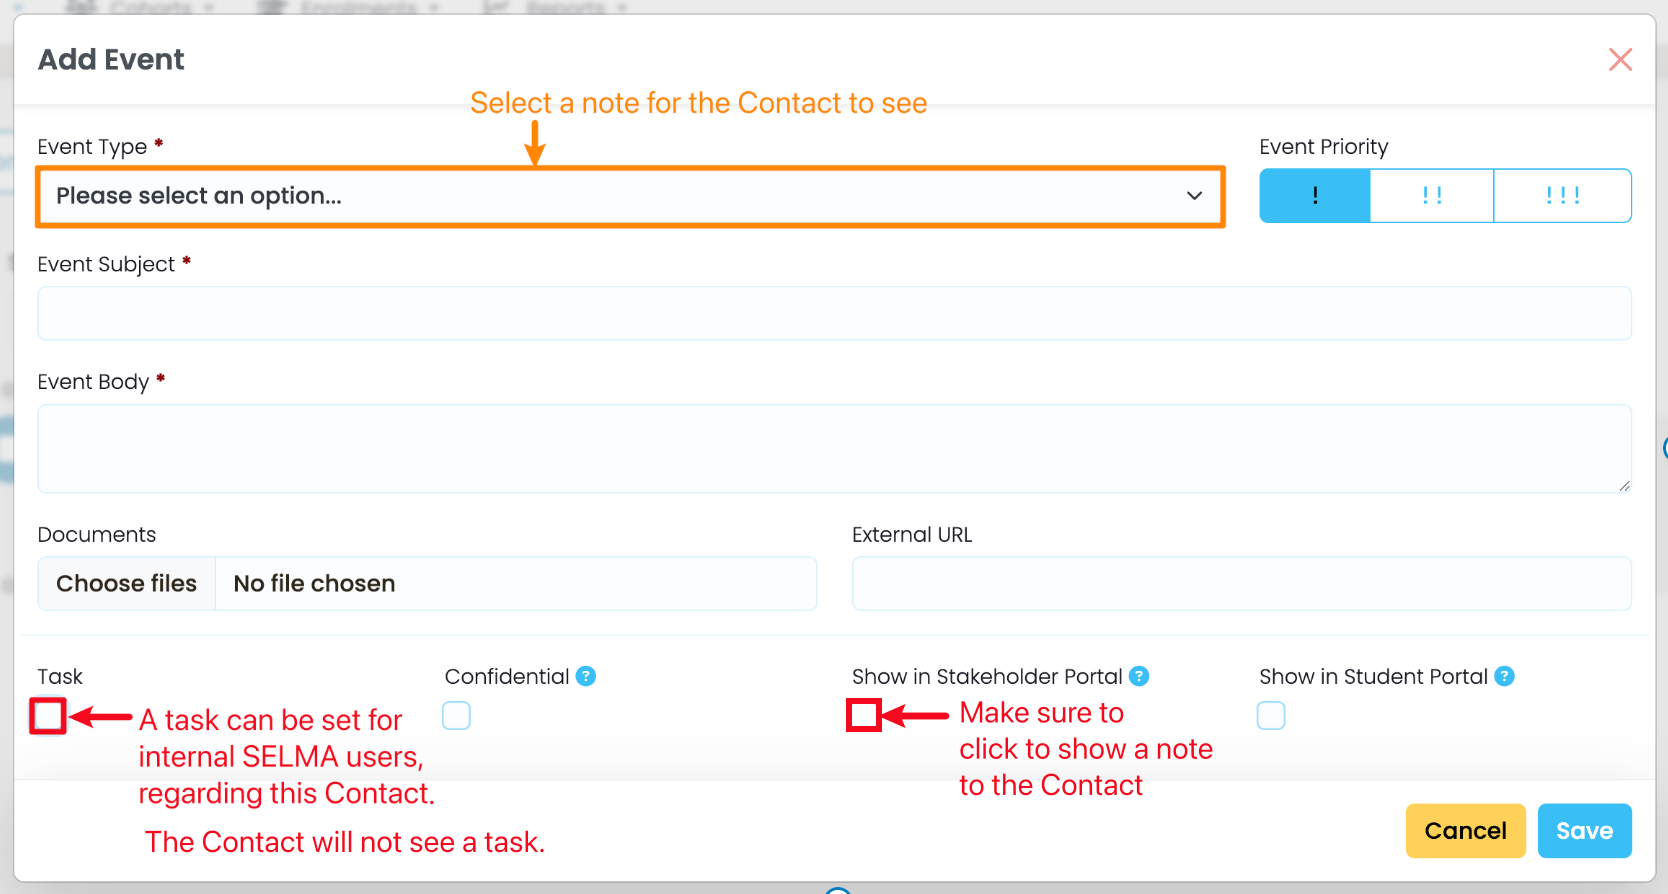
Figure 7i. Add an Event
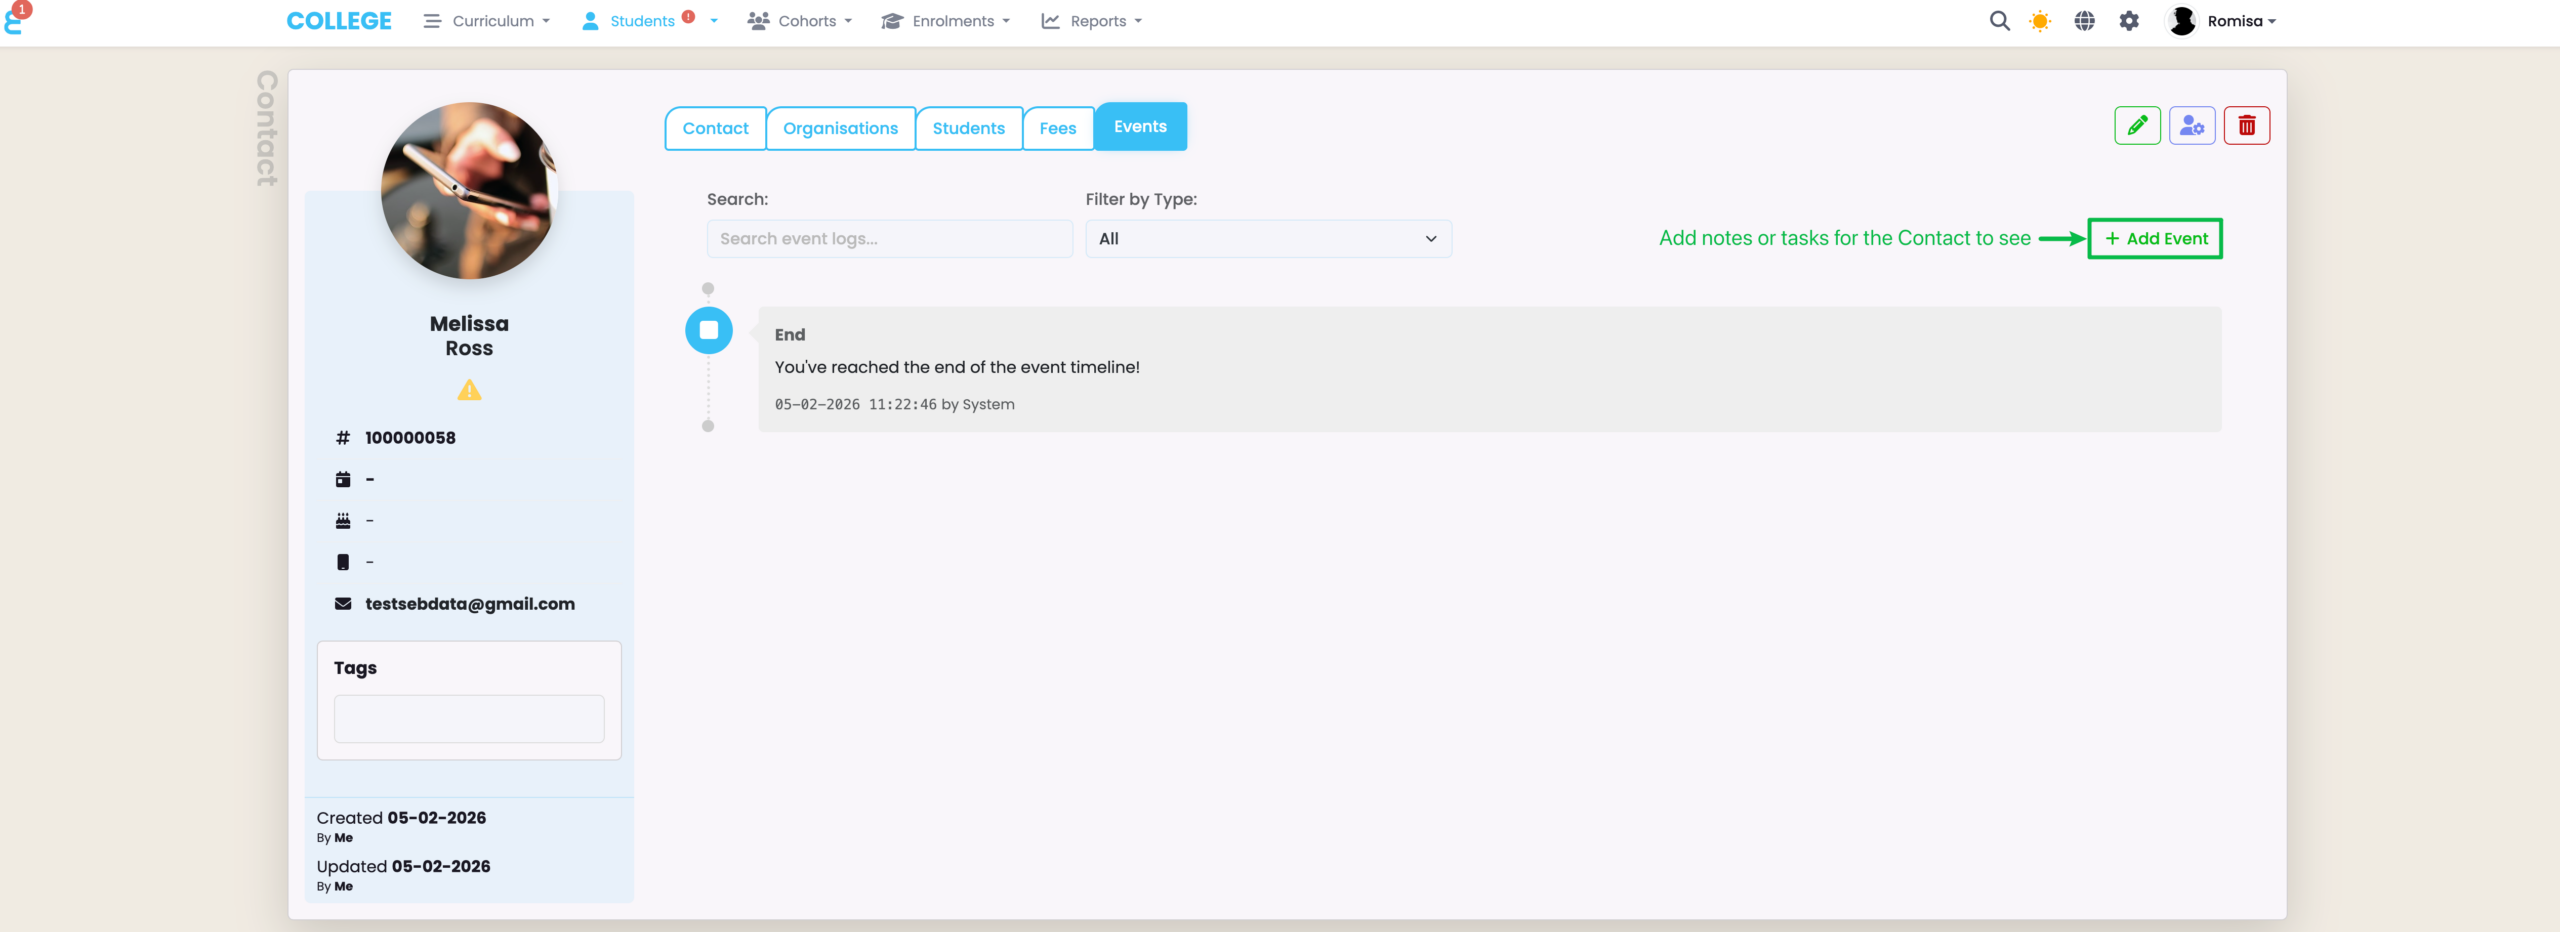
Figure 7ii. Add Note Details
You can add a note for the Contact to see. You can also set up a task to assign to internal SELMA users, regarding this Contact.
Intake Tab
The Intake Tab is visible to the Contact, only. However, you should manage the settings that results in the appropriate Intakes to show, here:
- Link an Organisation to the relevant Programme.
- Jump to Figure 4i-ii.
- Link the Contact to the Programme
- Jump to Figure 5i.
- Remove irrelevant Intakes from showing to the Contact
- See Figure 11, below.
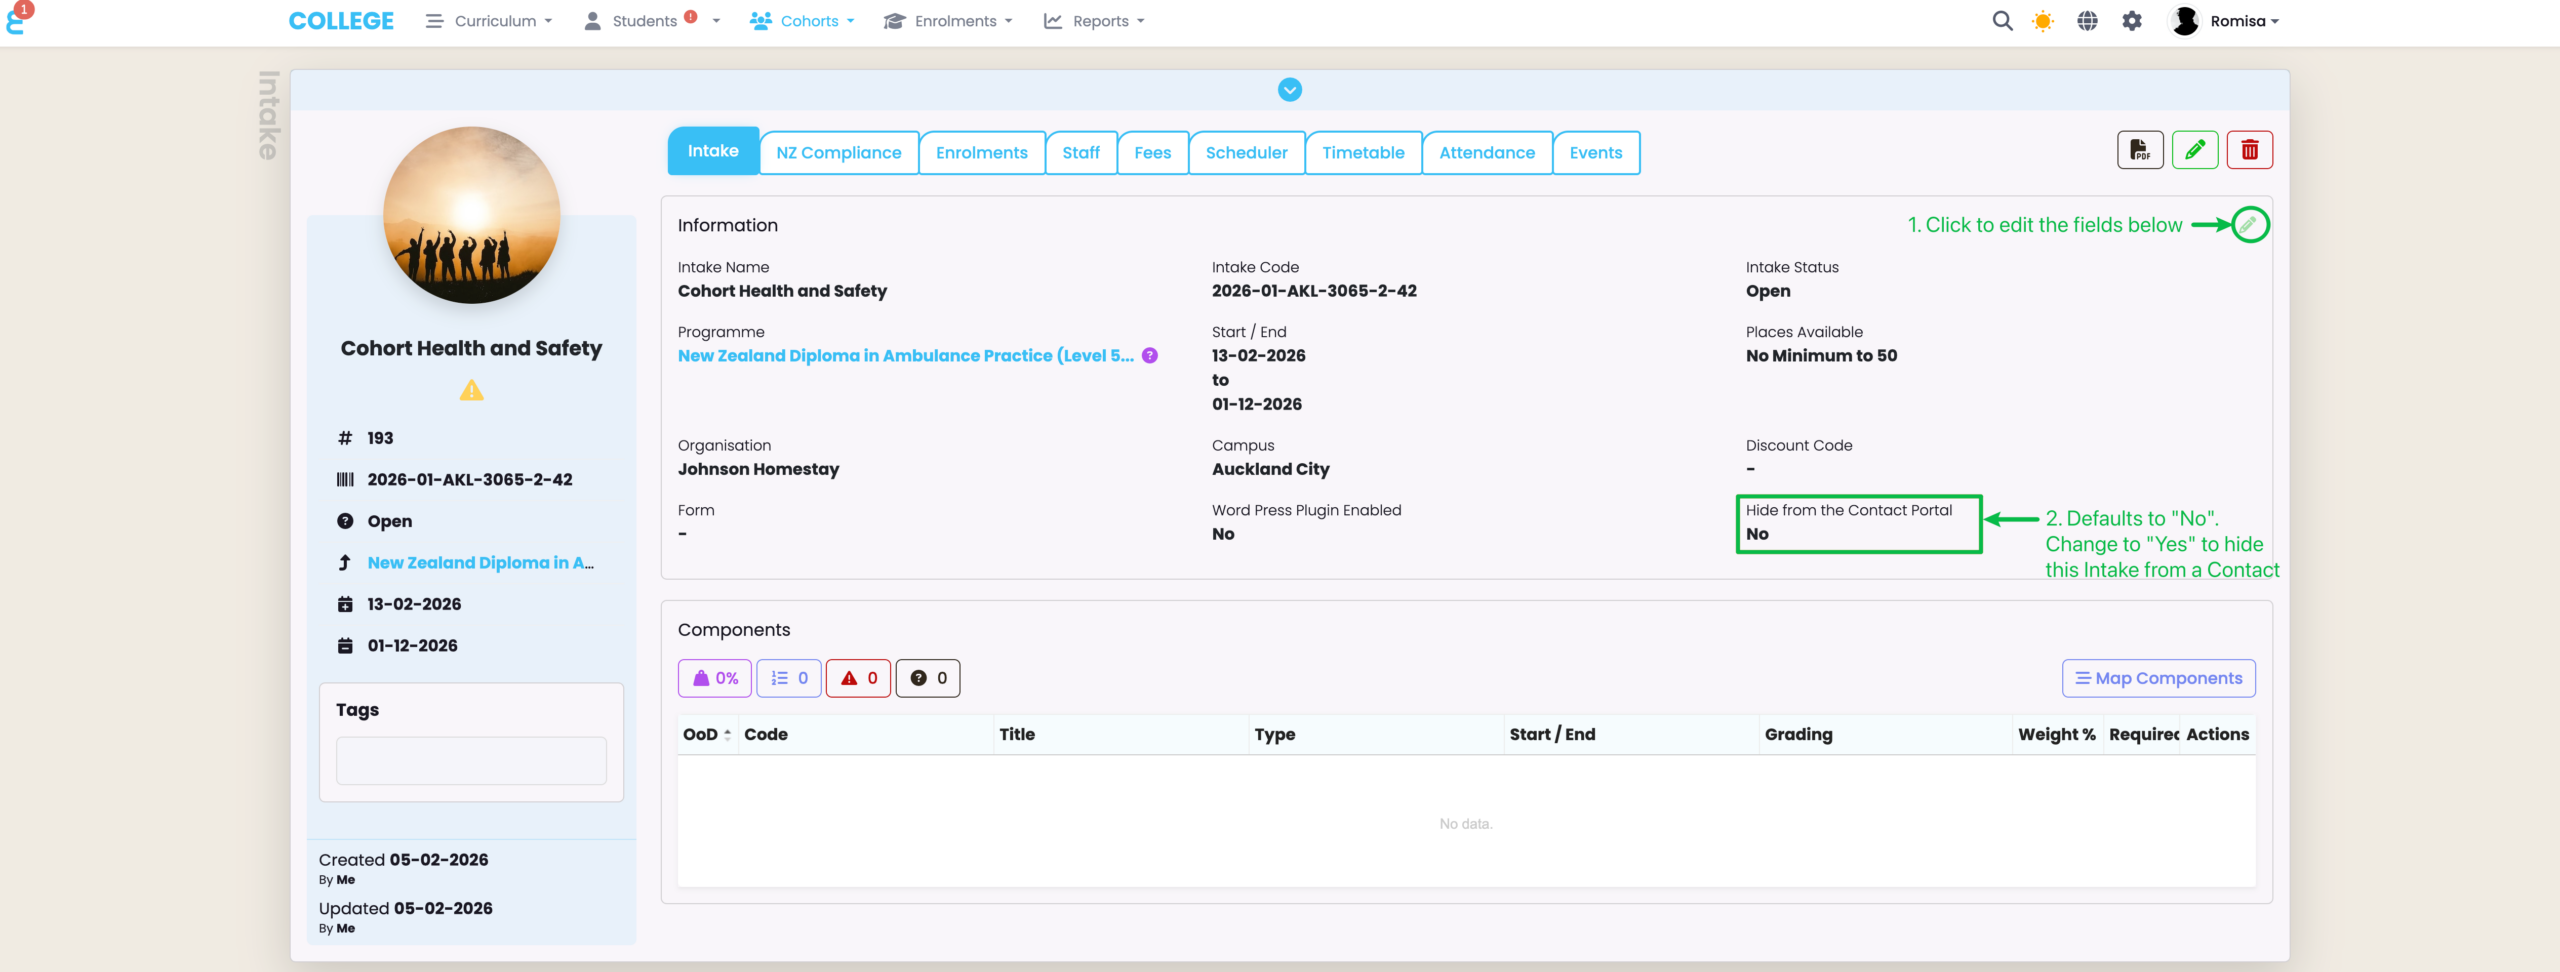
Figure 8. Hide an Intake from the Contact Portal
The “Hide from the Contact Portal” field defaults to “No”. Change it to “Yes” to hide a select Intake from showing to a Contact linked to the corresponding Programme.
Add New Contact Types
Create custom Contact Type options reflected in dropdown lists in SELMA e.g. when filling out new Contact details.
Figure 10i. Navigate from Settings > Lookup Data
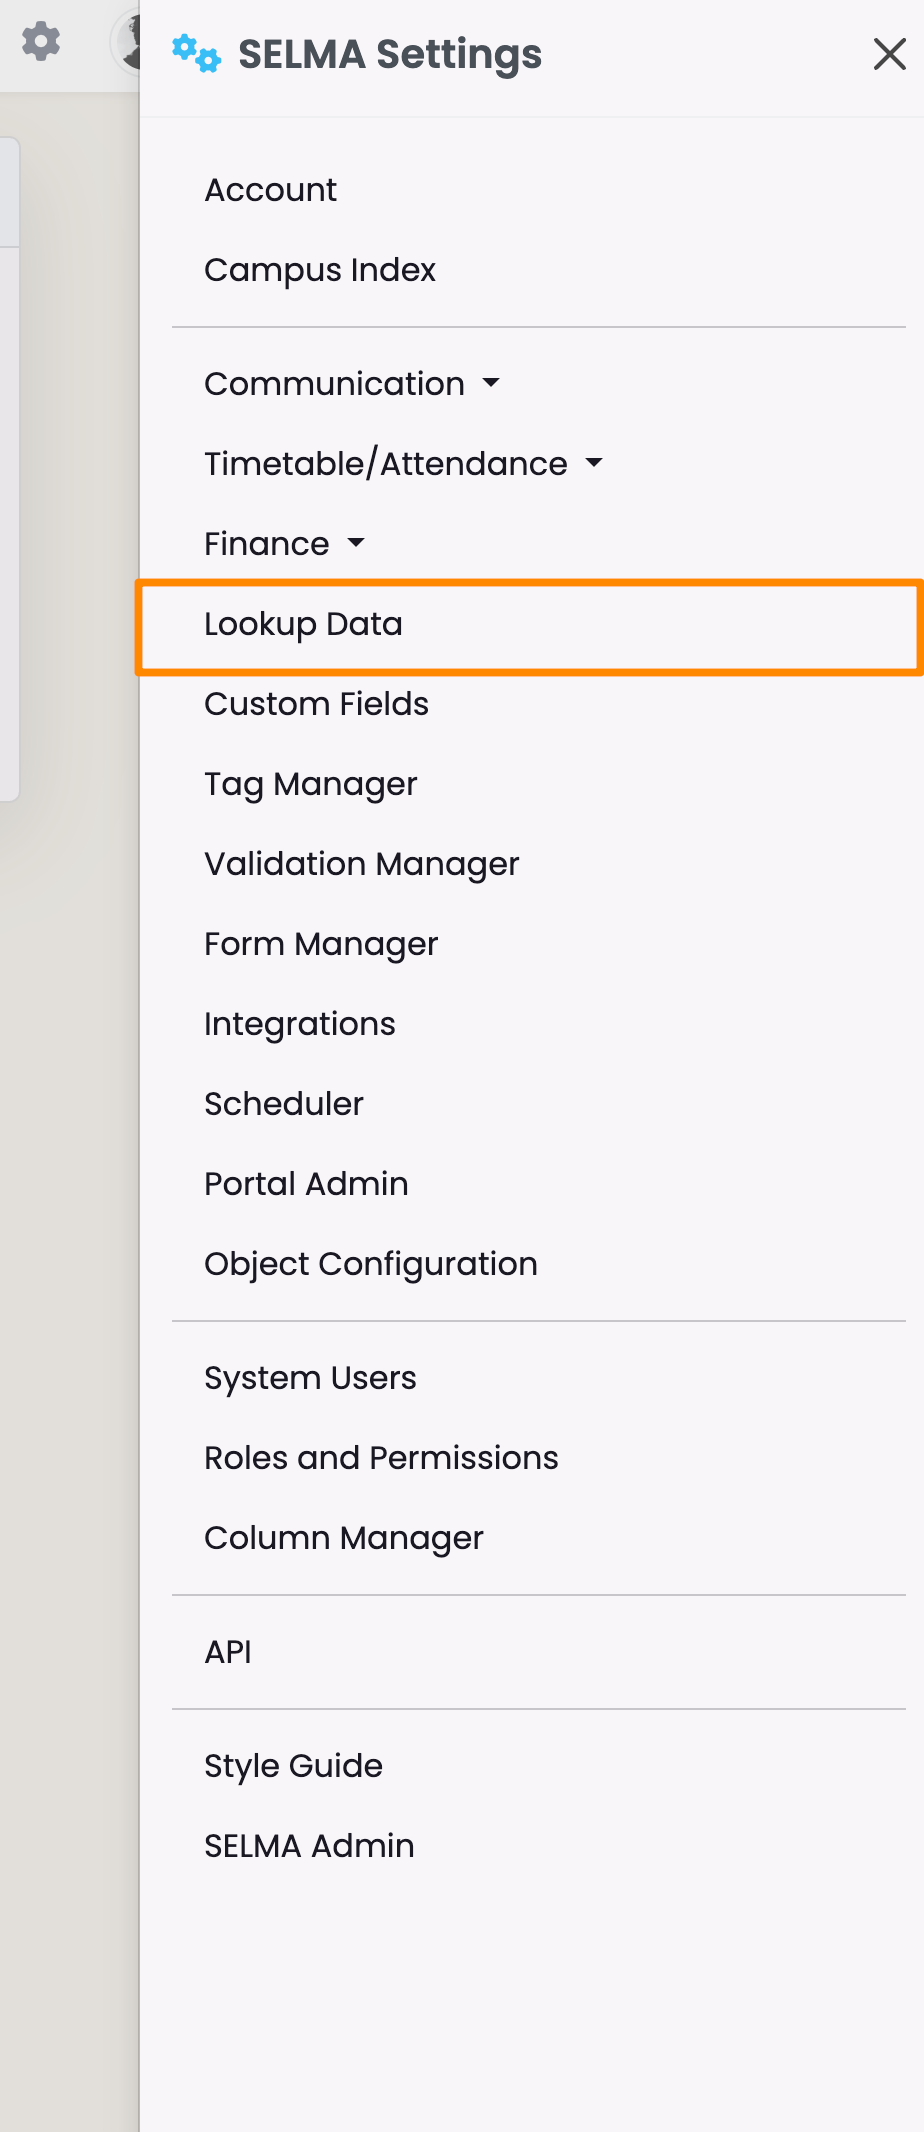
Figure 10ii. Find Contact Type
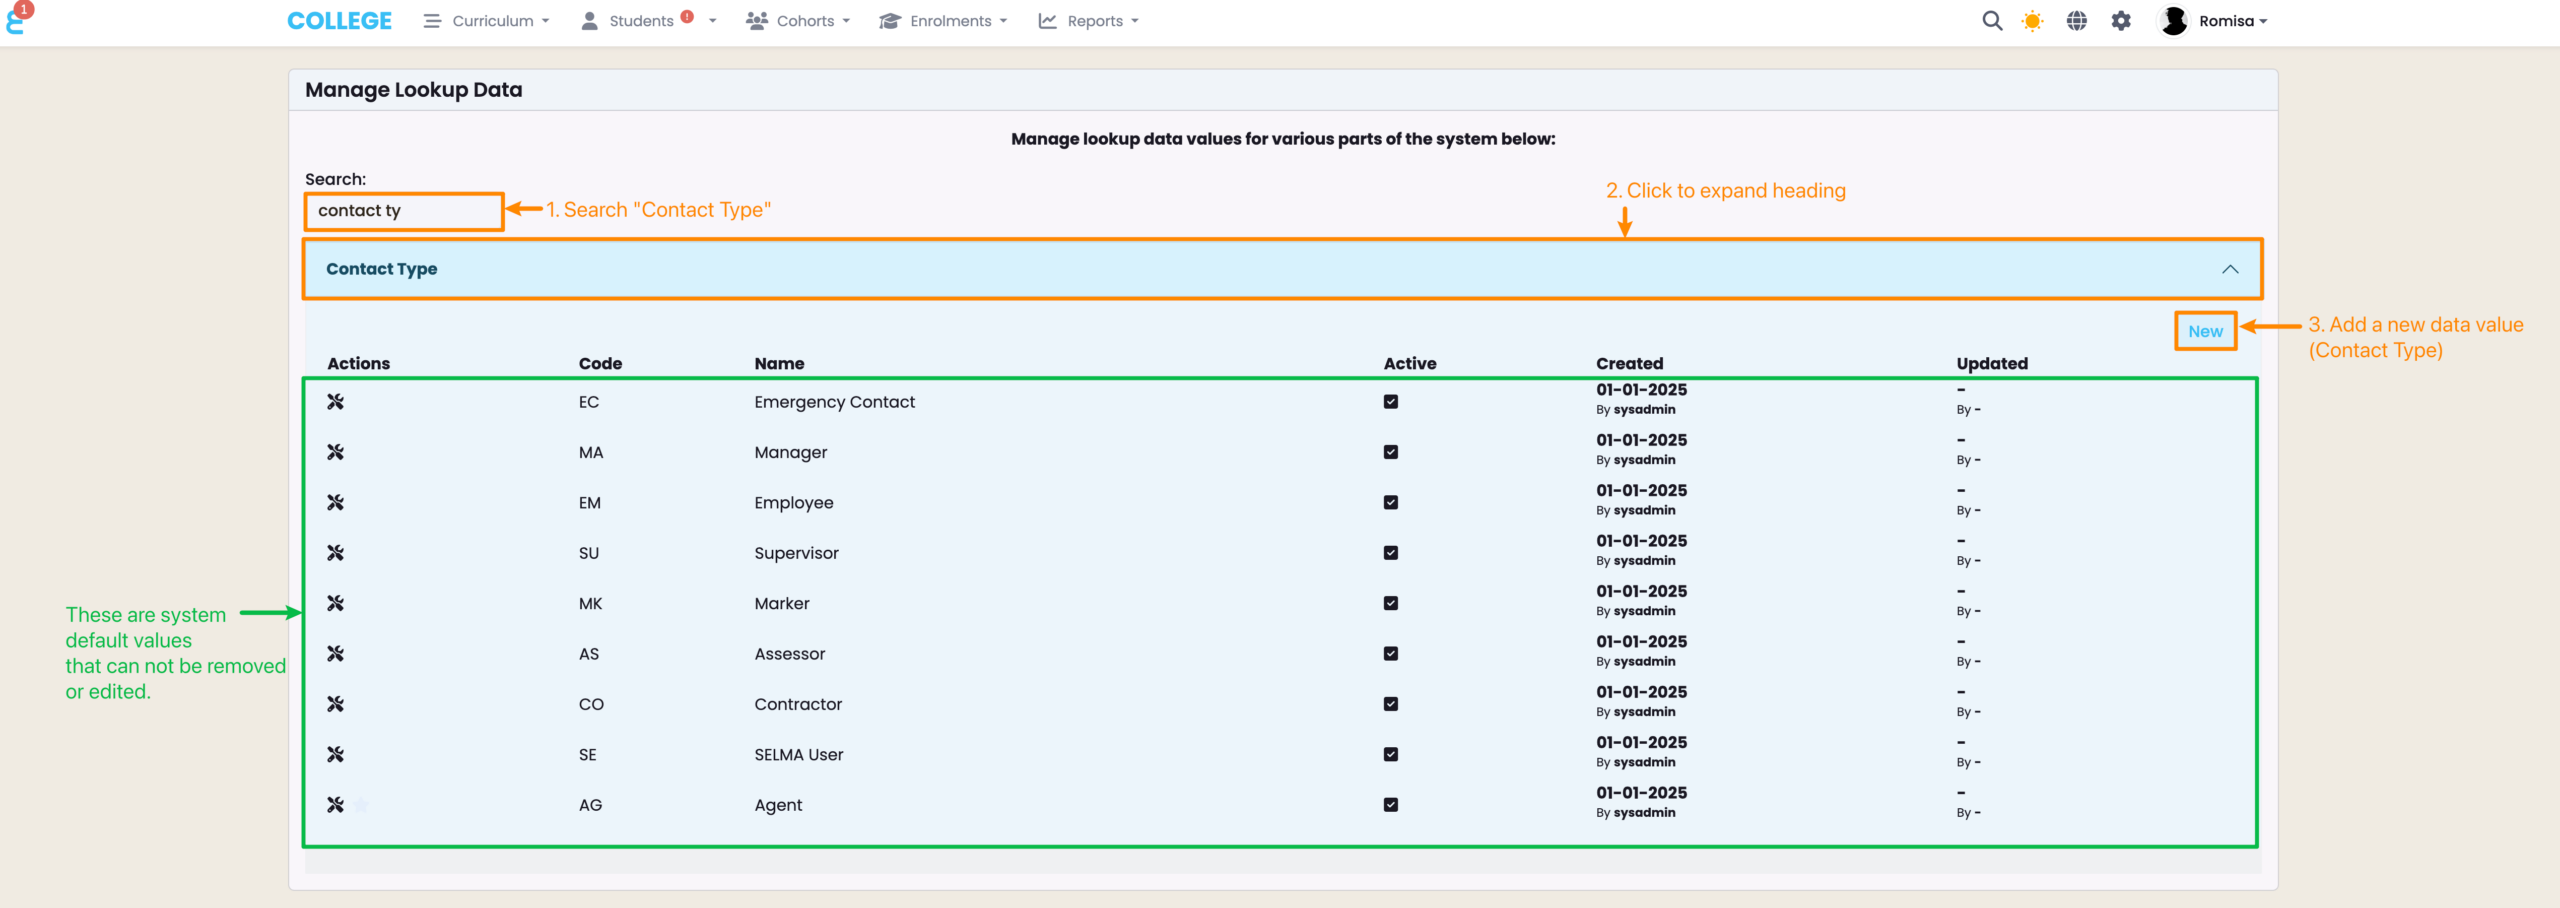
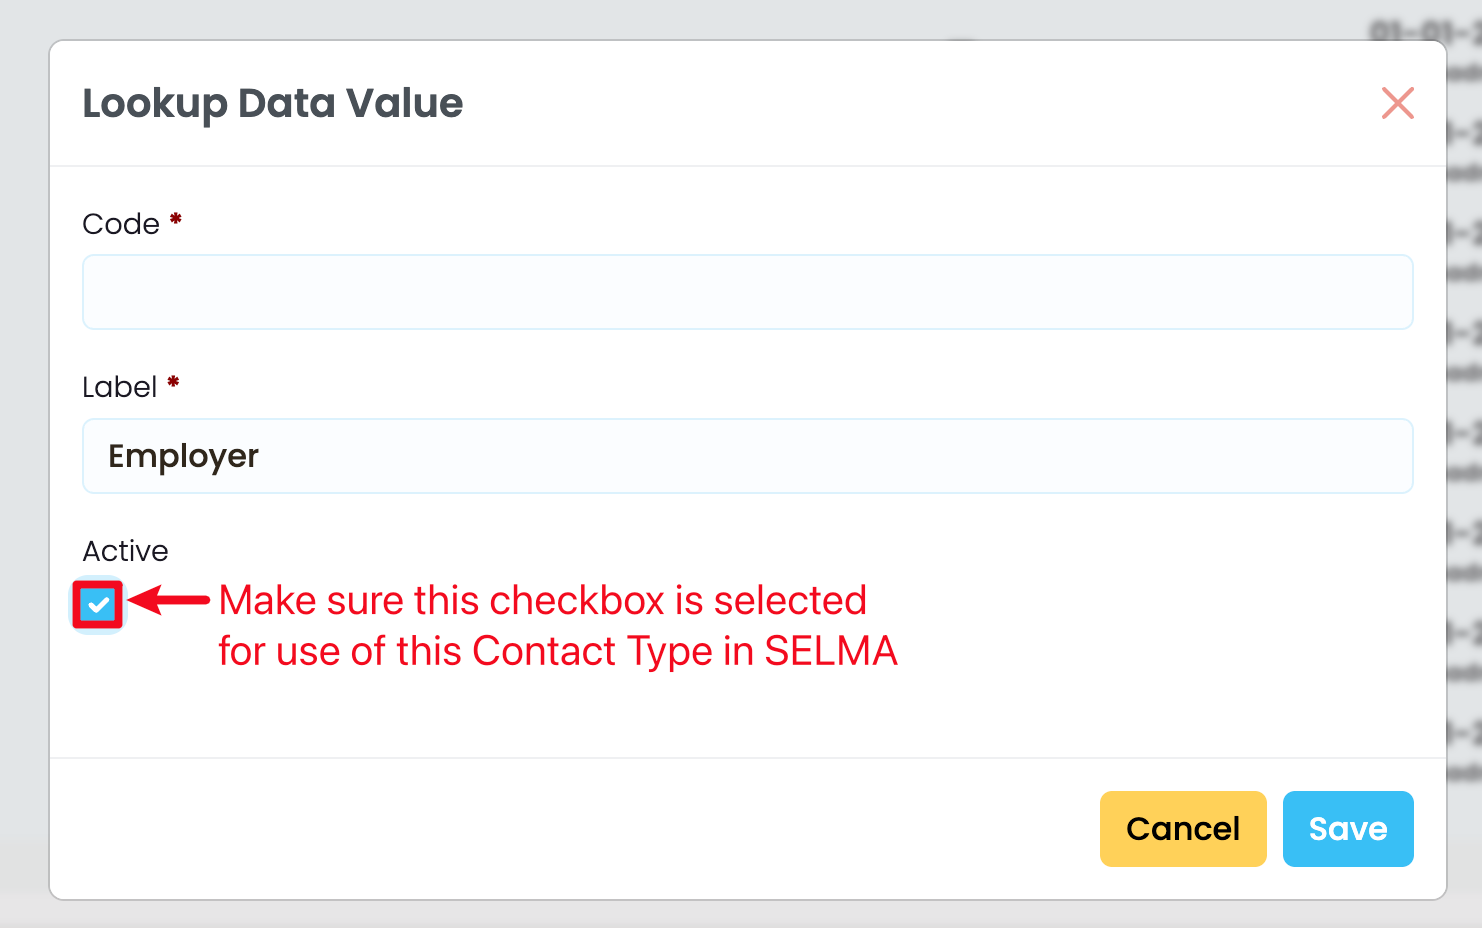
Figure 10iii. Add details and Save
Fill in the required details, as marked by red asterisks, and ensure you select “Active” so that you can use the Contact Type elsewhere in SELMA.