
Cloning creates a new Intake, however, it transfers some information from an established Intake.
Components, Compliance information, Fees and Scheduler Events, are automatically inherited by the new clone Intake, while you can manually specify for Staff to be inherited, too.
Note: Enrolments are not inherited by a cloned intake.
Follow the steps below to Clone an Intake:
- Navigate Cohorts > Clone Intake (Figure 1.).
- Fill out the required fields, as marked by red asterisks. Some of these are as seen in Required Fields on the “Add Intake” Screen.
- Campuses can be different between cloned intakes, so specify one from a list taken from the Campus Index (Figure 2.).
- Click the “Add New Intake +” button to add multiple clones (Figure 2.).
- Click the “Create” button (Figure 2.).
If you have created a single cloned Intake, you will be taken to its profile, directly. From the Events tab, you can see that the Cloning has been logged (Figure 3.).
If you have created multiple clones, you will be taken to a page listing those Intakes, first, where you can select which profile to view and edit (Figure 4.).
Figure 1. Click “Clone Intake” to take you to the cloning creation page.
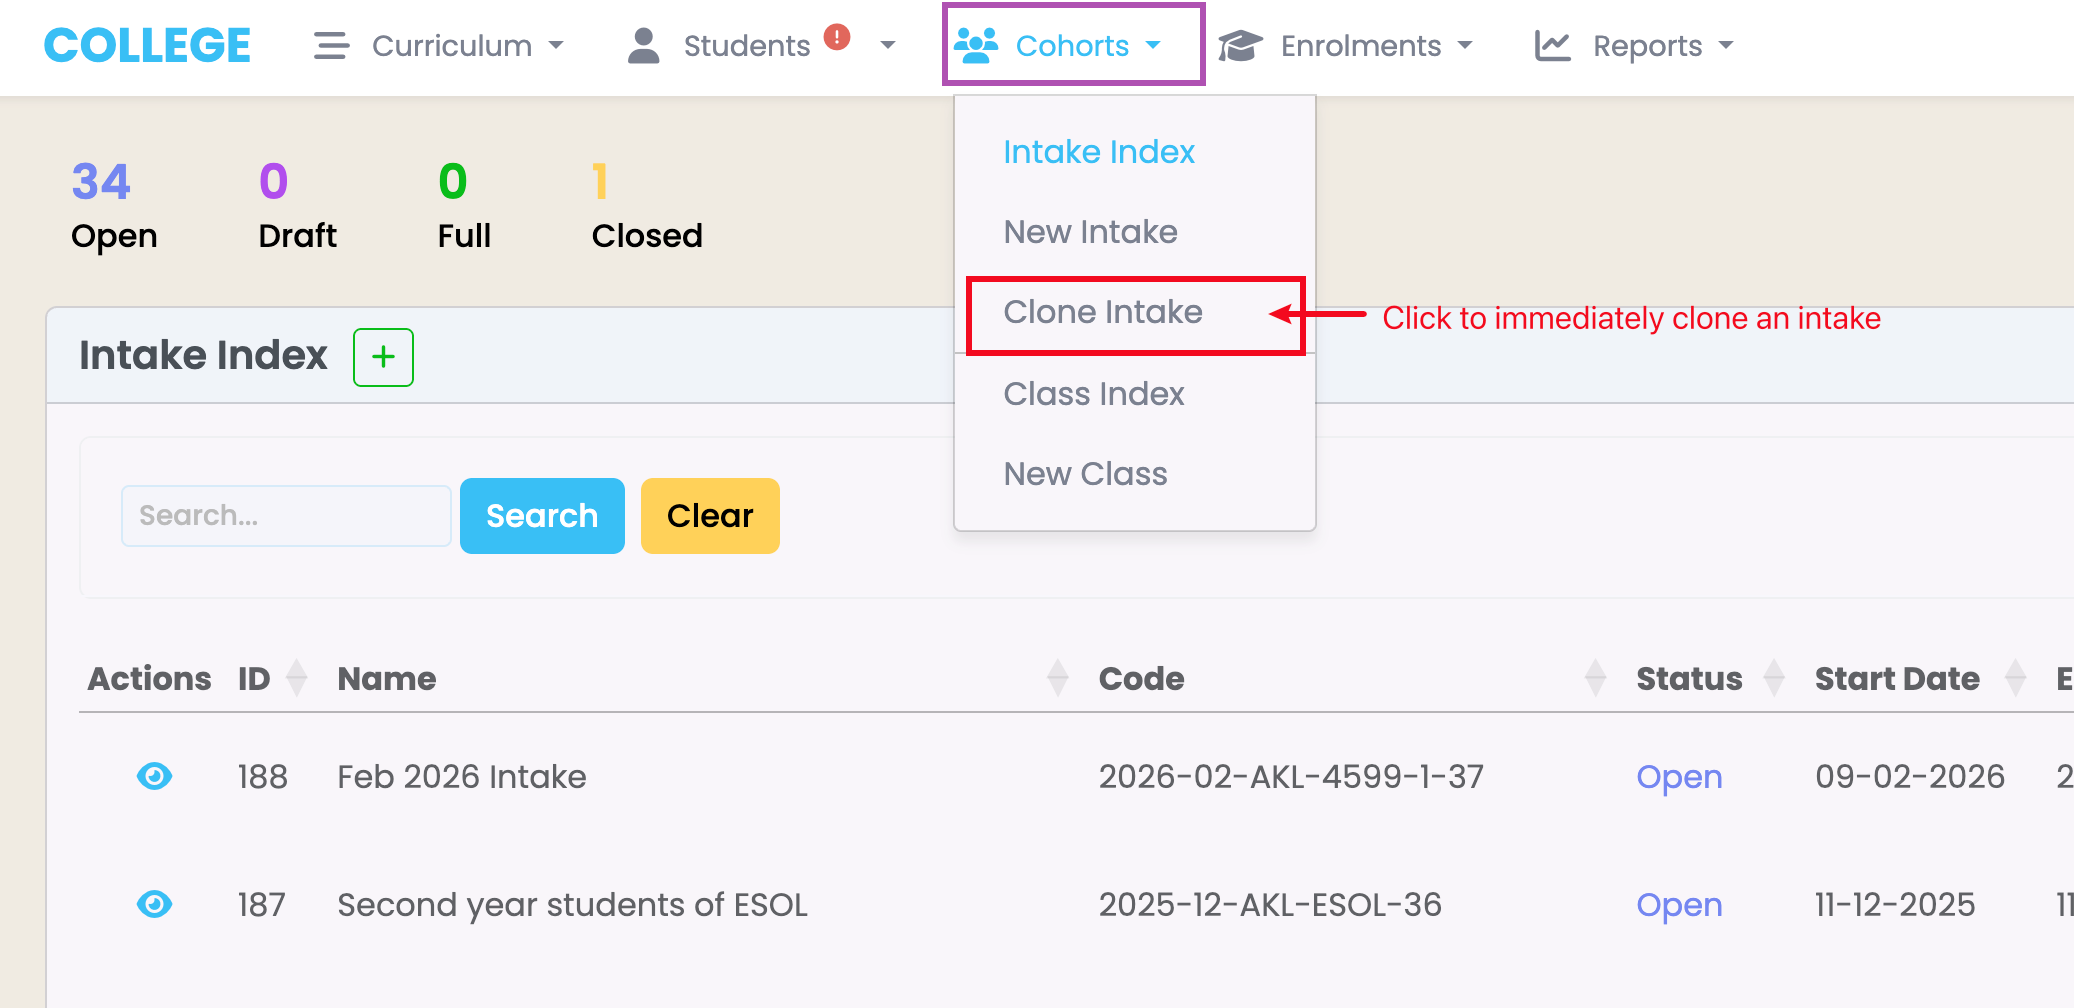
Figure 2. Ensure the Intake Status is set to “Open” for Enrolments to be inherited (purple), and click the “Copy Staff?” tick-box (green) to assign the same Staff as the cloned Intake.
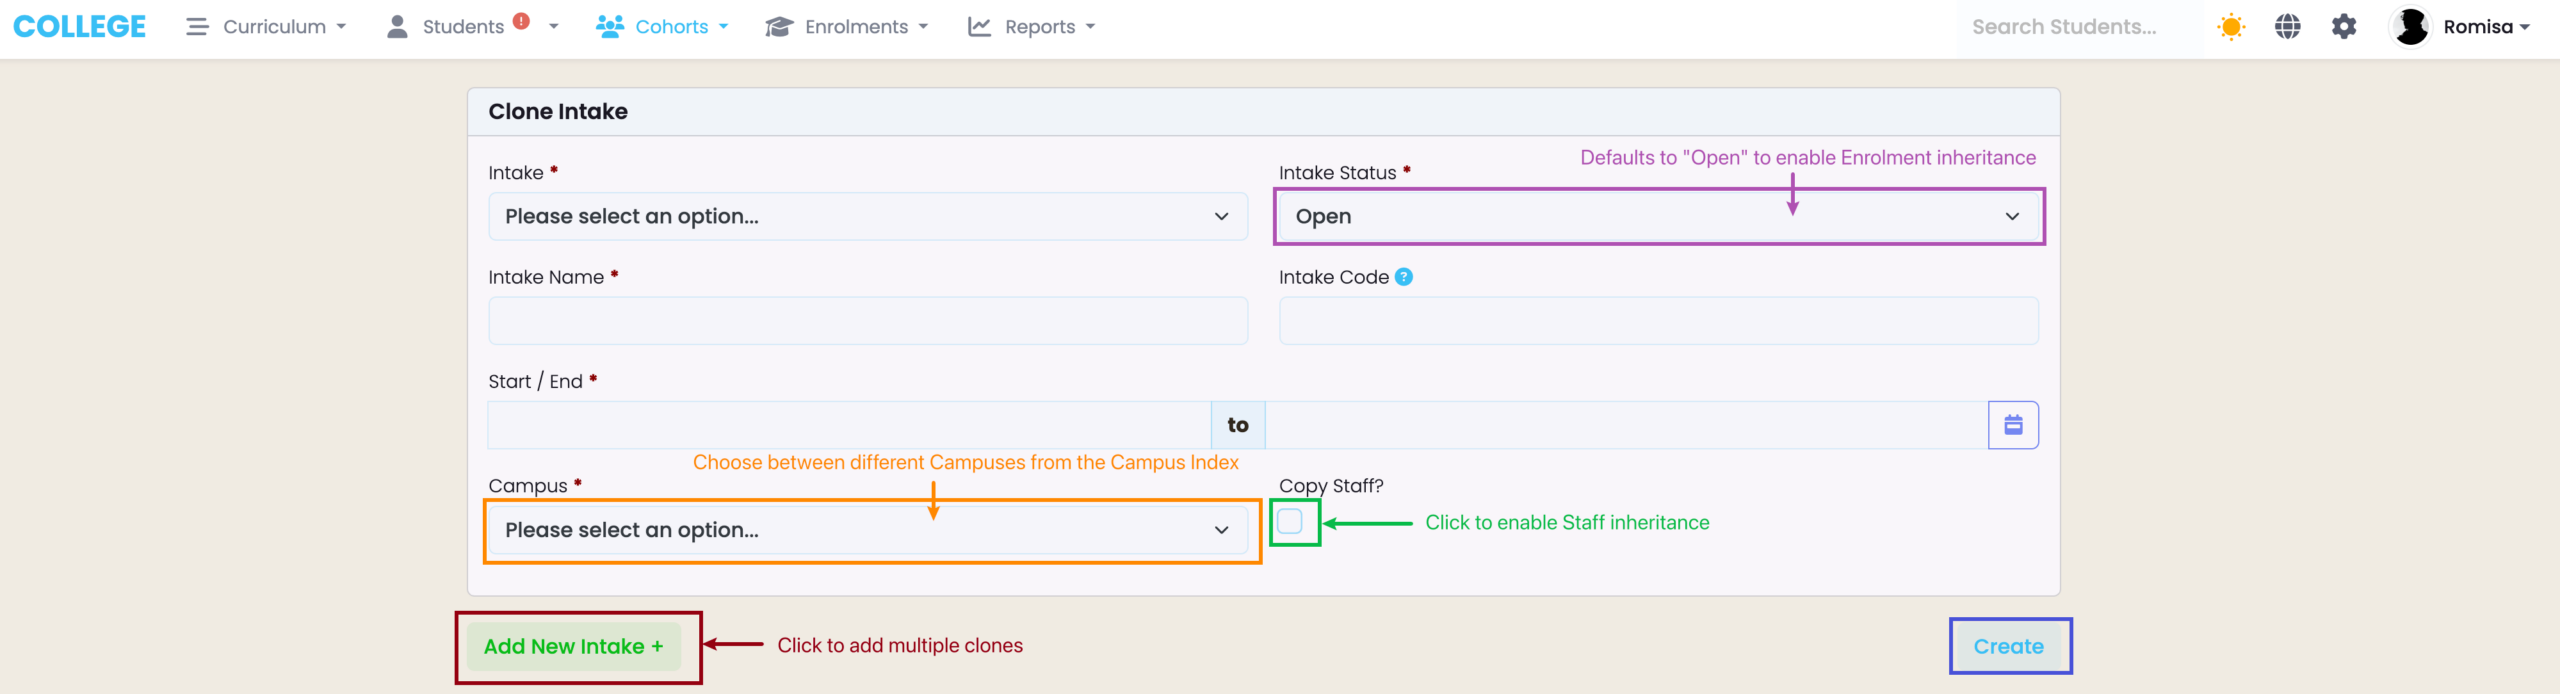
Figure 3. View the Events tab to read extra details about the Cloning that has occurred.

Figure 4. You will see a list of your cloned Intakes, if you have created multiple at the same time.
