An application is a pathway that a student undertakes before an enrolment record can be created for them in the system.
It involves multiple steps, each with prerequisites that the student should meet.
In this article:
Create an Application Template
Figure 1. Navigate to Settings > Application Template Manager
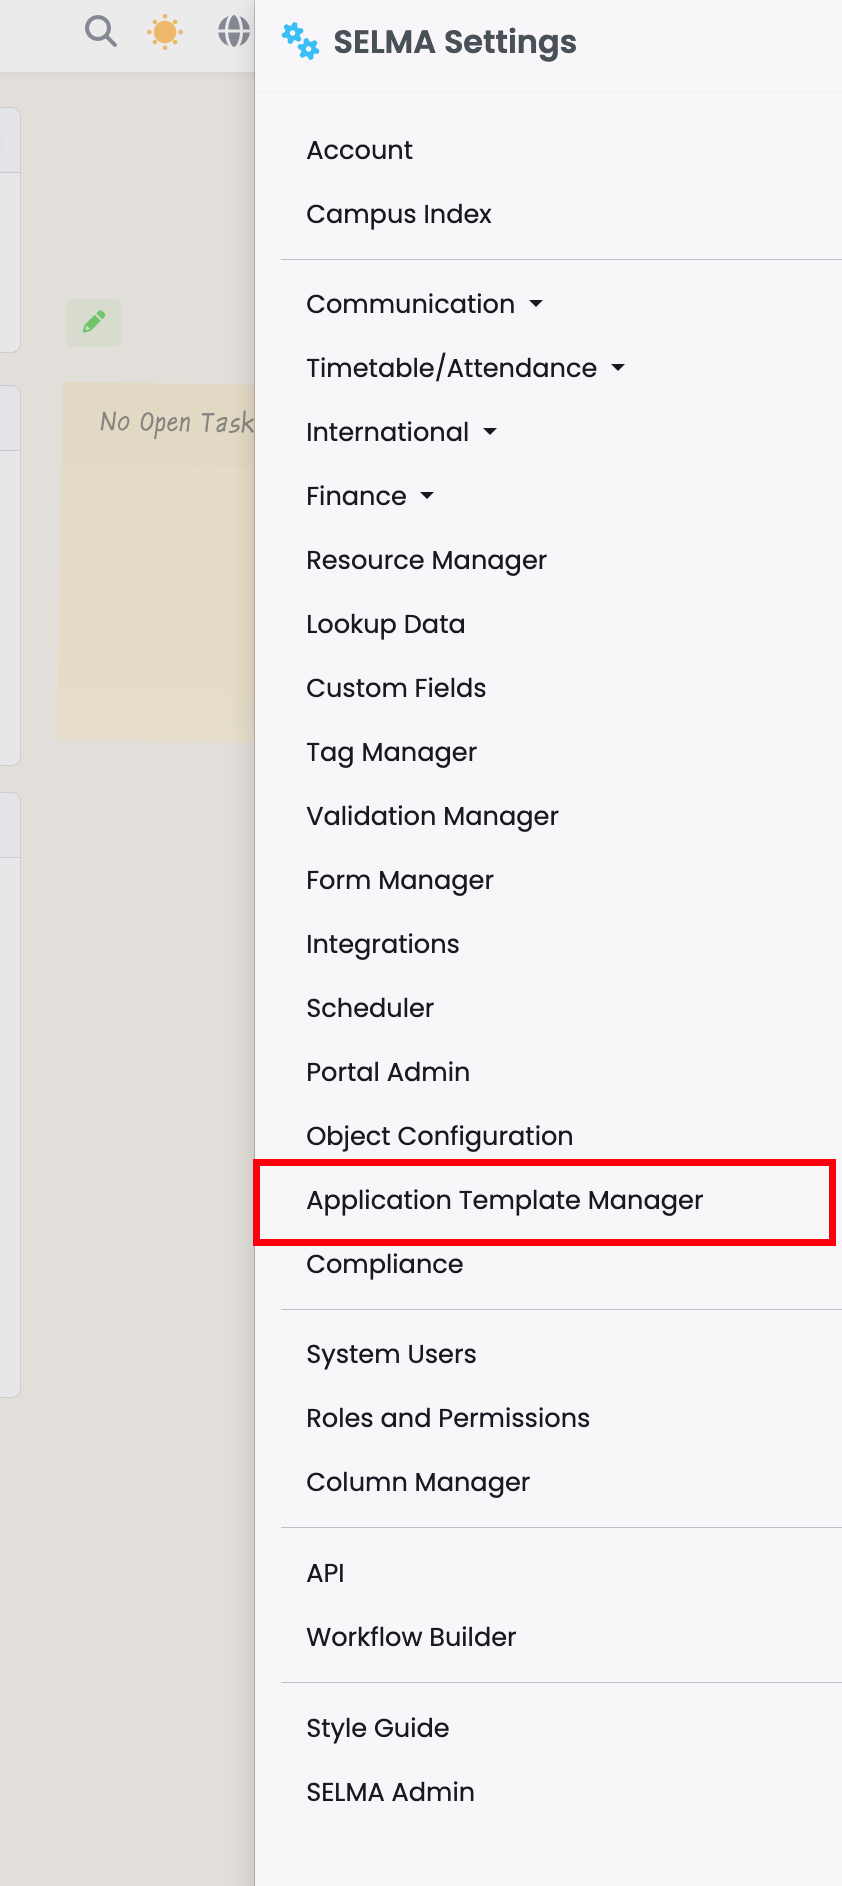
Figure 2. Click the “+” Icon to Add a New Template
From the Application Template Manager you can create a new template or edit and duplicate existing templates.

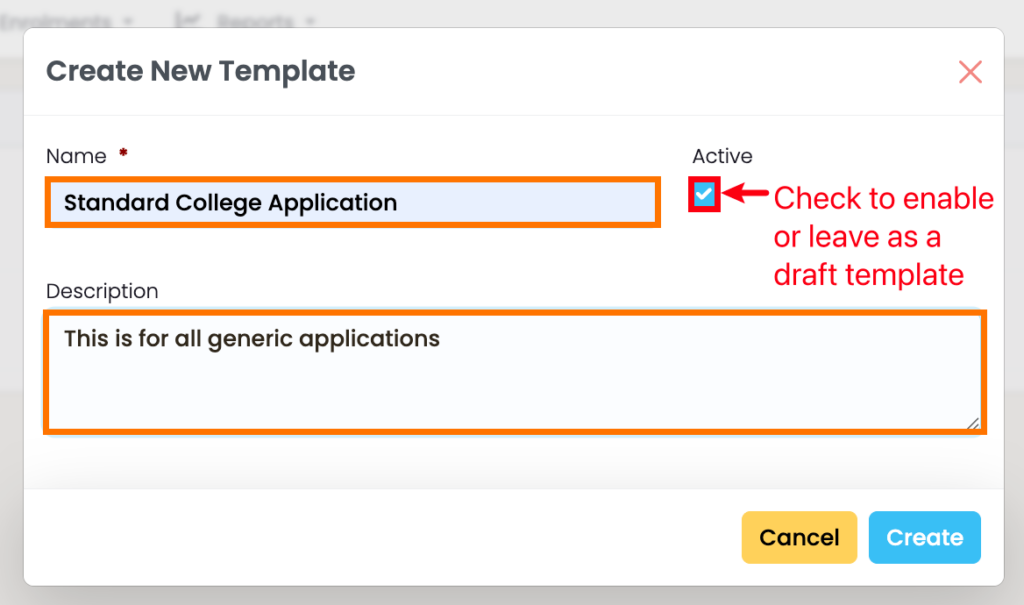
Figure 3. Add Template Name and Description
Enter a name and description (orange), and activate the template if you need to use it straight away (red).
Application Template Editor
The three categories Submitted, In Review, and Outcome each have two tabs: fields and steps.
The “Steps” tab is where you add steps of the Application pathway, and the “fields” tab is where you add fields which determine the pre-requisites of each step in the pathway.
To populate a custom list of steps and fields please click “Manage Steps” and “Manage Fields” under the corresponding tab. This will take you to Lookup Data.
- Note: To create fields under Lookup Data, please add custom values under the header “Application”. To create steps under Lookup Data, please add custom values under the header “Application Step”.
Figure 1. Submitted
Steps (purple) and fields (lilac) added on the Submitted category (brown). Click and drag available fields and steps to this area.
Note: If you need to add new fields to a step open the “Fields” tab (red) and click “Manage Fields” (green). If you need to add new steps to a category open the “Steps” tab and click “Manage Steps”. Please also remember to click the top right save button before editing the next category.
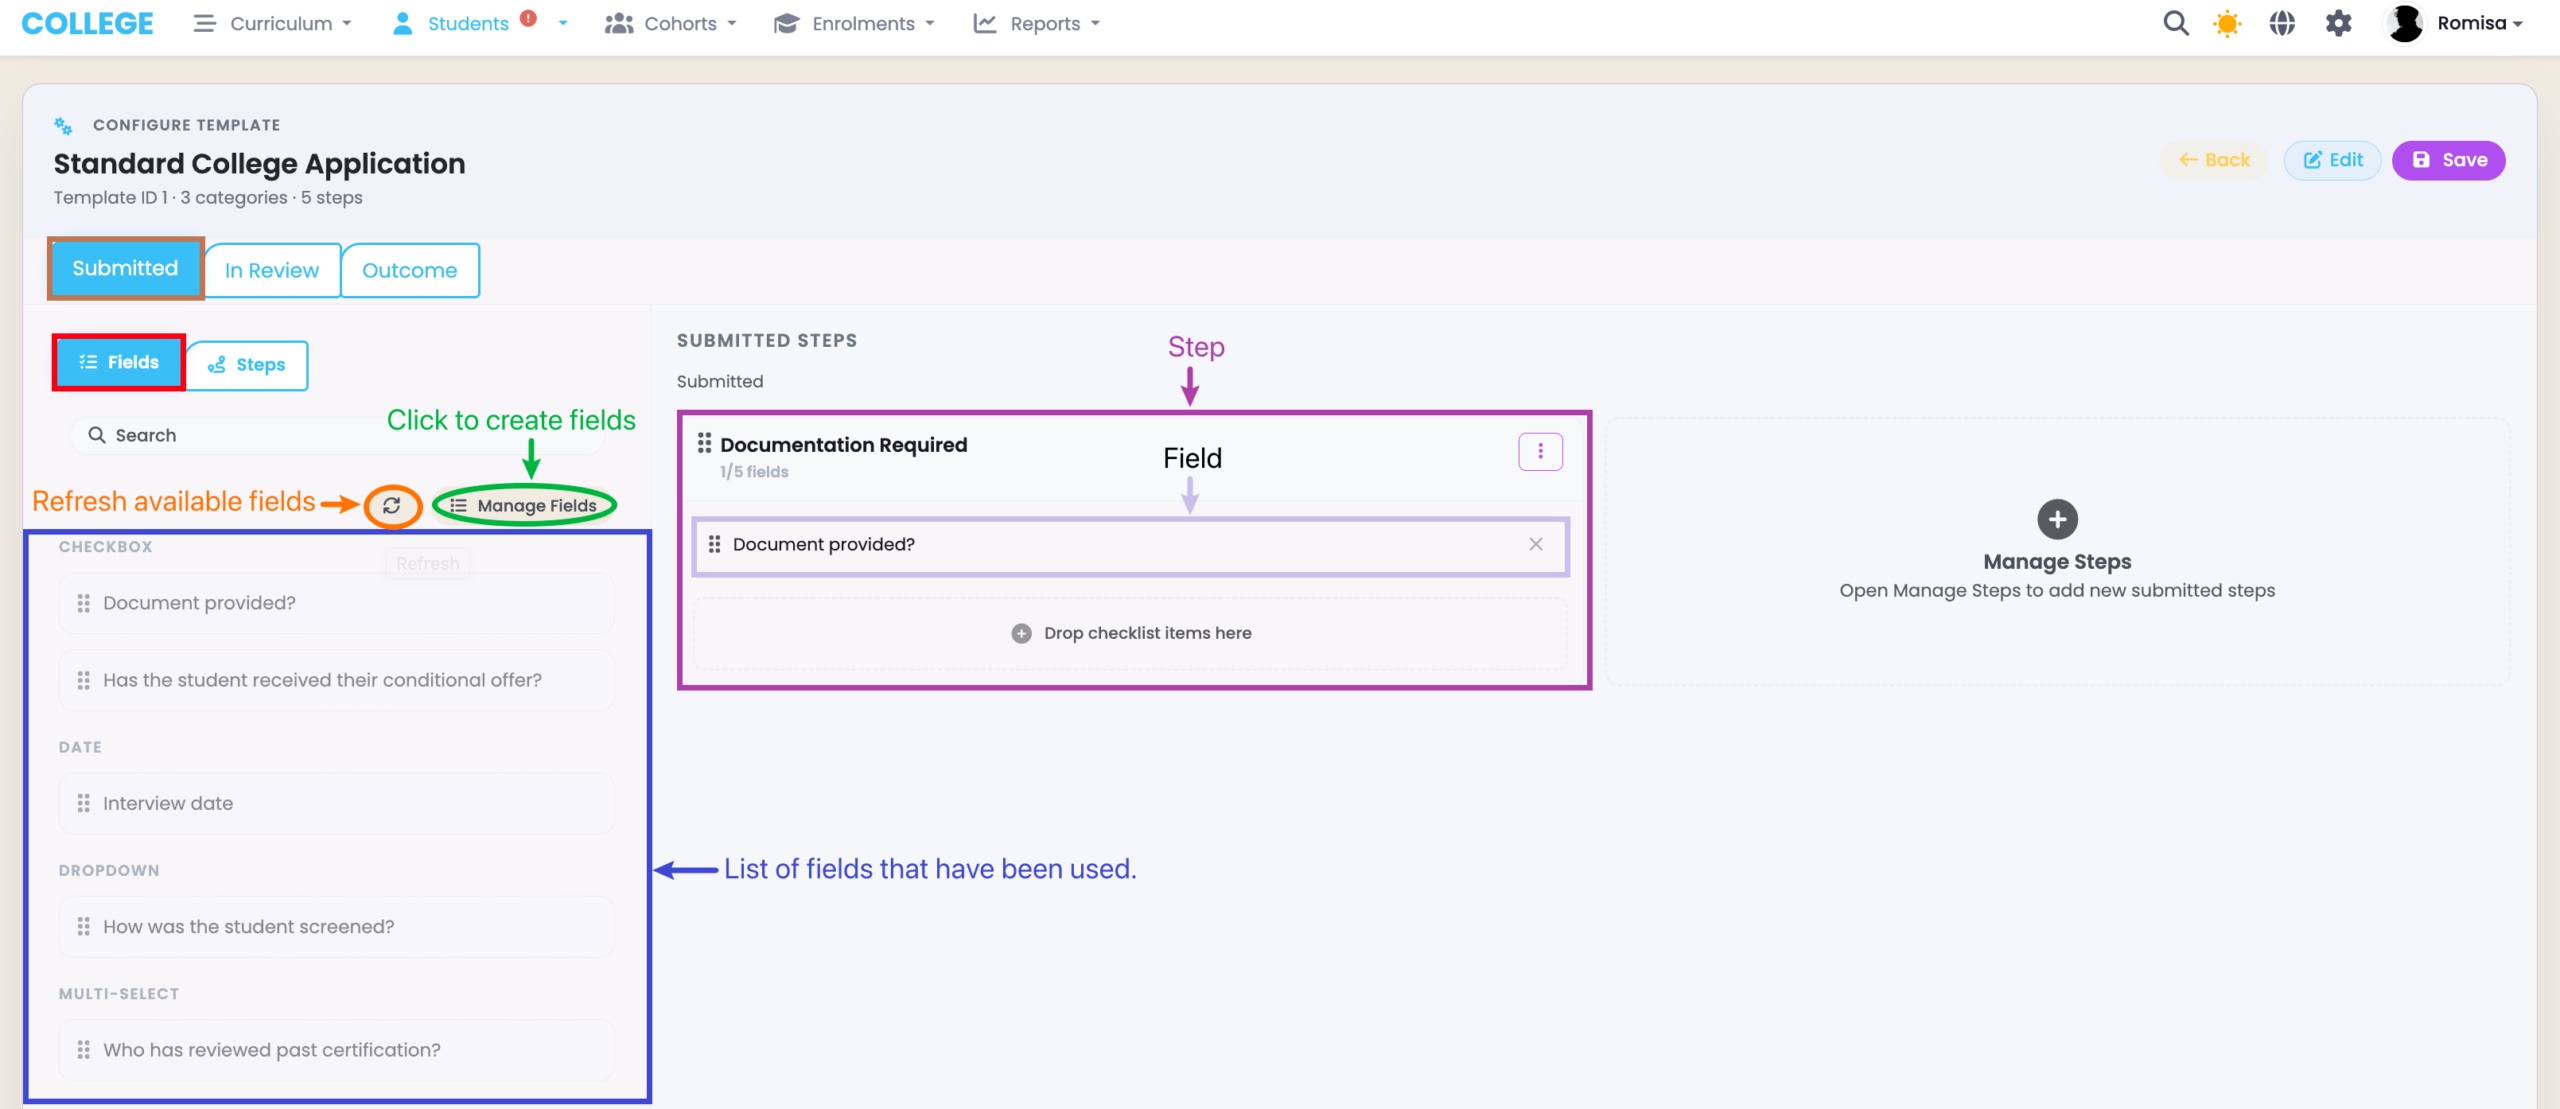
Figure 2. In Review
Steps (purple) and fields (lilac) added on the In Review category (brown). Click and drag available fields and steps to this area.
Note: If you need to add new fields to a step open the “Fields” tab (red) and click “Manage Fields” (green). If you need to add new steps to a category open the “Steps” tab and click “Manage Steps”. Please also remember to click the top right save button before editing the next category.
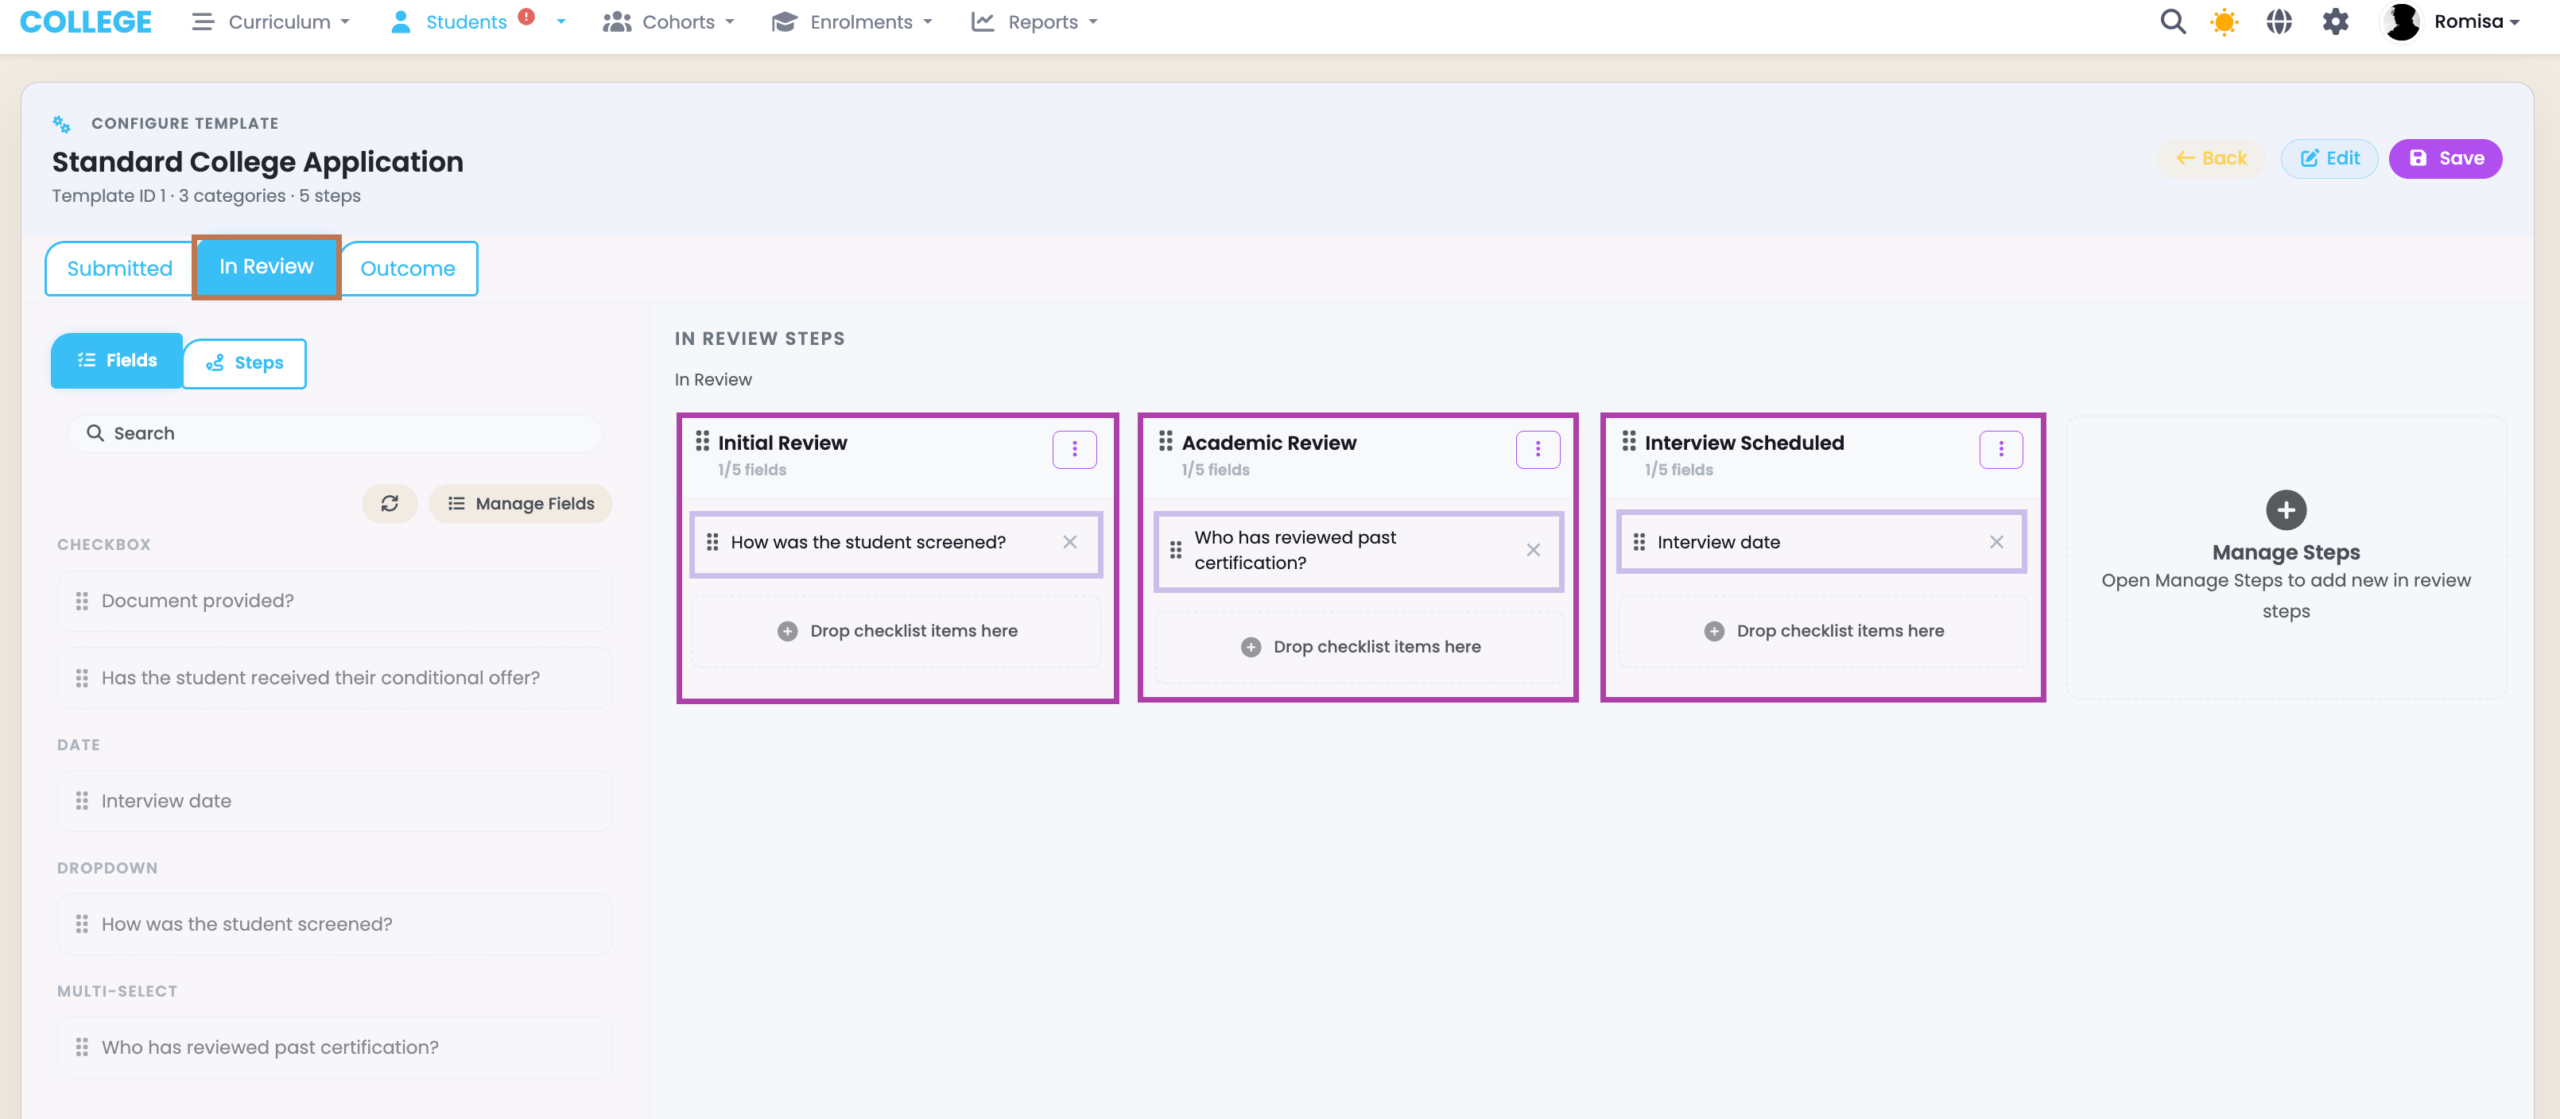
Figure 3. Outcome
Steps (purple) and fields (lilac) added on the Outcome category (brown). Click and drag available fields and steps to this area.
Note: If you need to add new fields to a step open the “Fields” tab (red) and click “Manage Fields” (green). If you need to add new steps to a category open the “Steps” tab and click “Manage Steps”. Please also remember to click the top right save button before editing the next category.
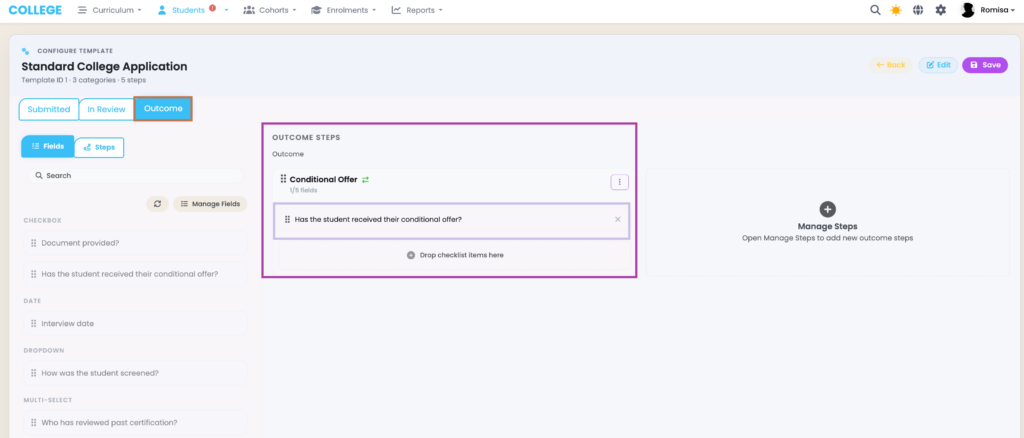
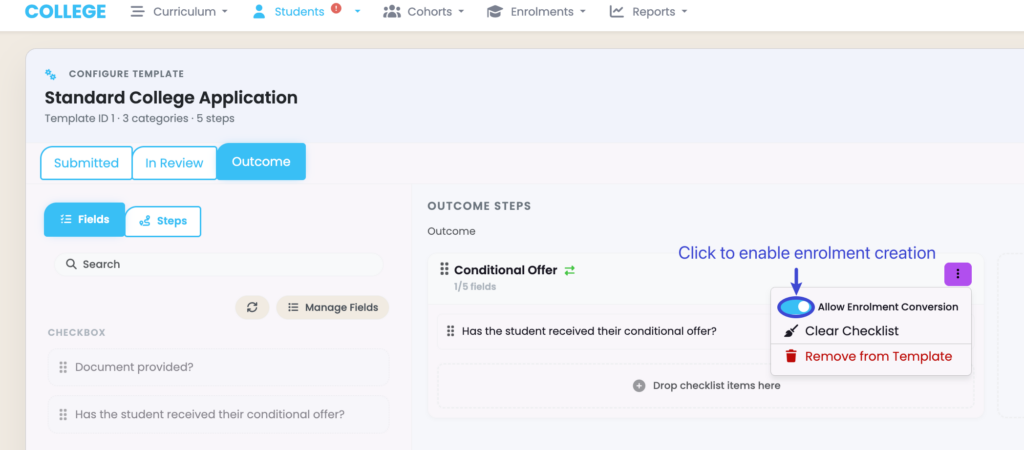
Figure 4. Save and Enable Enrolment Creation
To create an enrolment on a particular step, click the toggle (blue) and click save as before.
Create an Application
If you are creating a student for the first time, you can create an application directly on the student creation form.
Otherwise, you can navigate to the application index and create an application from there.
Figure 1. Click the “+” Icon to Add a New Template
To create a new application, click the “+” icon (orange). You can also switch between the Kanban view (red) or list view (green) on the index grid to sort and view existing application records.

Figure 2. Select Intake and Application Template
Fill out all required details as marked by red asterisks and select the Application Template you just created. Once you select an available intake (orange) the date range and components will be automatically inherited from that intake (green).
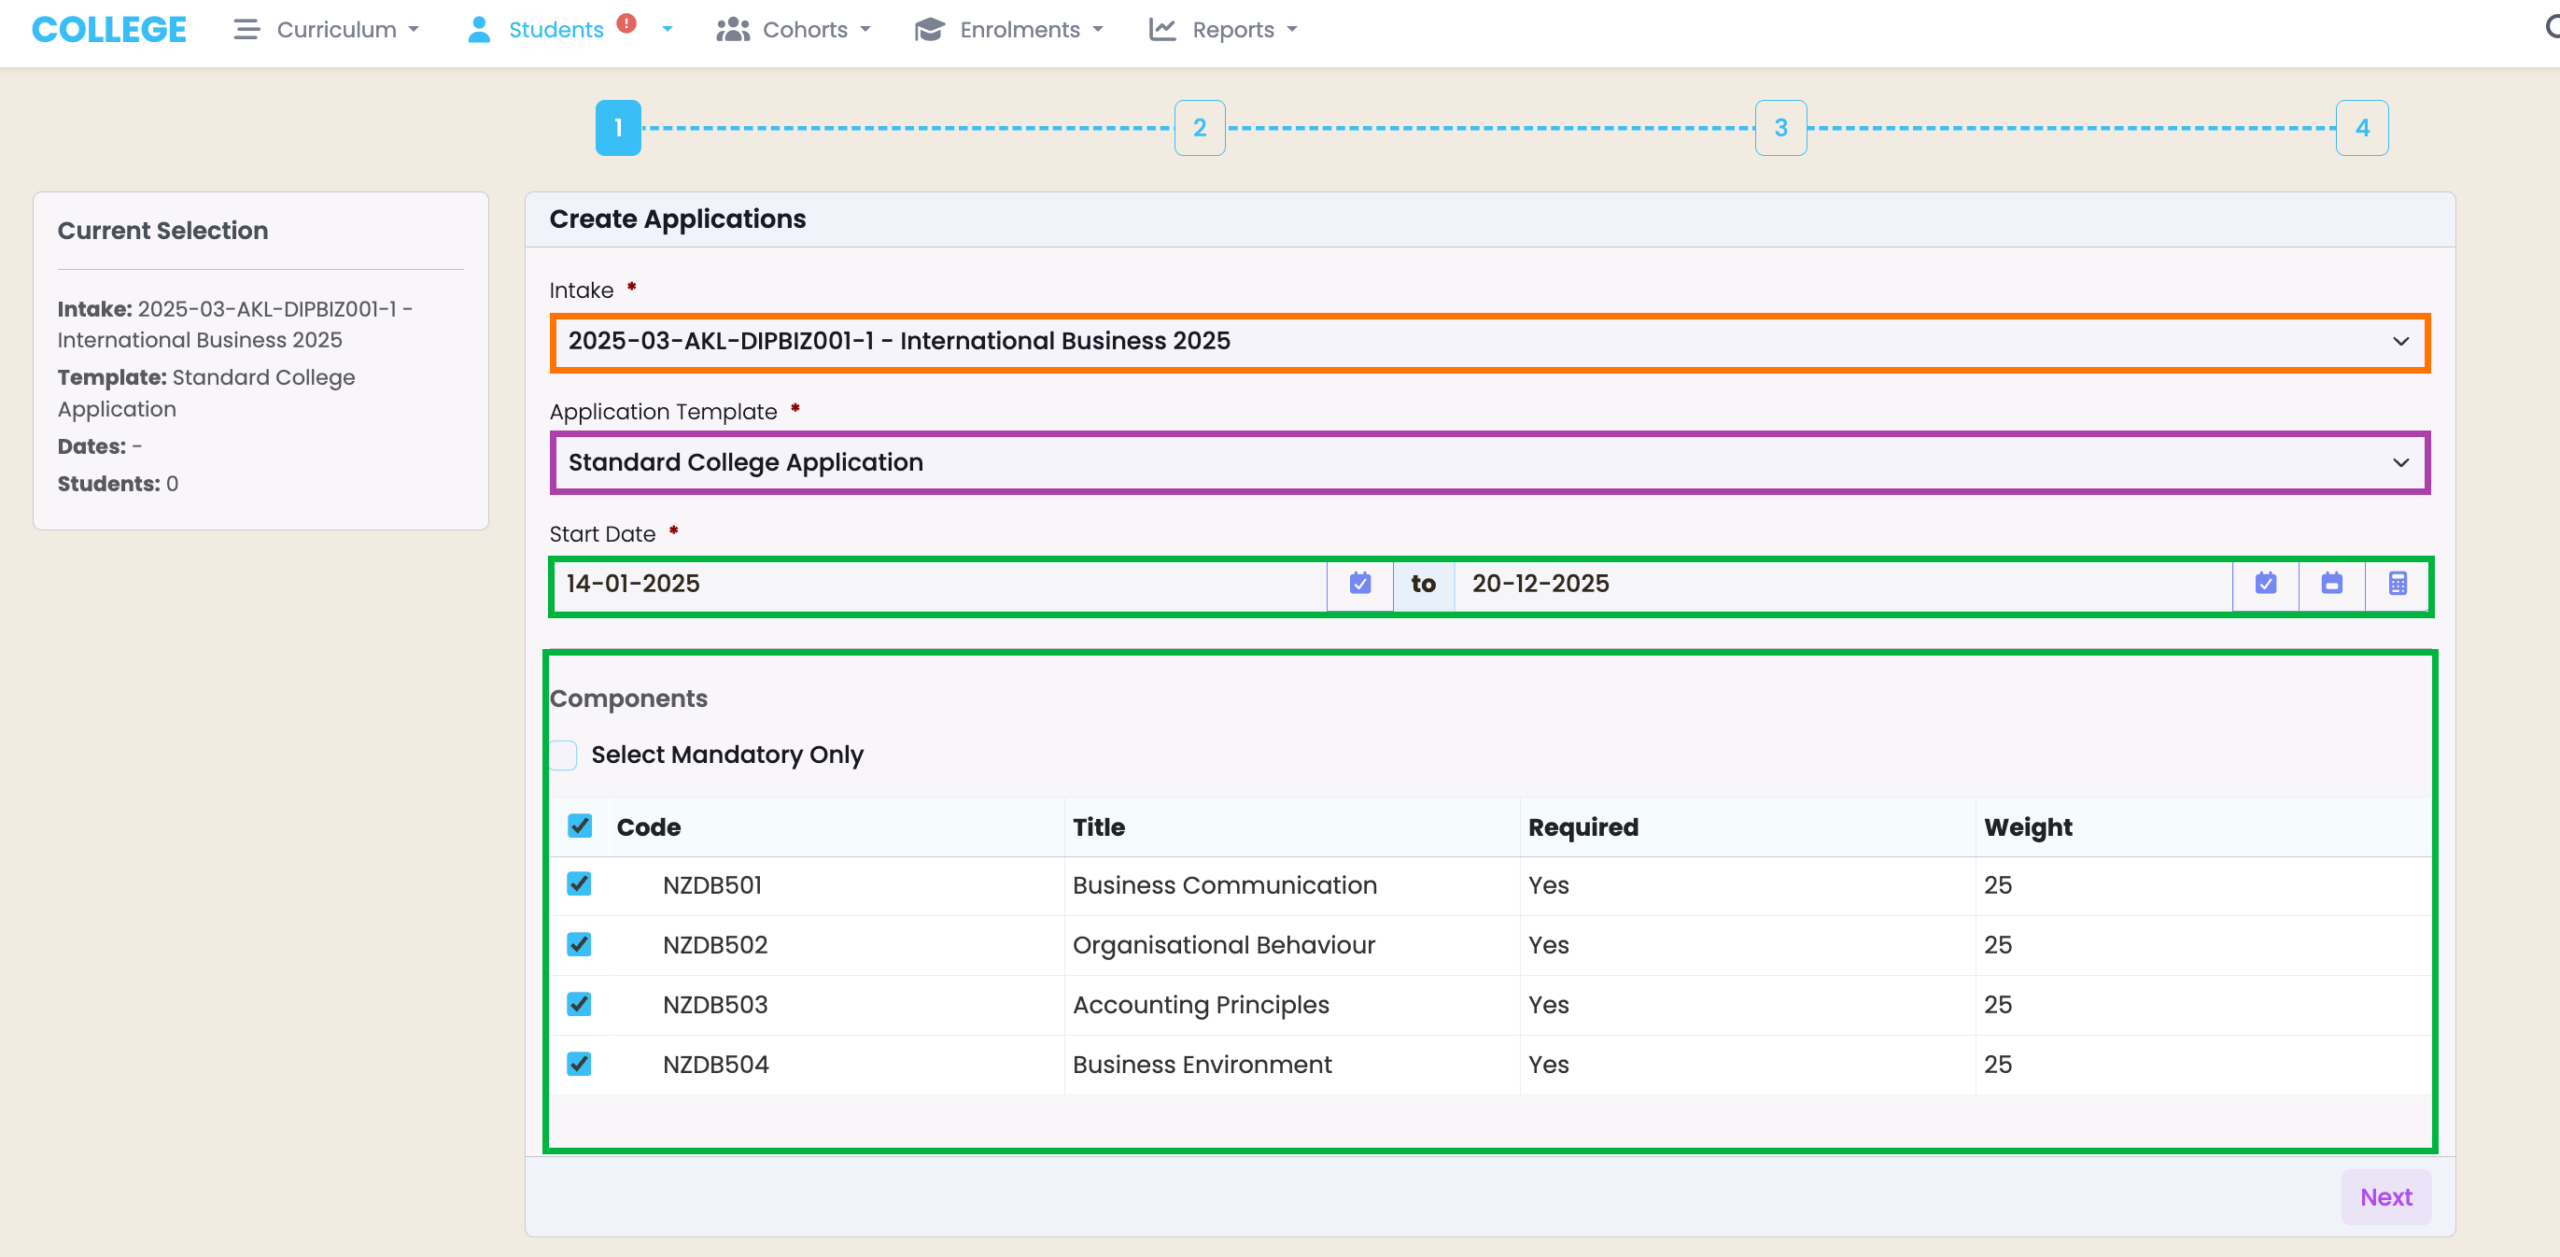
Figure 3. Select Student/s
Search for and select available student/s (black text).
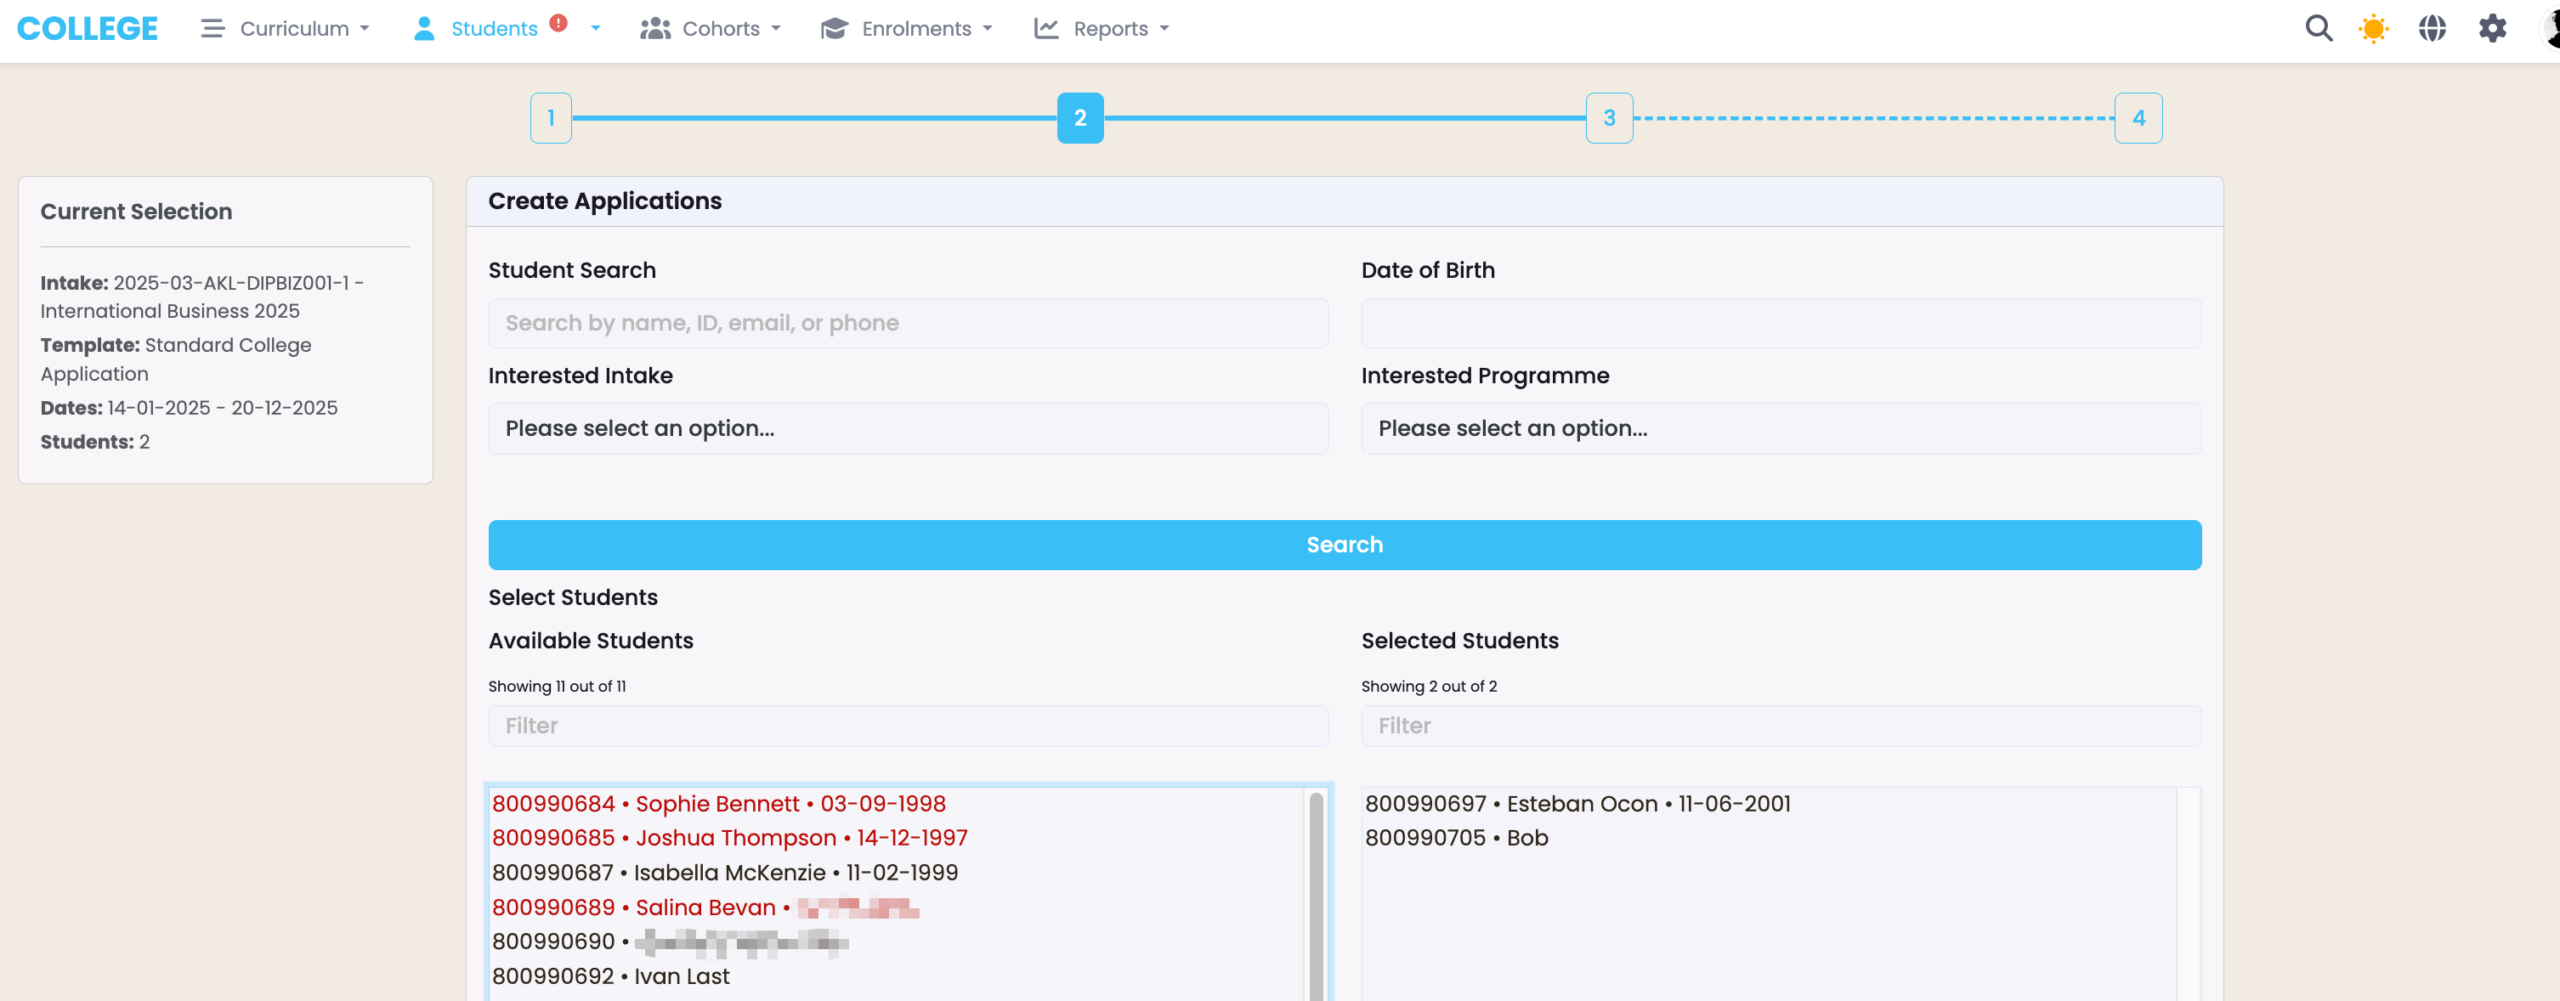
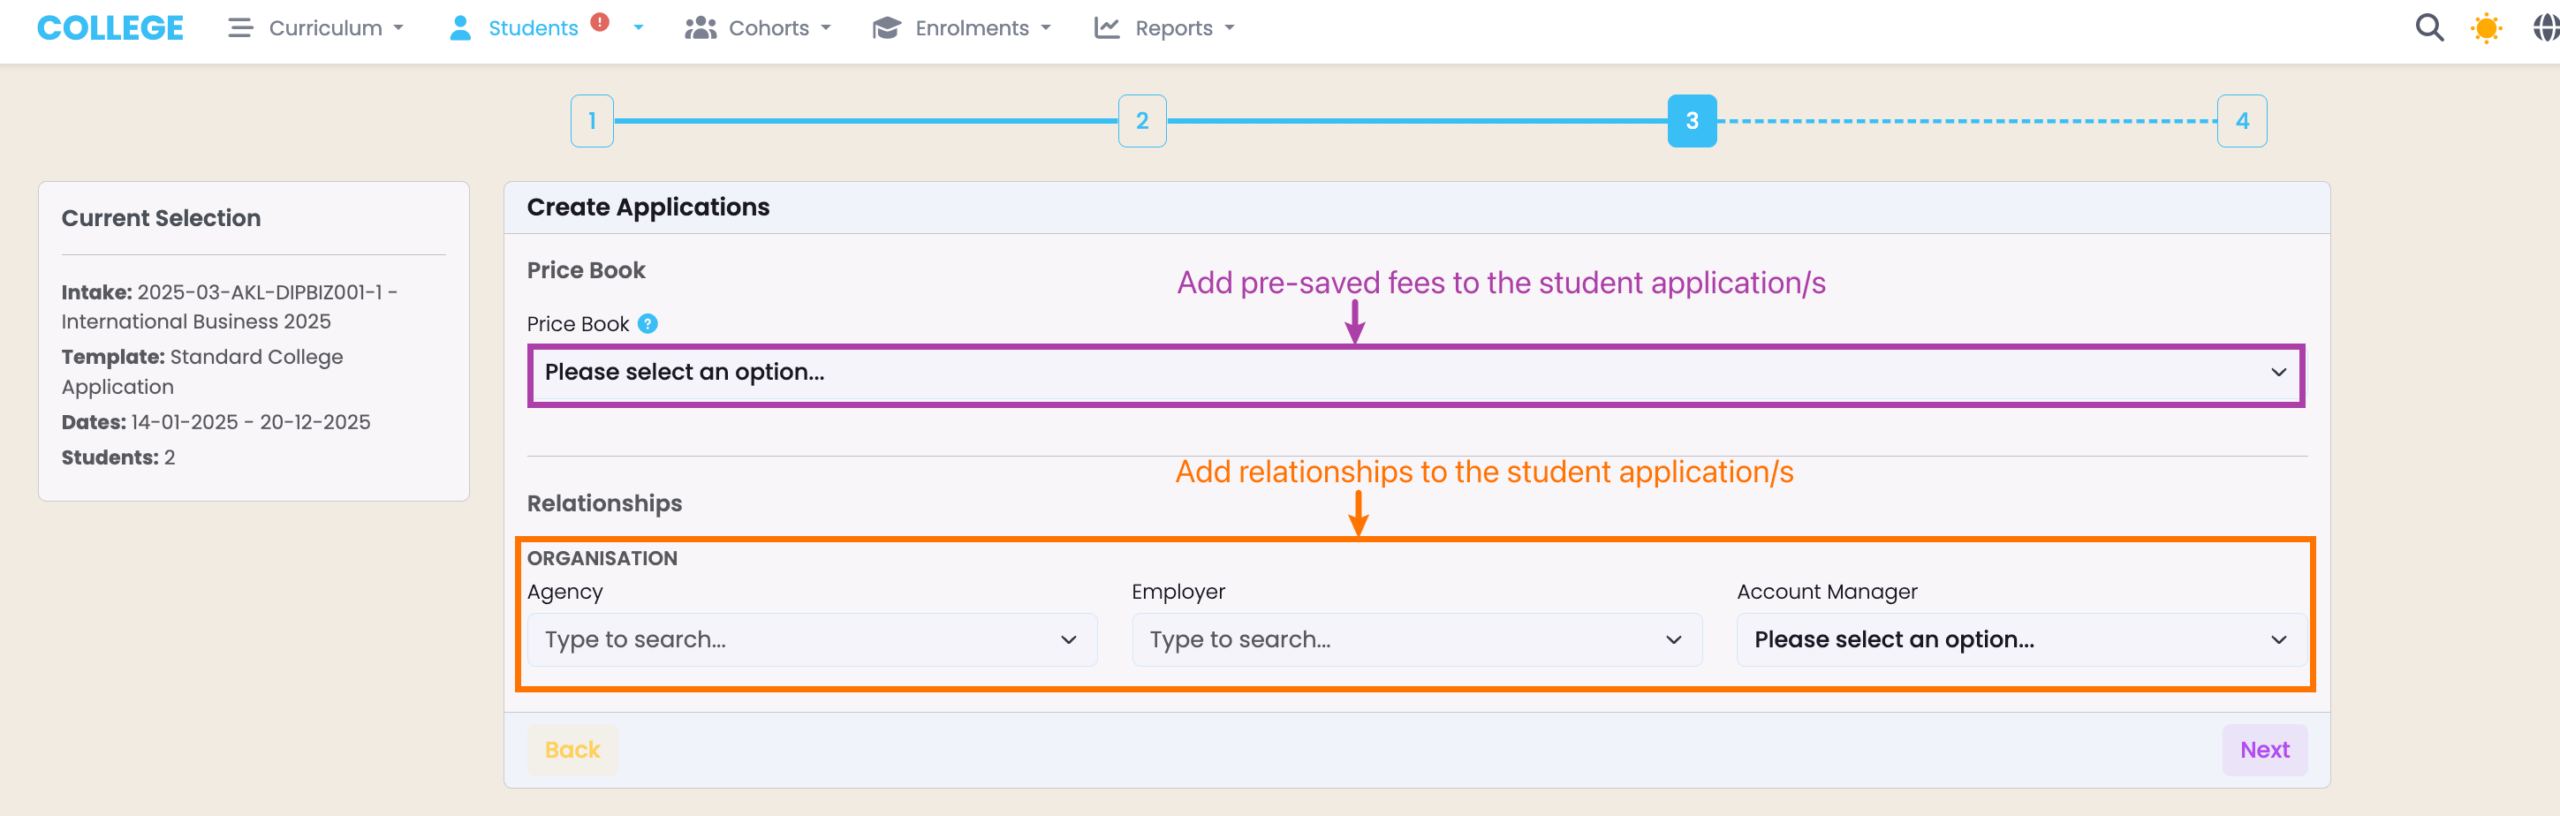
Figure 4. Add Fees and Link Relationships
Add additional details and relationships to the Student Application.
Manage and Review Applications
Figure 1. Progress Bar
You can see the steps in the Application pathway as a progress bar at the top of the screen (green). The corresponding fields for each step is found below the progress bar, and can be edited by clicking the pencil icon next to the field (purple). Click on each step title to move to the next step.
Note: If mandatory fields haven’t been filled, you will see a warning message at the of the screen and will be prevented from moving on to the next step.

Figure 2. Update the Application Status
Once you have filled out all prerequisites under each step, click the “Mark as Current” button to update the Application Status (red). This will update the progress bar to show you which steps have been completed on first view.
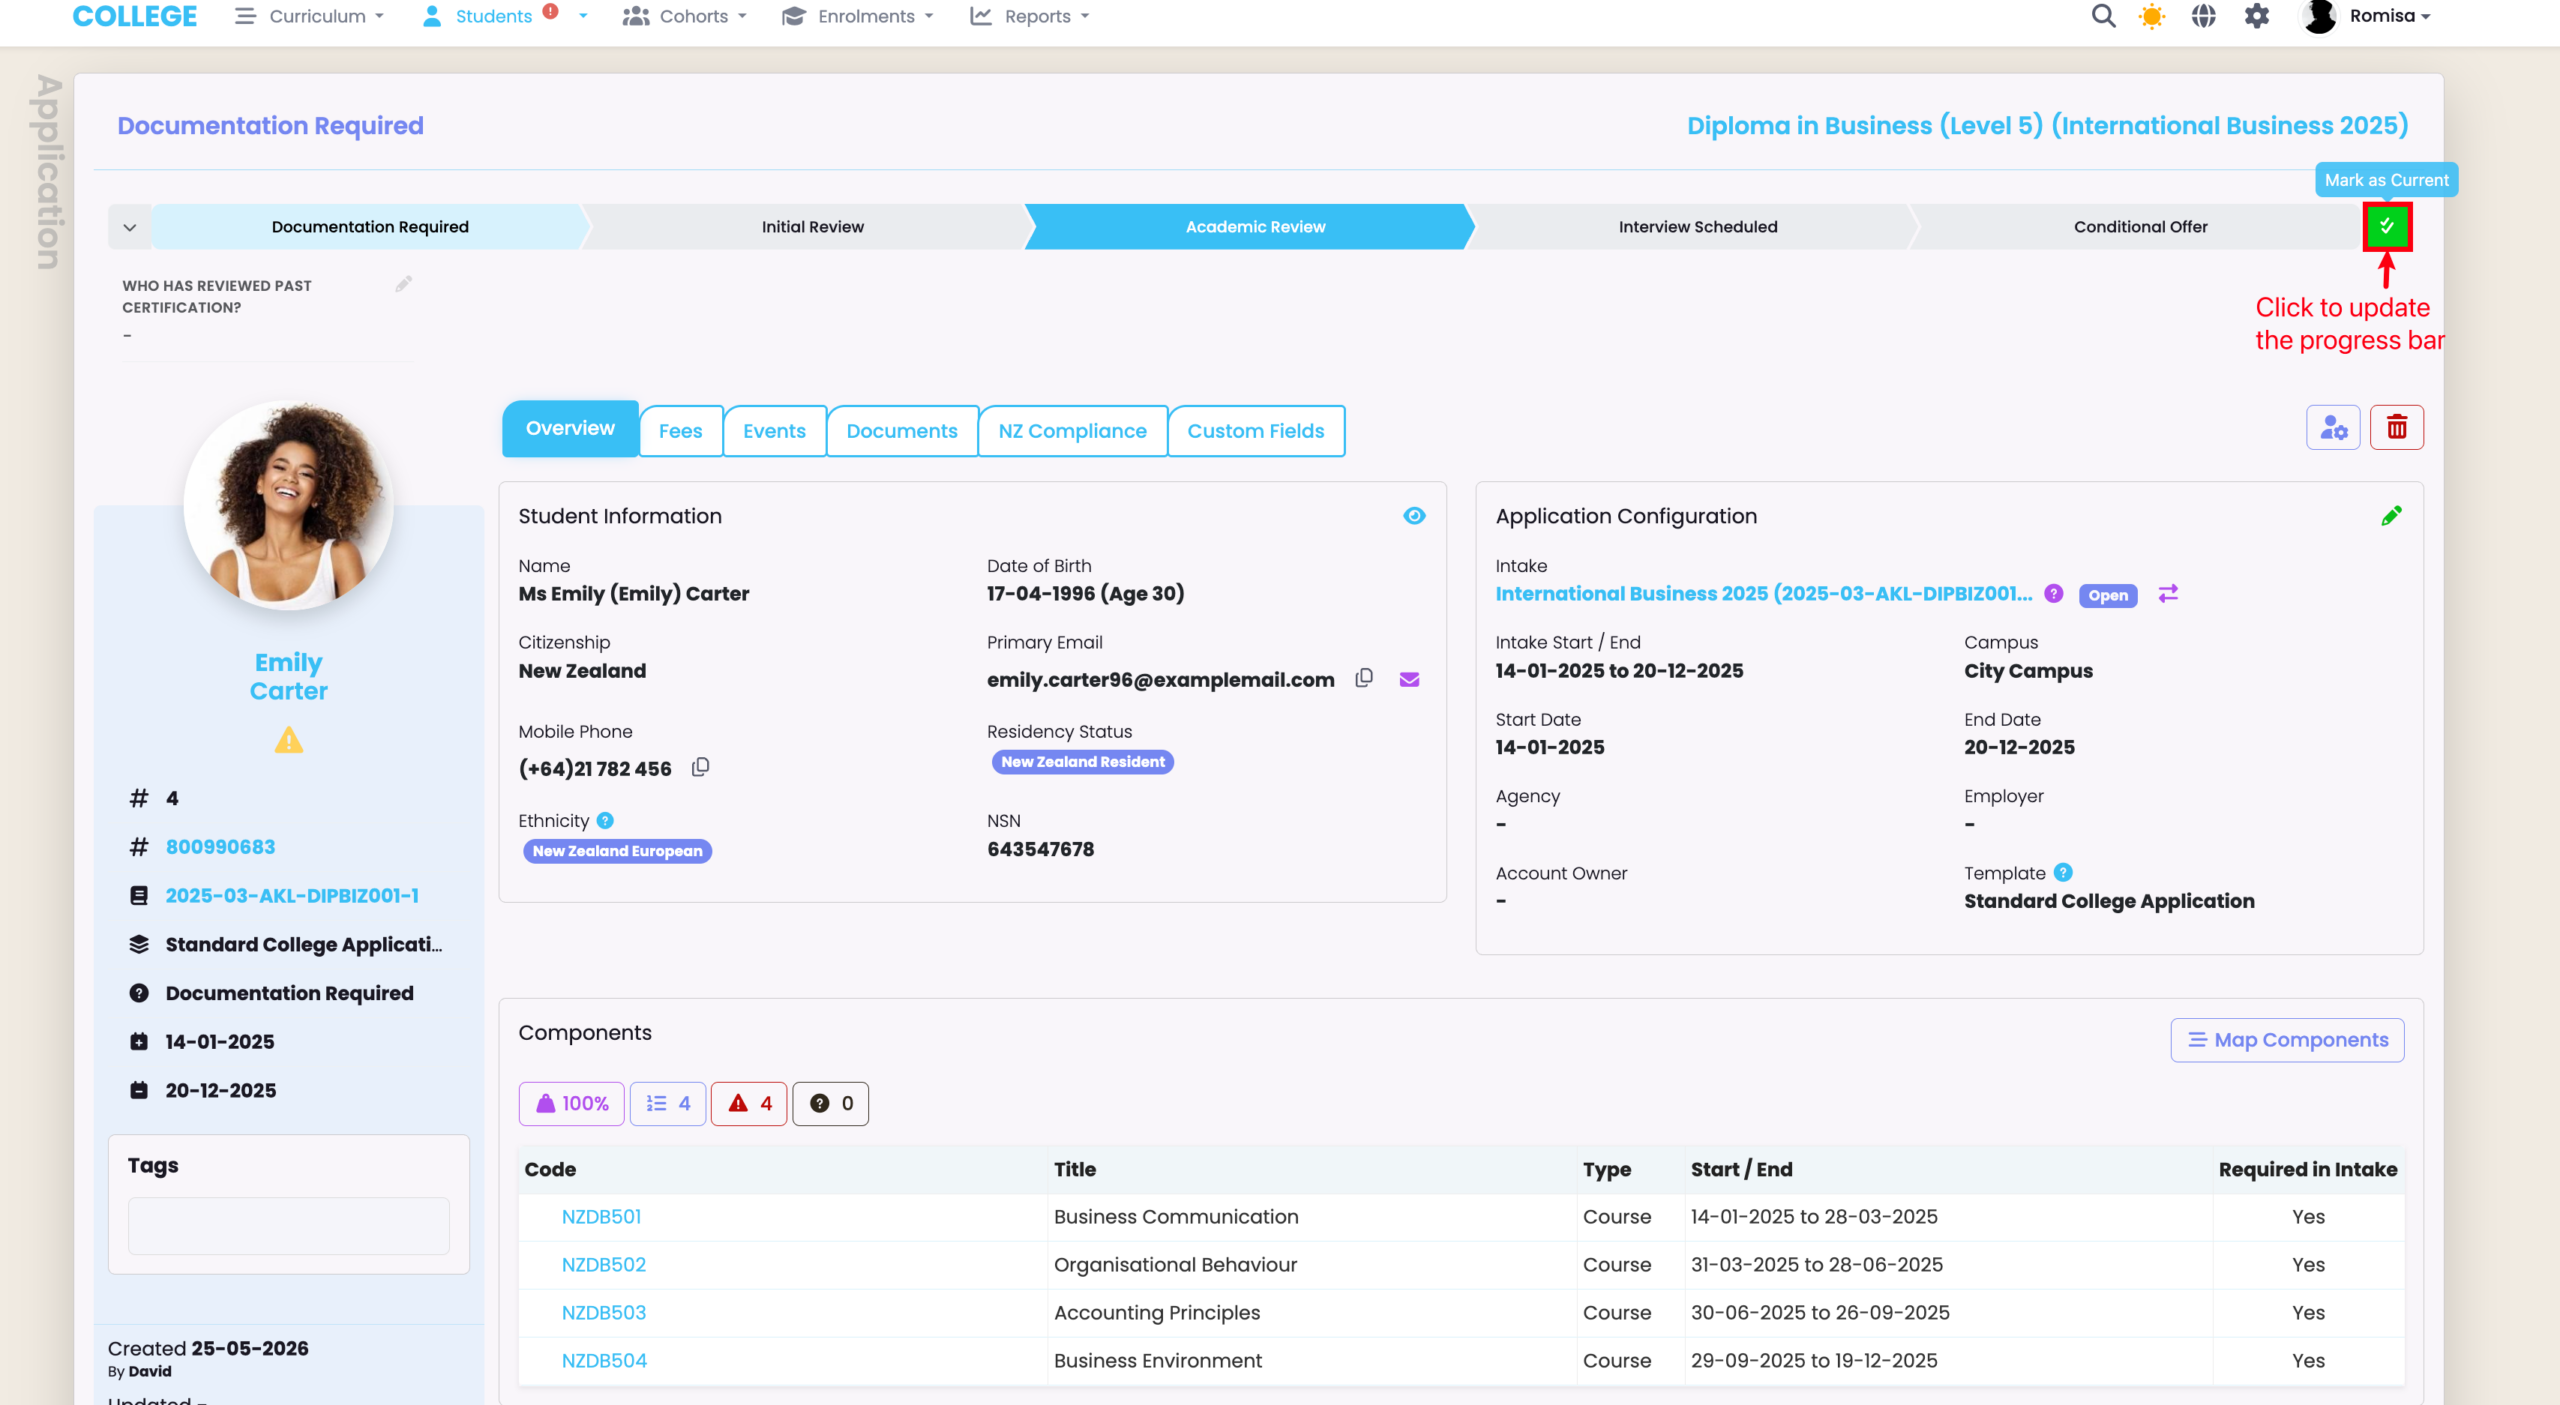
Figure 3i. Application Components
These Components are inherited from the Intake if it has been set-up there, previously. If you don’t see the Component/s you need, you can add them ad-hoc using the “Map Components” button.
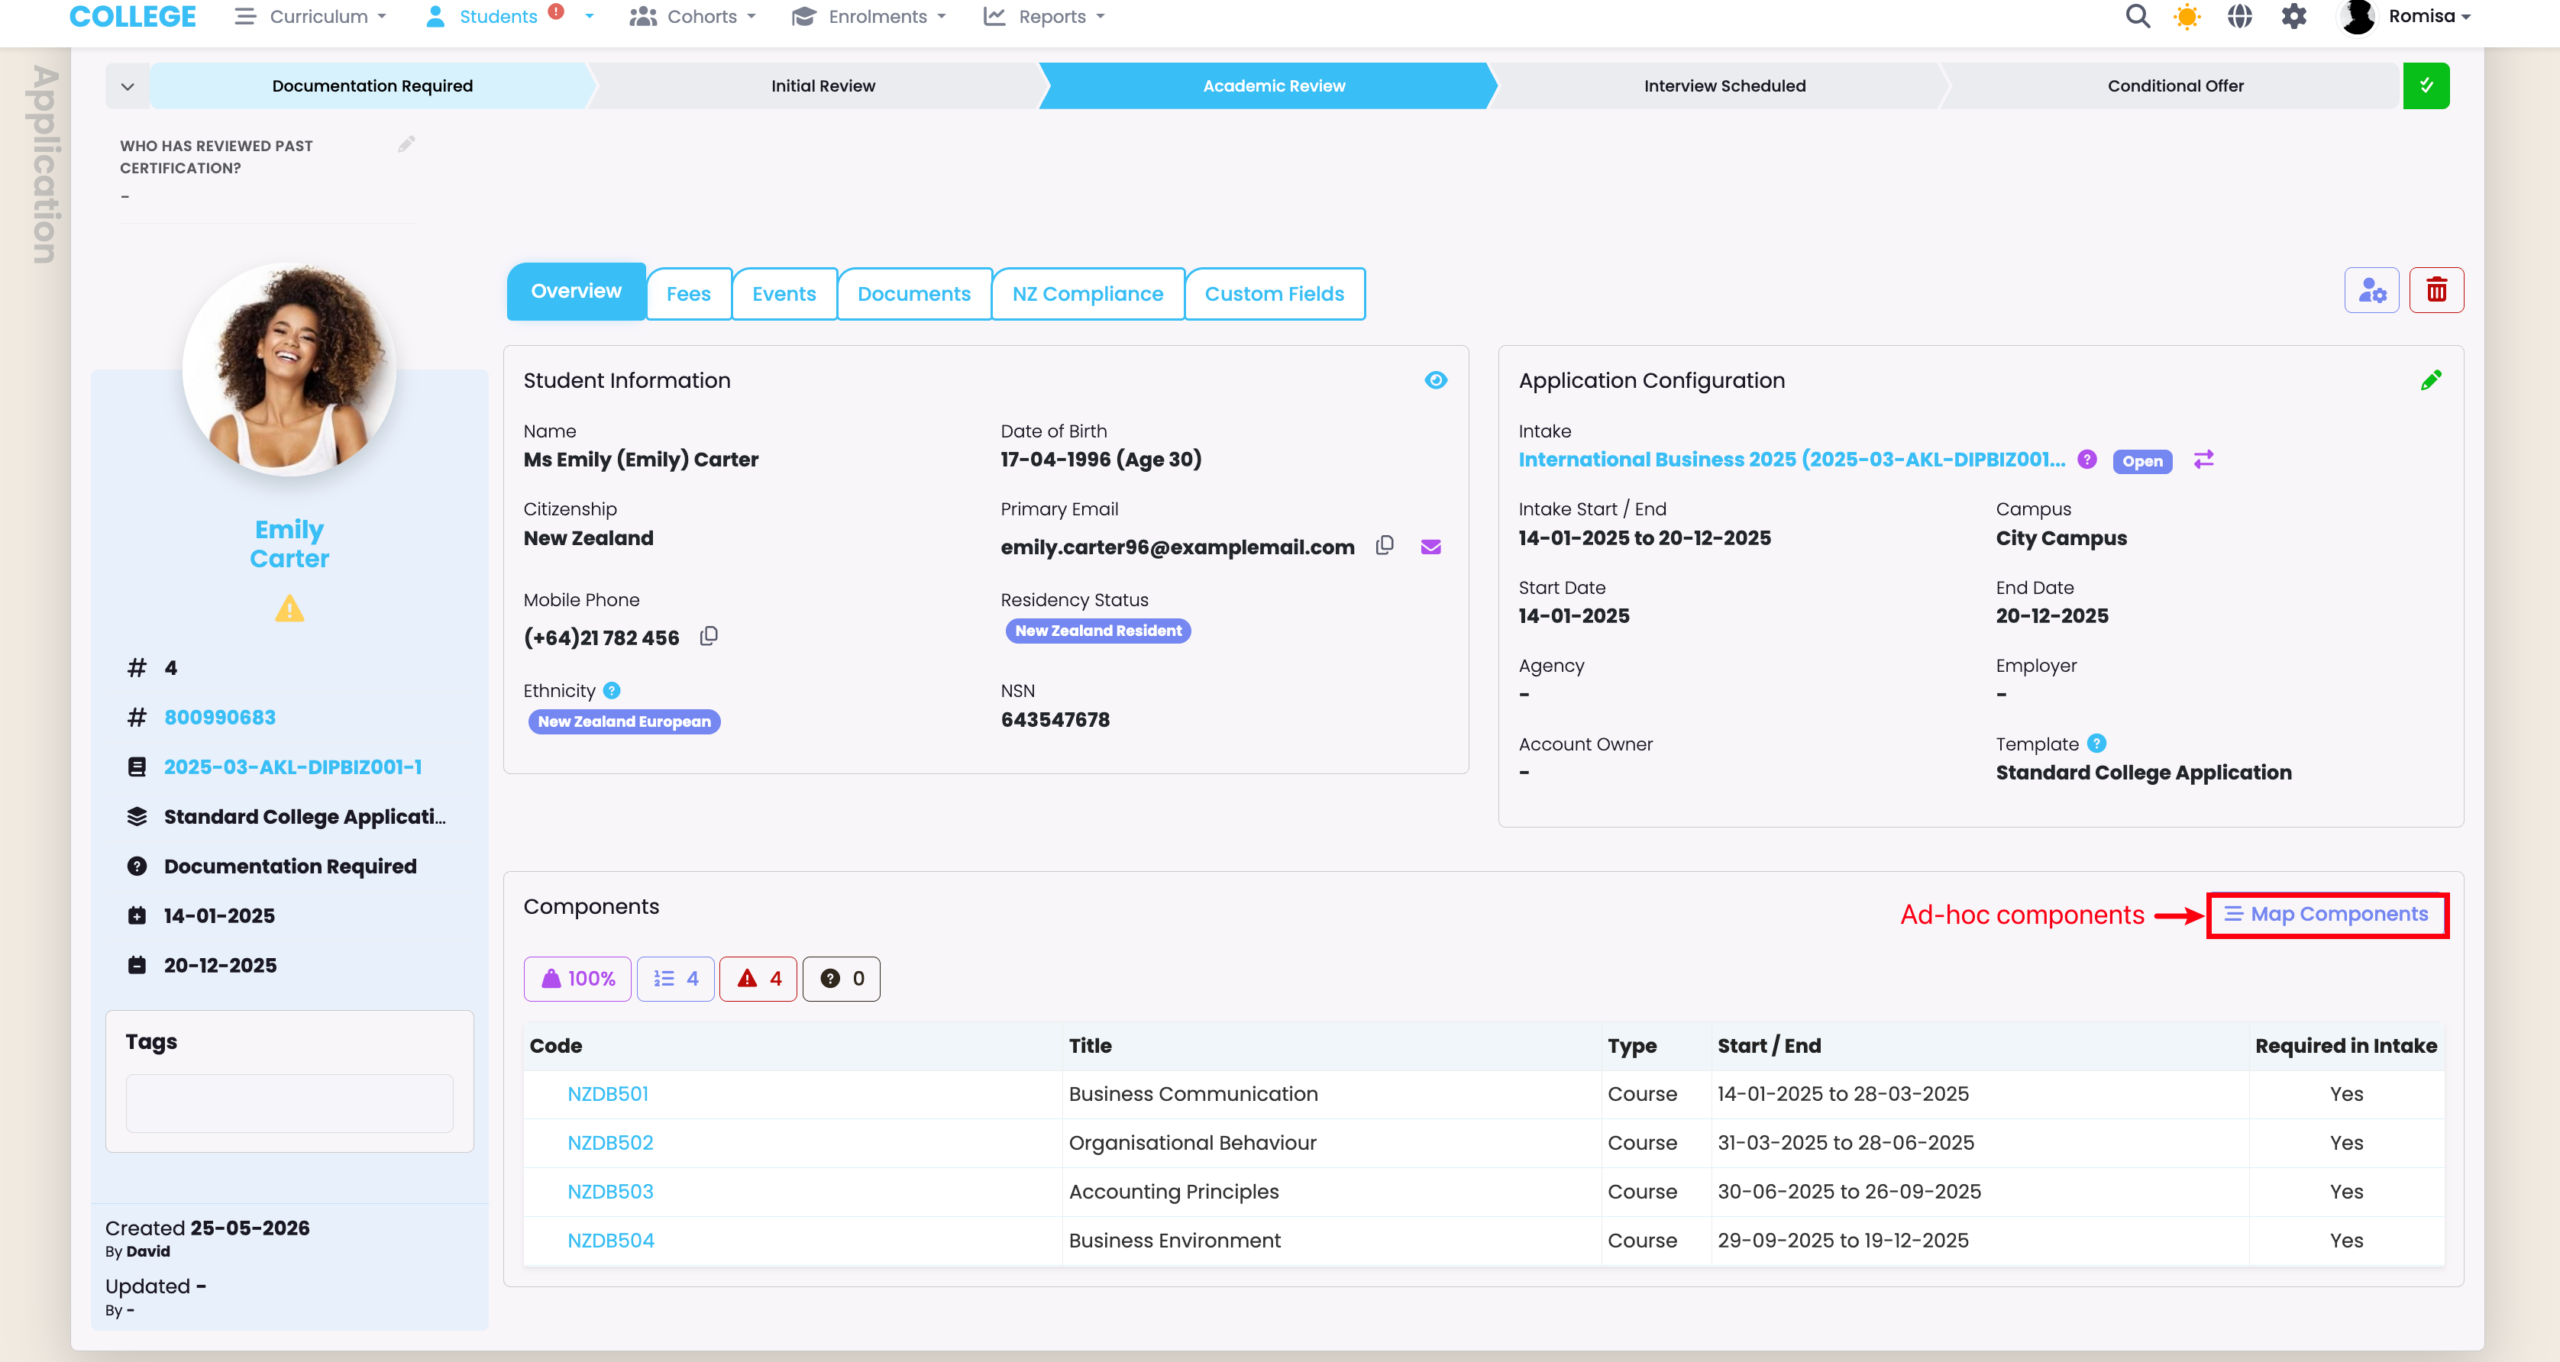
Figure 3ii. Select Components
Search for your Component in the search field (orange), and click and drag the card tile from the left column to the right column.
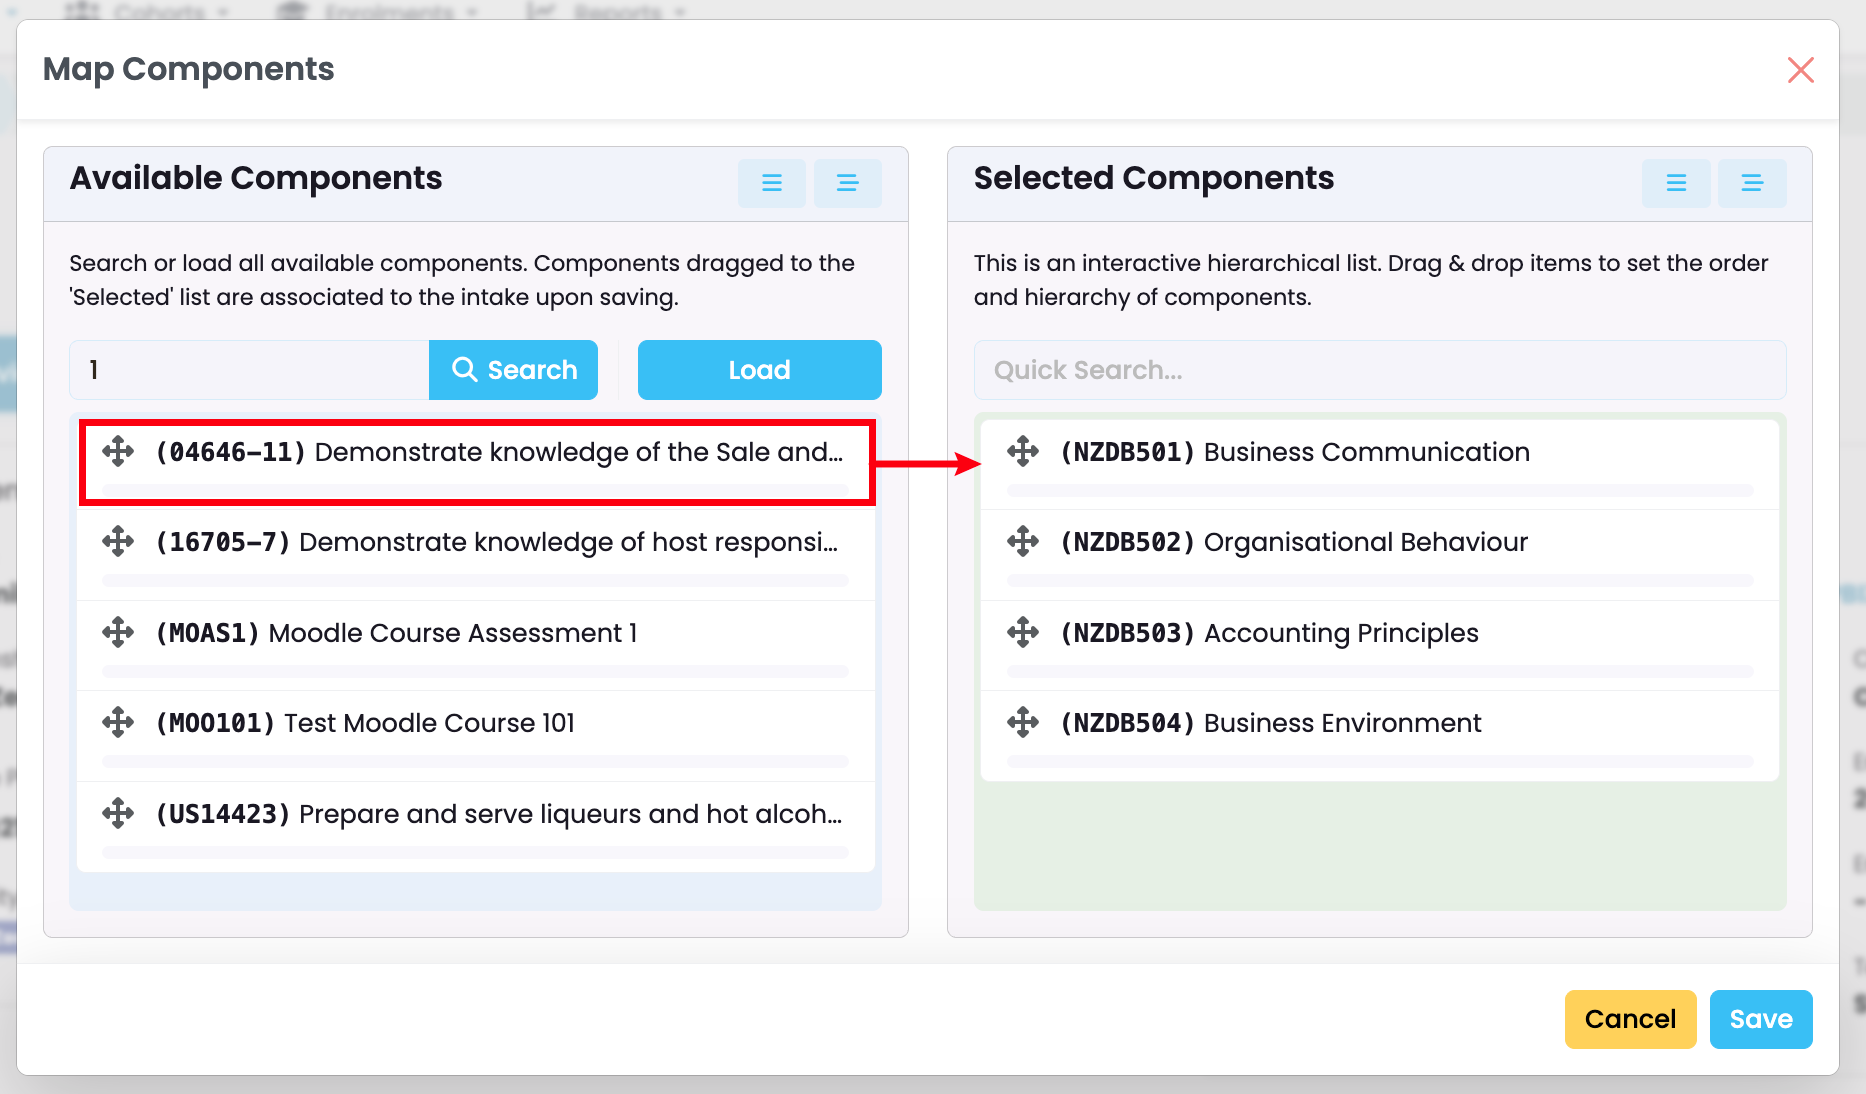
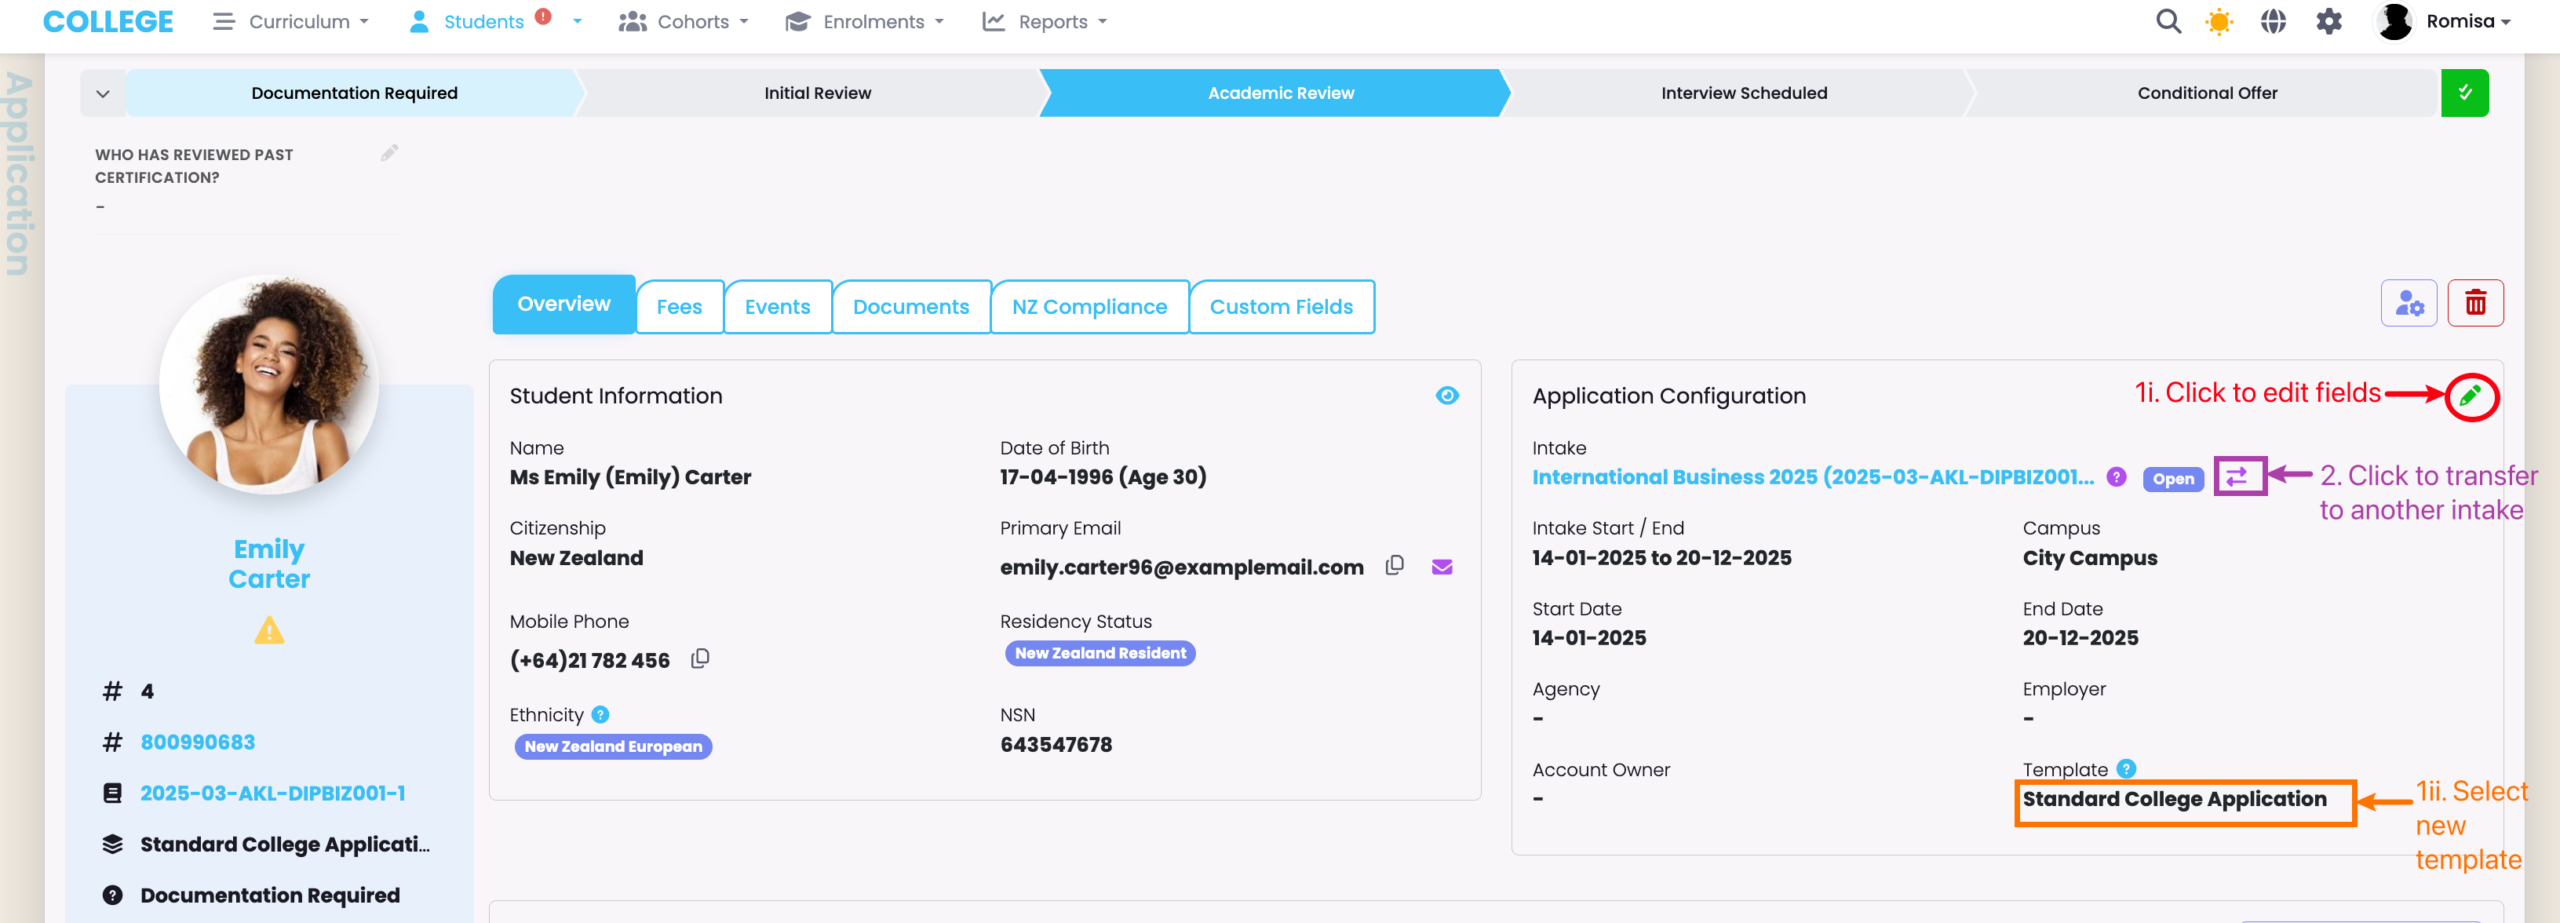
Figure 4. Change the Intake and Application Template
If you need to change the Application Template edit the field (red). If you need to transfer the Application to a different Intake, click the double-arrow icon (purple).
Note: This will revert the application progress back to Step 1 of the new template.