Please send the following article to the Student who will be using the Student Portal.
Navigate the Student Portal
The following sections describe how you should upload documents, view your submissions and review other details on your Student record.
Upload Documents
Upload documents, such as assessments, against Enrolment Components, as indicated in the steps below.
Figure 1. Open an Enrolment
Click the blue highlighted text to open an Enrolment; (you can also select an Enrolment from the Enrolments tab (orange)).
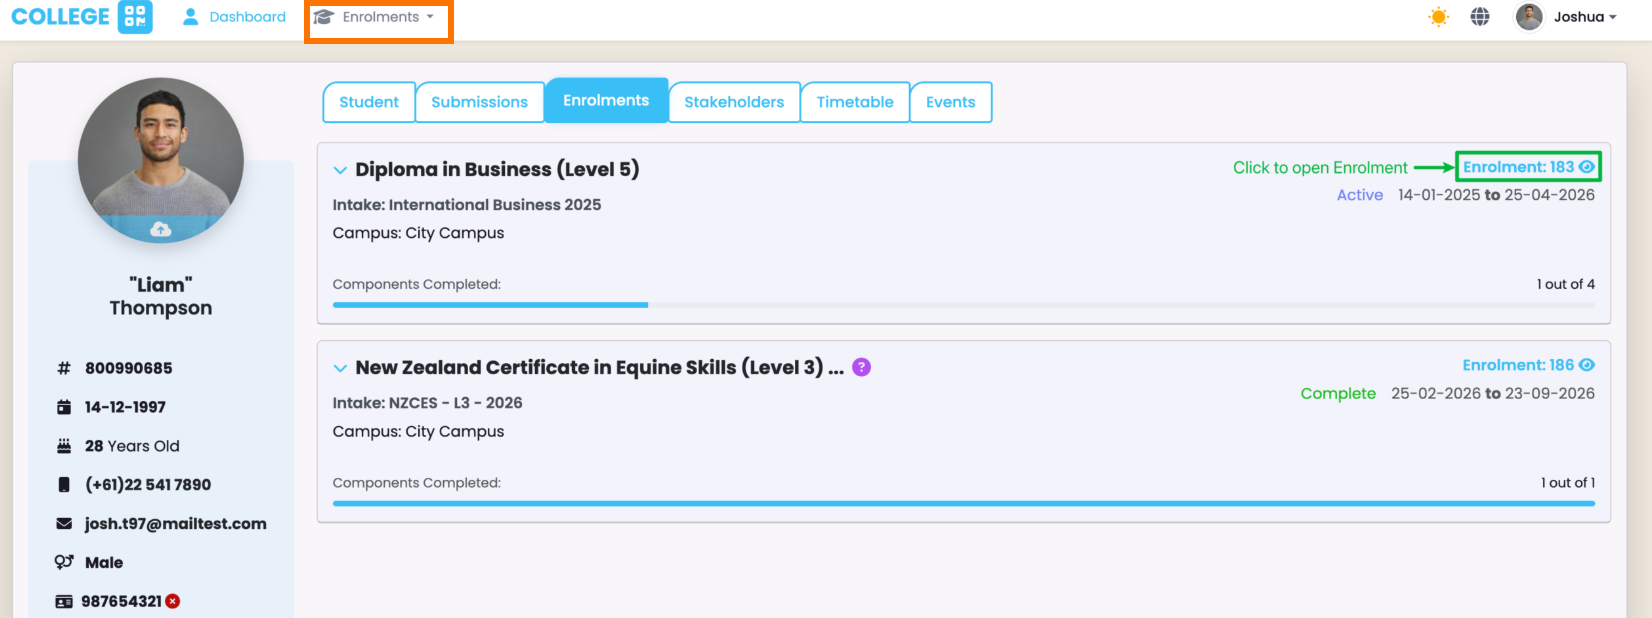
Figure 2. Upload Documents to an Enrolment Component
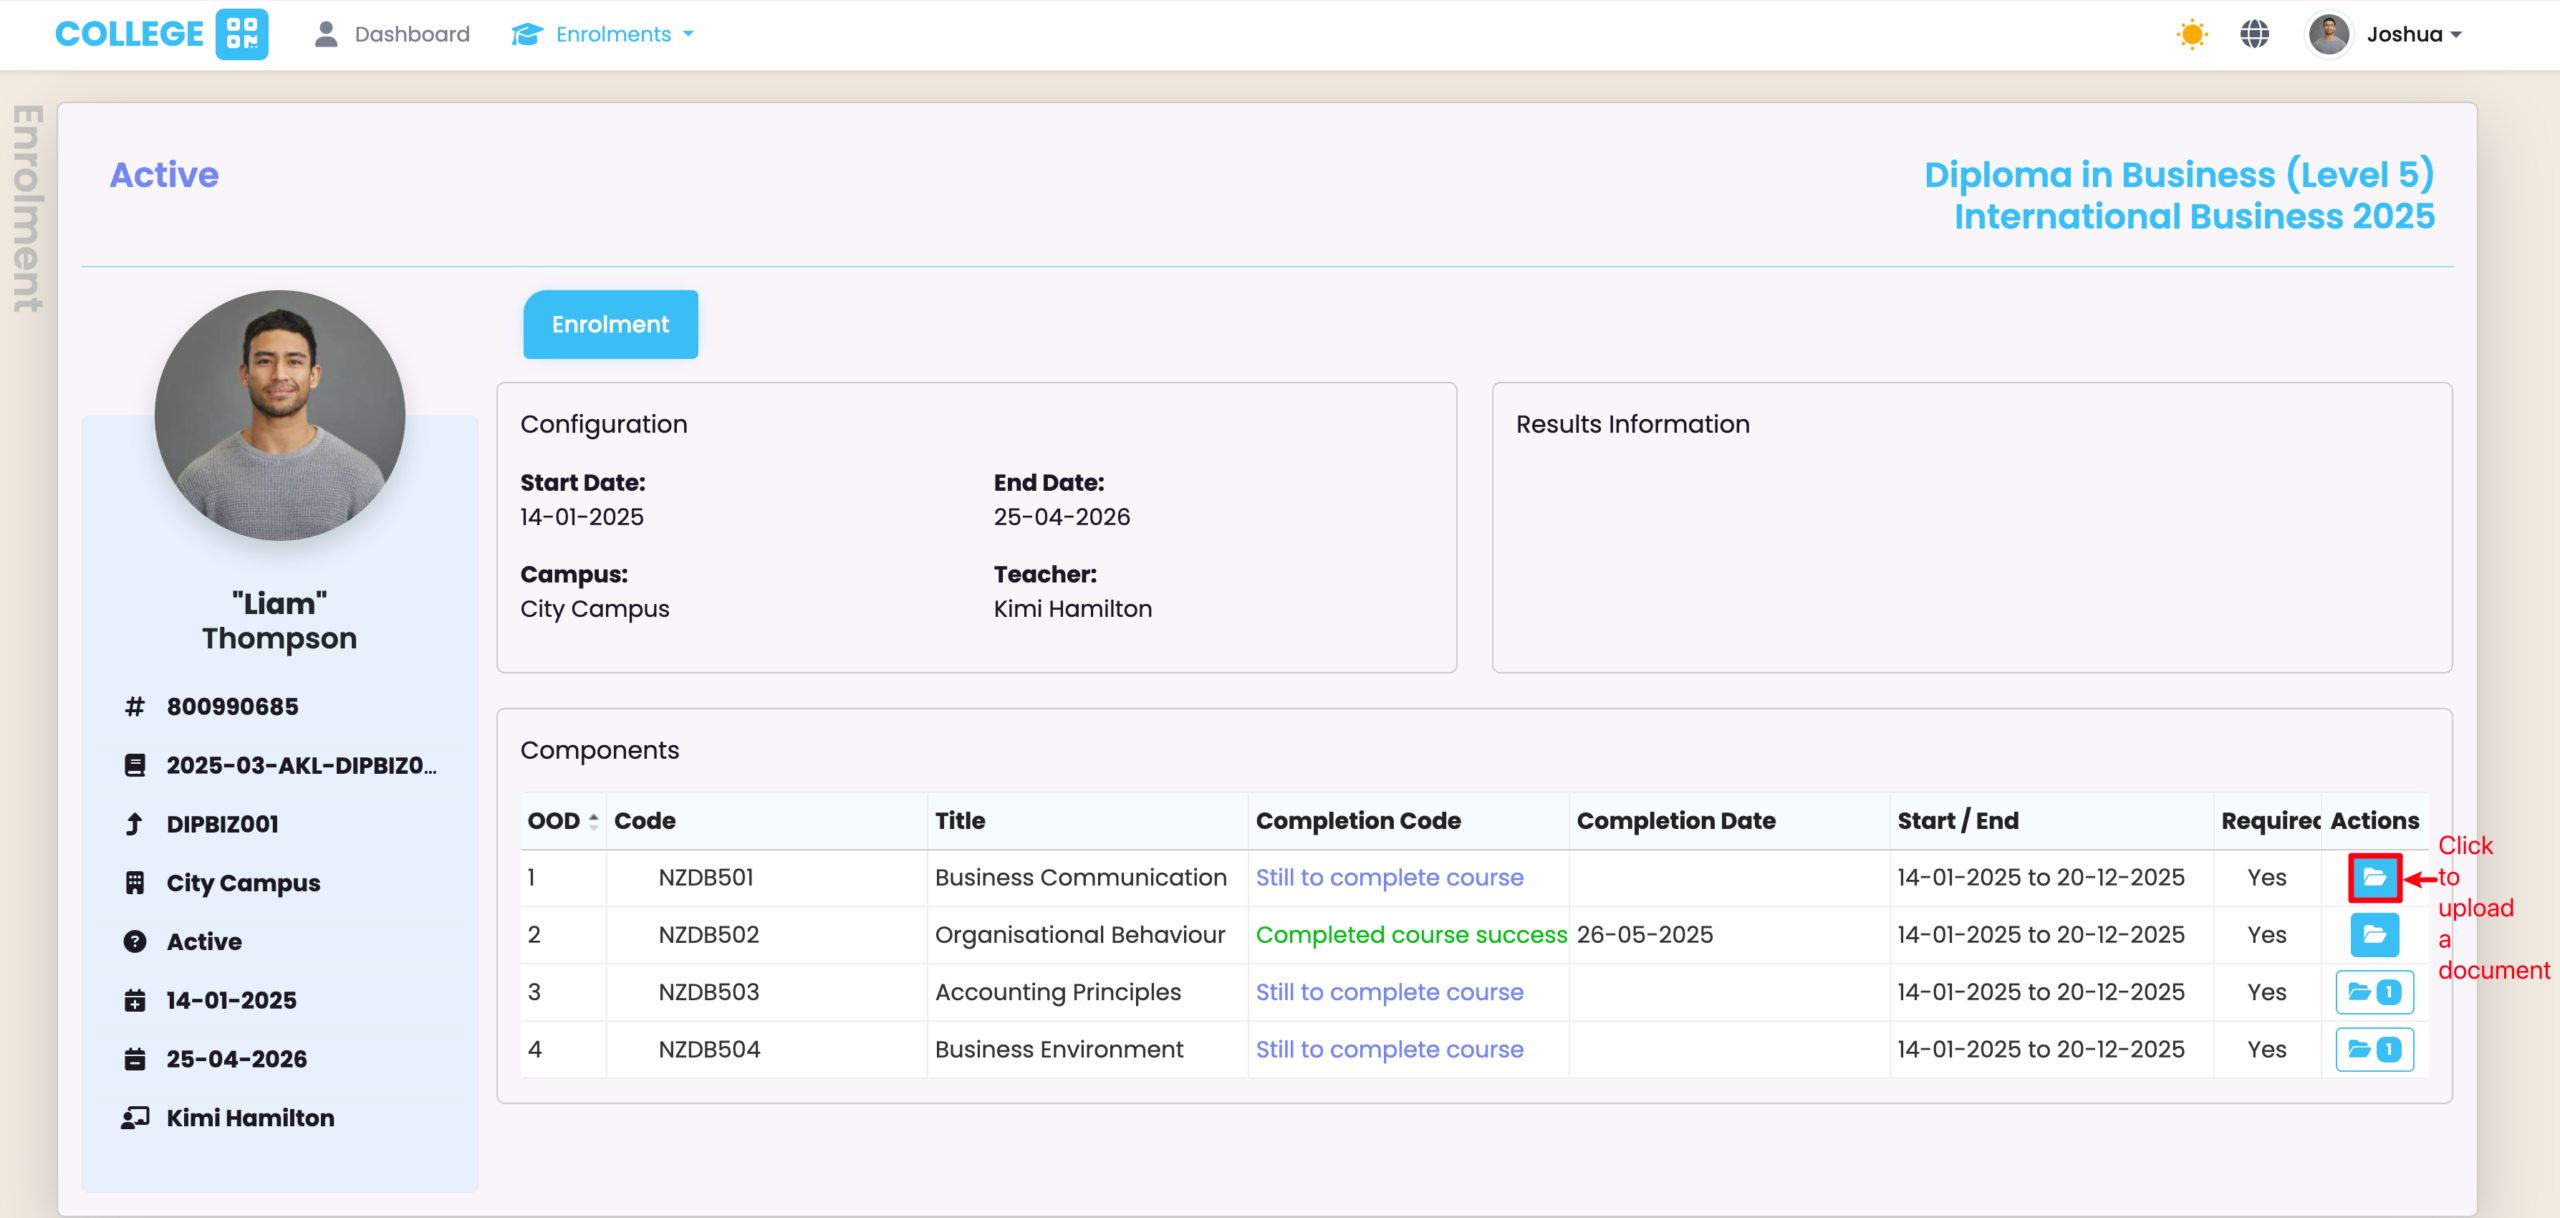
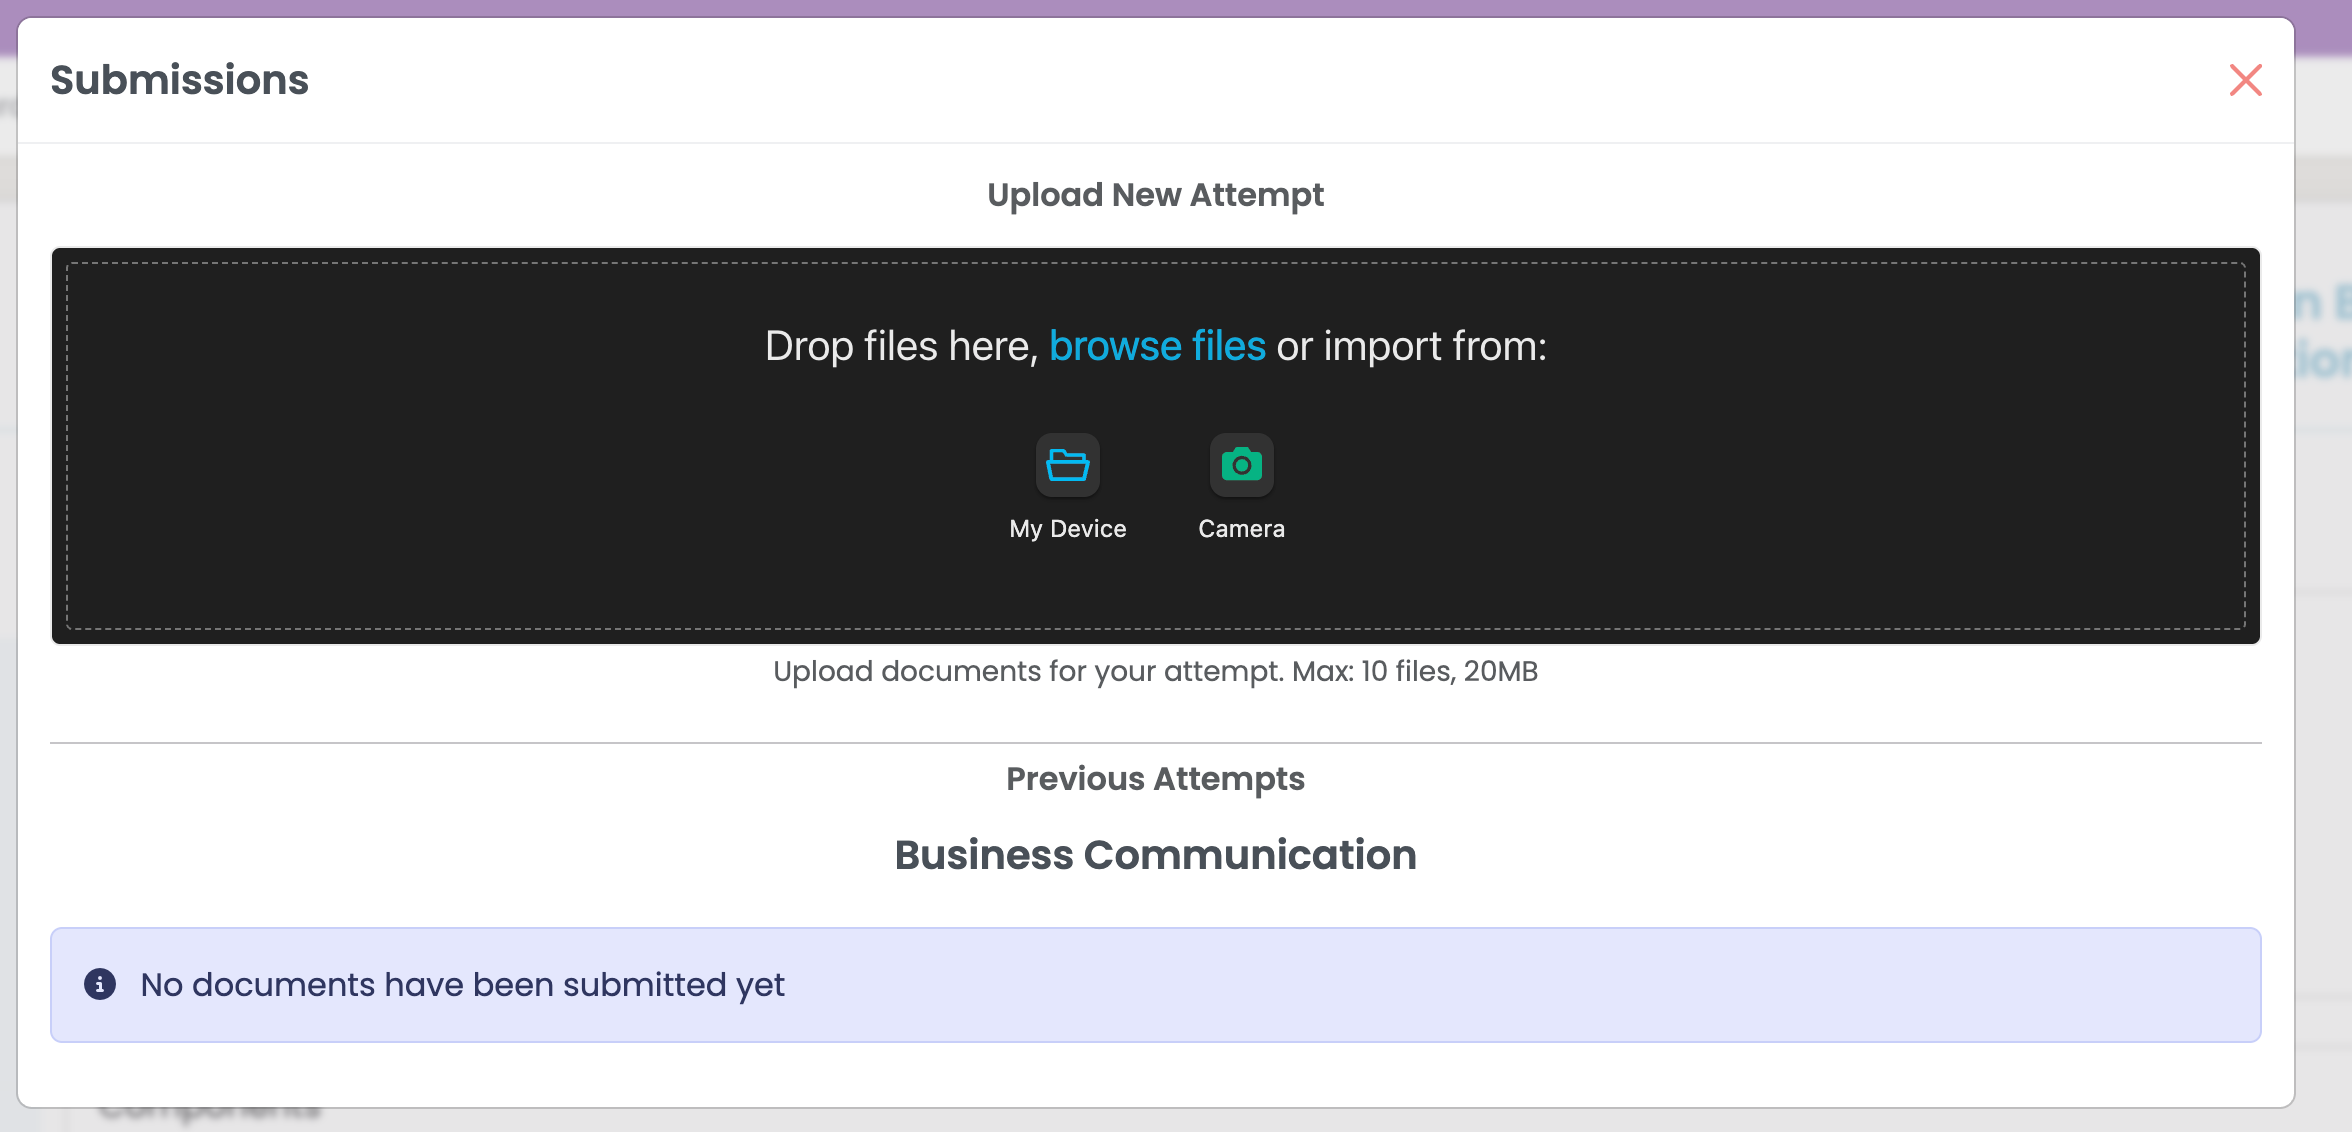
Figure 3. Import Files from Your Computer
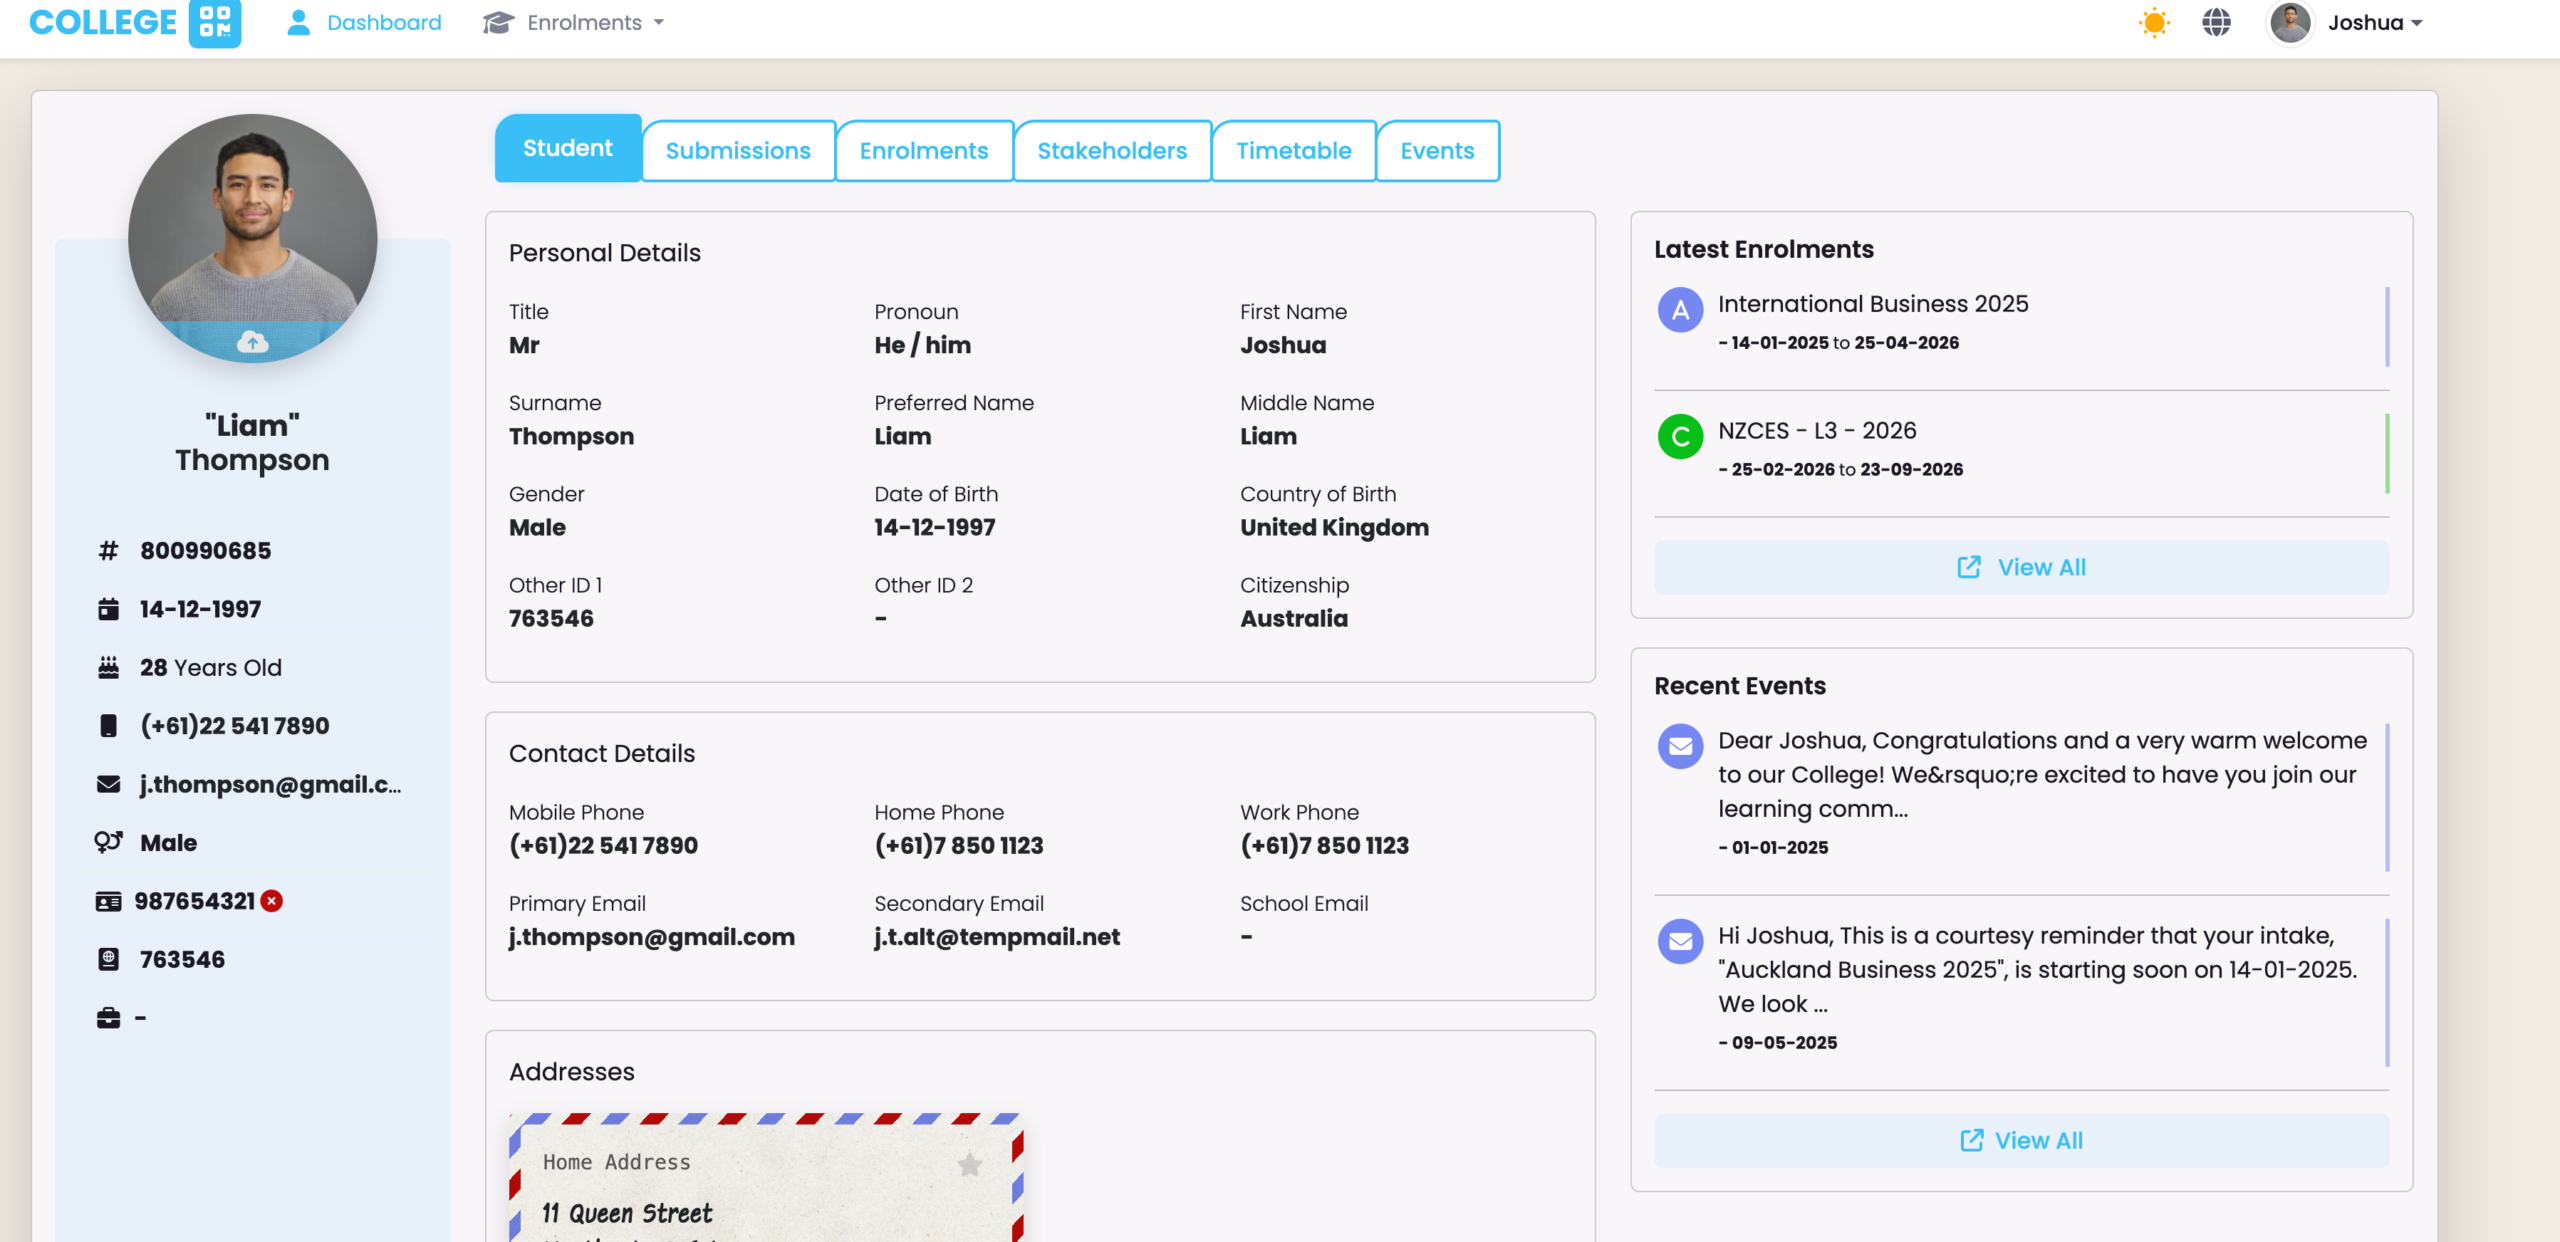
View Personal Information
Review details against your Student profile.
Figure 4. Student Tab
On the Student tab, you can see your Personal Details, including your Names, Country of Birth, Date of Birth, and Addresses. On the right, you will see your Latest Enrolments and Recent Events, which are communications sent by your education provider.
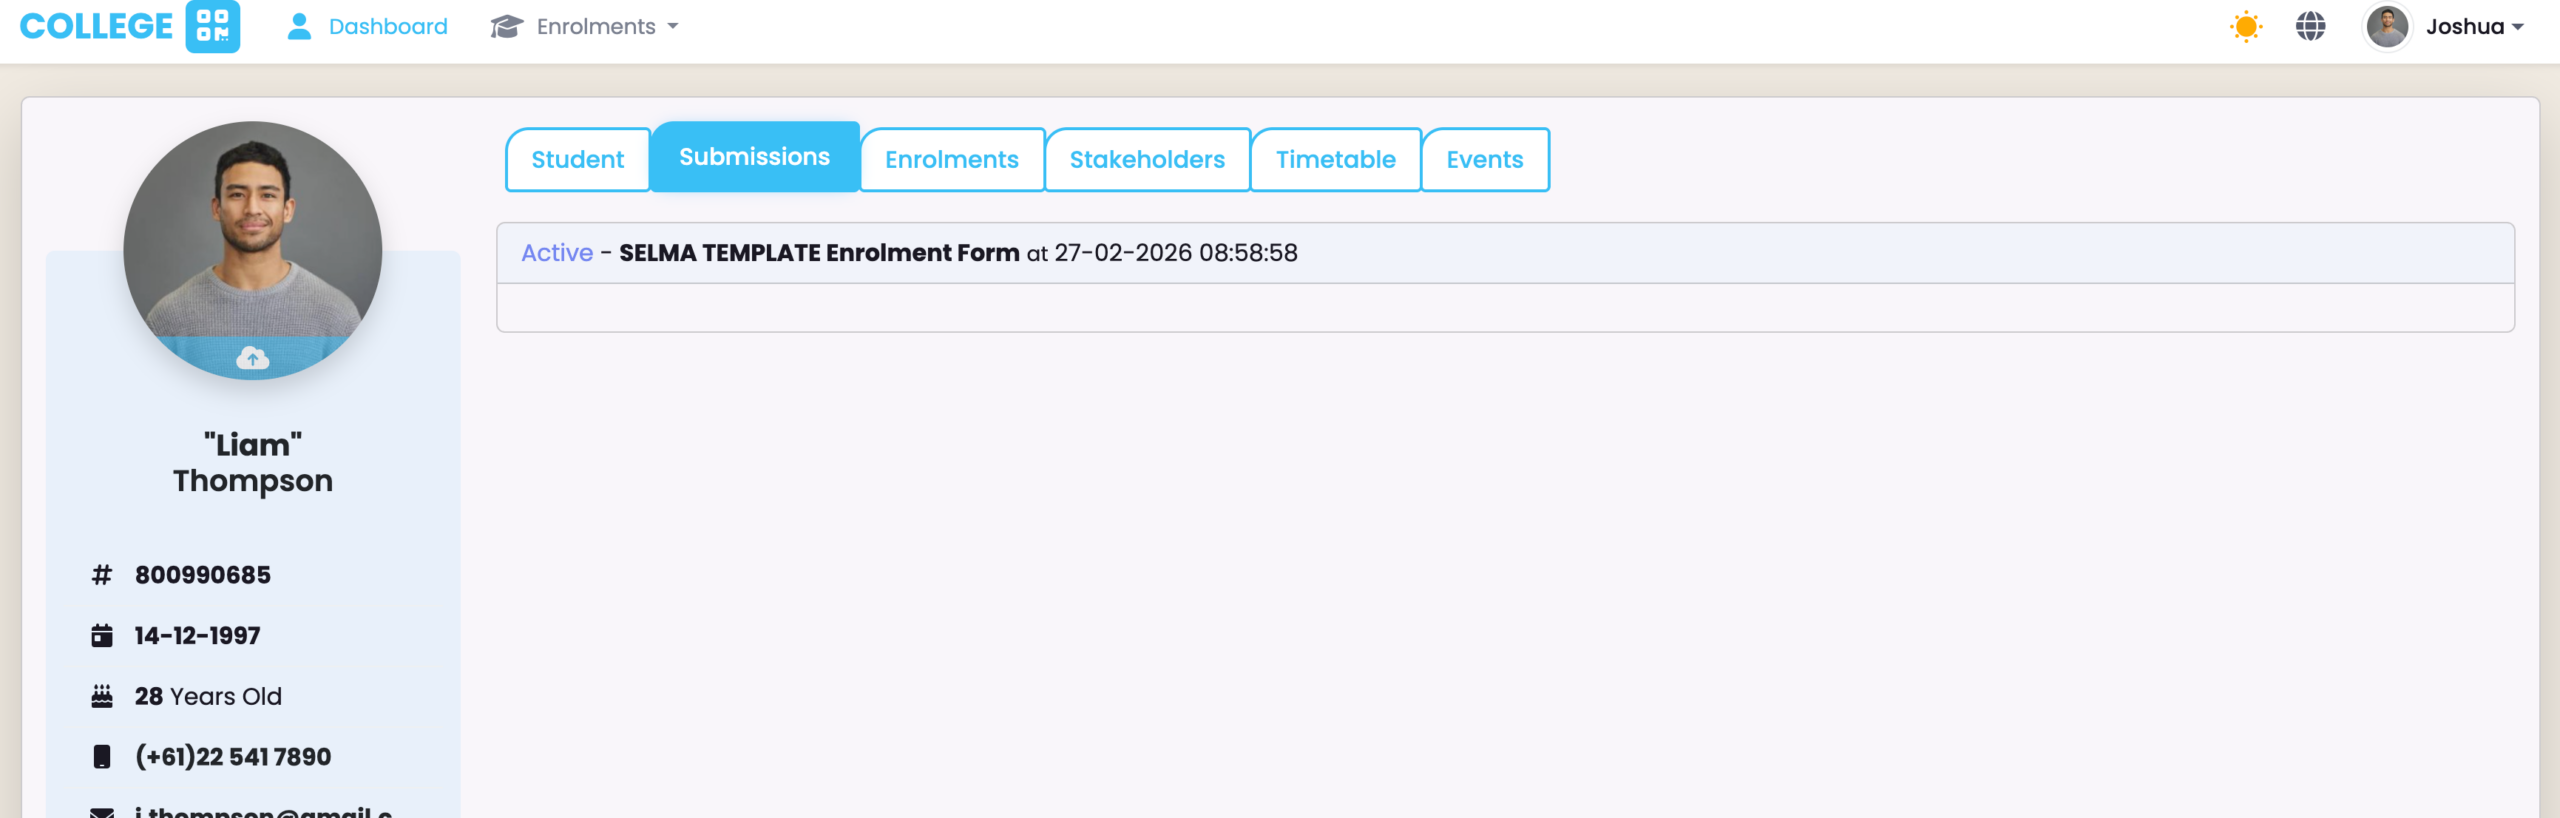
View Form Submissions
The Submissions tab will show forms that you have completed in the past, or that which you are currently filling-out.
Figure 5. Submissions Tab
If you have completed a form, or saved it to complete later, you can view or access it again, respectively, on the Submissions tab.
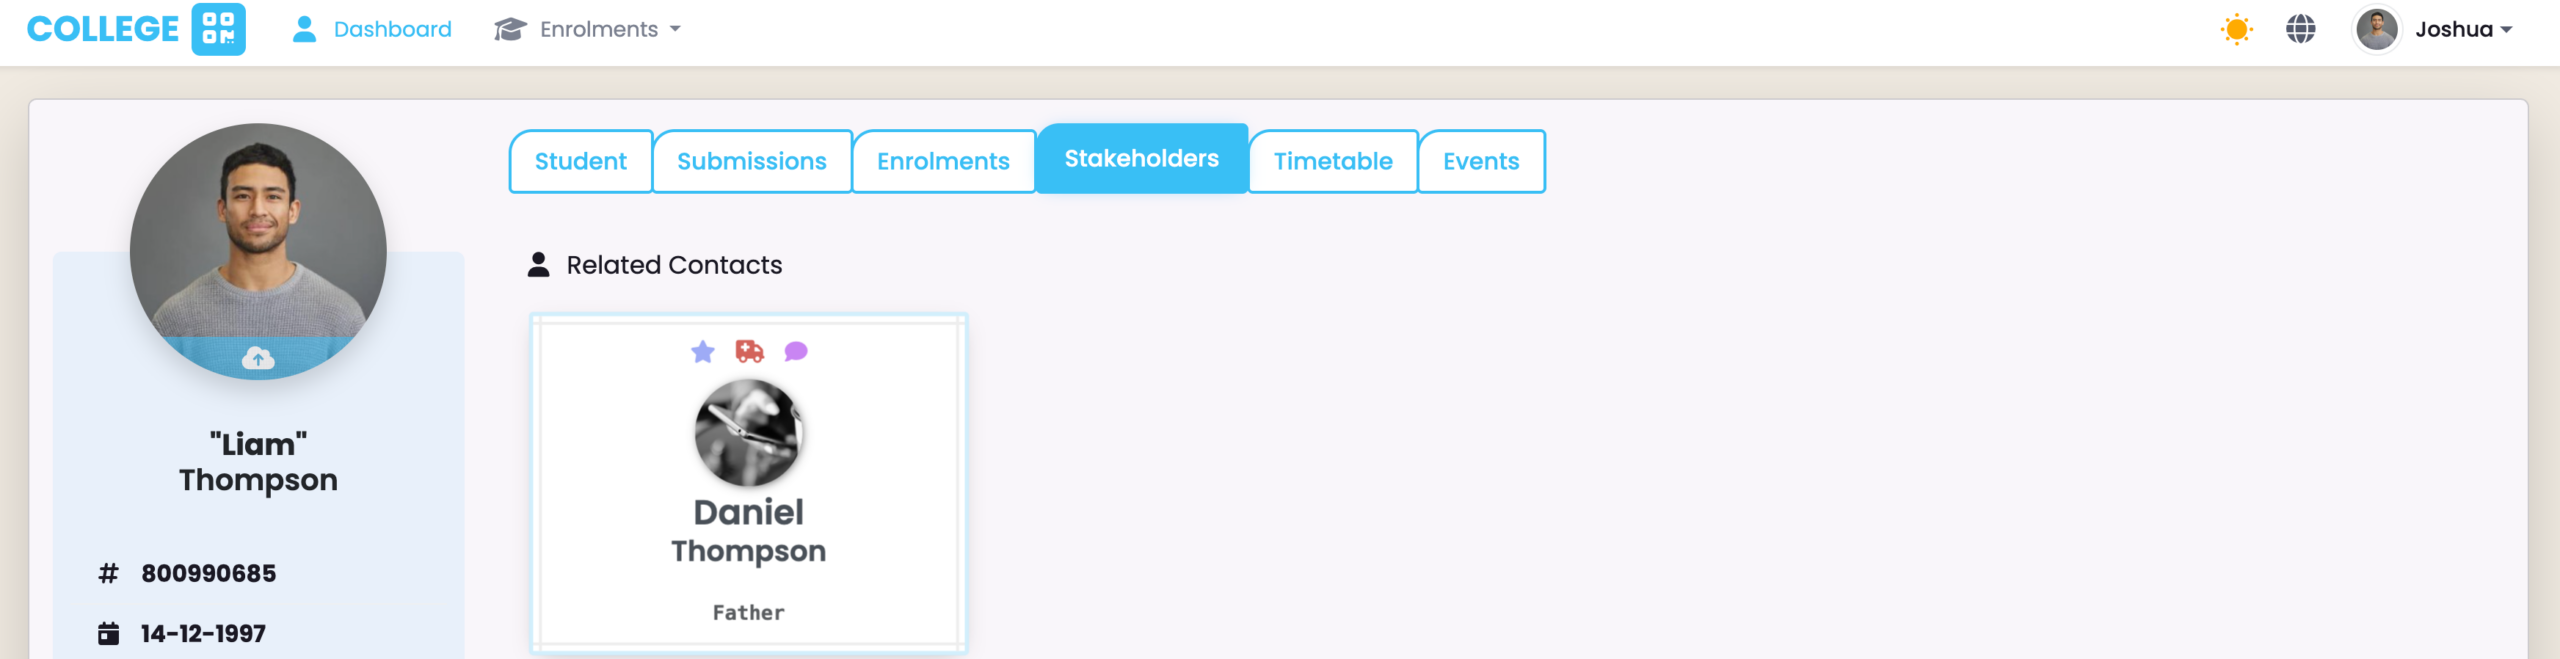
View Contacts
View information about the Contacts associated with you. These details will have been captured by your form.
Figure 6. Stakeholders Tab
The Stakeholders tab holds information about your related Contacts. Click a card to flip it and reveal more details. Icons on the front of the card indicate if a Contact is listed as a Primary Contact (star), Emergency Contact (ambulance), and CCed in all communications (speech bubble) sent to you by your education provider.
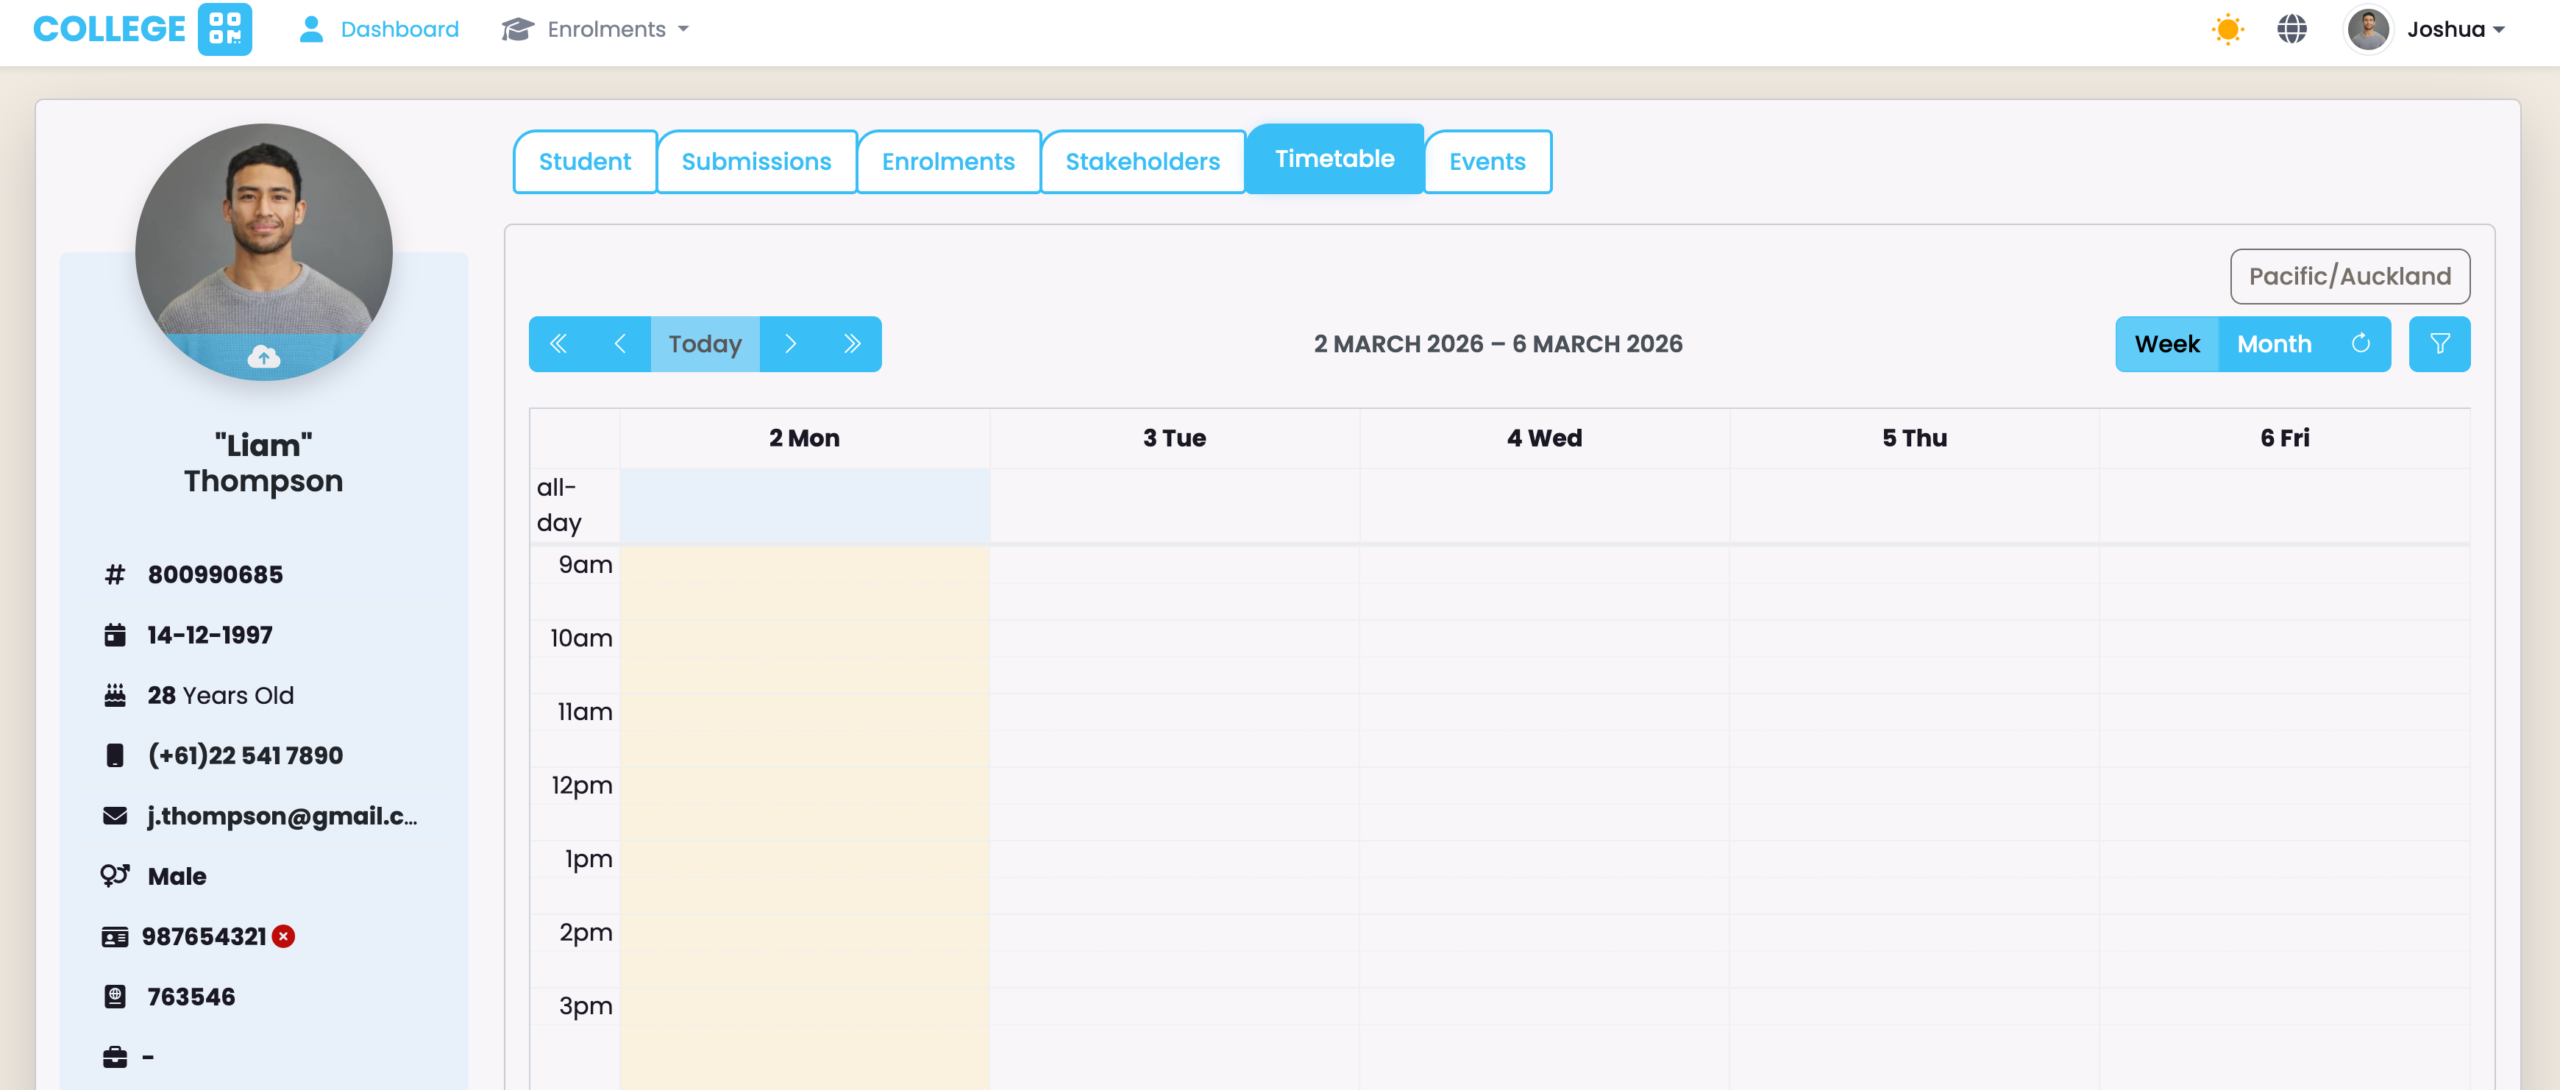
View Timetable Sessions
Figure 7. Timetable Tab
See your scheduled Timetable sessions on the Timetable tab.
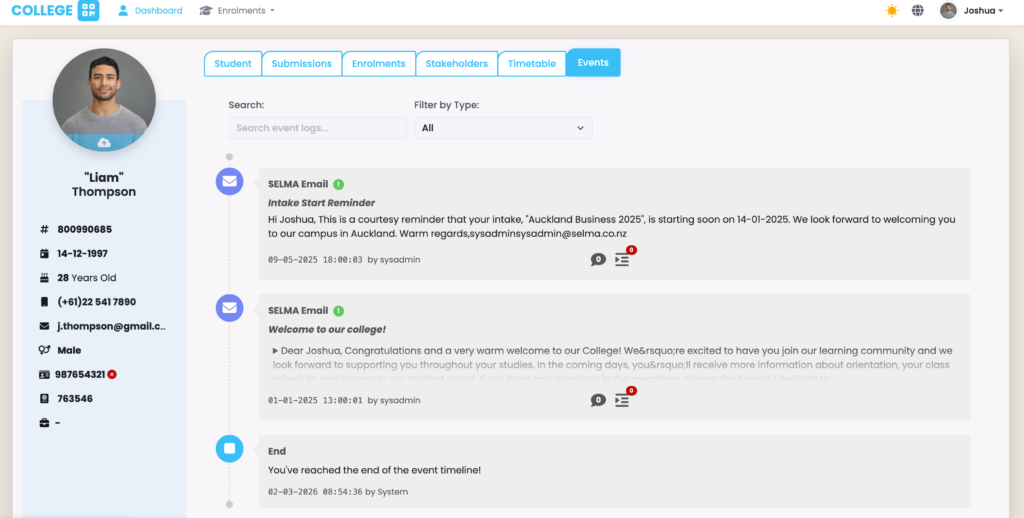
View Events
Events are communications sent to you by your education provider.
While you can see a quick overview of communications on the Student Tab, you can see a list of all communications on the Events tab.
Figure 8. Events Tab
View a list of communications from your education provider on the Events tab.