The Contact Portal grants the Stakeholder access to associated Student and Enrolment records, and allows them to enrol Students into Intakes.
In this Section:
Assign Students to Stakeholders
Enable Stakeholder access to specific Student and Enrolment records, by creating Student-Contact Associations.
Figure 1i. Add a Related Contact
Navigate to a Student profile and add a Related Contact on the Stakeholders tab.
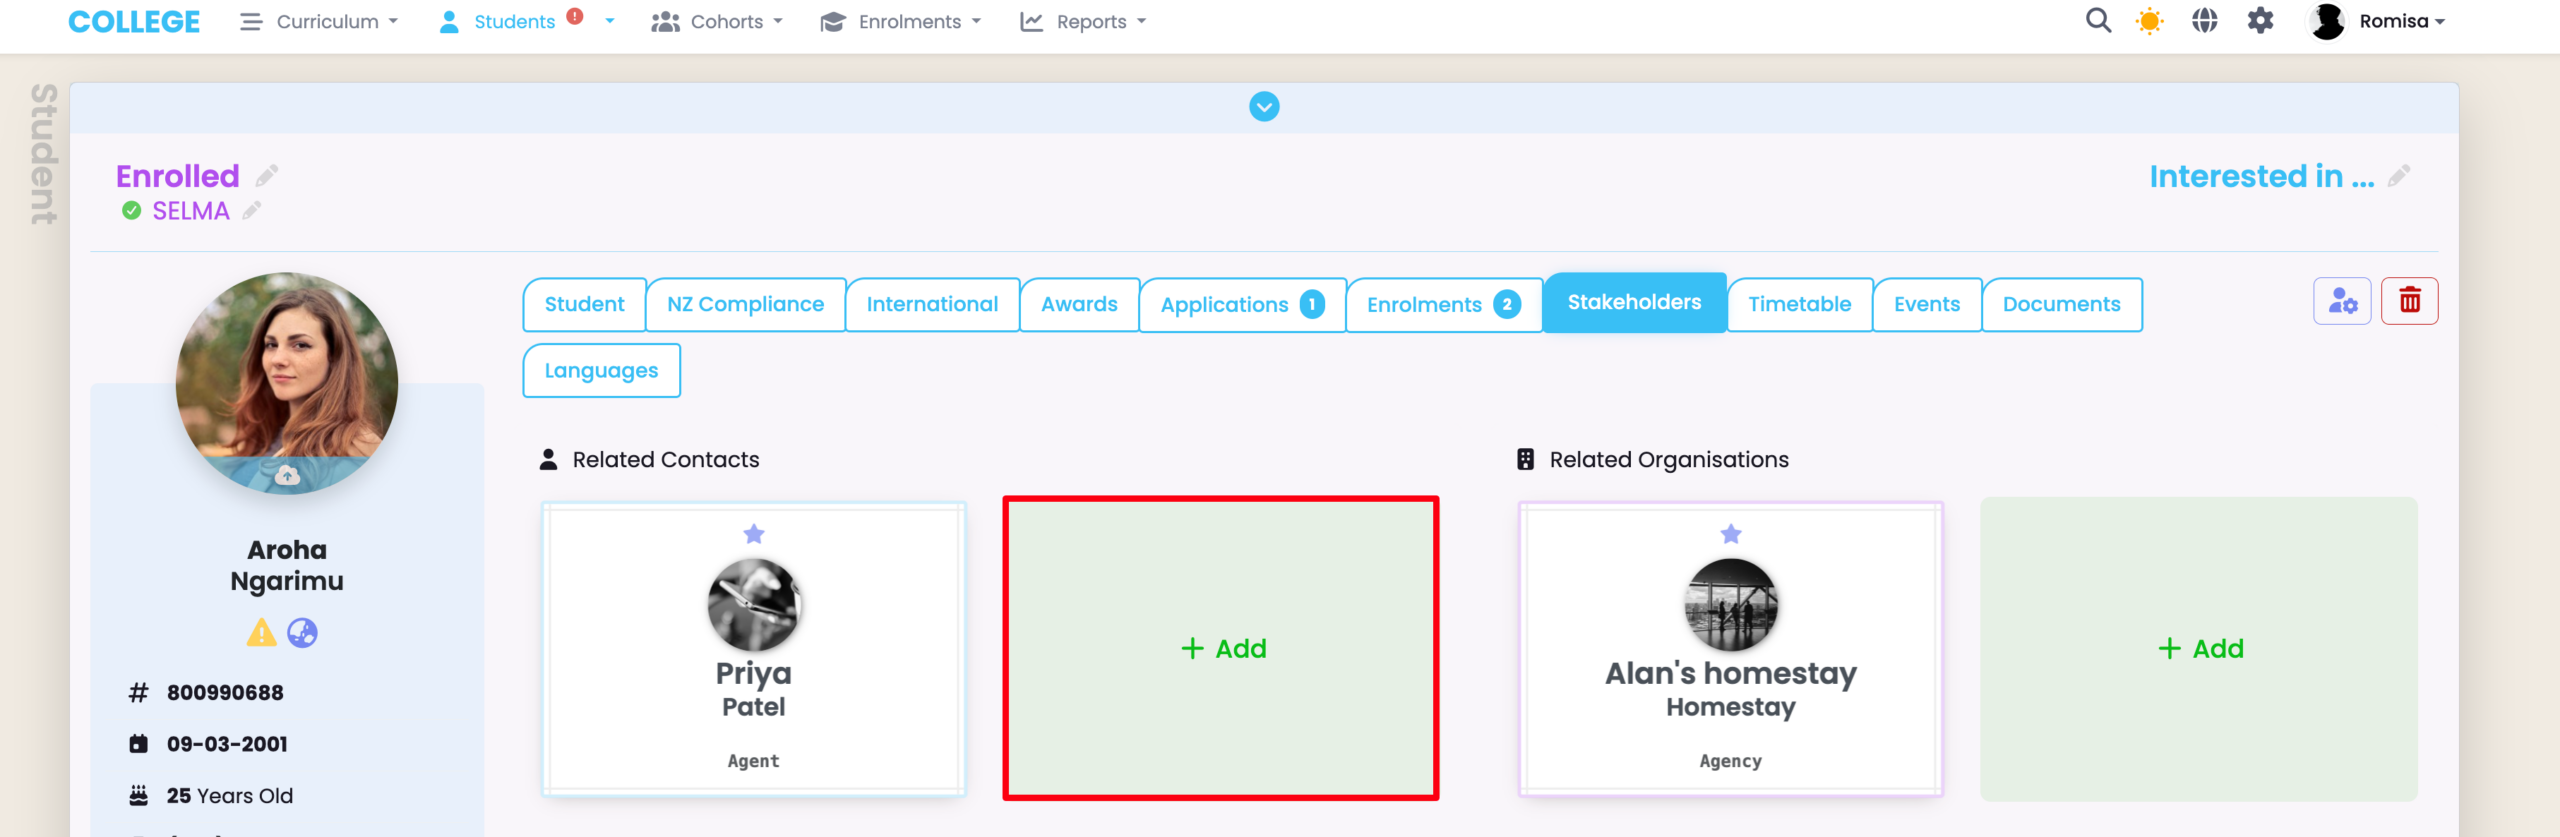
Figure 1ii. Provide Required Details and Save
Fill-in the required details, as indicated by red asterisks. You can also set the contact as the primary contact, emergency contact, and/or include them in communications.
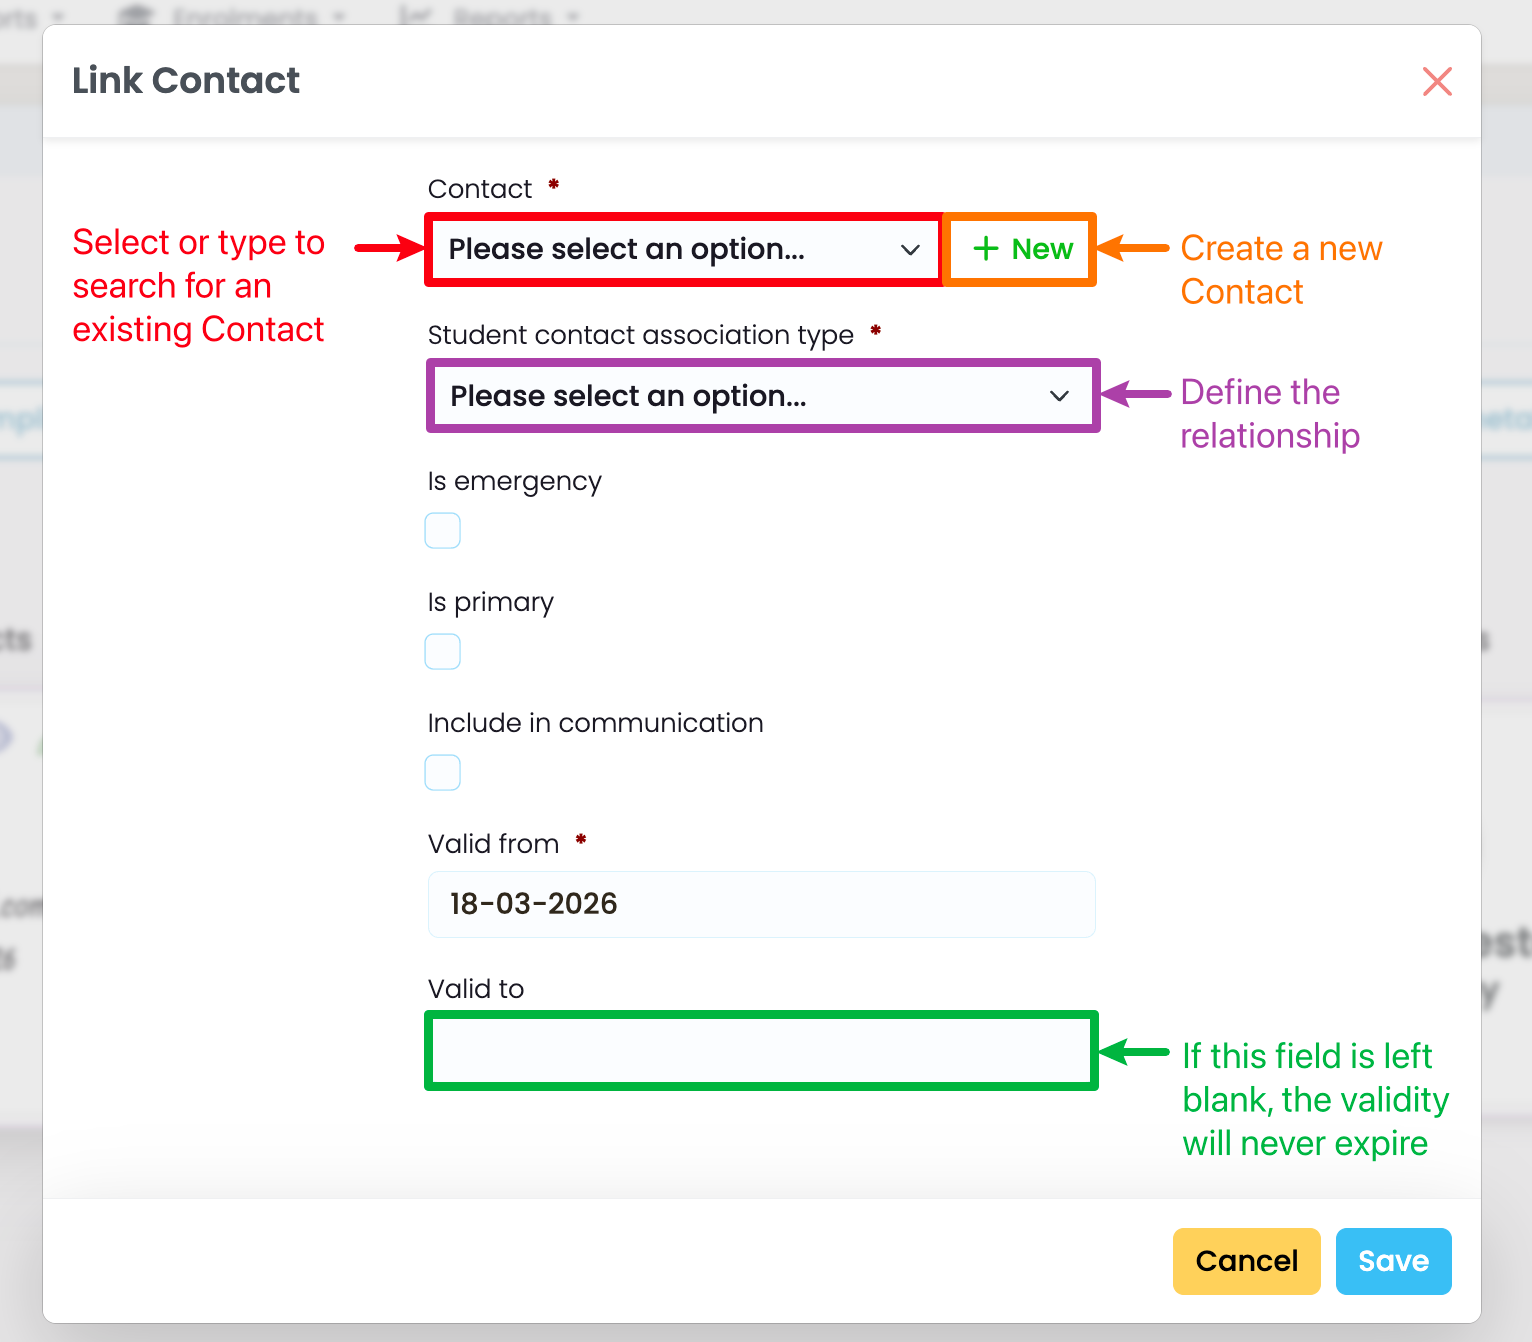
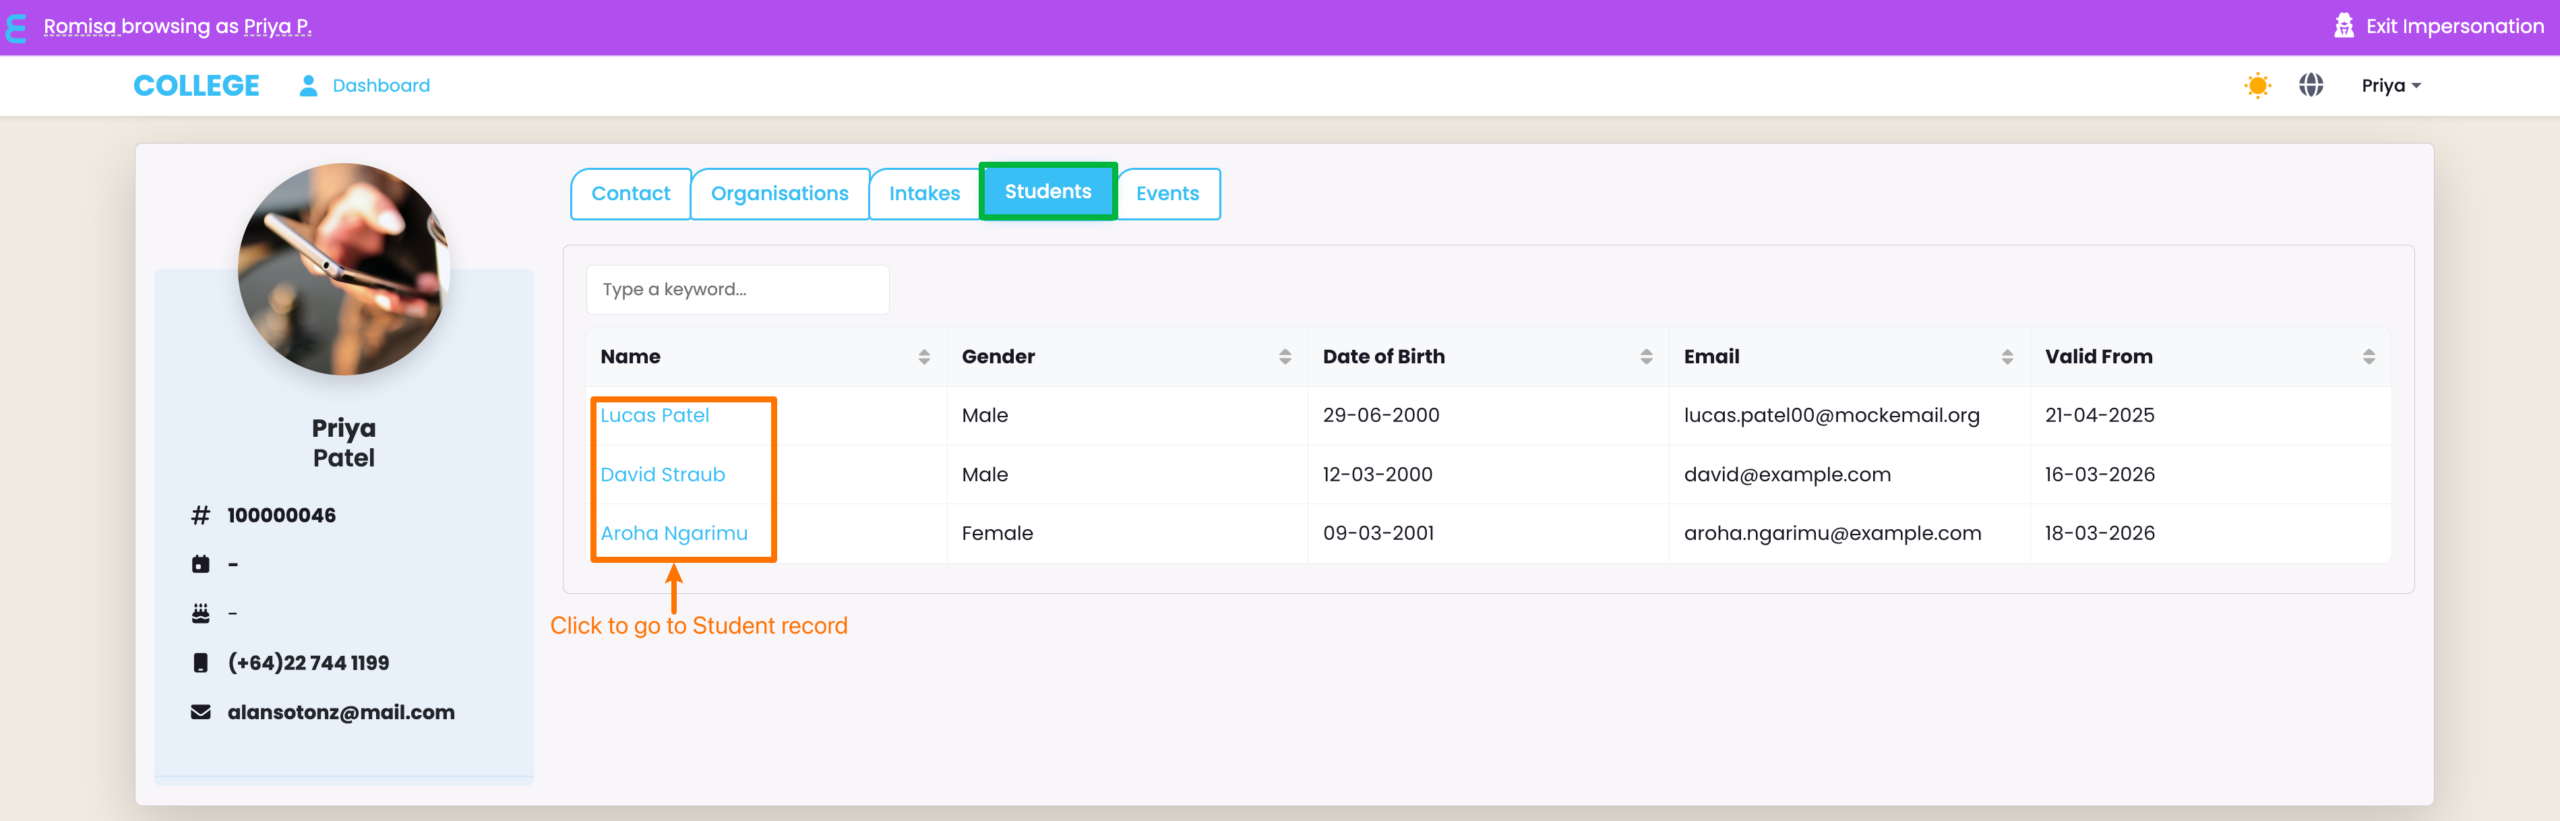
Figure 2. Contact Portal View
The Stakeholder will now be able to see a list of Students they are associated with. If they click on a name on the Students tab, they will be taken to the corresponding Student profile, and will be able to see their respective Enrolment details, too.
Enable Enrolment Creation for Stakeholders
Before the Stakeholder can enrol Students, successfully, you must follow a series of steps to configure their Contact Portal.
Please read the following sub-sections, sequentially, to configure the portal for stakeholders who wish to create Enrolments.
Portal Configuration
There are some pre-requisite settings to change before you proceed.
- Note: The following steps can only be done by the Primary User.
Figure 3i. Navigate to Settings > Portal Admin
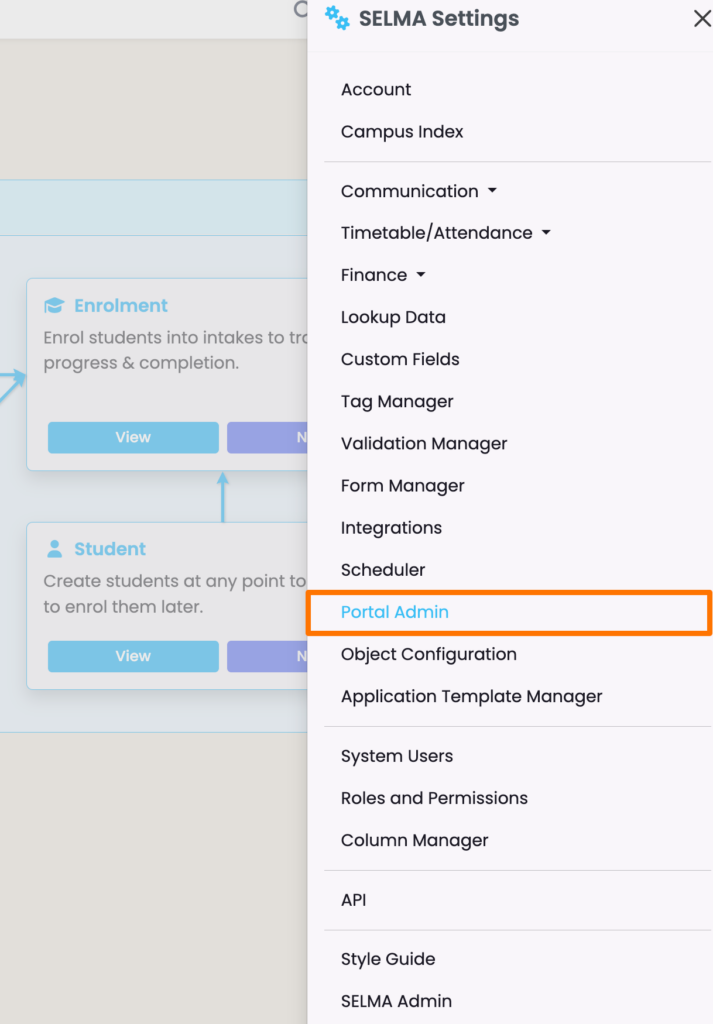
Figure 3ii. Ensure Contact Portal is Active

Figure 3iii. Enrol Students Flag
Scroll to the bottom of the Portal Admin page, and enable “Contacts Enrol Students”.

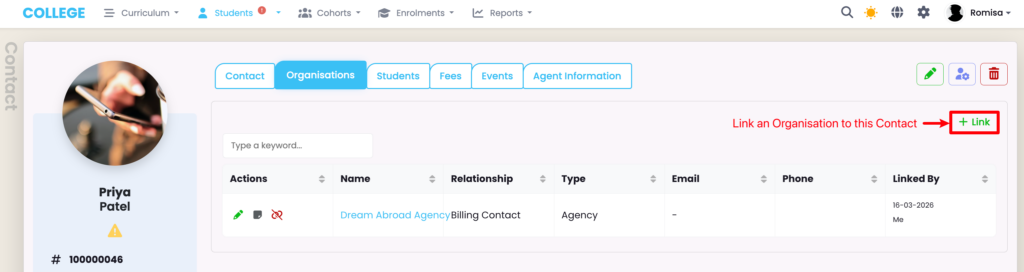
Create a Contact-Organisation Association
Link the Organisation to the appropriate Contact from the Organisations tab.
Figure 4. Link the Organisation to the Contact
Navigate to the Organisations tab on the Contact profile, and click the green “+Link” button create a relationship between the Organisation and Contact.
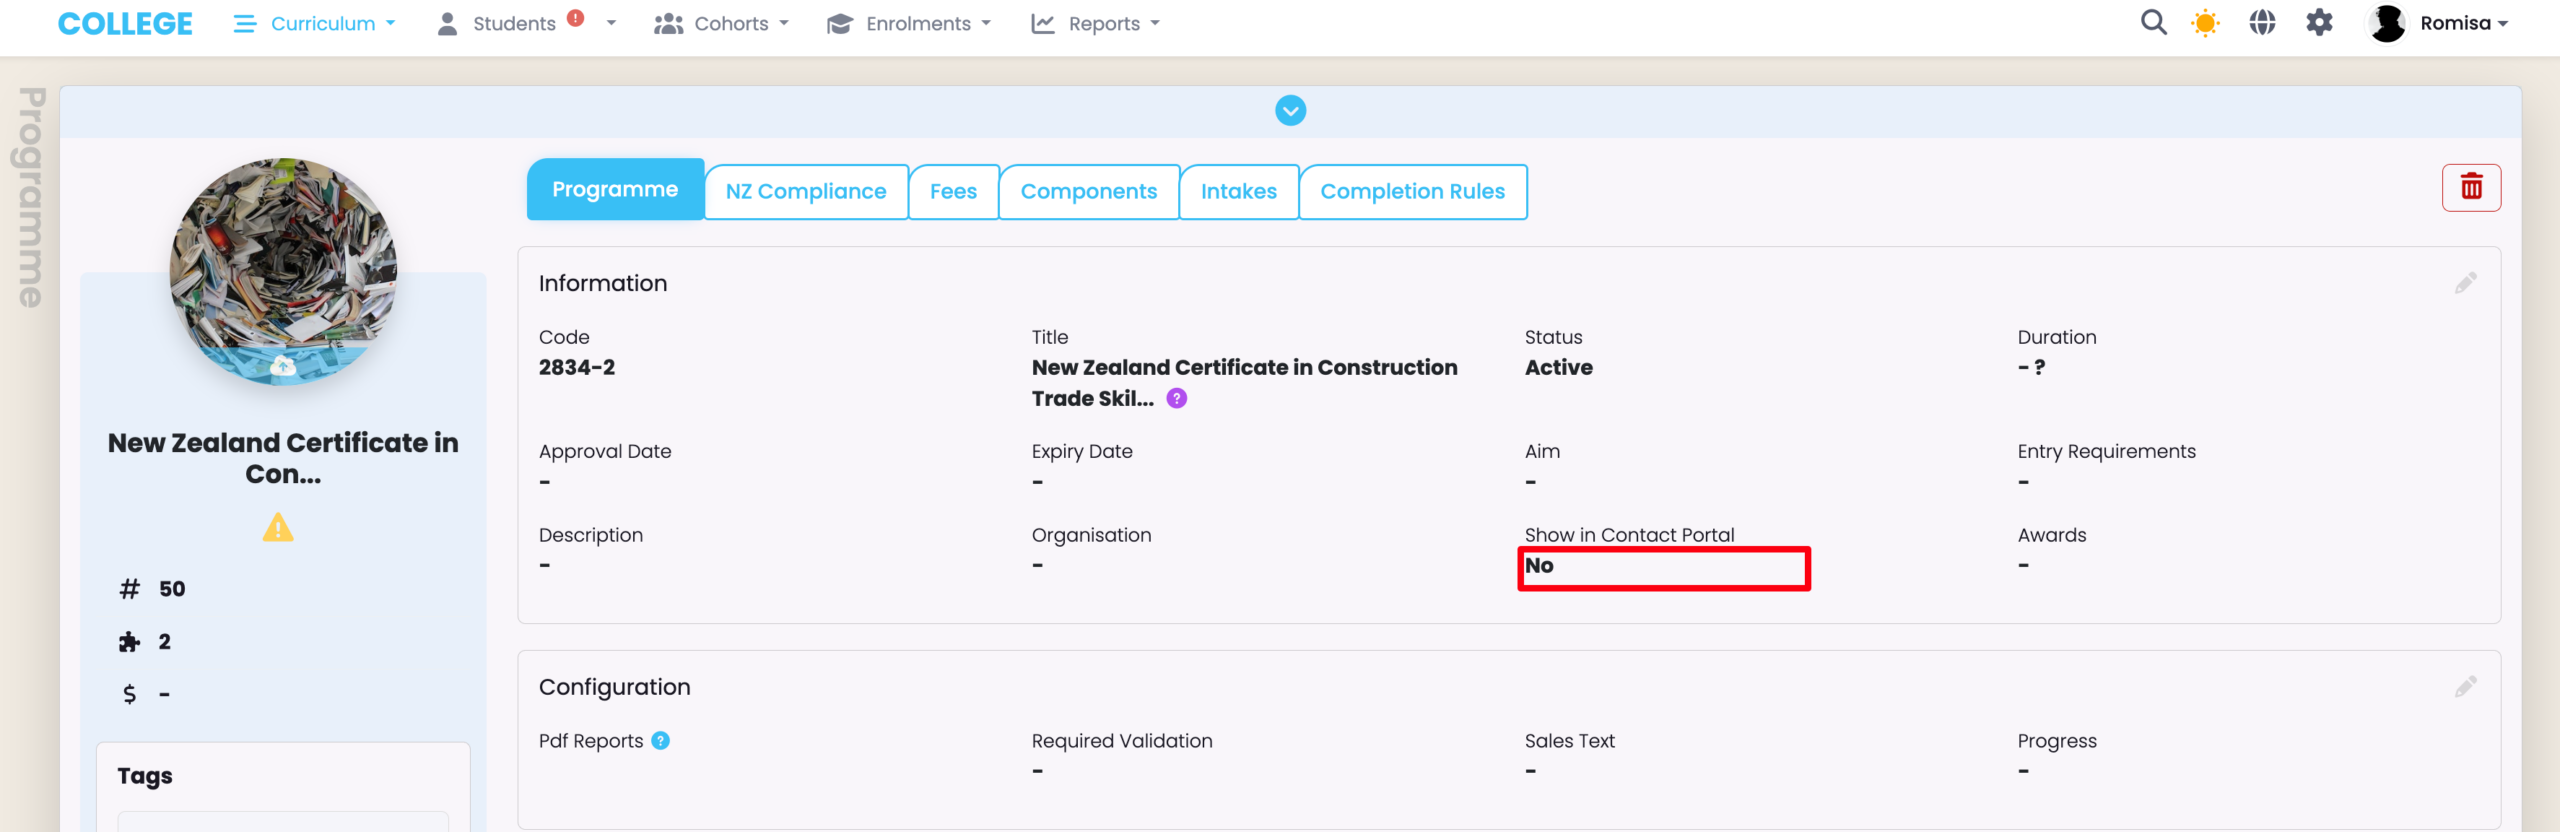
Enable the Contact Portal on the Programme
Enabling the Contact Portal on the Programme will show ALL of the Intakes associated with that Programme on the Contact Portal.
- Note: You must set this up whether or not you require all intakes to show.
Figure 5. Navigate to Curriculum Index > Programme
On the Programme tab, edit the “Show in Contact Portal” field to “Yes”.
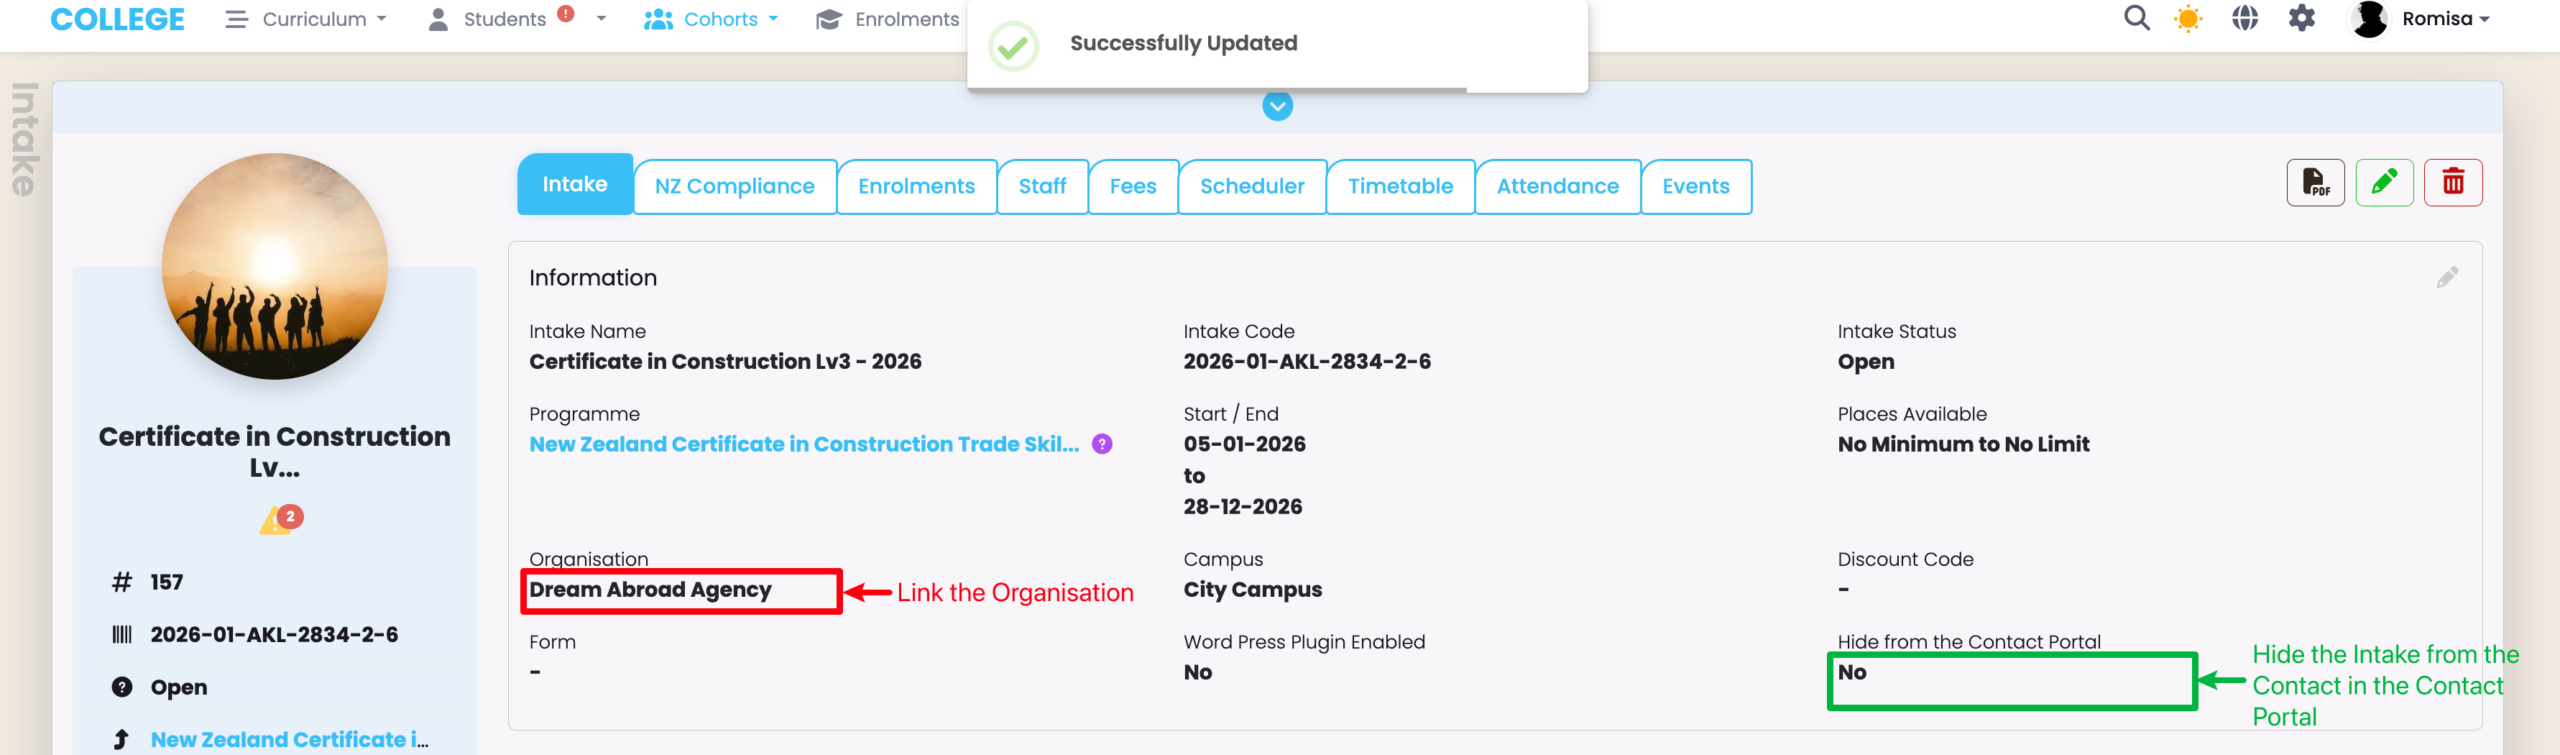
Create an Intake-Organisation Association
Link the Organisation to the appropriate Intakes from the Intake tab.
From here, you should also hide an Intake from the Contact Portal, if necessary.
Figure 6. Link the Organisation to the Intake
Navigate to the Intake tab on the Intake profile, and select the relevant Organisation (red). You can also hide the Intakes you do not want the Contact to see in the Contact Portal (green).
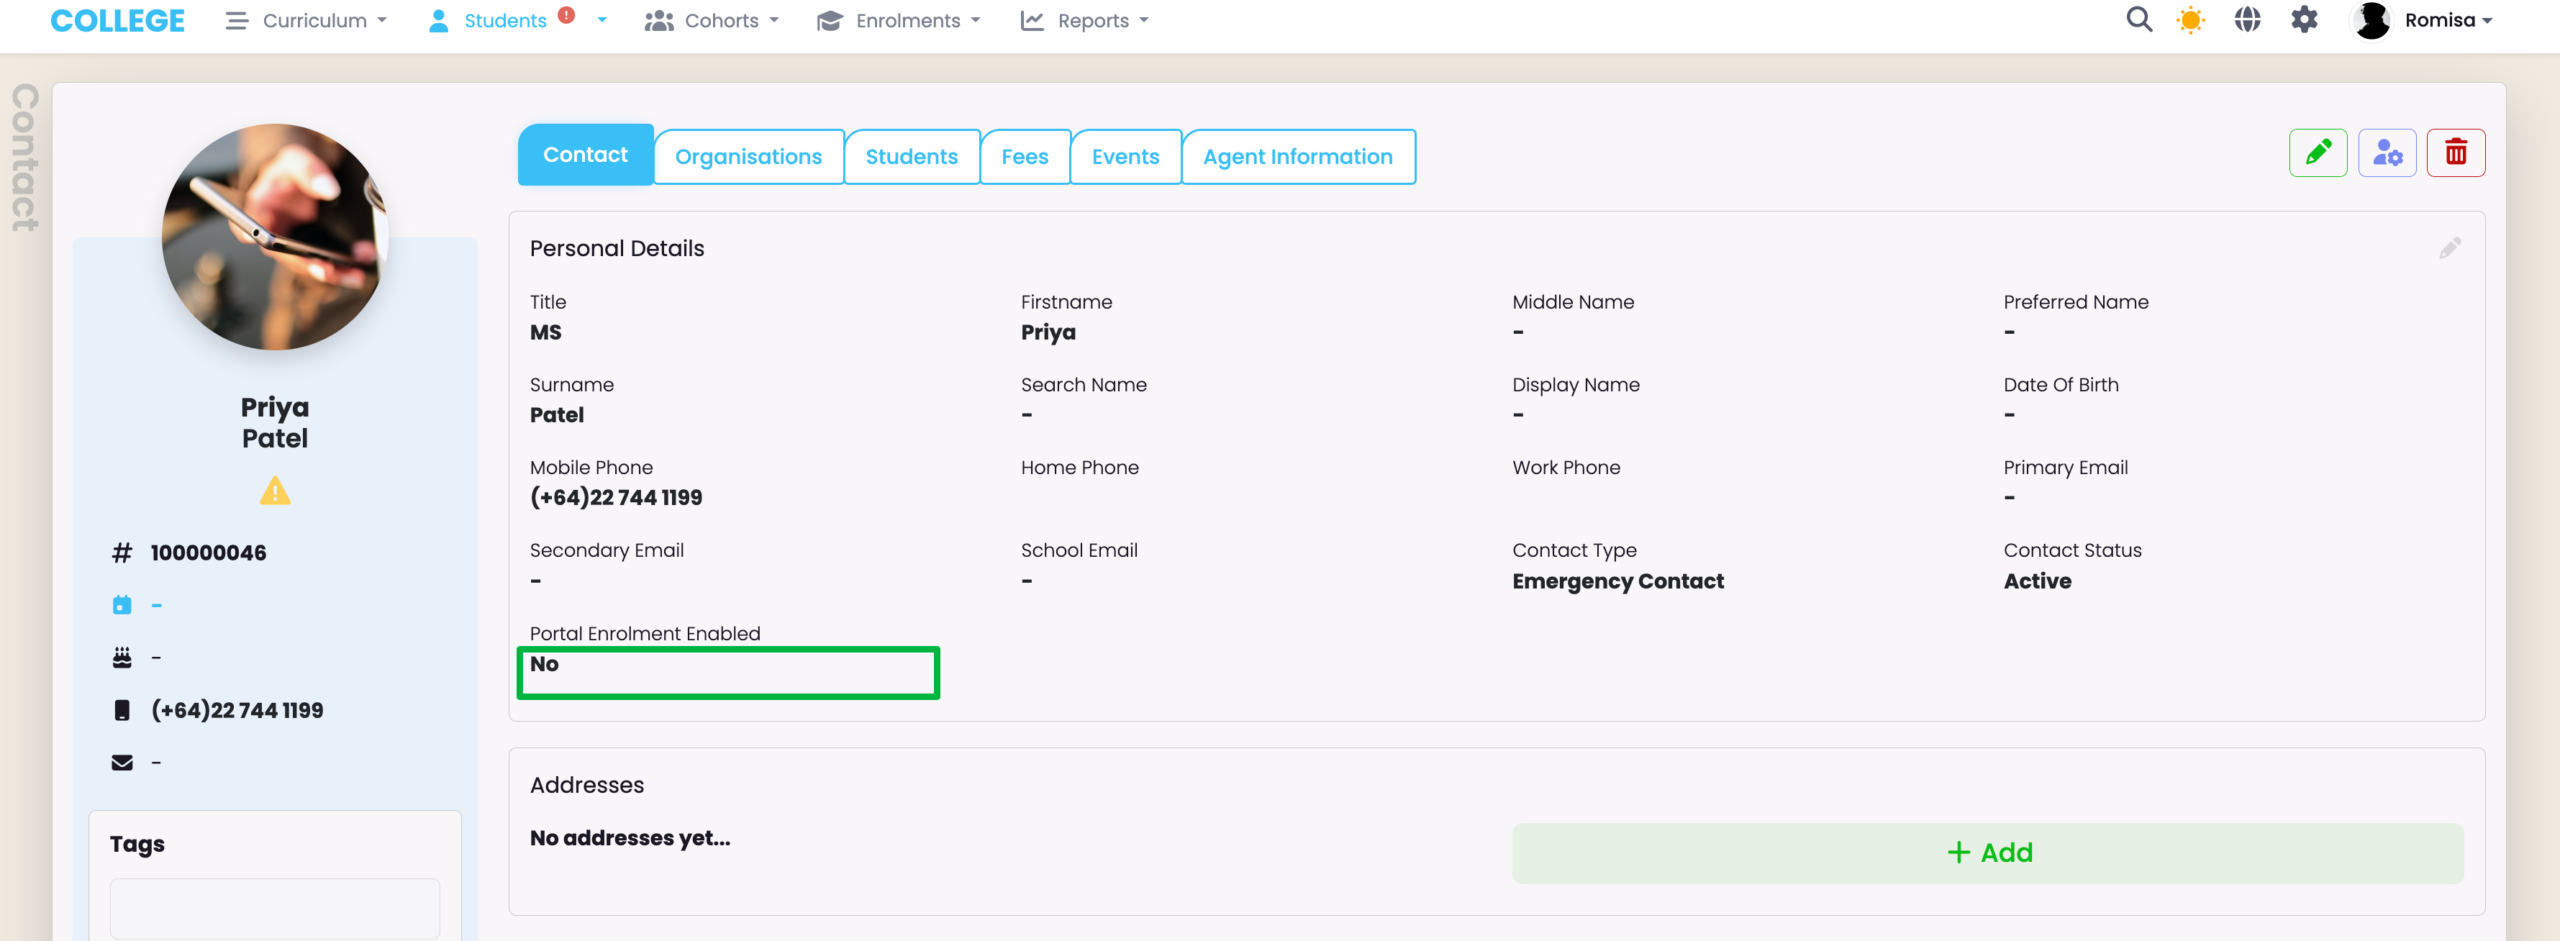
Enable Portal Enrolment for Contacts
Allow Contacts to Enrol Students into Intakes from the Contact Portal.
Figure 7. Portal Enrolment Enabled | Contact tab
Navigate to the Contact tab of the Contact profile and change the field to “Yes” (green).