
In this Section:
Access the Form Manager
The Form Builder is an additional paid feature to your SELMA subscription plan.
- If you do not have this feature, please contact SELMA Support to get you started.
Figure 1. Navigation Bar
Click the cog icon in the top navigation bar.
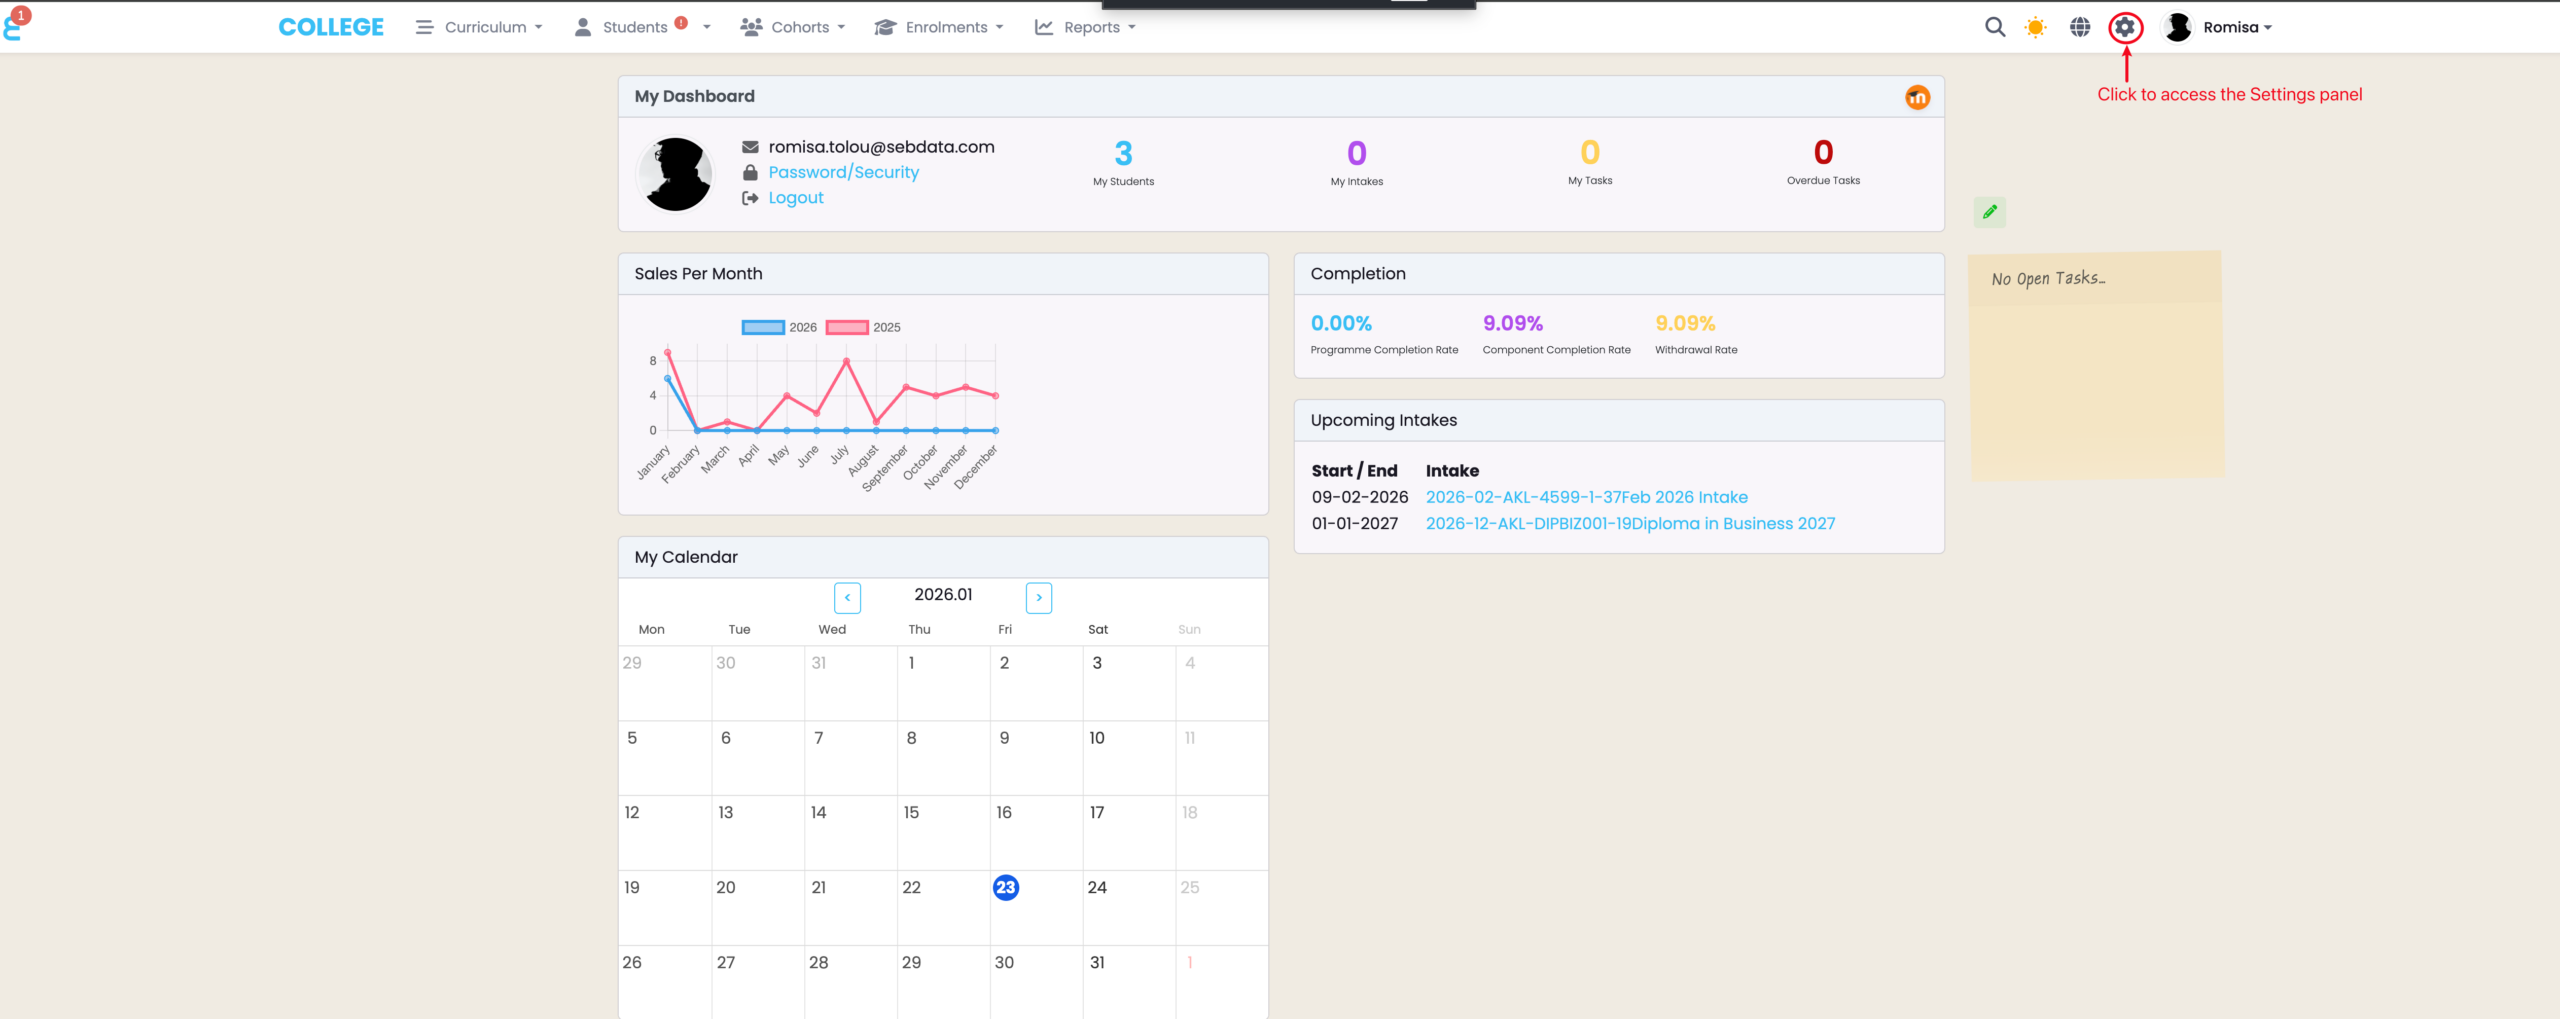
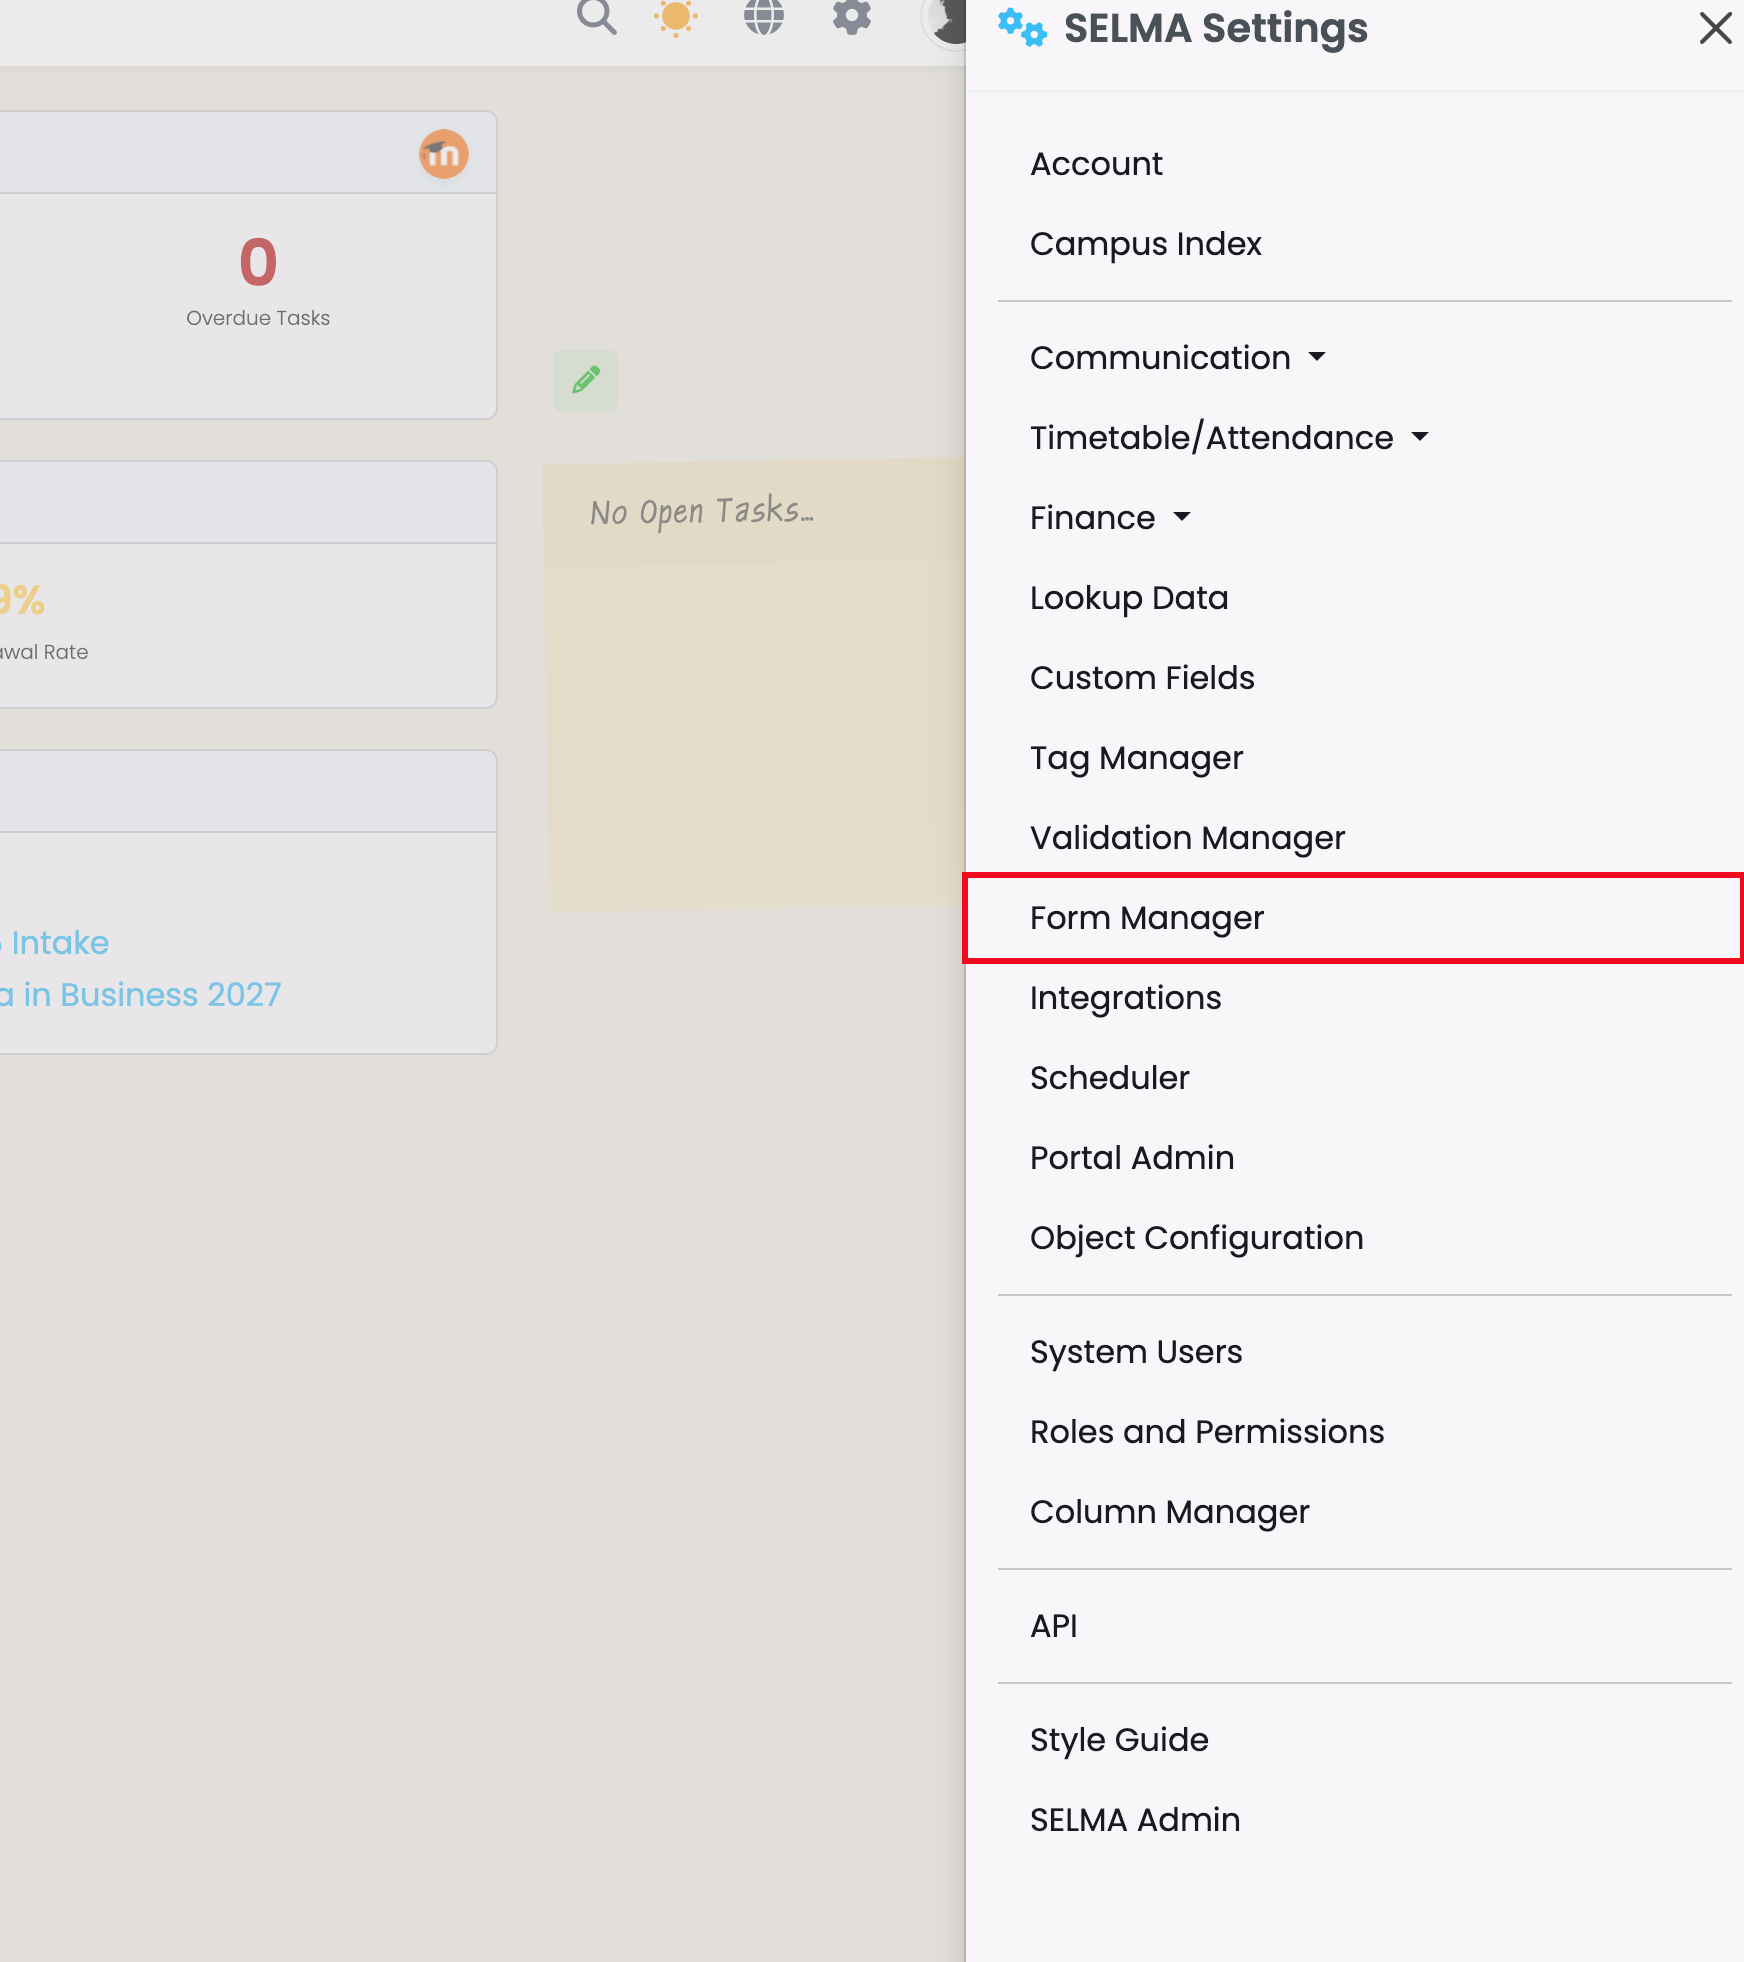
Figure 1ii. Settings Panel
Click “Form Manager“.
Form Manager Overview
The Form Manager allows you to create and store Enquiry and Enrolment Forms.
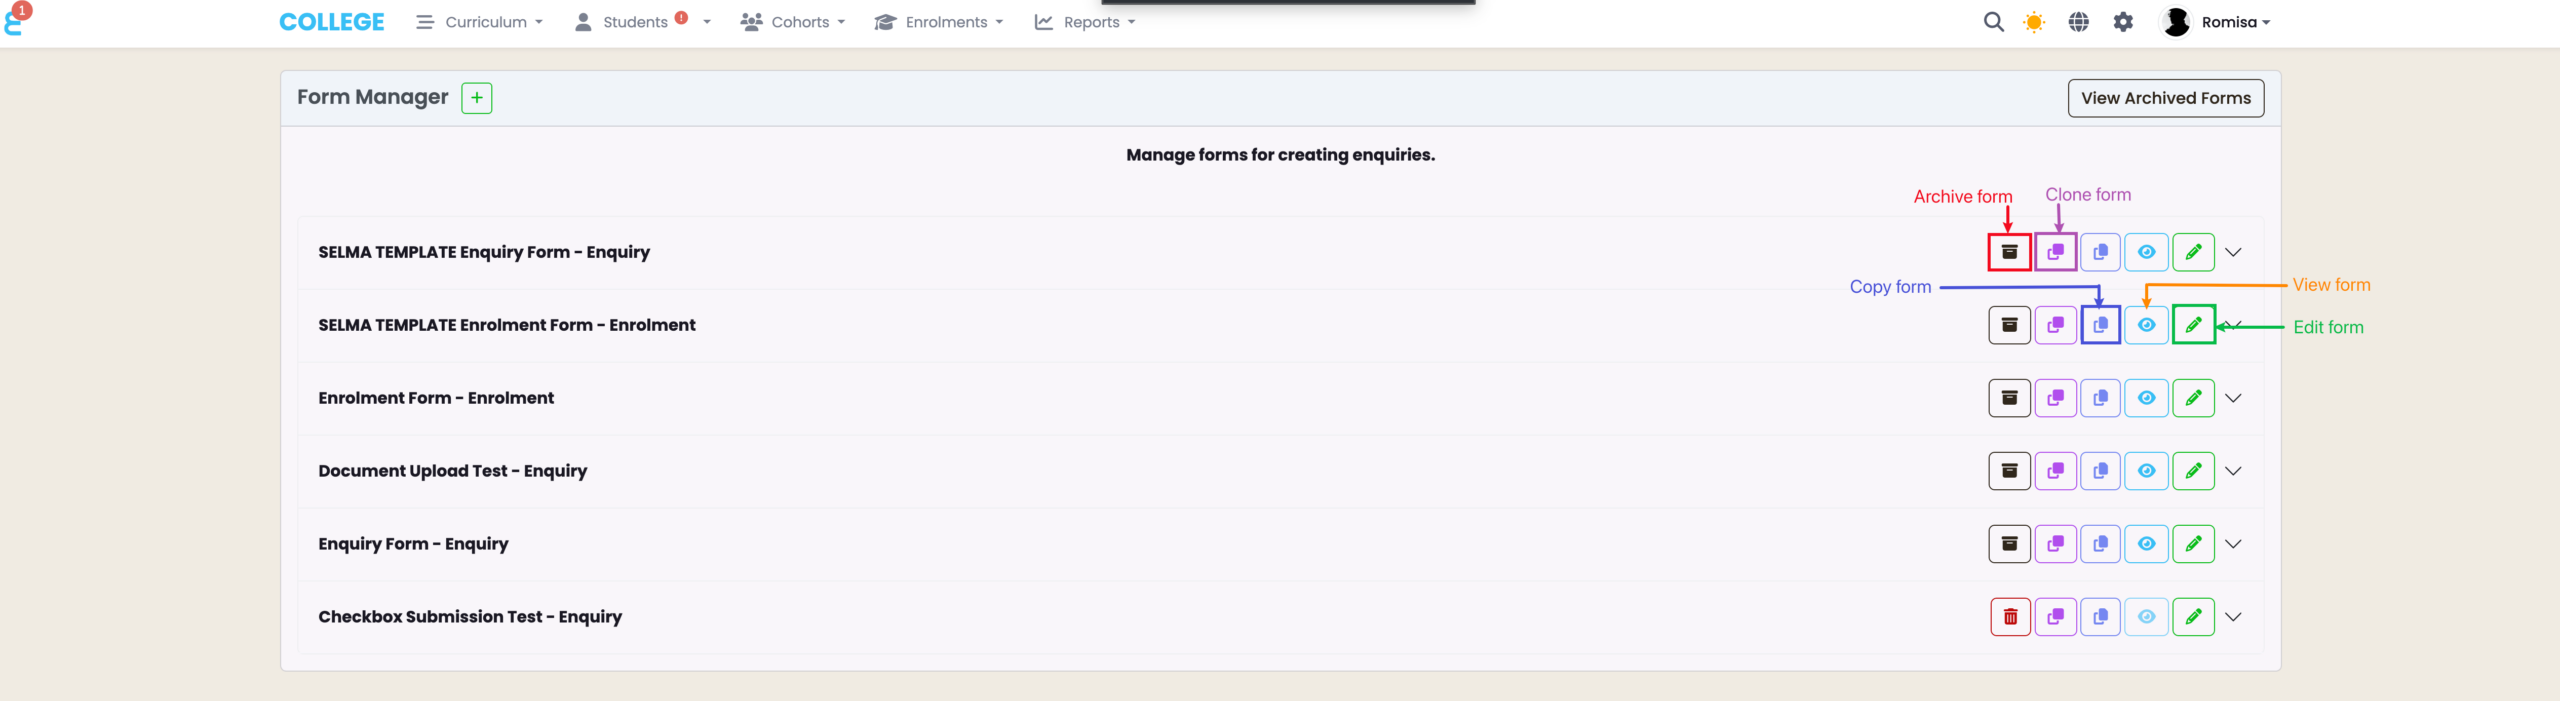
Figure 2. Form Manager Interface
Manage your forms by using the Quick Actions buttons to archive, clone, copy URL, view and edit.
Enquiry Form
The Enquiry Form can be used to gather basic information from interested applicants, or complete expression of interest applications.
Enquiry Form Submissions from New Applicants
- A unique Student record is created with the status “Enquiry“.
Enquiry Form Submissions from Returning Students
- The existing Student profile is updated.
Figure 3i. Set-Up the Enquiry Form
Use “Form Fields” to drag and drop fields to the “Form Editor” (green), and use the Form Editor to edit field labels, add “help” messages, and add “Required” fields, as indicated by red asterisks. Set-up the “Form Configuration” on the right-hand panel.
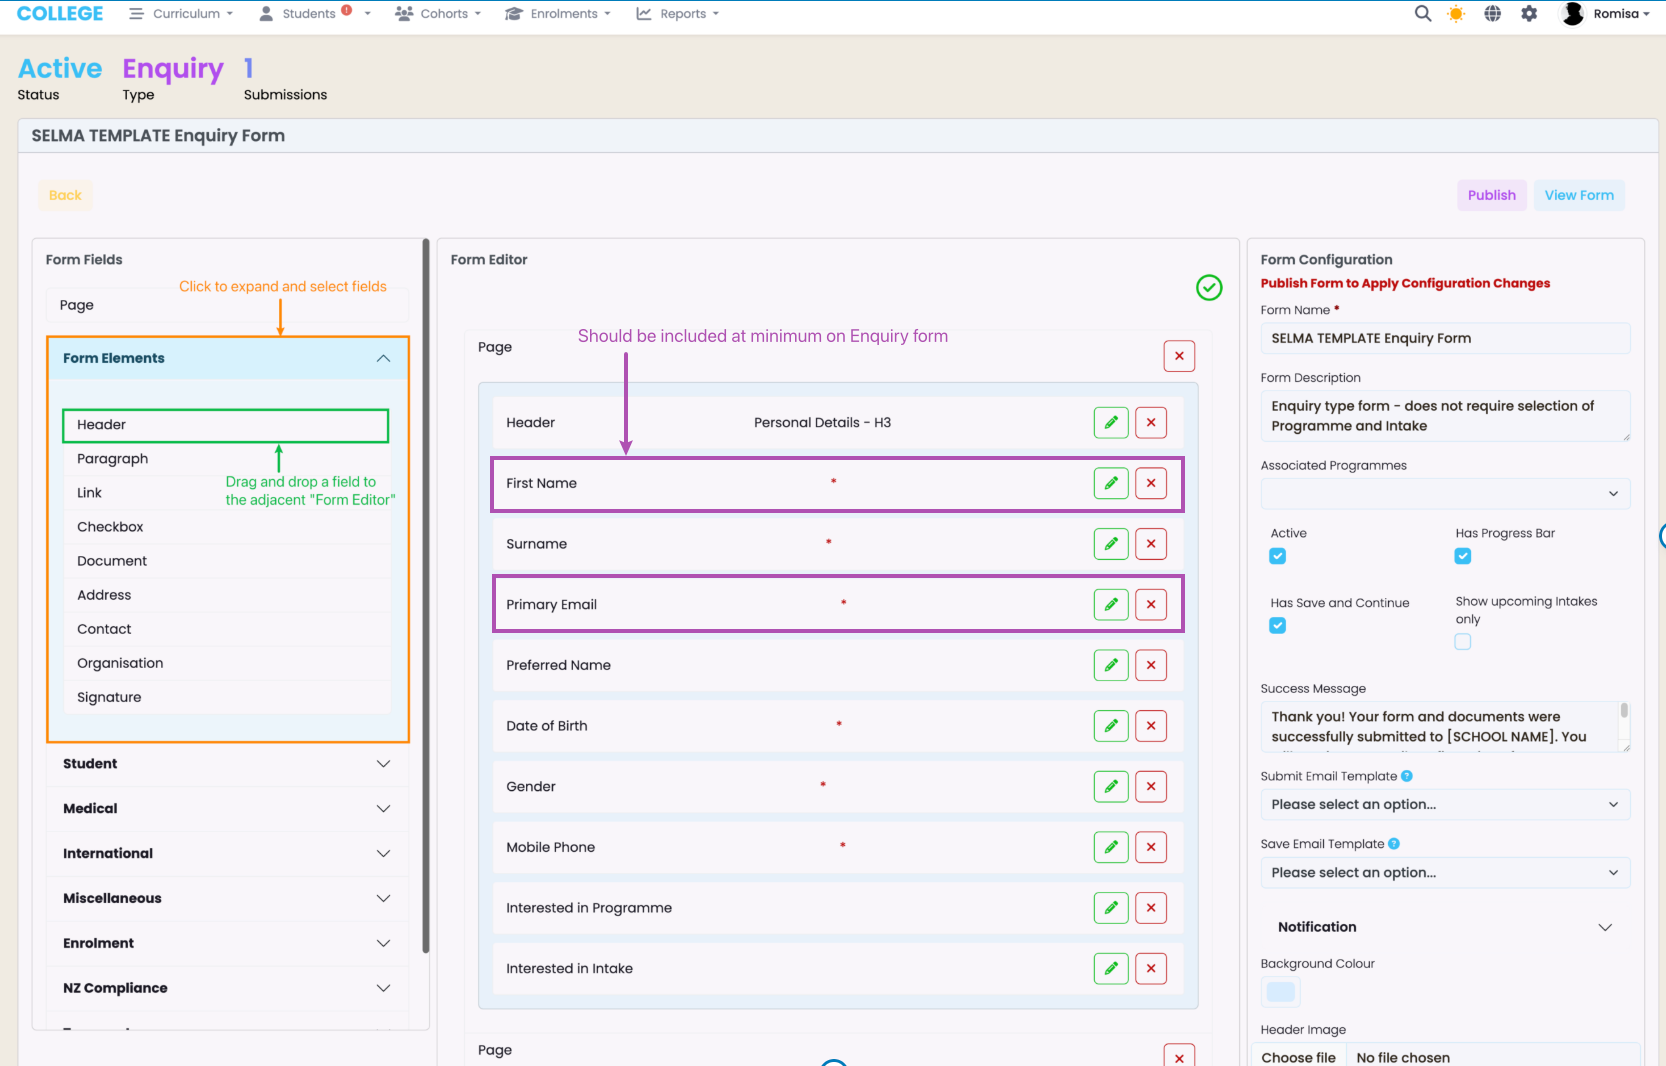
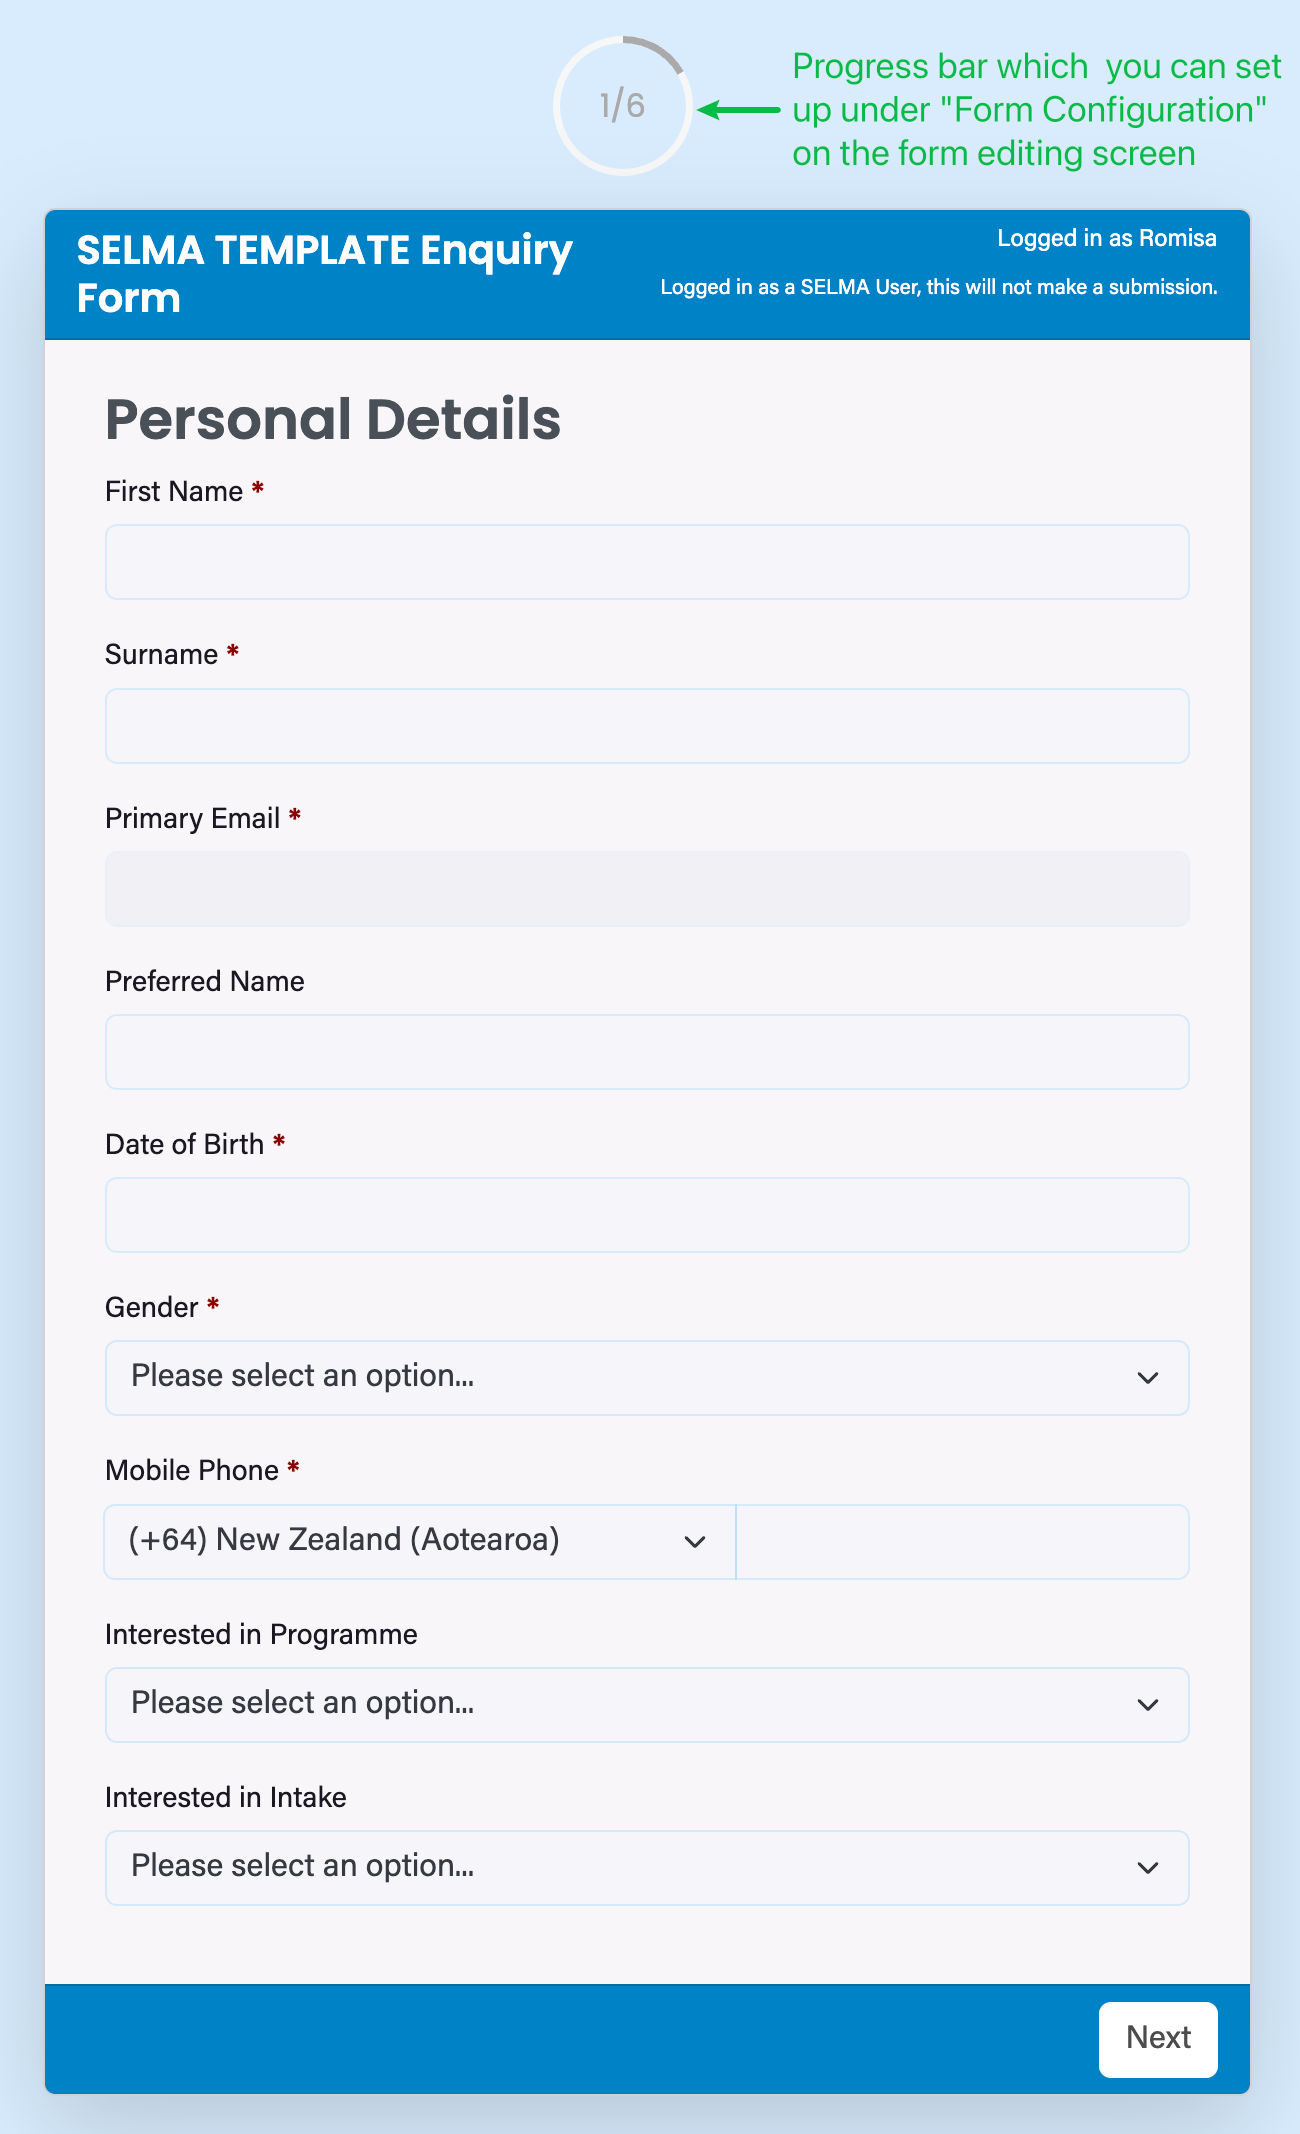
Figure 3ii. View the Enquiry Form
Enrolment Form
The Enrolment Form is used to create an Enrolment record for a Student application.
You can opt to include a Payment integration on your Enrolment form, which is an additional paid feature to your Form Builder.
- If you do not have this feature, please contact SELMA Support to get you started.
Enrolment Form Submissions from New Applicants
- A unique Student profile is created with the status “Enrolled“.
- An Enrolment is created on the Intake selected by the Student.
Enrolment Form Submissions from Returning Students
- The existing Student profile is updated.
- An Enrolment is created on the Intake selected by the Student.
Figure 4i. Set-Up the Enrolment Form
Minimum required fields are indicated by red asterisks, and include First Name, Primary Email and the Intake the Student is interested in.
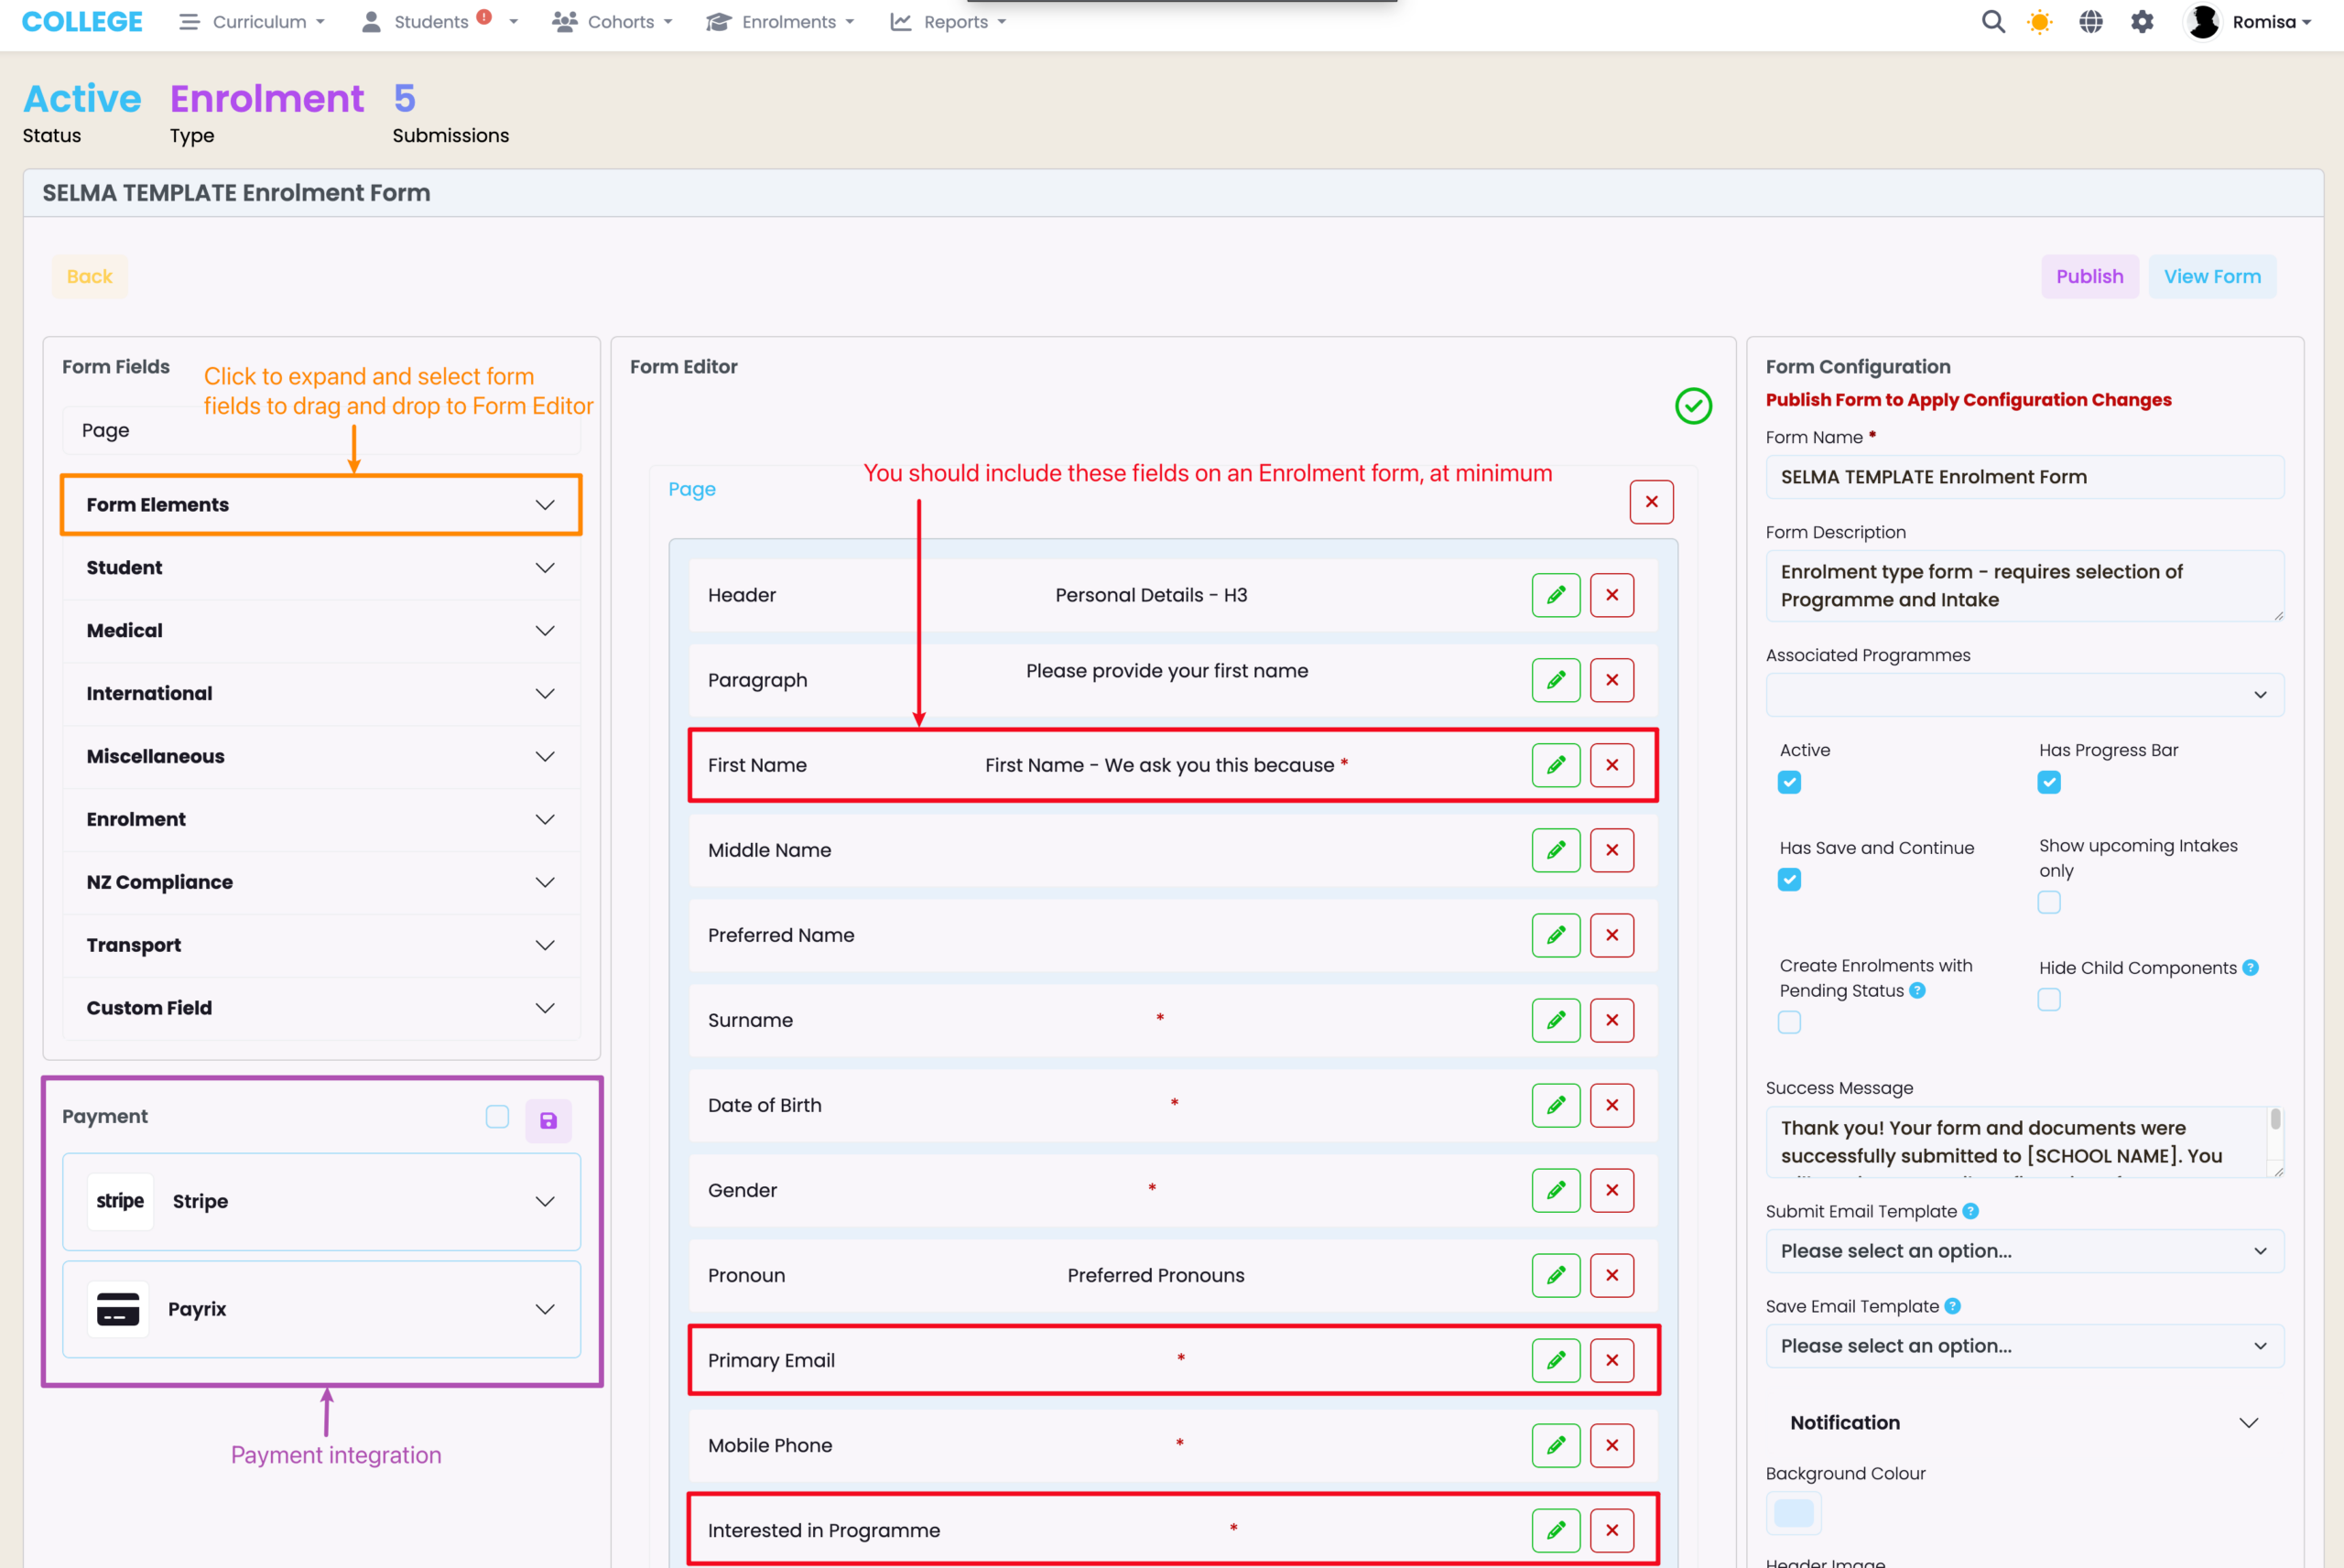
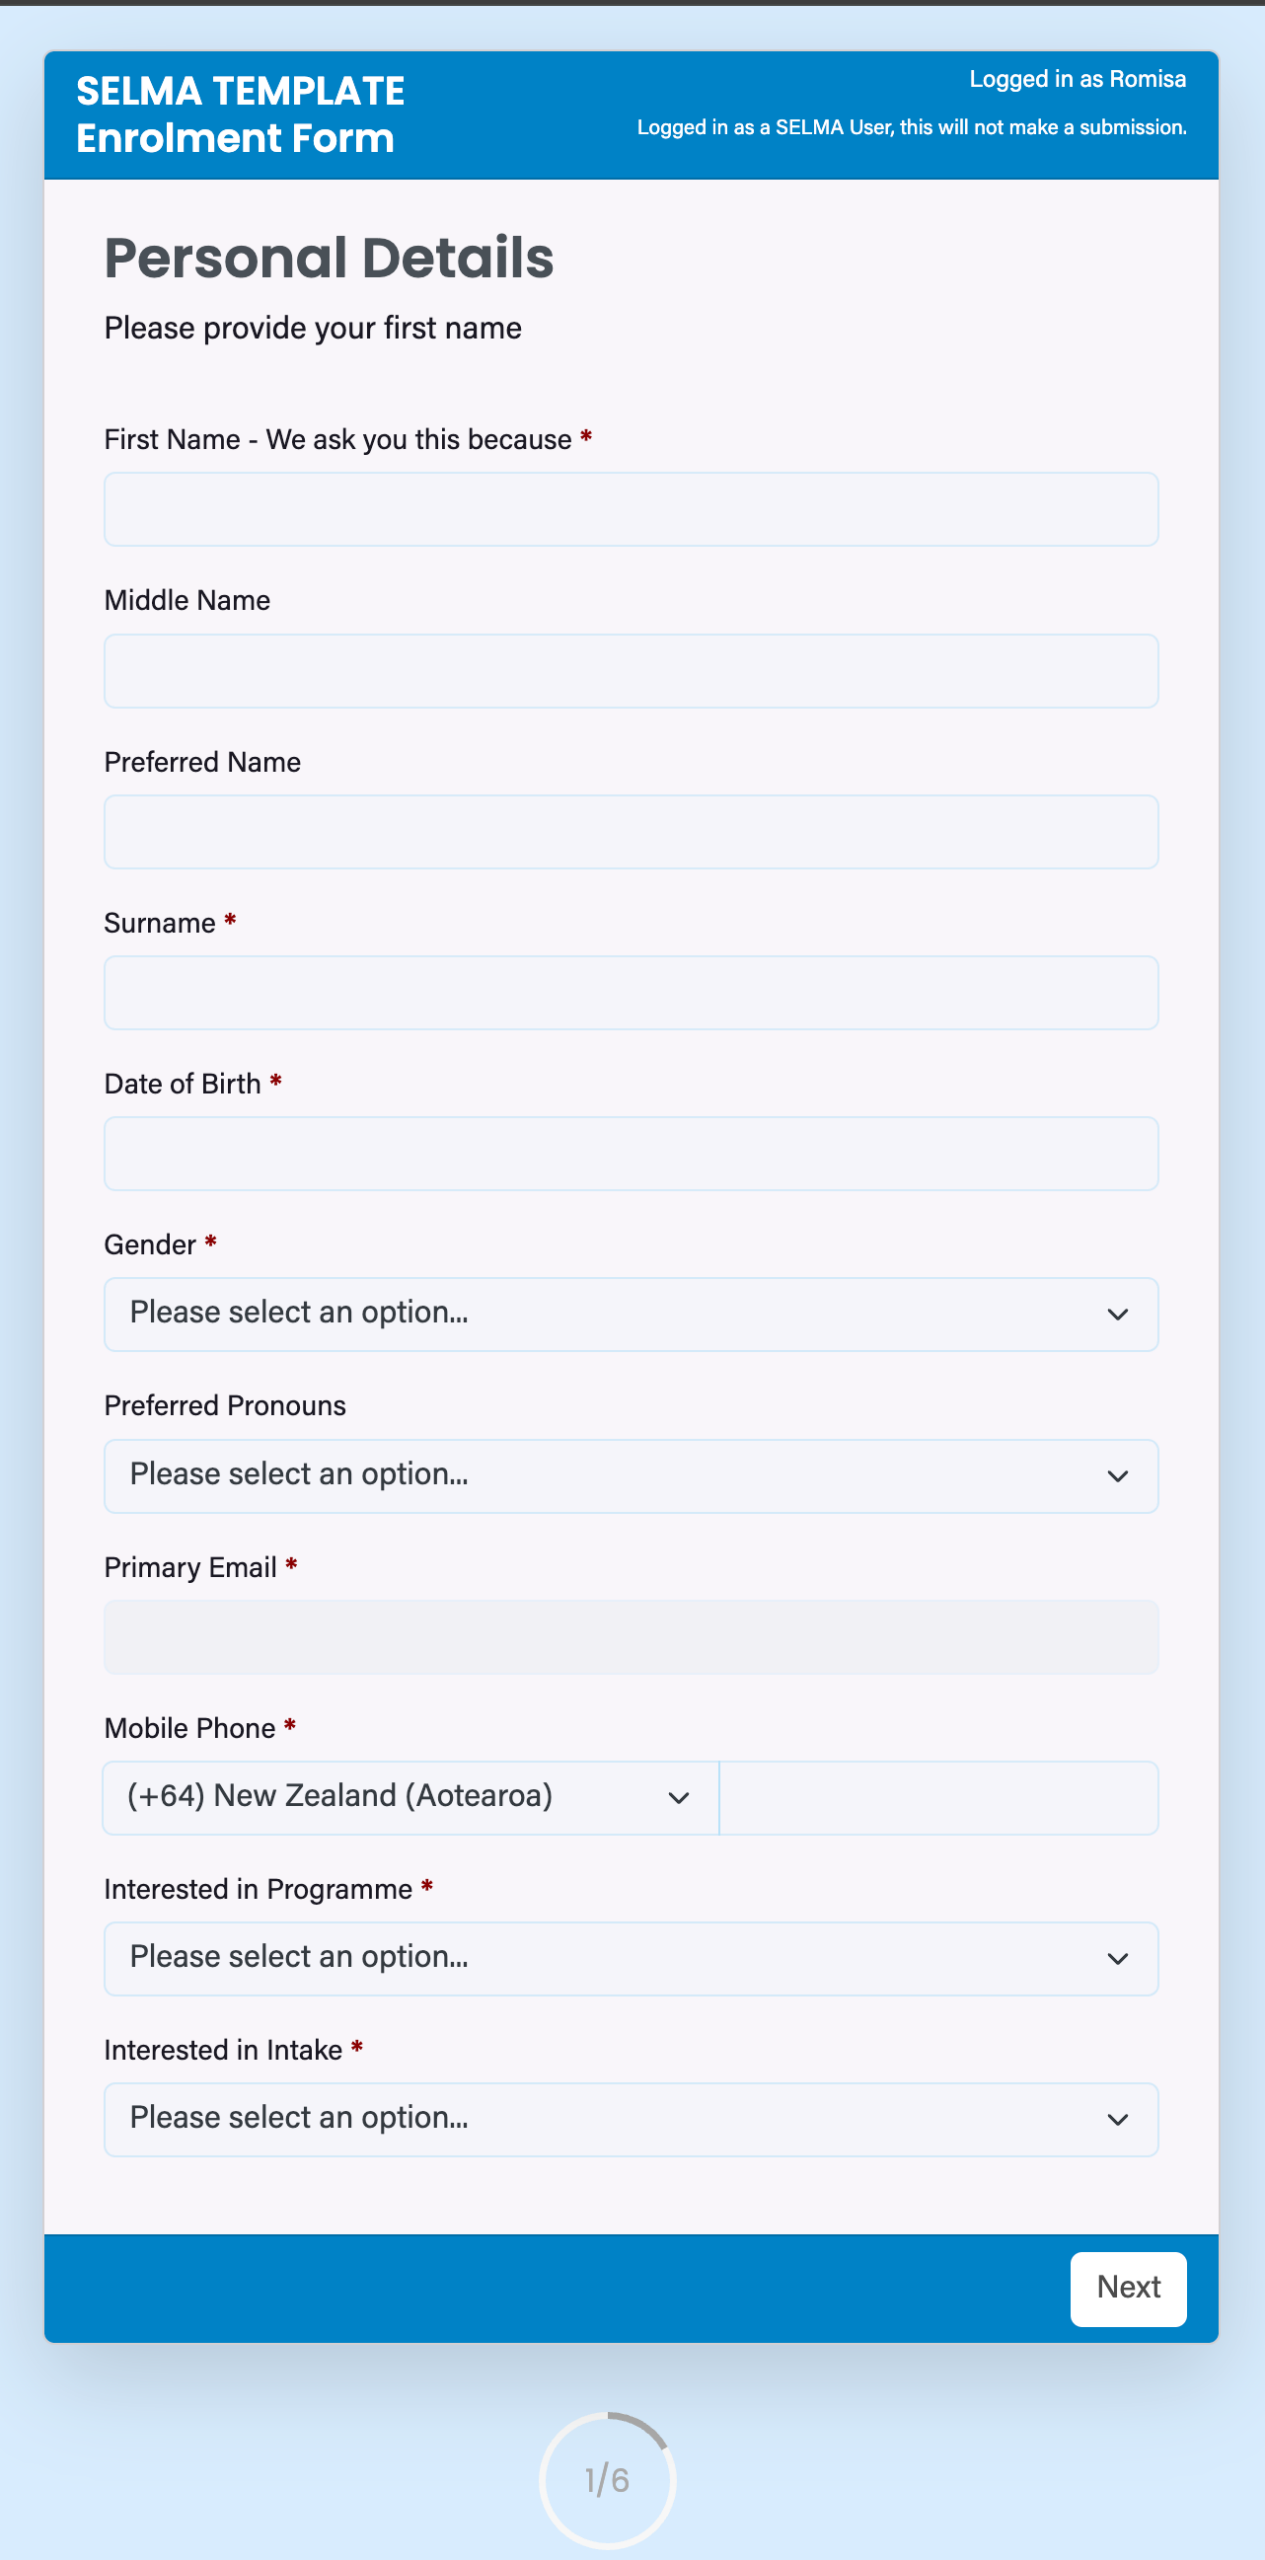
Figure 4ii. View the Enrolment Form
Related Articles
For more information on setting-up forms and viewing submissions, please refer to the following articles:
.