
This Section discusses how to use each of the tabs in an Enrolment Profile, as seen in order.
- Enrolment Profile Tabs
Enrolment Tab
Overview
Enrolment Side-Panel
The side panel displays blue hyperlinks which take you to their relevant pages e.g. clicking the student ID hyperlink takes you to the Student profile (Figures 1i-ii.).
Components
Beside the list of Components, you can also see counts showing the total Weighted Sum of Components, the number of Components and the number of “Required” Components.
Click the “Grade Selected” button to grade selected Components, or the “Complete Selected” button to change their Completion Code Statuses (Figure 1i.).
- NOTE: Grade marking is disabled once Enrolment Component Completion Codes are “Completed“, and graded. If you wish to change a grade, you should revert the Completion Code to what it was before grading again.
You may also add/remove Components by clicking the “Map Components” button, and “Bulk Update Enrolment Components” using the purple Actions button (Figure 1iii.).
The Action Button
(Figure 1iii.)
The purple action button at the top of the screen allows you to:
- Send emails and text messages to Students
- Run the Status Wizard
- You may change the Enrolment Status to Complete, Failed or Withdrawn etc. using the Status Wizard.
- Notes:
- Ensure you use the Status Wizard to indicate a “Withdrawal” – NOT the editable Withdrawal fields under the “Results Information” section.
- Note: All “Required” Enrolment Components must be Completed to be able to change the Enrolment Status to “Complete”.
- Notes:
- You may change the Enrolment Status to Complete, Failed or Withdrawn etc. using the Status Wizard.
- Run Completion Rules which updates Components based on a set of conditions
- Completion Rules are set at the Programme level.
- See Curriculum – Completion Rules for a guide.
- Completion Rules are set at the Programme level.
- Transfer the Enrolment to another Intake
- Add an alert for other System Users, i.e. Staff members, to see attached to an enrolled Student.
PDF Reports
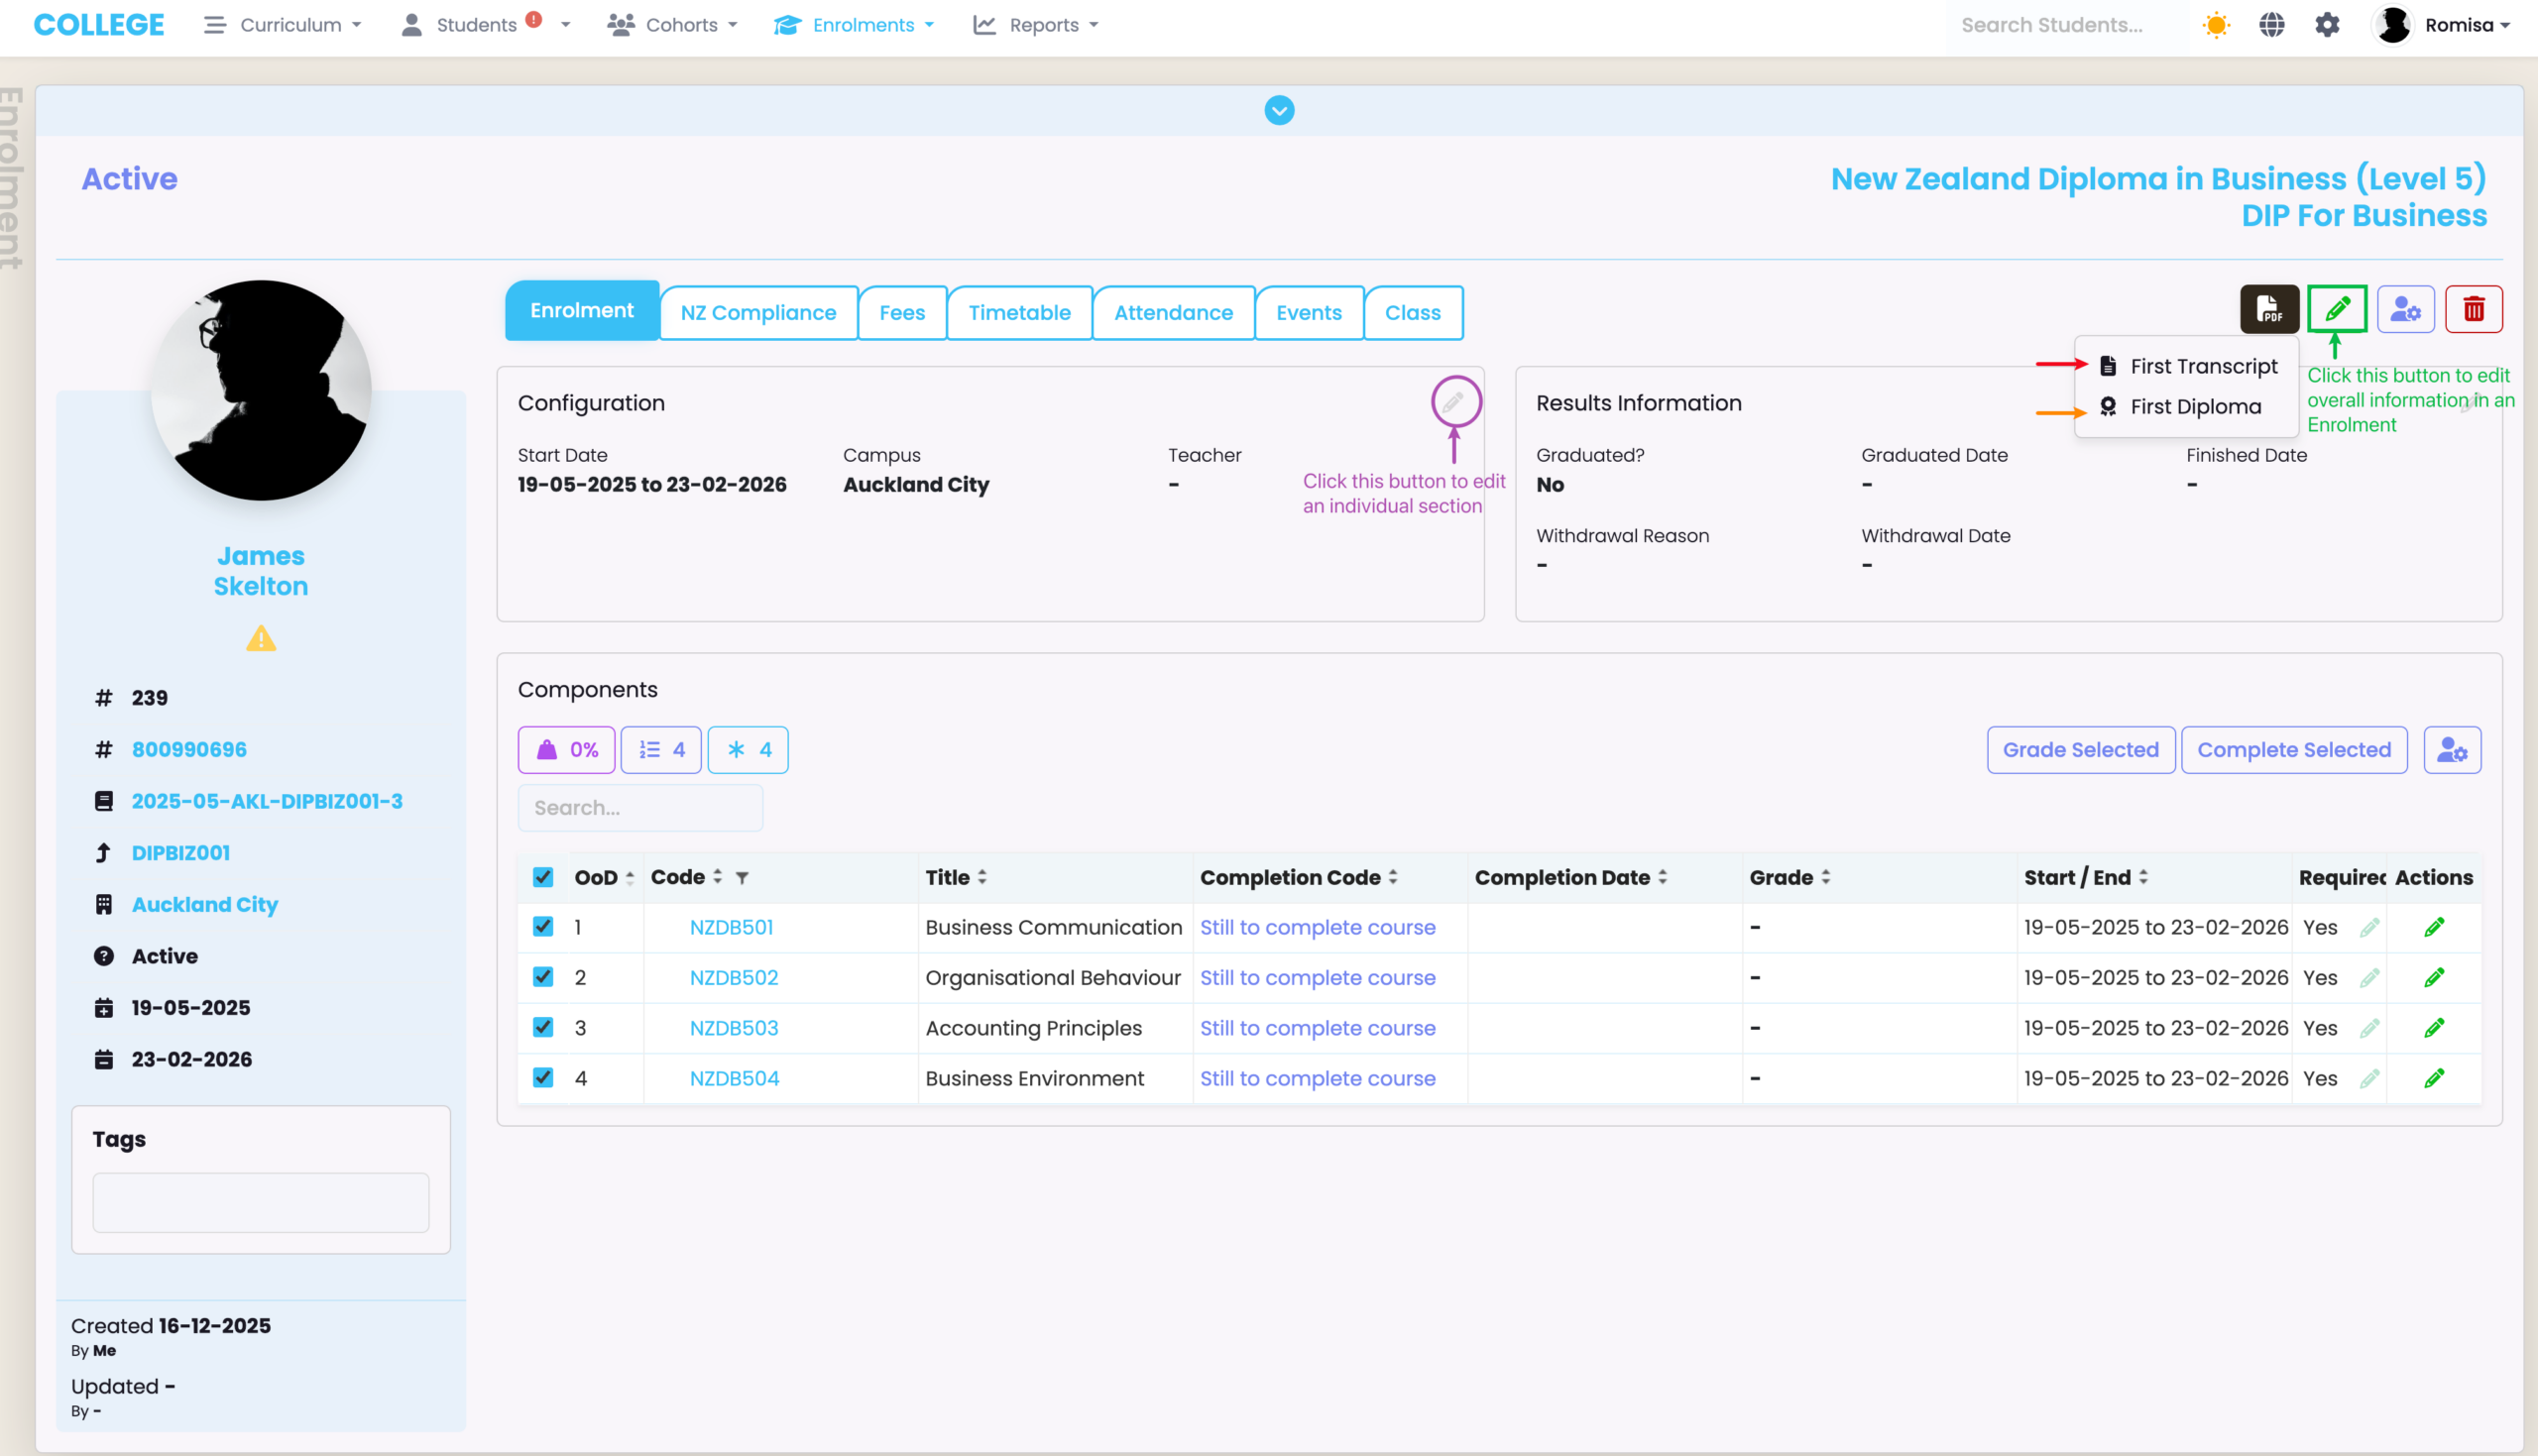
The PDF Reports feature generates multiple official qualification documents to certify an enrolled Student.
The default types which exist are:
- Diplomas: A basic official qualification document that certifies the successful completion of a program of study
- Transcripts (also Record of Achievement): detailed, official record of all courses taken, grades received, and qualifications achieved.
- In other words, you will see the Enrolment Status and Completion Code Status of the Component/s once the Component’s are completed (Figure 1iv.).
For SELMA to build and add custom PDF templates for you, please contact SELMA Support.
Figure 1i. Select Components to grade (orange) and change the Completion Status of Components (red).
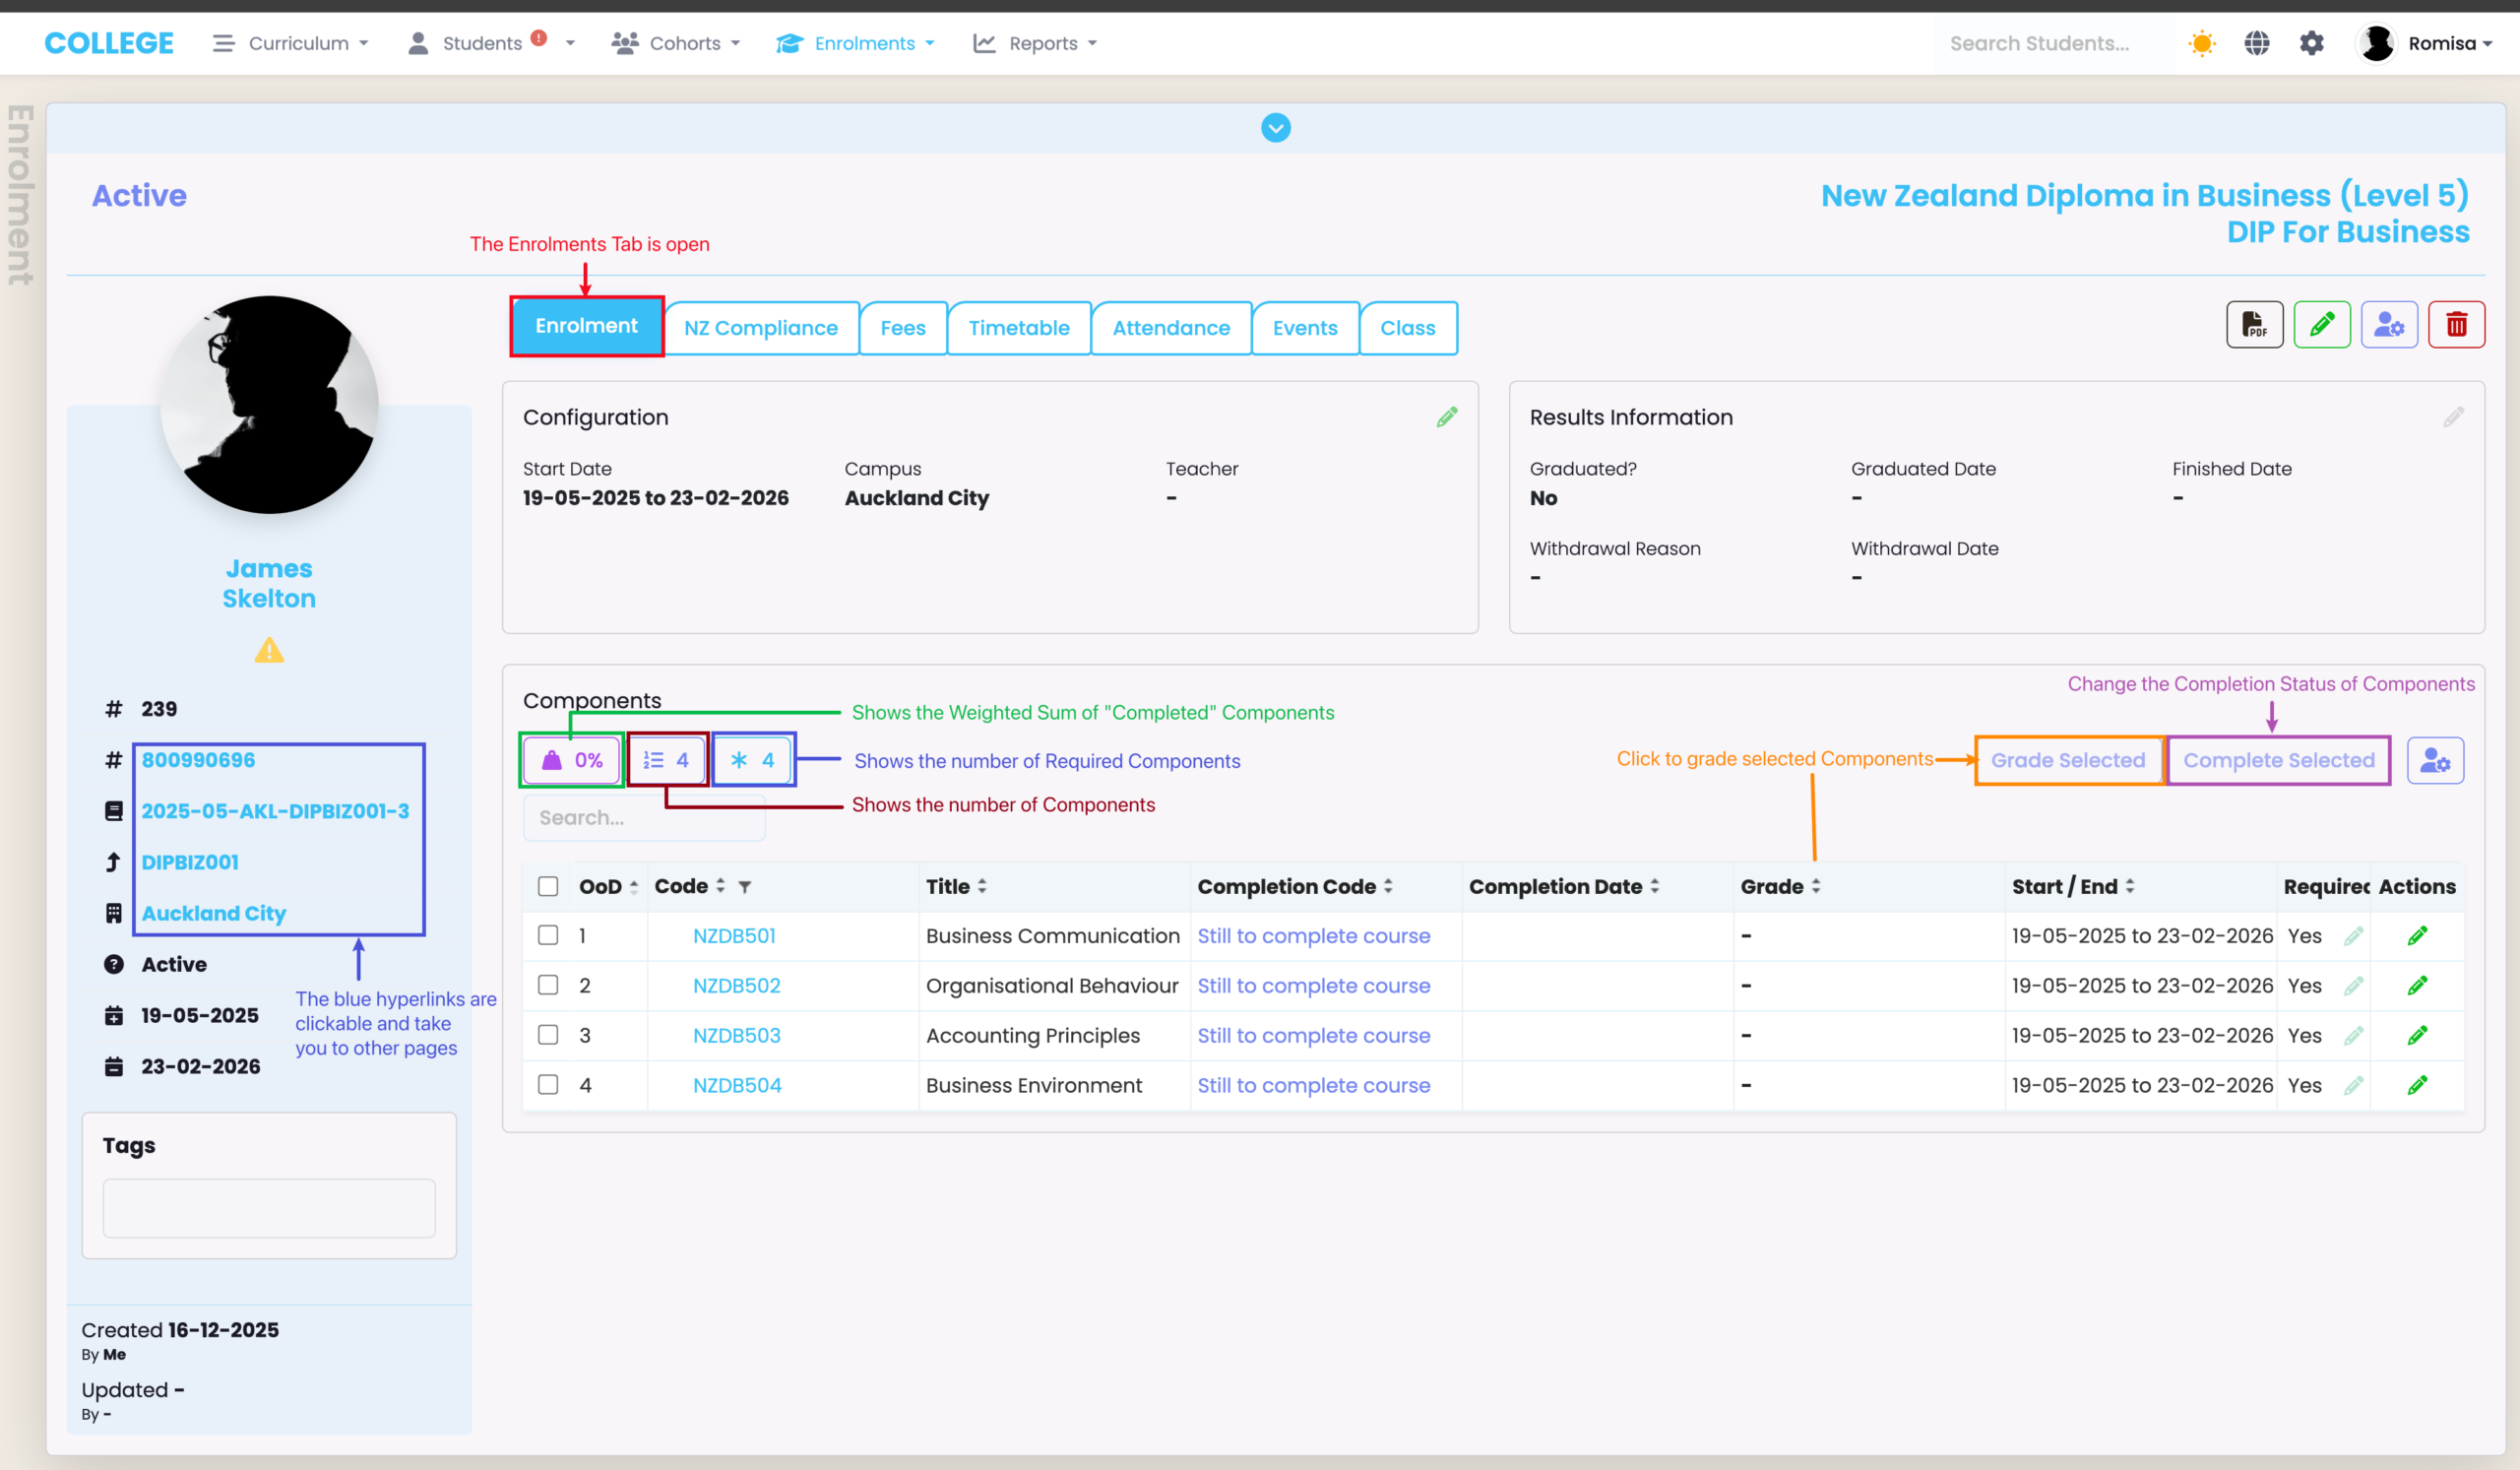
Figure 1ii. Click the “Map Components” button (red) to add/remove Components attached to the Enrolment, and click “Bulk Update Enrolment Components” (orange) to change different field information linked to Components.
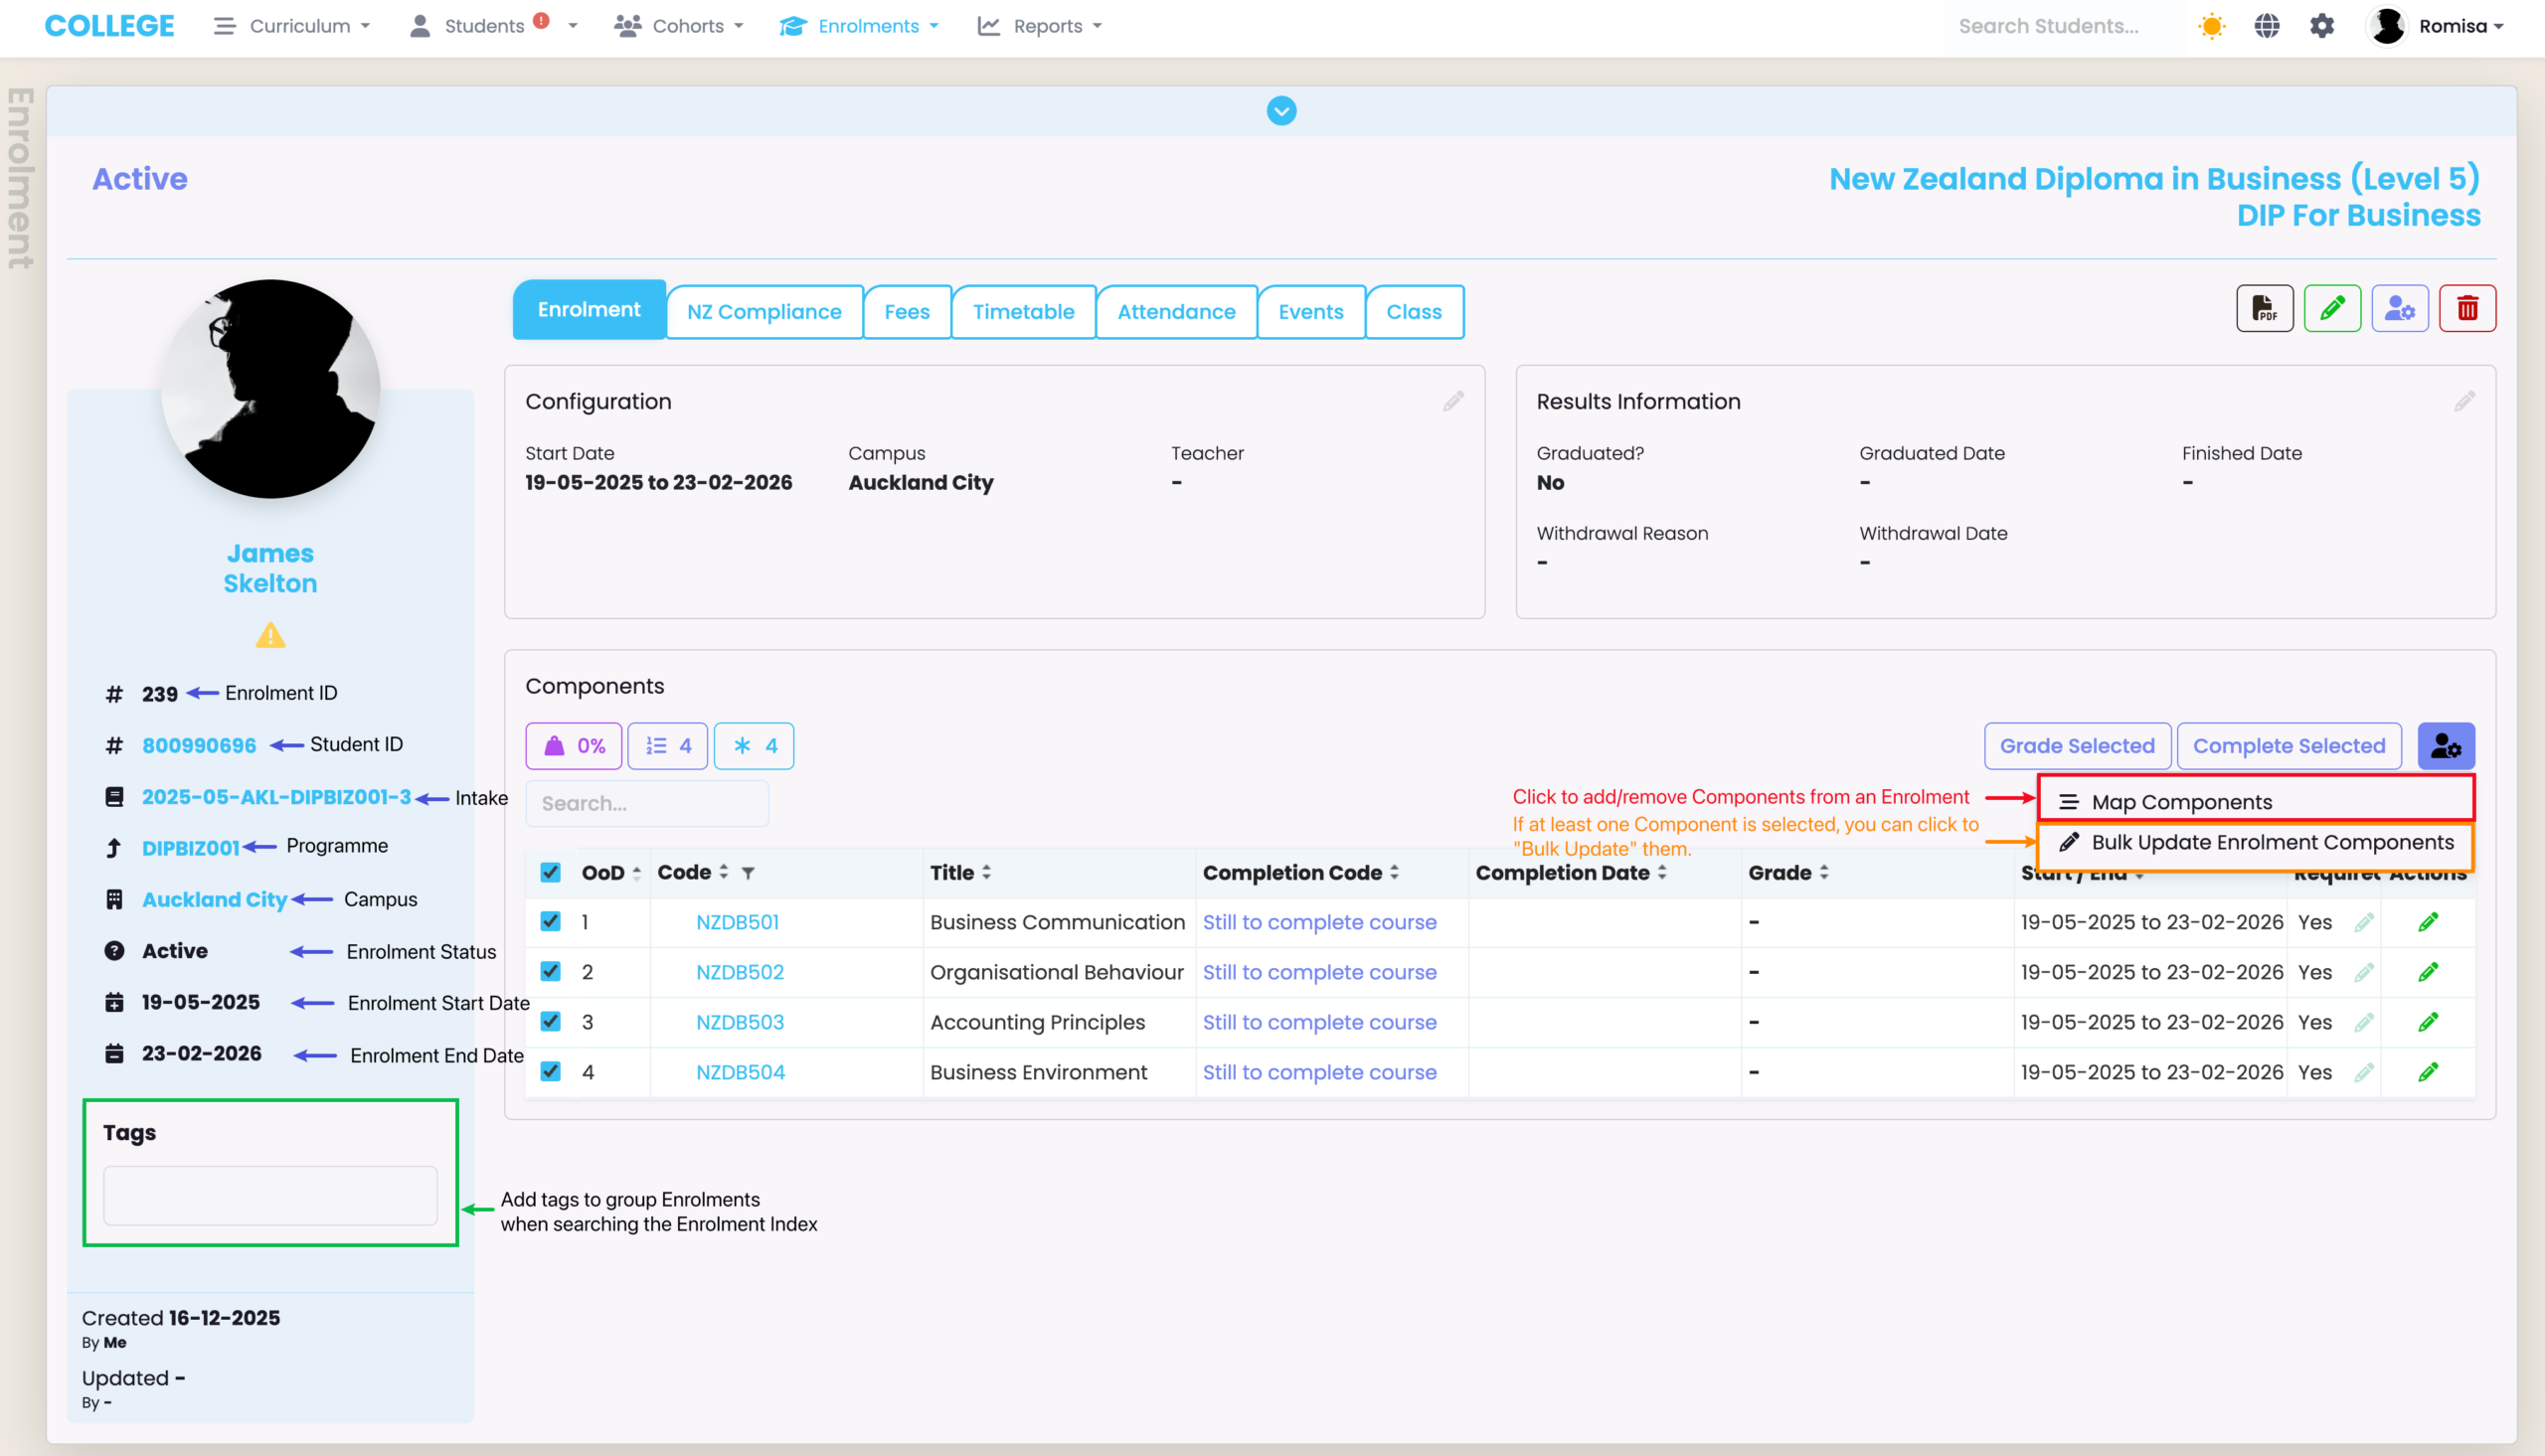
Figure 1iii. Send emails or text messages to enrolled Students (orange), or use the Status Wizard to change their Enrolment Status (green). Other options include running Completion Rules (red), to automatically update the Components’ Completion Code Status for you.
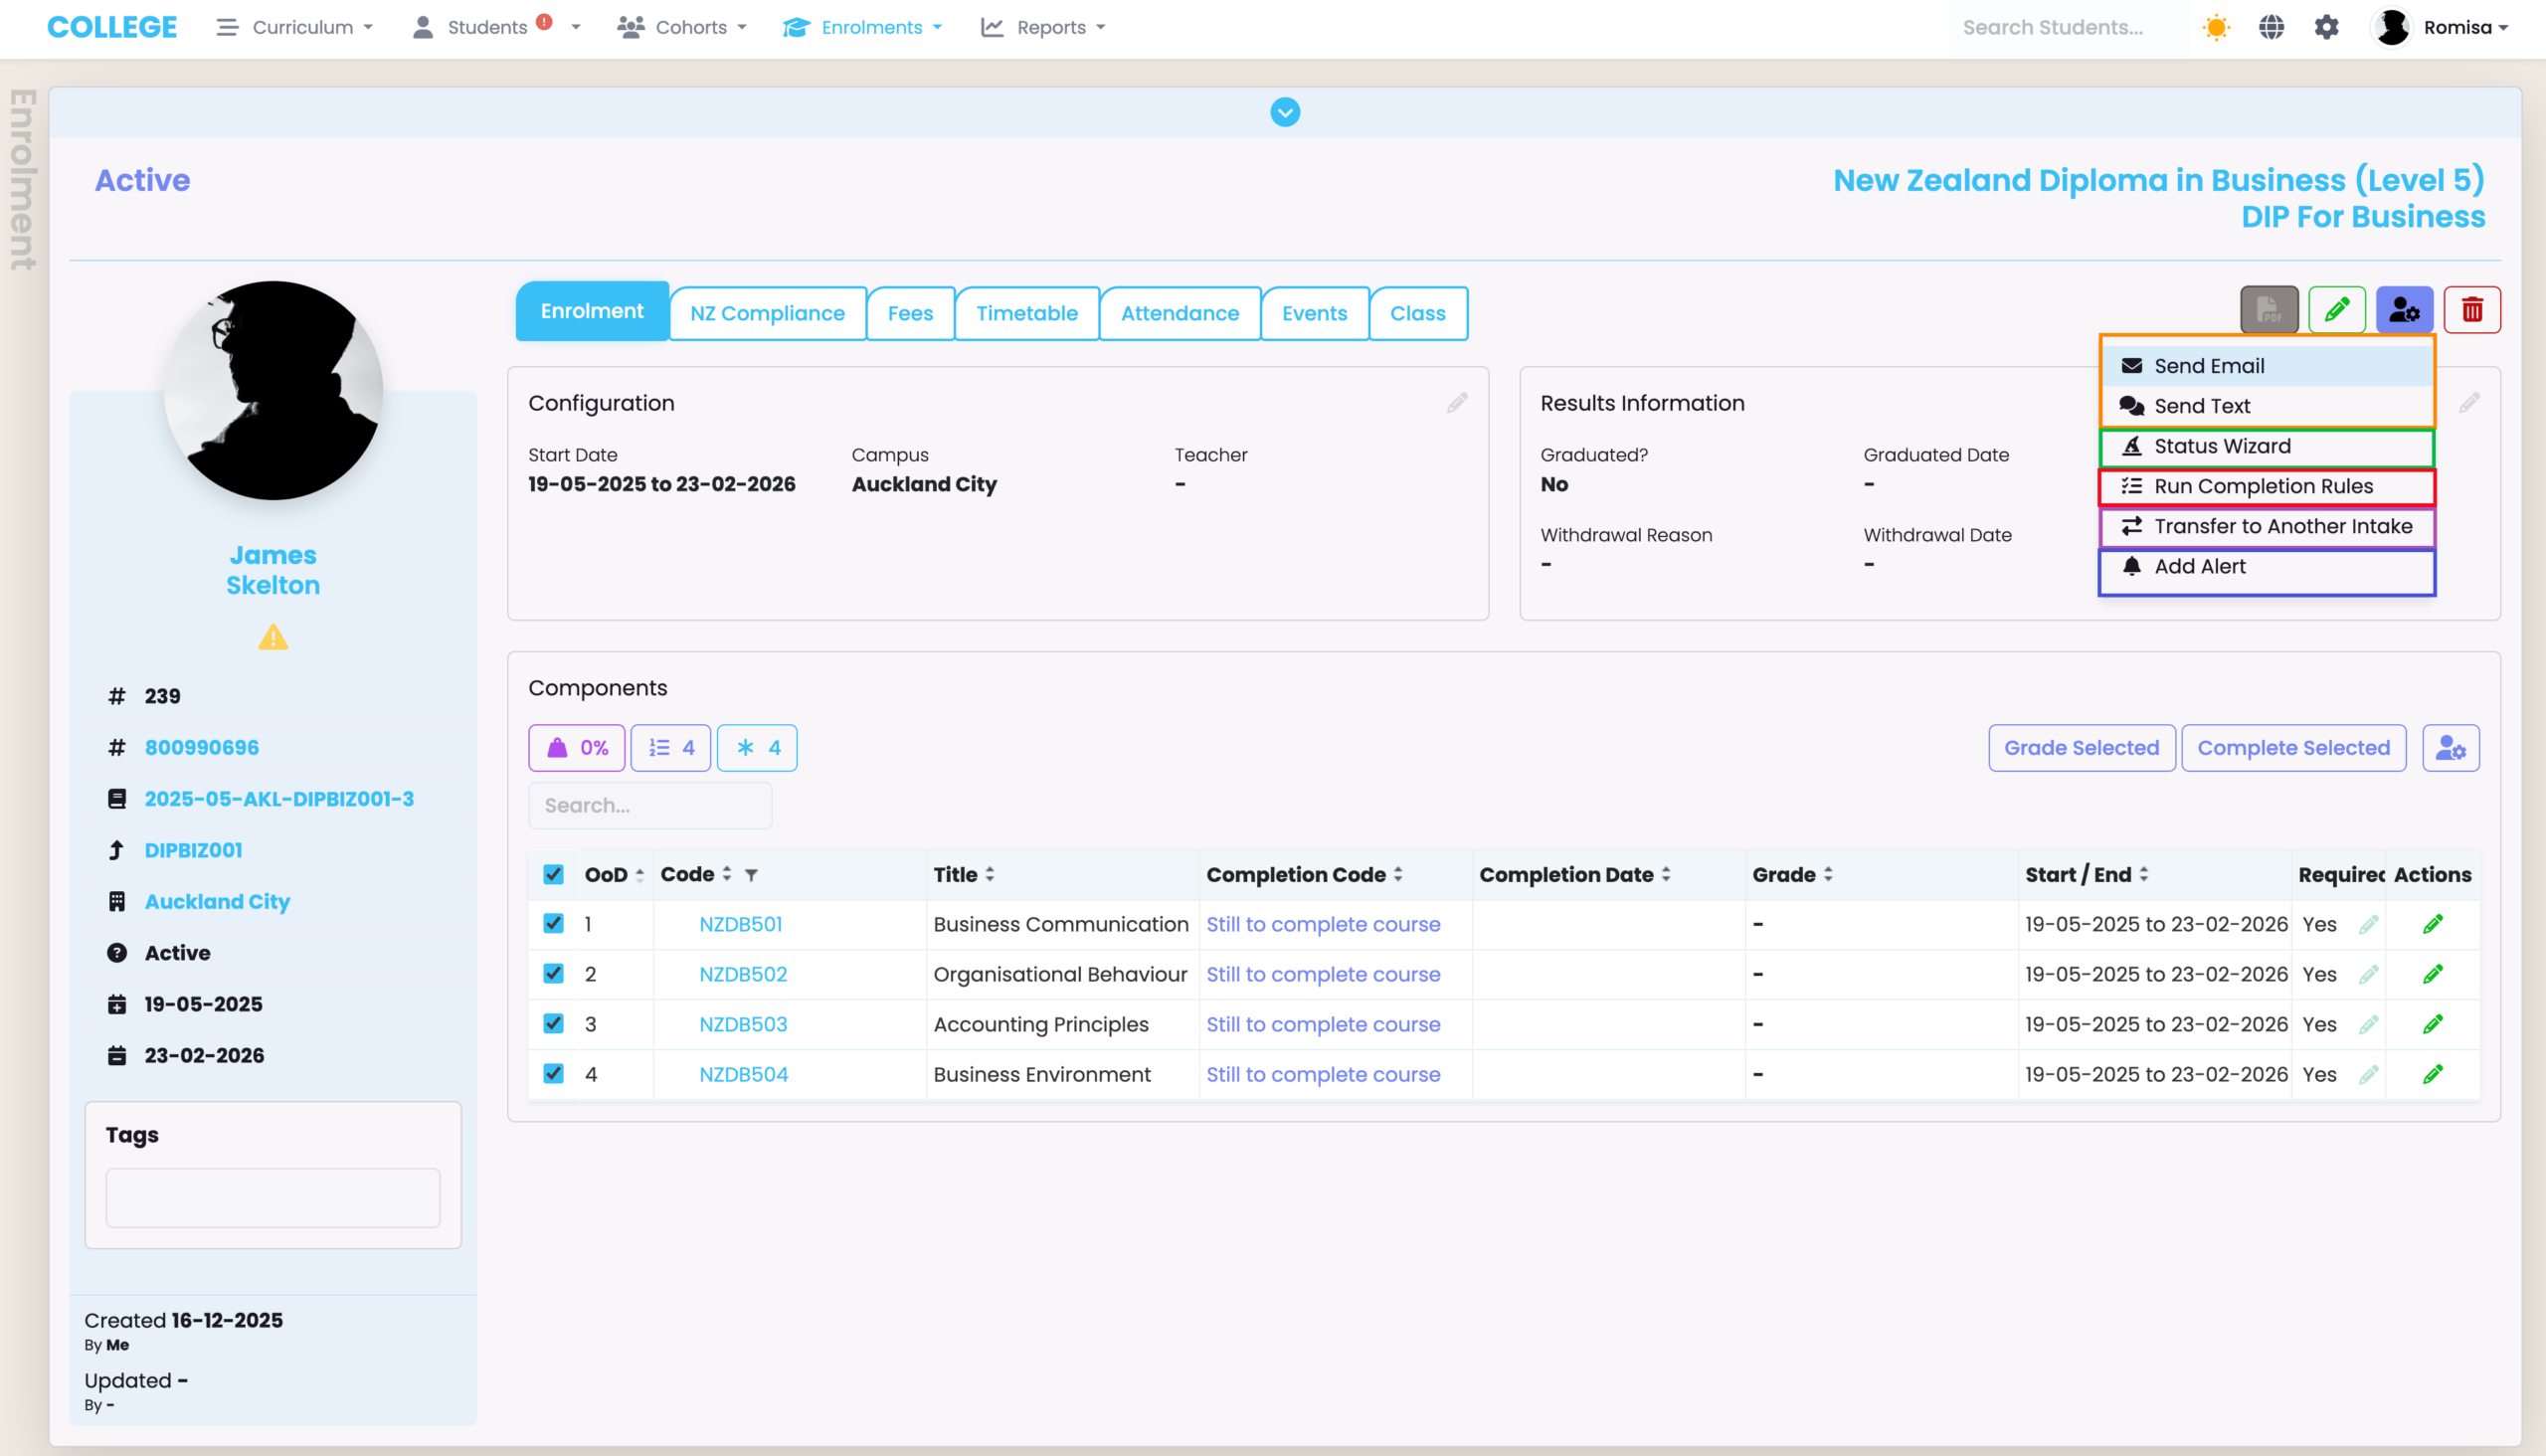
Figure 1iv. Click the “First Transcript” button (red arrow), or the “First Diploma” button (orange) to generate and download a transcript and diploma, respectively. Other custom-built PDF templates are added here, too.
Compliance Tabs
NZ Compliance Tab
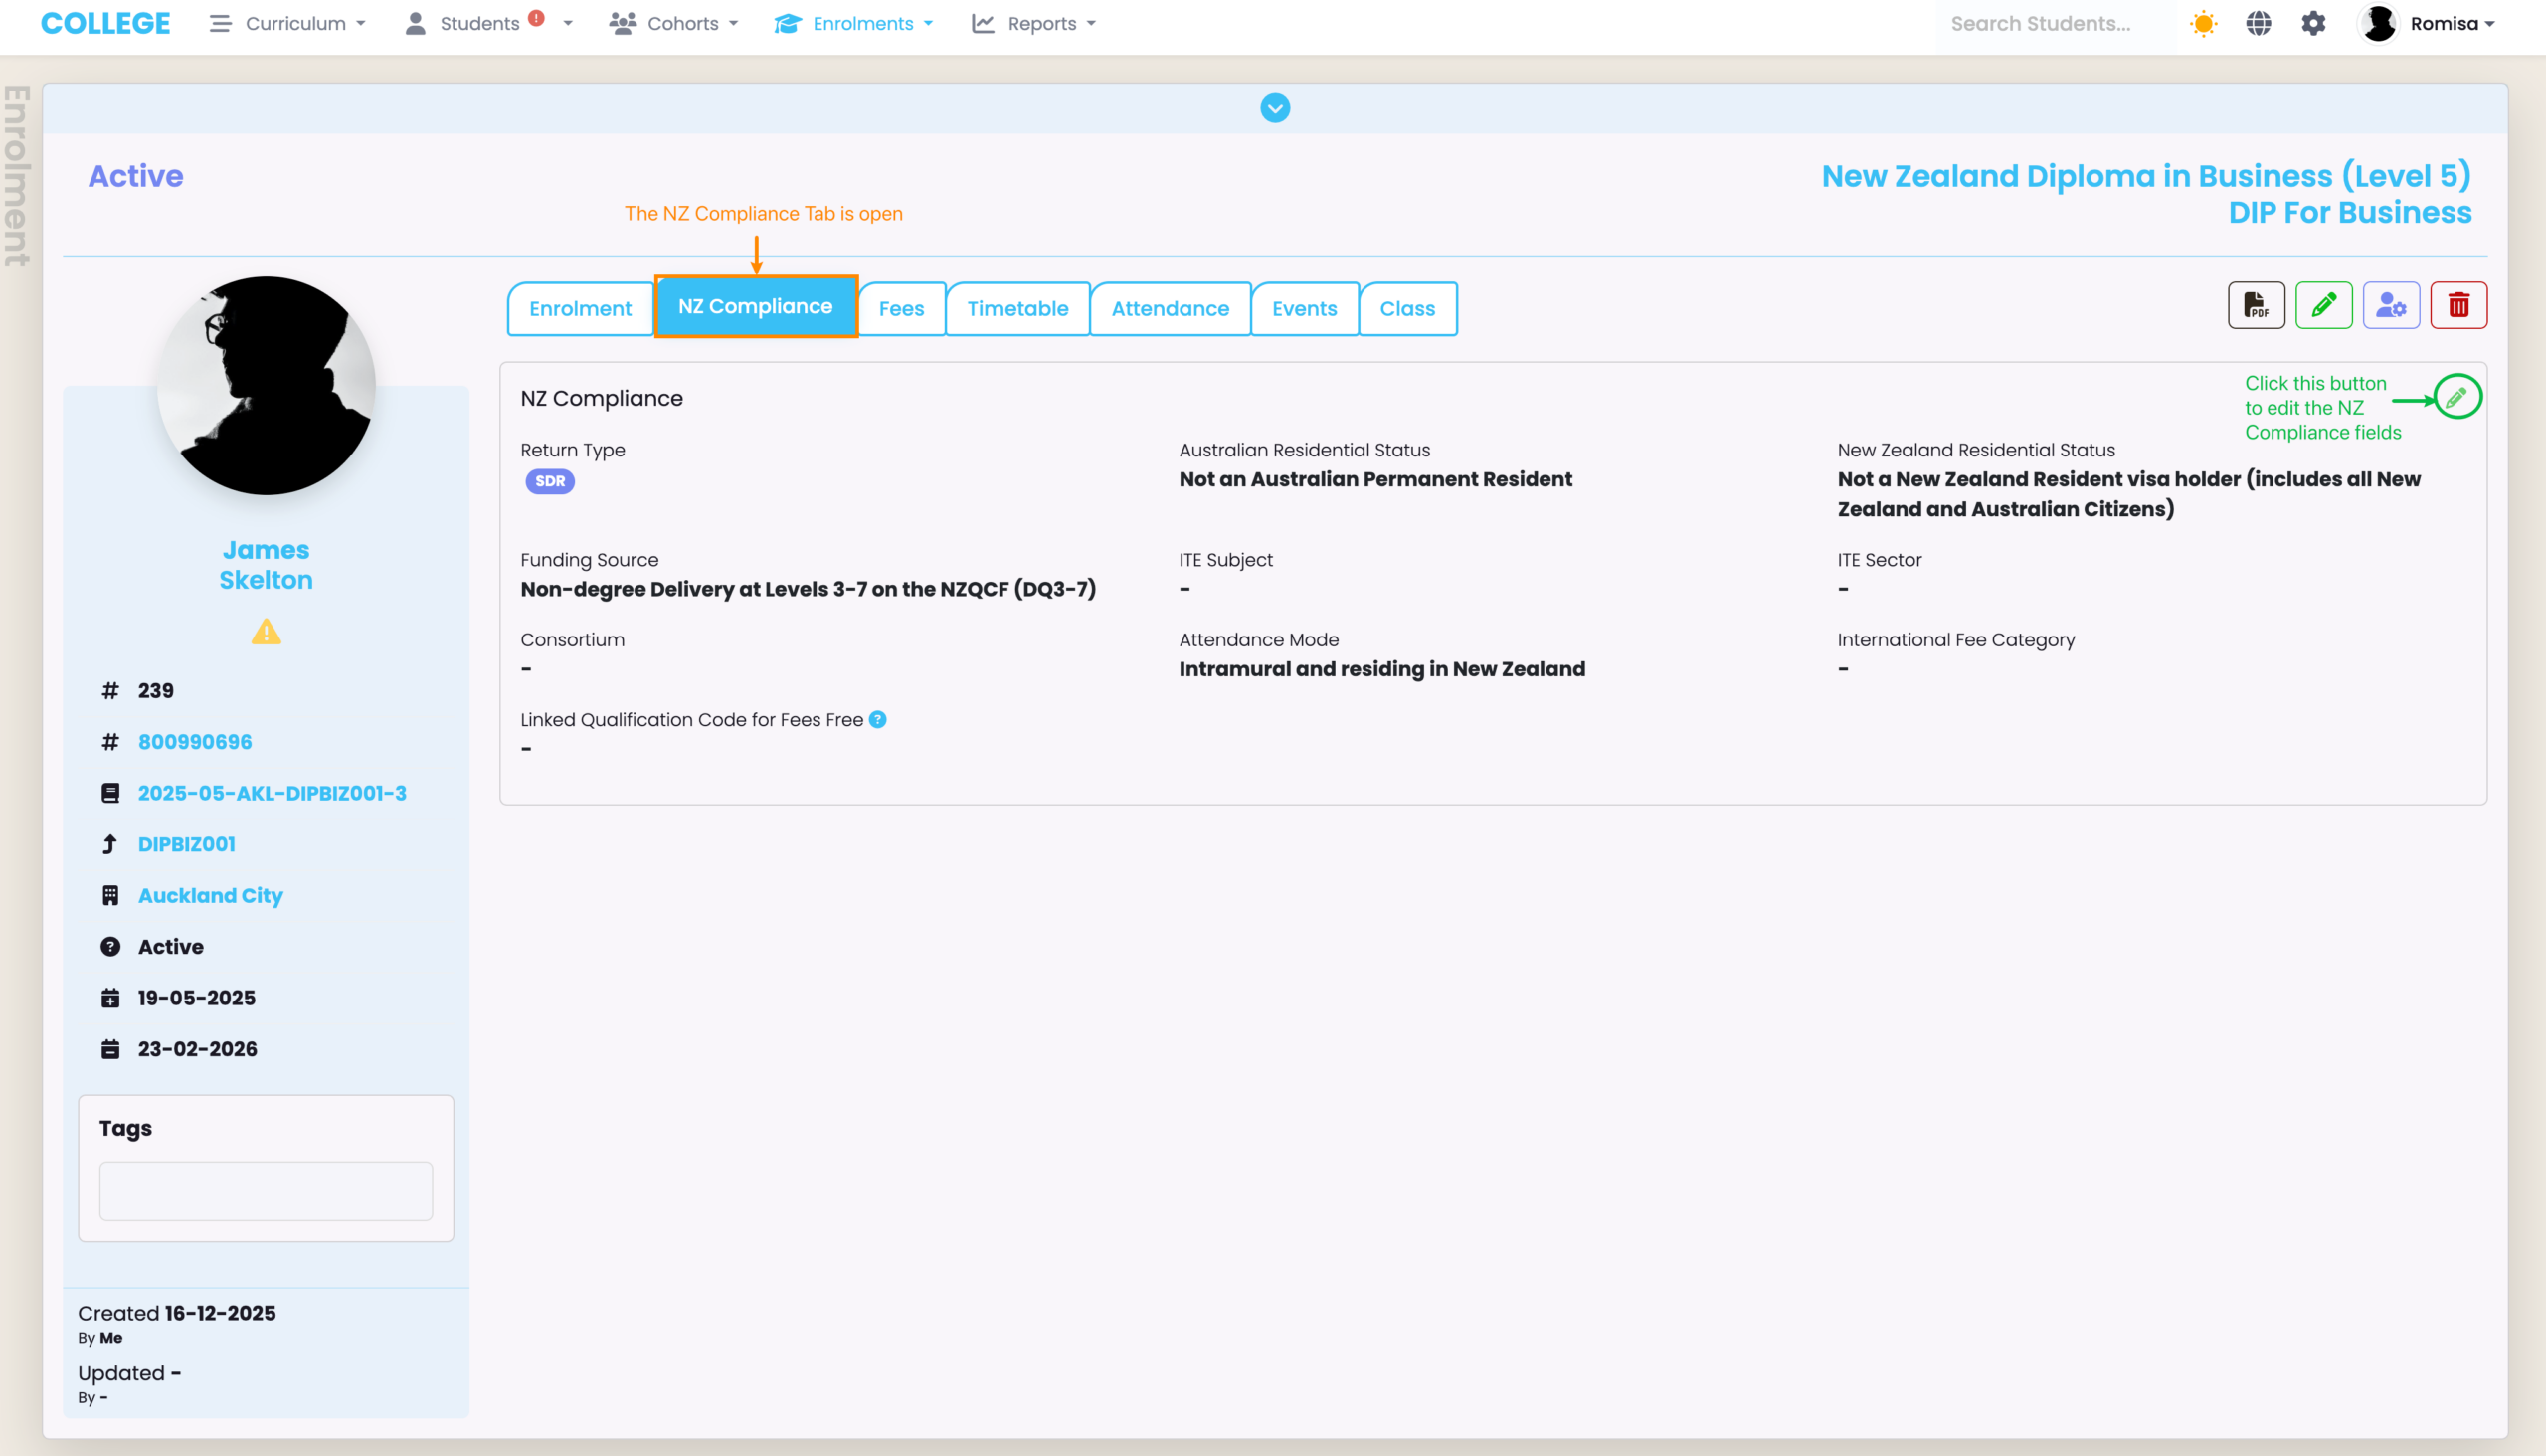
The NZ Compliance tab is visible to NZ providers only (Figure 2.).
Figure 2. Click the pencil icon (green), to edit details seen in the NZ Compliance section.
AUS Compliance Tab
The AUS Compliance tab is visible to AUS providers only (Figure 3.).
Figure 3. Click the pencil icons (green), to edit different sections seen in the AUS Compliance section.

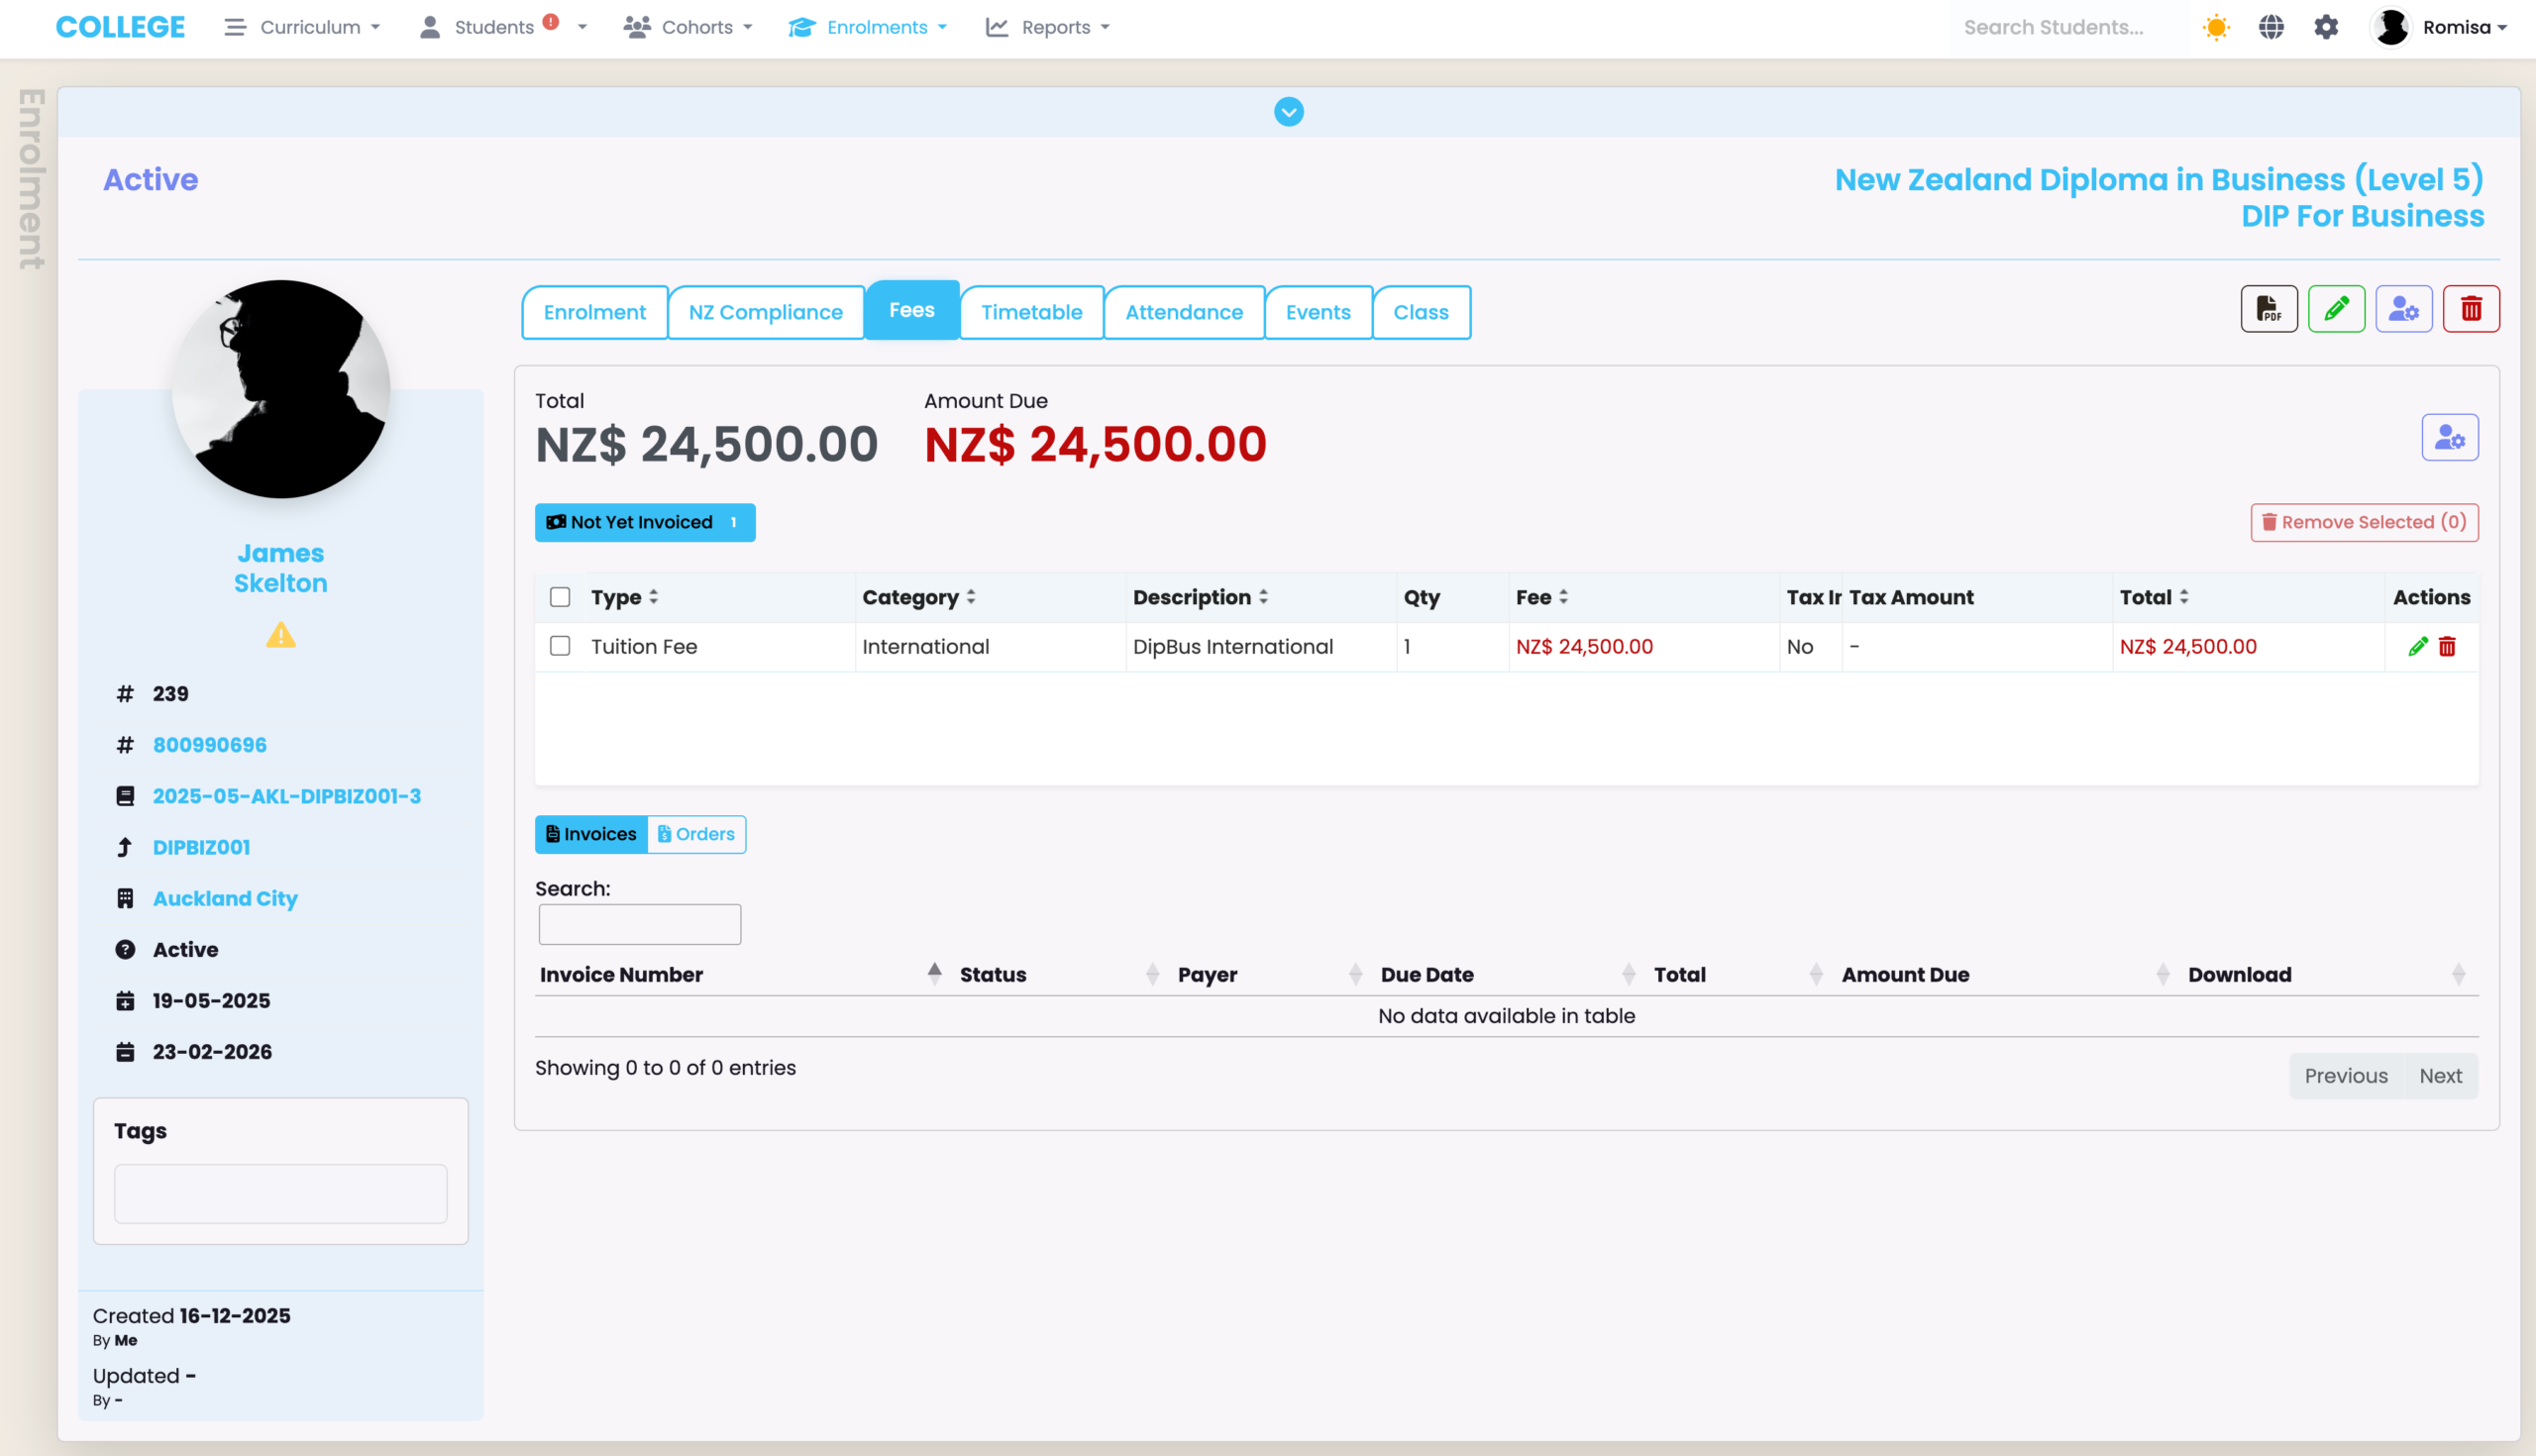
Fees Tab
Fees can be inherited from the Programme and Intake level, or set manually at the Enrolment level (Figure 4.).
See Finance – Fees for more information on Fees Set-Up.
Figure 4. An overview of the Fees tab at the Enrolment level.
Timetable Tab
See Attendance – Create Timetables for more information.
Attendance Tab
See Attendance – Mark Attendance for more information.
Events Tab
See Event Log – The SELMA Event Log for more information.
Class Tab
See Cohorts – Creating and Managing Classes for more information.