An Enrolment profile shows the Components attached to an enrolled Student.
This section discusses the process of creating and managing Enrolments.
In this section:
Enrolment Index
Navigate to Enrolments > Enrolment Index.
Here, you can:
- Search and open existing Enrolments.
- Use the following Search features:
- The basic search which searches by name/ID/email
- The Saved Search which saves specific search criteria you have entered into the Advanced Search fields (see SELMA 101 – Tips and Tricks for Using SELMA productively)
- The Enrolment Status Count which is clickable to filter by Enrolment Status
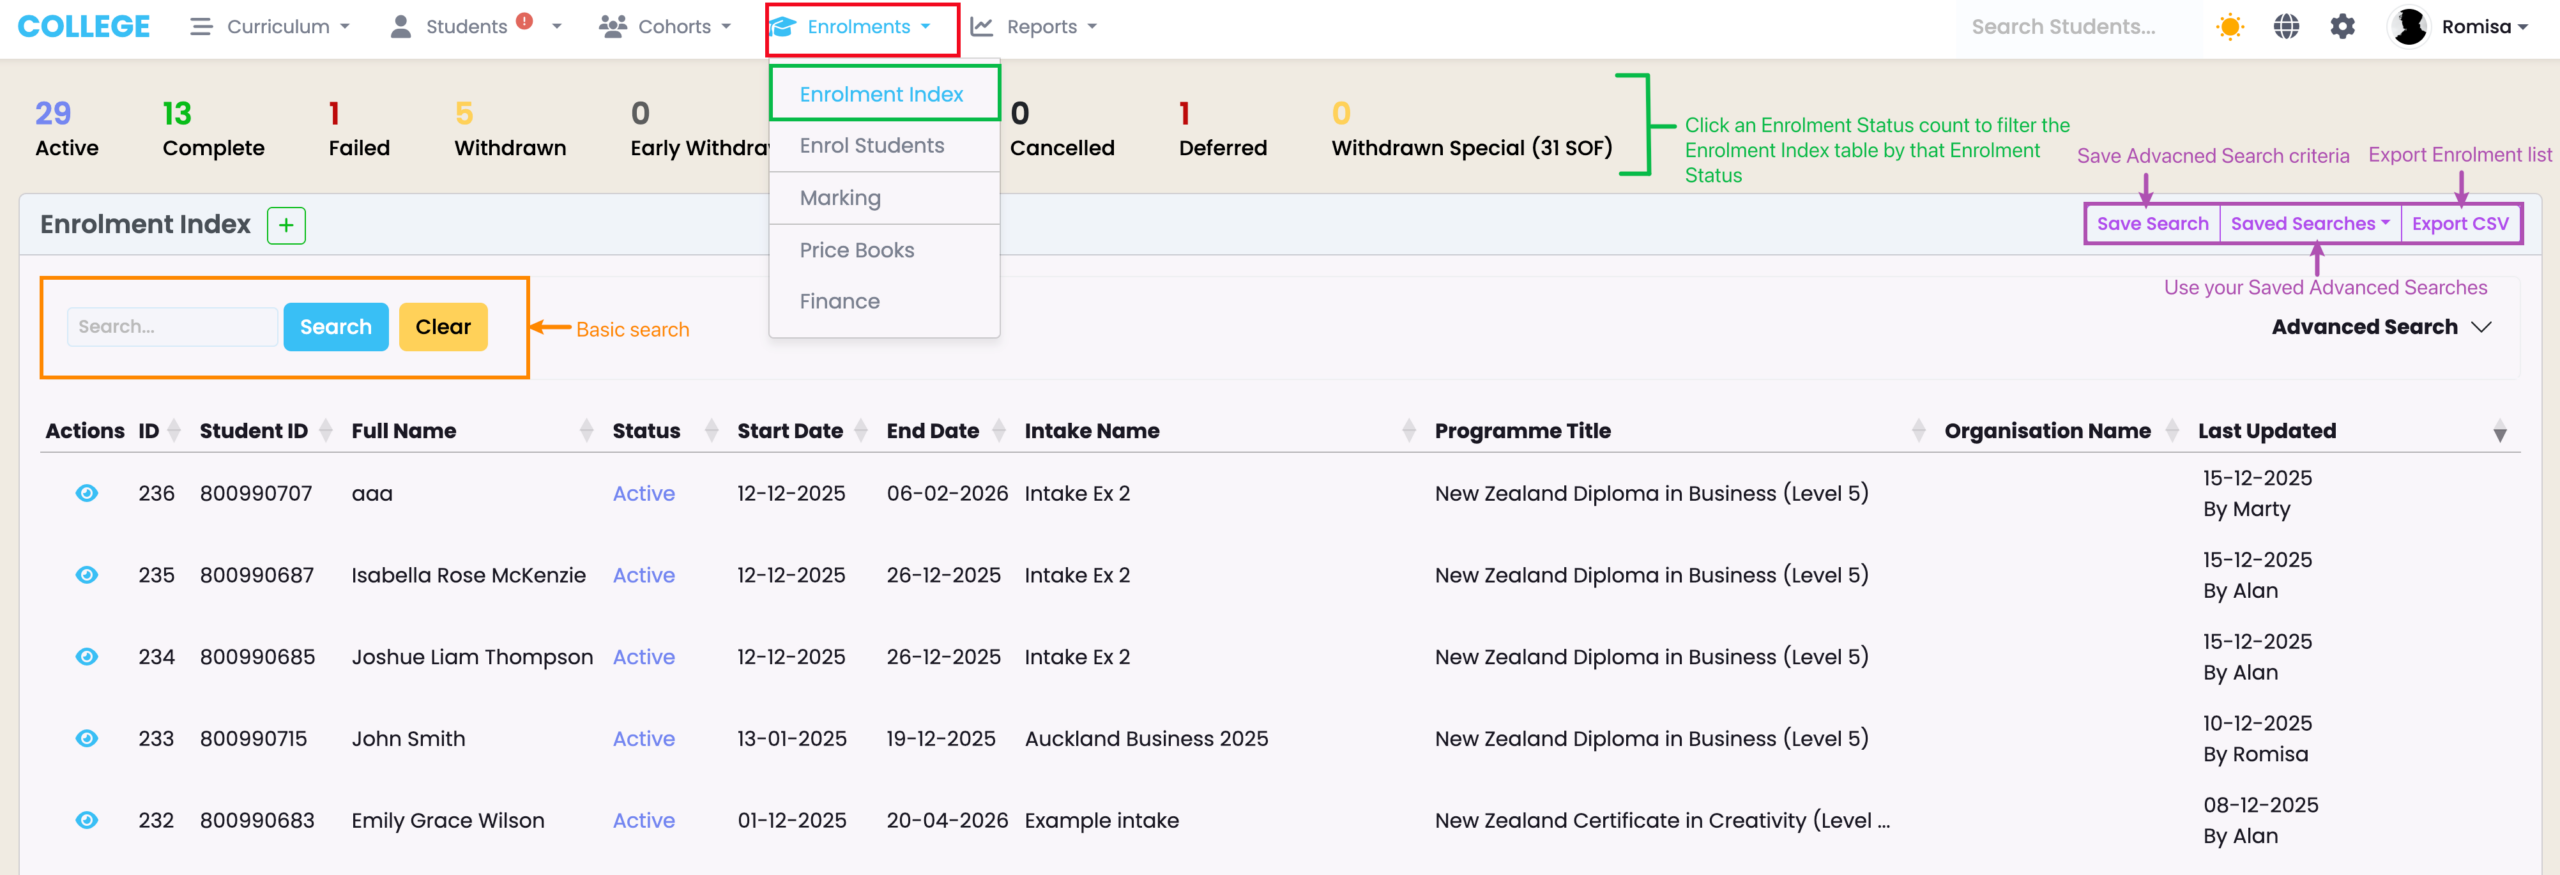
- Export the Intake list as a CSV file (Figure 1.).
Figure 1. Access the Enrolment Index (red) via the top navigation bar (green). Use the basic Search (orange) or the Advanced Search, below the Save Search feature (purple).
Create an Enrolment
There are two ways to create an Enrolment:
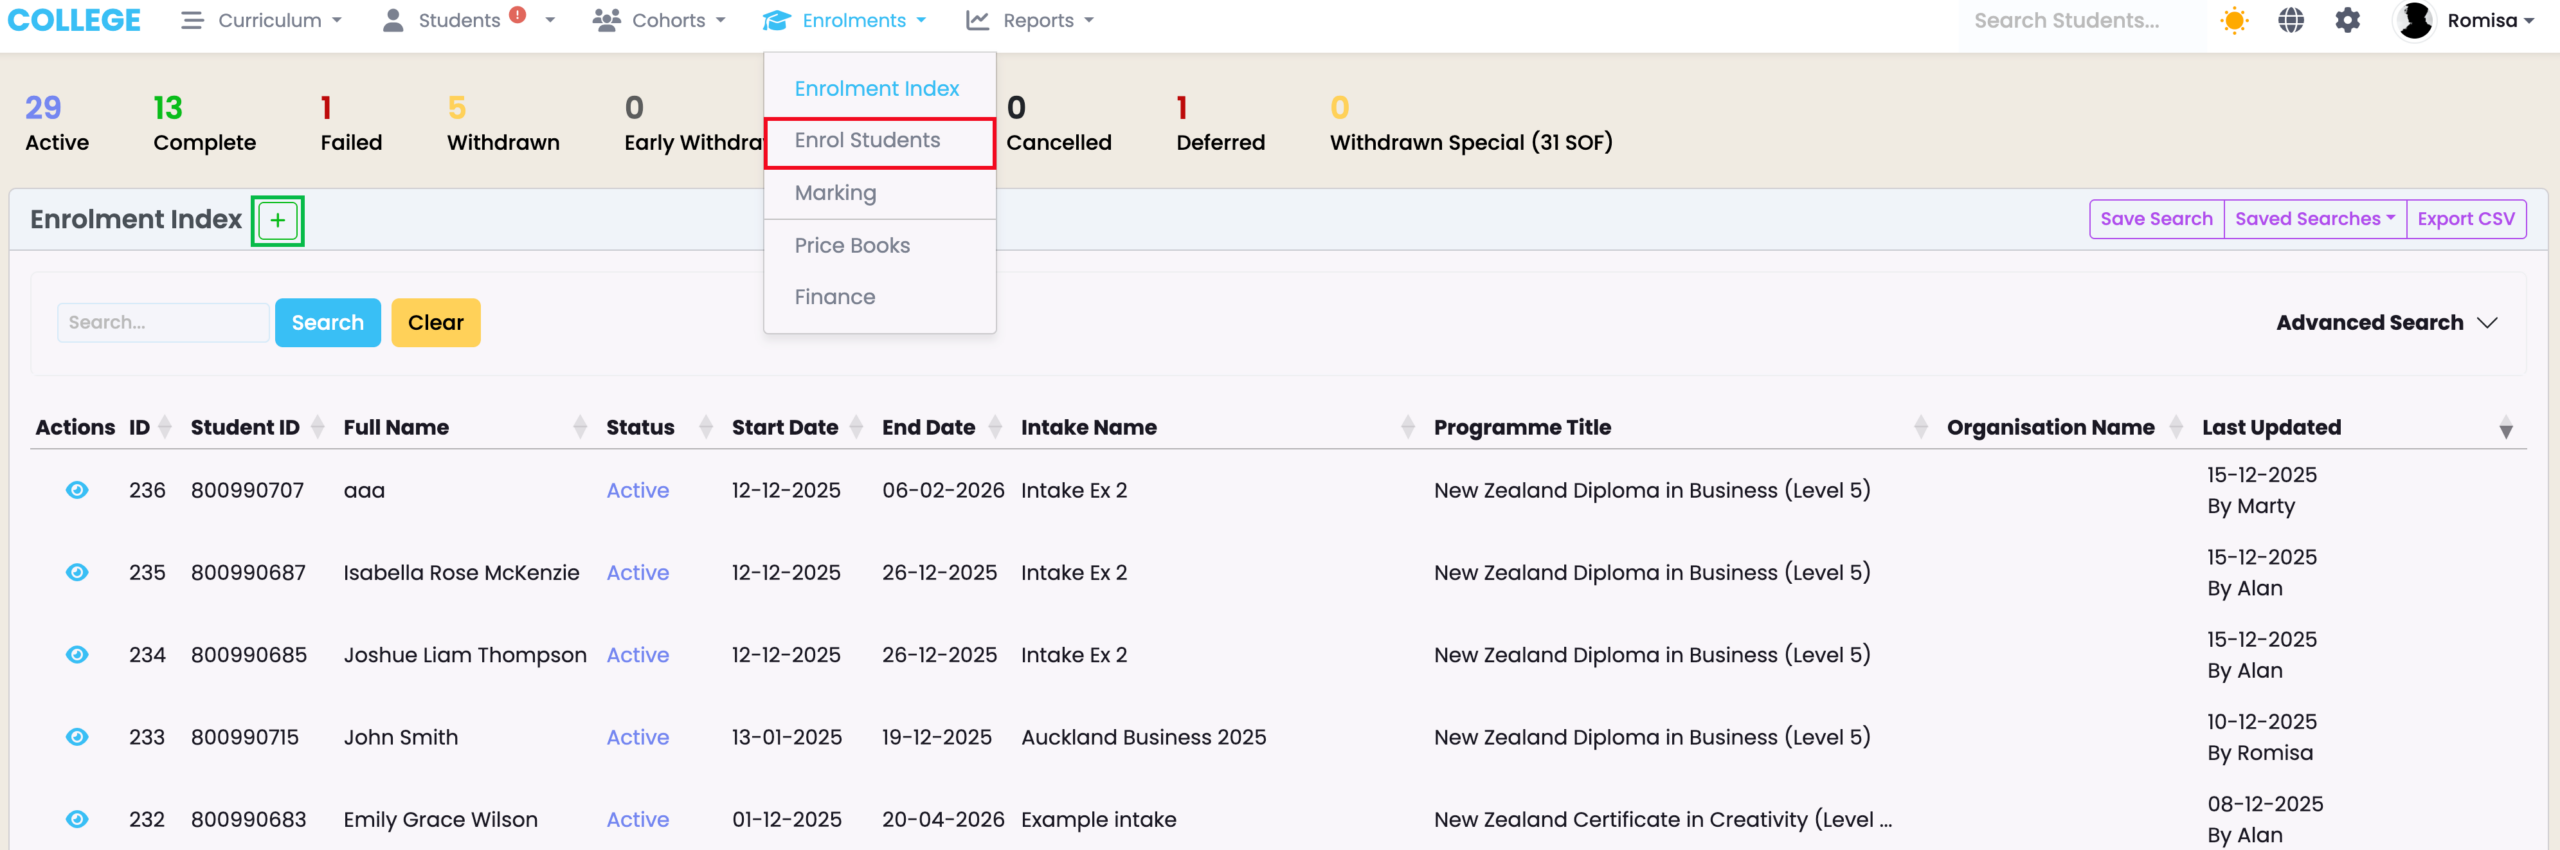
- Click “Enrol Students” through Enrolments in the top navigation bar (Figure 2.).
- Click the green cross icon on the Enrolment Index dashboard (Figure 2.).
Figure 2. Immediately “Enrol Students” (red) or navigate to the Enrolment Index and click the green cross icon (green).
Steps to Create an Enrolment Profile
- On the first screen, select the Intake and Enrolment Status. You will see that in doing so, the Start and End Dates will be automatically inherited by that of the selected Intake. Click the following buttons to auto-generate different dates (Figure 3i.):
- Orange circle – Use Intake End Date.
- Burgundy circle – Uses Programme Duration to calculate an End date.
- Blue circle – Calculates an End Date based on the number of units you add to the Start Date (see also Figure 3ii.).
- On the second screen, search for “Available students” and click to select those who are not enrolled into the Intake (Figure 4.).
- Students marked red are already enrolled into the Intake, so they can’t be selected.
- Students marked orange have a Validation Status mismatch with their selected Programme, so they can’t be selected.
- If you need to adjust, check the “Required Validation” field under Configuration on the Programme Tab, and the Validation Type on a Student profile.
- See Students – Validating a Student in this resource to guide you.
- If you need to adjust, check the “Required Validation” field under Configuration on the Programme Tab, and the Validation Type on a Student profile.
- On the third screen, you can select all “Mandatory” or “Required” Components to attach to the Enrolment, and skip selecting “Active” or “Completed” Components (Figure 5i.).
- You can add or remove a Component as a “Mandatory” or “Required” Component on the Programme | Components Tab (Figure 5ii.).
- On the fourth screen, apply a Price Book and set a Funding Source for NZ/AUS Compliance.
- Note: Funding source inherits that of the Intake, automatically (Figure 6i-ii.).
- See Finance – Price Book for a guide on creating Price Books.
- Note: Funding source inherits that of the Intake, automatically (Figure 6i-ii.).
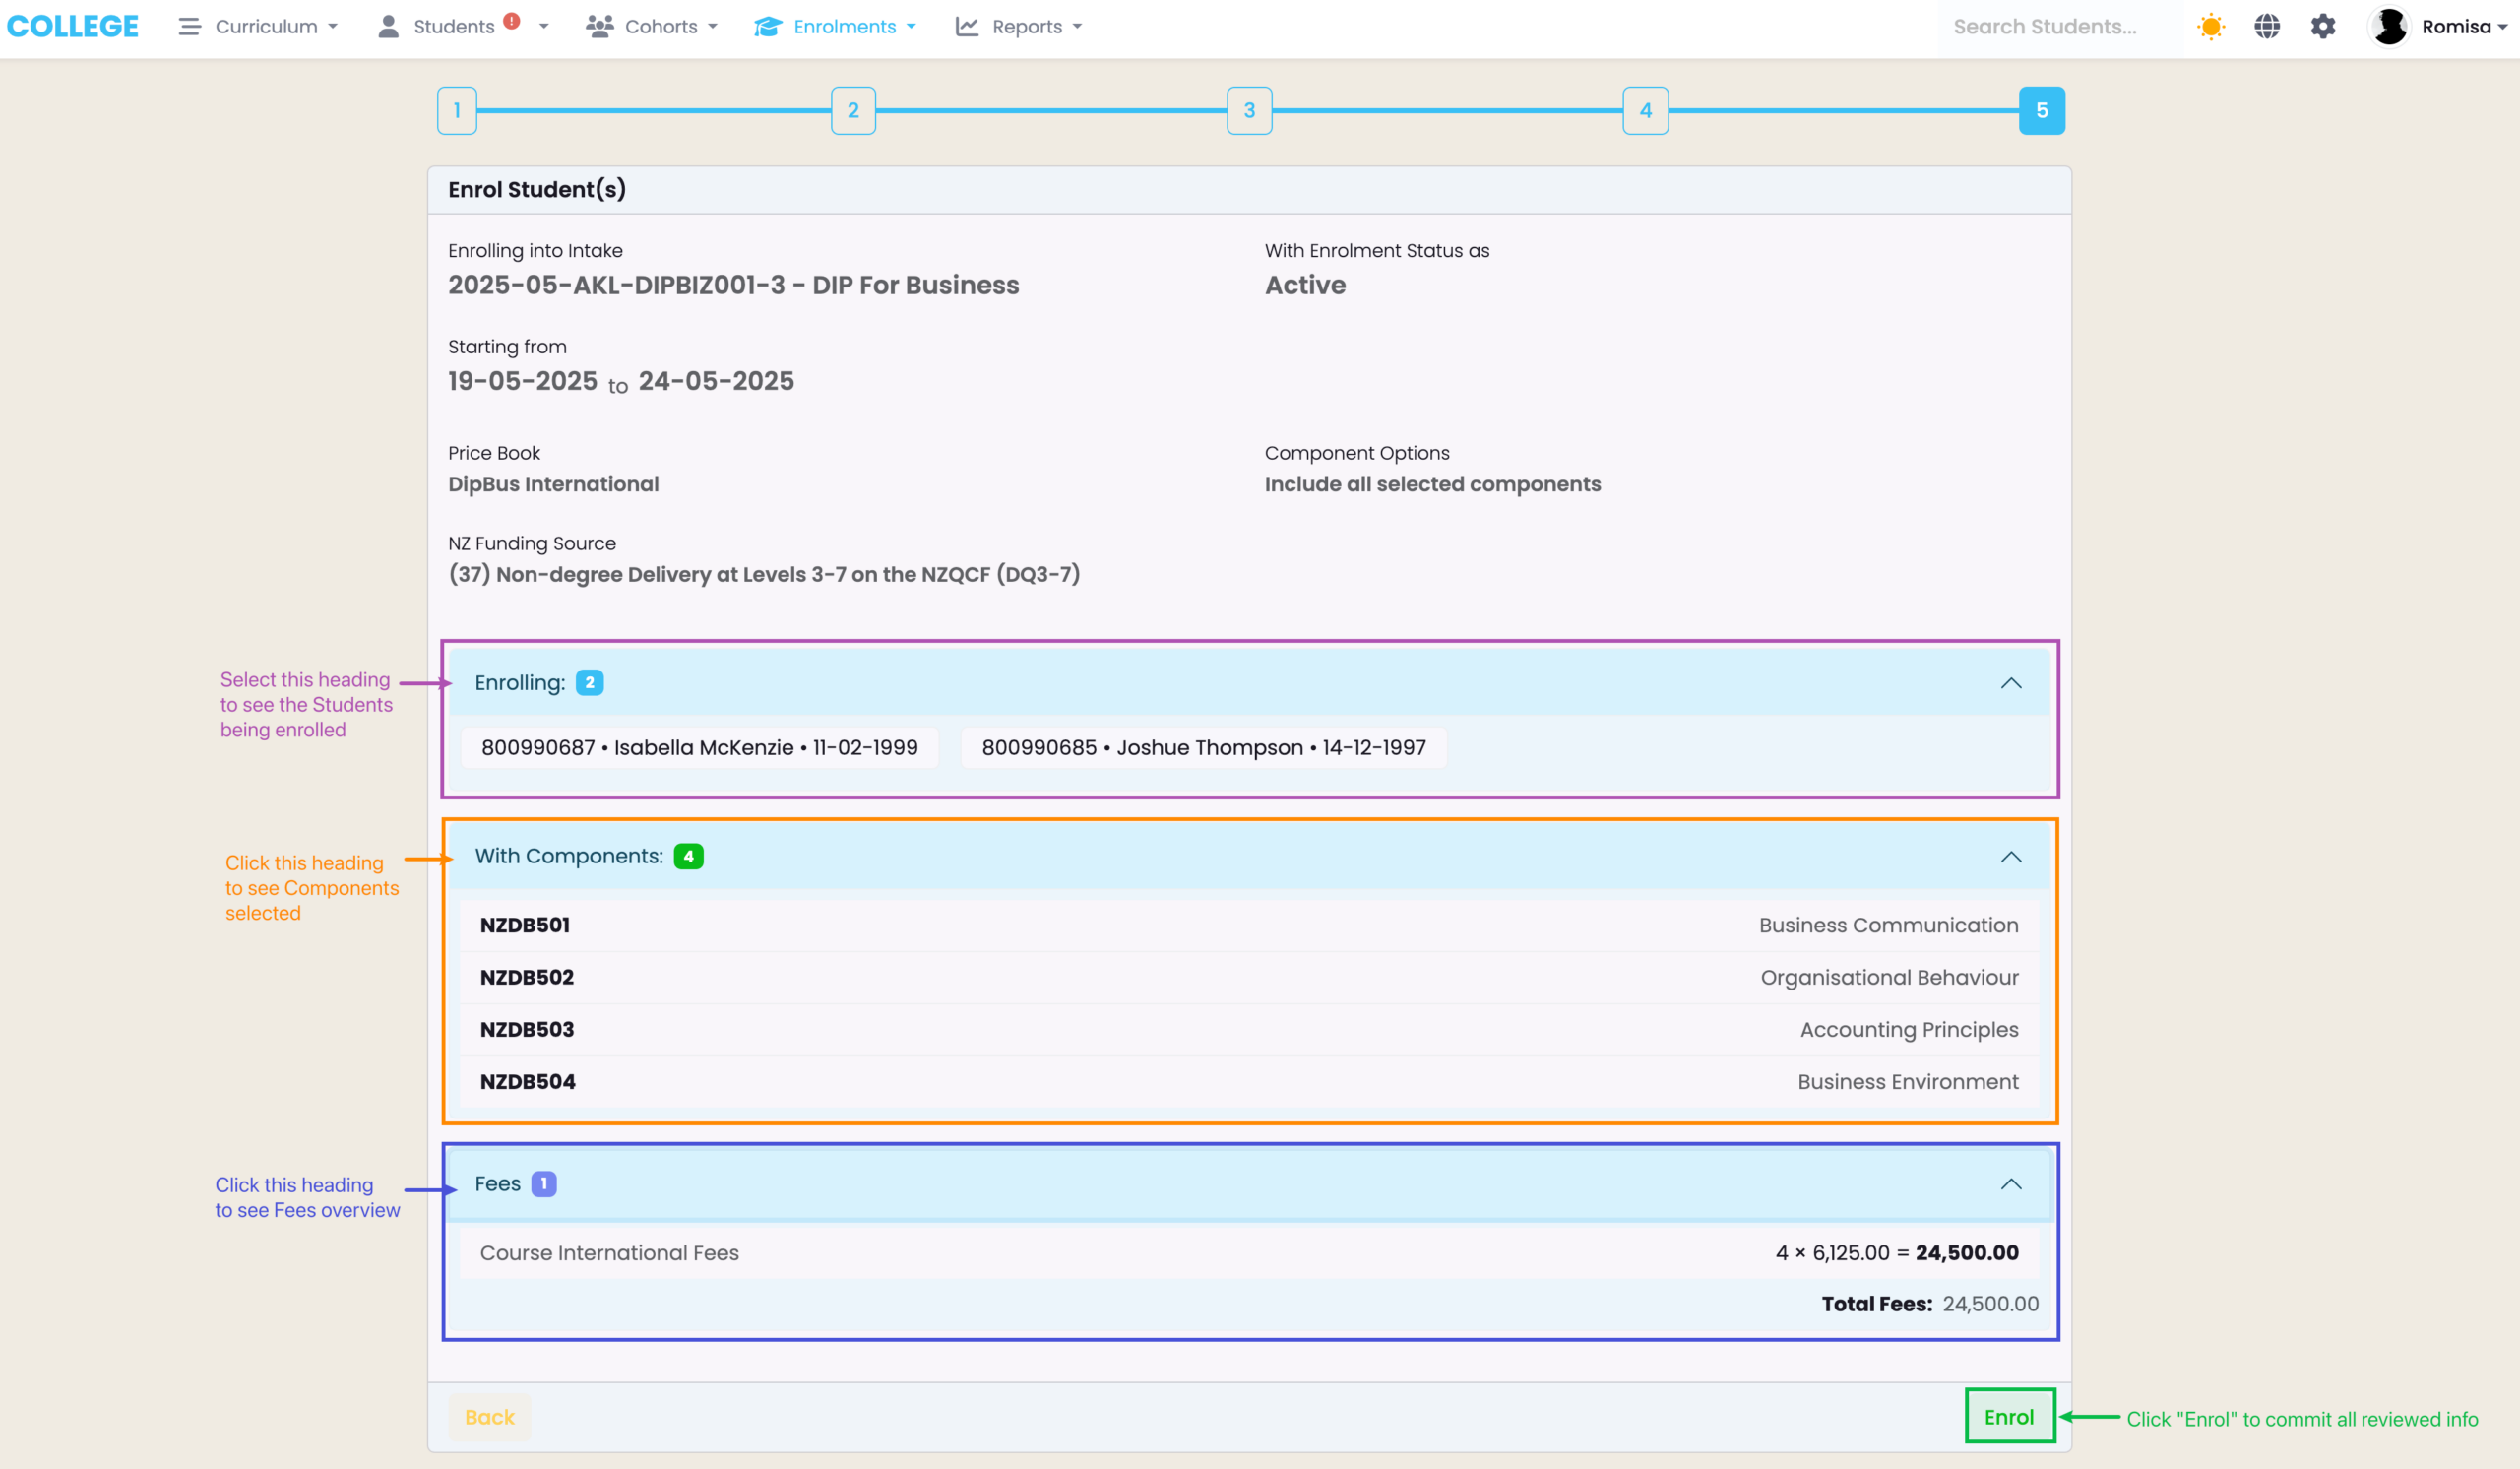
- On the fifth and final screen, review all information and click “Enrol“.
Once Enrolments have been created, you will be taken to a screen showing a full list of those Enrolments. Click on one to open that Enrolment profile.
Figure 3i. Fill out the “Intake” and “Enrolment Status” fields to generate a Start Date and End Date, inherited from the Intake. Use the buttons beside the End Date to change it, automatically.
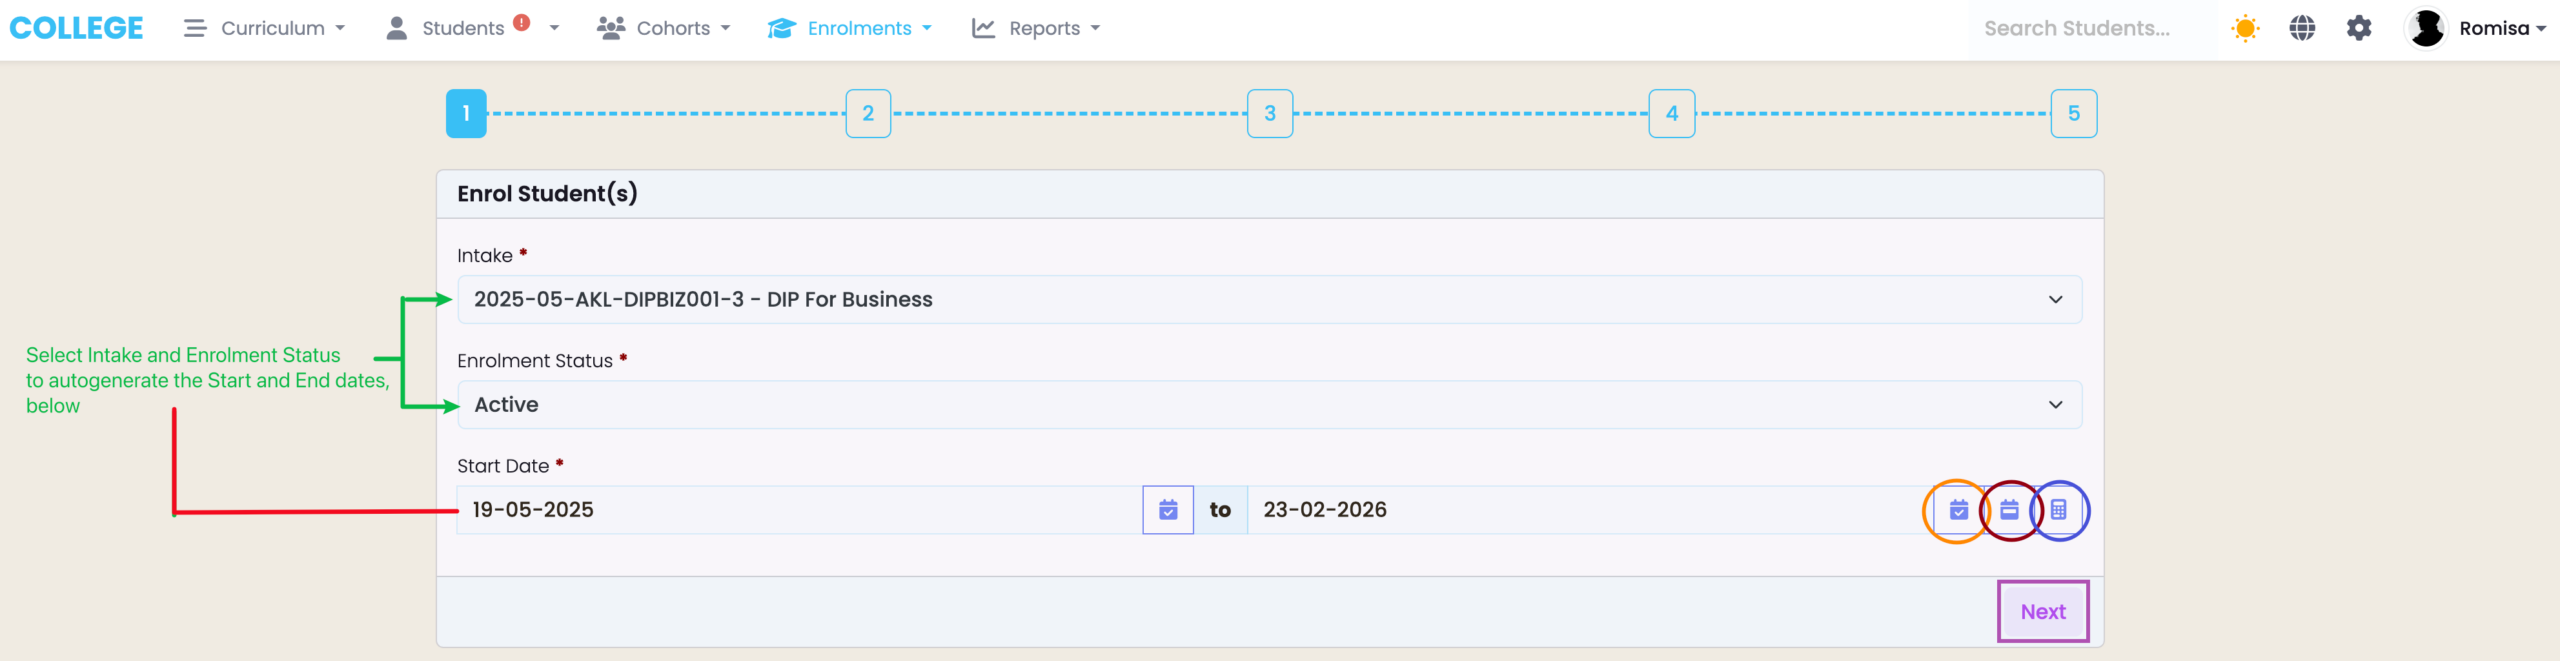
Figure 3ii. Calculate an End Date based off of the Start Date.
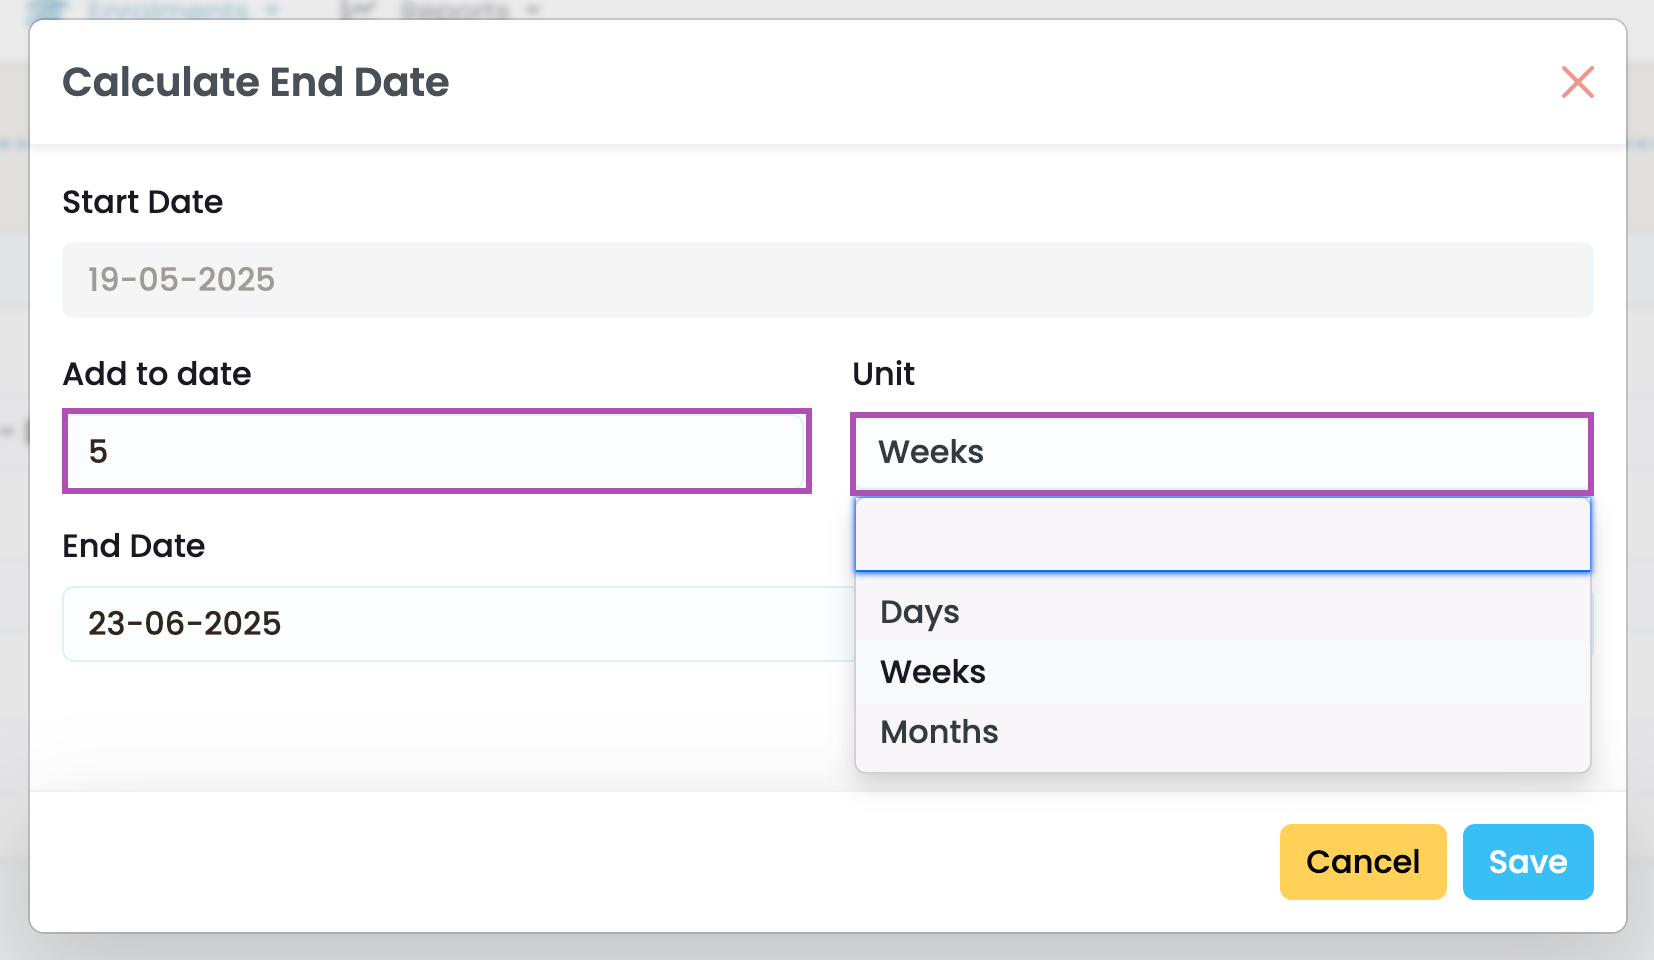
Figure 4. Filter by group interest in Intakes or Programmes (brown) if indicated on the Student profiles, and select available students to be enrolled (purple arrow). Use the Filter Search to find and ensure a Student has been selected (neon green).
Note: Please ensure Student Status is “Validated” to be able to see them in the Student Search drop-down list (brown). You will not see Students with the Status “Enquiry”, “Provisional or “Inactive”, here.
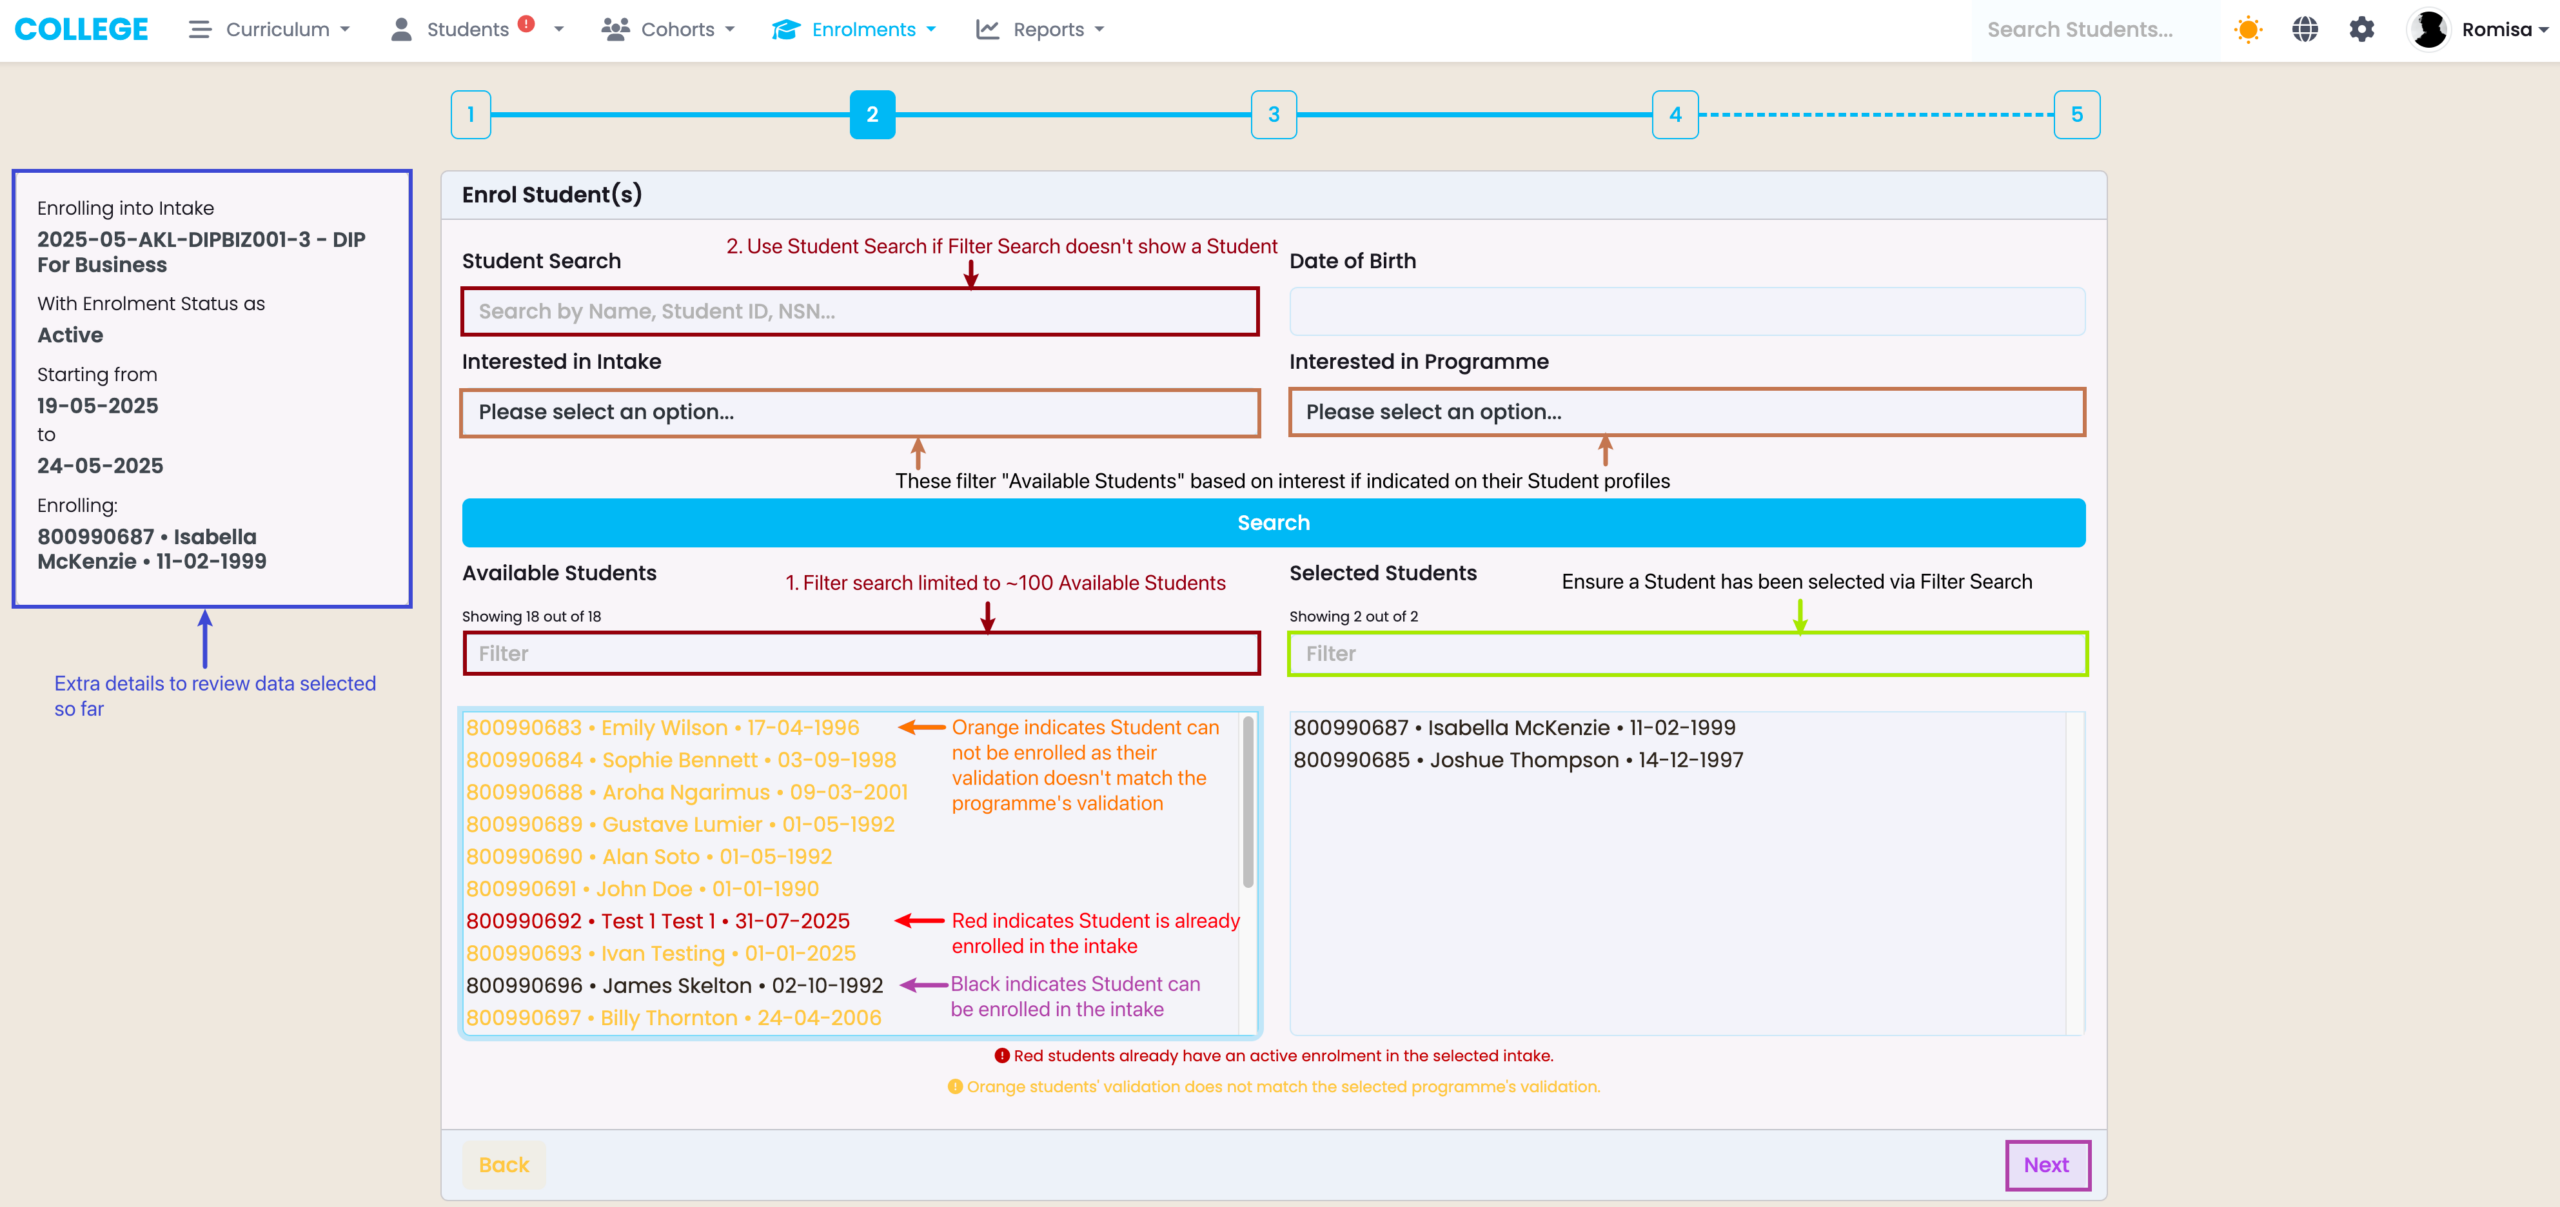
Figure 5i. Select all “Required” Components by clicking the “Select Mandatory Only” tick-box (red). Skip Components that are present in “Active” enrolments or already successfully completed (purple).
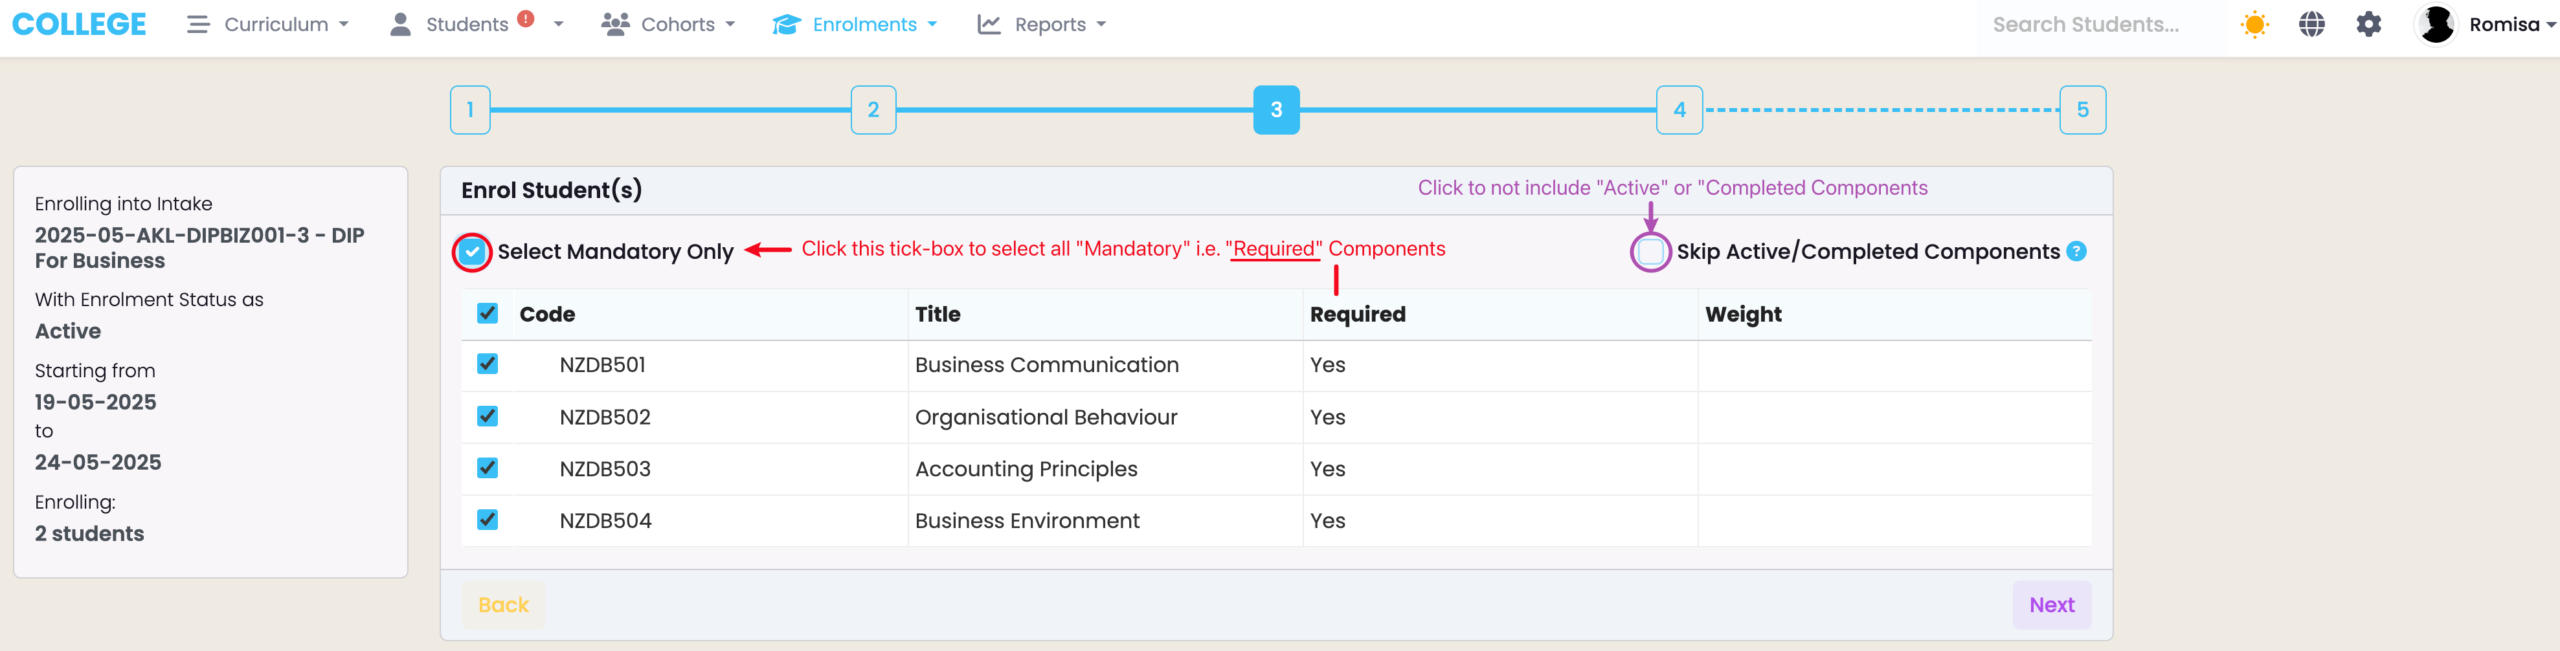
Figure 5ii. Edit which Components are “Required” for Enrolments, at the Programme | Components Tab.
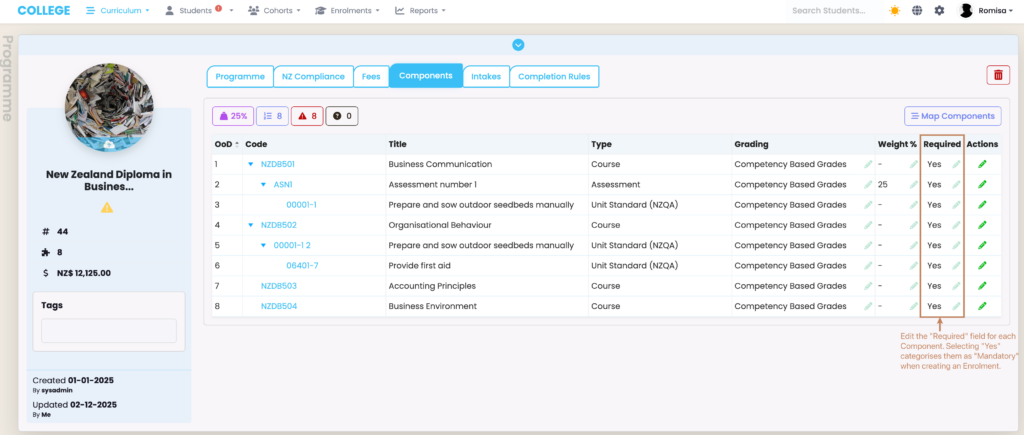
Figure 6i. The NZ Compliance Funding Source is inherited from the associated Programme of the Intake you are enrolling your Students.

Figure 6ii. The AUS Compliance Funding Source is inherited from the associated Programme of the Intake you are enrolling your Students.

Figure 7. Review all information selected, and click to open each heading (purple, orange, blue arrows) for more information. Click “Enrol” to submit all (green).