Classes are cohorts of Students enrolled to different Programmes, who share specific components. Therefore, they allow for Enrolments linked to specific components to be updated or graded in bulk.
This section discusses the process of creating and managing Classes.
In this section:
- Class Index
- Create a Class
- Navigating the Class Profile
- Enrolments Tab
- Scheduler Tab
- Timetable Tab
- Attendance Tab
- Grading Tab
- Events Tab
Class Index
Navigate to Cohorts > Class Index.
Here, you can:
- Search and open existing Classes.
- Use the Save Search feature
- This saves specific search criteria you have entered into the Advanced Search fields (see SELMA 101 – Tips and Tricks for Using SELMA productively)
- Export the Class list as a CSV file (Figure 1.).
Figure 1. Access the Class Index (red) via the top navigation bar (green). Use the basic Search (orange) or the Advanced Search, below the Save Search feature (purple).

Create a Class
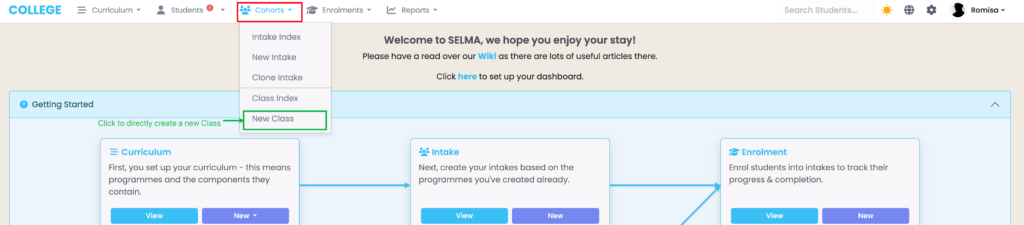
There are two ways to create a class:
- Click the green cross icon on the Class Index dashboard (Figure 2.).
- Navigate to “Cohorts” and click “New Class” in the navigation drop-down list (Figure 3.).
Figure 2. Create a new Class via the Class Index dashboard (green).
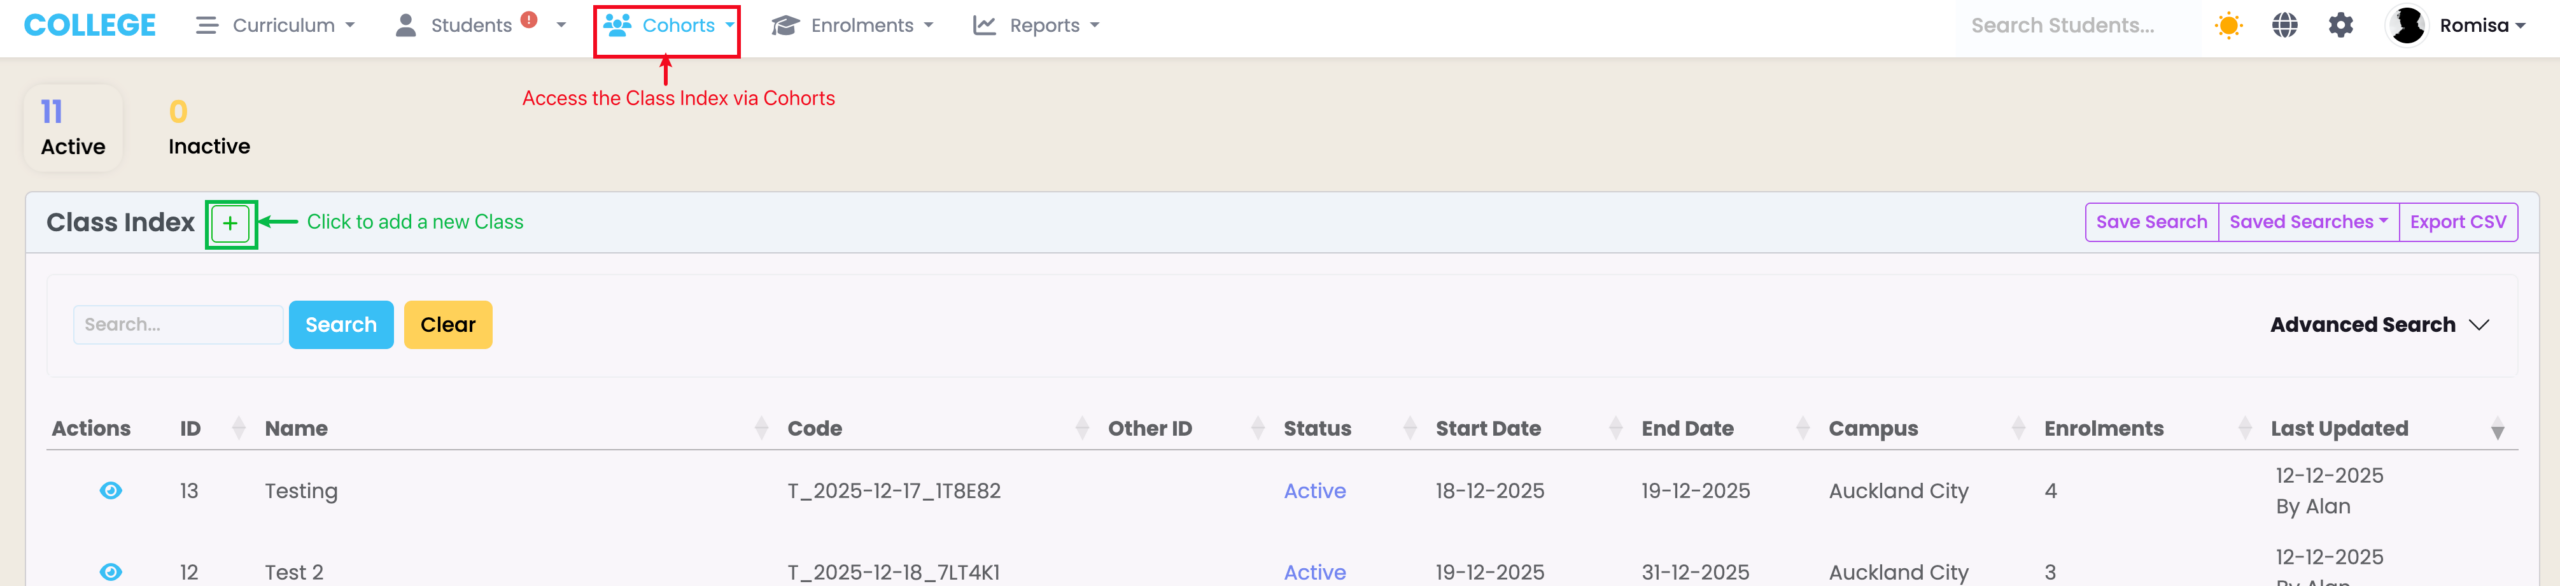
Figure 3. Create a new Class, immediately, by navigating to Cohorts in the navigation bar (purple) and clicking “New Class” in the dropdown menu (red).
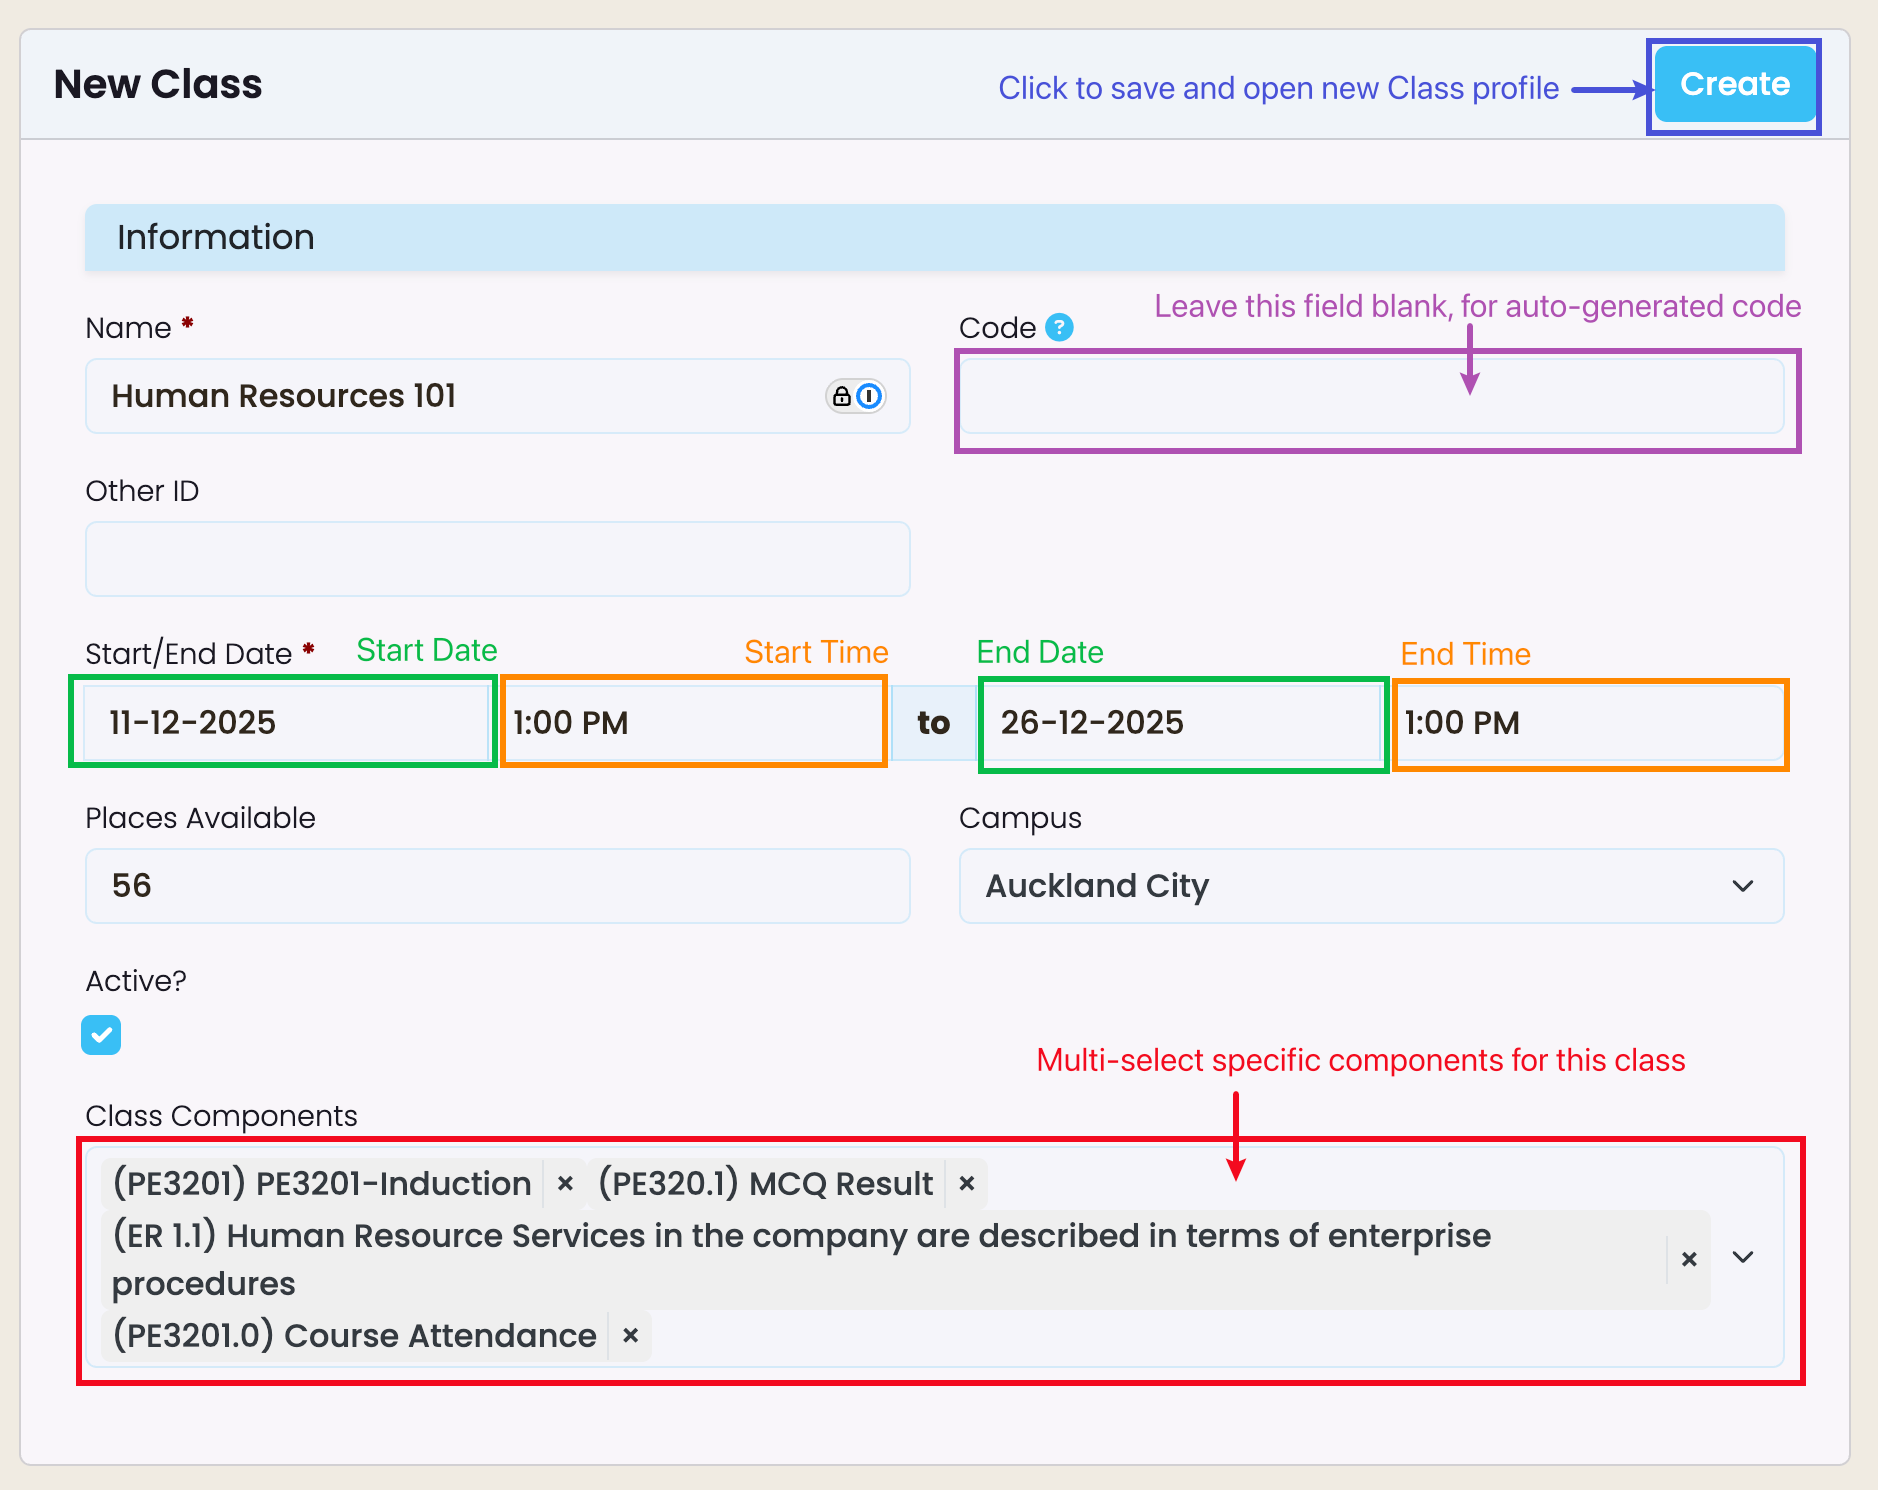
Field Descriptions on the “New Class” Screen
Once you have clicked the relevant button to create a Class, fill out the fields on the “New Class” screen, and add Enrolment Components to link to this Class.
Note: If you are using this class as a shell, or no grading is needed, don’t add Components.
You will find that some fields are similar to the ones seen when creating a new Intake (see Required Fields on the “Add Intake” Screen), including but not limited to:
- Class Code which can be left blank to auto-generate a code for you, using the class’s unique Name, Programme, Start-to-End Date and Campus.
- The Class Code is often referenced across other areas of the system, so it is best to create a meaningful and consistent code (Figure 4.).
- Places available which sets limits for the number of enrolled students in a class.
Additional fields to note:
- Start and End Times for the Start and End Dates, respectively (Figure 4.).
- Class Components which is a multi-selection field linking specific Components to this class of Students (Figure 4.).
Figure 4. Fill out the following fields, with special consideration for the “Class Code” (purple), and the specific Components (red) you would like to link to this particular Class.
Navigating the Class Profile
Once you have clicked the “Create” button (Figure 4.) and created a new Class, you will be taken to view the Class profile.
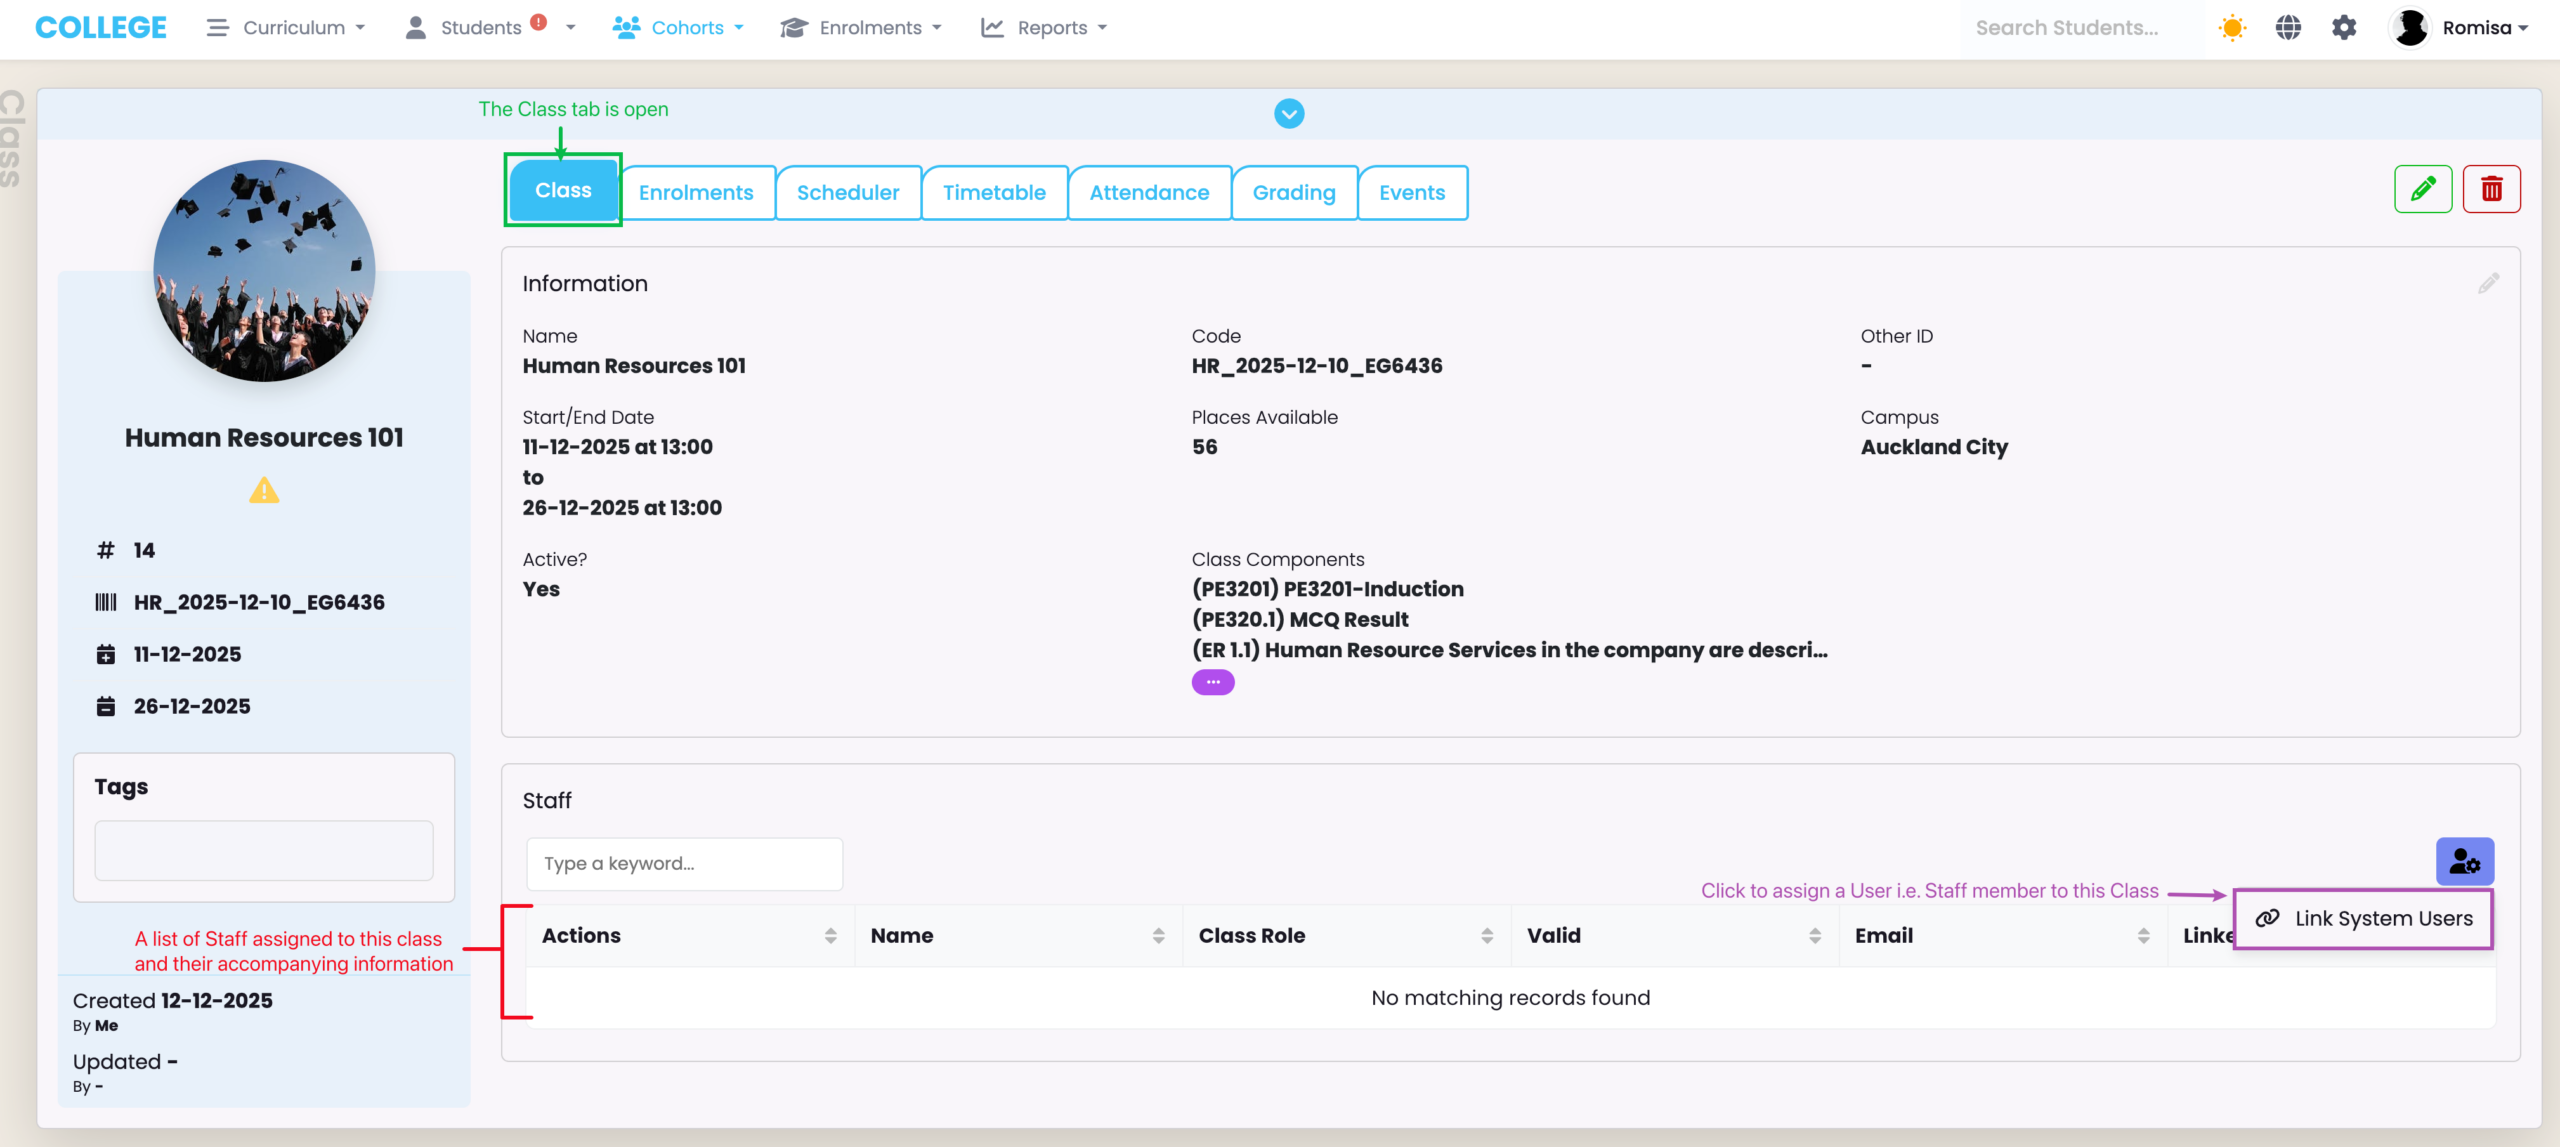
Class Tab
On the Class profile, you will see information you have just created and a section on Staff, where you can assign System Users to a class (Figure 5.).
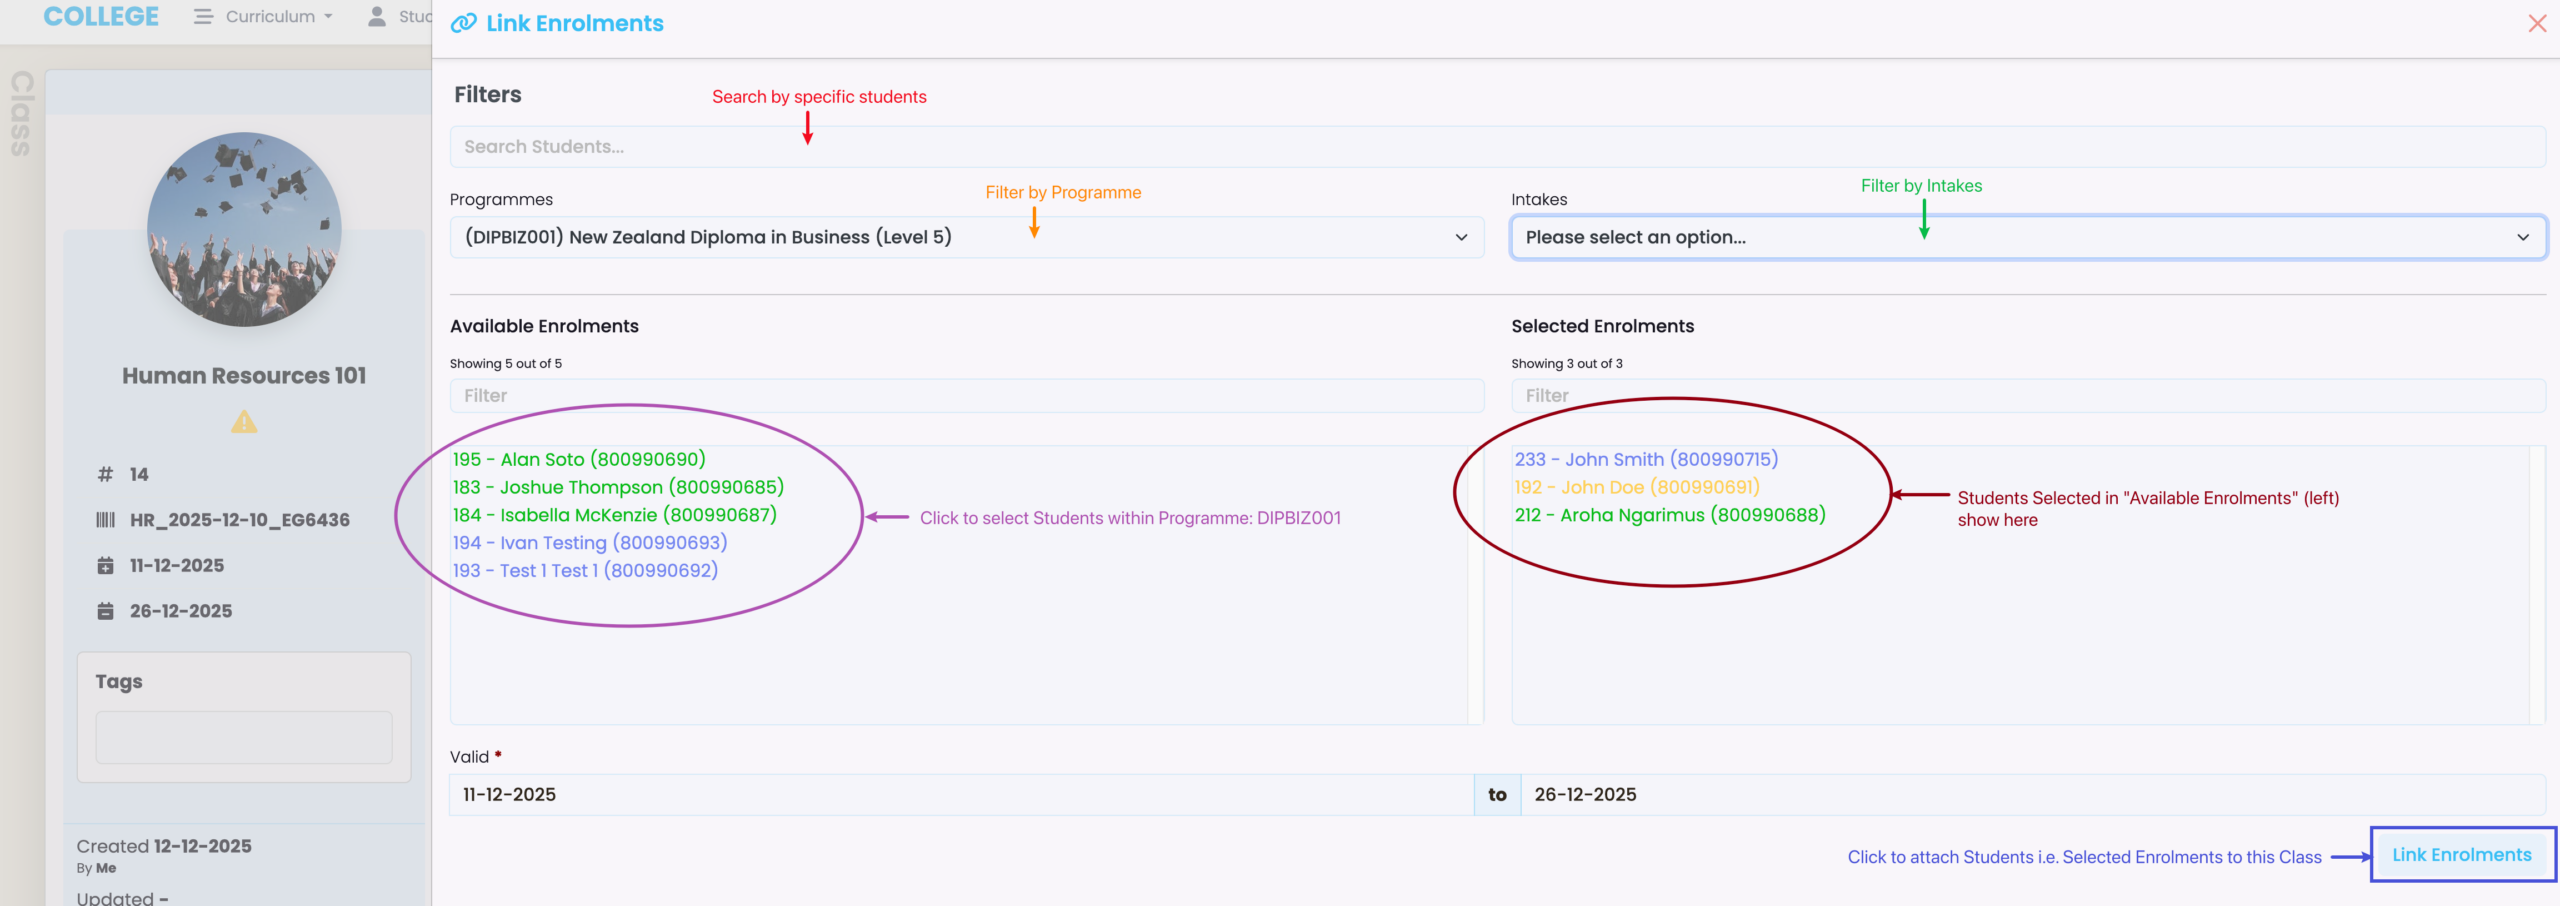
When linking System Users to a Class, you can search by name, or filter by Programme or Intake to select Students to attach to the Class (Figure 6.).
Figure 5. On the Class tab, Click the purple action button to “Link System Users” to this Class.
Enrolments Tab
Link Enrolments
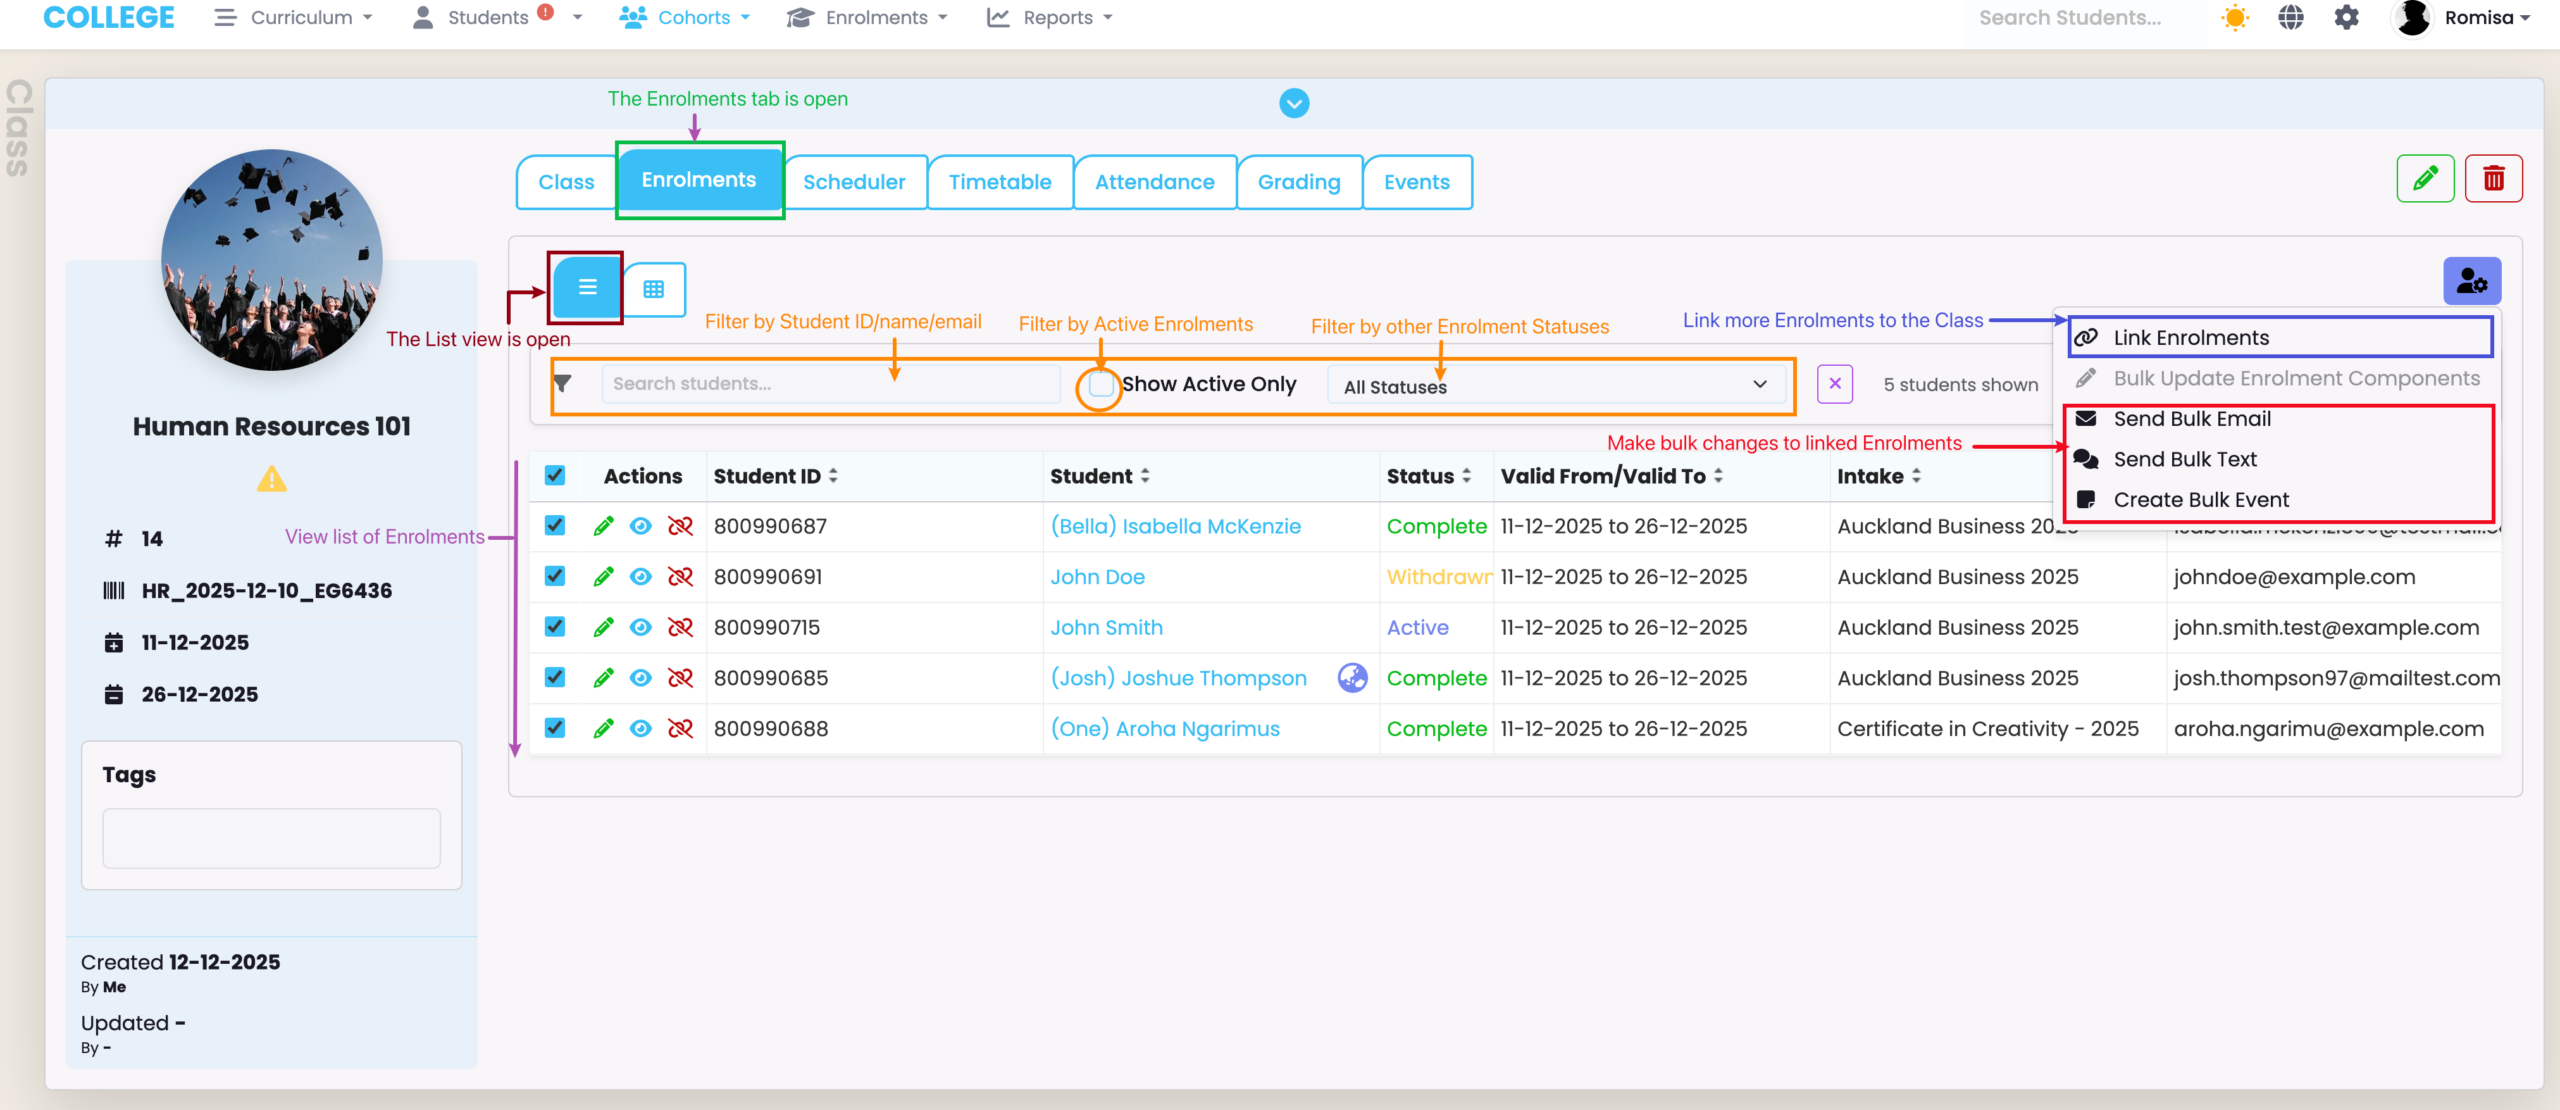
The Enrolments Tab is for making bulk actions against Enrolments, such as sending bulk emails and text messages to System Users, and creating bulk events, like notes, to send to Students.
To enrol Students into a class, click the purple Actions button, in either the List View or Matrix View, and navigate to “Link Enrolments” (Figure 7.). Then, see Figure 6 for a description of how to Link Enrolments.
Note: You can Link Enrolments at the Class and Enrolment levels.
Figure 6. In this example, we have filtered for Students within a particular Programme (orange), who we can select to link to a Class. Click the “Link Enrolments” button (blue) to commit the Students to the Class.
The List View
The default viewing mode is the “List View”, where you can perform bulk actions against Enrolments. You can also filter by Enrolment Status (Figure 7.).
Figure 7. Make bulk updates (red) against Enrolments (purple), and filter by Enrolment Status (orange).
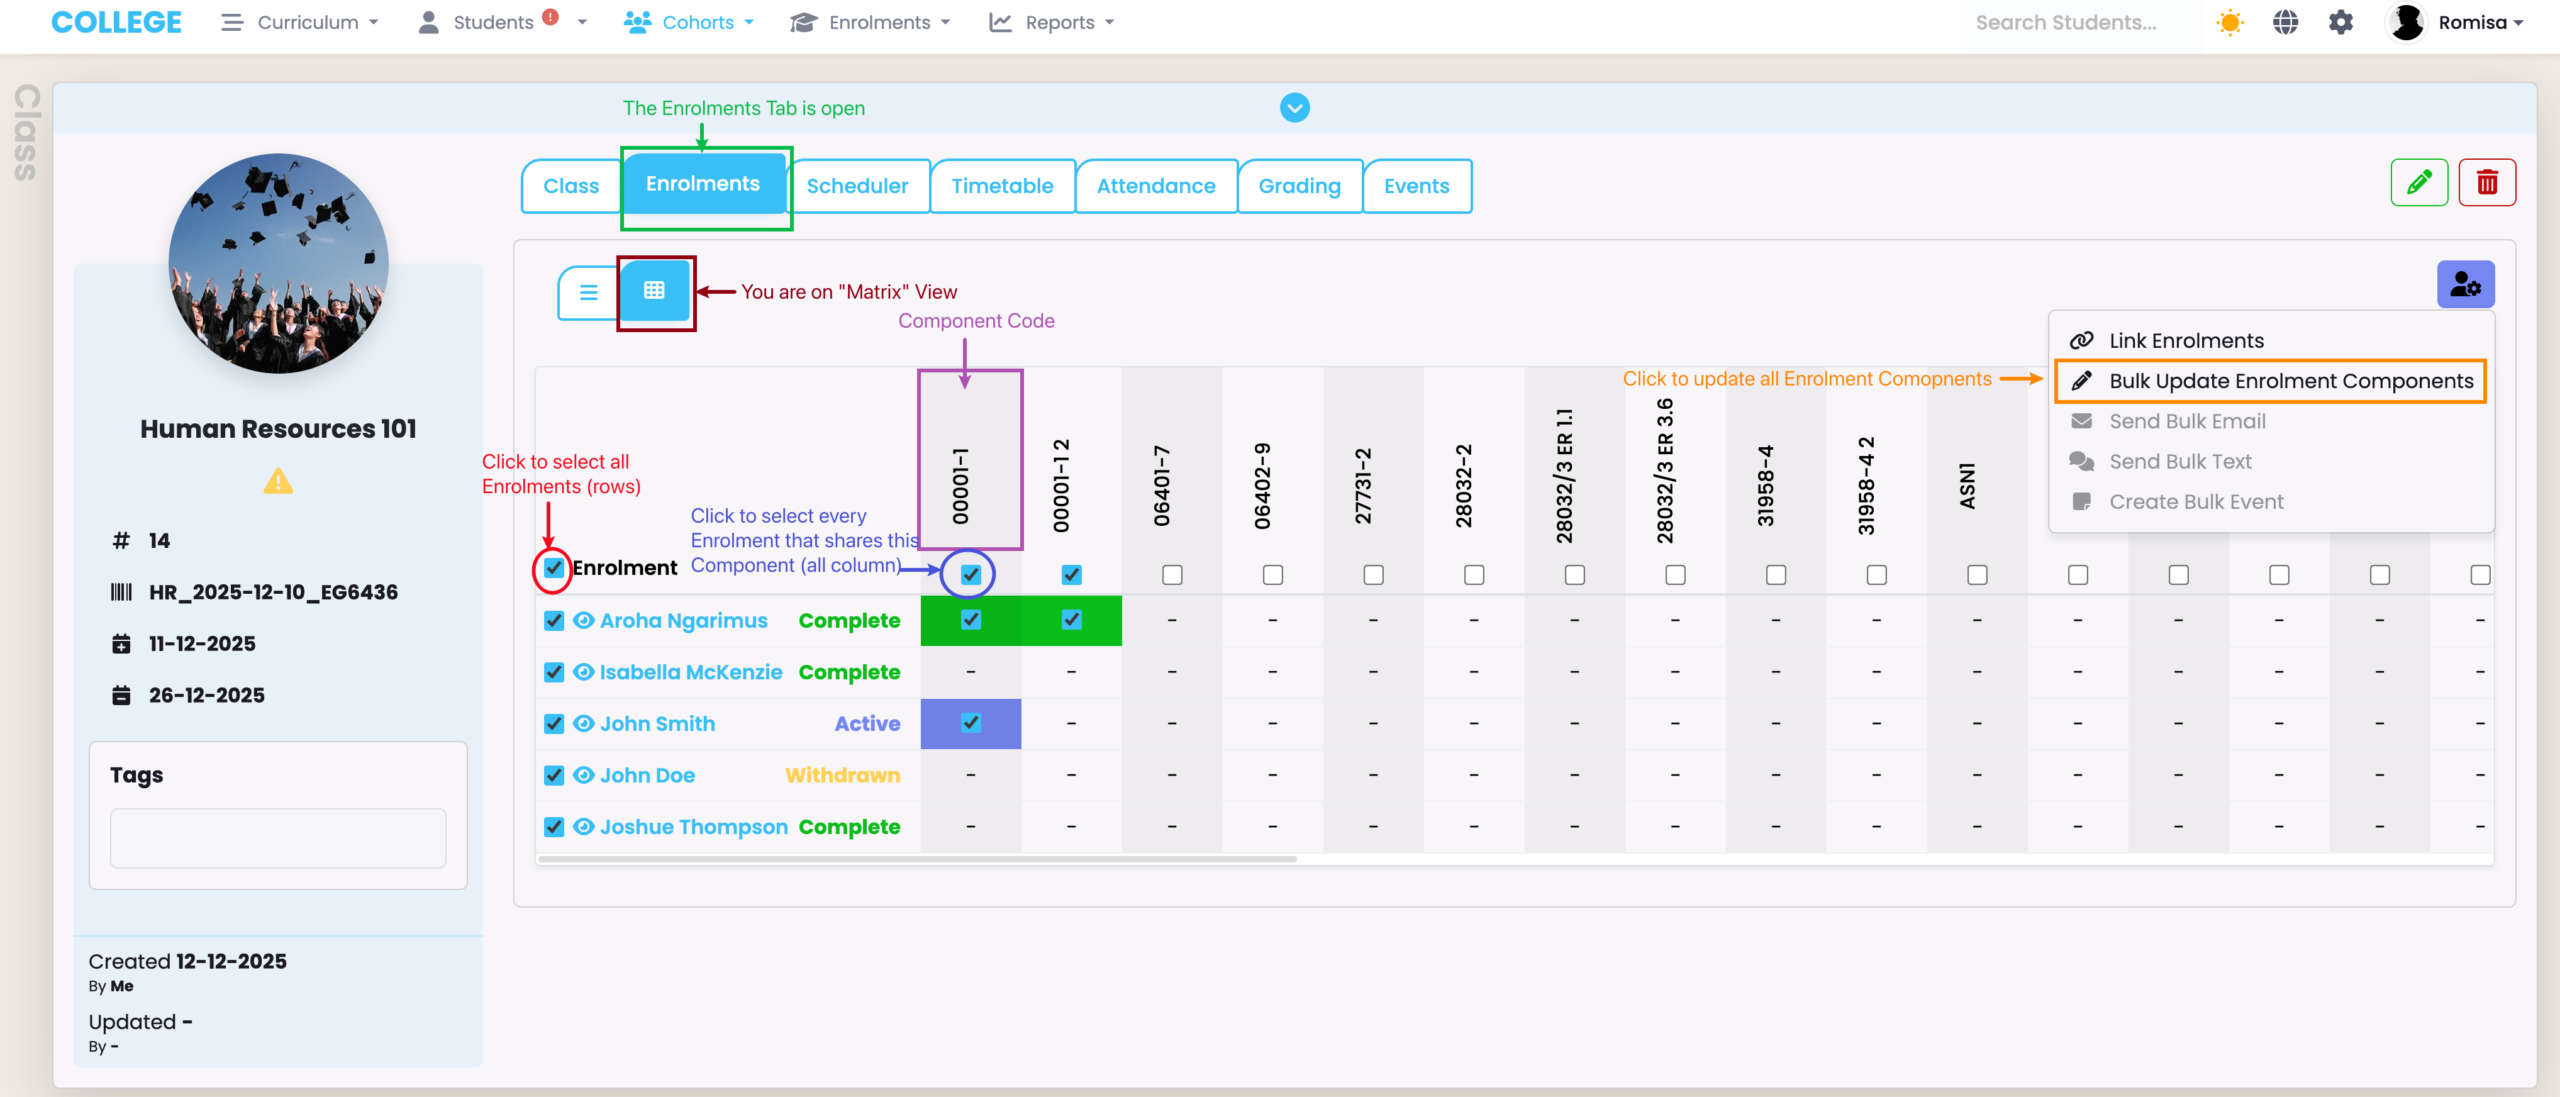
The Matrix View
The second viewing mode is the “Matrix View”, accessed via the button adjacent to the “List View” . There, you can “Bulk Update Enrolment Components” by Component Code (Figure 8.).
Note: Tiles within the Matrix grade are colour coded by Component Status, which is also labelled on the grid and shown in the hover message description when you hover your mouse over a tile (Figure 8.).
Figure 8. The Matrix View allows you to select individual Enrolment Components or bulk update them by selecting all Enrolments (red) or all Enrolments which share specific Components (purple), and clicking the relevant Action button (orange).
Scheduler Tab
The Scheduler Tab for Classes is navigated like the Scheduler Tab for Intakes.
Please refer to Cohorts – Navigating the Intake Profile – Scheduler Tab in this resource for a general guide on the Scheduler Tab.
Timetable Tab
The Timetable Tab for Classes is navigated like the Timetable Tab for Intakes.
Please refer to Cohorts – Navigating the Intake Profile – Timetable Tab in this resource for a general guide on the Timetable Tab.
Attendance Tab
The Attendance Tab for Classes is navigated like the Attendance Tab for Intakes.
Please refer to Cohorts – Navigating the Intake Profile – Attendance Tab in this resource for a general guide on the Timetable Tab.
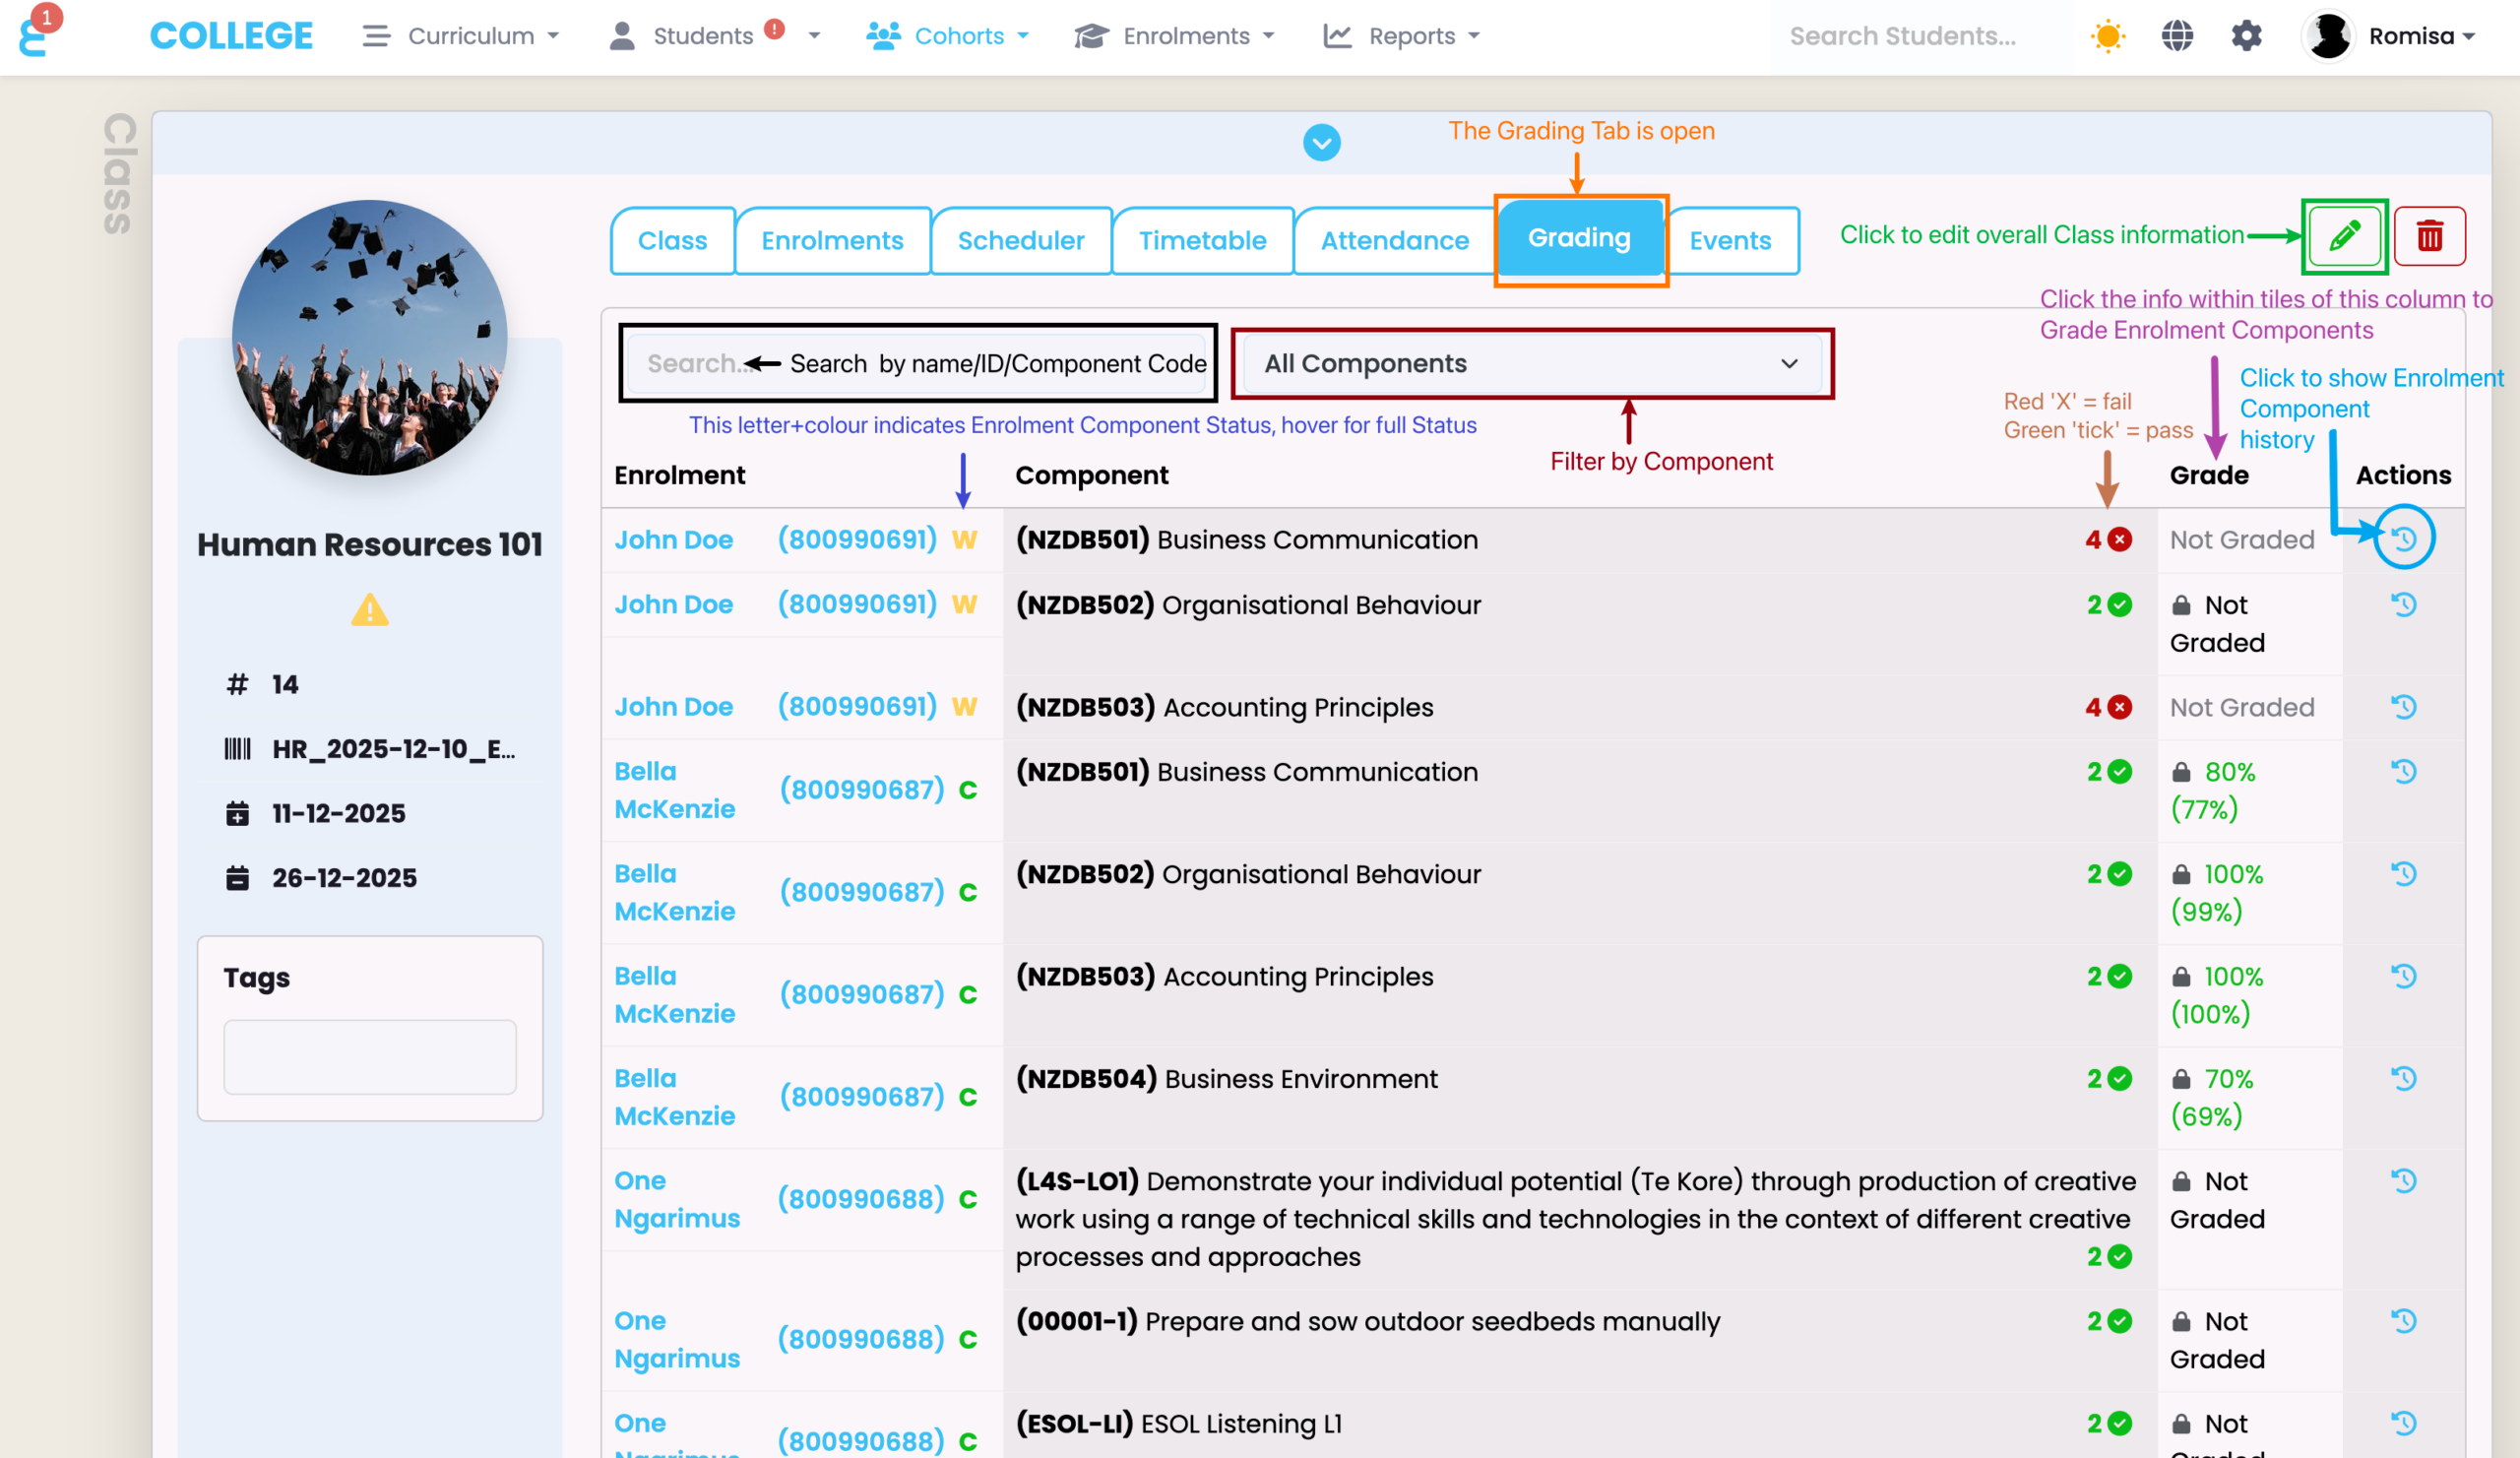
Grading Tab
Within the Grading Tab, you can grade Enrolment Components that are linked to this Class, and view and edit Class or Enrolment Component history (Figure 9).
Note: You can only grade components linked to a Class and an Enrolment.
Figure 9. Use the search (black) or filter feature (burgundy) to find Enrolments and Components, quickly. The pencil icon (green) enables you to edit overall Class information, and the information within the “Grade” column is clickable, to grade Enrolment Components (purple).
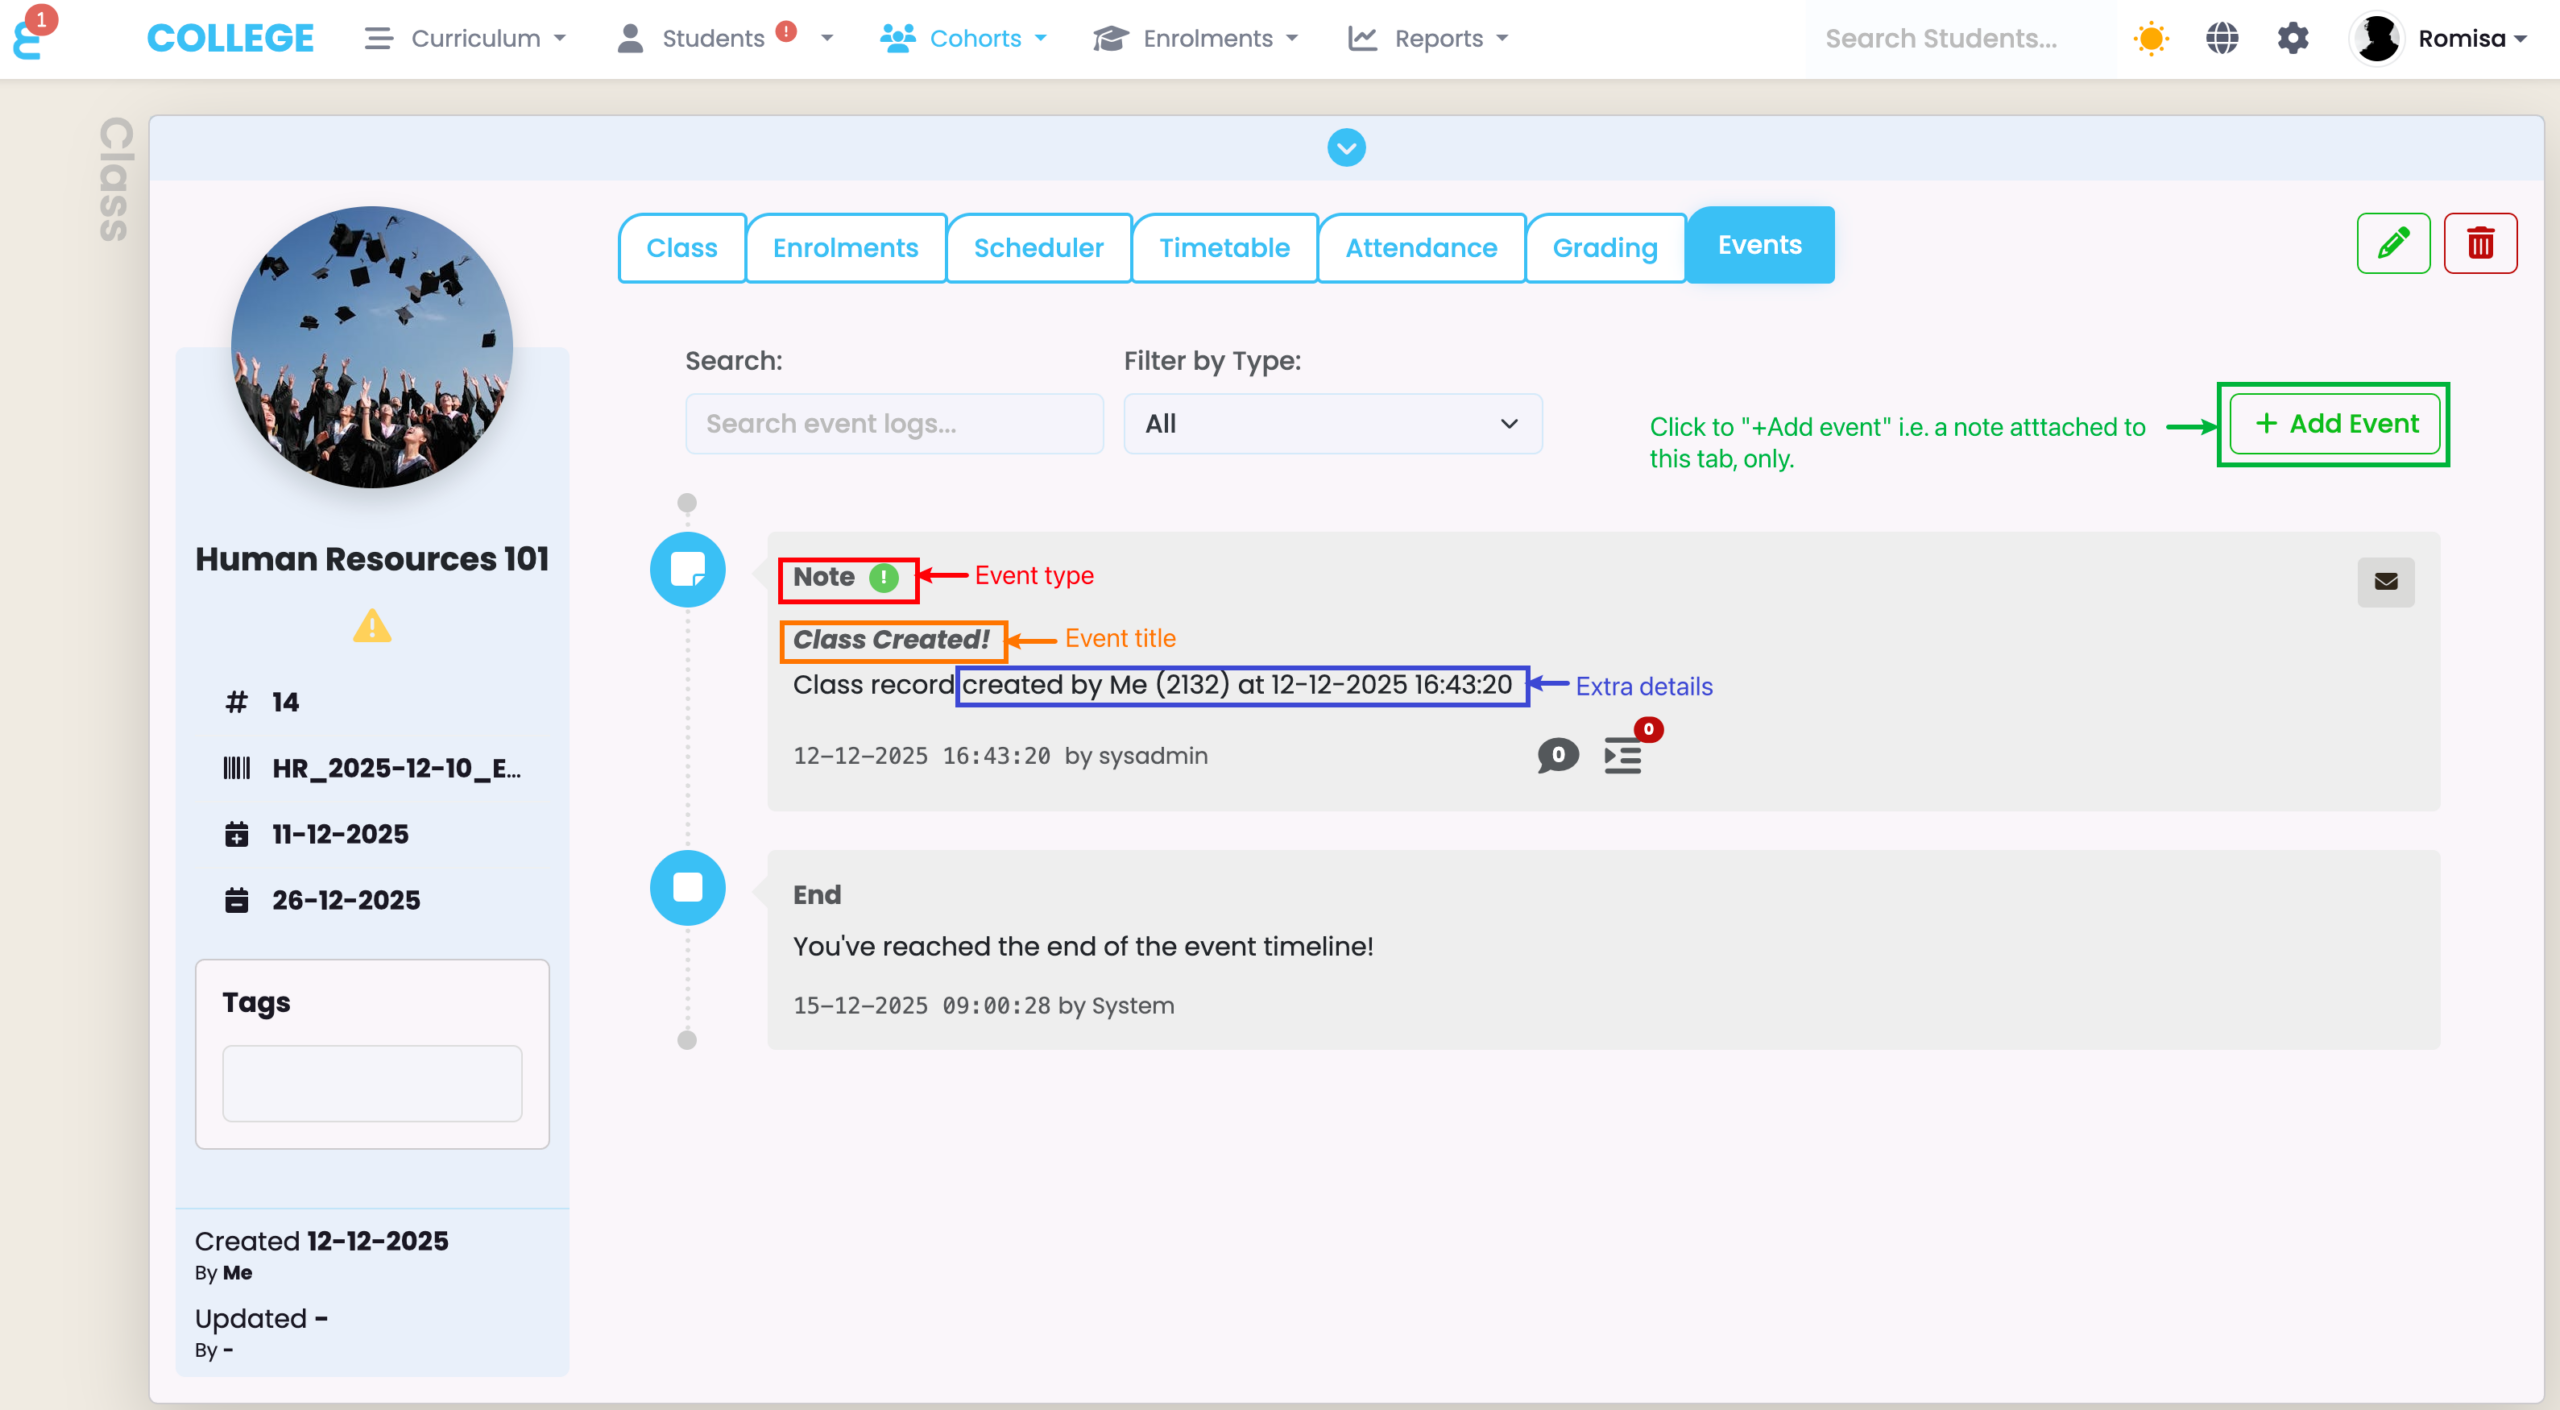
Events Tab
This tab shows System updates regarding the Class. You can click the “+Add Event” button to attach a note to this tab, specifically (Figure .).
See Event Log – The SELMA Event Log in this resource for more information.
Figure . Notes include the Event type (red), the Event title (orange) and extra details (blue). Click the “+Add Event” button (green) to add a note to this tab.