Students in SELMA
A student profile contains important information about the student and their relationship with you.
Creating a Student Profile
To create a new Student quickly:
Navigate to Students > New Student in the top navigation bar (Figure 1.).
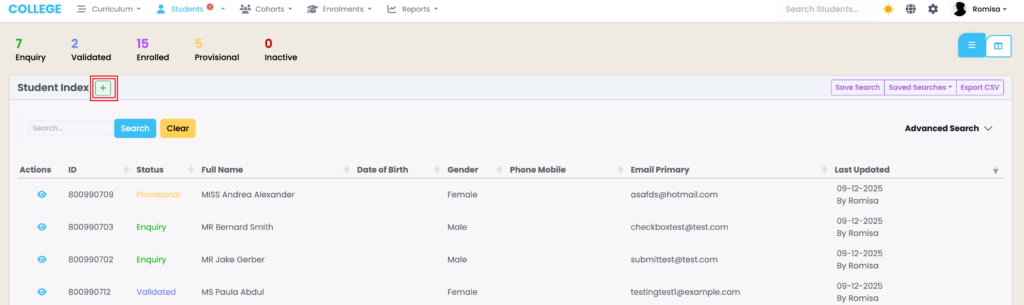
If you access the Student Index first, you will be taken to a page to view the student list before creating a new Student; in which case you should click the green cross icon (Figure 2.).
Figure 1. You can create a new student profile by clicking “New Student” (blue) in the dropdown menu under “Students” (red).
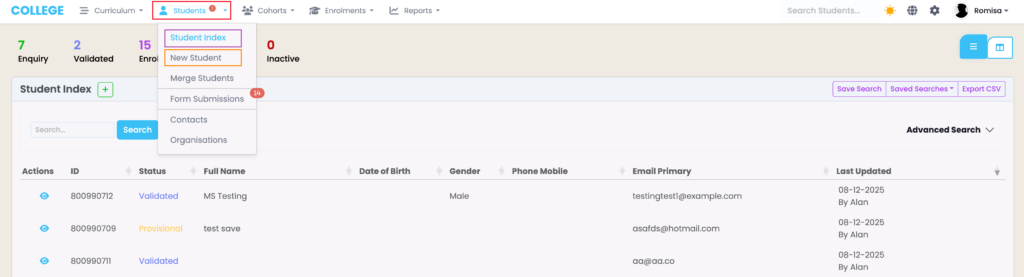
Figure 2. To create a new Student from the Student Index, click the button beside “Student Index” (red).
Student Record Details
Personal Details
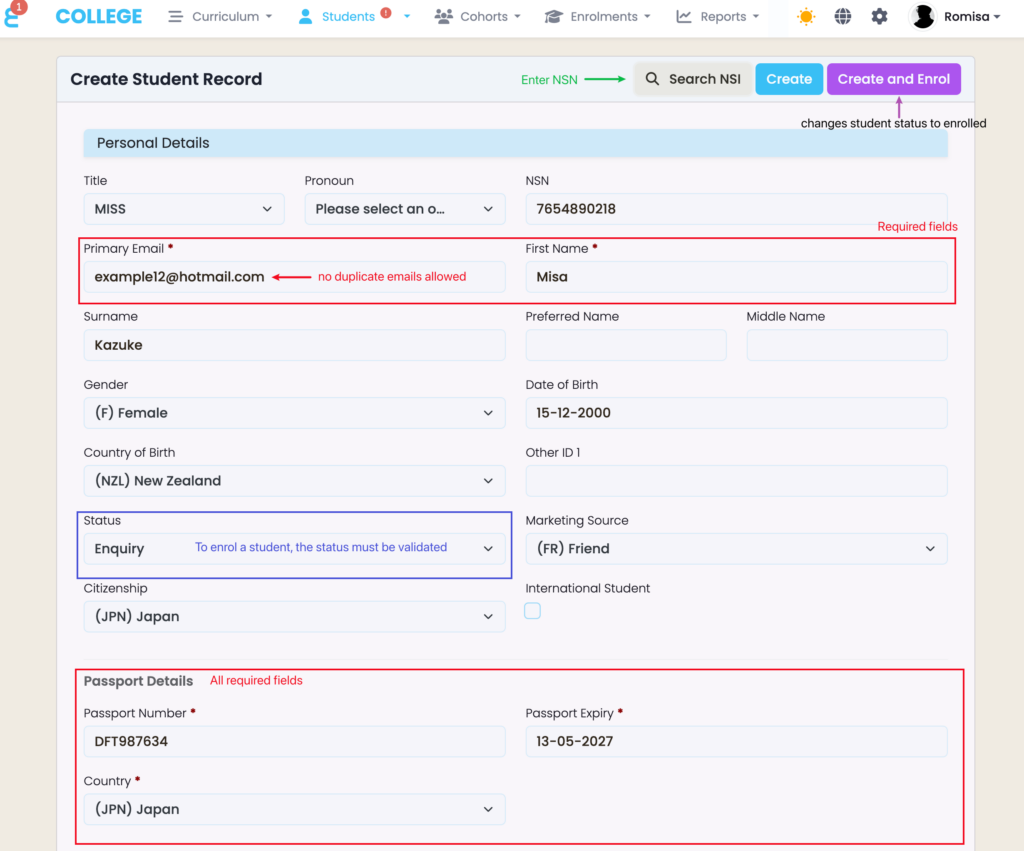
Fill out the fields as required, indicated by red asterisks, and update the Student “Status” to “Validated” to be able to enrol them at a later date (Figure 3.).
Notes:
- Clicking the “Create and Enrol” button automatically updates the Student status to “Enrolled”.
- If you have a National Student Index (NSI) integration set-up with SELMA, you can search the NSI by National Student Number (NSN) to populate the fields in the Student Record for you.
- Contact SELMA Support to set up an NSI integration.
- No duplicate emails are allowed between students, including dummy emails used for students without an email address.
Figure 3. Required fields (red) should be filled out, and the student status changed to “Validated” to enrol the student at a later date (blue). Search by NSN (green) to populate the fields for you and double-check the details.
Other Details
The remaining sections can be filled out including the Student Contact details, Organisations and Contact information where you can add multiple contacts and assign them as Emergency Contacts.
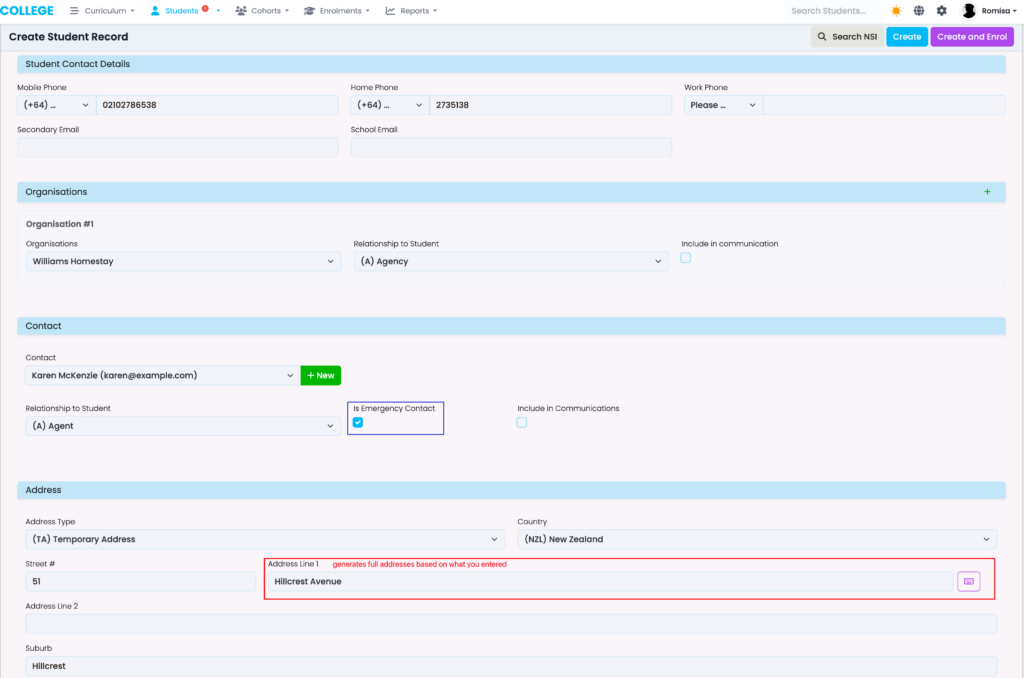
For the address section, use “Address Line 1” to generate an address and automatically update the remaining fields for you (Figure 4.).
Figure 4. Add emergency contacts (blue) and use the field “Address Line 1” (red) to generate an address and populate all Address fields automatically.
Submit Student to the Student Index
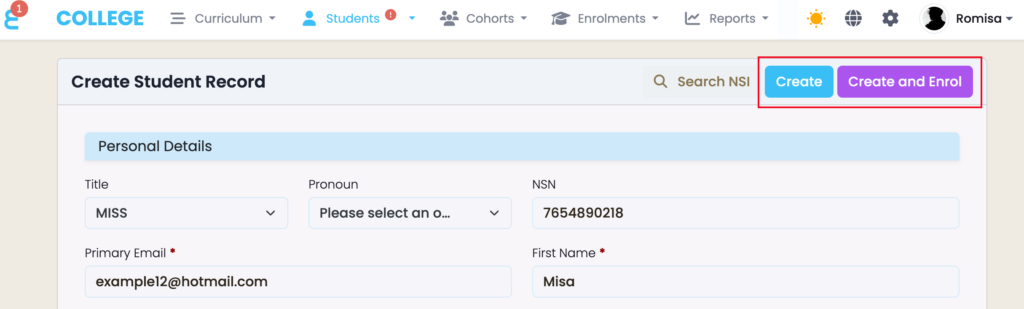
Click the blue “Create” button or the purple “Create and Enrol” button to create the new student profile within the Student Index.
Figure 5. The blue “Create” button submits the student record to the Student Index without enrolling them. The purple “Create and Enrol” button takes you to to Enrolments and automatically updates the Student status to “Enrolled”.