
Description
The SELMASIS Store Front plugin provides direct integration between your WordPress site and your SELMASIS instance, allowing you to display intake information directly on your website.
Features
- Direct API integration with SELMASIS
- Filter options by campus and programme
- Customizable display options
- Caching for improved performance
- Error handling and fallback options
- Secure authentication
Installation
- Download the plugin files
- Upload the plugin files through the WordPress plugin UI
- Activate the plugin through the ‘Plugins’ screen in WordPress
- Use the Settings -> SELMASIS Plugin Configuration screen to configure the plugin
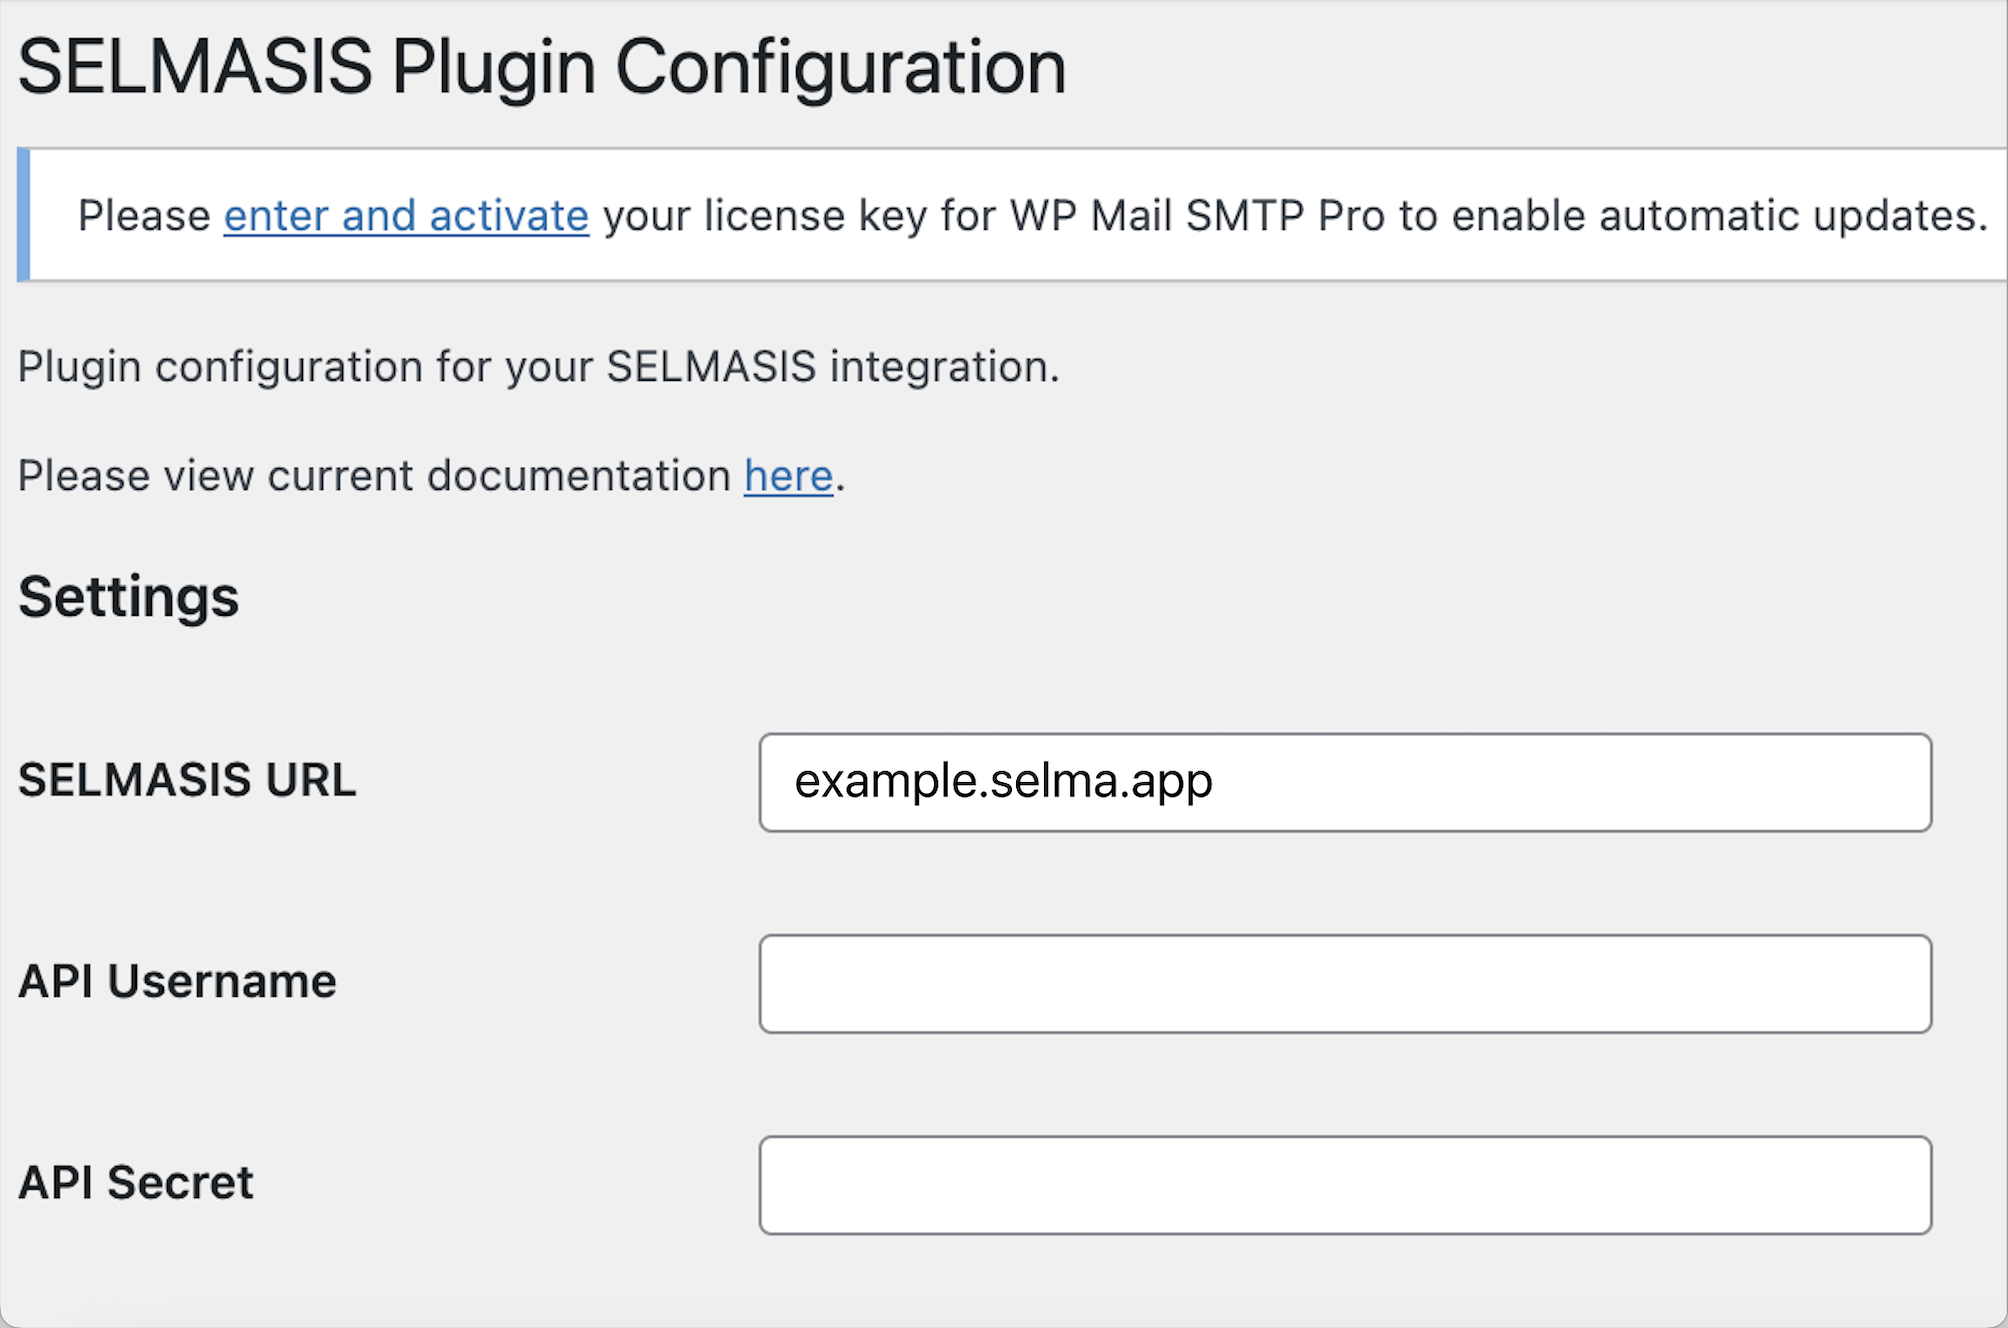
WordPress Configuration
- In WordPress, navigate to Settings -> SELMASIS Plugin Configuration
- Enter your SELMASIS URL, do not include https//: (e.g., example.selma.app)
- Enter your API Username
- Enter your API Secret
- Save changes
Usage
Use the shortcode [selmasis] to display the SELMASIS store front on any page or post.
Optional Shortcode Parameters
campus: Filter by specific campus IDprogramme: Filter by specific programme ID
Example:
// Shows all available intakes
[selmasis]

// Shows Intakes under Campus ID 12 and Programme ID 76
[selmasis campus=12 programme=76]

// Shows Intakes under Programme ID 76
[selmasis programme=76]
Requirements
- WordPress 5.0 or higher
- PHP 7.4 or higher
- Active SELMASIS account with API User access
How do I get API credentials?
Contact your SELMASIS account manager to request API access credentials.
Why isn’t my content displaying?
Check the following:
1. Verify your API credentials are correct
2. Ensure your SELMASIS URL is correct
3. Check your WordPress error logs for any specific errors
4. Verify your server can reach the SELMASIS API
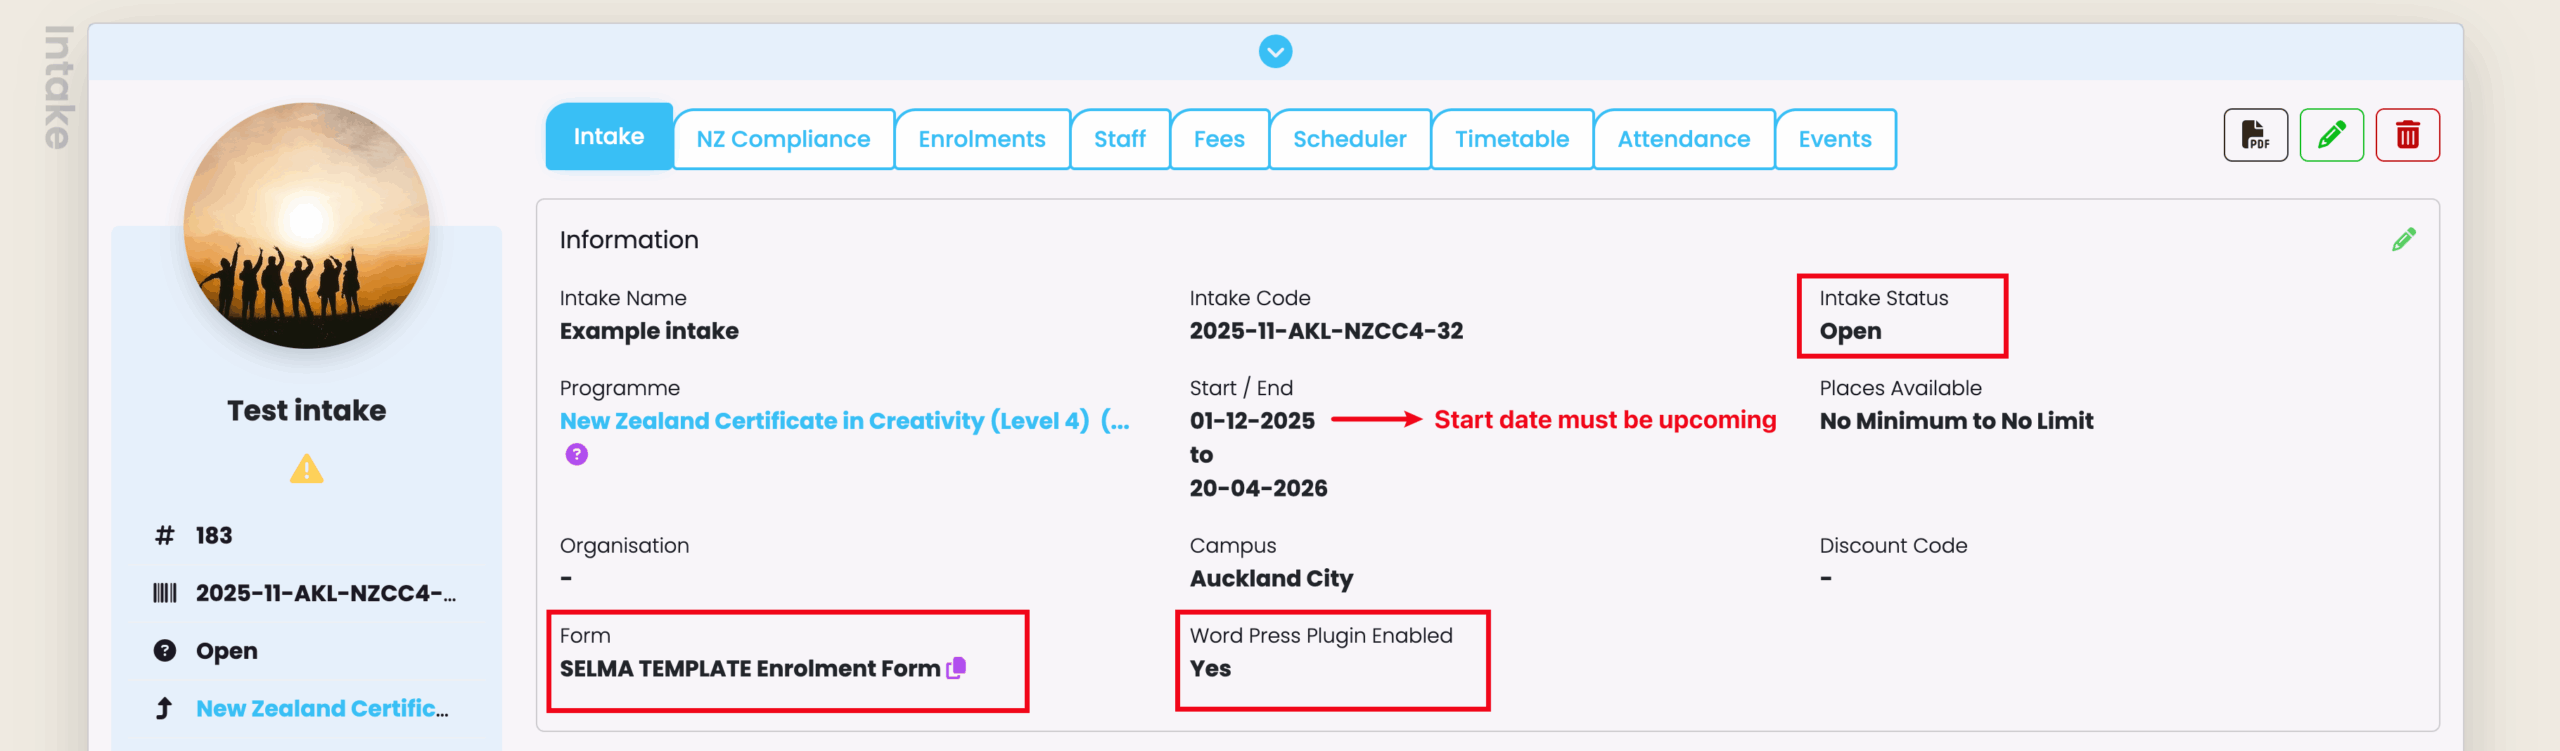
5. Make sure your Intakes and Form are setup correctly in SELMA: Intake Start Date must be in the future. Intake status must be “Open”. Intake must be linked to the correct form and Word Press Plugin Enabled = “Yes”.
How can I customise the display?
The plugin is fully customisable in your SELMA instance under Settings / Integrations / WordPress
