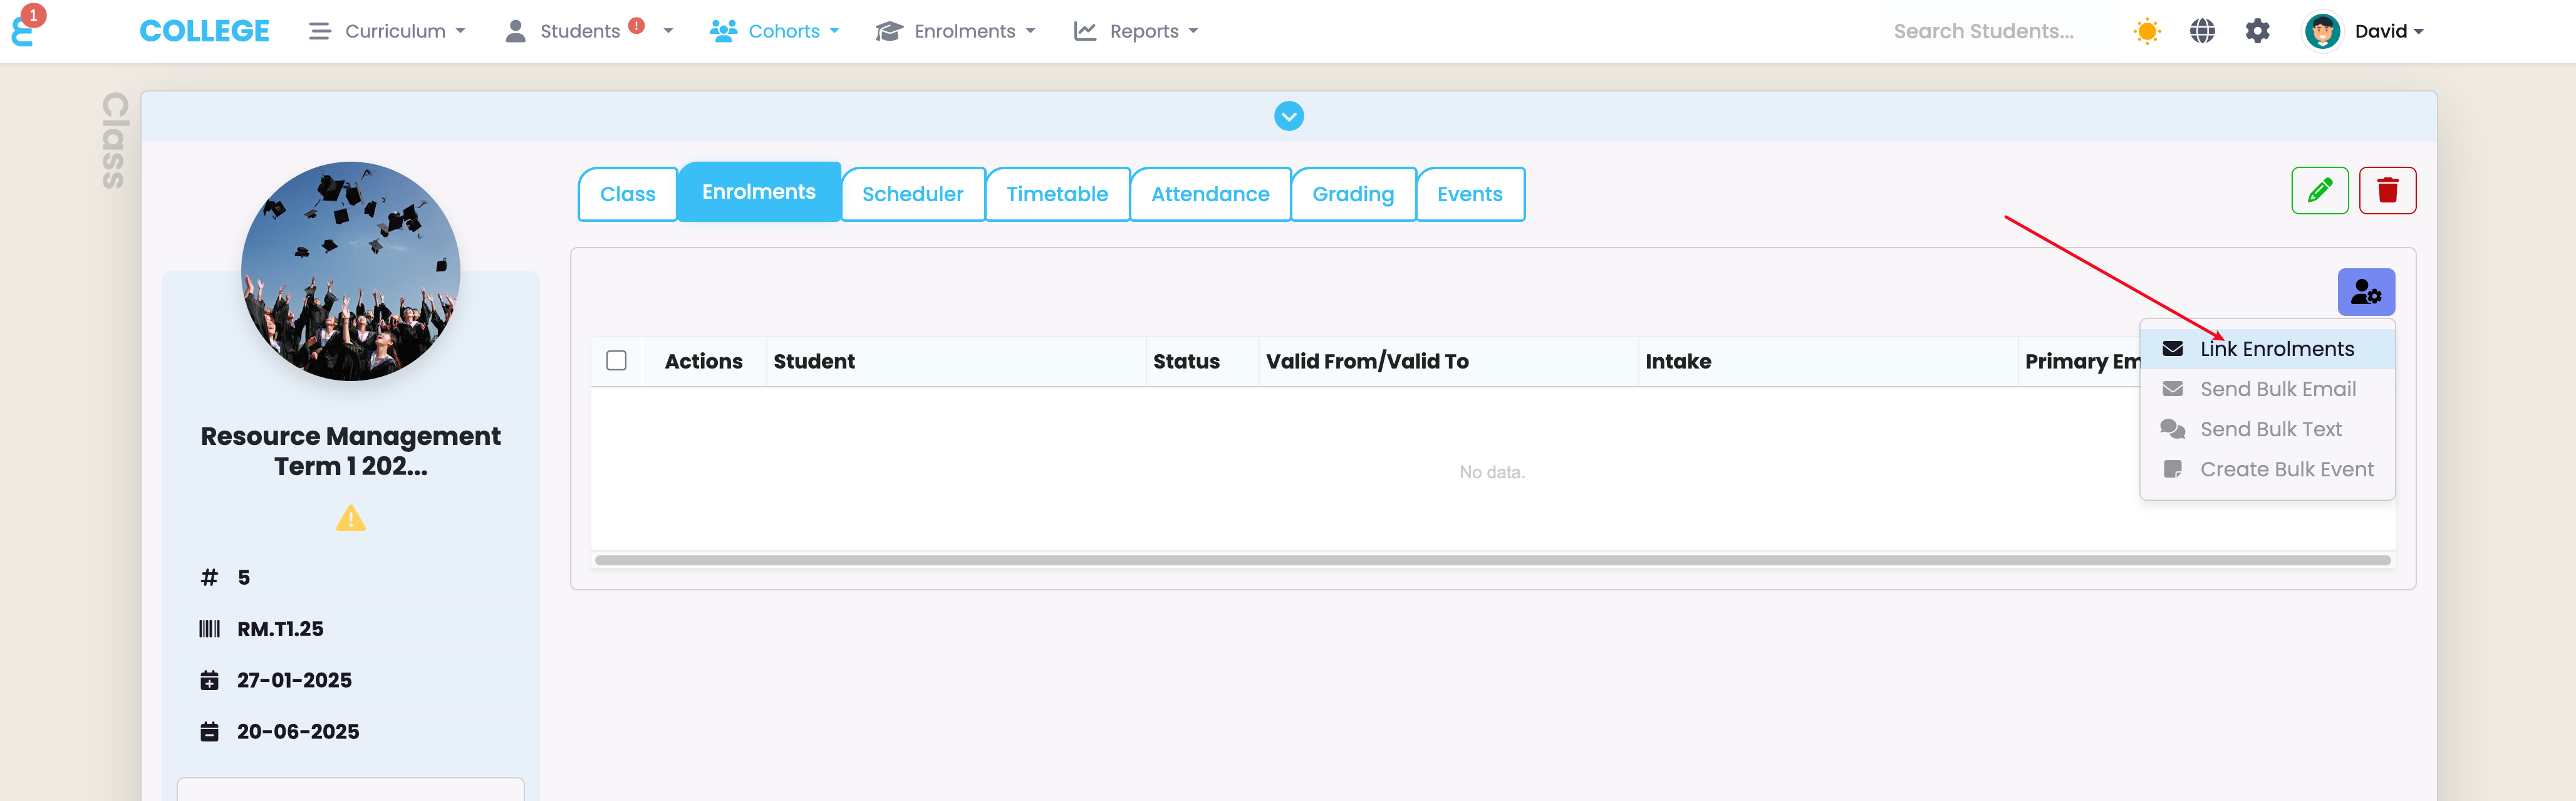
Once enrolments are linked into the class, the class will show up on the students enrolment, and if the student has portal access, they might see the classes timetable if one has been created. To link enrolments to a class, go to the “Enrolments” tab, click the function button and select “Link Enrolments”:
The enrolment linking slide in function will open. Use the programme or intake filter to show a list of available students to link to the class:
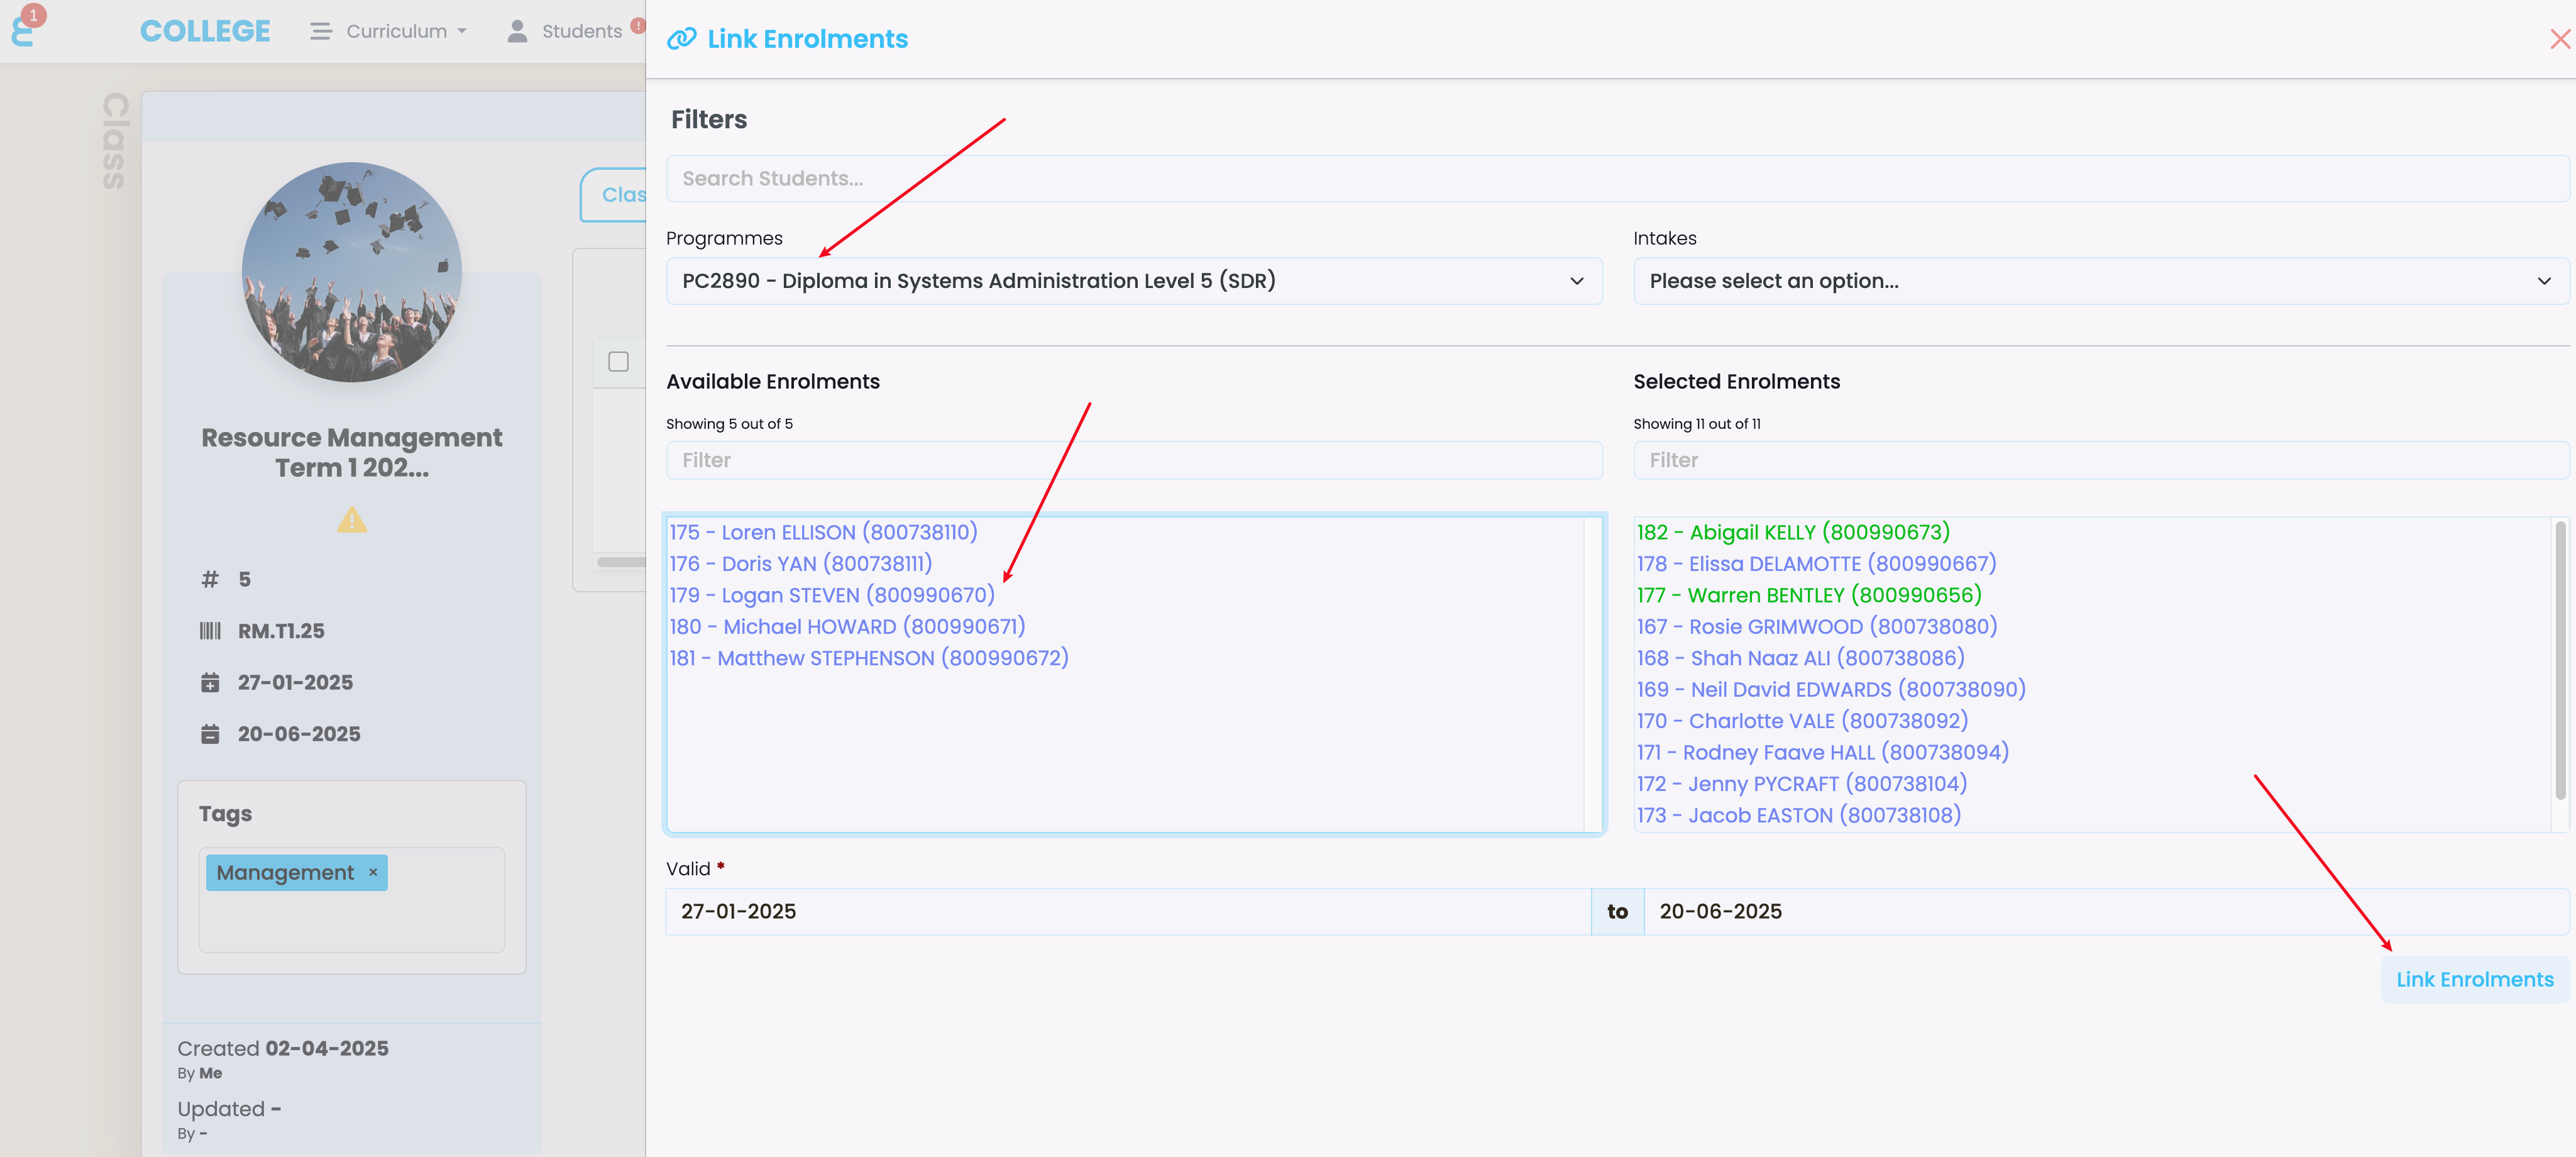
Click on the student to move them to the “Selected Enrolments” window and click on “Link Enrolments”.
Once enrolments have been linked, the Enrolment tab becomes a very powerful feature. Below are several functions you can now perform on the class:
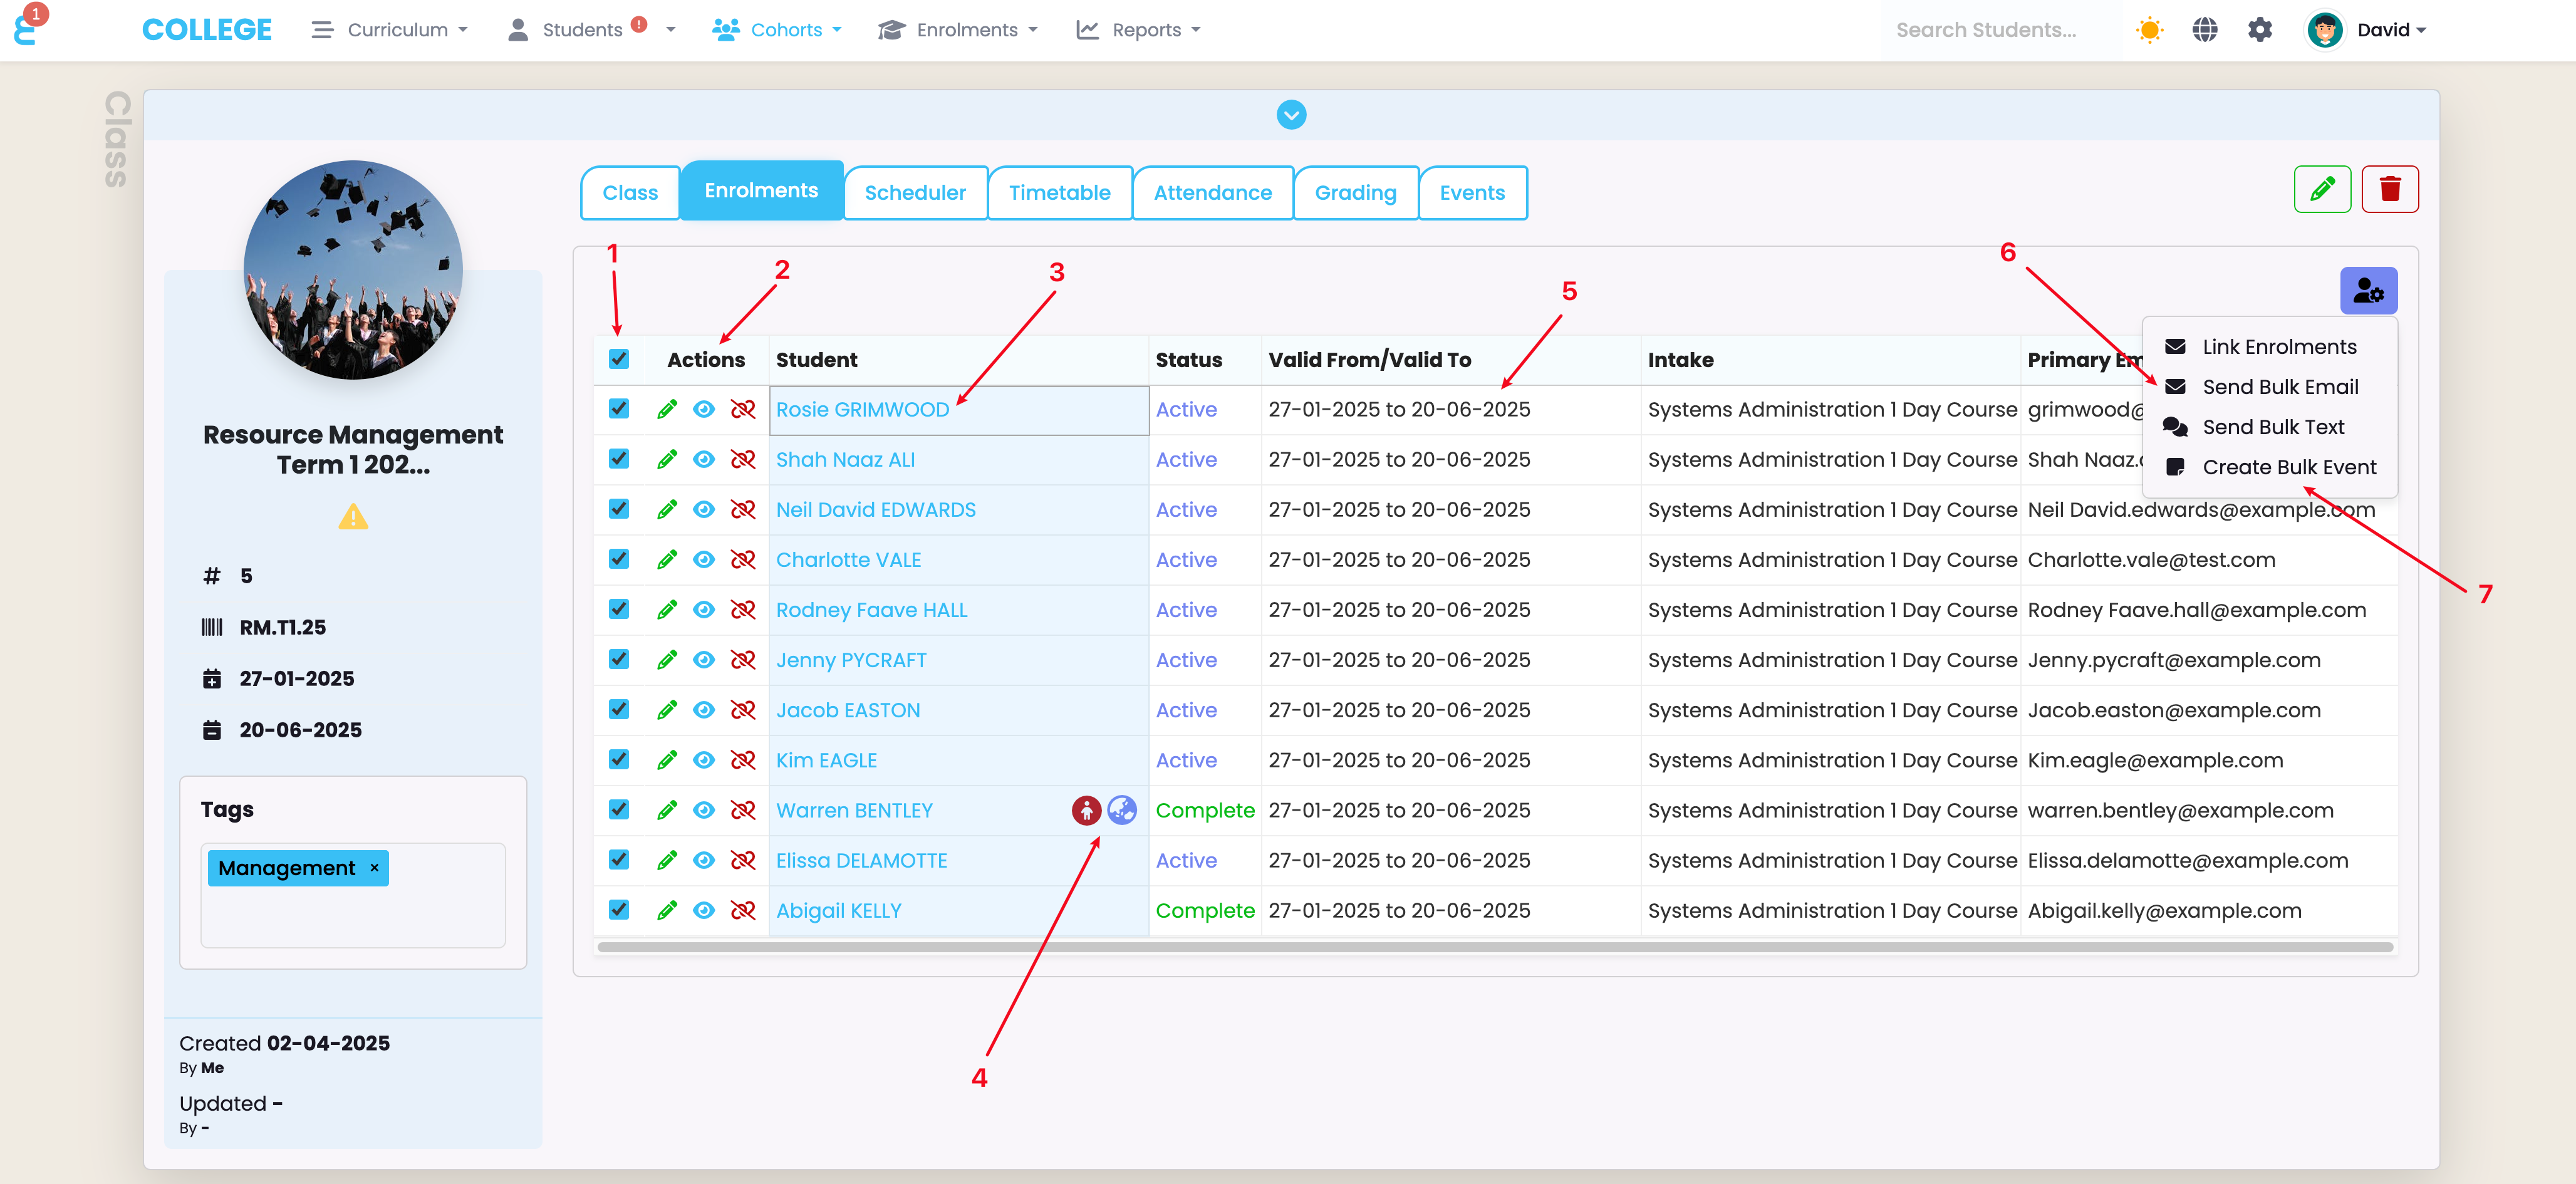
- You can select one or many enrolments for bulk processes such as emailing, or event creation
- You can edit linked enrolments, unlink them from the class, or click the eye button to open and view the enrolment
- You can click on the students name to open their profile
- Students that are international, have an alert, or are under aged are highlighted with an extra icon in the list.
- The duration of a student in the class can be adjusted, e.g. if the student starts late. This will mean the student won’t be expected in the class until their individual start date (no attendance register will be created).
- You can now send an email or text message in bulk to the selected enrolments.
- You can create a bulk note (event log entry) for all selected students.
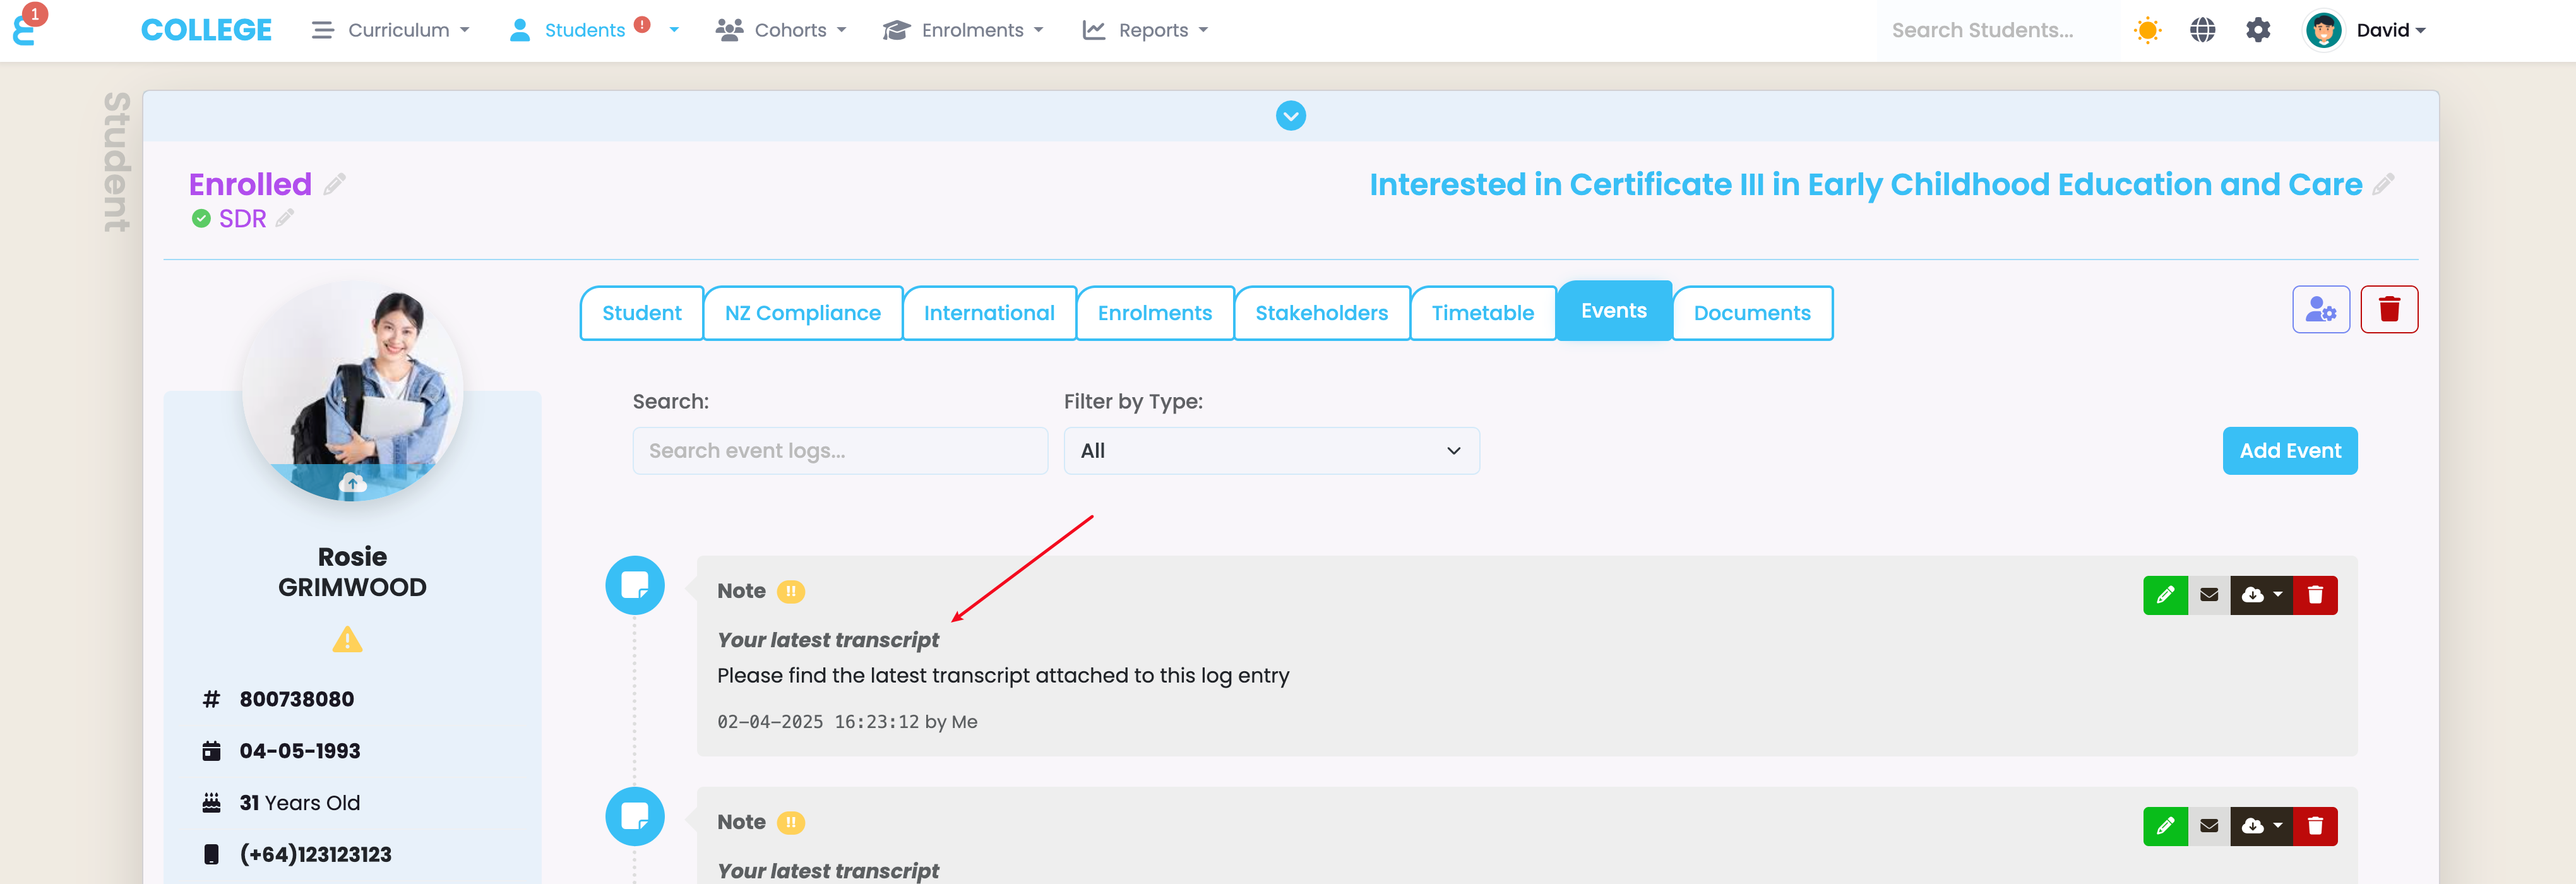
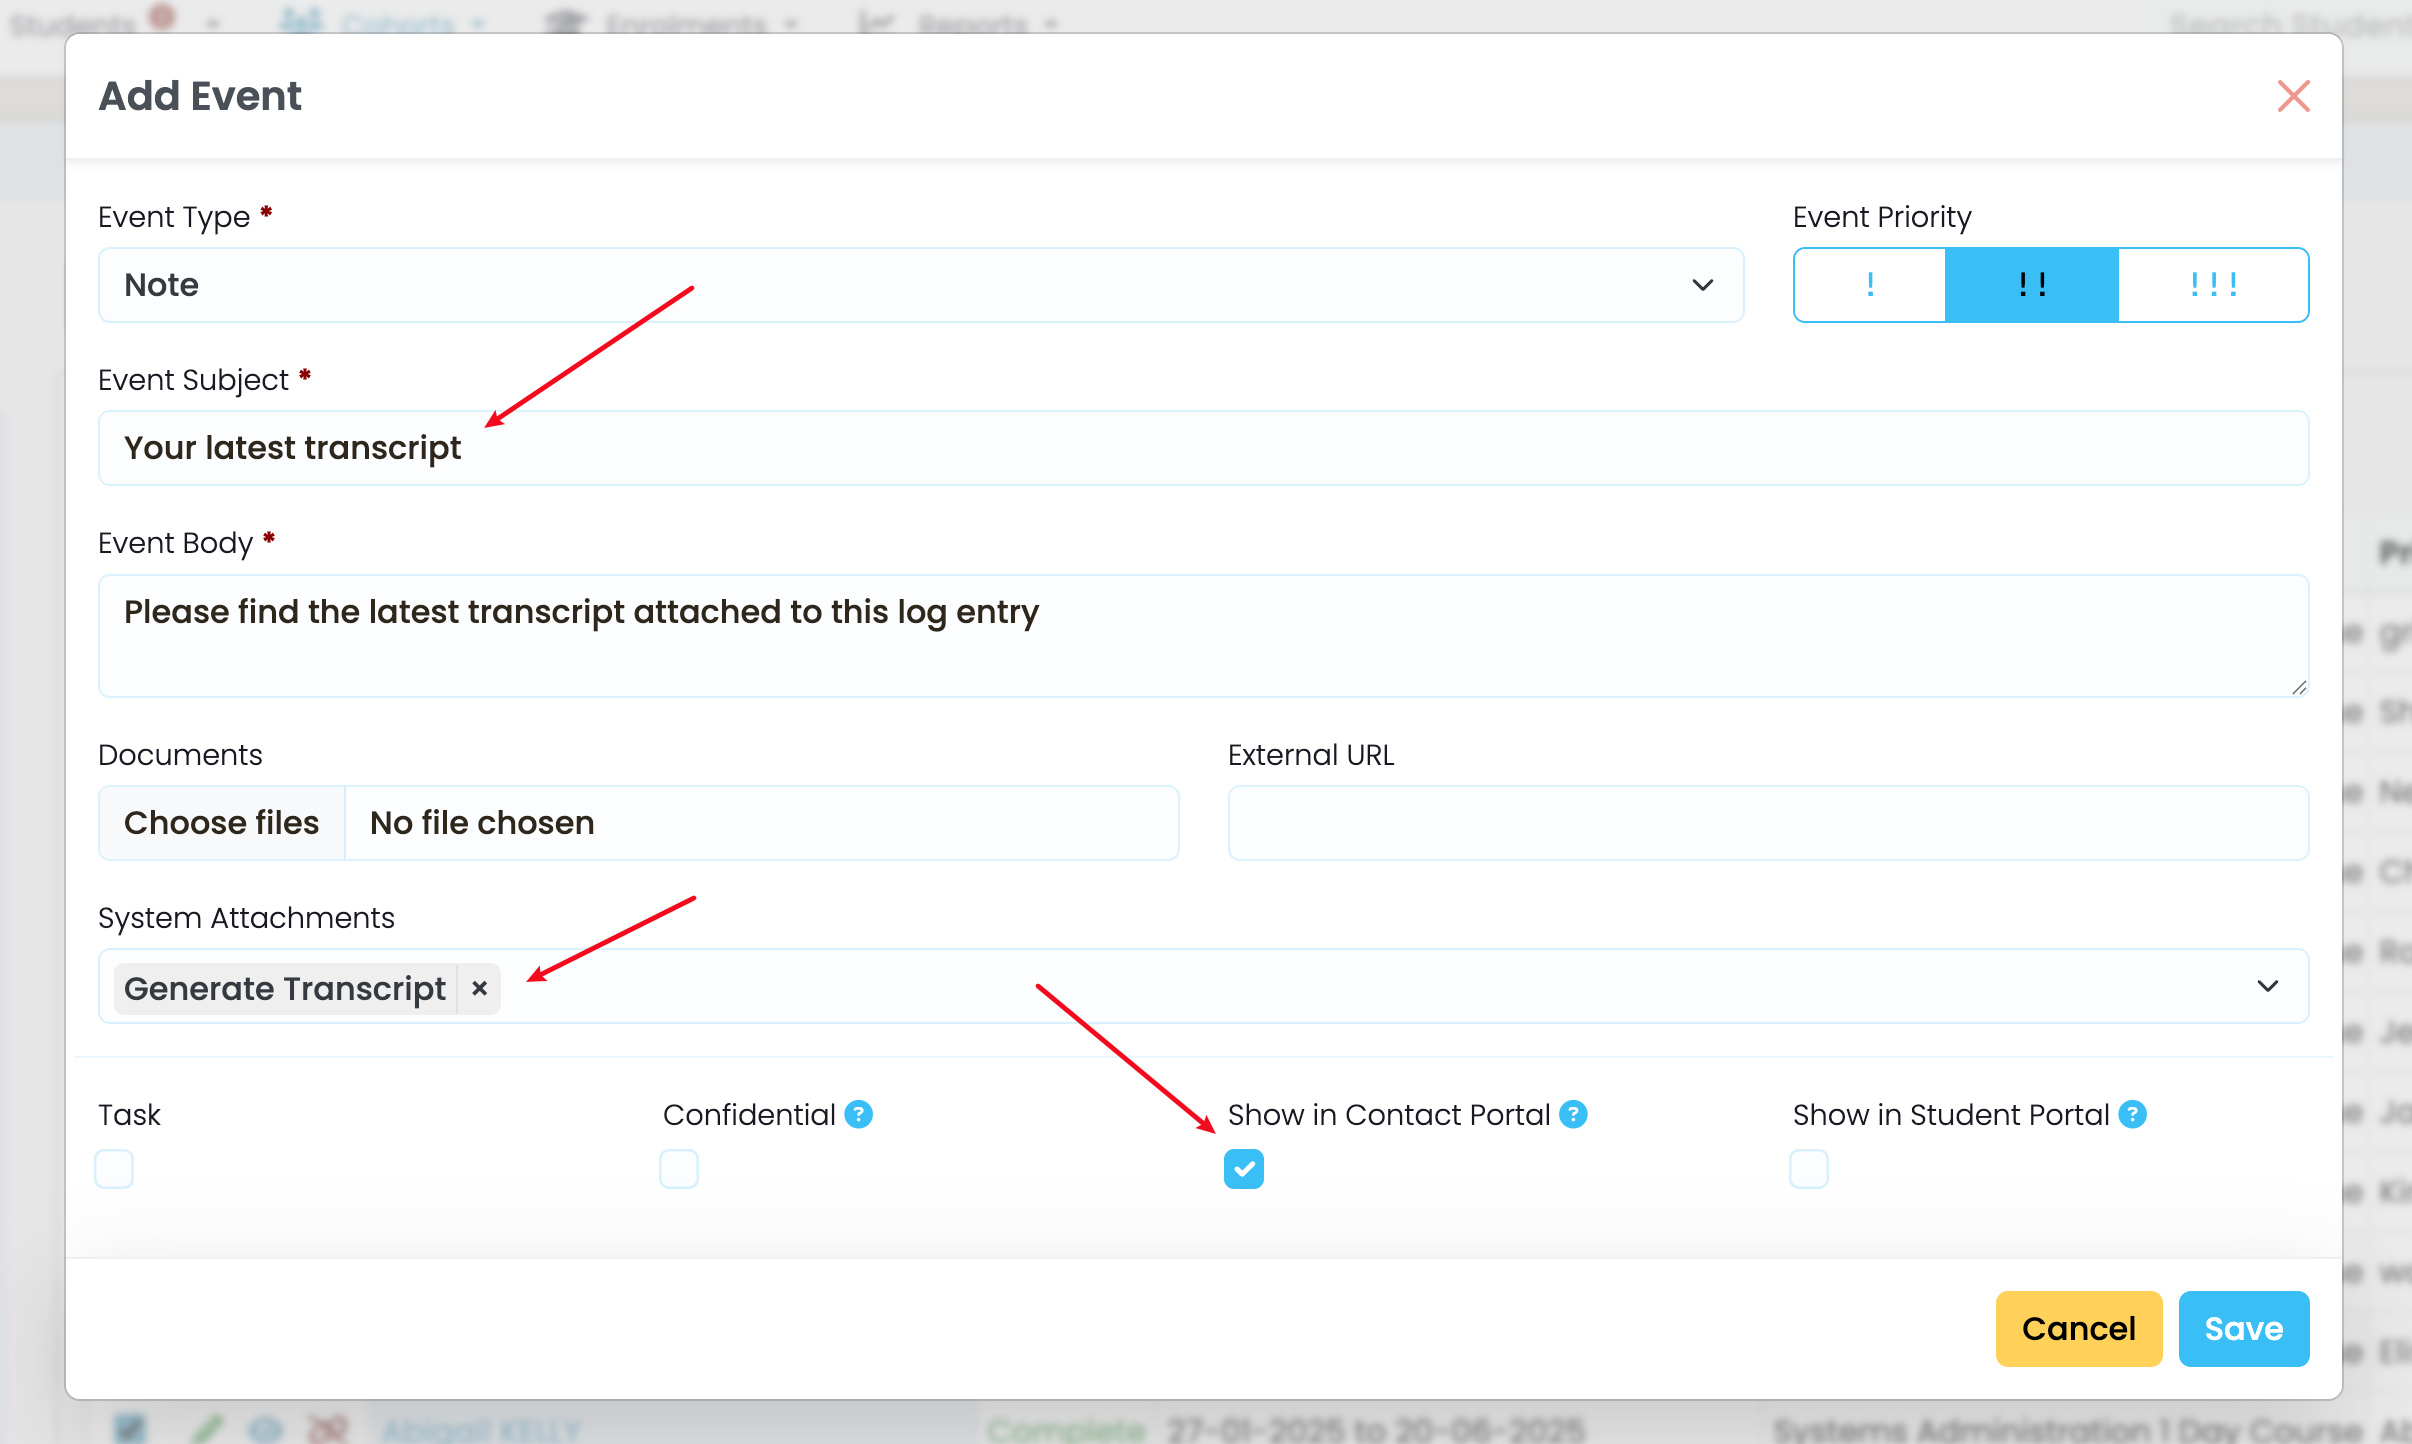
When you create a bulk event (7), you can e.g. create an event log entry for every student with an updated transcript in it. Below example creates an event log entry with the students individual event notes and publishes it in the student portal as well:
The student will now have an event log entry with their latest transcript on their profile: