Prerequisites
- Administrator access to SELMA and your Moodle instance
- Integration enabled in SELMA by SELMA Support
Moodle Configuration Steps
- In Moodle, go to Site Administration > Server > Web services > Overview
- Follow the steps shown on the Overview page. Consider the following as you make your way through the steps:
- Ensure the ‘REST’ protocol is enabled
- Once you’ve created a dedicated webservices user and dedicated role (recommended), ensure the role has the following capabilities:
- enrol/manual:enrol
- gradereport/user:view
- moodle/course:enrolreview
- moodle/course:managegroups
- moodle/course:view
- moodle/course:viewparticipants
- moodle/grade:viewall
- moodle/role:assign
- moodle/site:accessallgroups
- moodle/site:viewuseridentity
- moodle/user:create
- moodle/user:viewdetails
- moodle/user:viewalldetails
- moodle/user:update
- report/completion:view
- webservice/rest:use
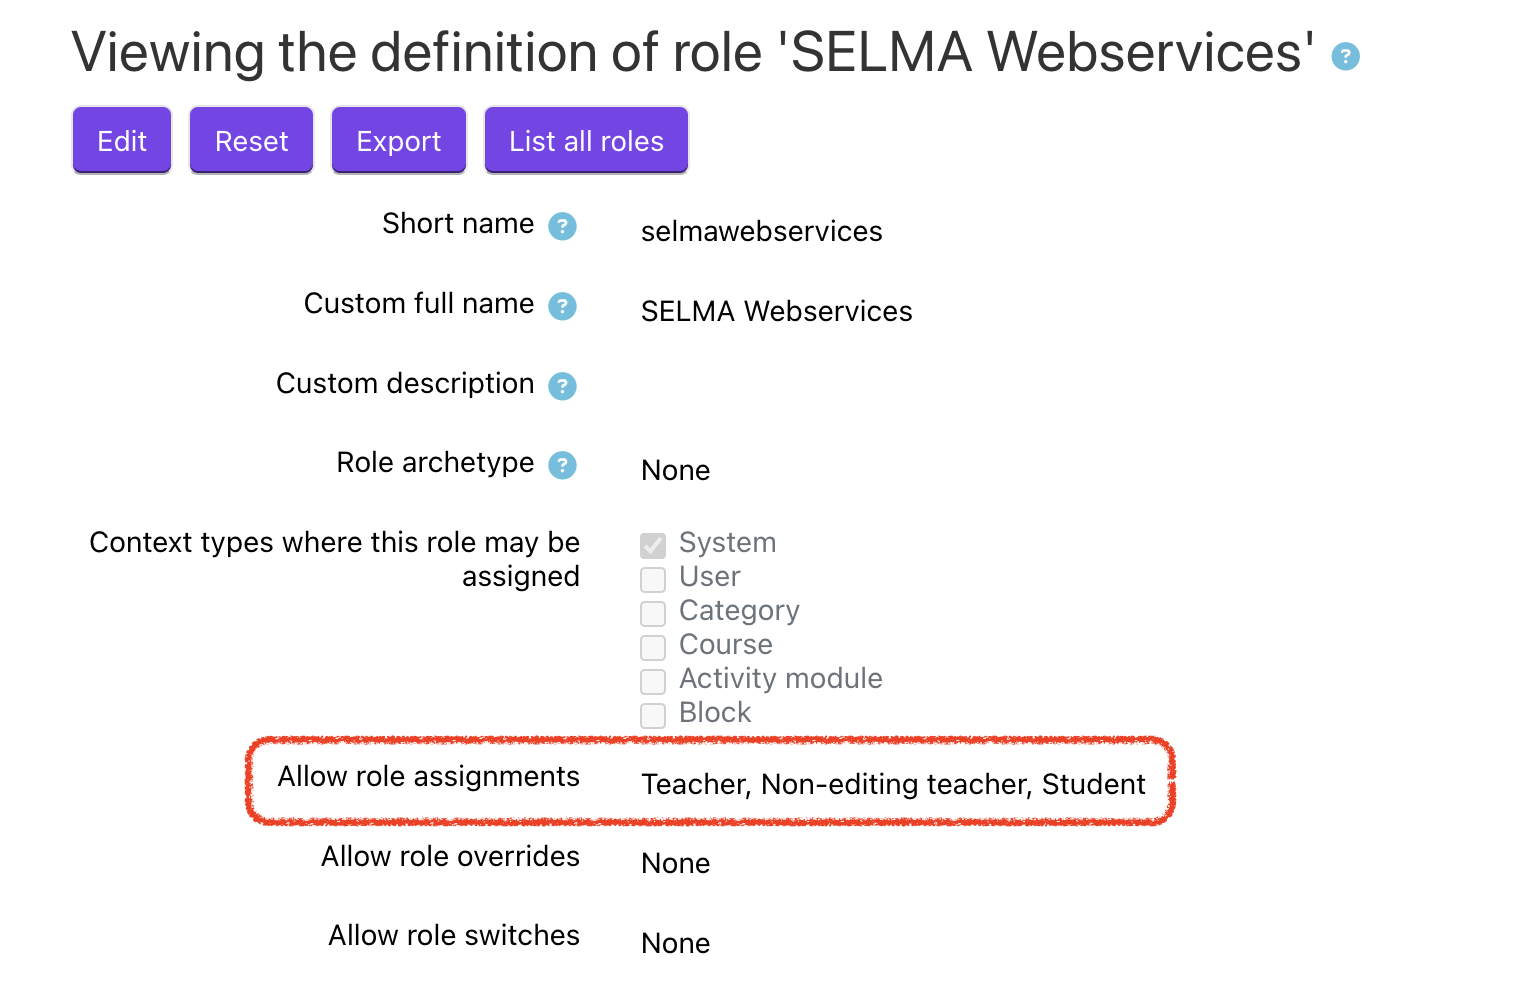
- Ensure the webservices role has the ability to assign roles to other users – this is a separate setting on the role in Moodle. It should be able to assign the roles you specify on the Moodle Configuration page in SELMA. The setting in Moodle looks something like this:

- Make sure you assign the role to the webservices user.
- After creating a service, add the following functions (endpoints) to it:
- core_completion_get_course_completion_status
- core_course_get_courses
- core_group_add_group_members
- core_group_create_groups
- core_group_get_course_groups
- core_user_create_users
- core_user_get_users
- core_user_update_users
- core_webservice_get_site_info
- enrol_manual_enrol_users
- gradereport_user_get_grade_items
- Copy the token somewhere safe so you can paste it into SELMA (see below).
For more detailed information about setting up web services in Moodle, visit: https://docs.moodle.org/en/Using_web_services
SELMA Configuration Steps
- Navigate to Integrations > Moodle in SELMA
- Configure the following settings:
- Endpoint: Your Moodle URL (e.g. https://moodle.yourdomain.com)
- Token: The web service token created in Moodle
- Default Teacher Role: Usually ID ‘3’ (Verify ID in Moodle)
- Default Student Role: Usually ID ‘5’ (Verify in Moodle)
- Groups Enabled: Enable if you want SELMA classes to sync as Moodle groups
- Use the “Test Connection” button to verify your configuration
- Check the logs section for any errors if the test fails
Important Notes
- Keep your web service token secure
- Monitor the logs regularly for any sync issues
- Contact SELMA support if you need assistance
