
The SELMA-Moodle Integration serves as a connector between your Moodle instance and your SELMA instance. This allows you to provision students from SELMA to Moodle and sync grades/completion from Moodle to SELMA.
In this Section:
Pre-requisites
Please contact SELMA Support to enable your Moodle Integration.
- Individuals with administrator access to your Moodle site should follow the steps below.
- Enable the ‘
extendedusernamechars‘ setting in Moodle – this is required for usernames to sync properly.
Get Started in Moodle
Follow the steps, below, to configure your Moodle instance:
Figure 1i. Navigate to Site Administration
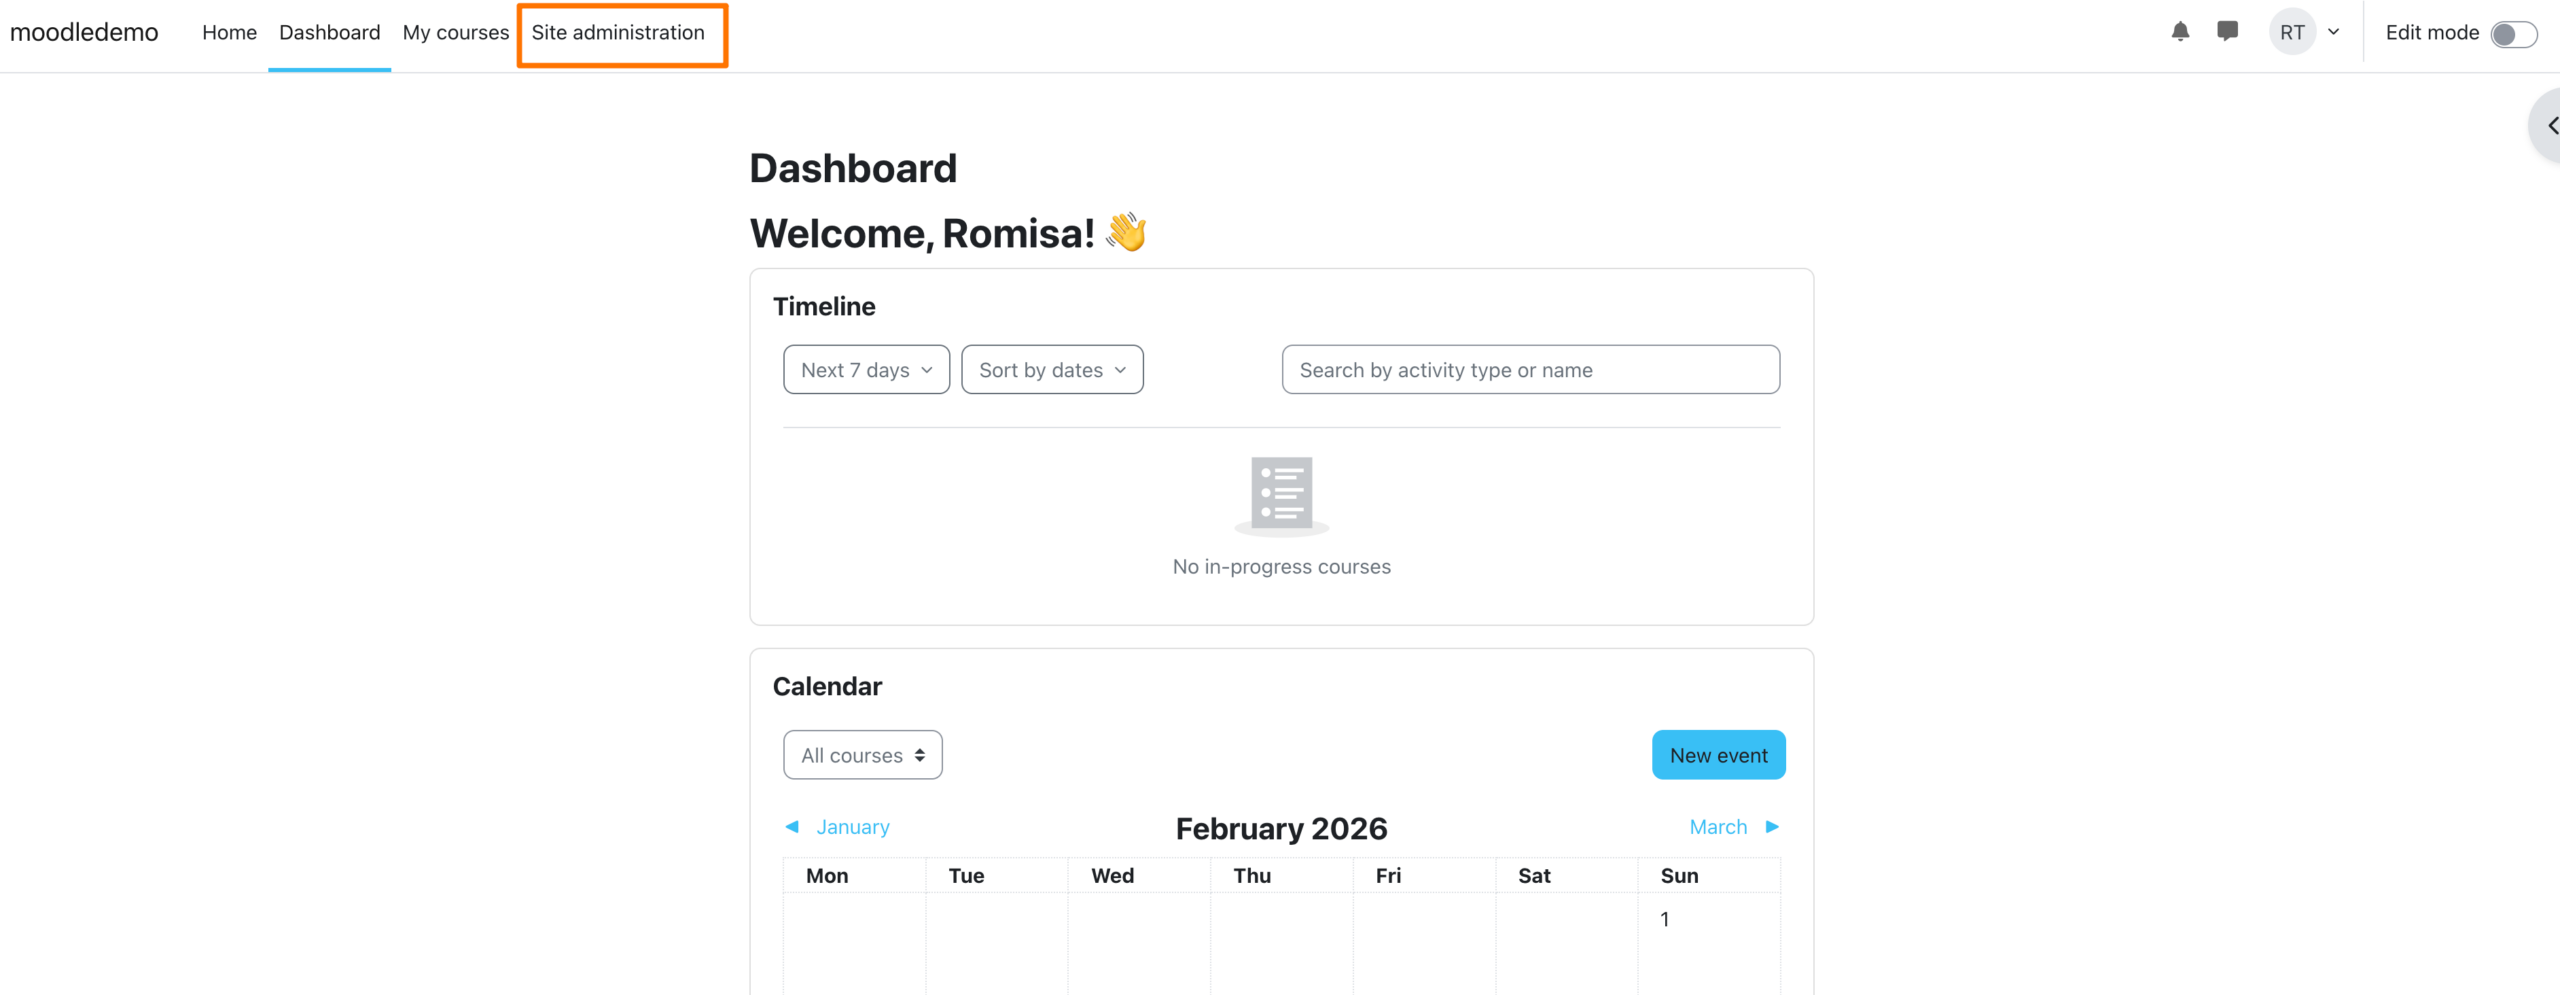
Figure 1ii. Navigate to Server > Web Services
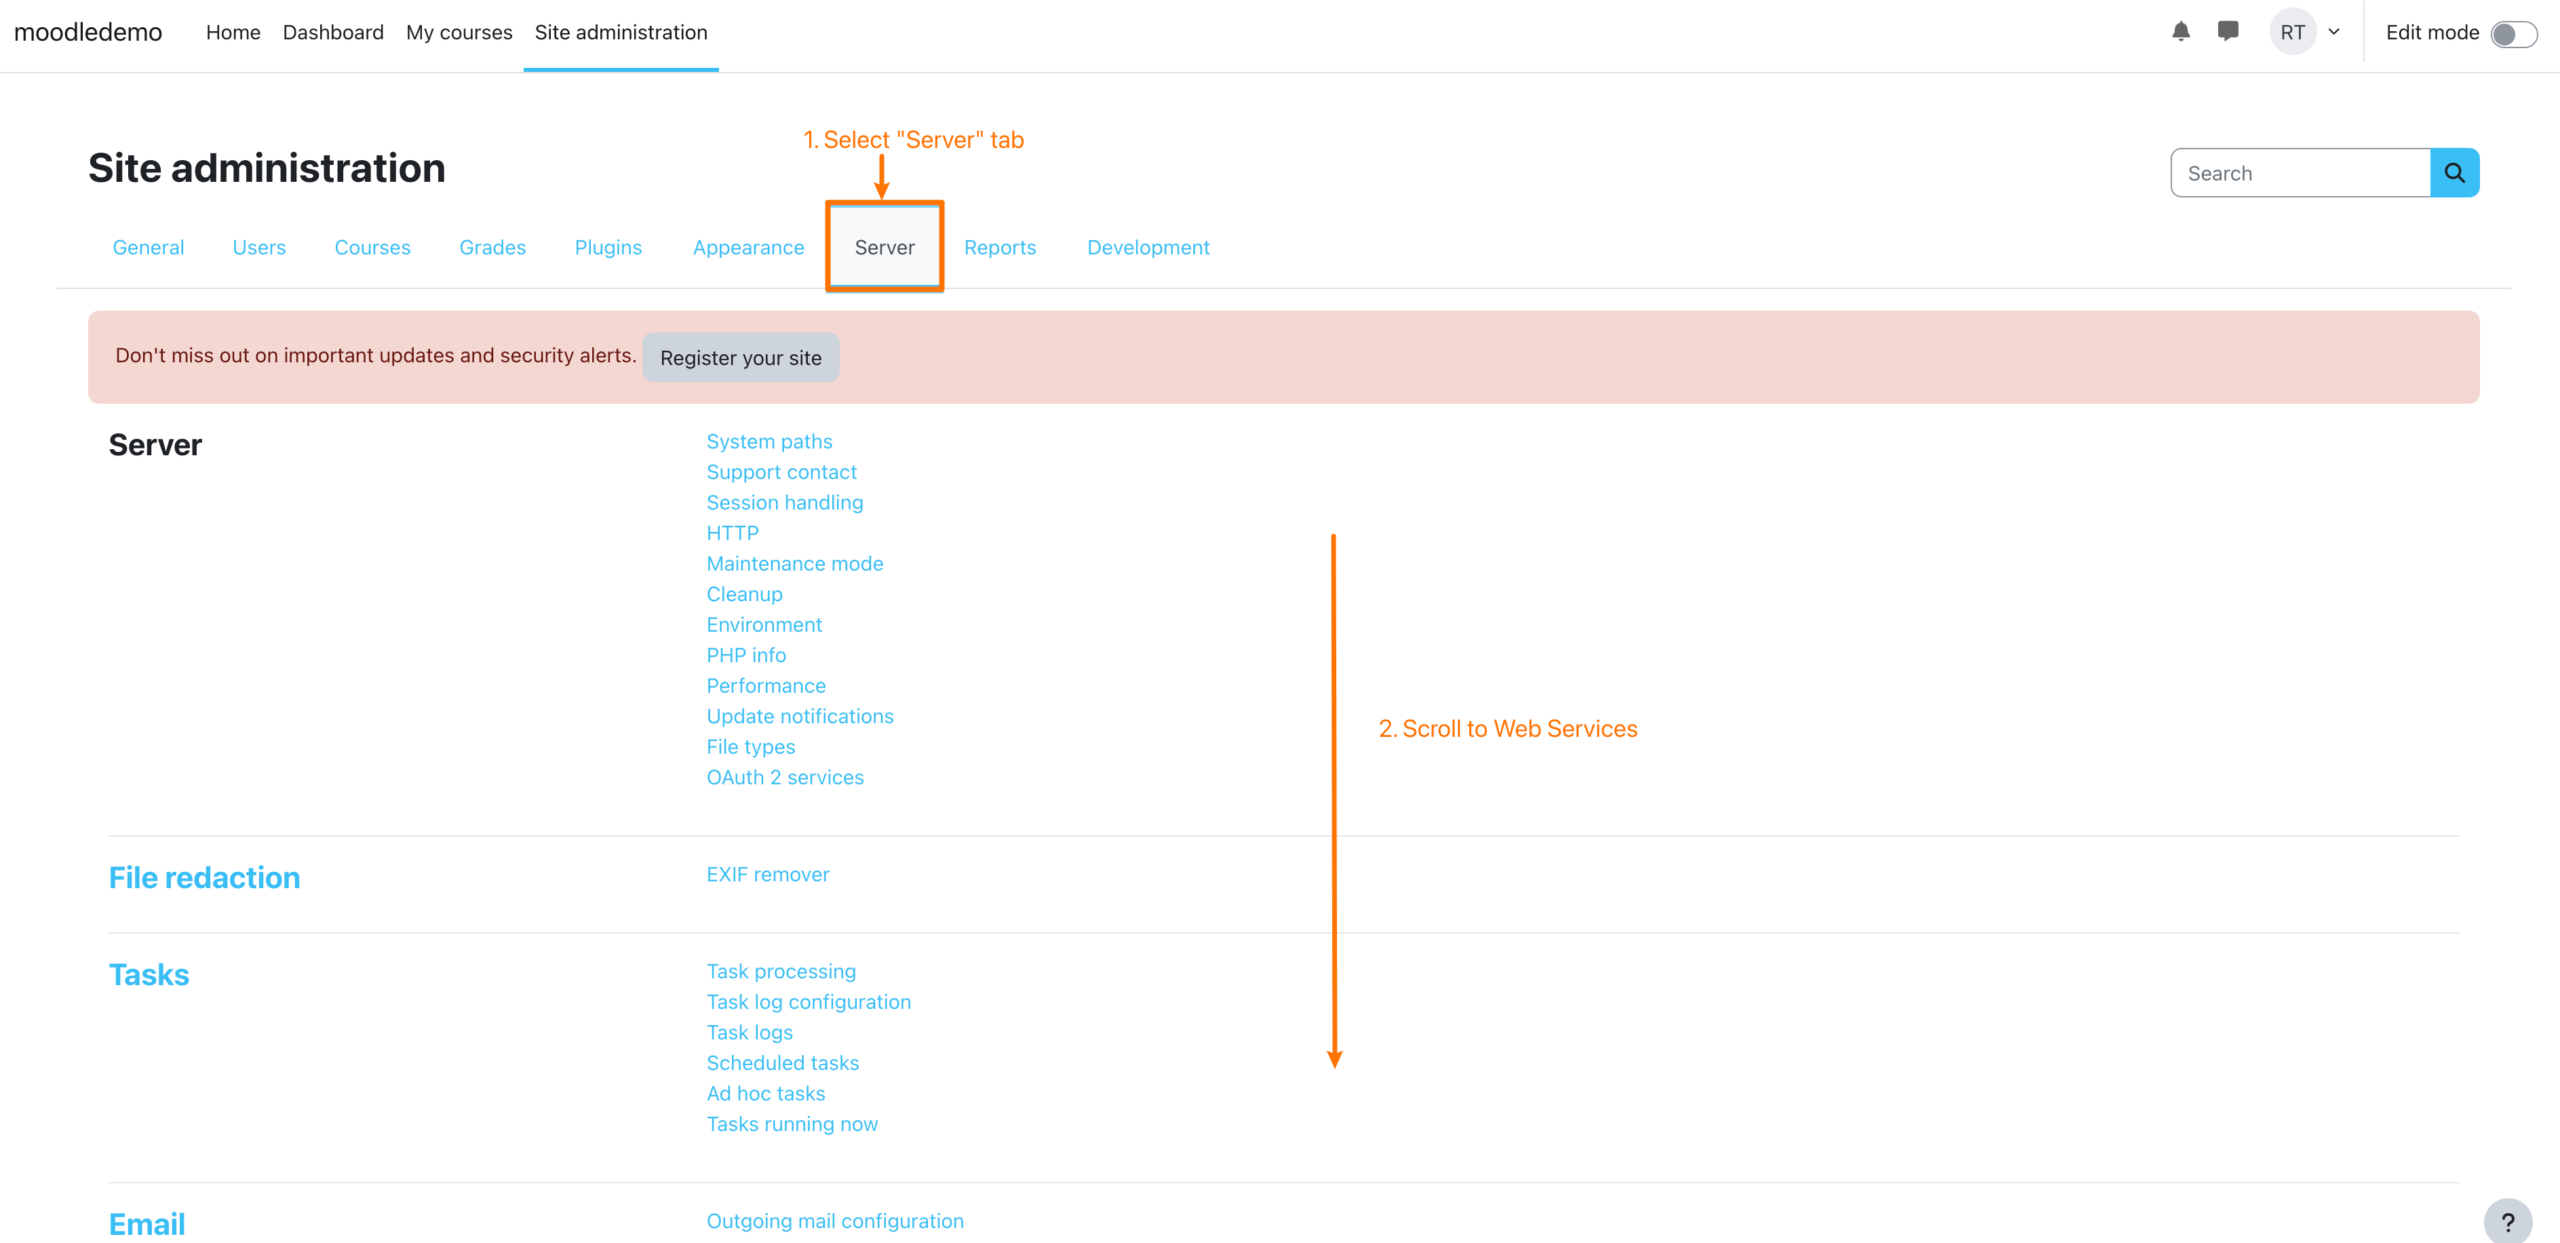
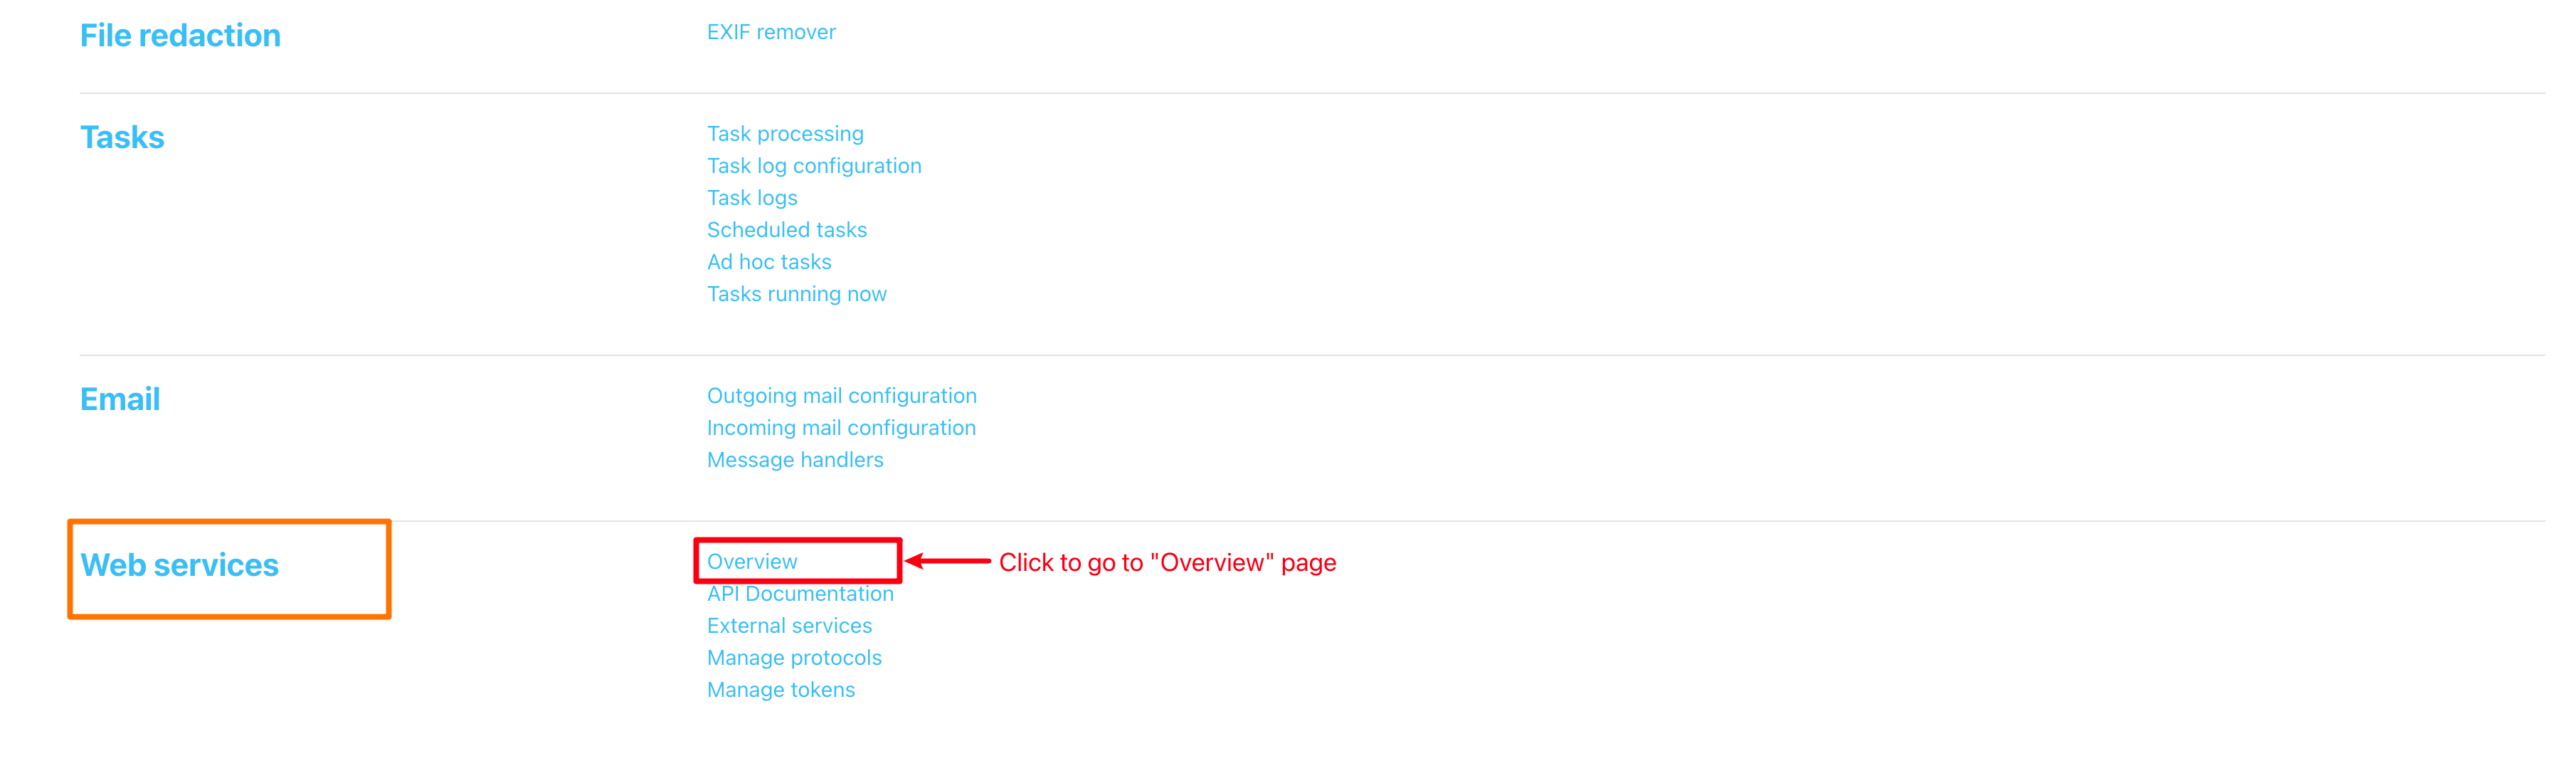
Figure 1iii. Navigate to Overview
Follow Steps Outlined on the Overview Page
Please follow the steps from 1-8, as described on the overview page.
Reminder:
- We recommend you follow the instructions below for ‘Step 4‘ of the Overview page.
- The ‘Step 4‘ link in Moodle simply takes you to check the permissions/capabilities, we provide the steps below to actually set them up.
- We also provide the list of functions you need to add as part of ‘Step 6‘ of the Overview page below.
Once you have completed each step successfully, jump to Retrieve Token and Hold, in this article.
Figure 2. Overview Page
Click the link for each step to take you straight to the relevant page and perform each task.
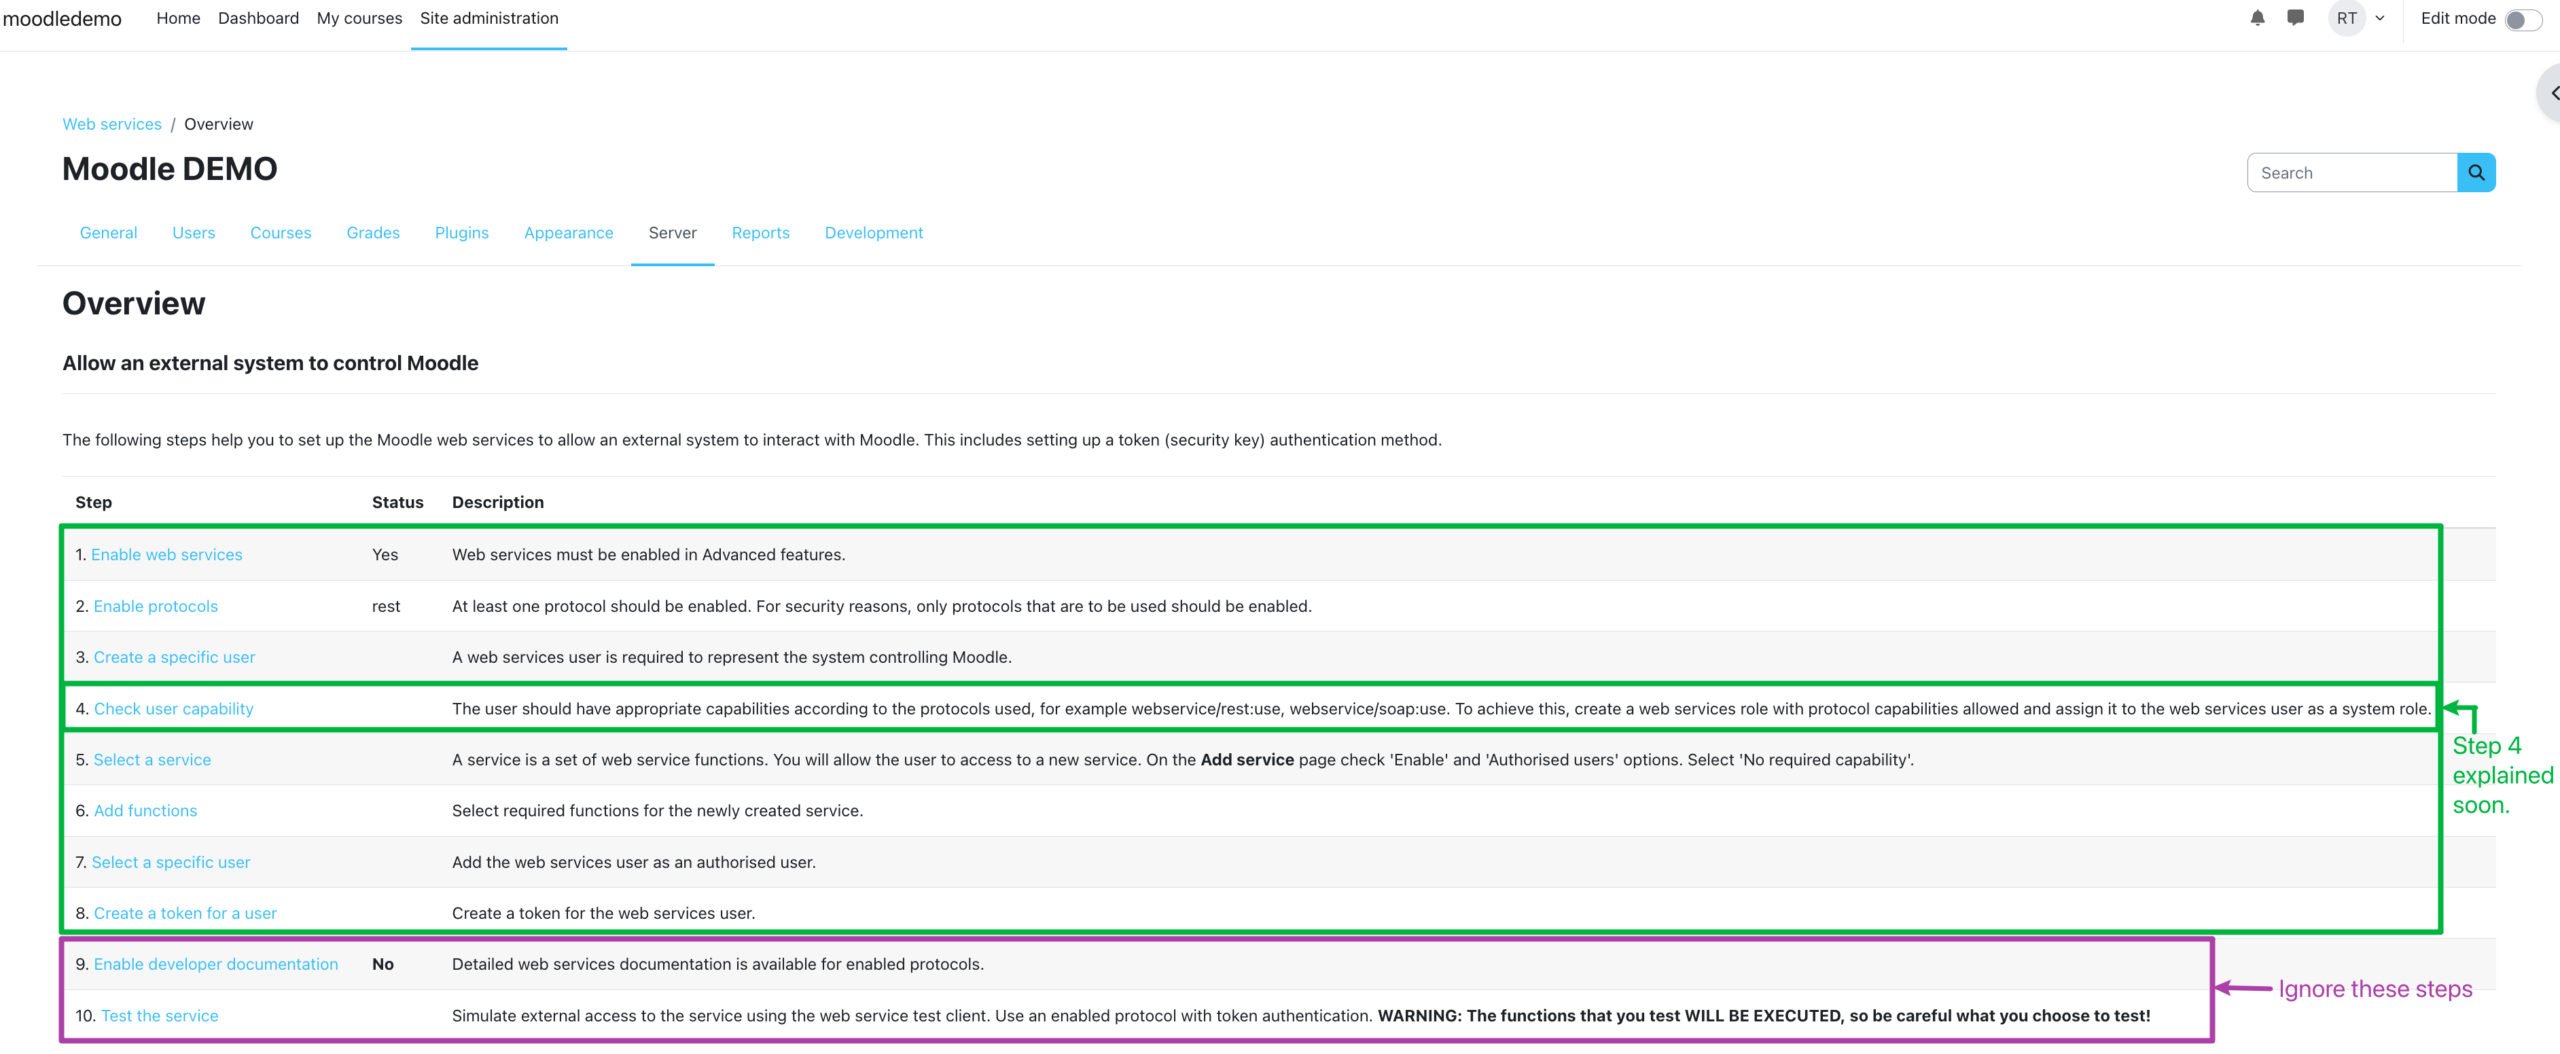
Step 4
Define Webservices User Role
The following describes what should be done in place of step 4 on the Overview Page.
To save time, you can import this role file which will automatically create and assign the required capabilities/permissions to the role – you still need to assign the role though:
Figure 3i. Navigate to the Users Tab
Under the “Users” tab, click “Define Roles”.
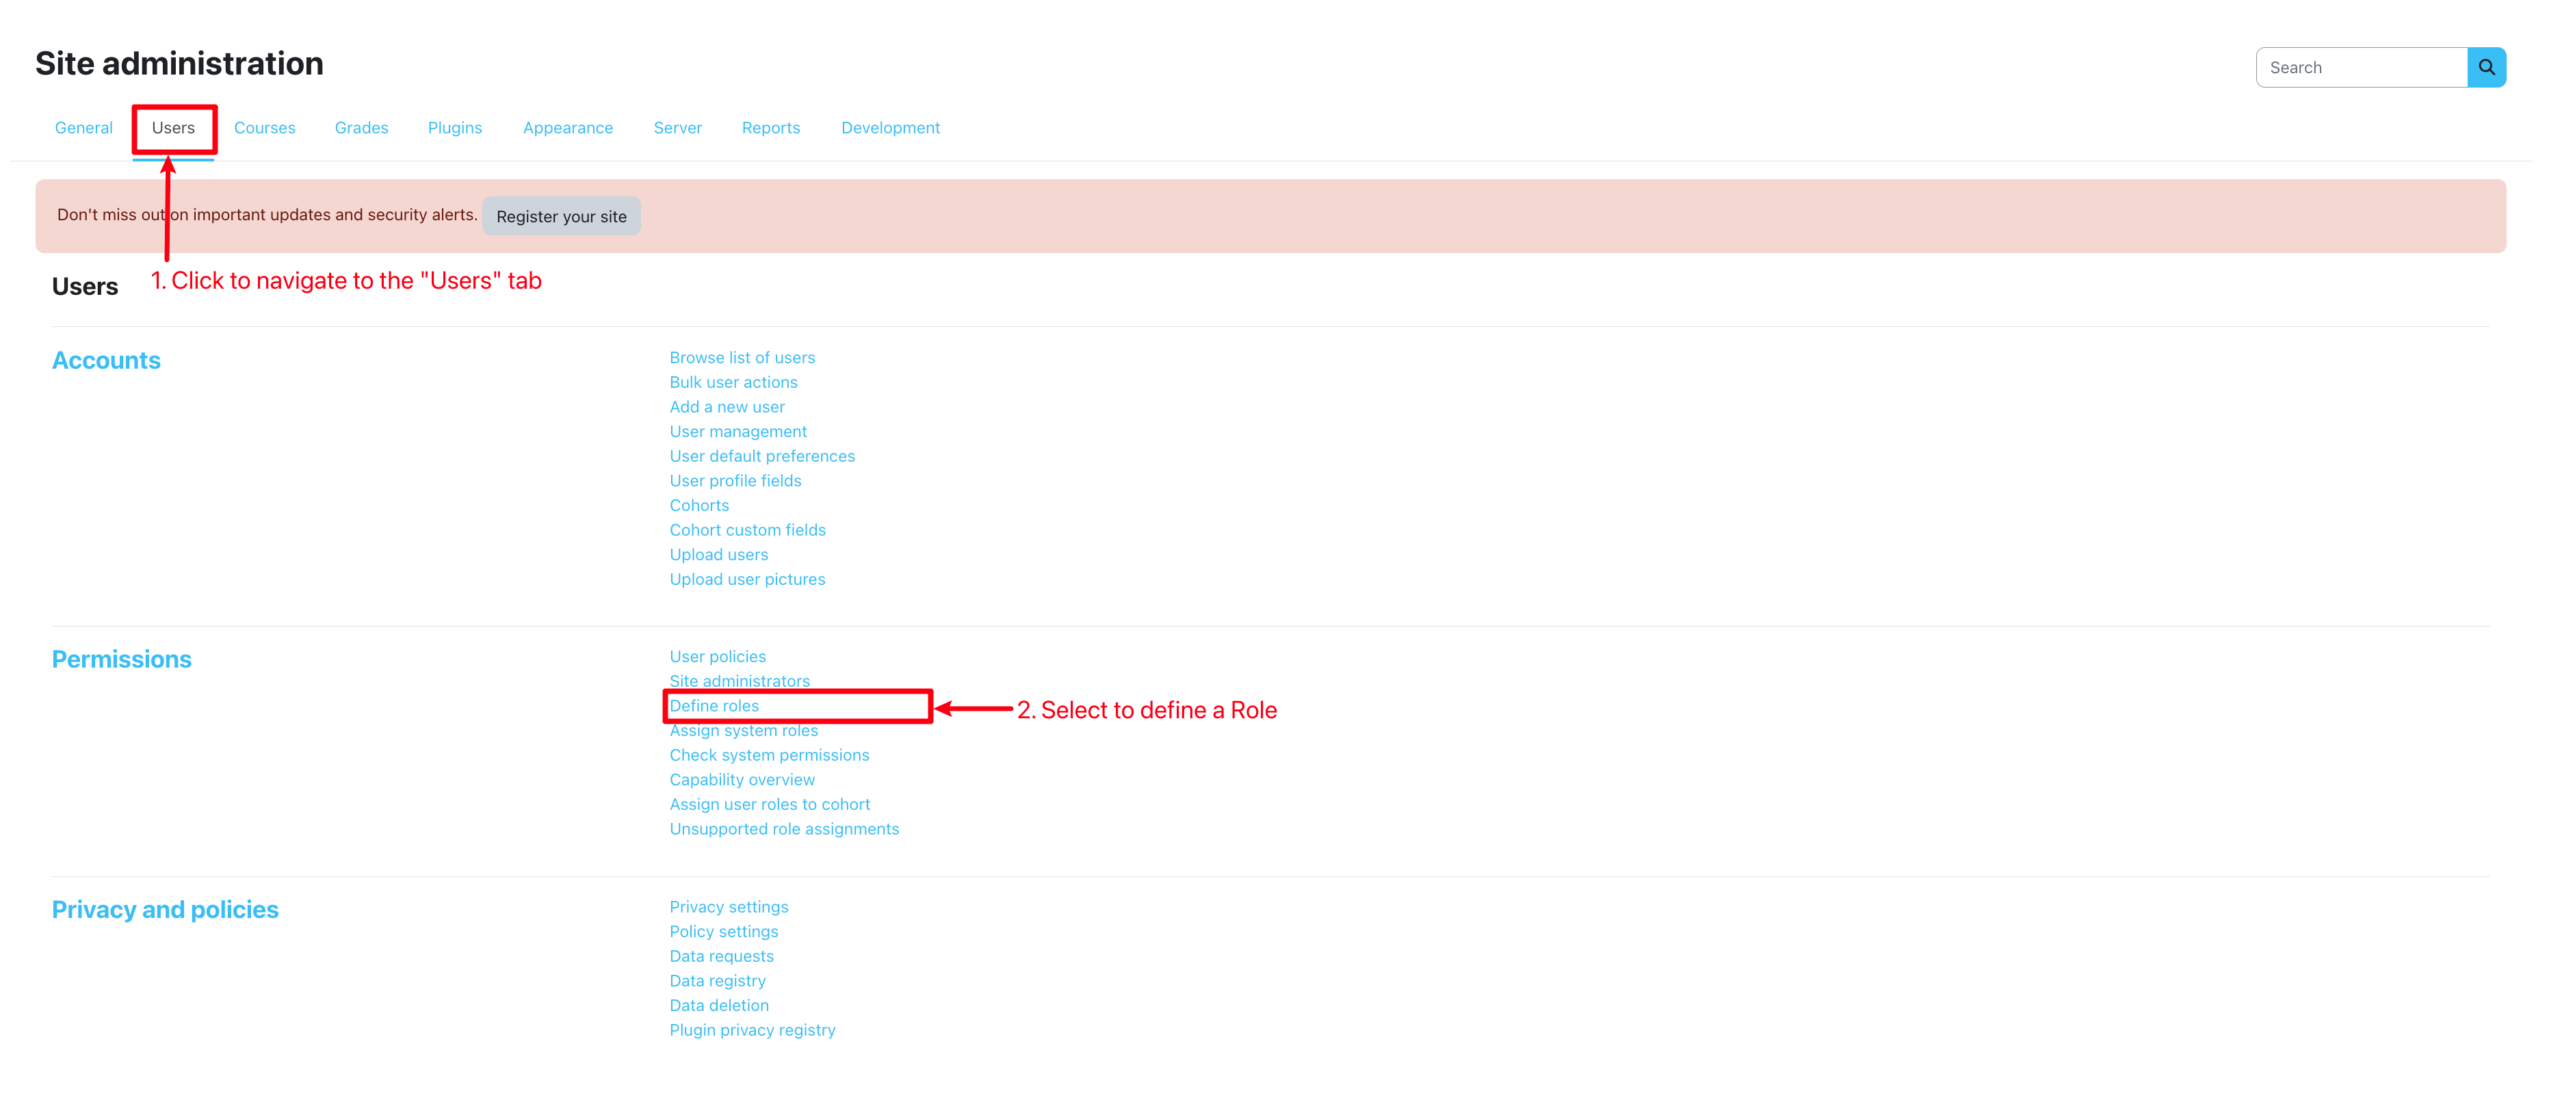
Figure 3ii. Edit Webservices Role
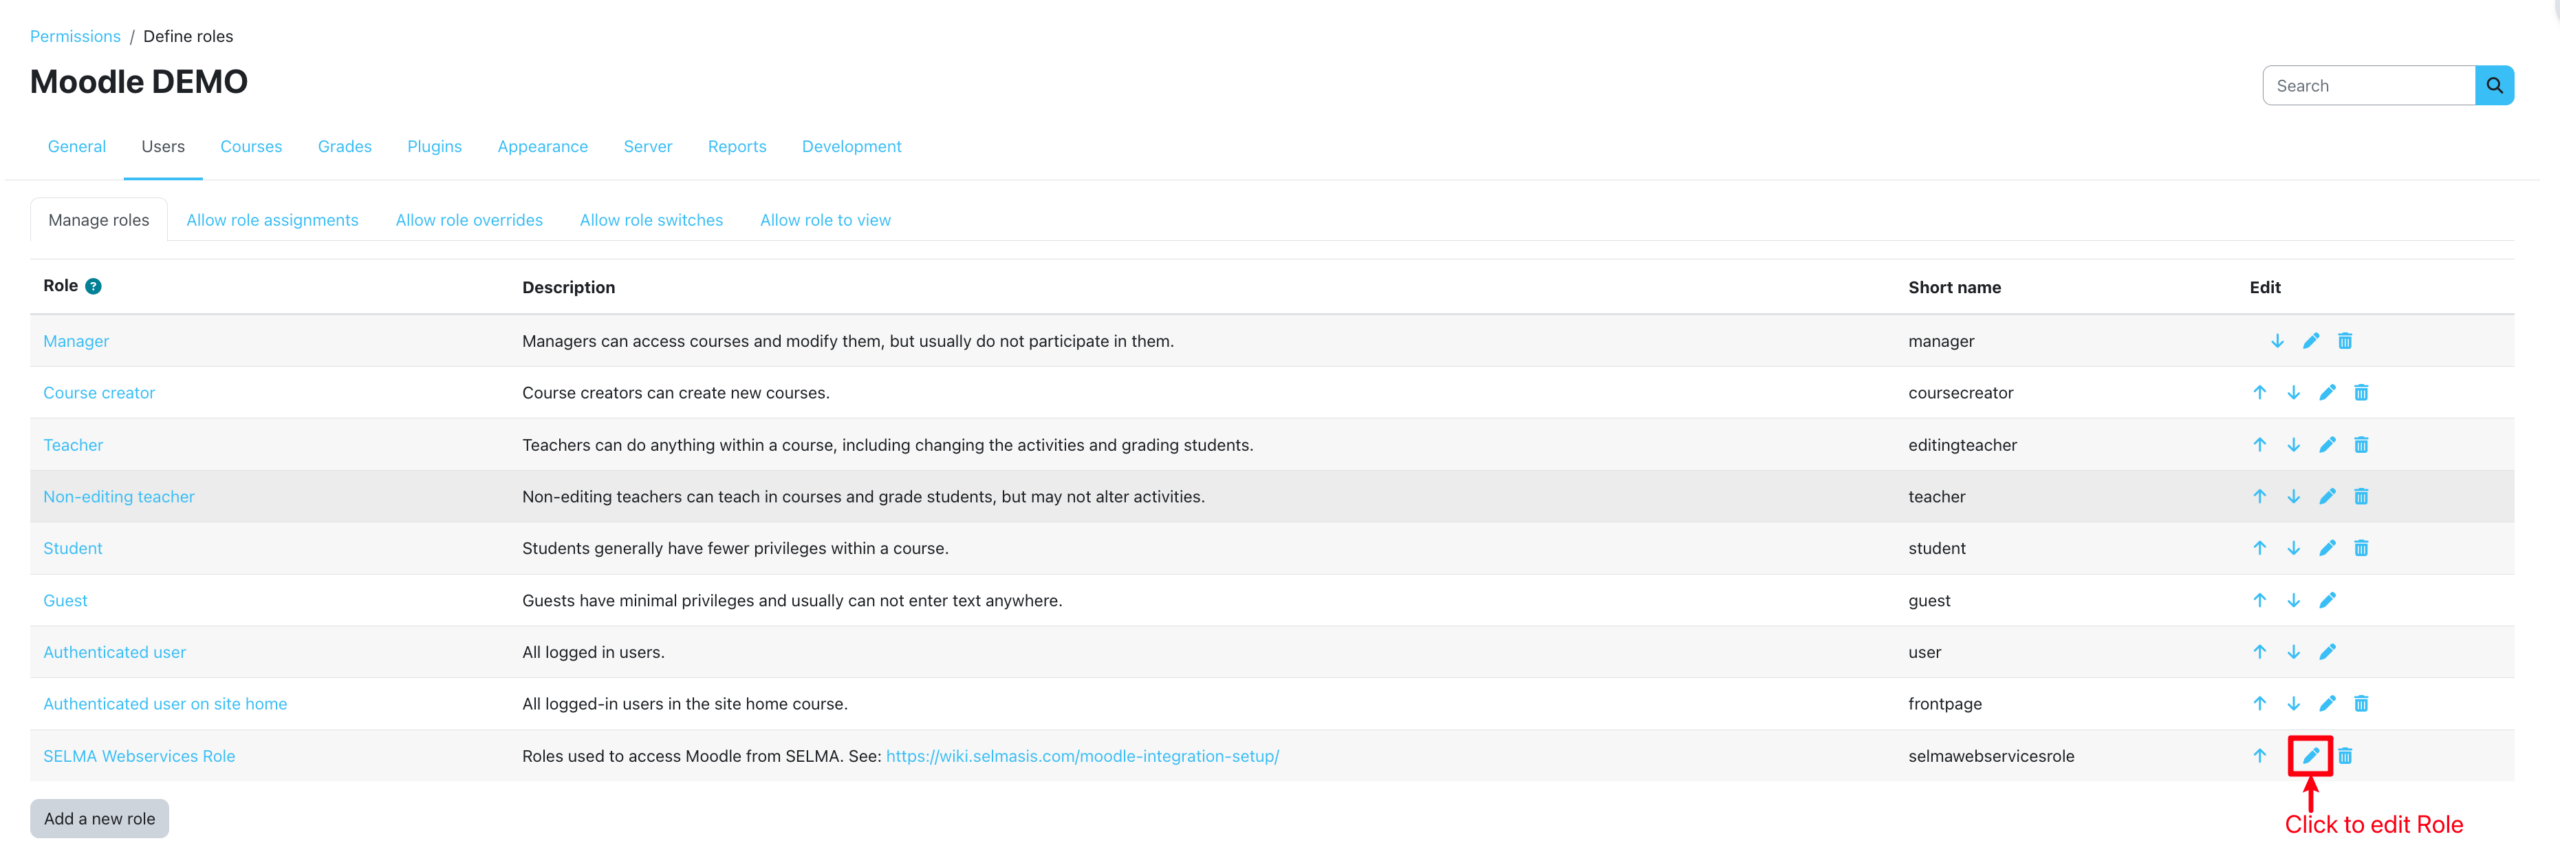
Figure 3iii. Provide Details and Enable Role Assignments
Provide a “Short name” and “Custom full name“, in addition to other important details linked to the Webservices Role. You must then ensure the Webservices role has “System” checked (orange), and specify which Roles it can make assignments to from Moodle (red).
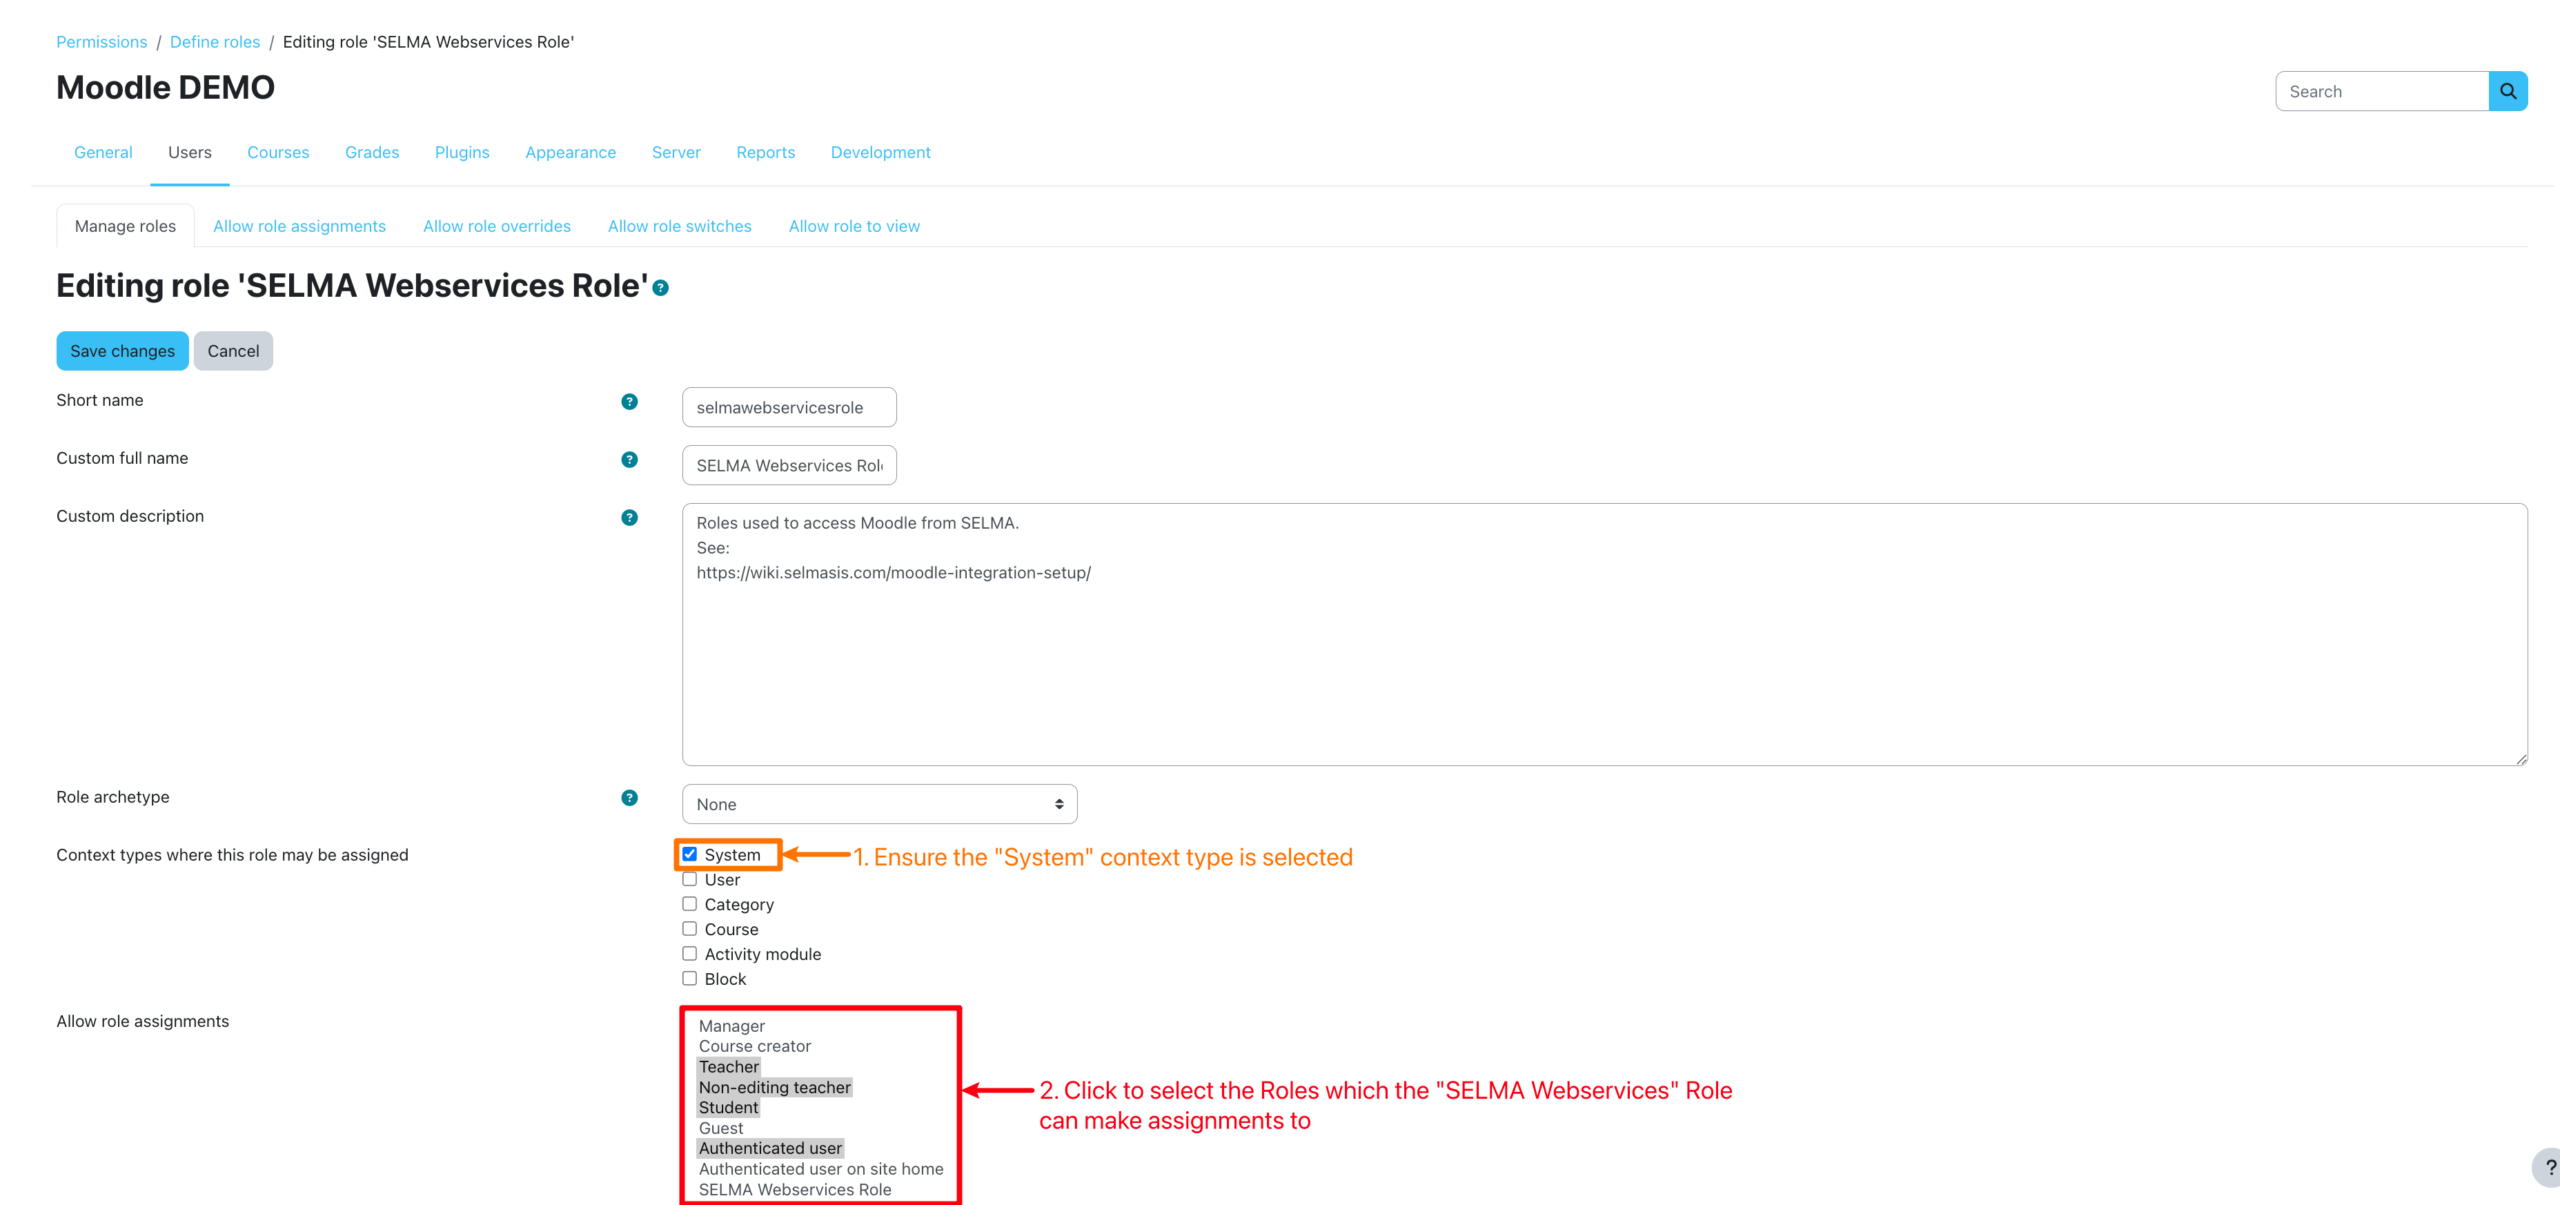
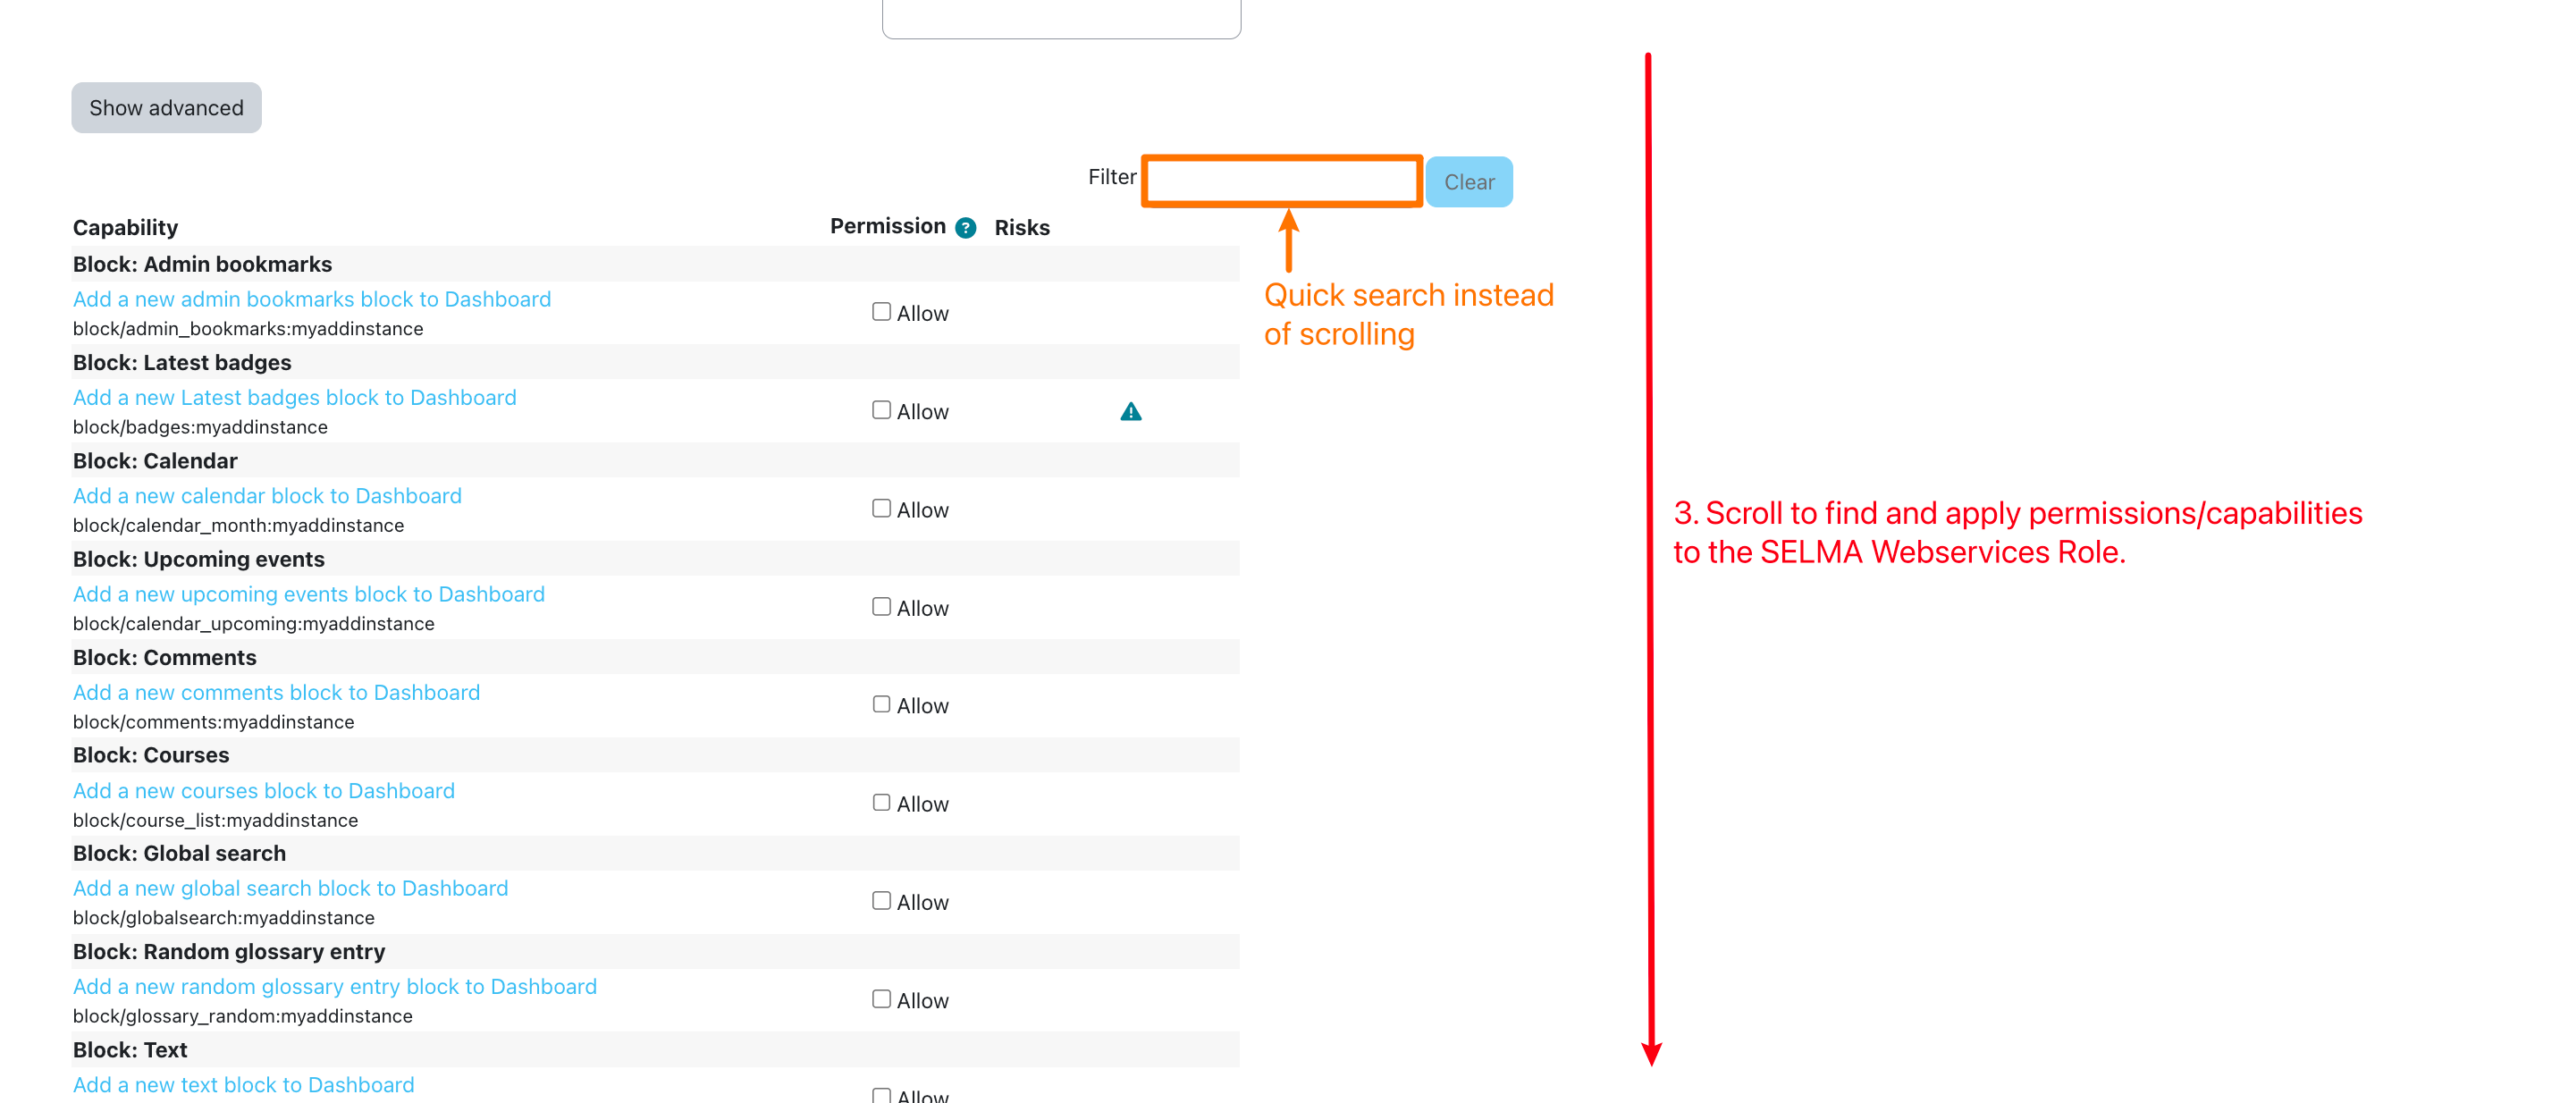
Figure 3iv. Search For and Enable Permissions
Enable Permissions/Capabilities for the Webservices Role.
NOTE: This is Step 4, as outlined in the Overview Page.
- enrol/manual:enrol
- gradereport/user:view
- moodle/course:enrolreview
- moodle/course:managegroups
- moodle/course:view
- moodle/course:viewparticipants
- moodle/grade:viewall
- moodle/role:assign
- moodle/site:accessallgroups
- moodle/site:viewuseridentity
- moodle/user:create
- moodle/user:viewdetails
- moodle/user:viewalldetails
- moodle/user:update
- report/completion:view
- webservice/rest:use
- moodle/grade:viewhidden (allows grade retrieval even if the gradebook item is hidden)
- moodle/course:viewhiddencourses (allows importing hidden courses into SELMA)
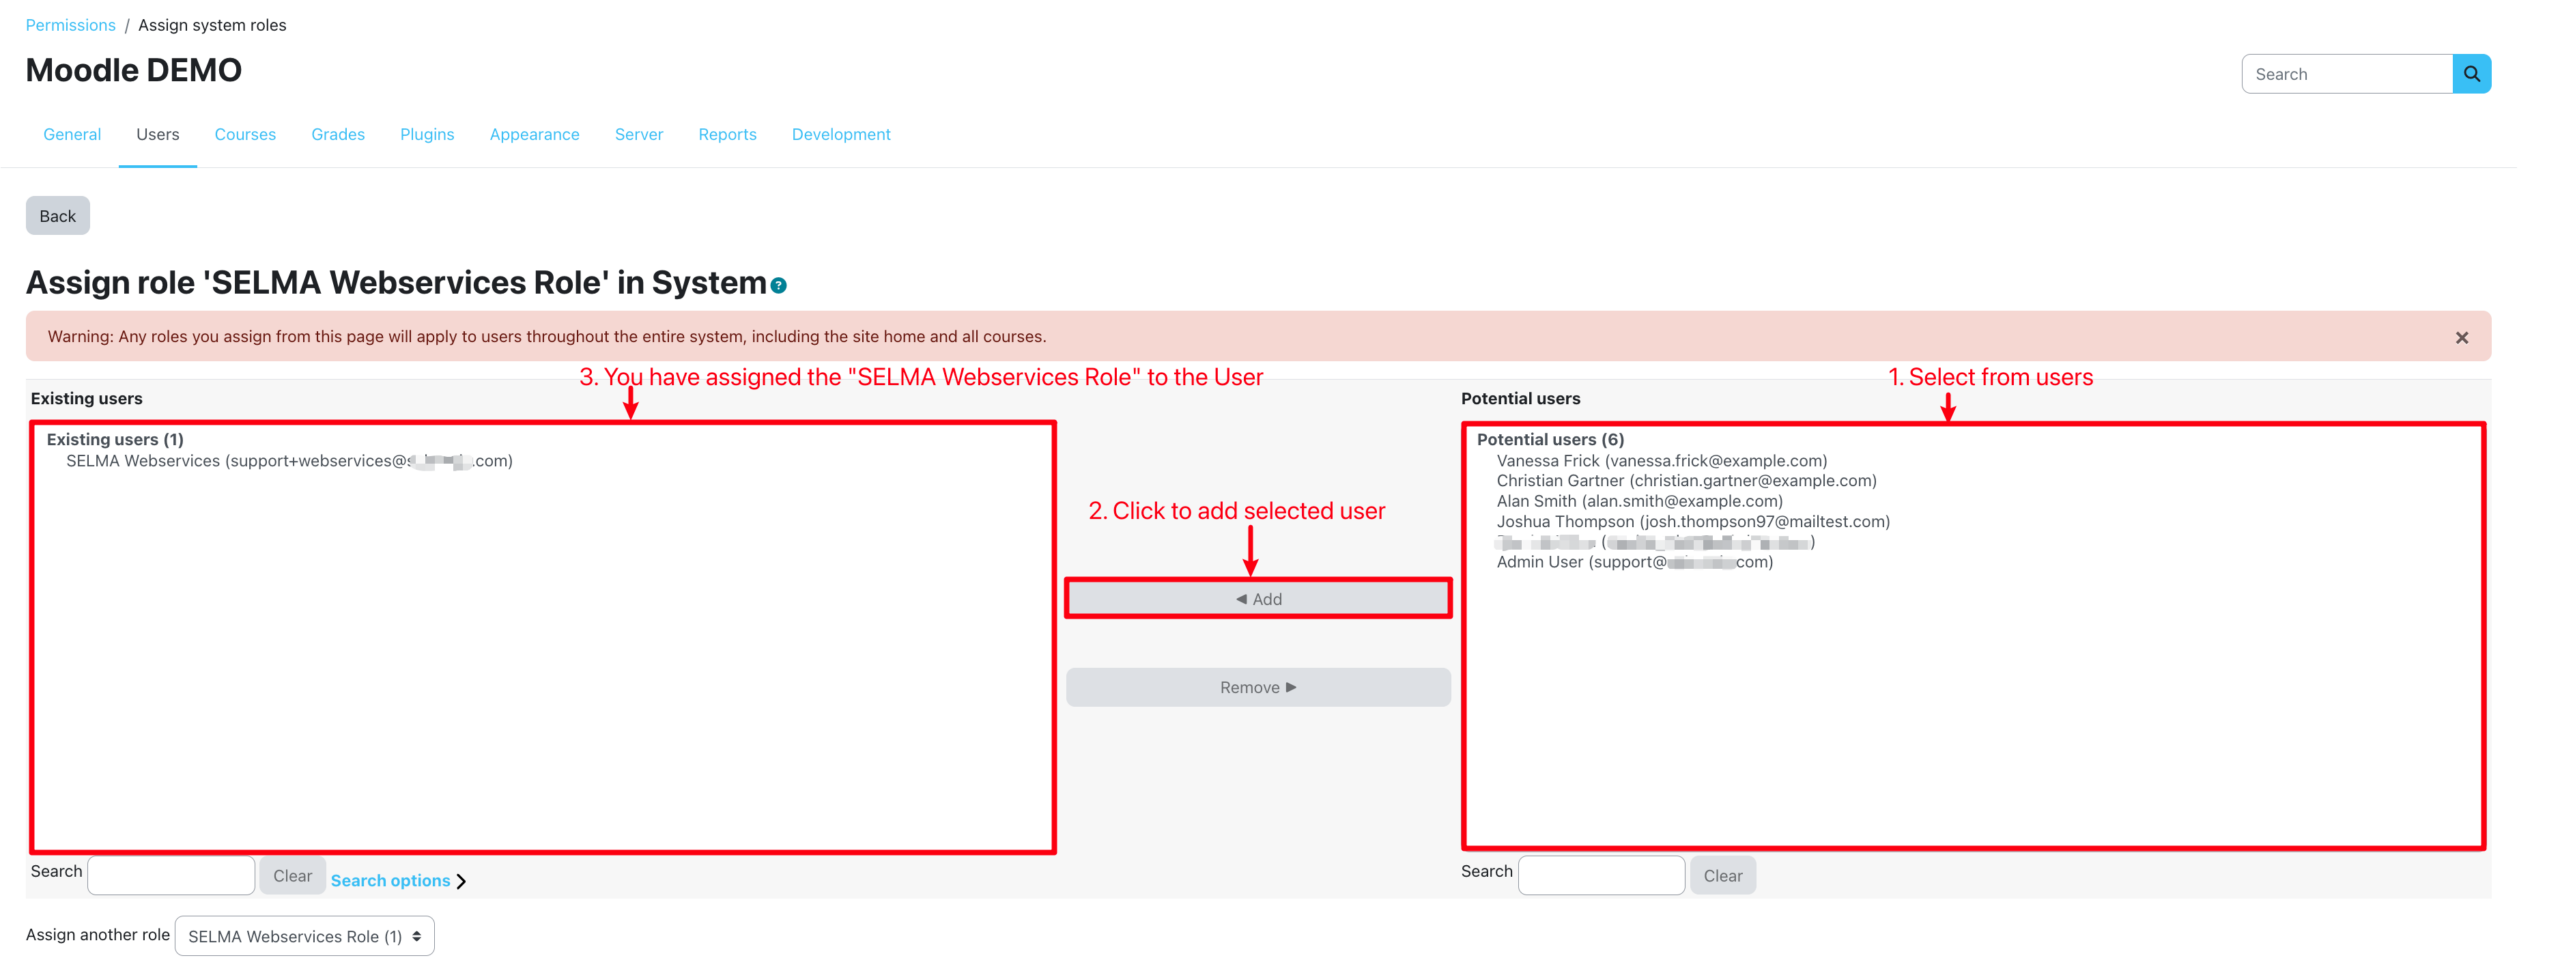
Assign System Roles
Figure 4i. Click “Assign System Roles”
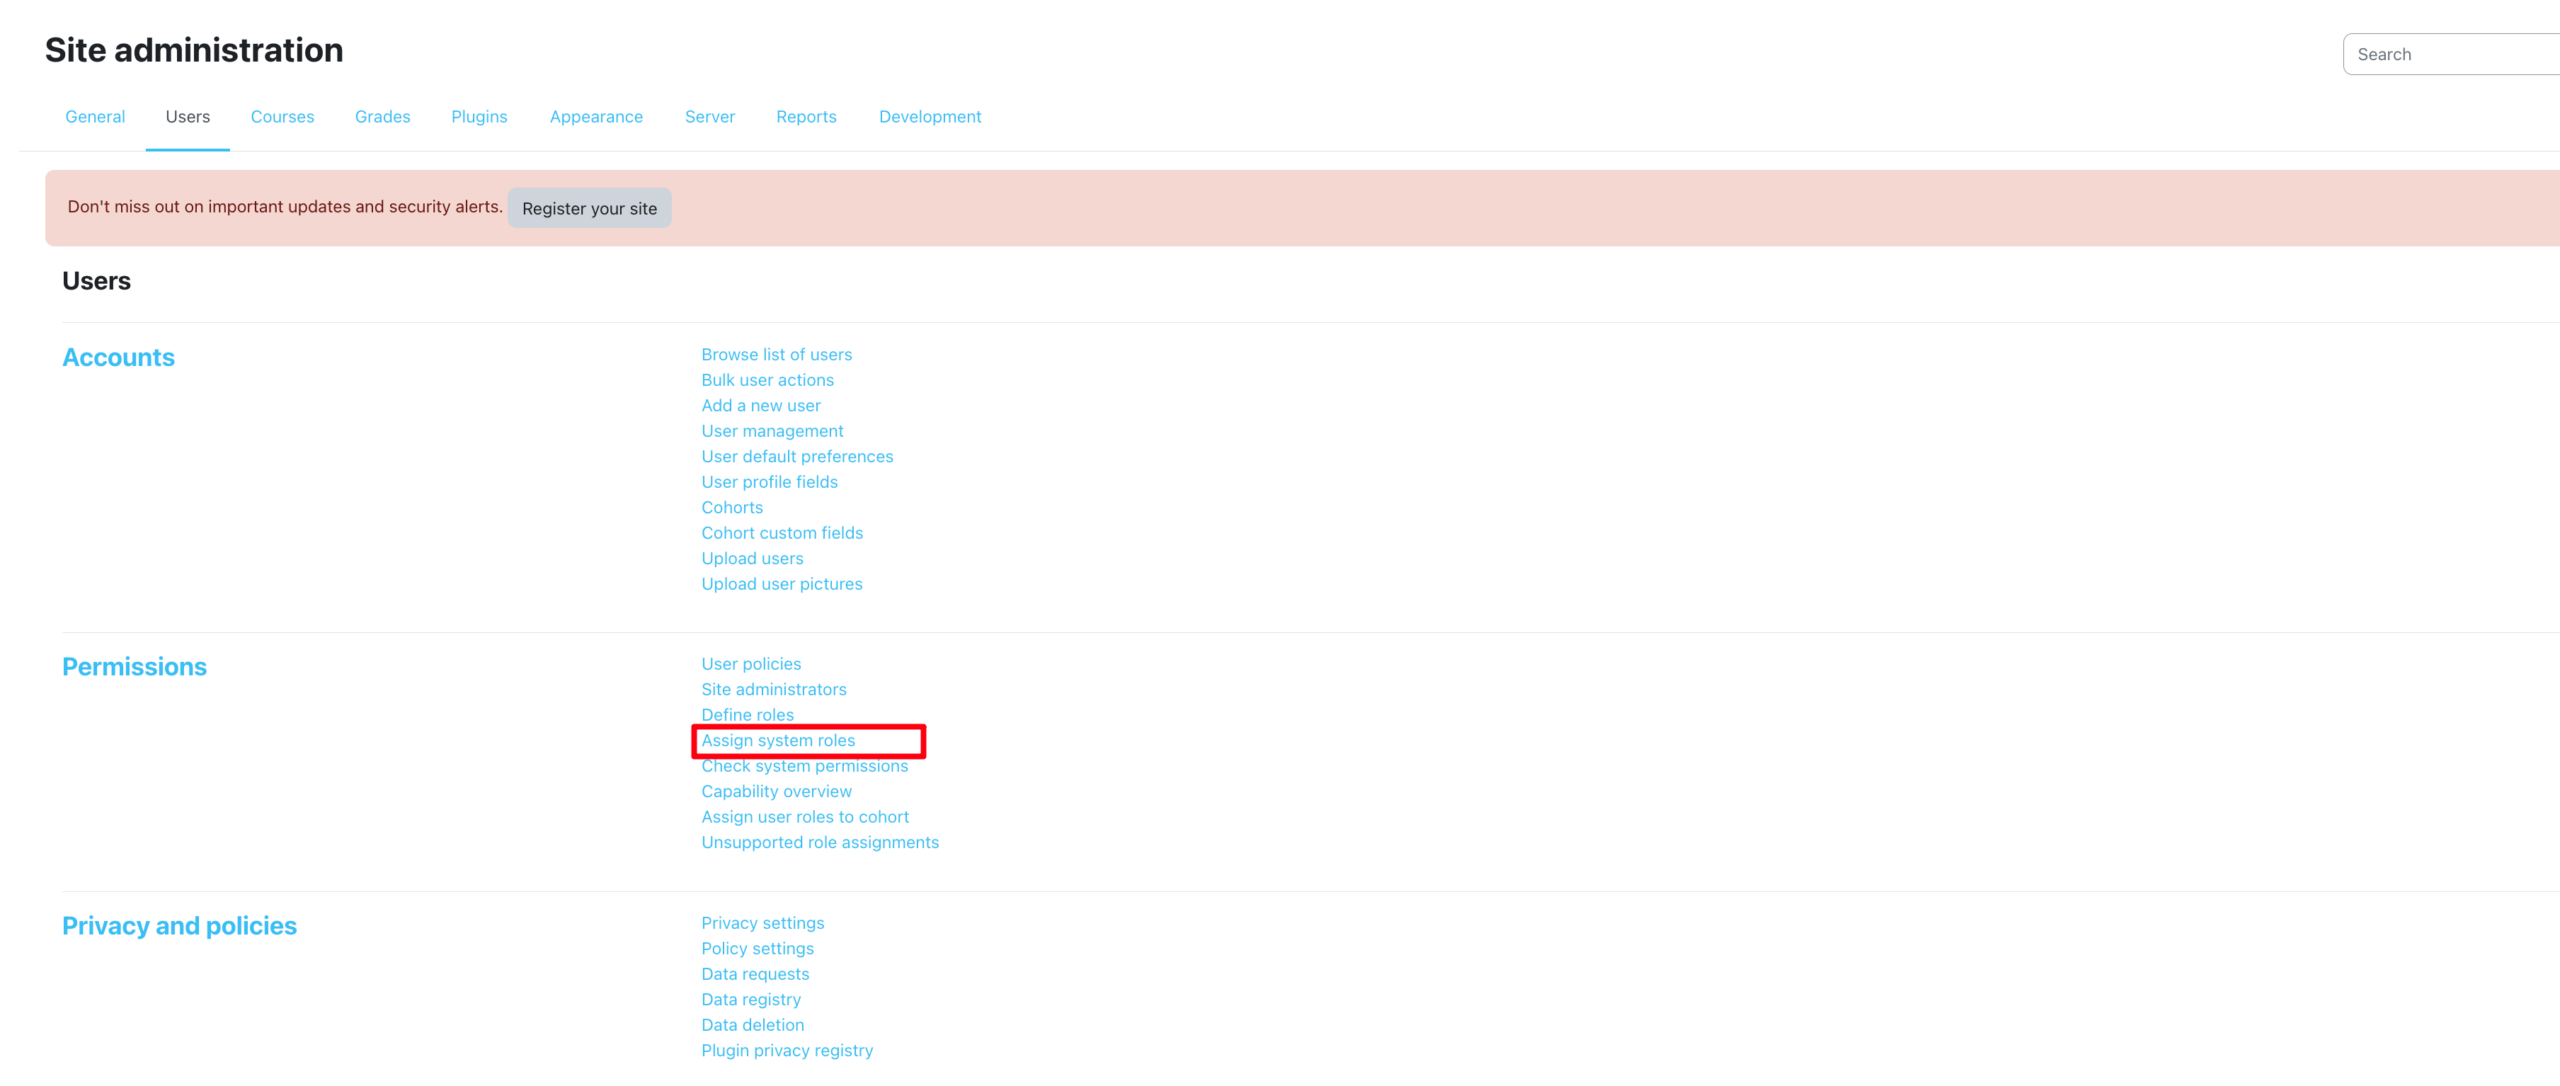
Figure 4ii. Select System Role
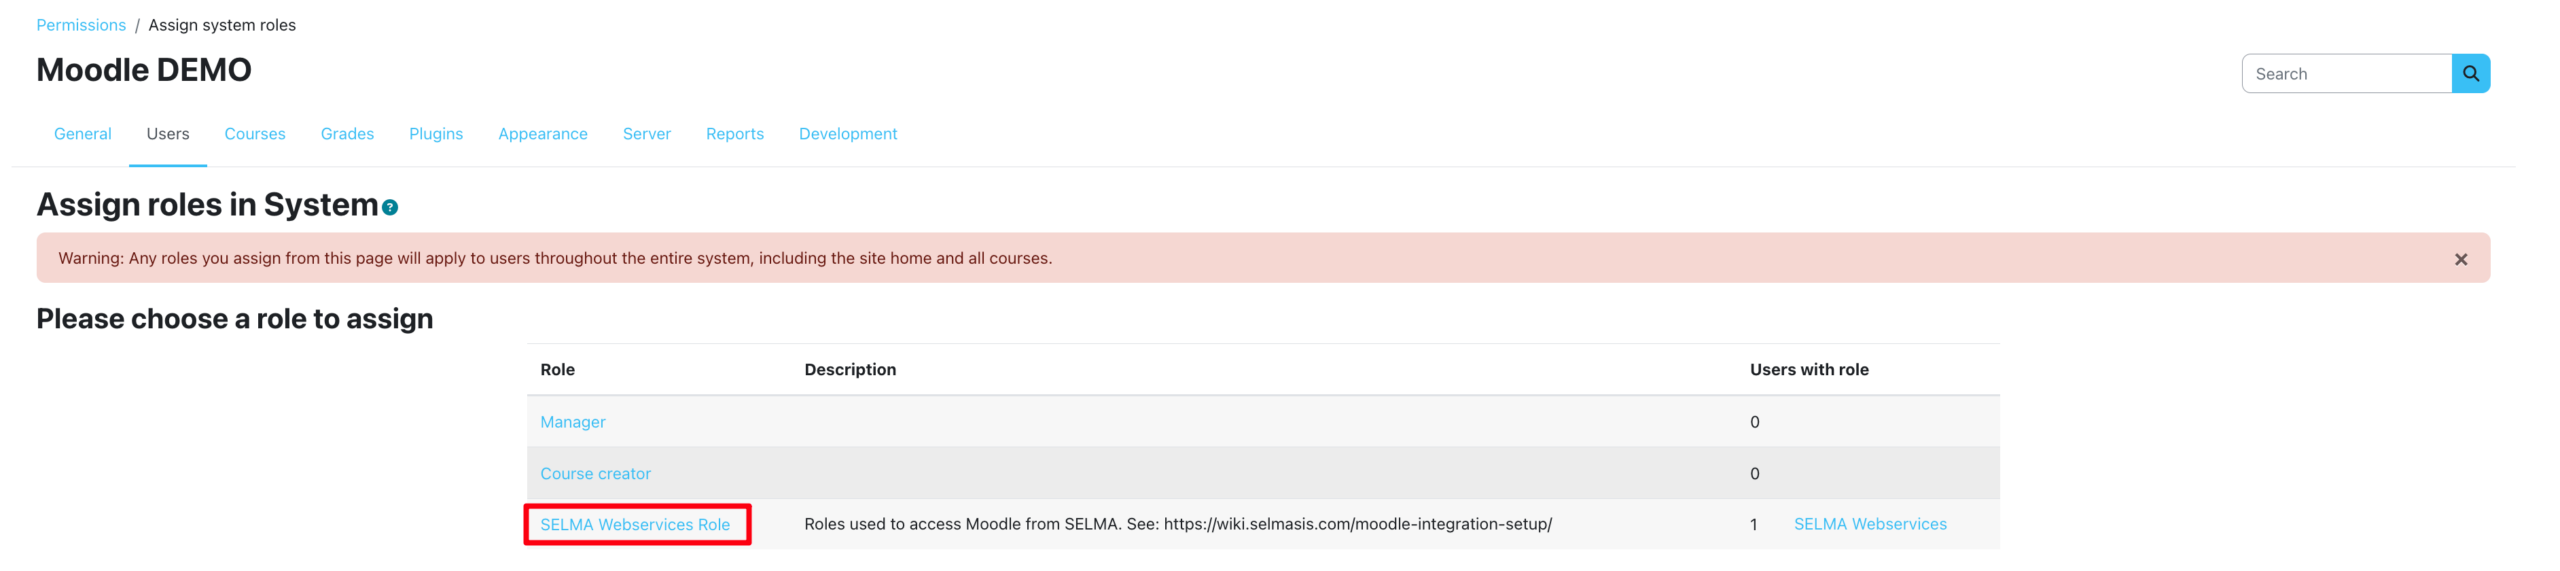
Figure 4iii. Select User
Select the User you have created previously, to assign the “Webservices” Role to.
Step 6
Add Functions (End-Points)
The following lists the Functions (i.e. End-Points) you should add to the Service for step 6:
- core_completion_get_course_completion_status
- core_course_get_courses
- core_enrol_get_users_courses (lets SELMA show the current Moodle access status on each course)
- core_group_add_group_members
- core_group_create_groups
- core_group_get_course_groups
- core_user_create_users
- core_user_get_users
- core_user_update_users
- core_webservice_get_site_info
- enrol_manual_enrol_users
- gradereport_user_get_grade_items
Click for more detailed information about setting-up Web Services in Moodle.
Retrieve Token and Hold
Once you have completed all the steps outlined on the Overview Page, you will have a token to use later in SELMA.
- Please save your token somewhere secure, for use in SELMA.
View the Next article
Please see the next article in this Manual, Integrations – Moodle Set-Up (In SELMA), for steps to be completed in SELMA.