Enabling the Microsoft 365 Integration in SELMA lets your organisation’s users’ use their Microsoft mailbox for emailing directly in SELMA. As such, emails sent from within SELMA are stored in the mailbox’s ‘sent’ folder as well (and replies will go to the user’s inbox).
Note: The below instructions serve as a guide only – please ask your IT Team/Provider about what’s best for your organisation.
Azure Application
For this to work we need a few credentials for an ‘app’ in Azure.
Please go to https://portal.azure.com/#home and register an application (https://portal.azure.com/#view/Microsoft_AAD_RegisteredApps/ApplicationsListBlade).
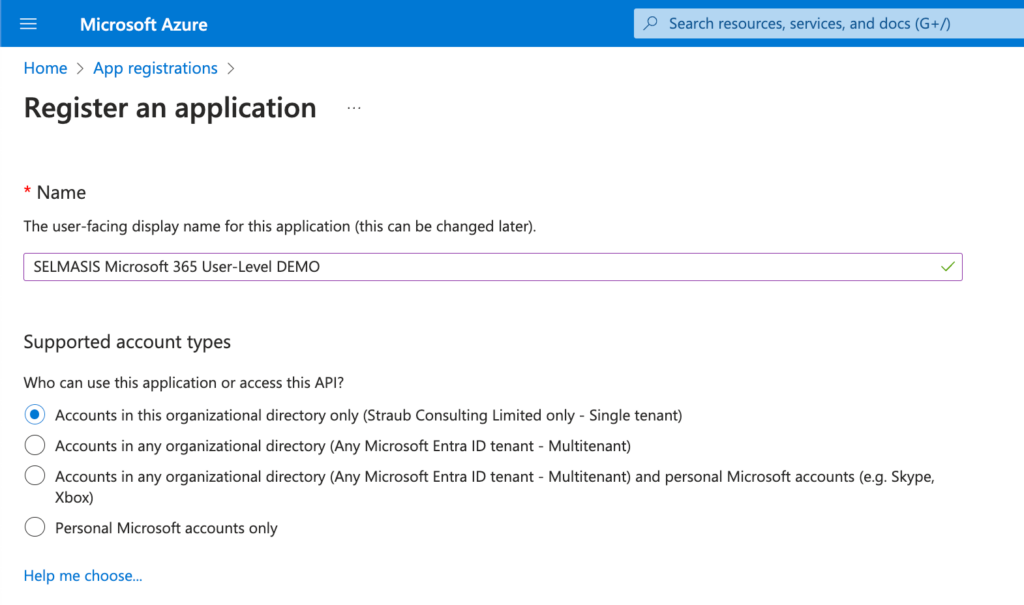
It just needs to be named at this point – something like “Selma Integration” to make it easy to identify it in the future. The remaining fields can be left with their default values.
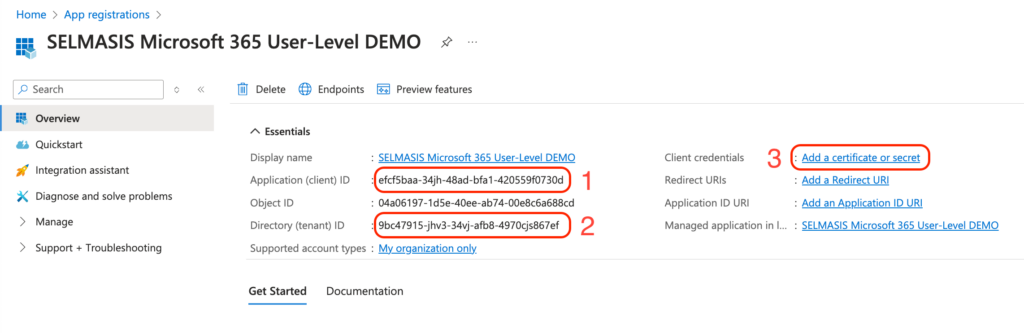
Once created, note the following details from the App:
- Application (client) ID
- Directory (tenant) ID
- Client Secret – this needs to be added to the App.
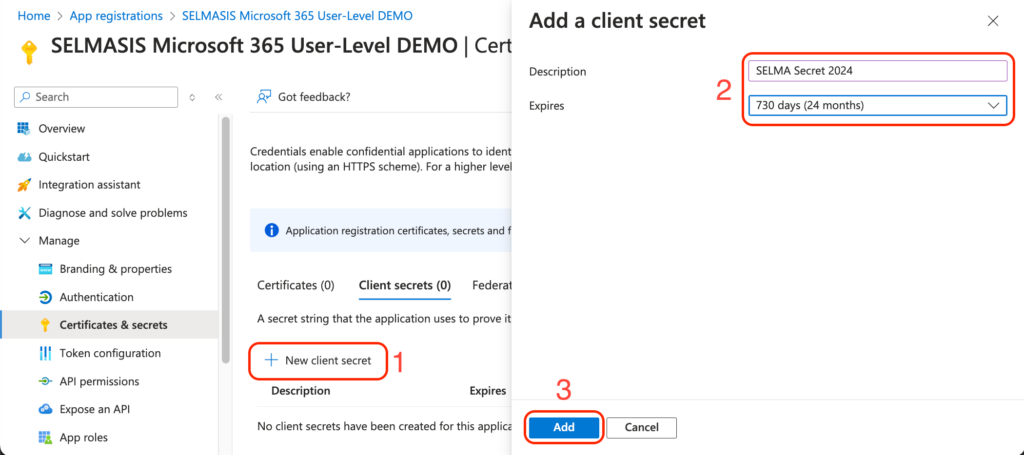
- Client Secret (Continued)
- Add new client secret
- Set a name and expiry duration for the new secret
- Set a reminder somewhere to create a new secret before the expiry. Update the secret in SELMA before the expiry date to prevent issues.
- “Add” the secret
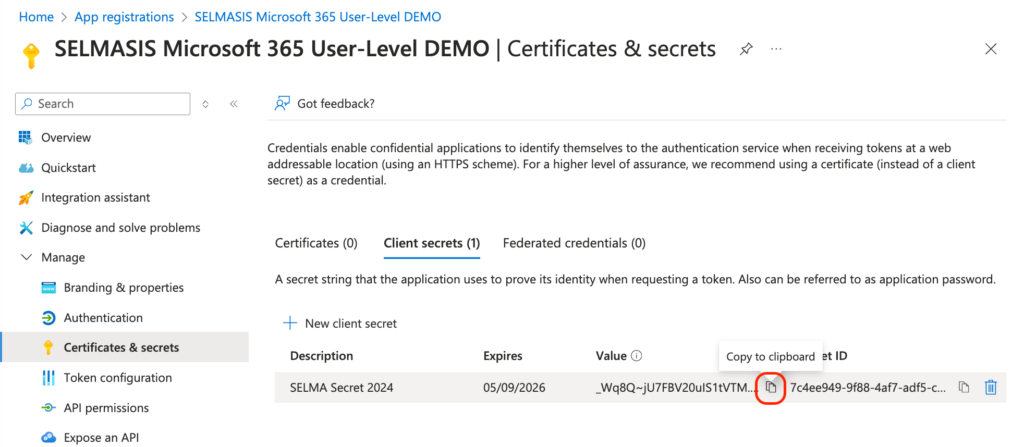
- Client Secret (Continued)
- Copy the secret value immediately at this point, as it won’t be shown again, to make it easy to send it to us later.
- If you can’t copy the secret anymore (if the page was refreshed, for example), please redo the entire step 3.
- Copy the secret value immediately at this point, as it won’t be shown again, to make it easy to send it to us later.
Redirect URL
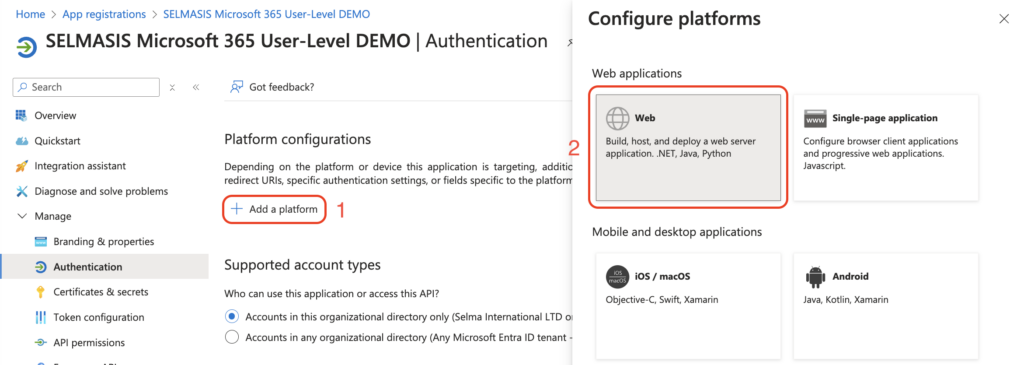
Return to the “Overview” page and add a redirect URL.
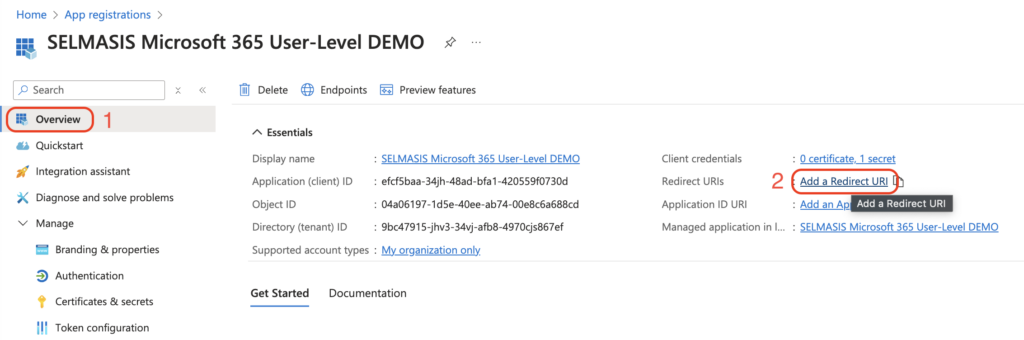
Click “Add Platform” and select the “Web” option.
You’ll be asked to enter the URL now. Back in SELMA, you can copy the redirect URL from the integration configuration page.
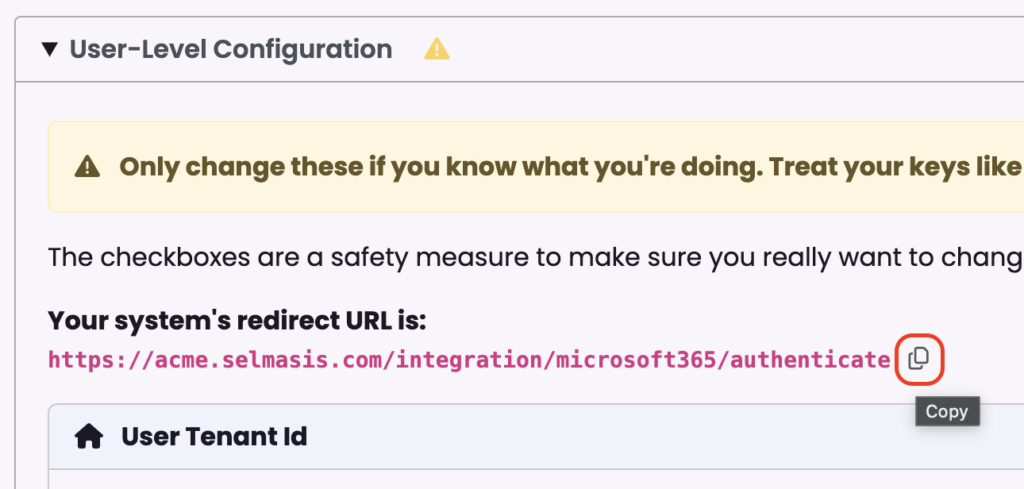
Enter this URL back in Azure.
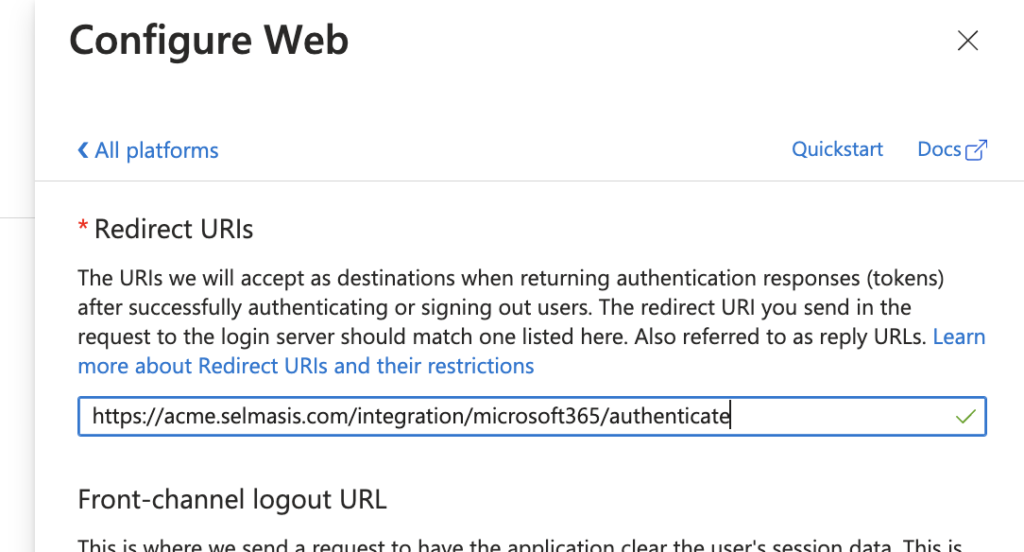
Click the “Configure” button (![]() ) to save the changes.
) to save the changes.
Permissions
Lastly, the App also needs to know the appropriate permissions to request from the user to perform the required actions.
Add the permissions by clicking “API Permissions” → “Add a permission” → “Microsoft Graph”.
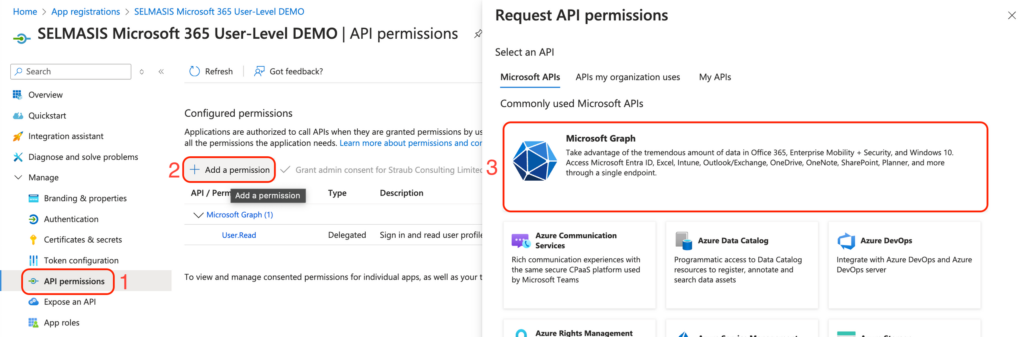
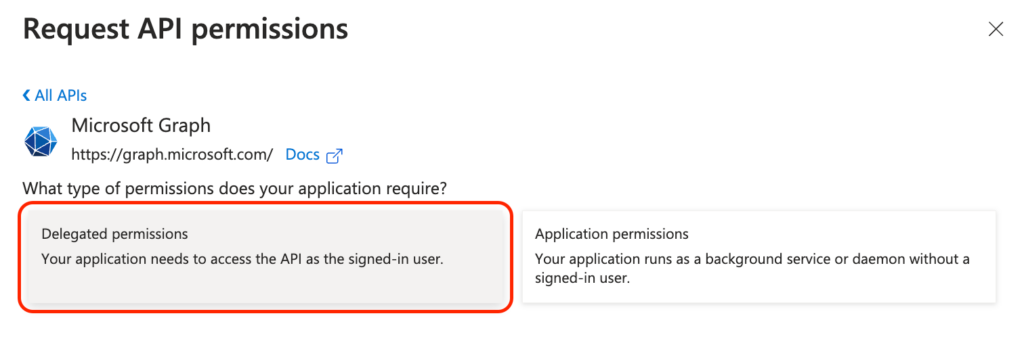
Choose the “Delegated permissions” option, as the integration needs to perform actions – send emails – on behalf of the user.
Ensure the ”User.Read” permission is already selected.
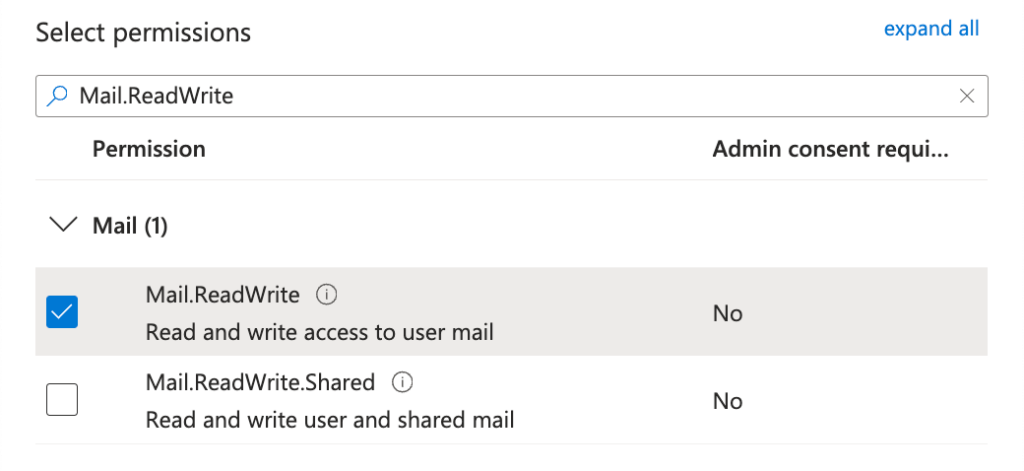
Add the “Mail.Send” and “Mail.ReadWrite” permissions. These are needed for sending an email on behalf of the user, and related actions. You can search for the permissions specifically.
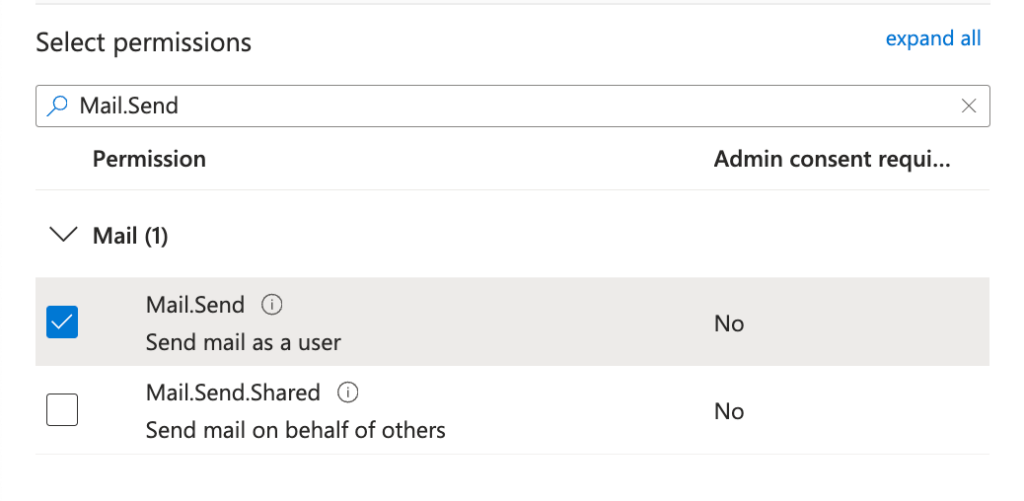
And
Remember to click “Add permissions”!
Next Steps
- Now, simply copy the below into SELMA by going to SELMA Settings (cog top-right) → Integrations & ‘Configure’ the Microsoft 365 integration
- Application (client) ID
- Directory (tenant) ID
- Client Secret
- Expand the “User-Level Configuration” section and update the fields with the respective information
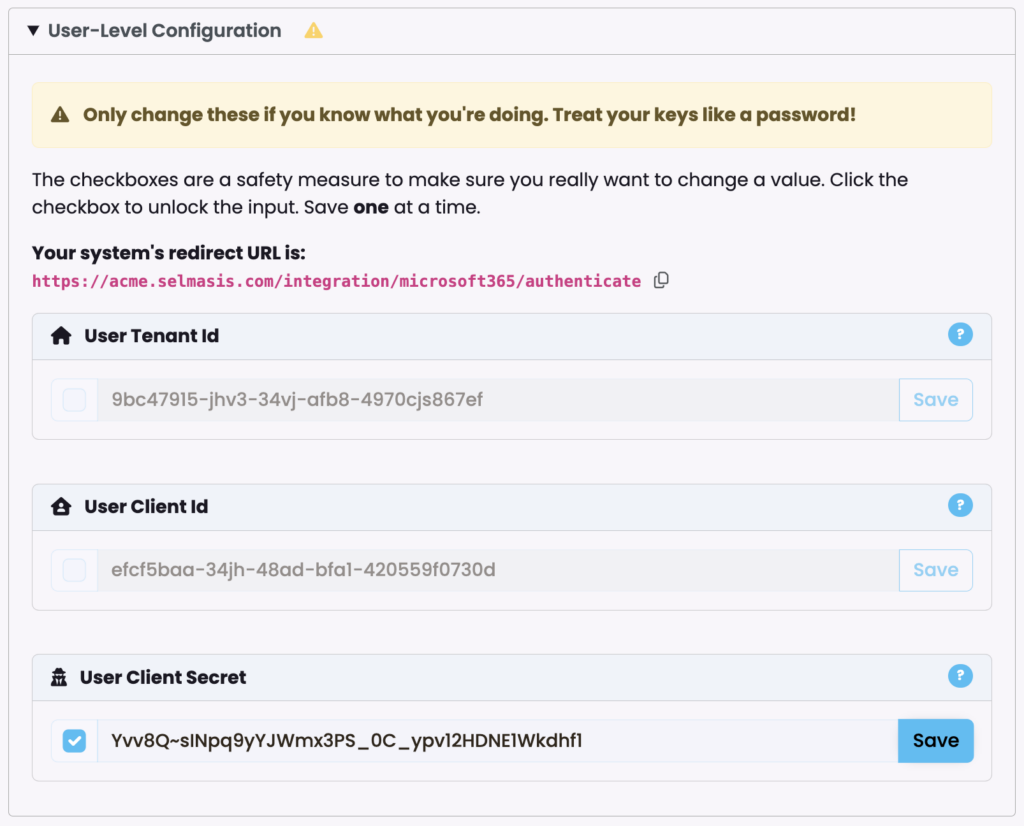
- Once all the fields are updated & saved, go to your profile in SELMA and click the “Link Microsoft 365” button. It will guide you through your usual Microsoft login process & ask for you to authorise the requested permission. Once authorised, you’ll be redirected back to SELMA. It should show that the link was successful.
Done! ✅
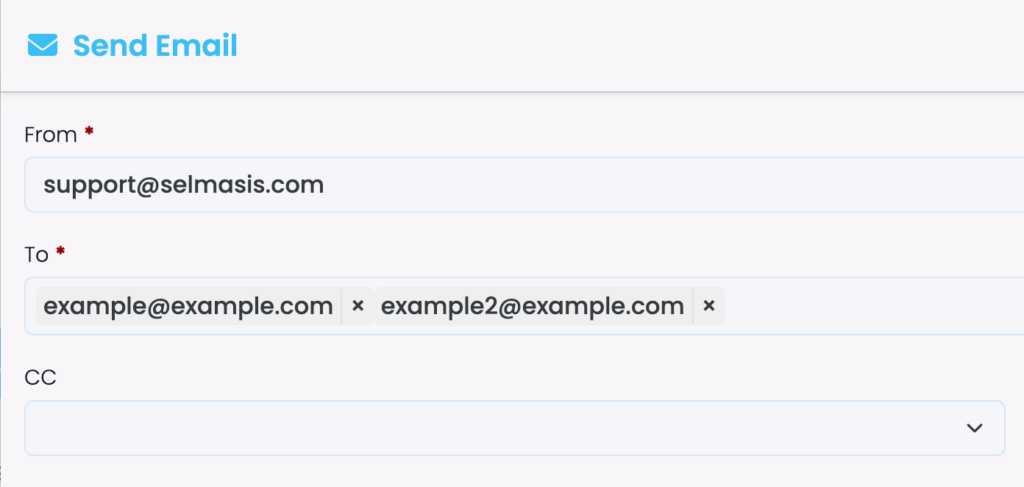
The integration is now fully set up and you’ll have a new ‘From’ field wherever emails can be sent from in SELMA with your email address as a ‘From’ option.