Initial Setup
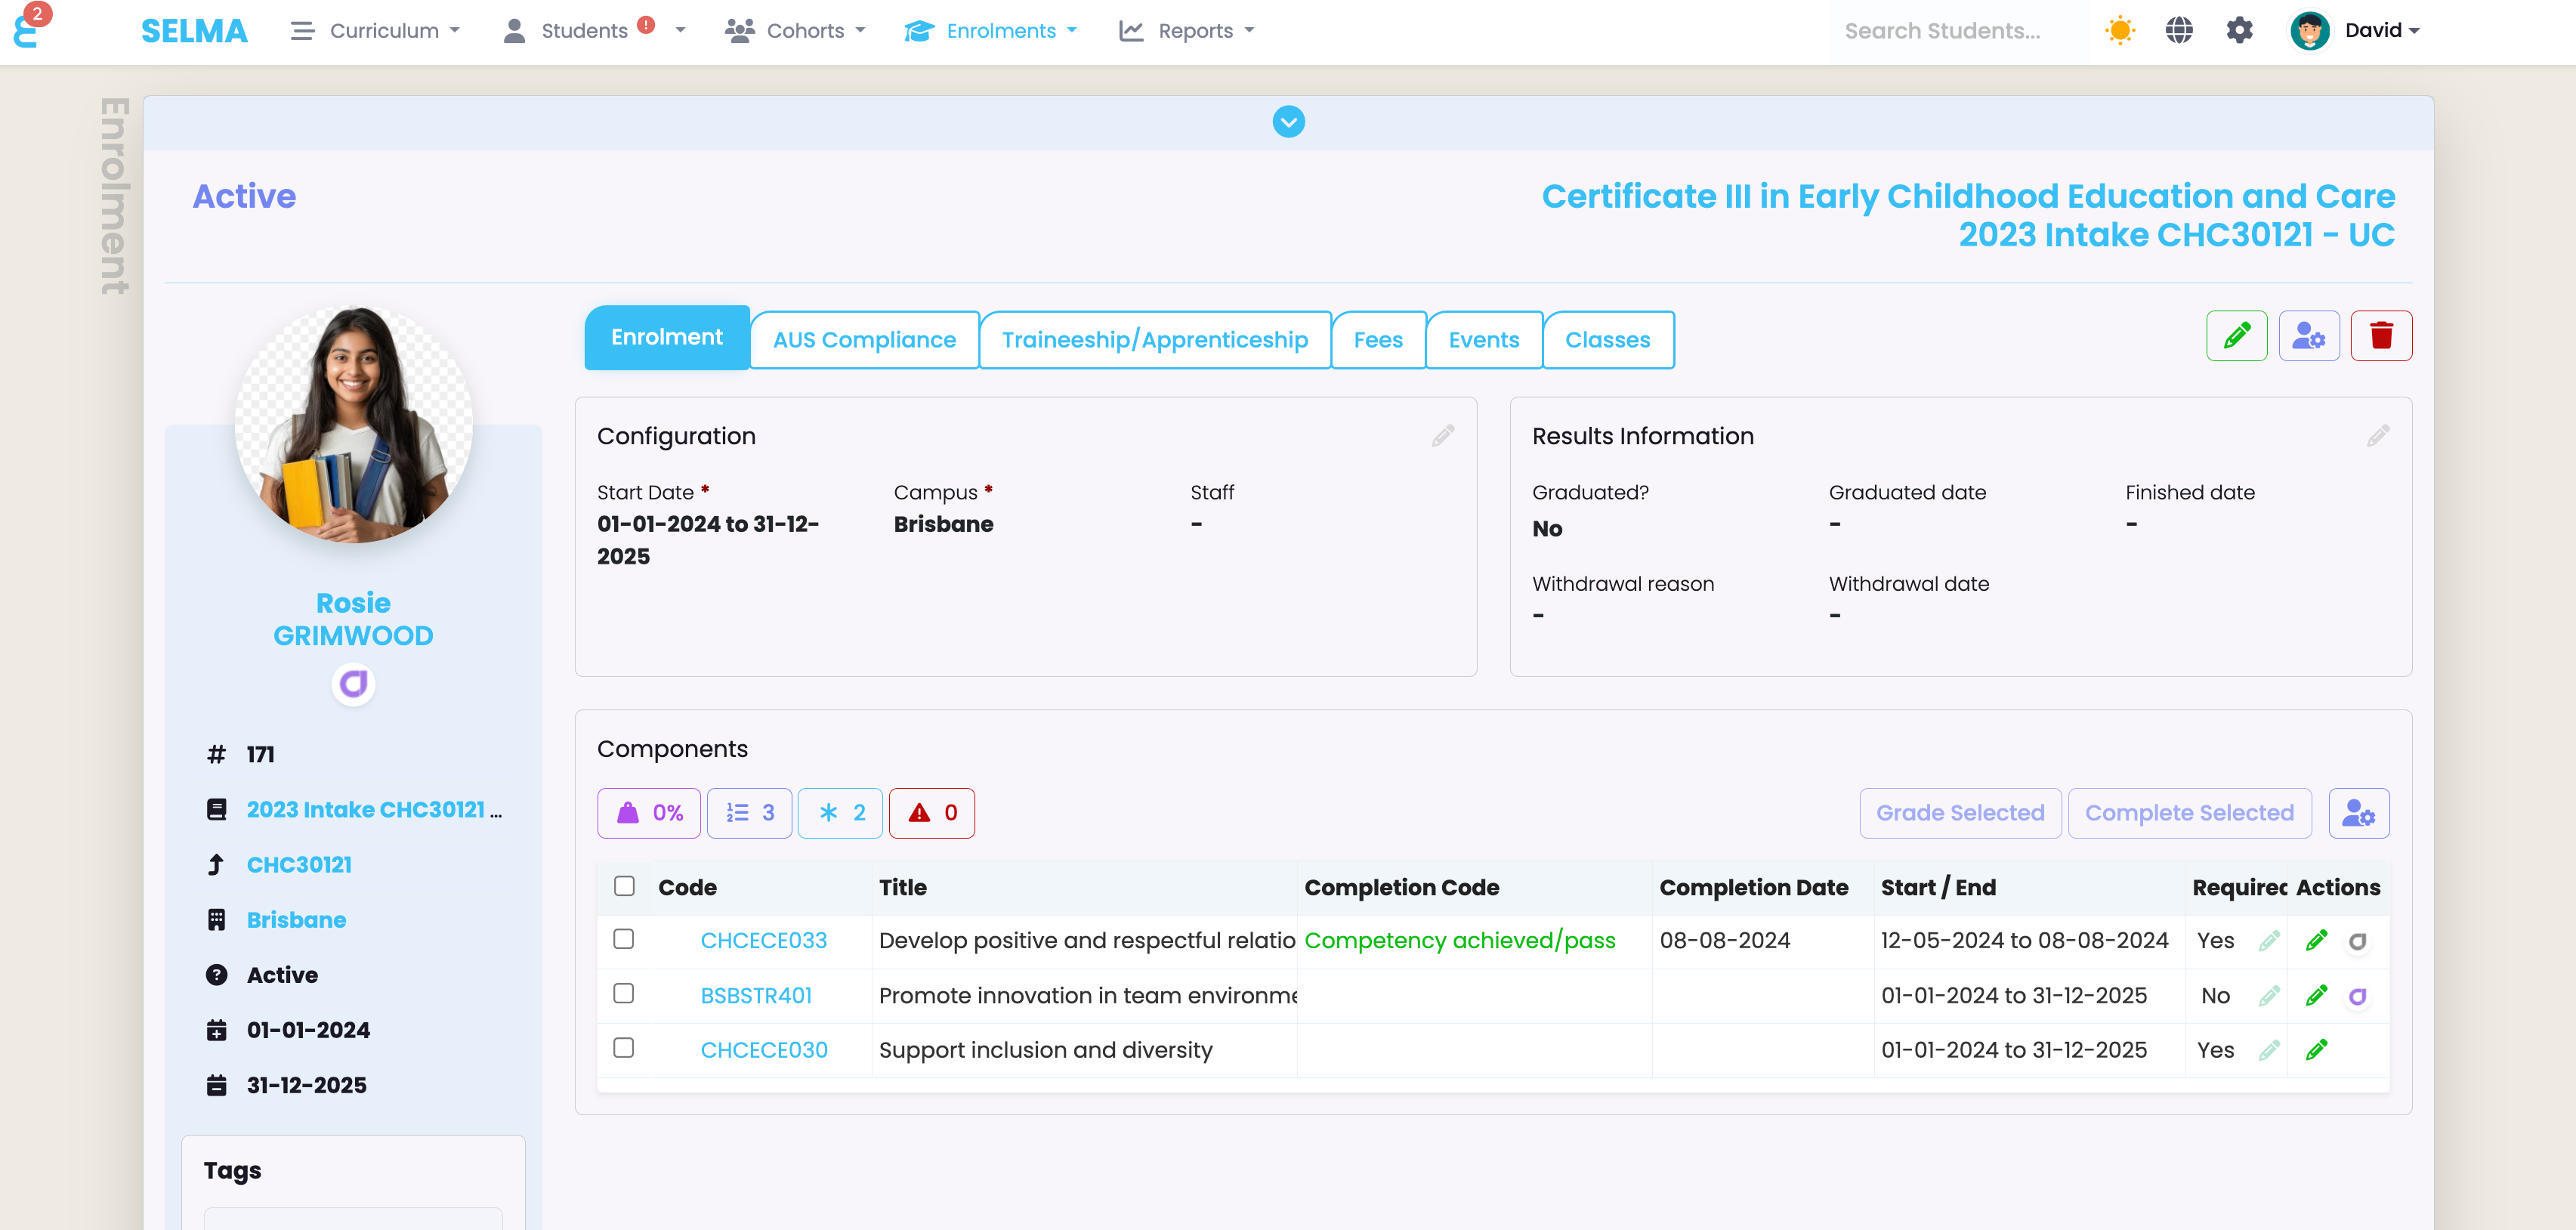
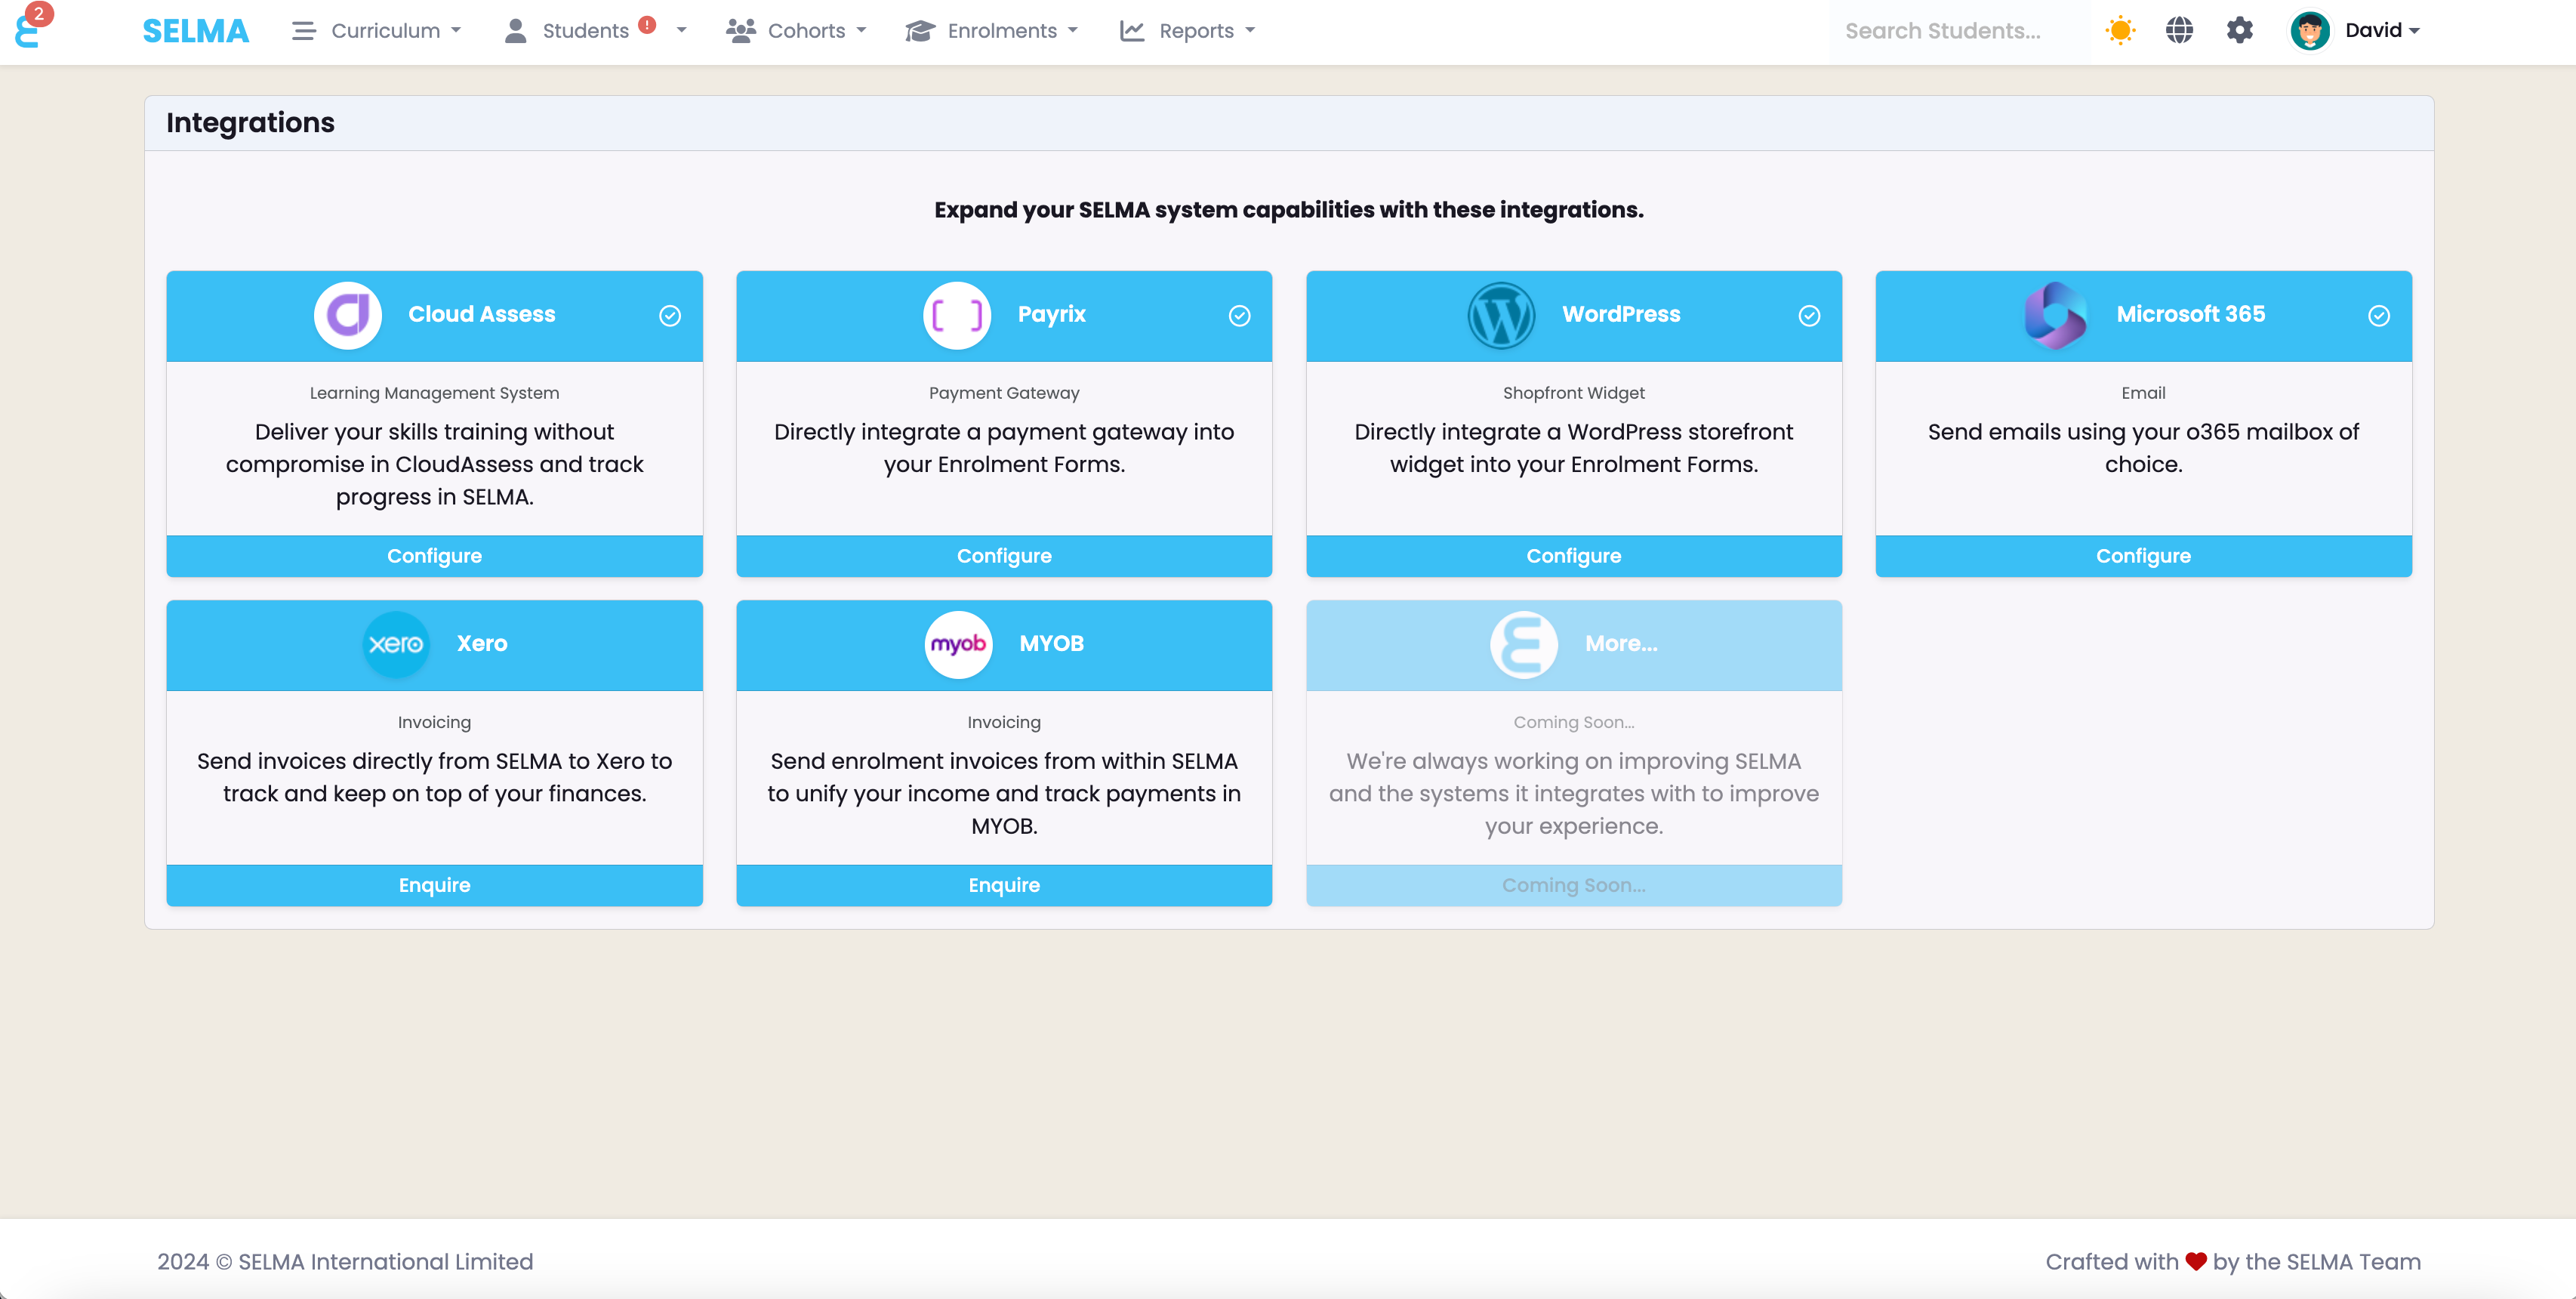
Navigate to Settings (Cogwheel icon), select Integrations, and click Configure under Cloud Assess.
Configuring Keys and Connection
To set up the Cloud Assess integration, enter the required URL and keys. If needed, contact SELMA or Cloud Assess support for assistance.
Understanding the Configuration Screen
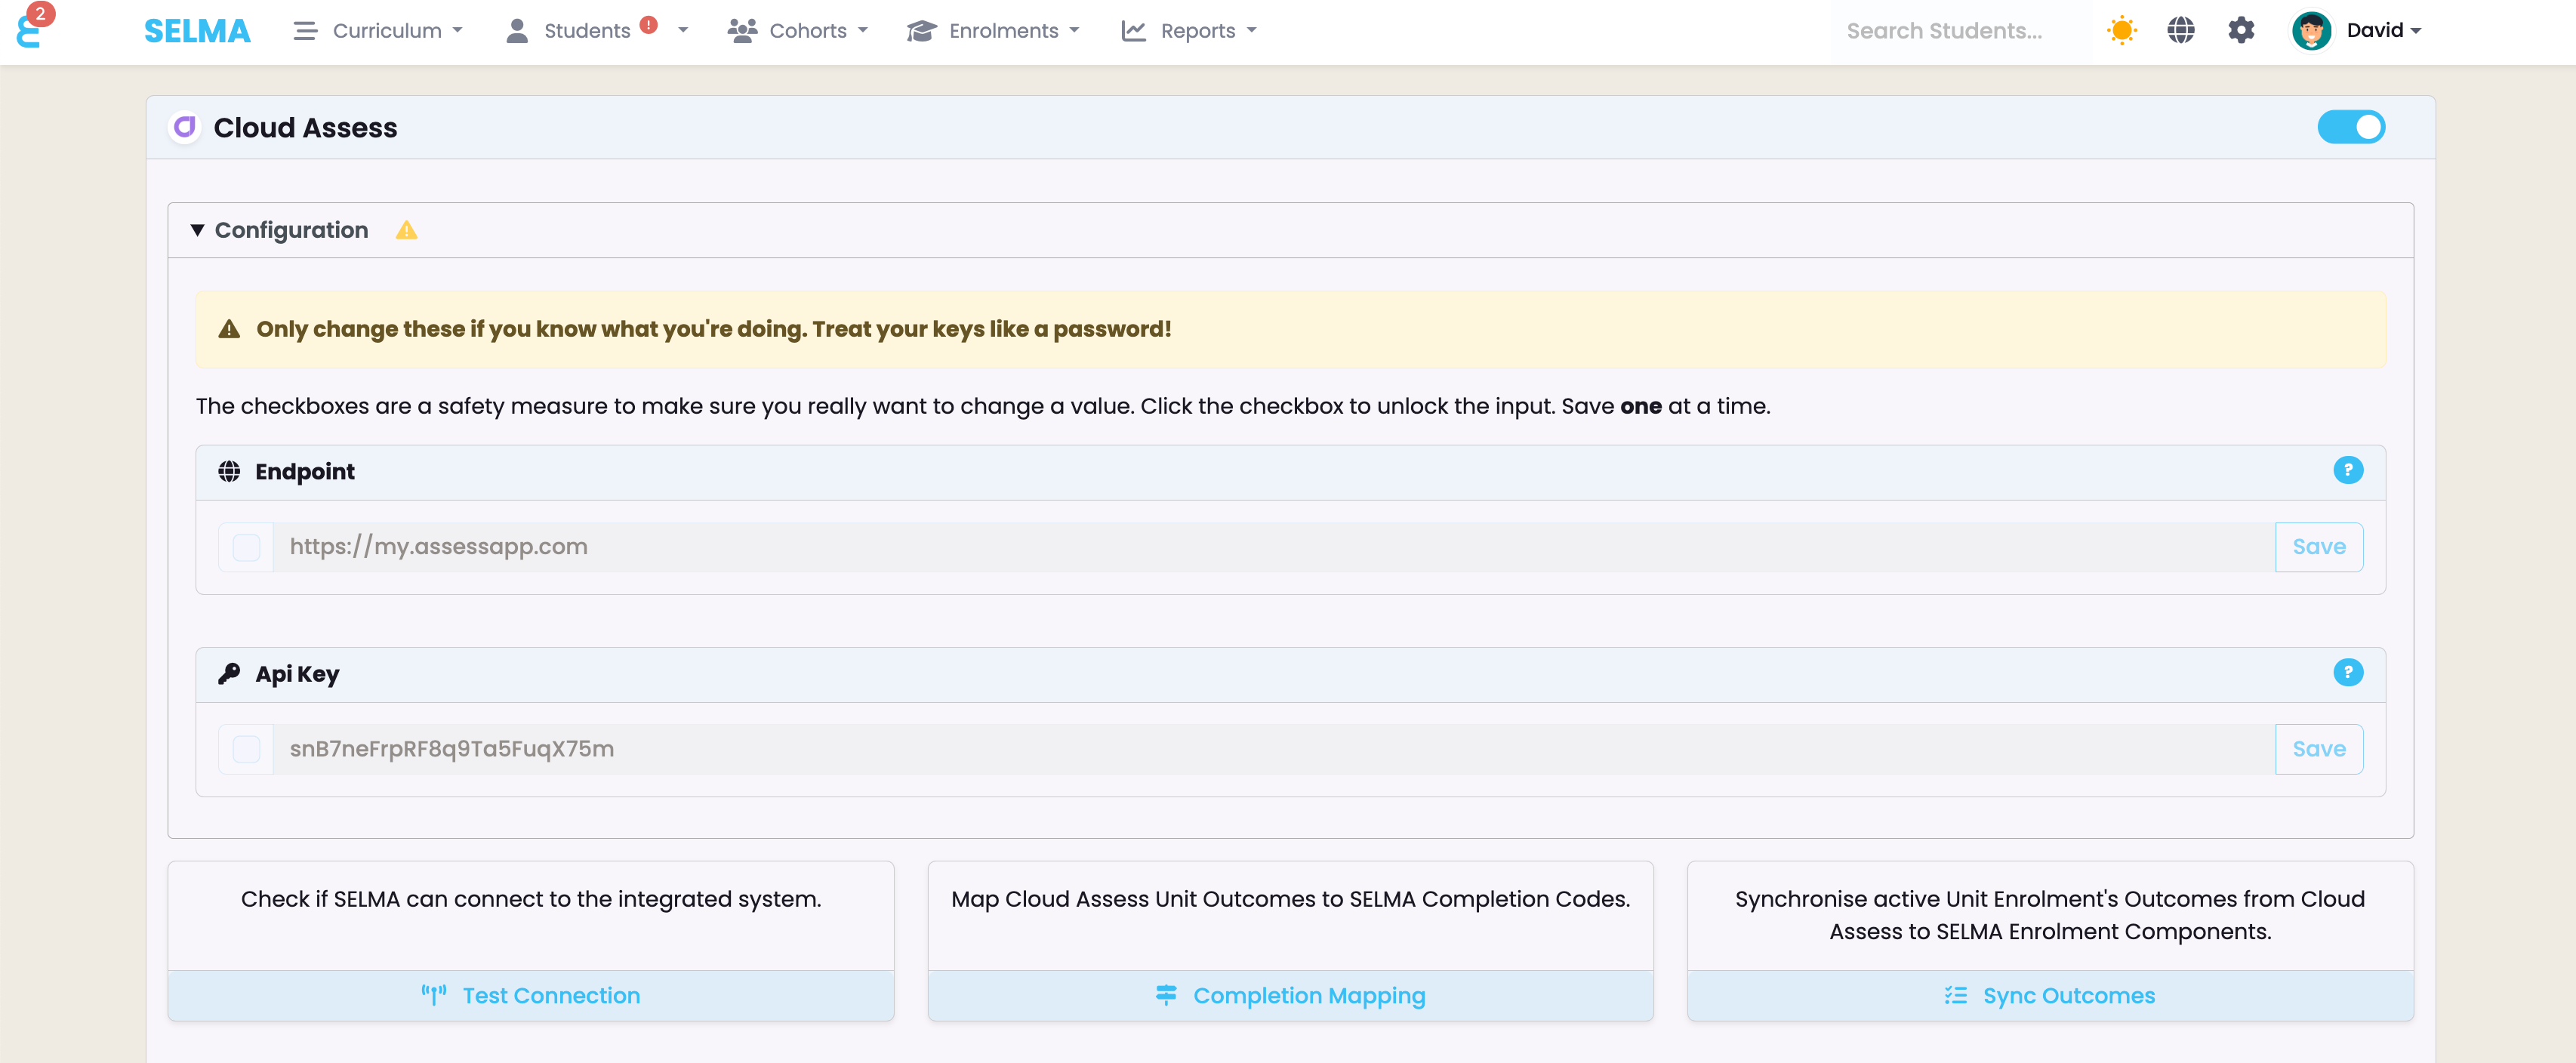
The configuration screen displays a log of all transactions between the systems, useful for troubleshooting. The Test Connection button checks if the keys are functioning correctly, and the toggle in the top-right enables or disables the integration. If the connection is successful and the toggle is on, your Cloud Assess integration is active.
The Sync Outcome button allows manual import of outcomes from Cloud Assess to SELMA, with the process also running automatically every 30 minutes (configurable).
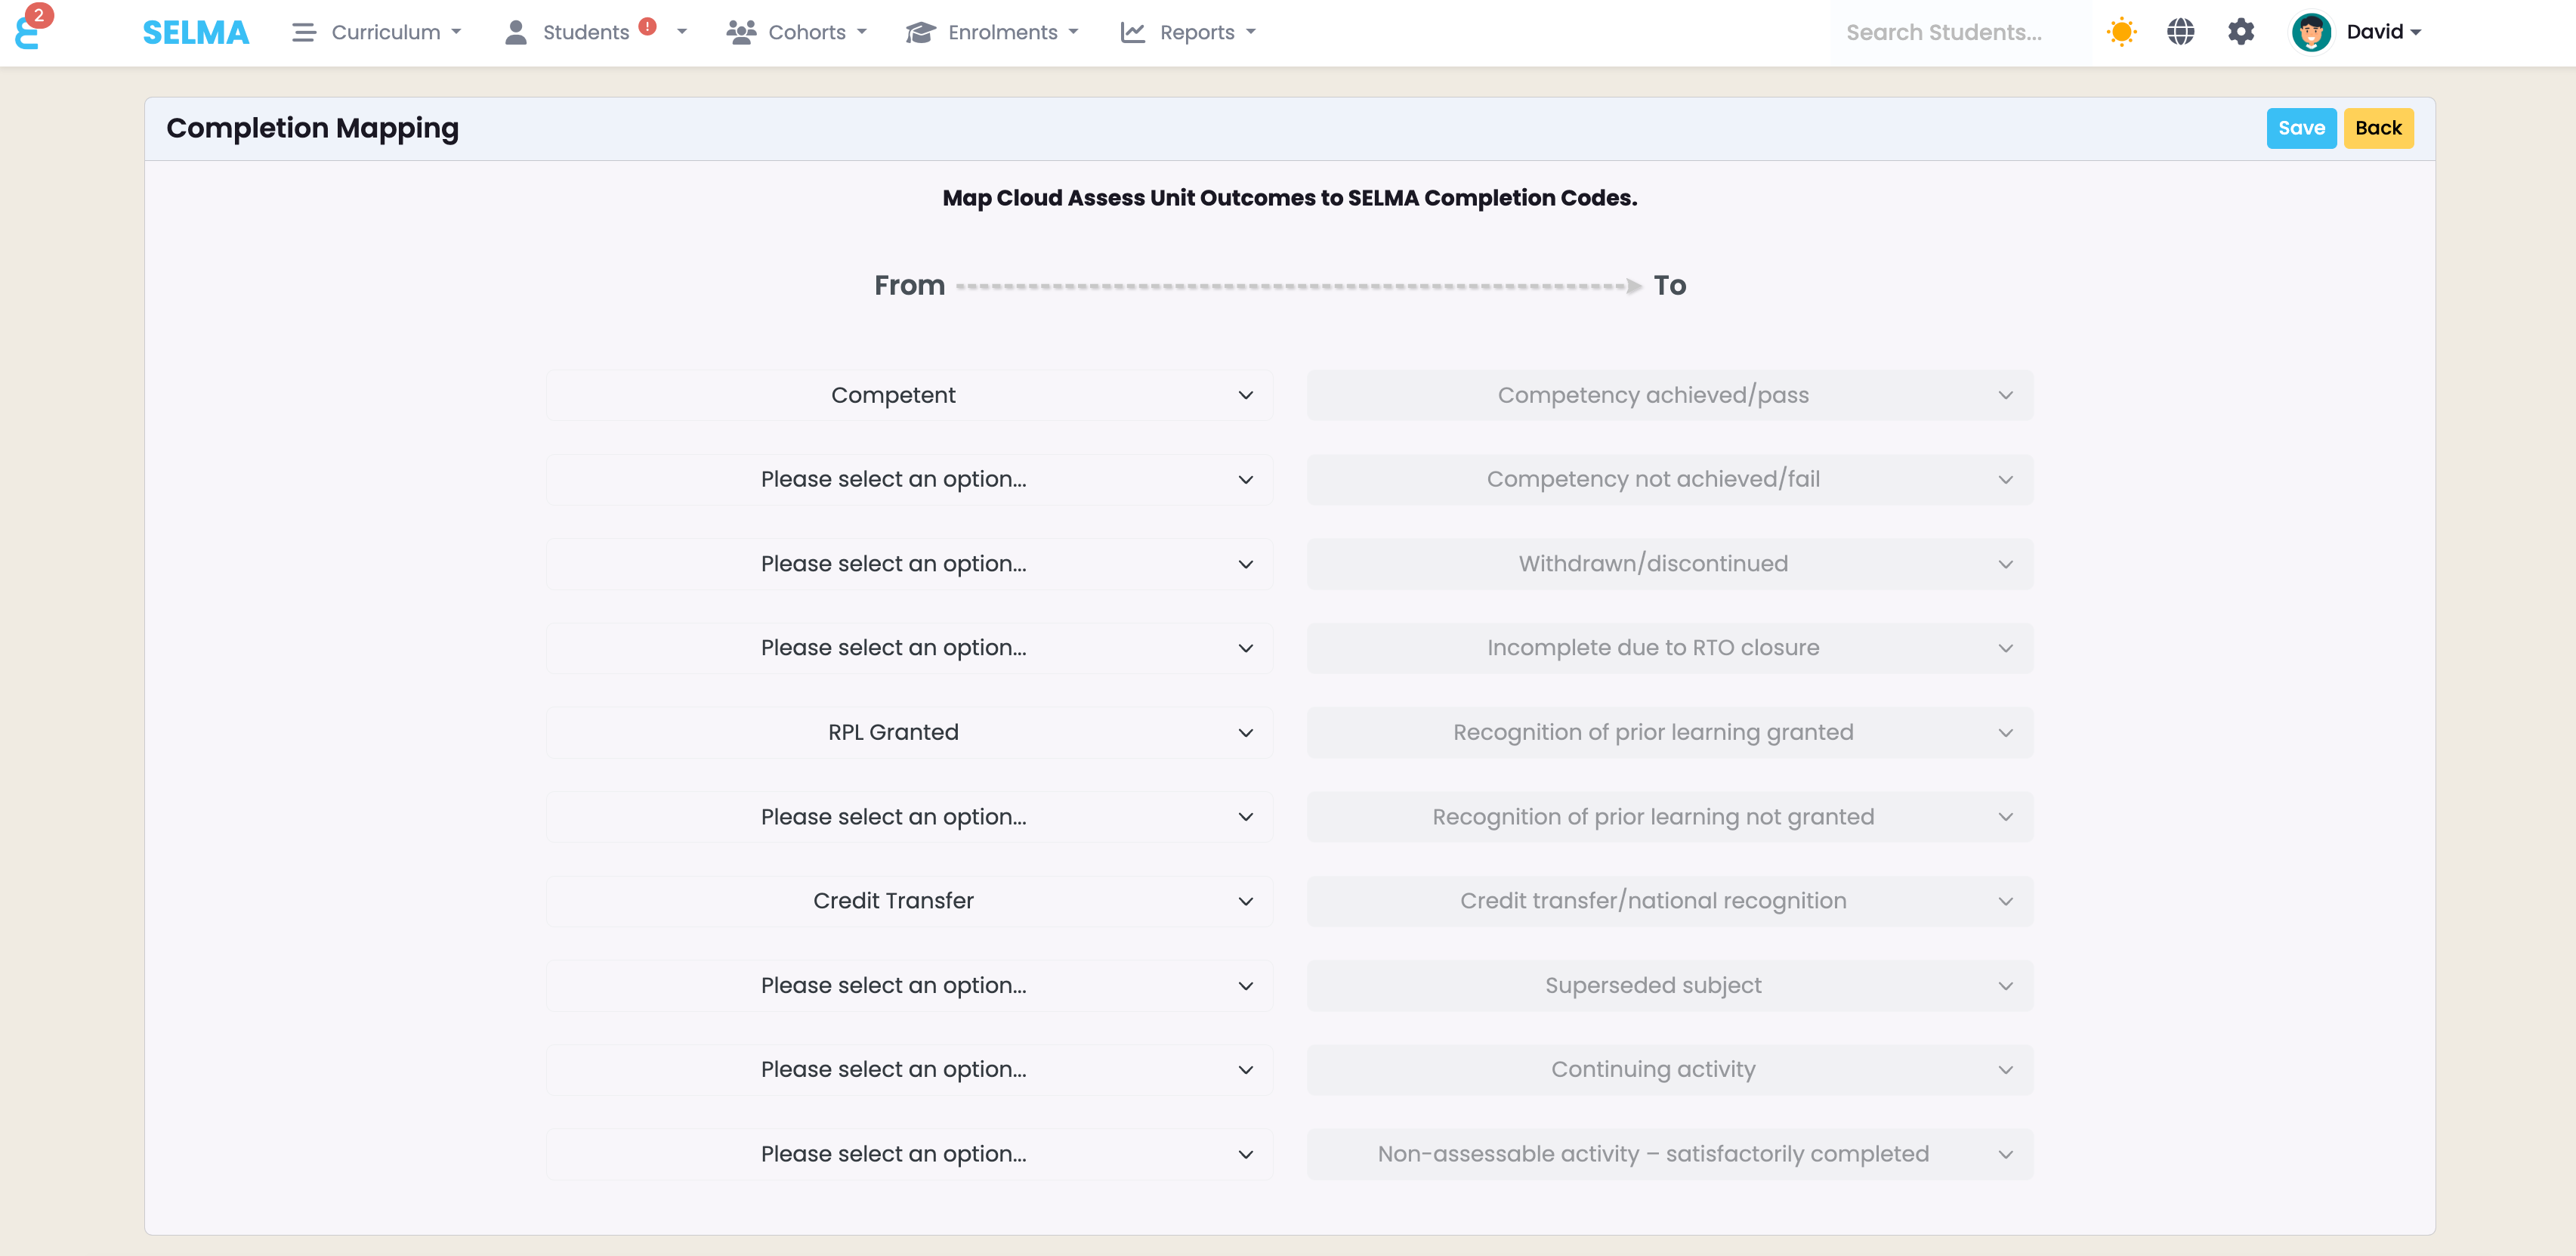
Outcome Mapping
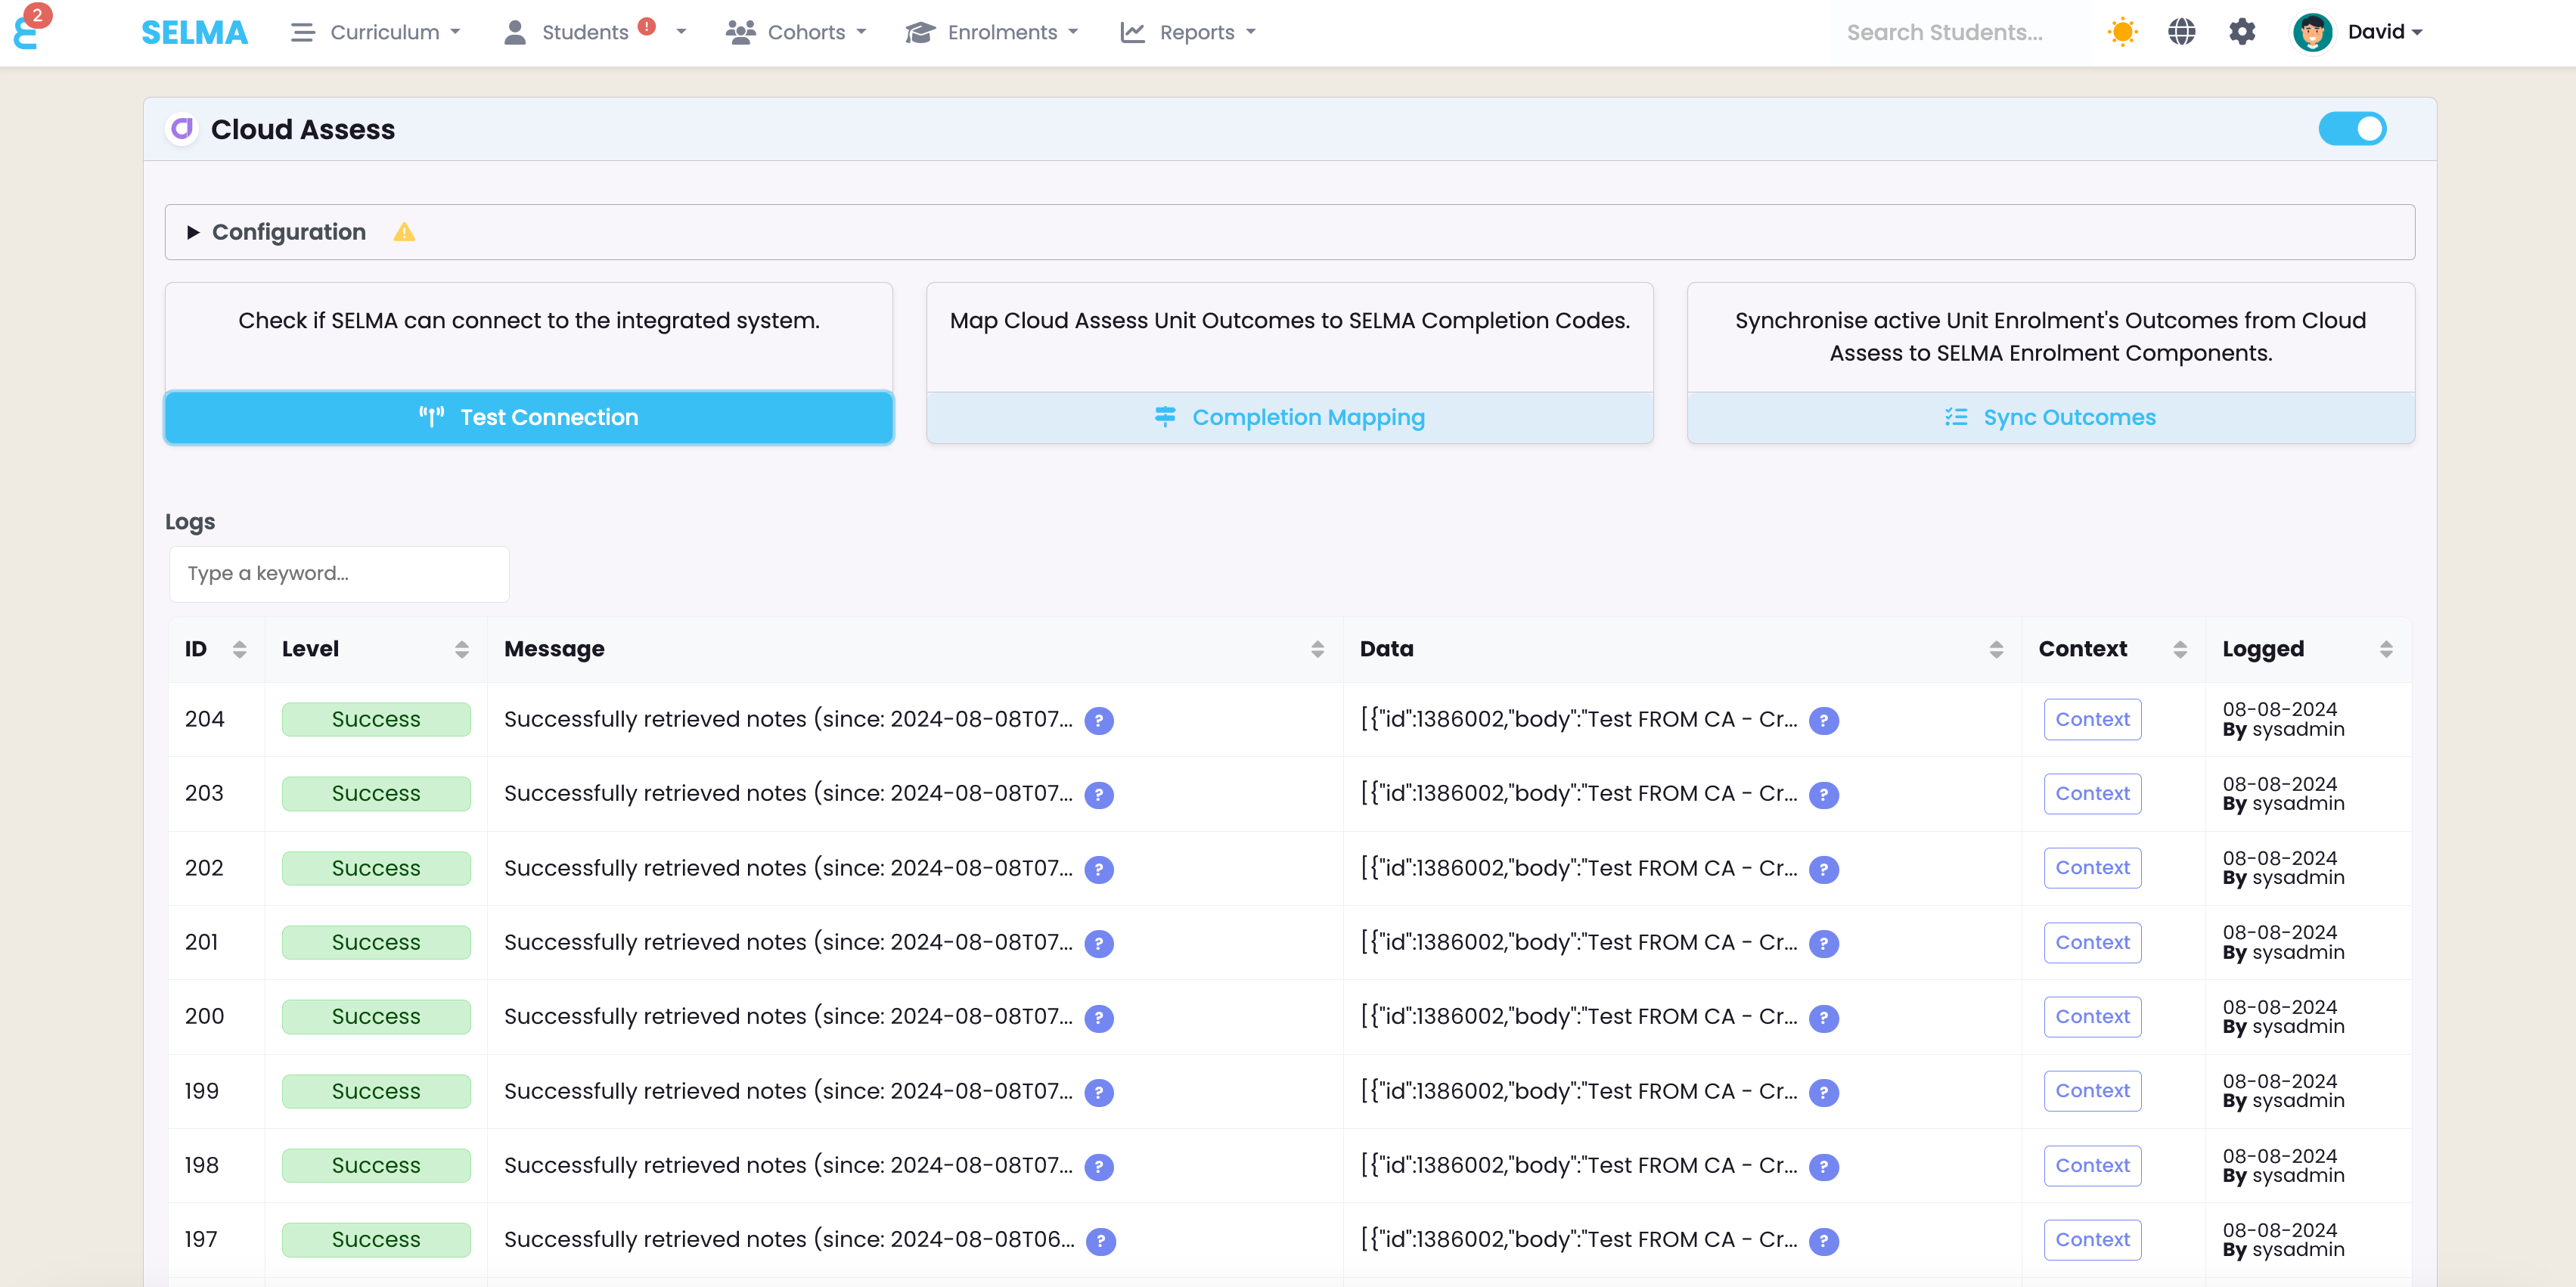
The Completion Mapping menu lets you define which Cloud Assess outcomes should be imported into SELMA and linked to specific SELMA Outcome Codes. SELMA only imports “Approved” marks from Cloud Assess.
Dashboard
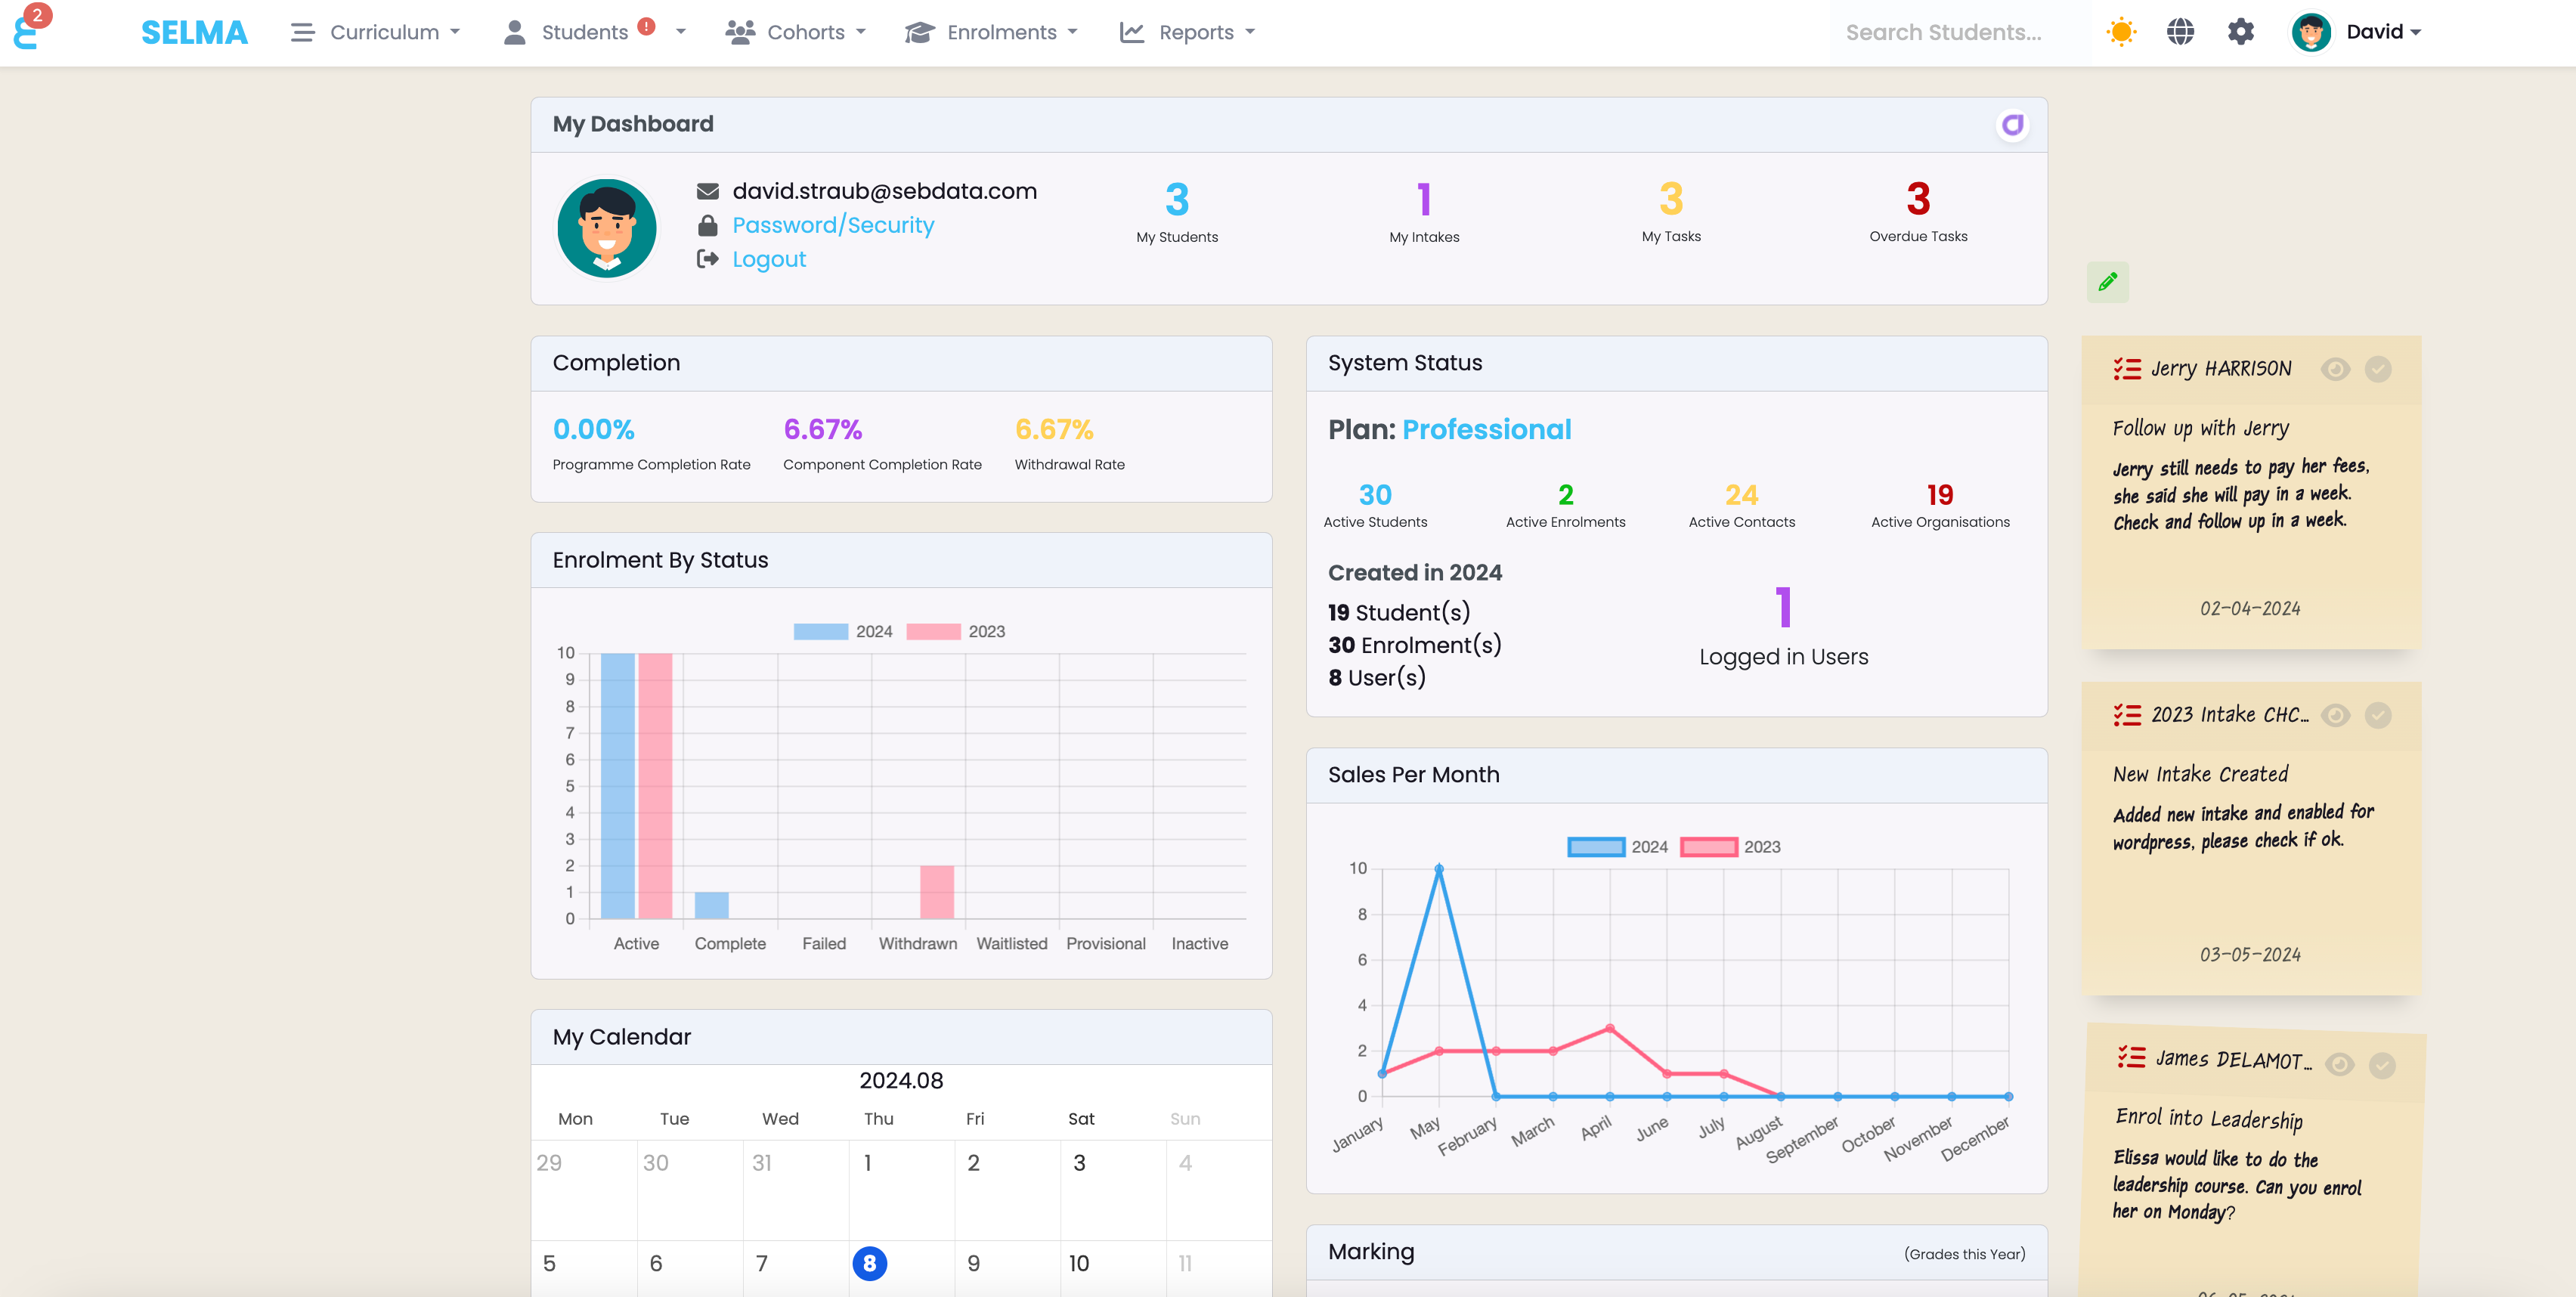
Once the Cloud Assess integration is activated, the dashboard displays a Cloud Assess logo in the top-right. Clicking this logo opens your Cloud Assess instance in a new browser window.
Linking SELMA Programs to Cloud Assess
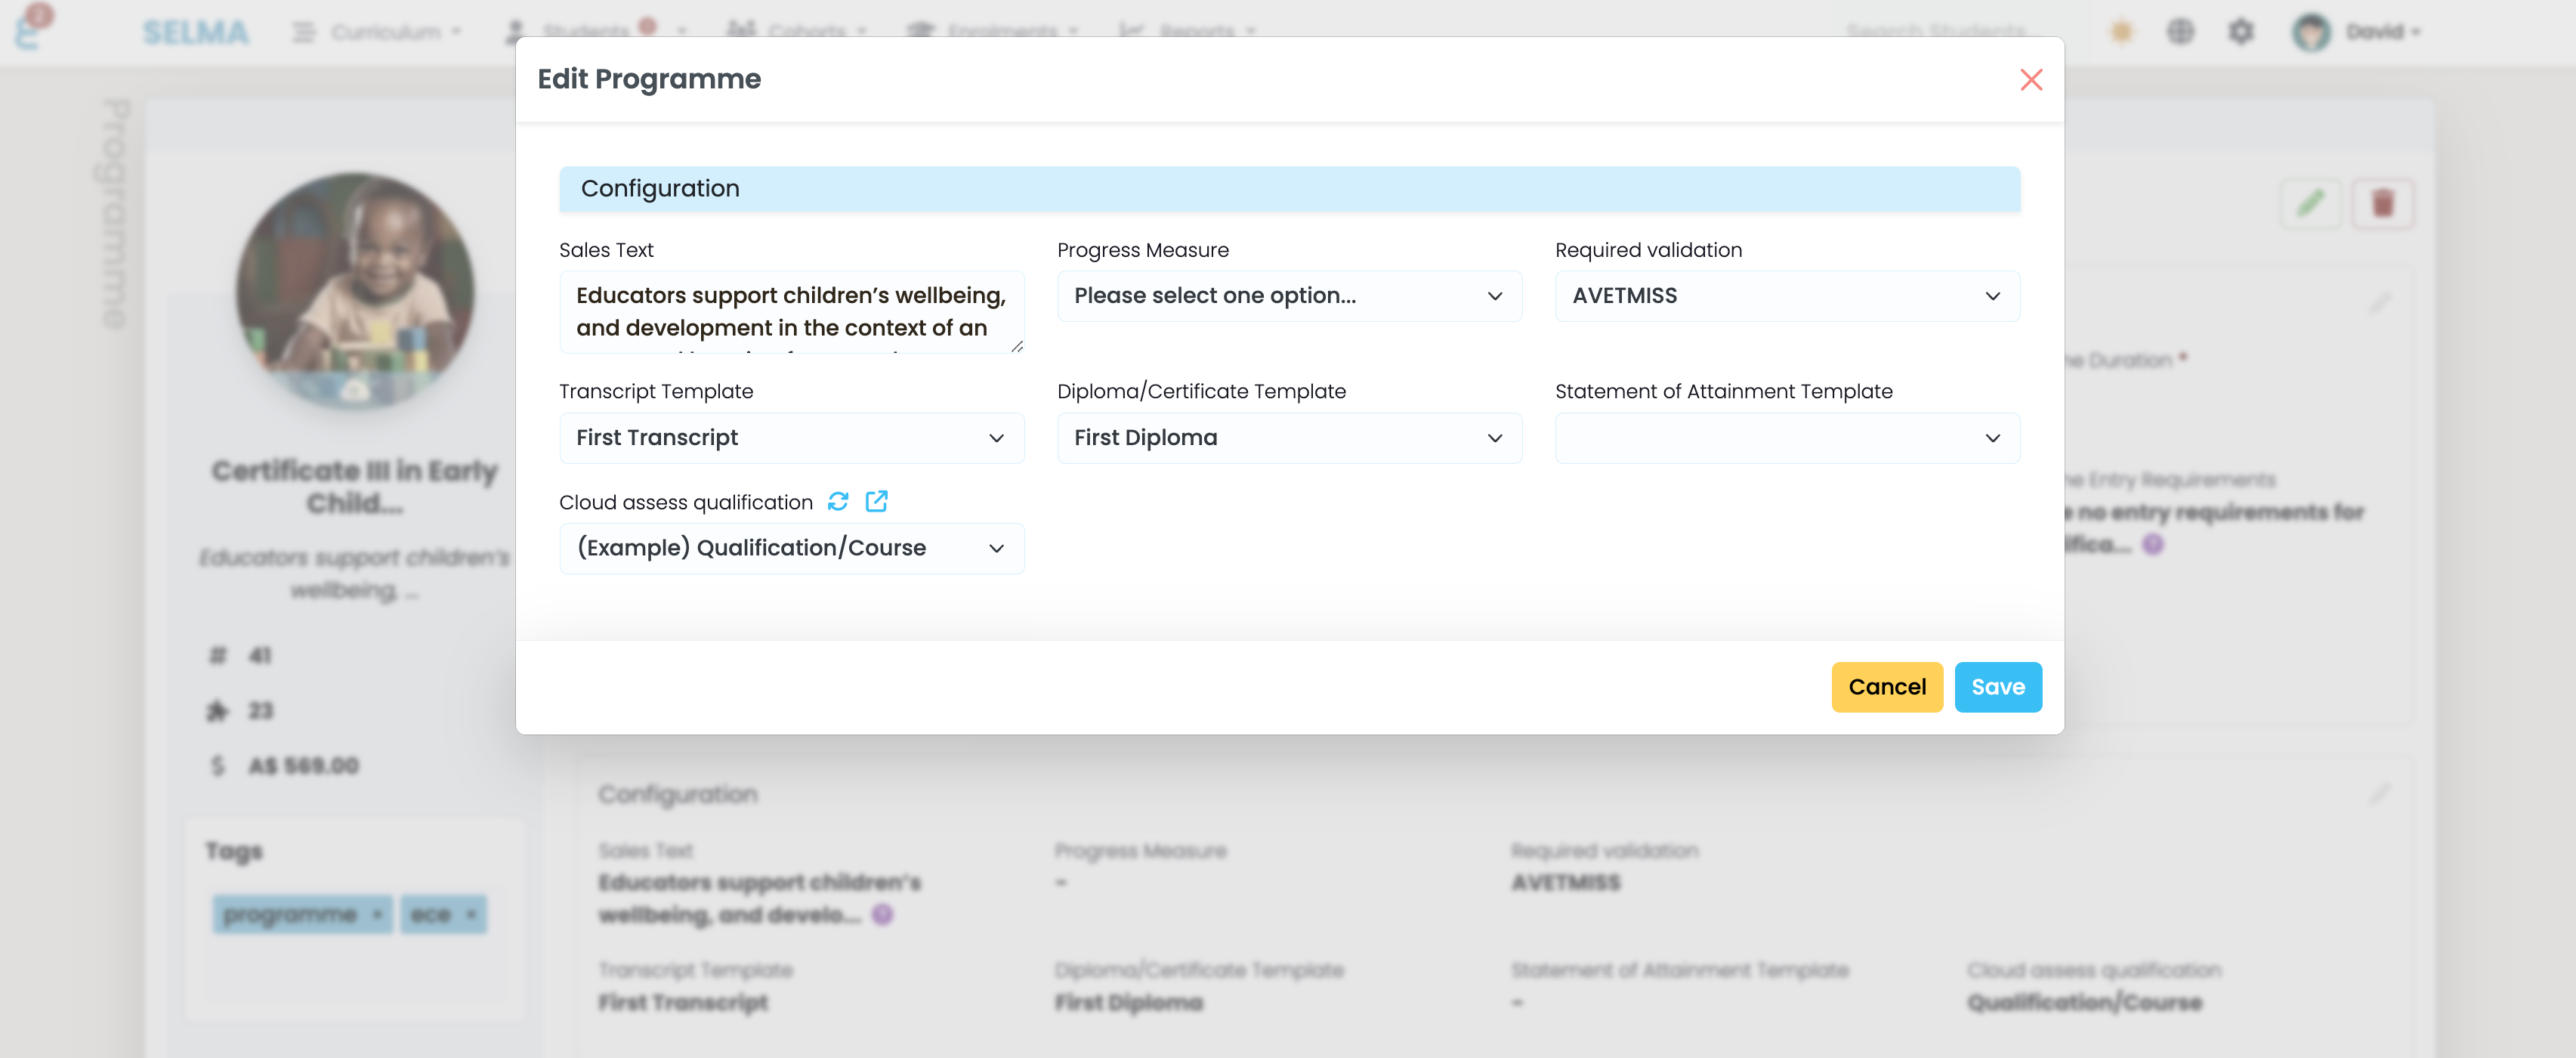
SELMA does not create programs or components in Cloud Assess; instead, it links them to relevant items in the SELMA curriculum. To link a program, open it in SELMA, edit the Configuration card, and select the appropriate qualification under Cloud Assess Qualification. If the qualification is not listed, click the refresh icon to update the selection.
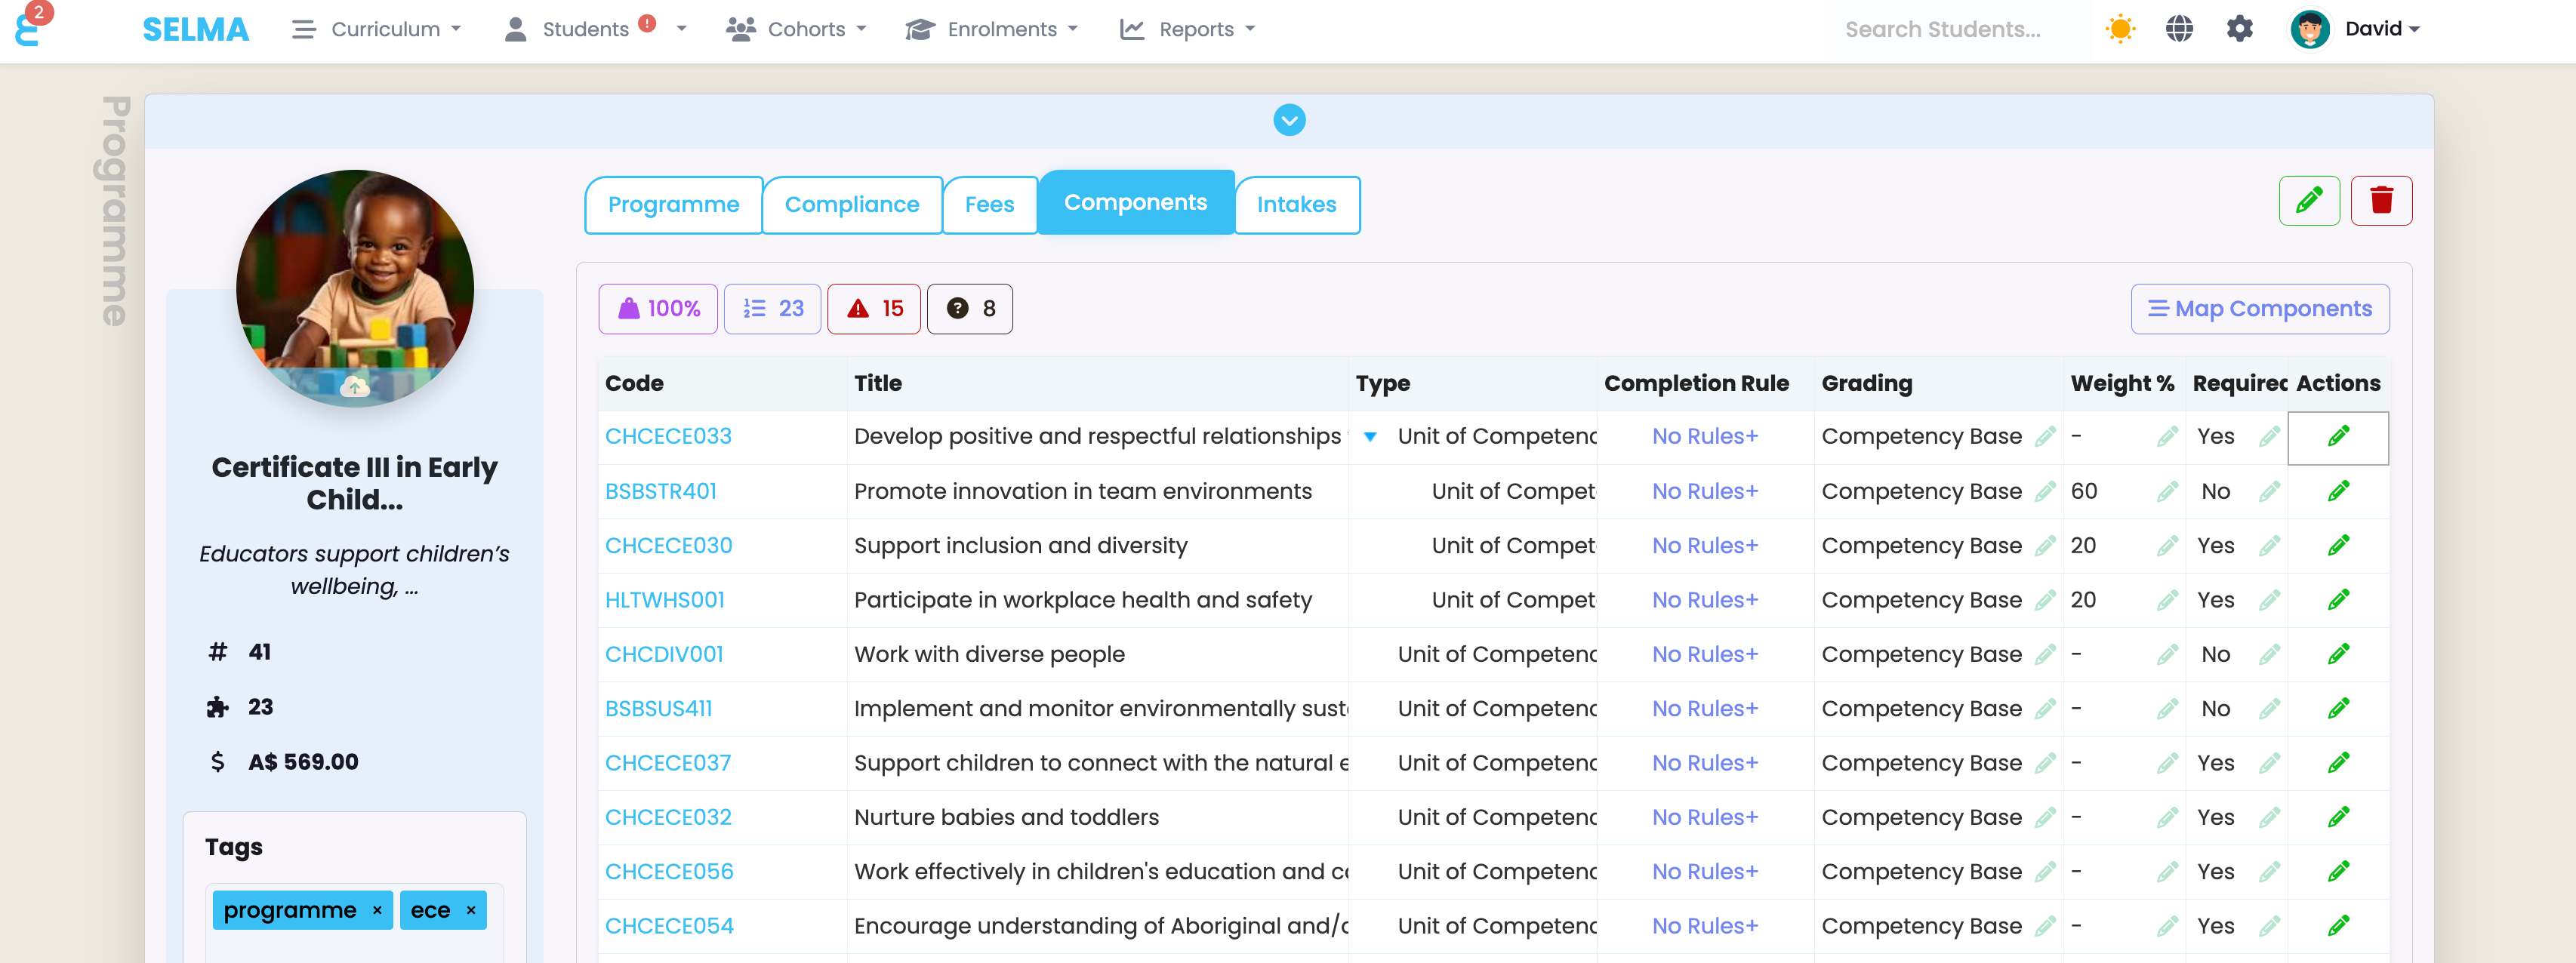
Next, link all relevant components to a Cloud Assess unit by editing each component under the Components tab:
In the pop-up window, edit the Configuration card and select the appropriate Cloud Assess unit:

Once configured, you can sync students, teachers, and enrollments with Cloud Assess when creating a new intake. Refer to the Intake section later in this manual for more details.
Creating Cloud Assess Users
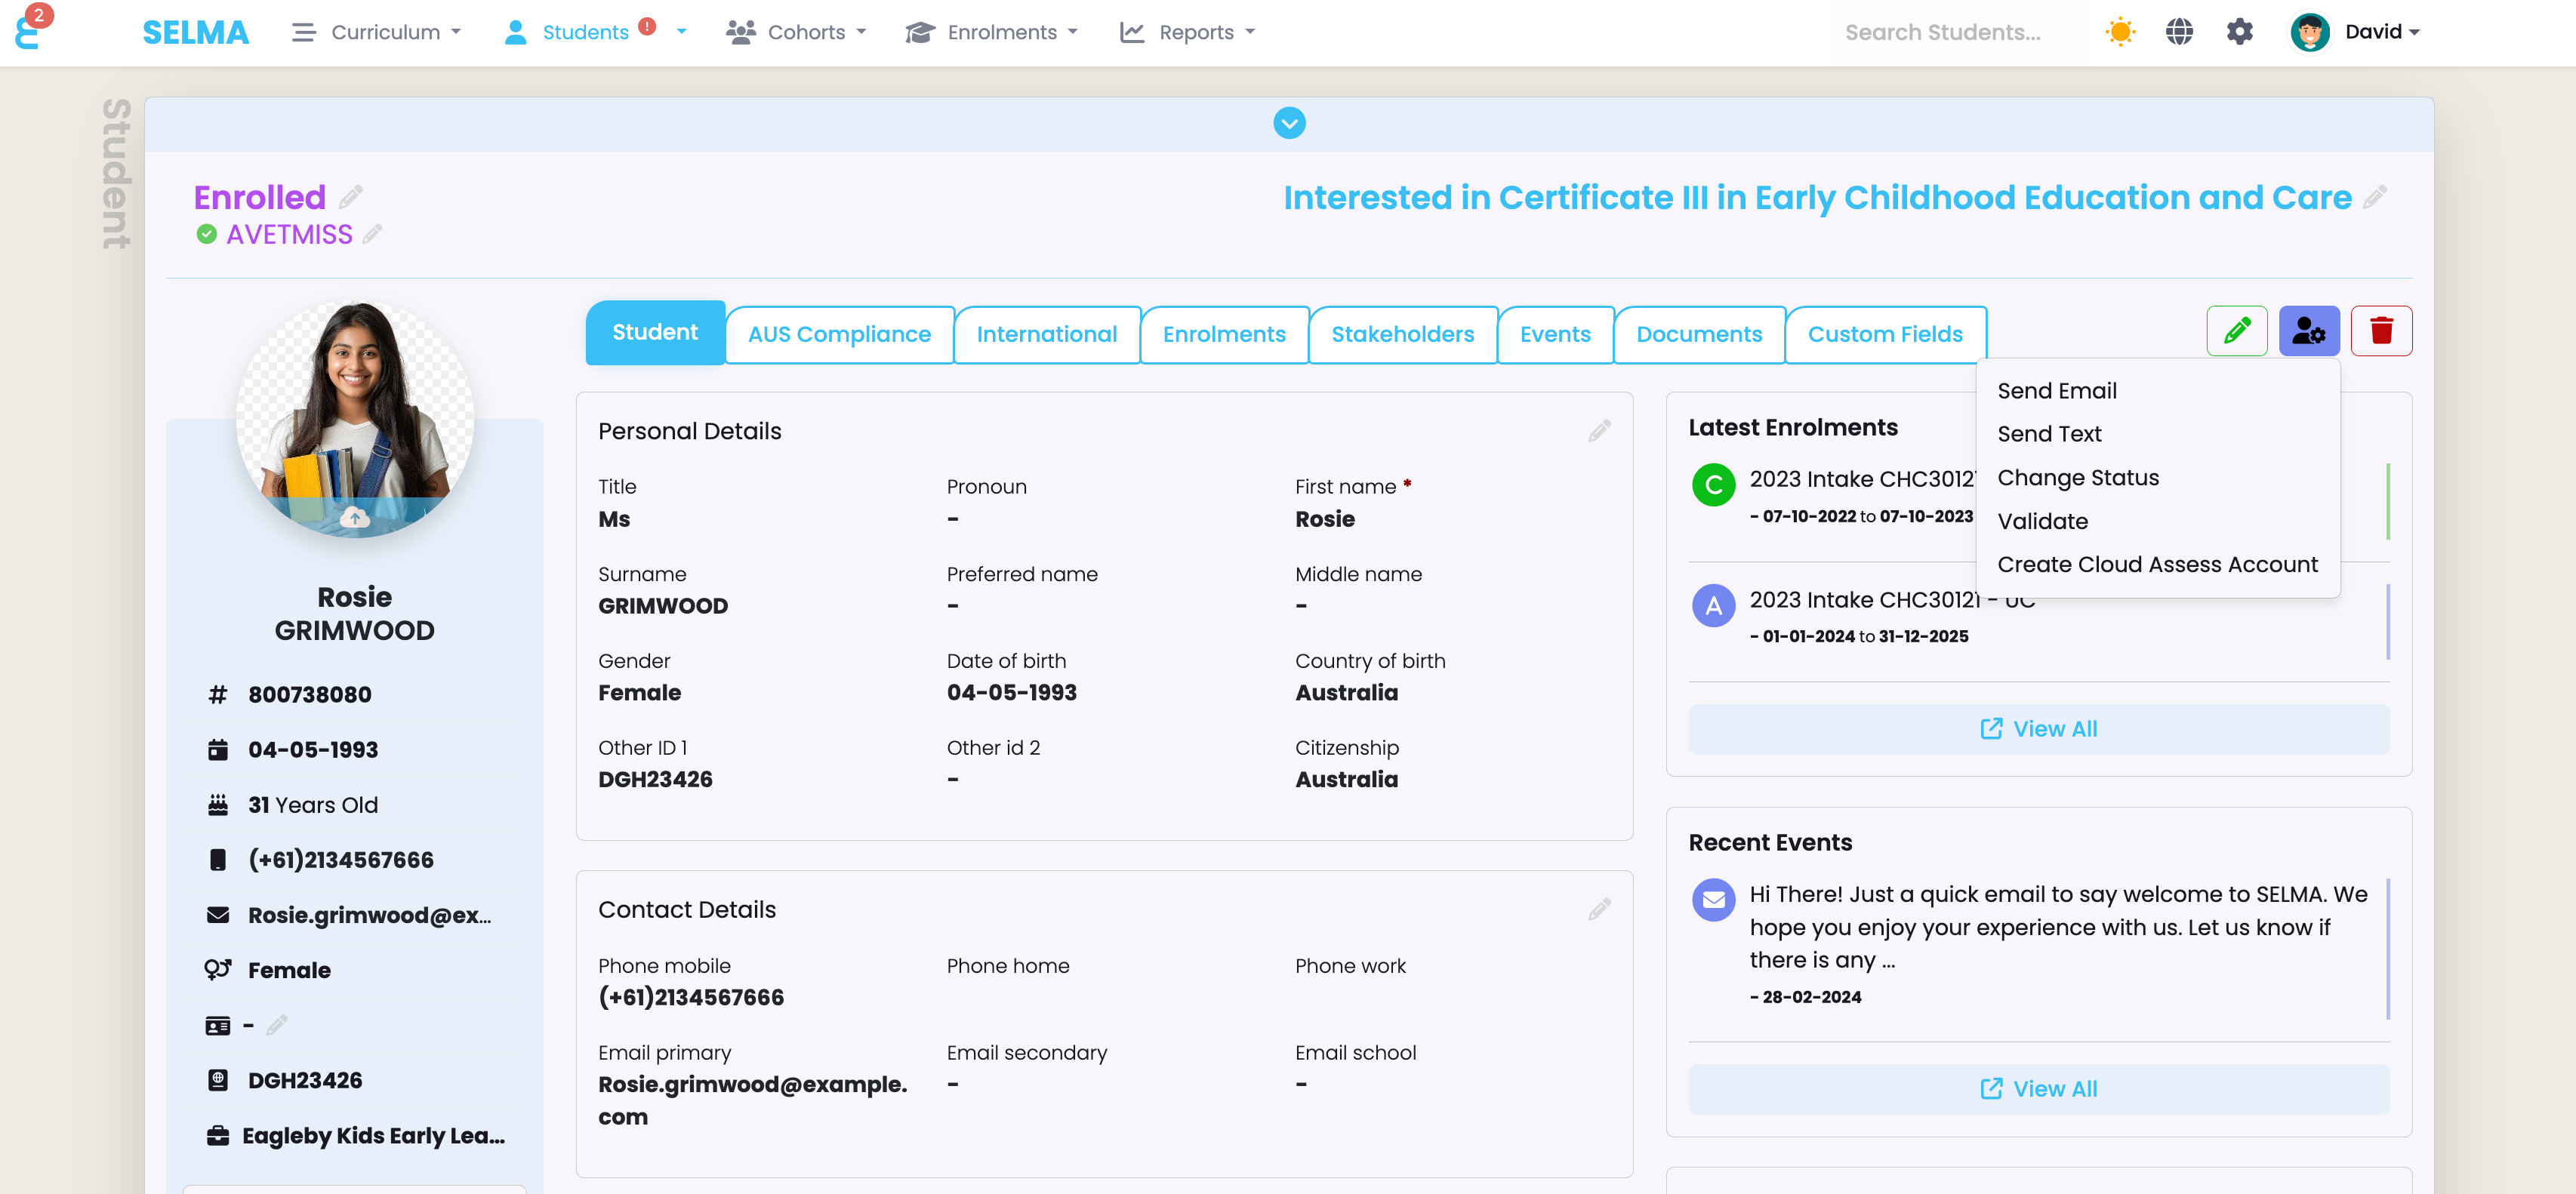
Create a Cloud Assess user from a student record by clicking the Function button and selecting Create Cloud Assess Account. This links the student to Cloud Assess. If the student’s email already exists in Cloud Assess, SELMA will link the existing user rather than creating a new one.
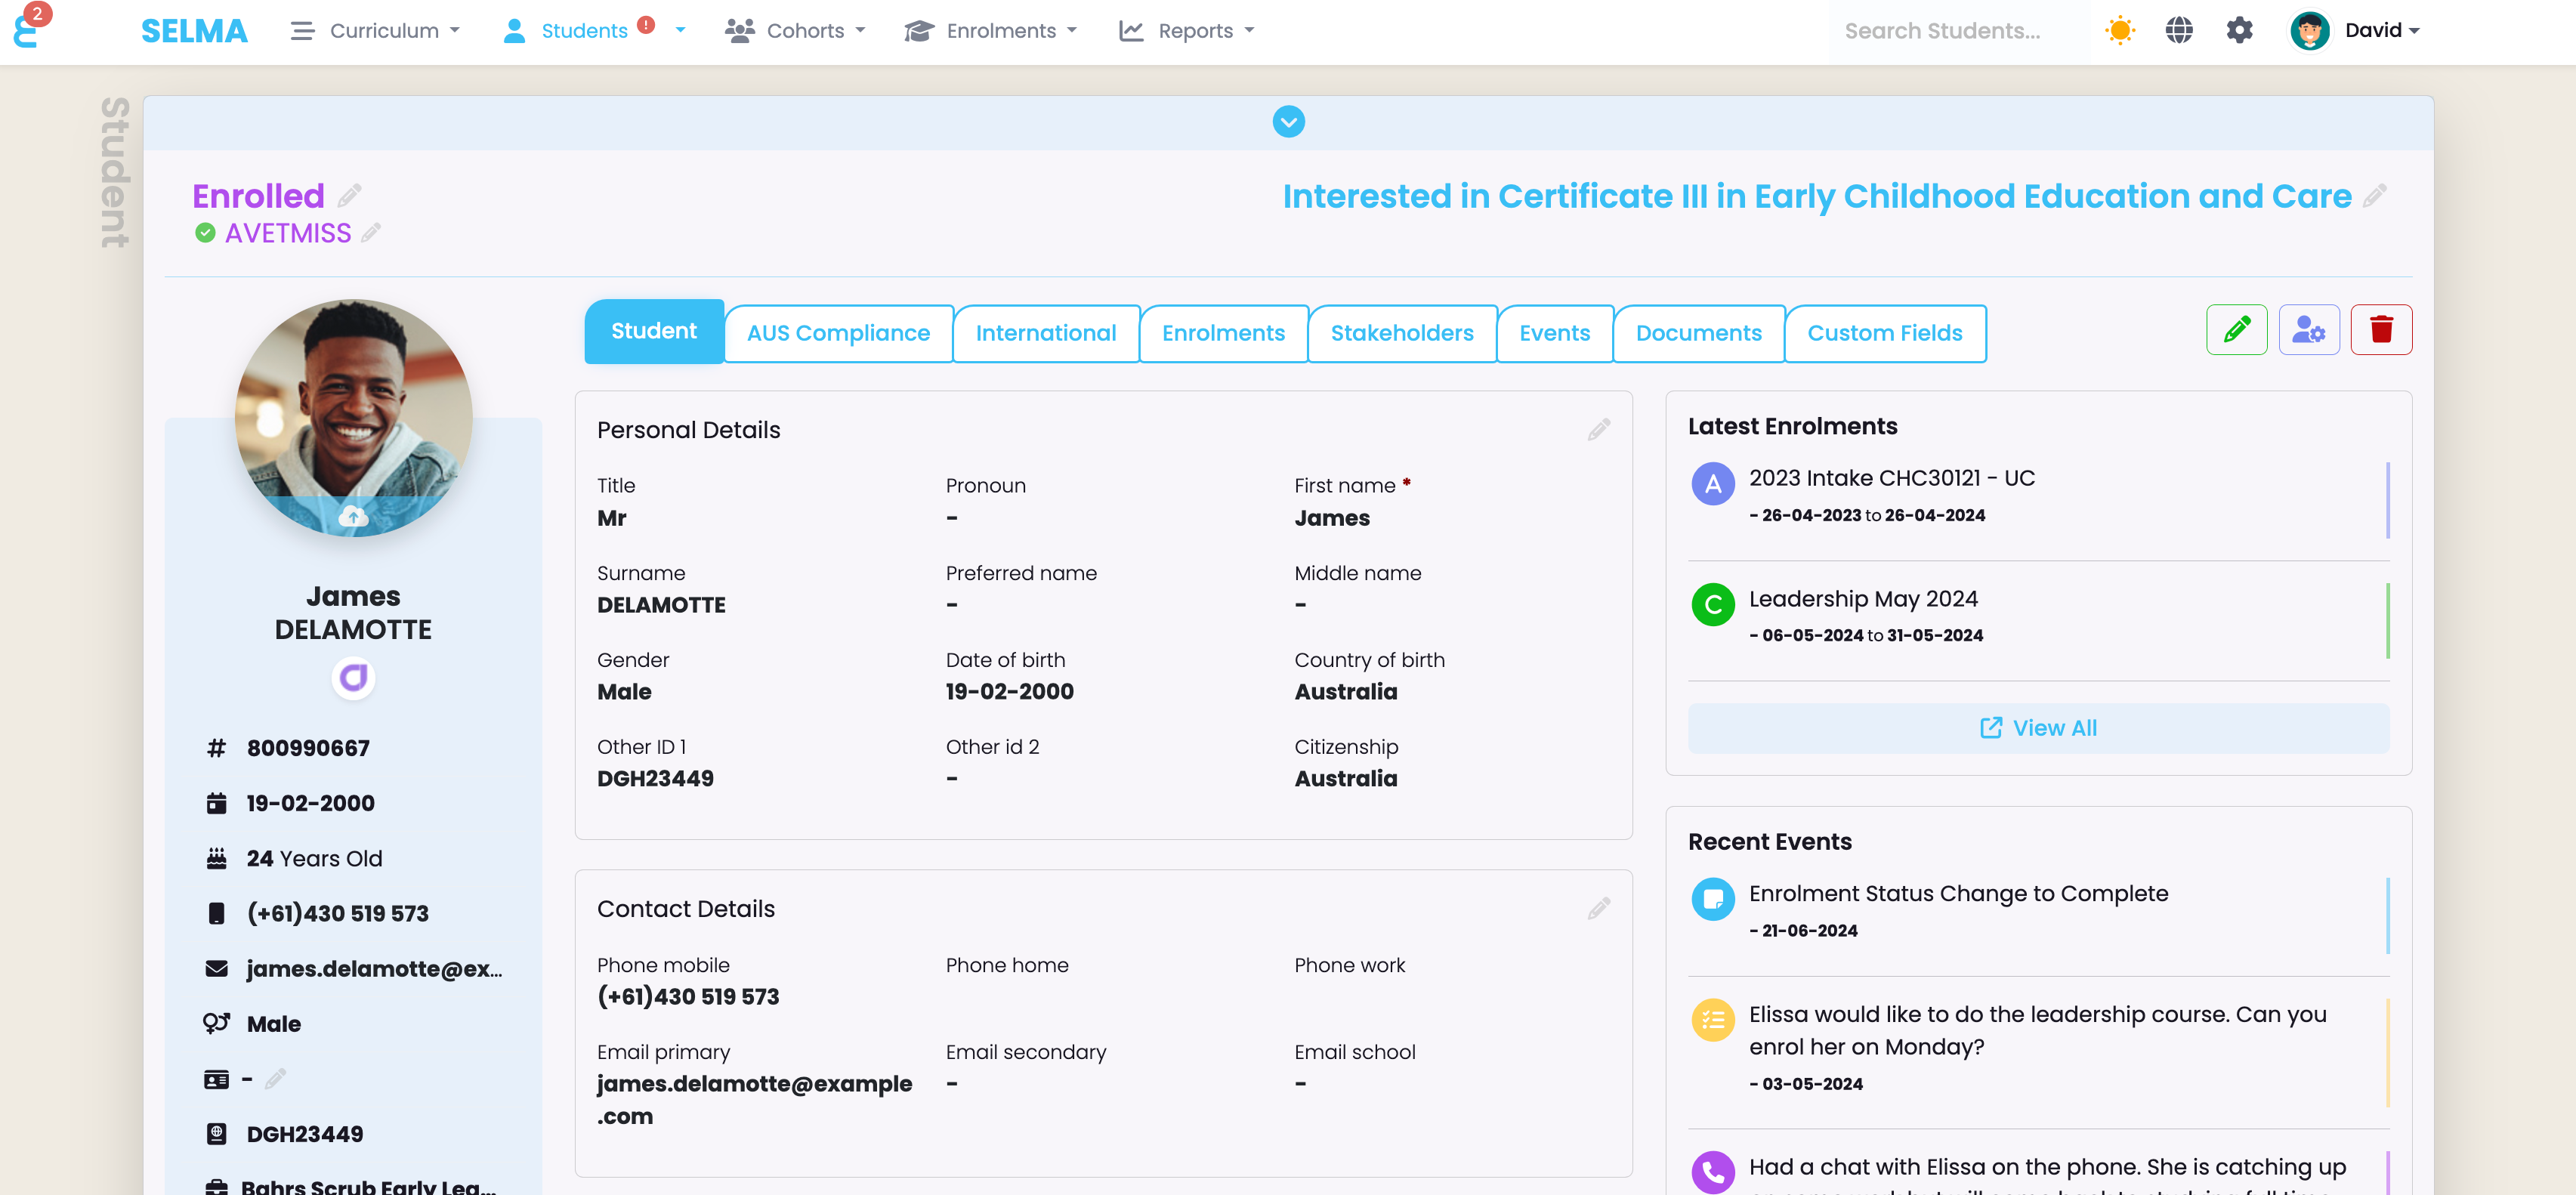
Students linked to Cloud Assess show a logo below their name. Clicking it opens the user profile in Cloud Assess:
Creating Notes in Cloud Assess & SELMA
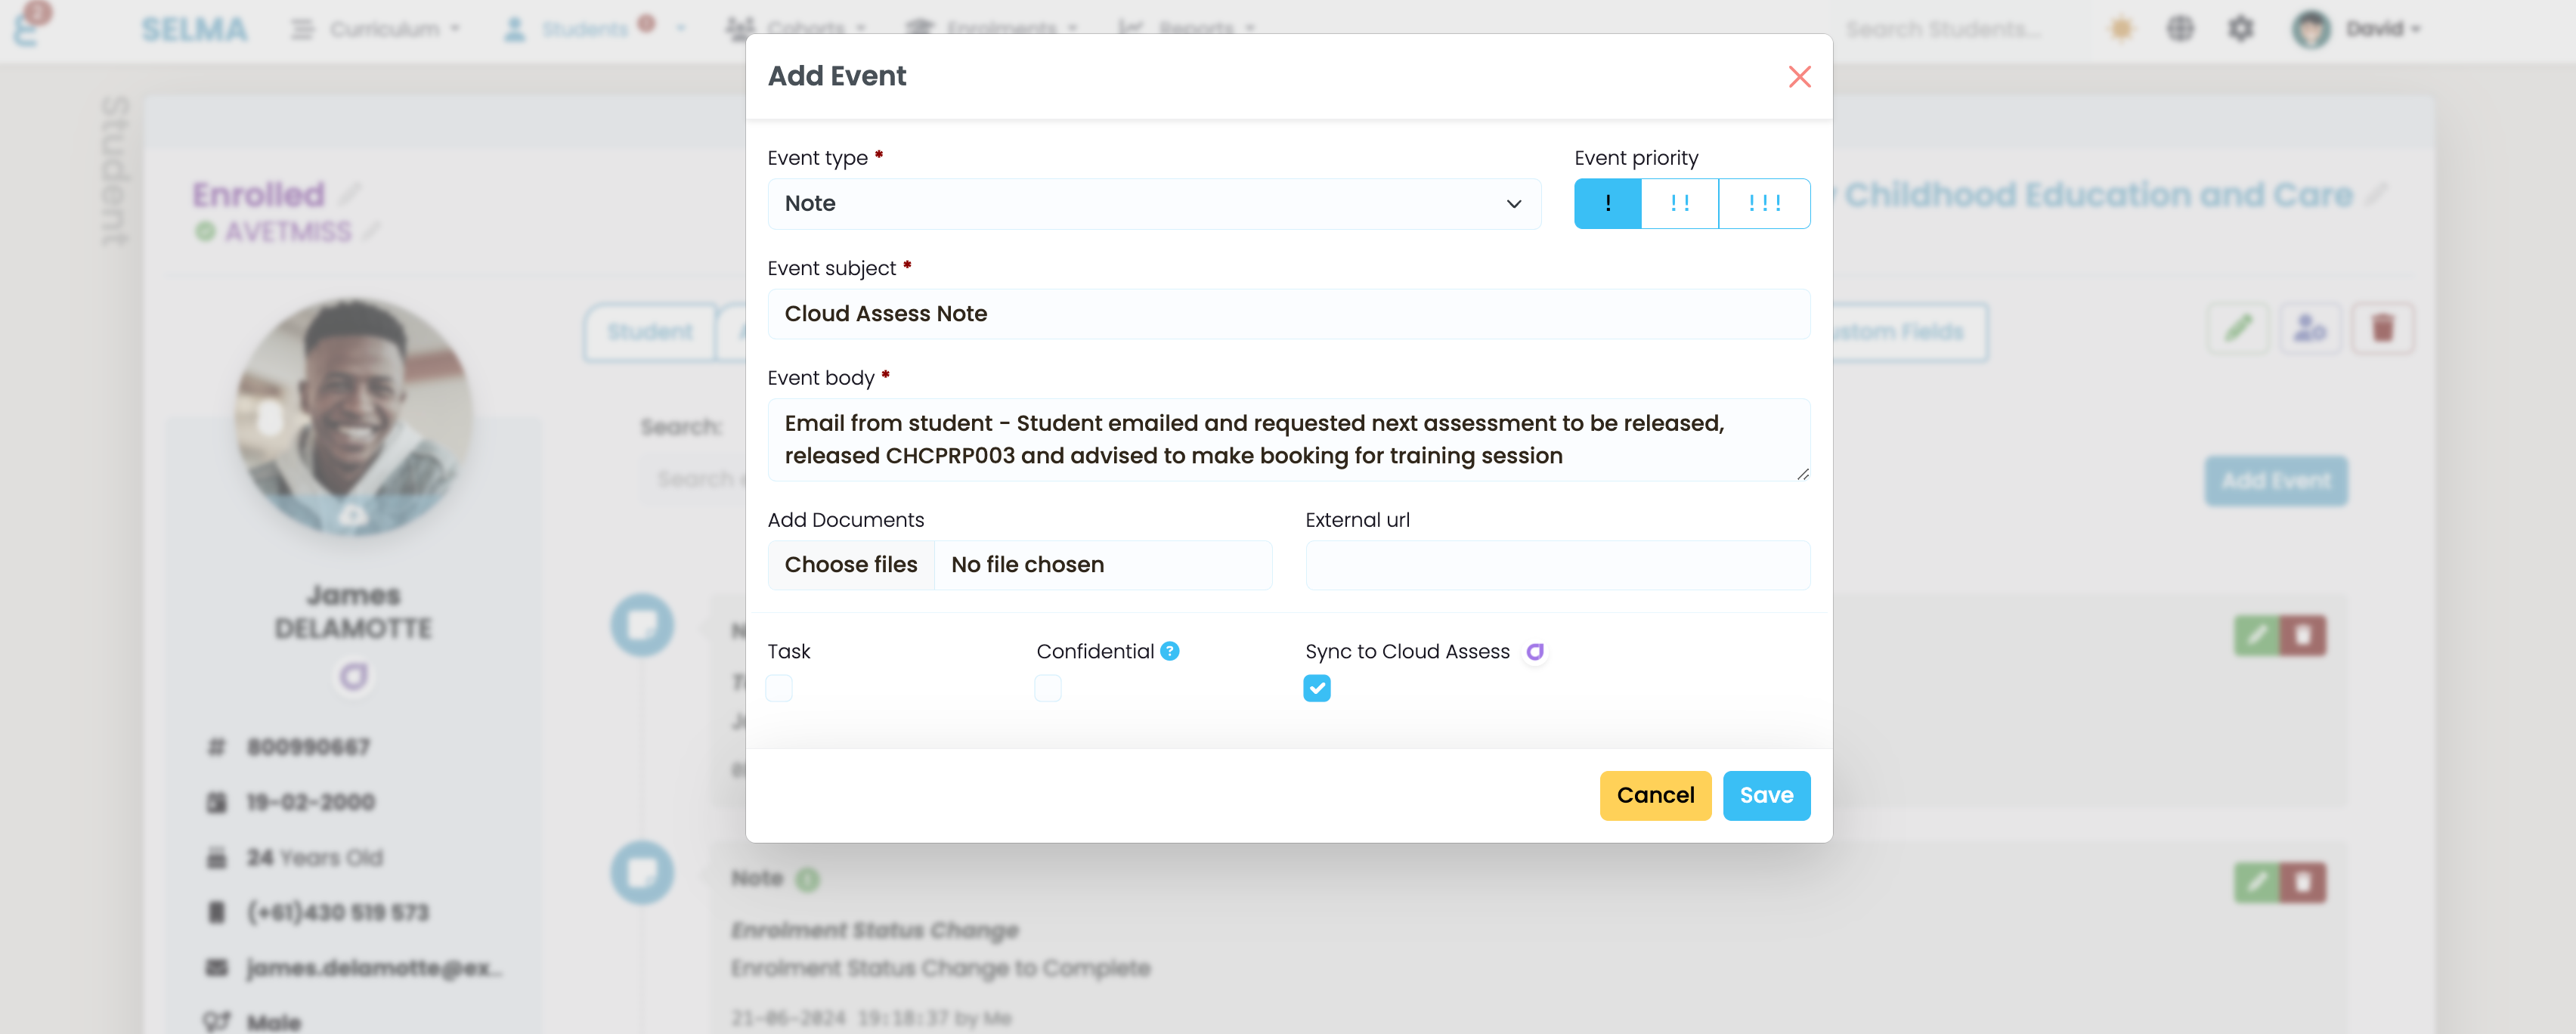
When creating a new note in SELMA, the Sync to Cloud Assess option is selected by default. Saving the note creates it in Cloud Assess as well.
Notes from Cloud Assess also appear in SELMA, marked with a small icon for easy identification. Syncing occurs automatically, though it may take up to 5 minutes for notes to appear in either system.

Creating Teachers
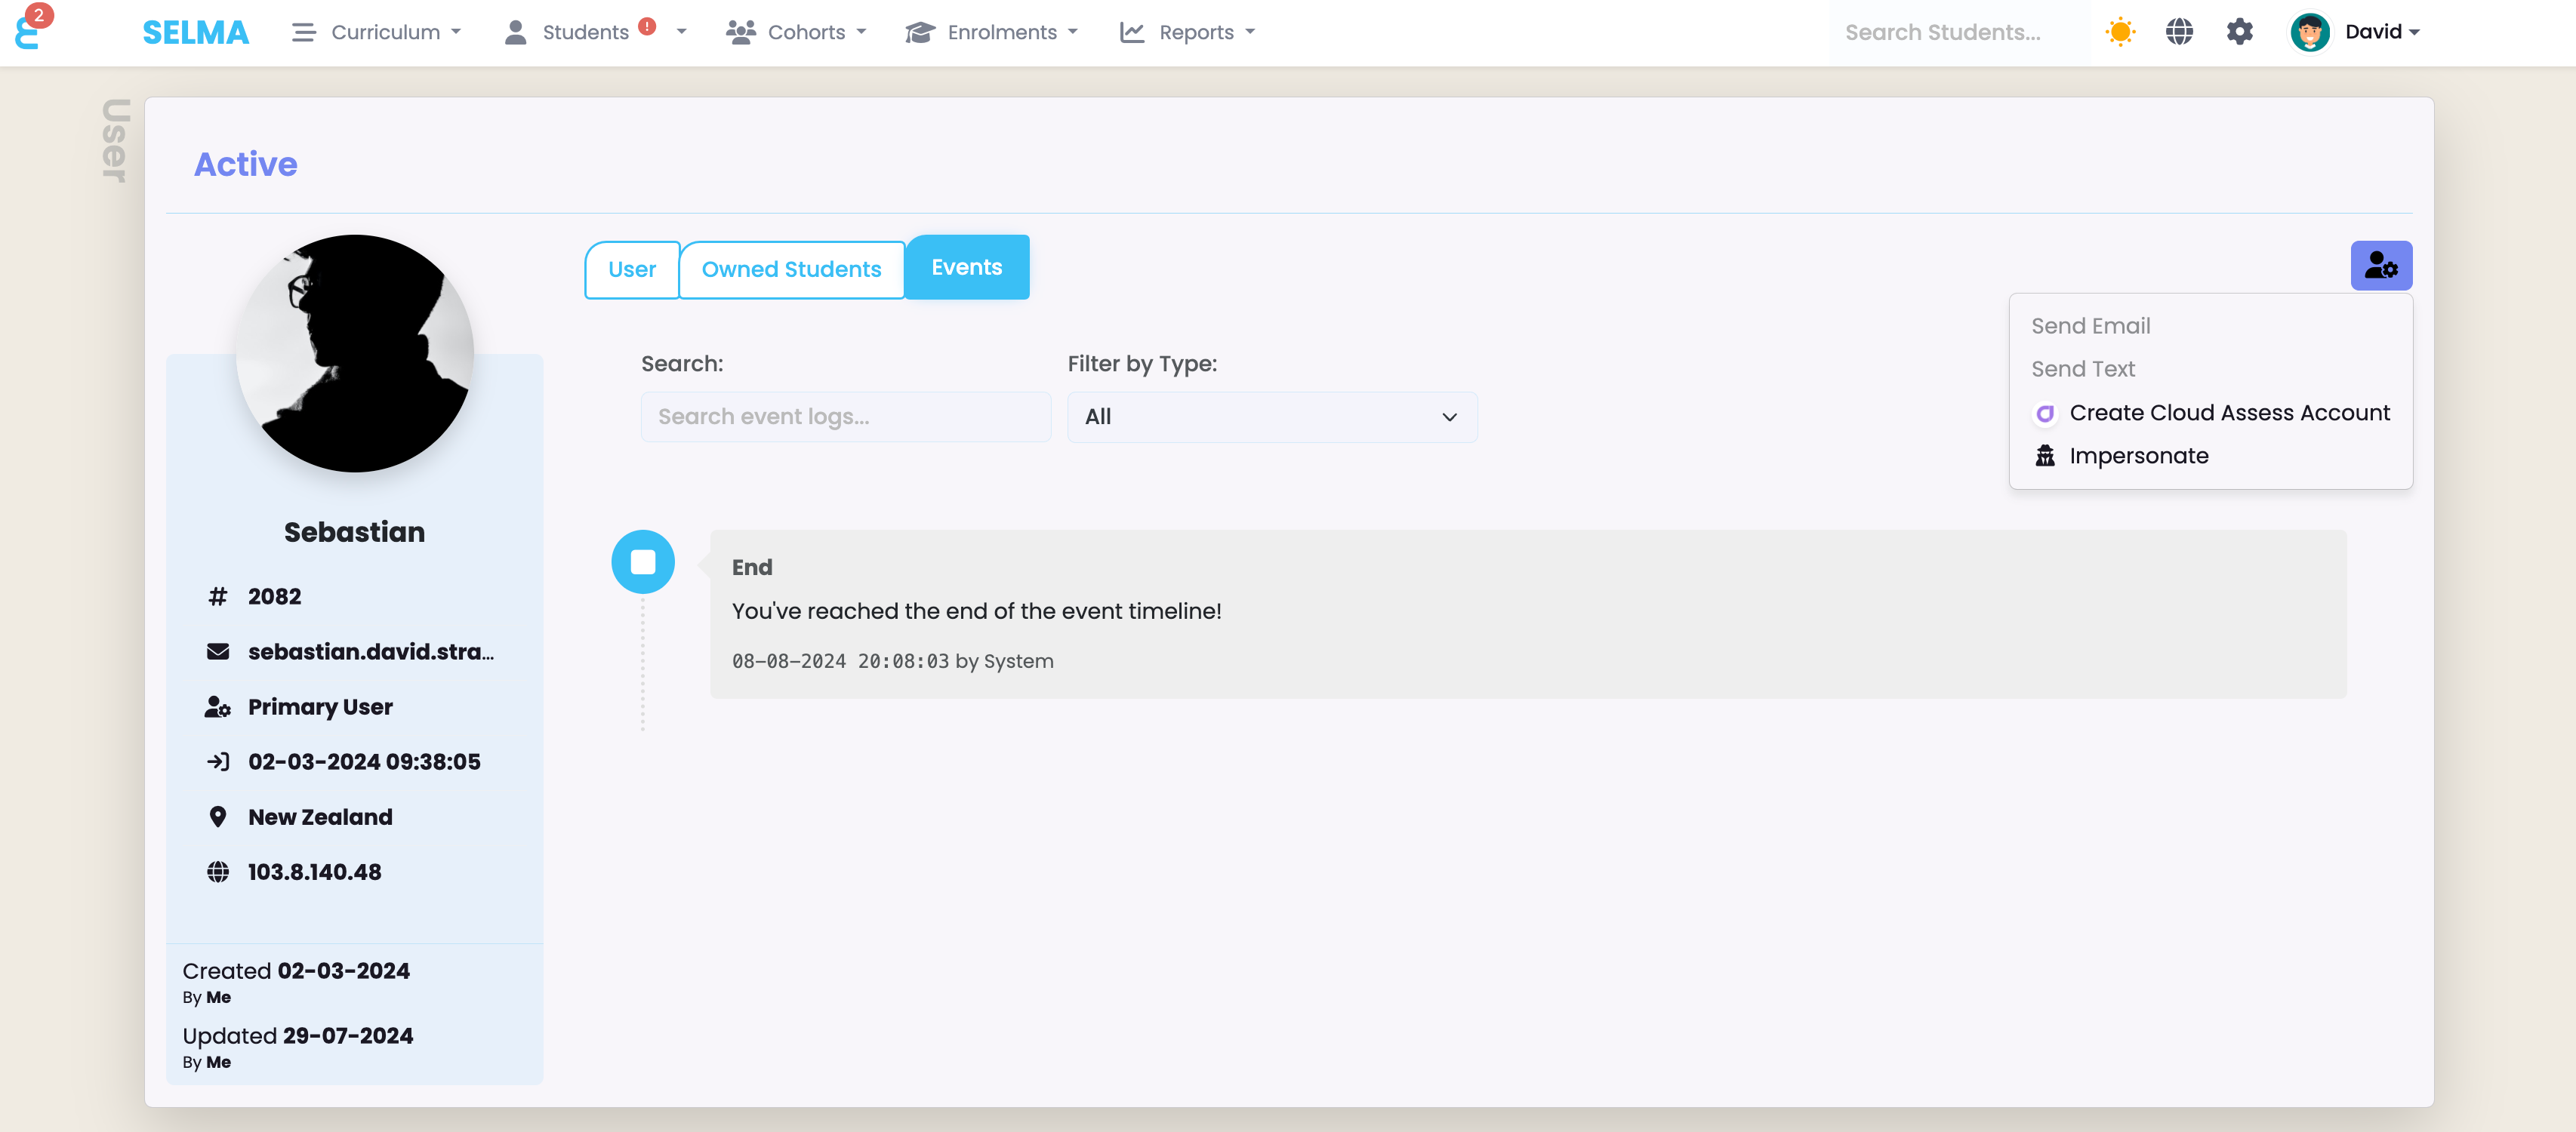
You can create Cloud Assess accounts for teachers similarly to students. From a teacher’s record (SELMA Settings – System Users), click the Function button and select Create Cloud Assess Account. SELMA will link to the existing Cloud Assess user if the email is already in use.
Synchronizing Intakes
With a SELMA intake that includes students and linked components, click the Function button and select Sync to Cloud Assess to initiate several processes:
- Create the intake in Cloud Assess if it doesn’t already exist.
- Create active students as users in Cloud Assess, if they don’t already exist.
- Create linked teachers as users in Cloud Assess, if they don’t already exist.
- Enroll all students and teachers into the intake and linked components.
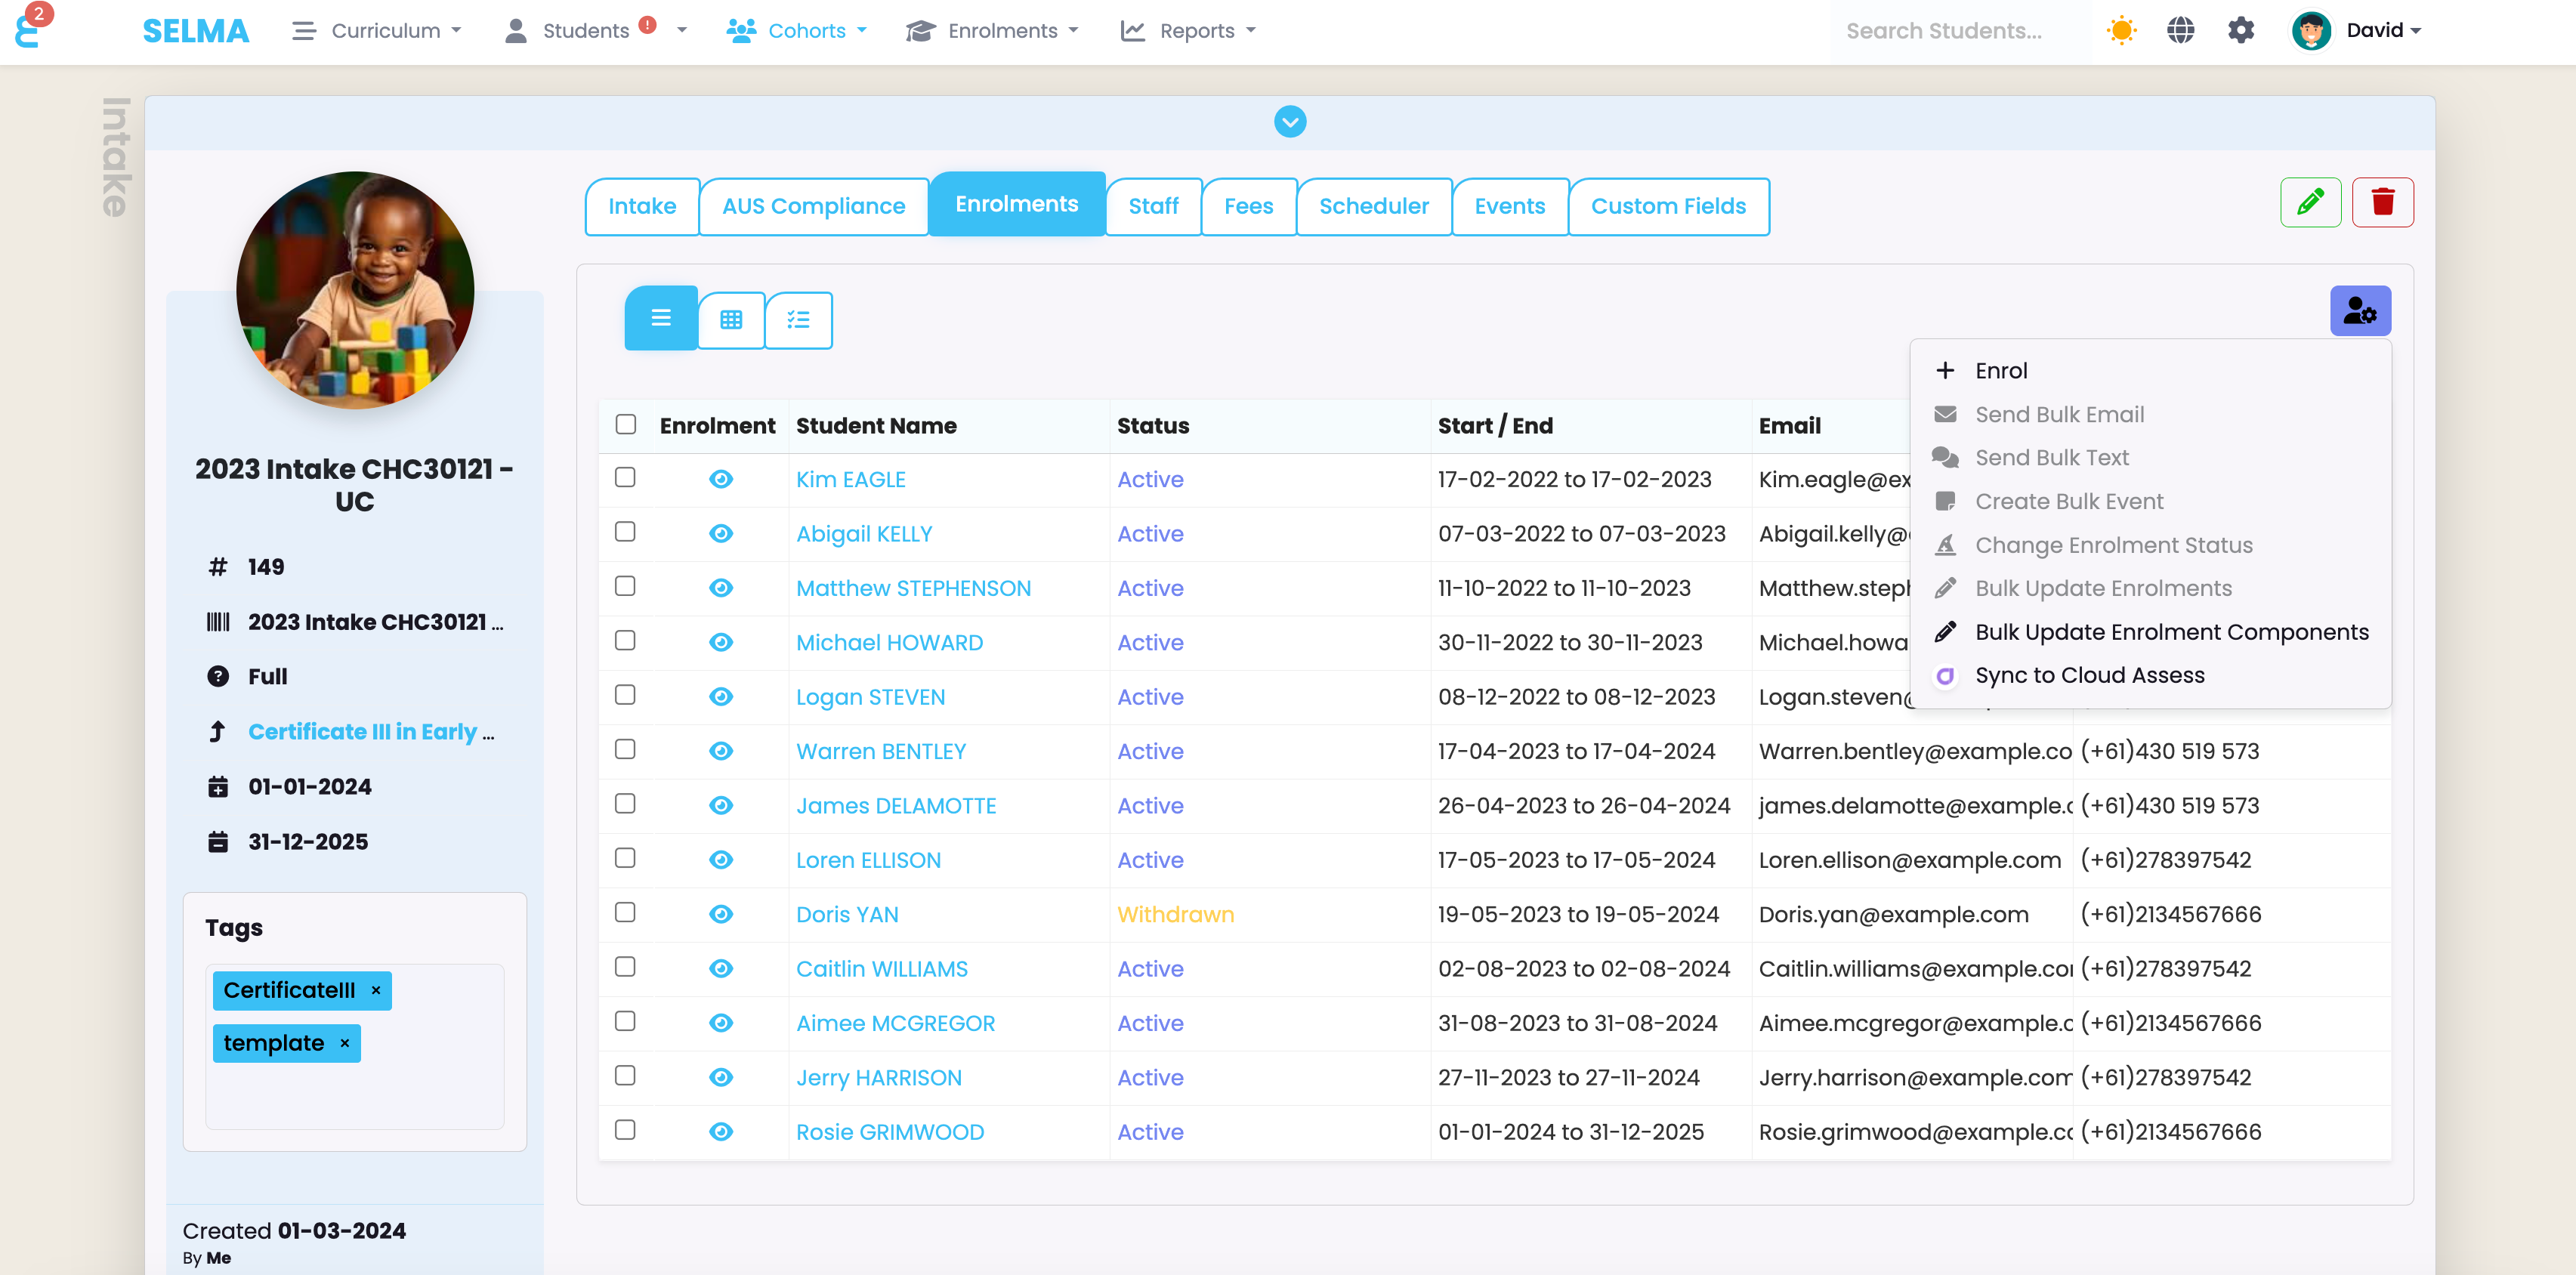
You can re-sync an intake to update it with the latest changes. A synced intake displays a Cloud Assess logo, which you can click to view the Cloud Assess intake in a new window:

Linked Enrollments and Outcomes
Linked enrollments display a Cloud Assess logo, which you can click to view the associated Cloud Assess enrollment. Enrollments are synced from the intake; there is no direct enrollment button for Cloud Assess in SELMA.
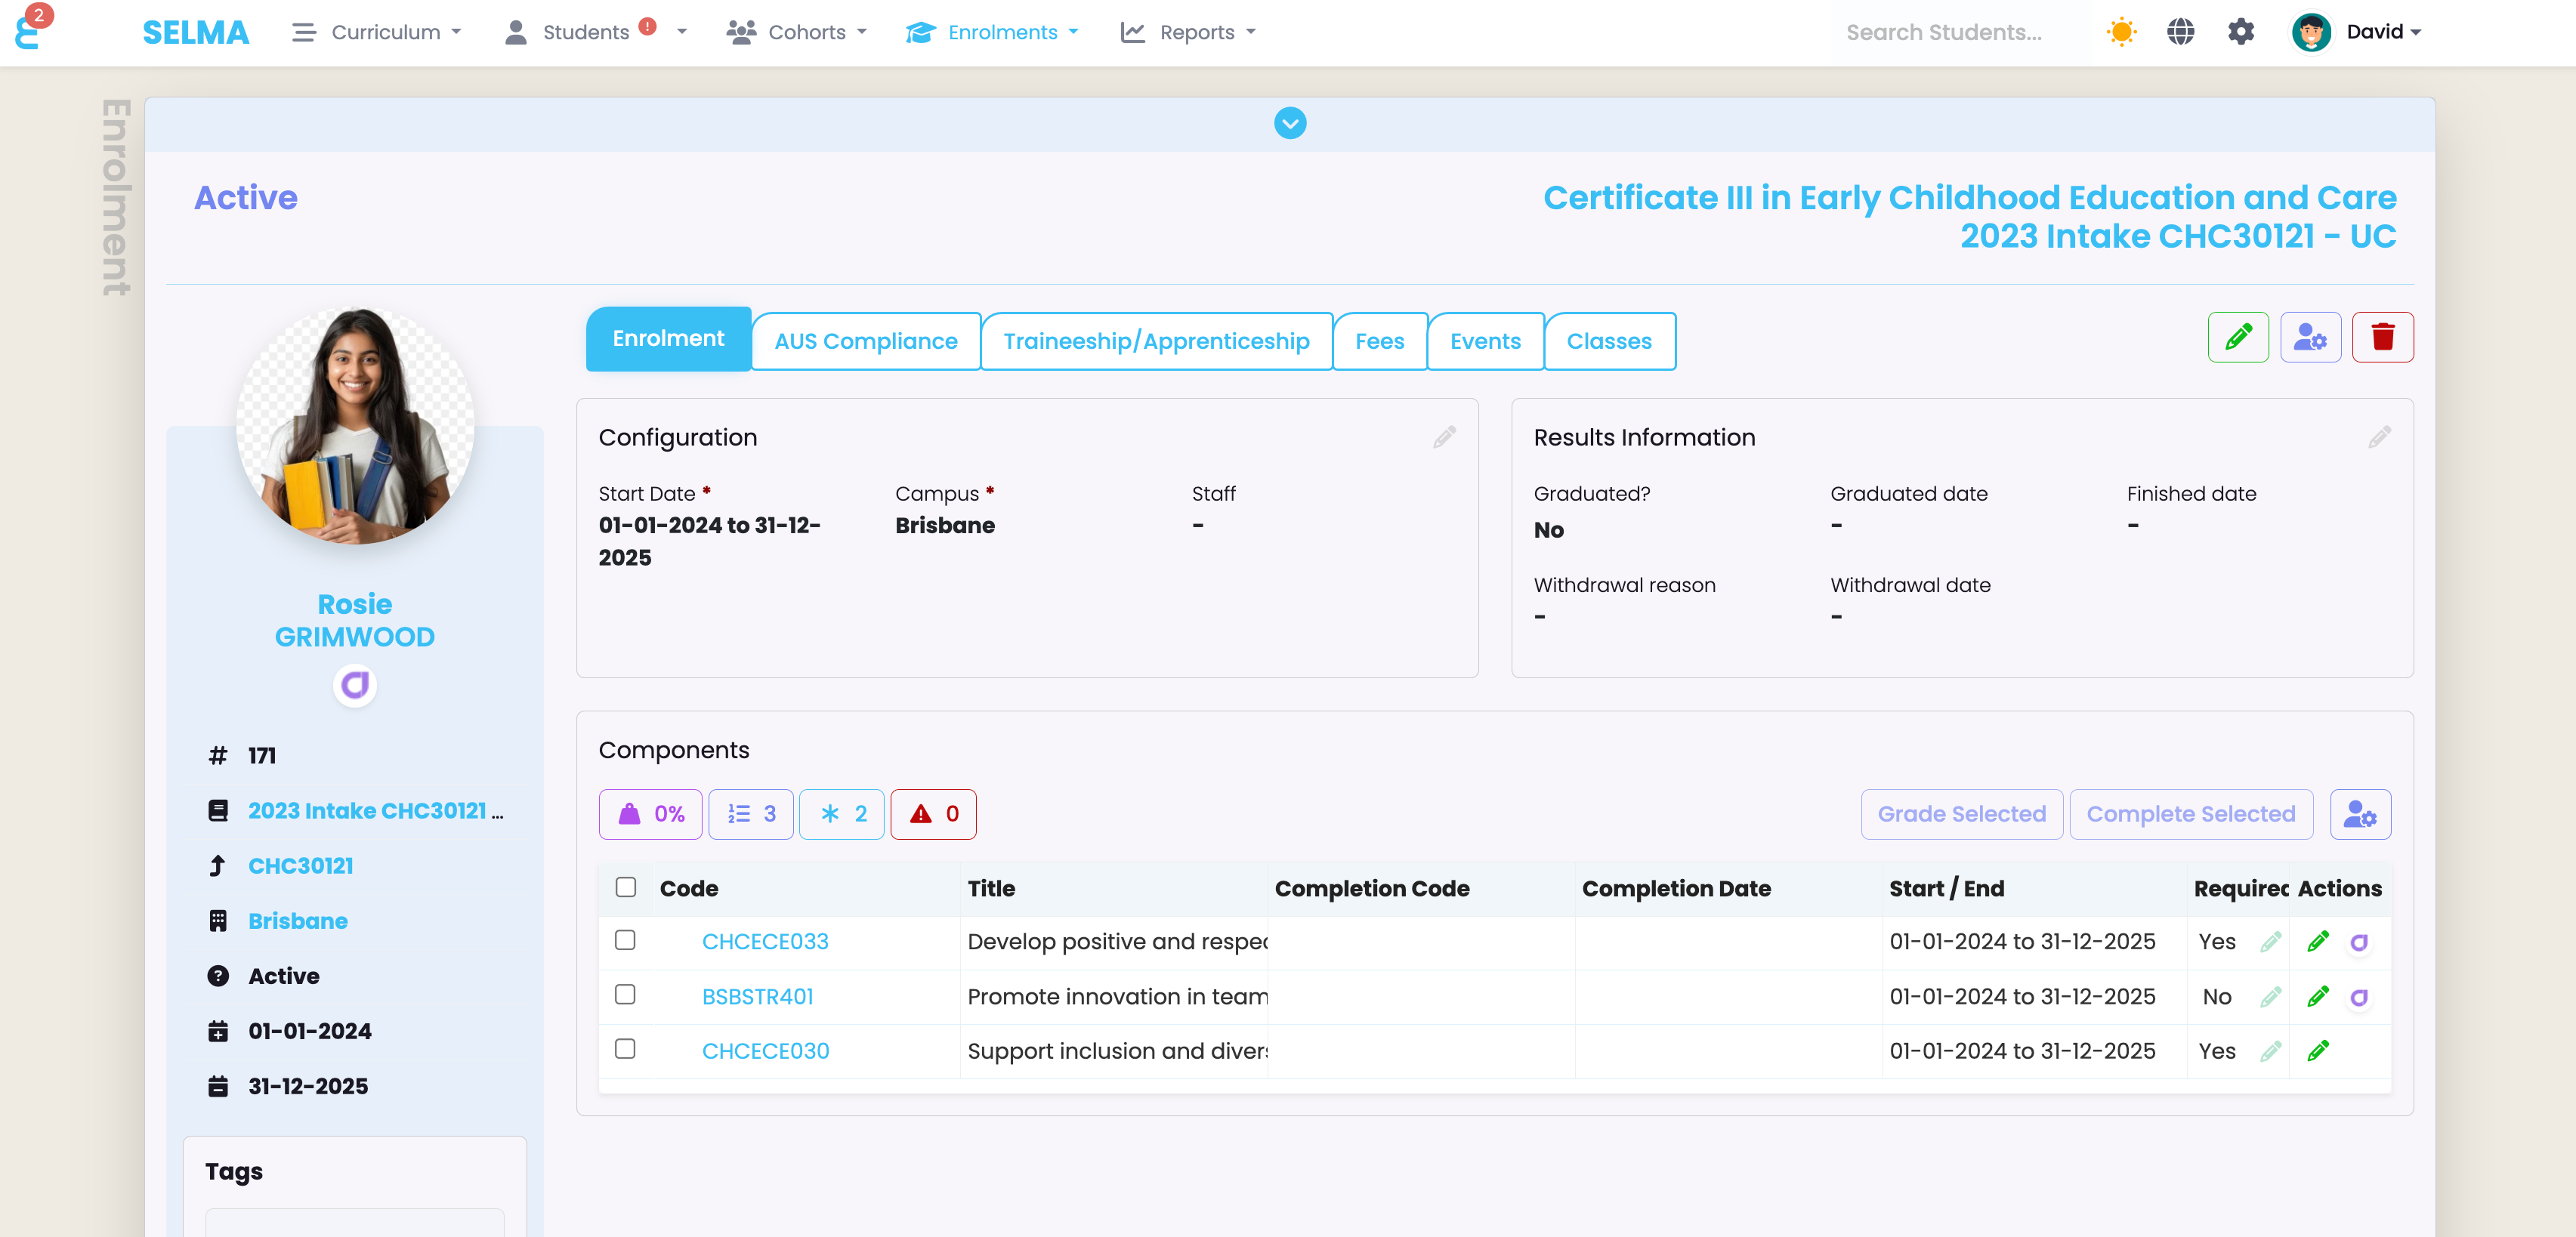
Unit outcomes are imported from Cloud Assess into SELMA at regular intervals (default is every 30 minutes) or by manually clicking Sync Outcome in the Integration Configuration menu. The appropriate outcome code, completion date, and start/end dates are updated accordingly.
