Create Timetables
In SELMA, timetables are created against an intake, a class, or for an individual students enrolment. It is not possible to mark students’ attendance without a timetable. Attendance sessions are created for marking based on a student being linked to a timetable and therefore expected to join a session.
Create an Intake Timetable
Intake timetables are typically used for short courses where all your students join the same intake at the same time and are expected to join training for a few hours or days. Intake timetables are also appropriate if your students are linked to a single teacher or tutor or if they study a single subject. For more complex scenarios e.g. where students join several classes for a subject each and have multiple teachers, use the class timetabling option (this is common for Higher Education students).
To create an intake timetable, open the desired intake and navigate to the intake timetable tab. Click on the << button to jump to the beginning of the timetable. The available calendar area to build the timetable in is from the intake start date to the intake end date:
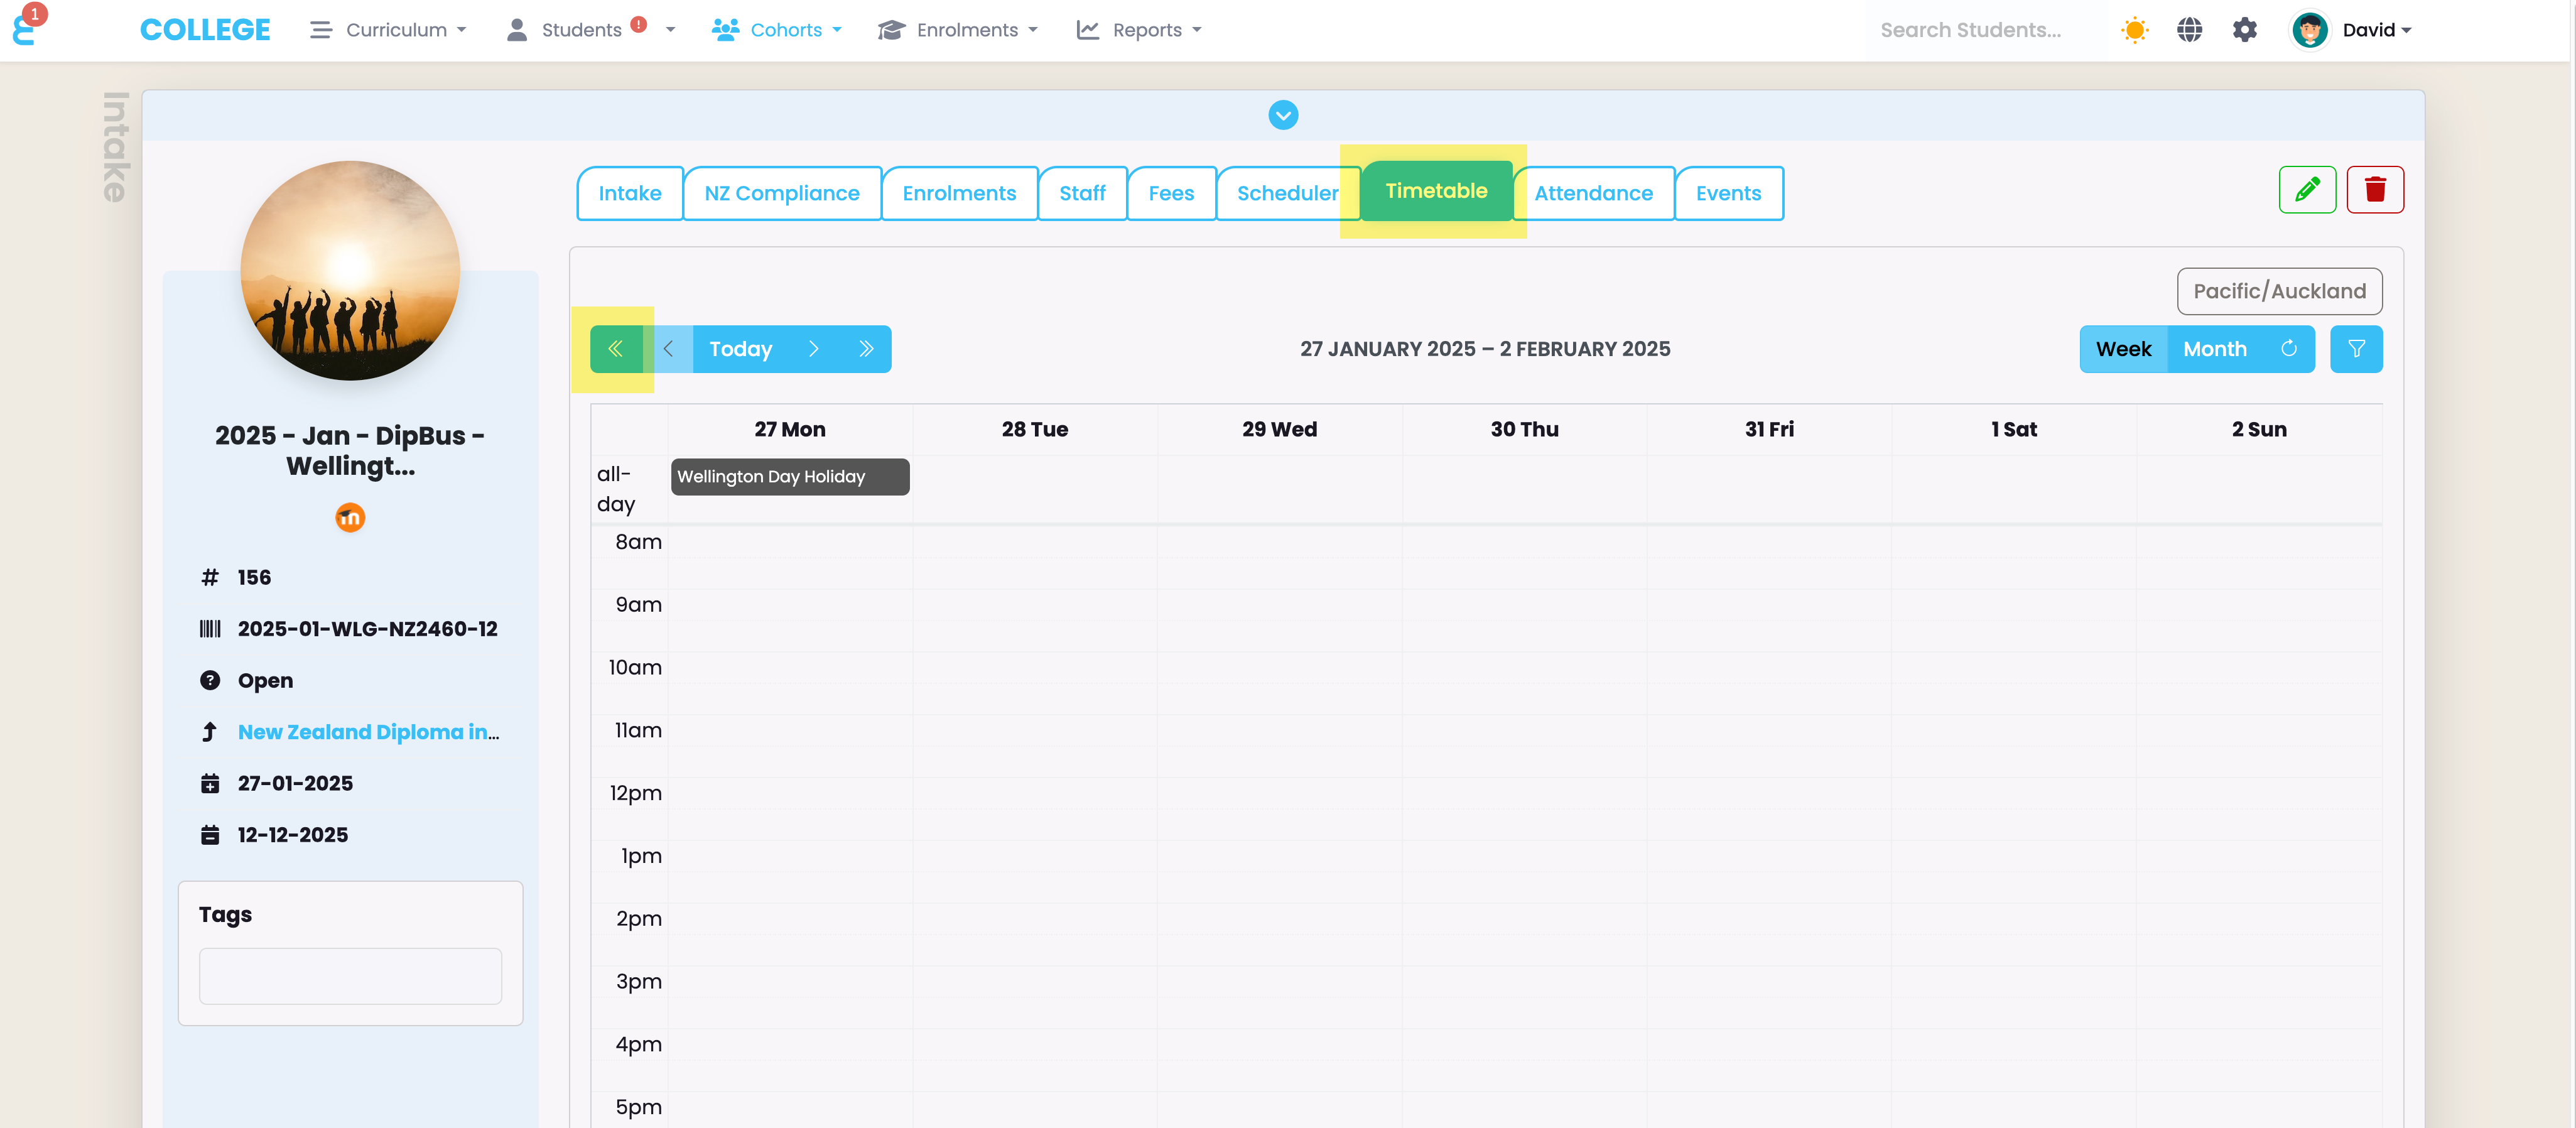
Creating the first Session
To create a session, click and drag the mouse over the area when the session should take place (like creating a meeting in a calendar):
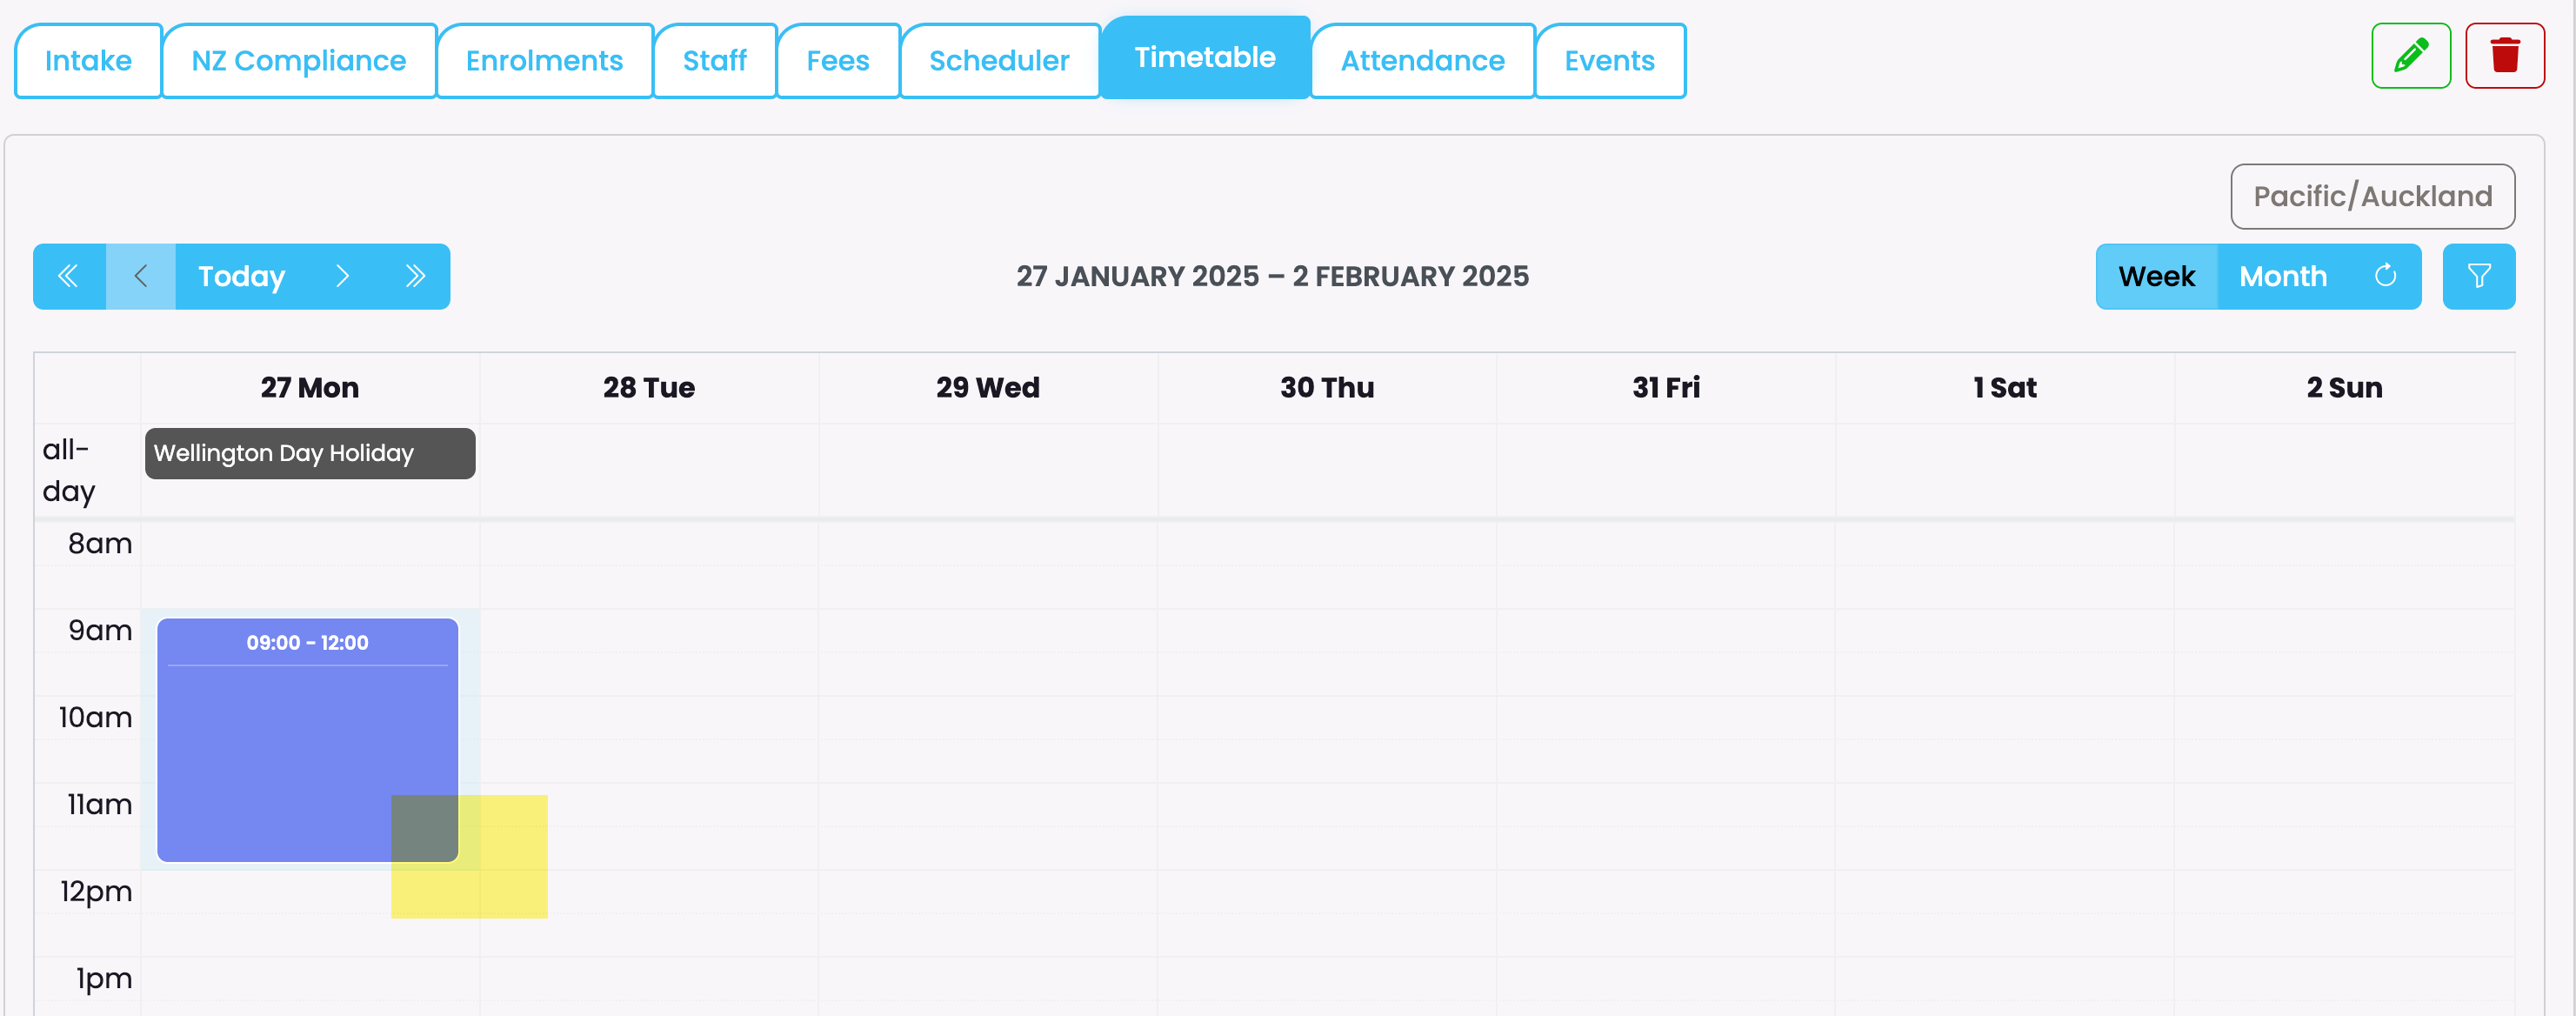
The session creation pop up will automatically open. The key area to create the session allows you to give the session a name, link it to a campus (which will default to the intake campus), a room, a component, and a teacher. The start and end time is suggested automatically from the click and drag area you selected:
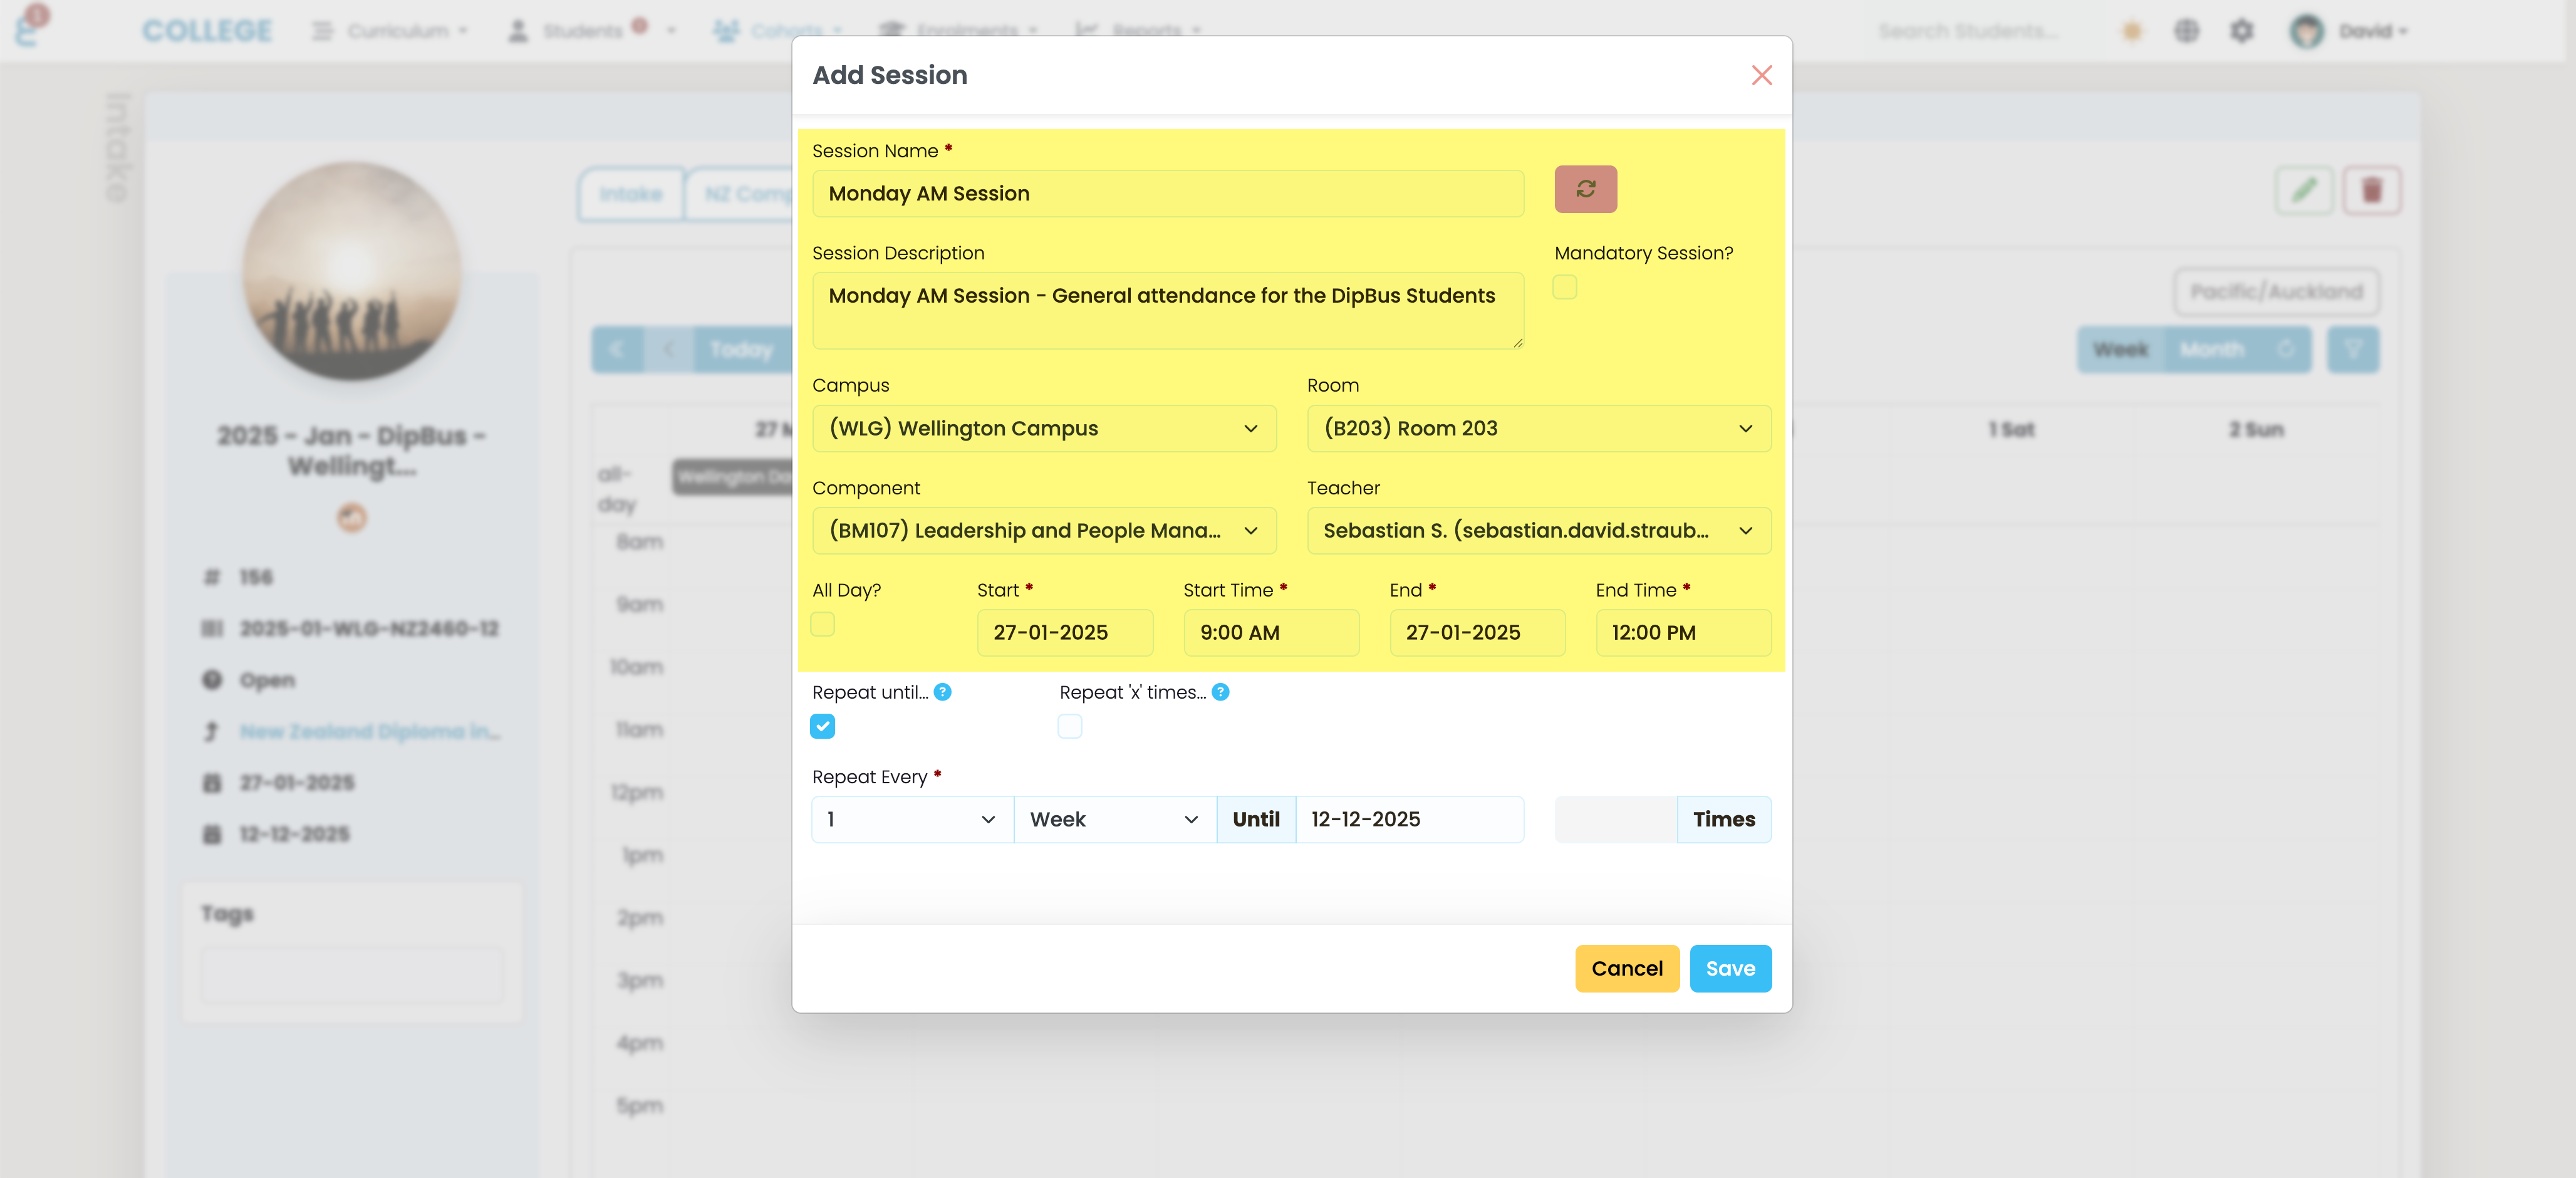
You may choose this to be an “all day” session in which case attendance is counted as 24h. If you manage your students by marking all day sessions as present, make sure you do not mix it with sessions that are of shorter time as the all-day sessions will disproportionally change the student’s attendance percentage.
Repeating a Session
The quickest way to build your timetable is to repeat the session e.g. every week. In below example, the session is repeated every week for the duration of the intake:
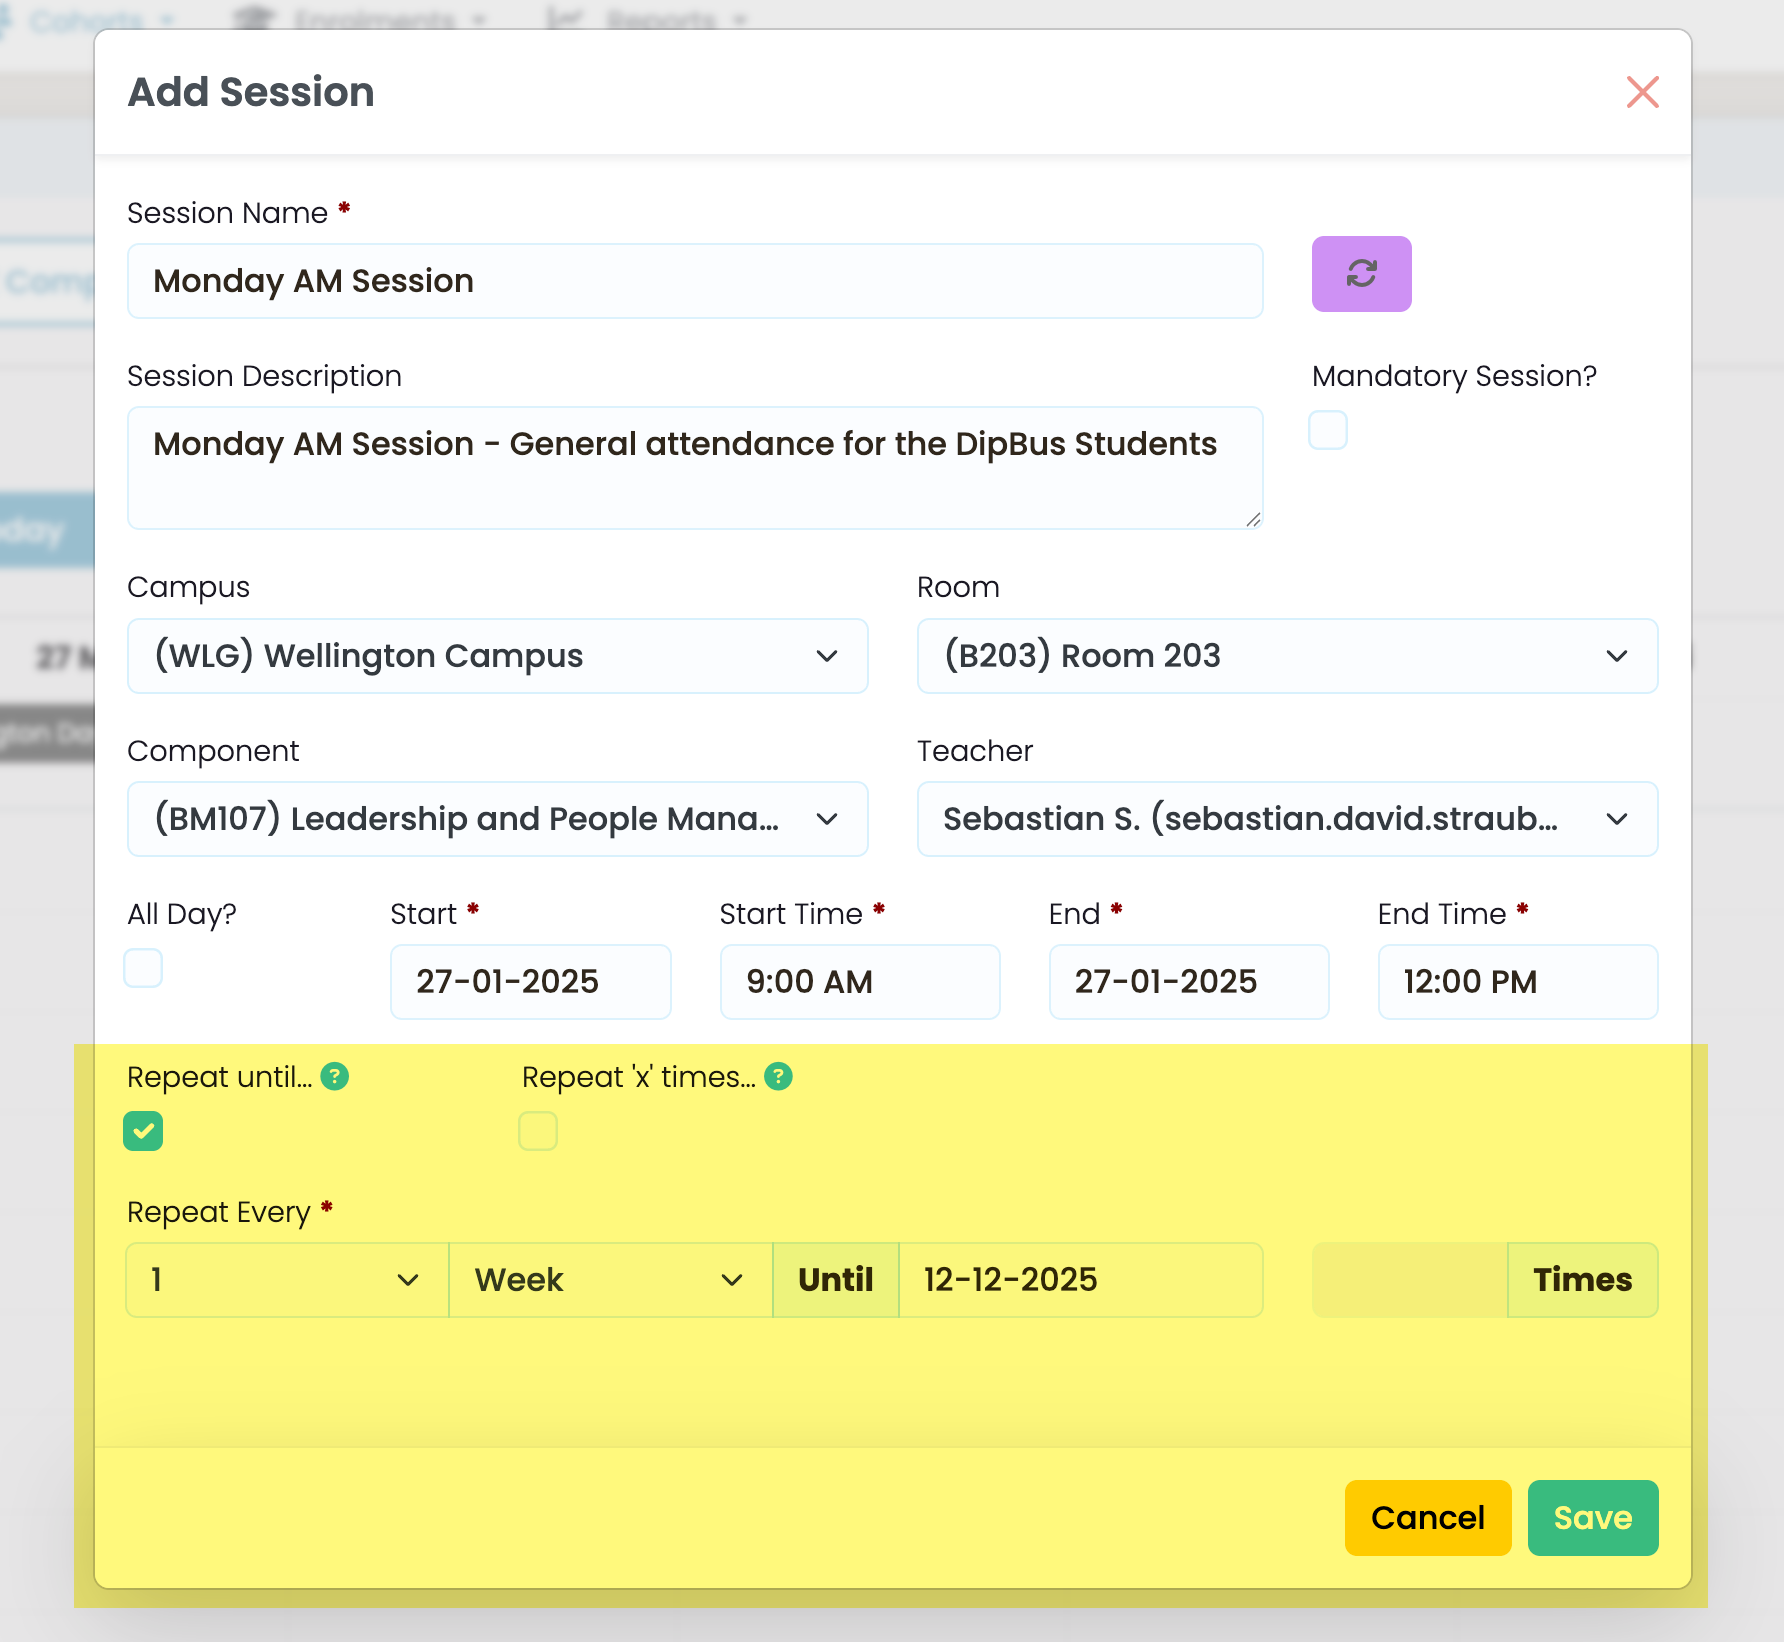
Once you are satisfied with the session. Click save to create it.
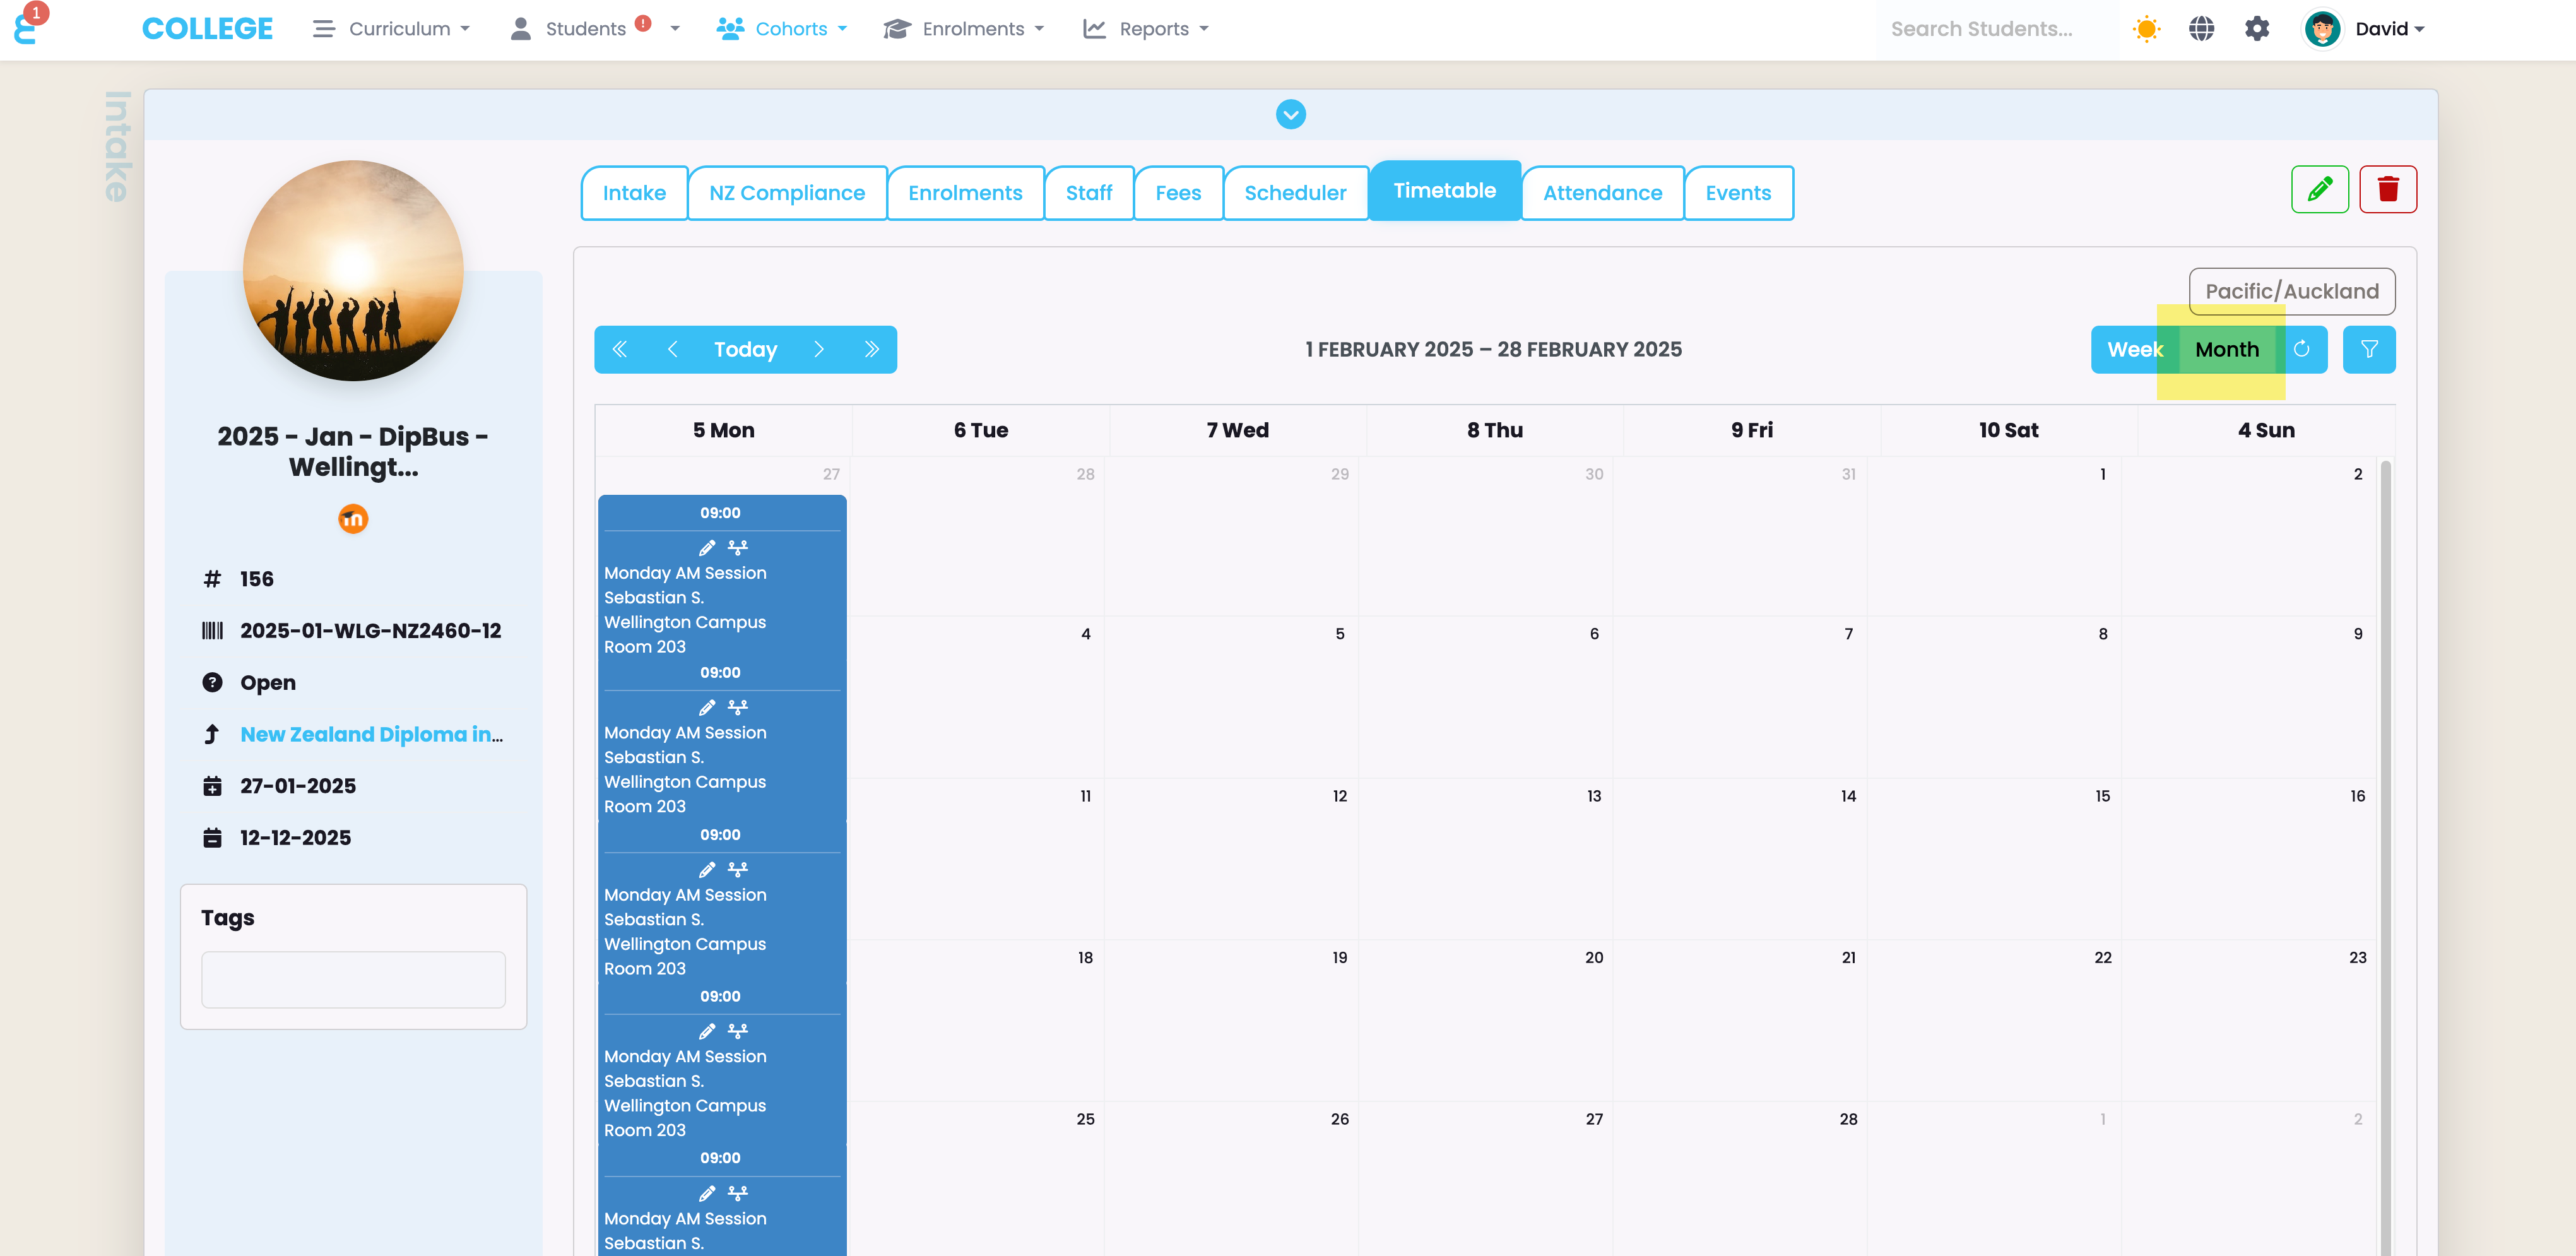
When switching to the “Month” view, you will see that the session was created multiple times, every Monday morning:
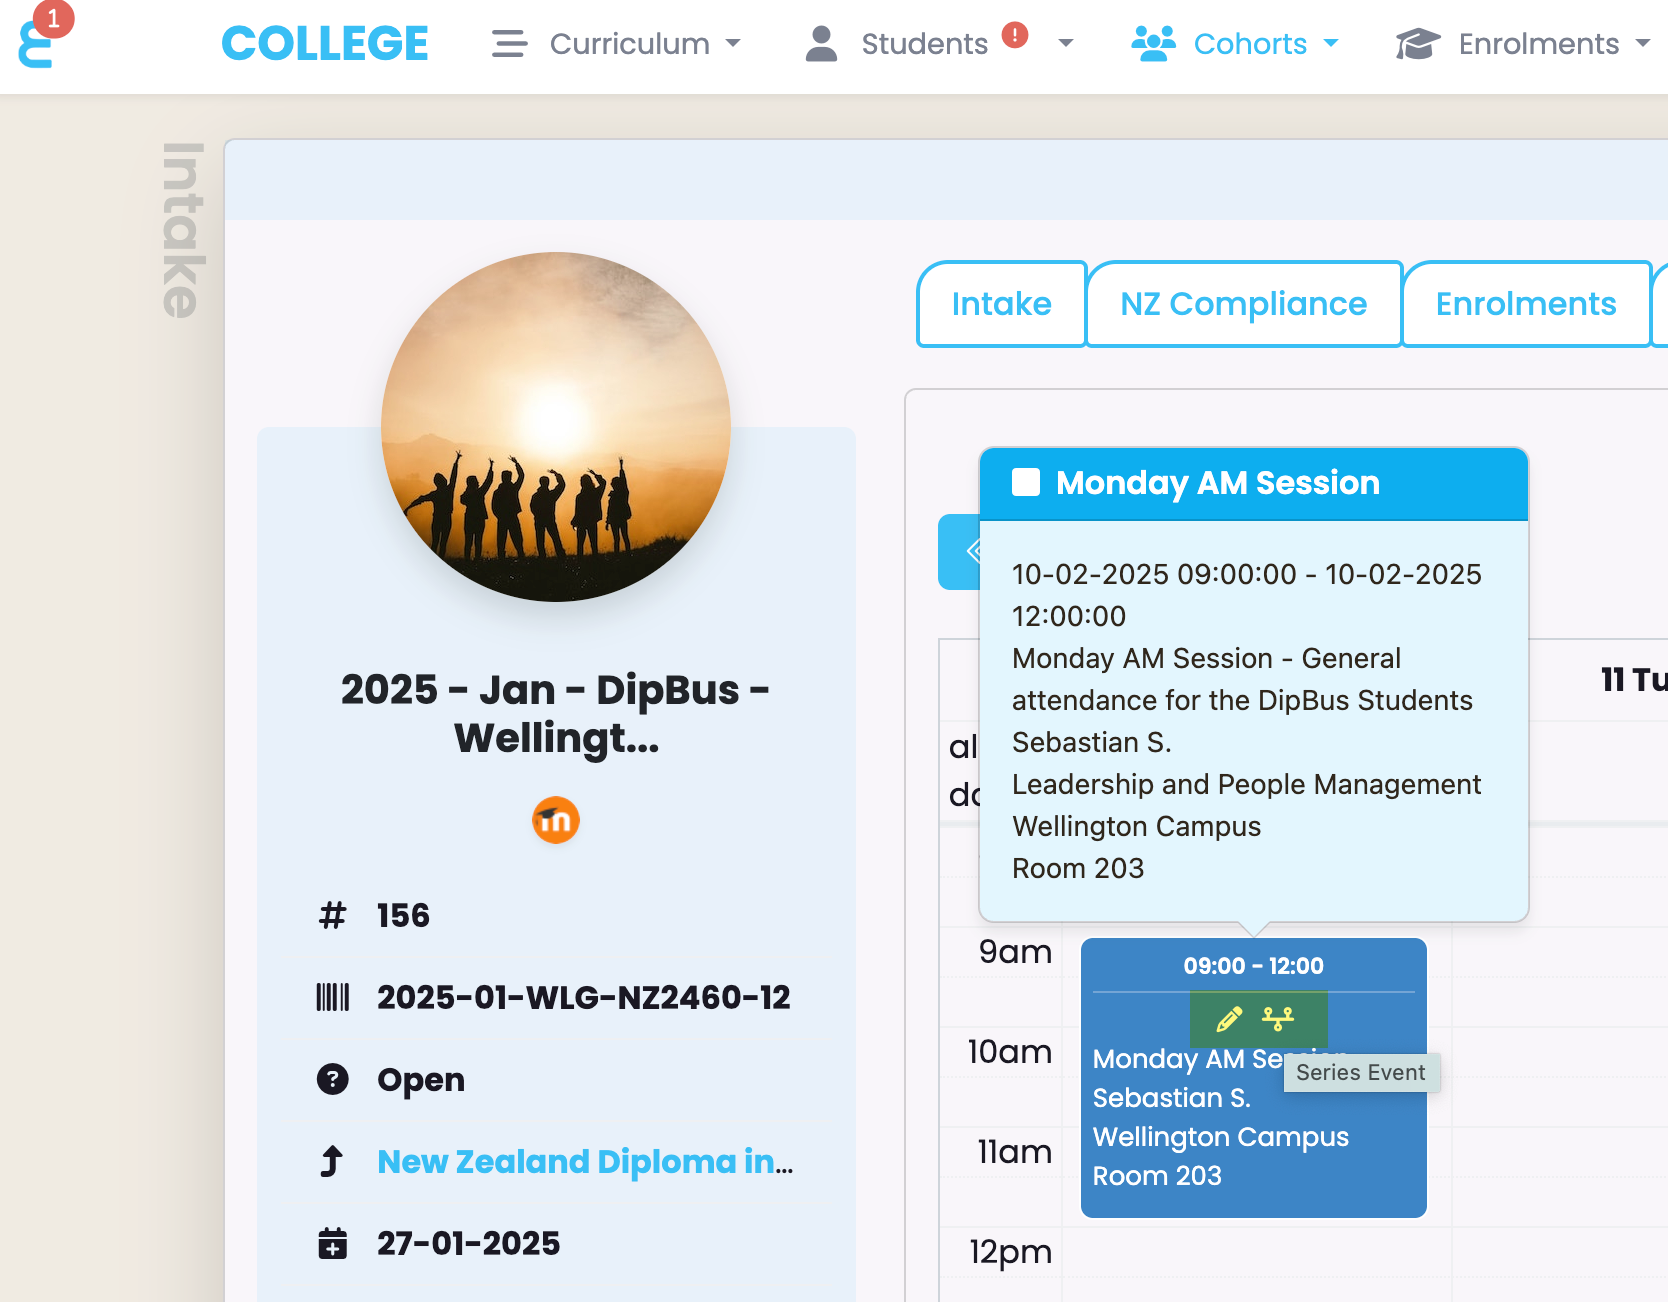
You can now also edit your sessions by clicking either on the pencil button (edit this session) or the series button (edit the entire series):
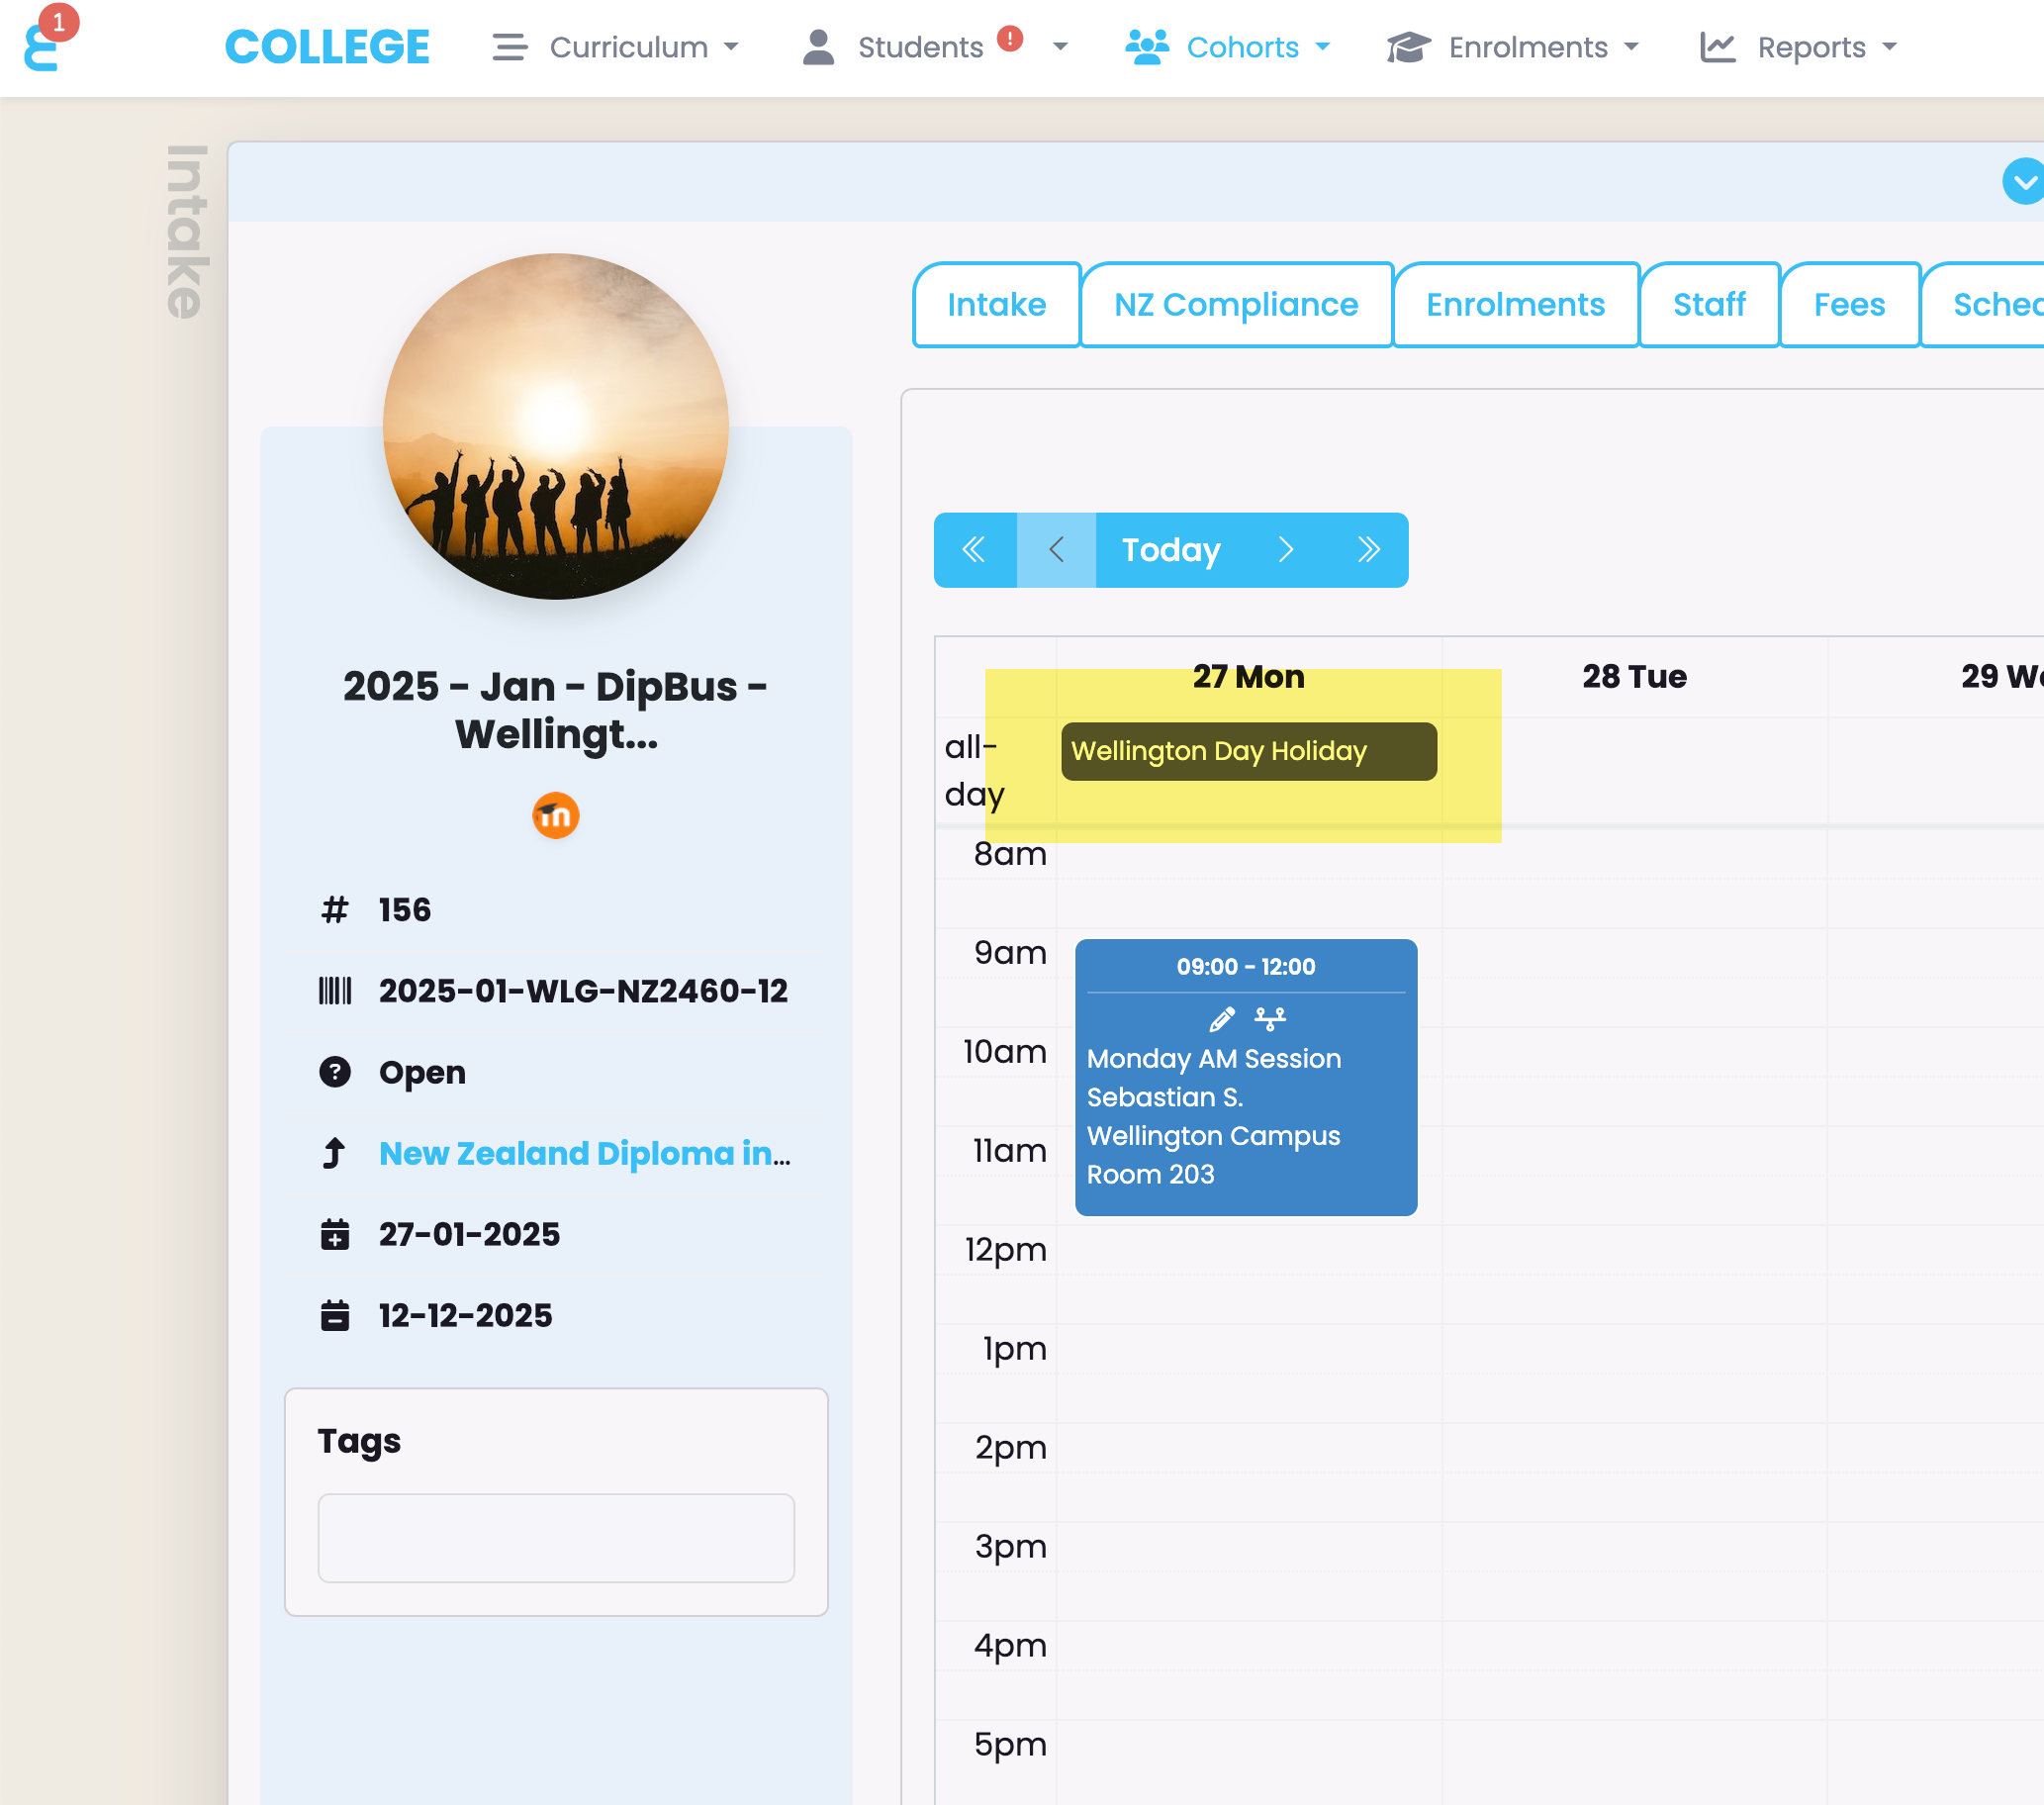
If the session falls onto a public holiday, the students attendance on this day is automatically marked as “Non Applicable”:
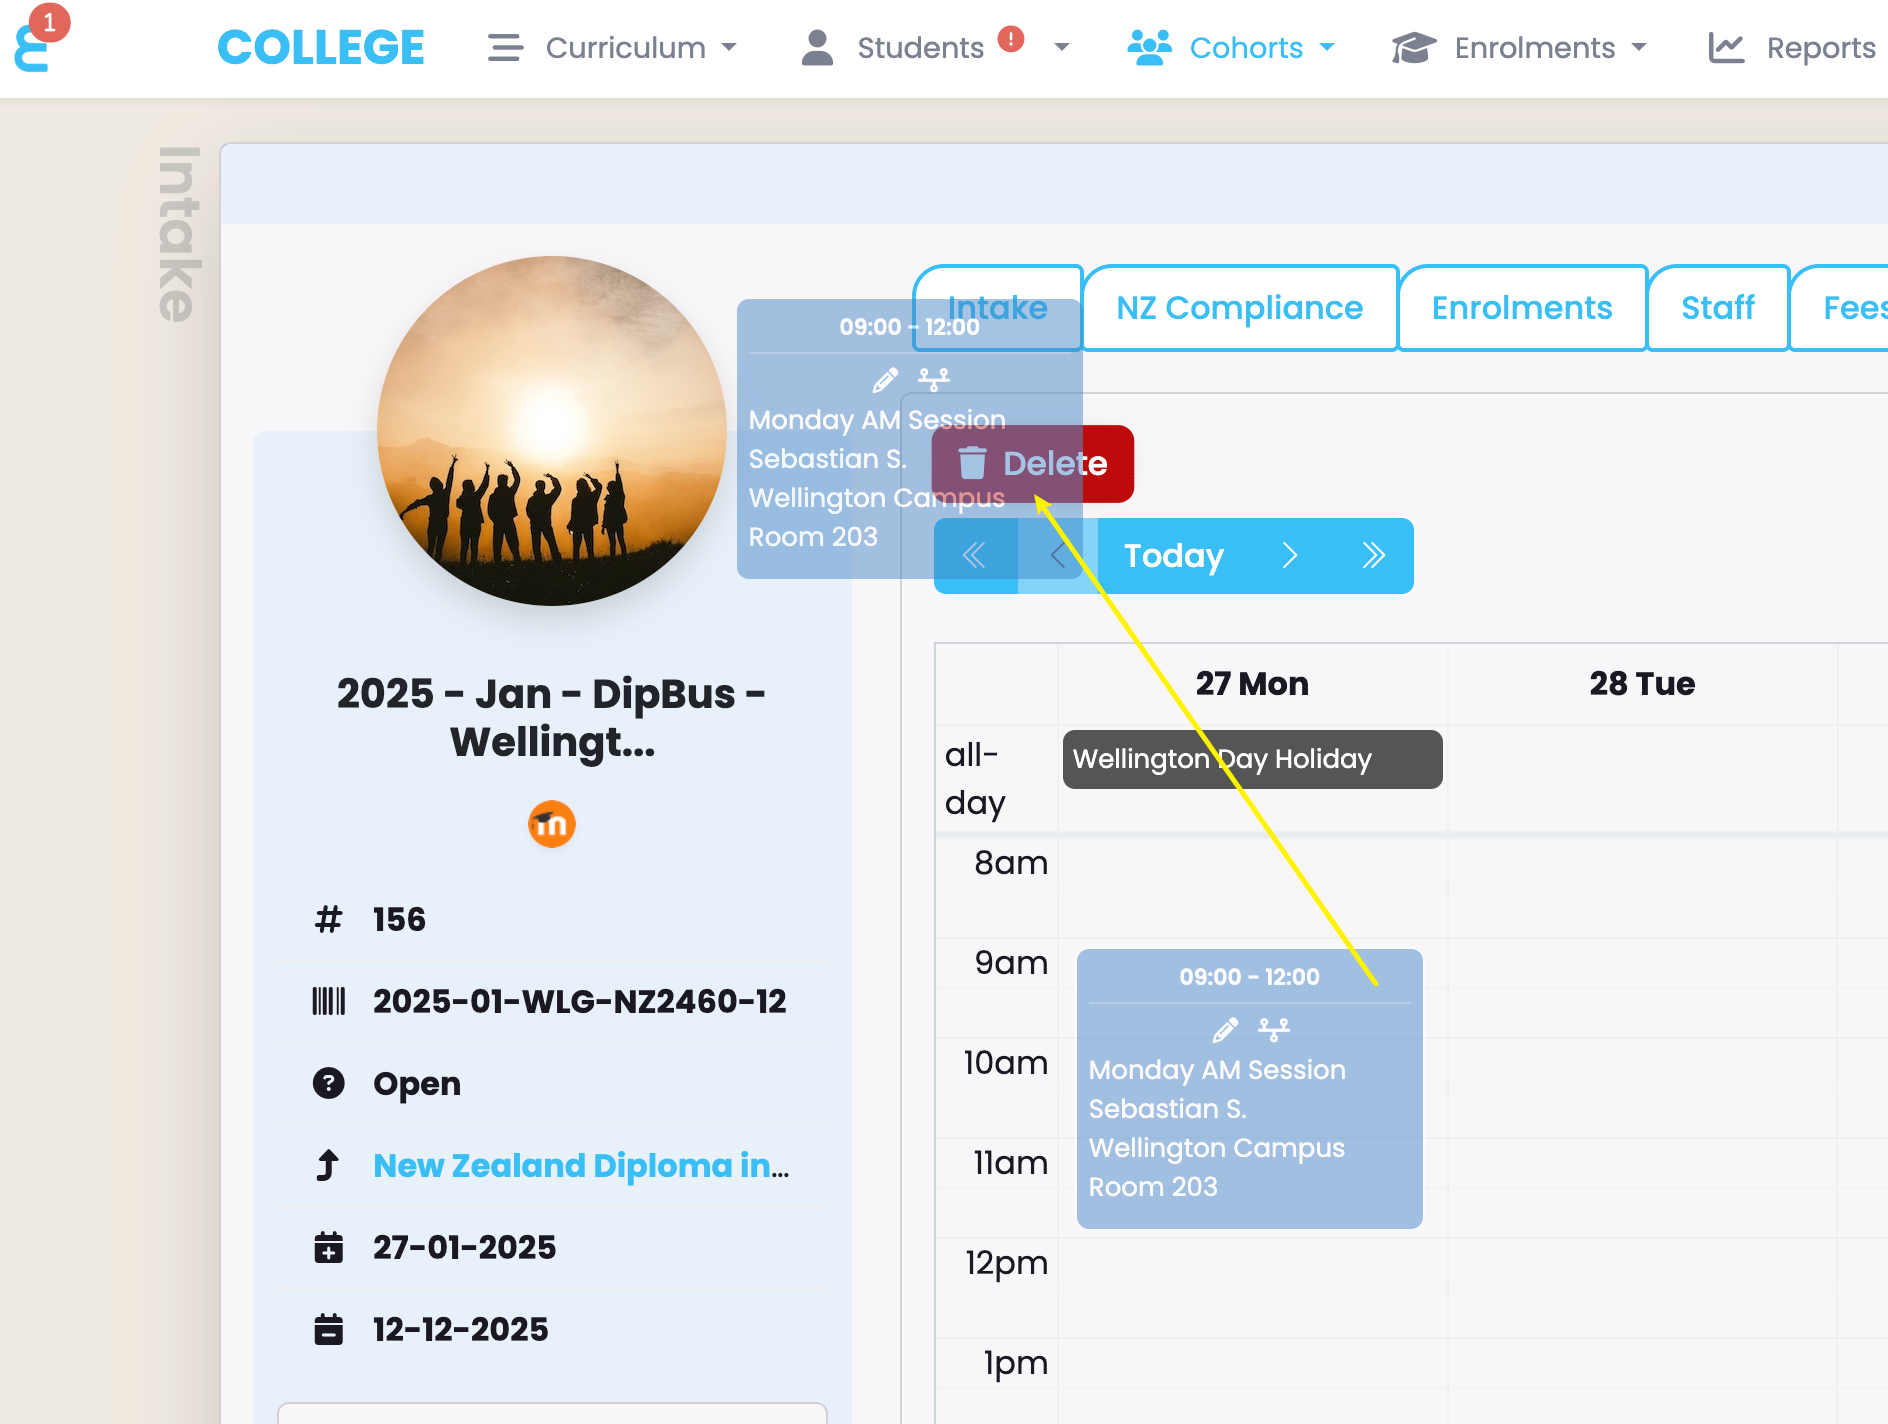
But you can also delete an individual session by click and dragging it. See next topic.
Delete a Session
You can also delete an individual session by click and dragging it. As soon as you move it, a delete bin will appear to drop it into:
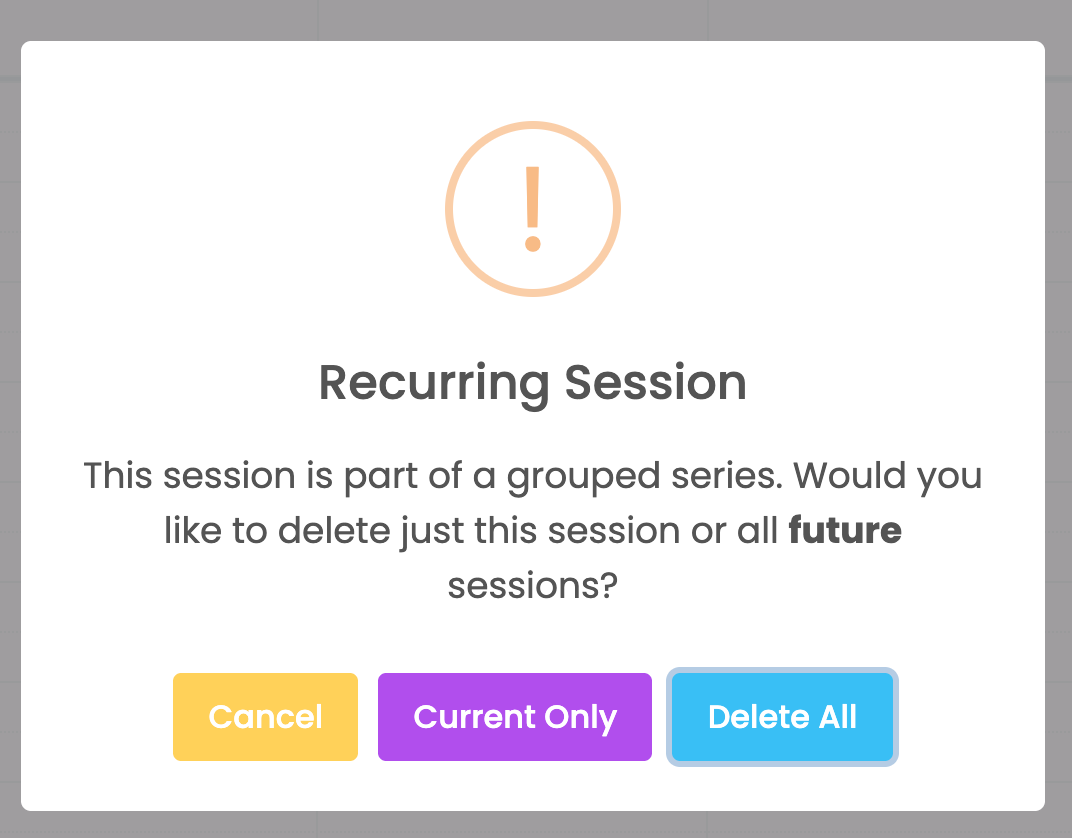
If the session is part of a series, the system will ask you if you wish to delete the individual sessional the whole series:
Creating the Attendance Register
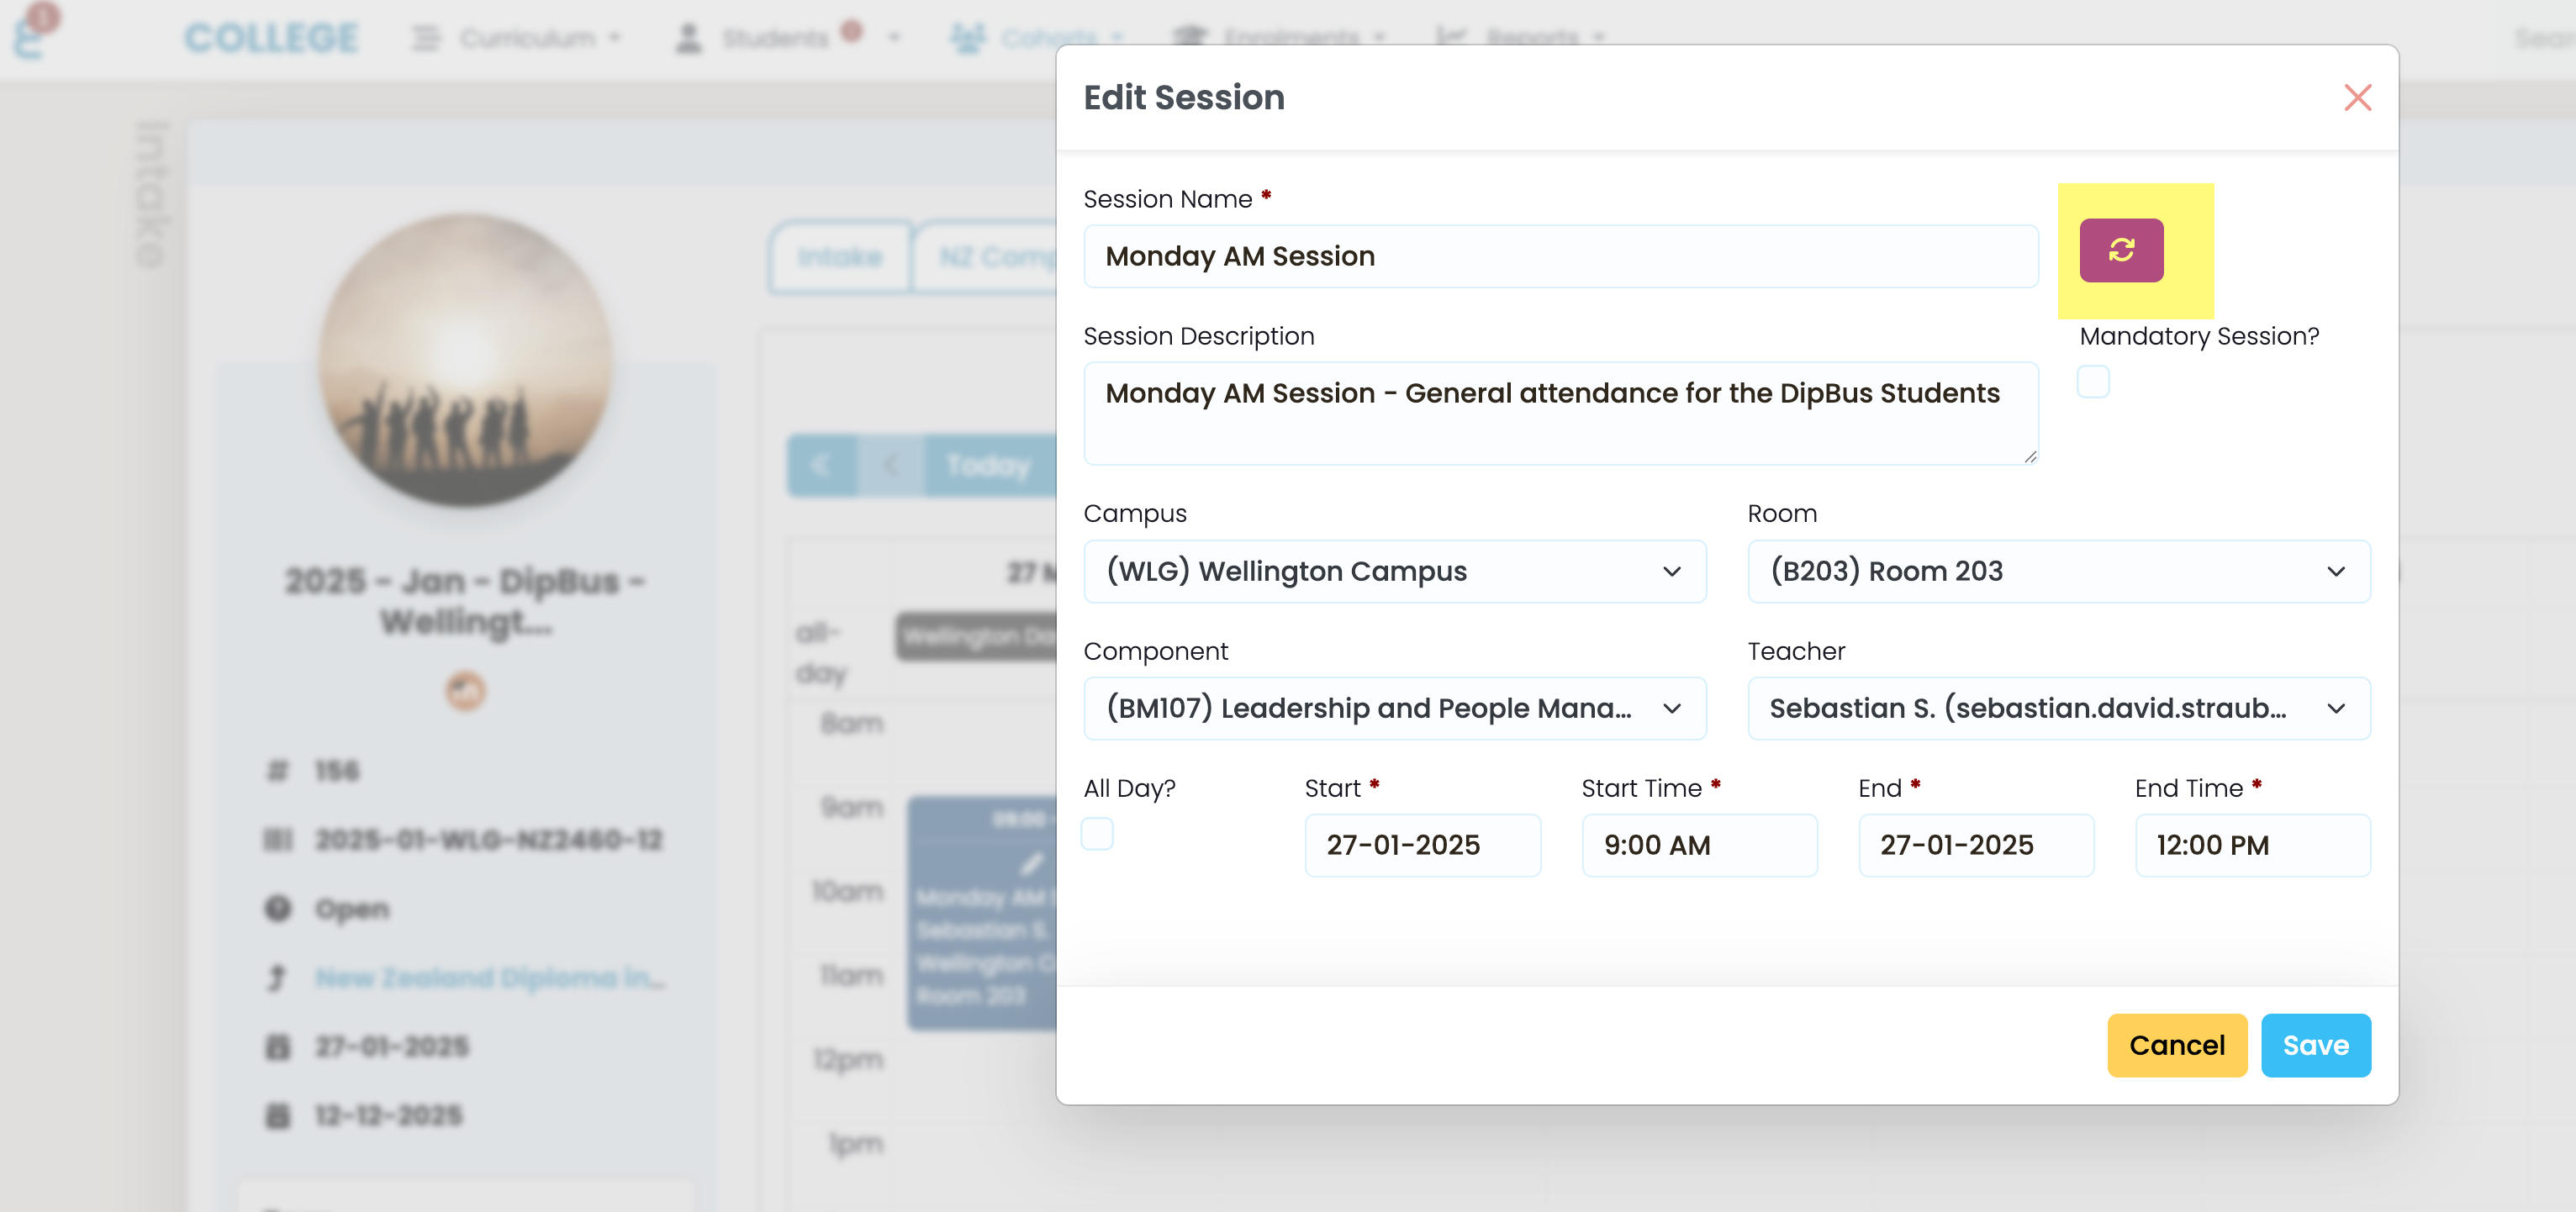
When a Session is created, attendance registers are created for marking automatically overnight. They are created for the students enrolled into the intake with a valid enrolment. However, if you create a session on the day, and you need to mark it immediately or on the same day, you can edit the session, and click on the purple button to create the attendance register for the session:
A message will confirm that the session was created for all relevant students in this intake:

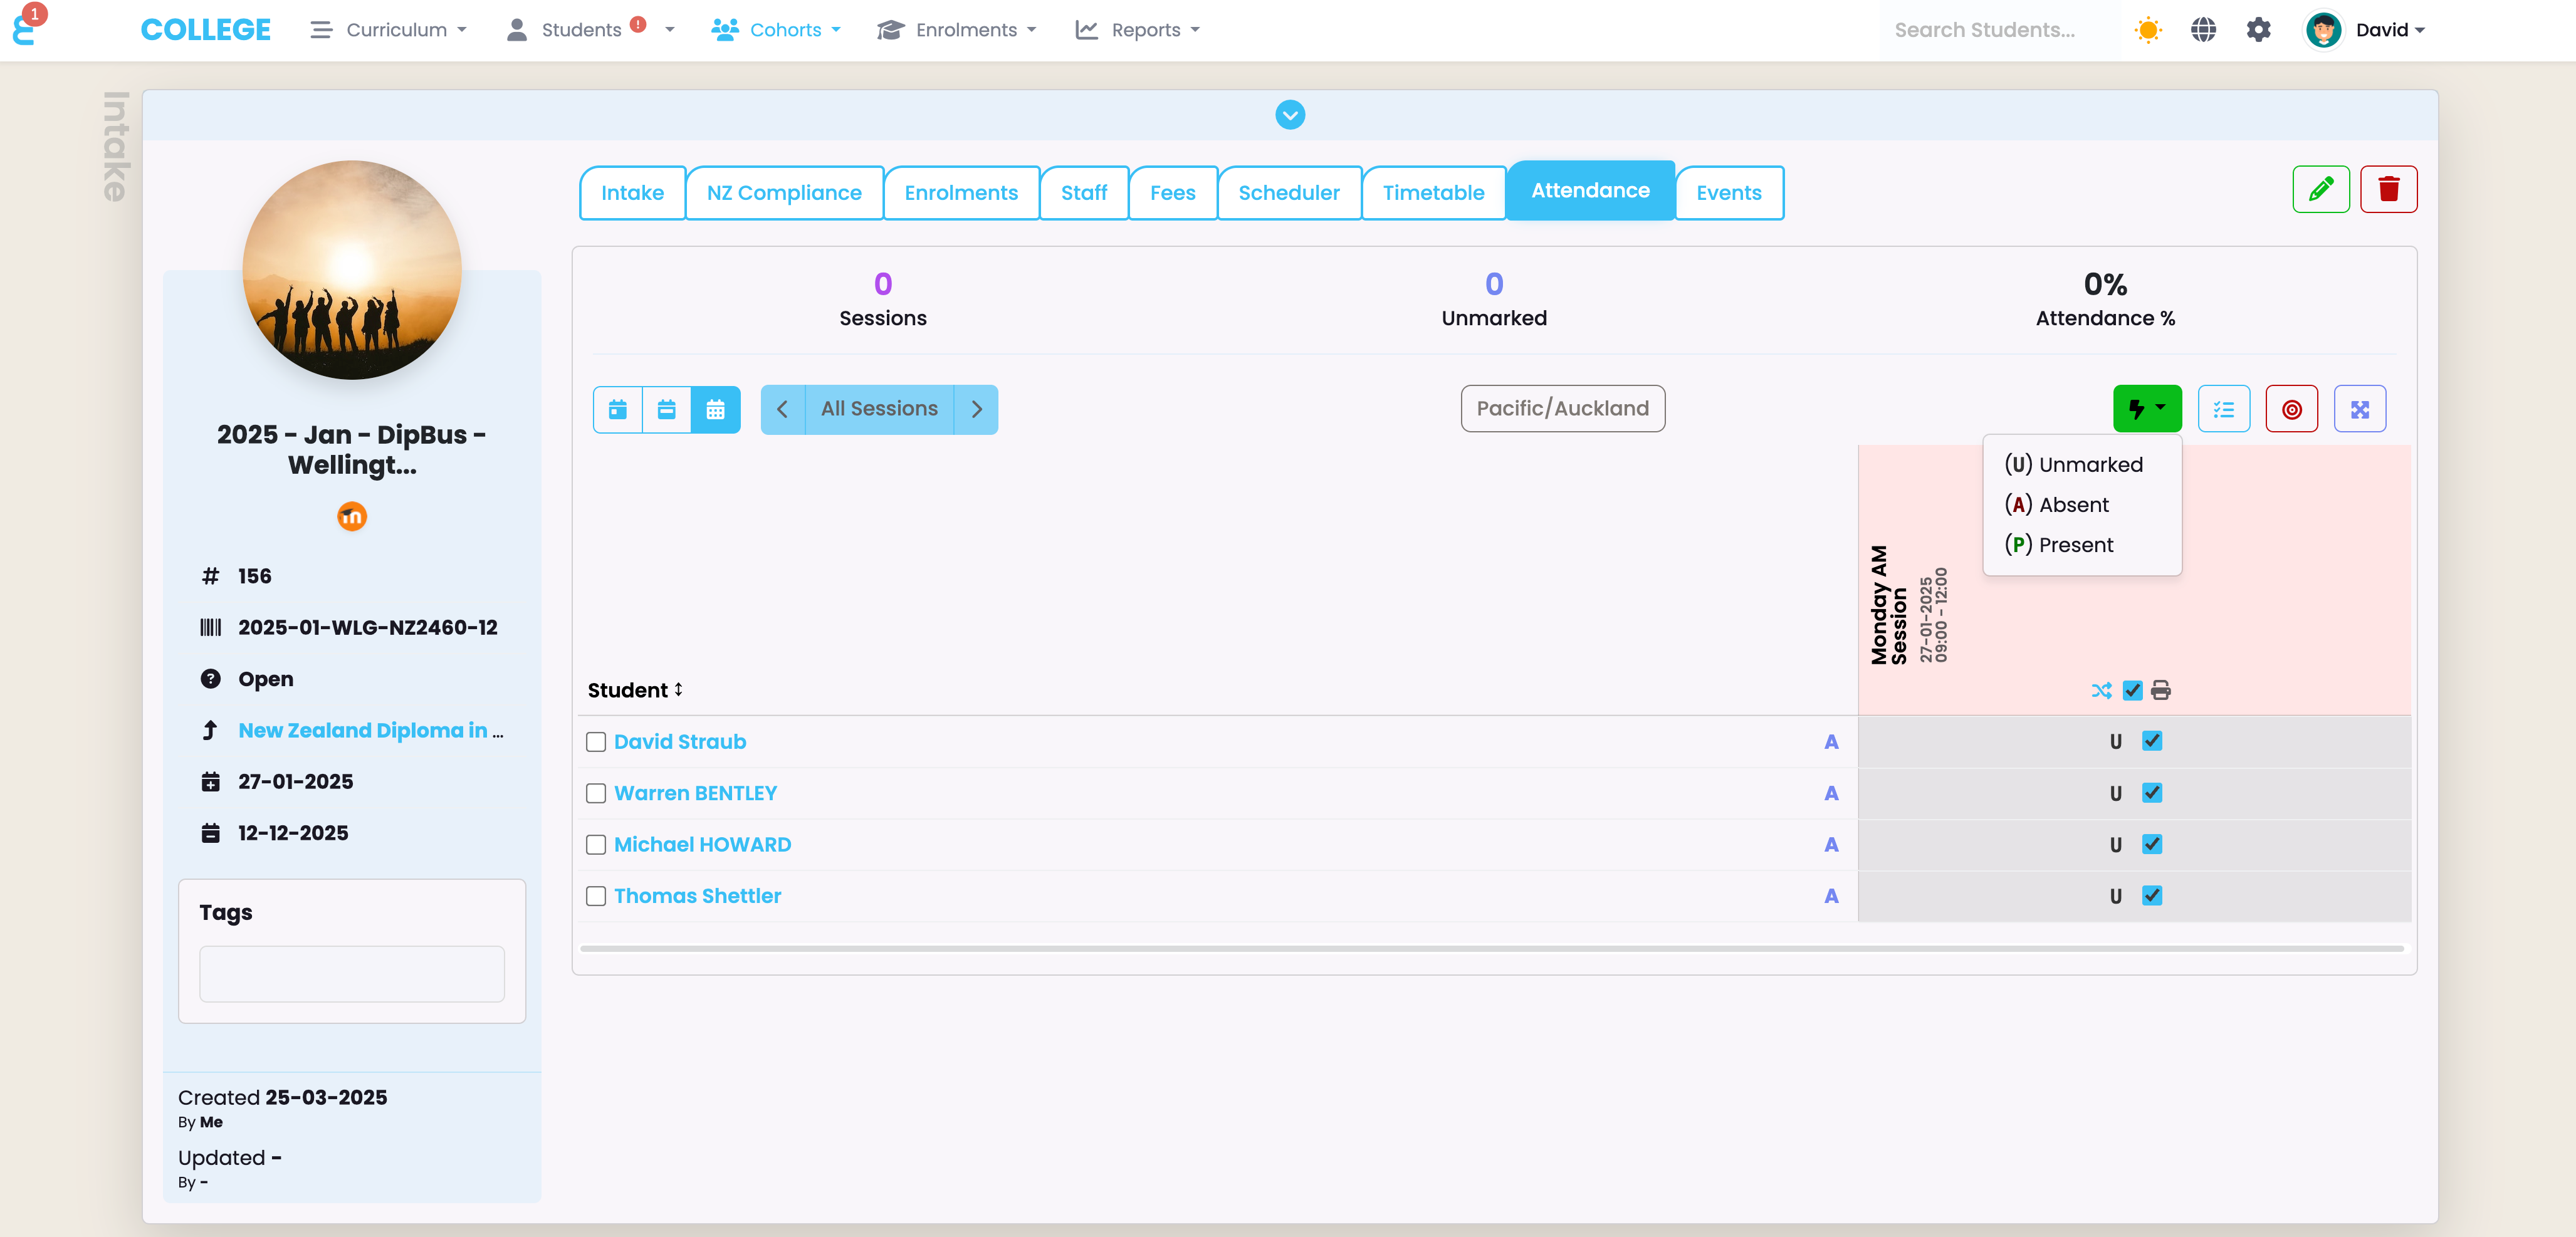
If you now move to the “Attendance” tab, the session is created and ready for marking:
Read the “Mark Attendance” resources for more on how attendance sessions are created and marked.
Create a Class Timetable
Class timetables are typically used for higher education students or students in several different intakes that join a class for a period:
Higher Education Students – Join multiple classes, usually a class per subject. They study in many classes simultaneously an the combination of all classes that they are linked to, build the students individual timetable.
Apprentices in Block Courses – Apprentices that are in a work based learning situation, that started all at different times and different intakes, might be grouped into a single class for a “Block Course” or a campus based training period.
To create a class timetable, follow the exact steps like in the “Create an Intake Timetable” section of this manual. The tabs, calendar, and session functions are identical on the class and intake object.
Linking subjects to a Session
Whilst linking a component (subject) to a session is possible in the Intake Timetable, it has more relevance in the class timetable for higher education students. When linking a subject on the session creation, the subject will show on the timetable for the student. The session will also take the colour of the component (you can setup the colours of a component in the curriculum, a random colour is assigned to any component on creation).
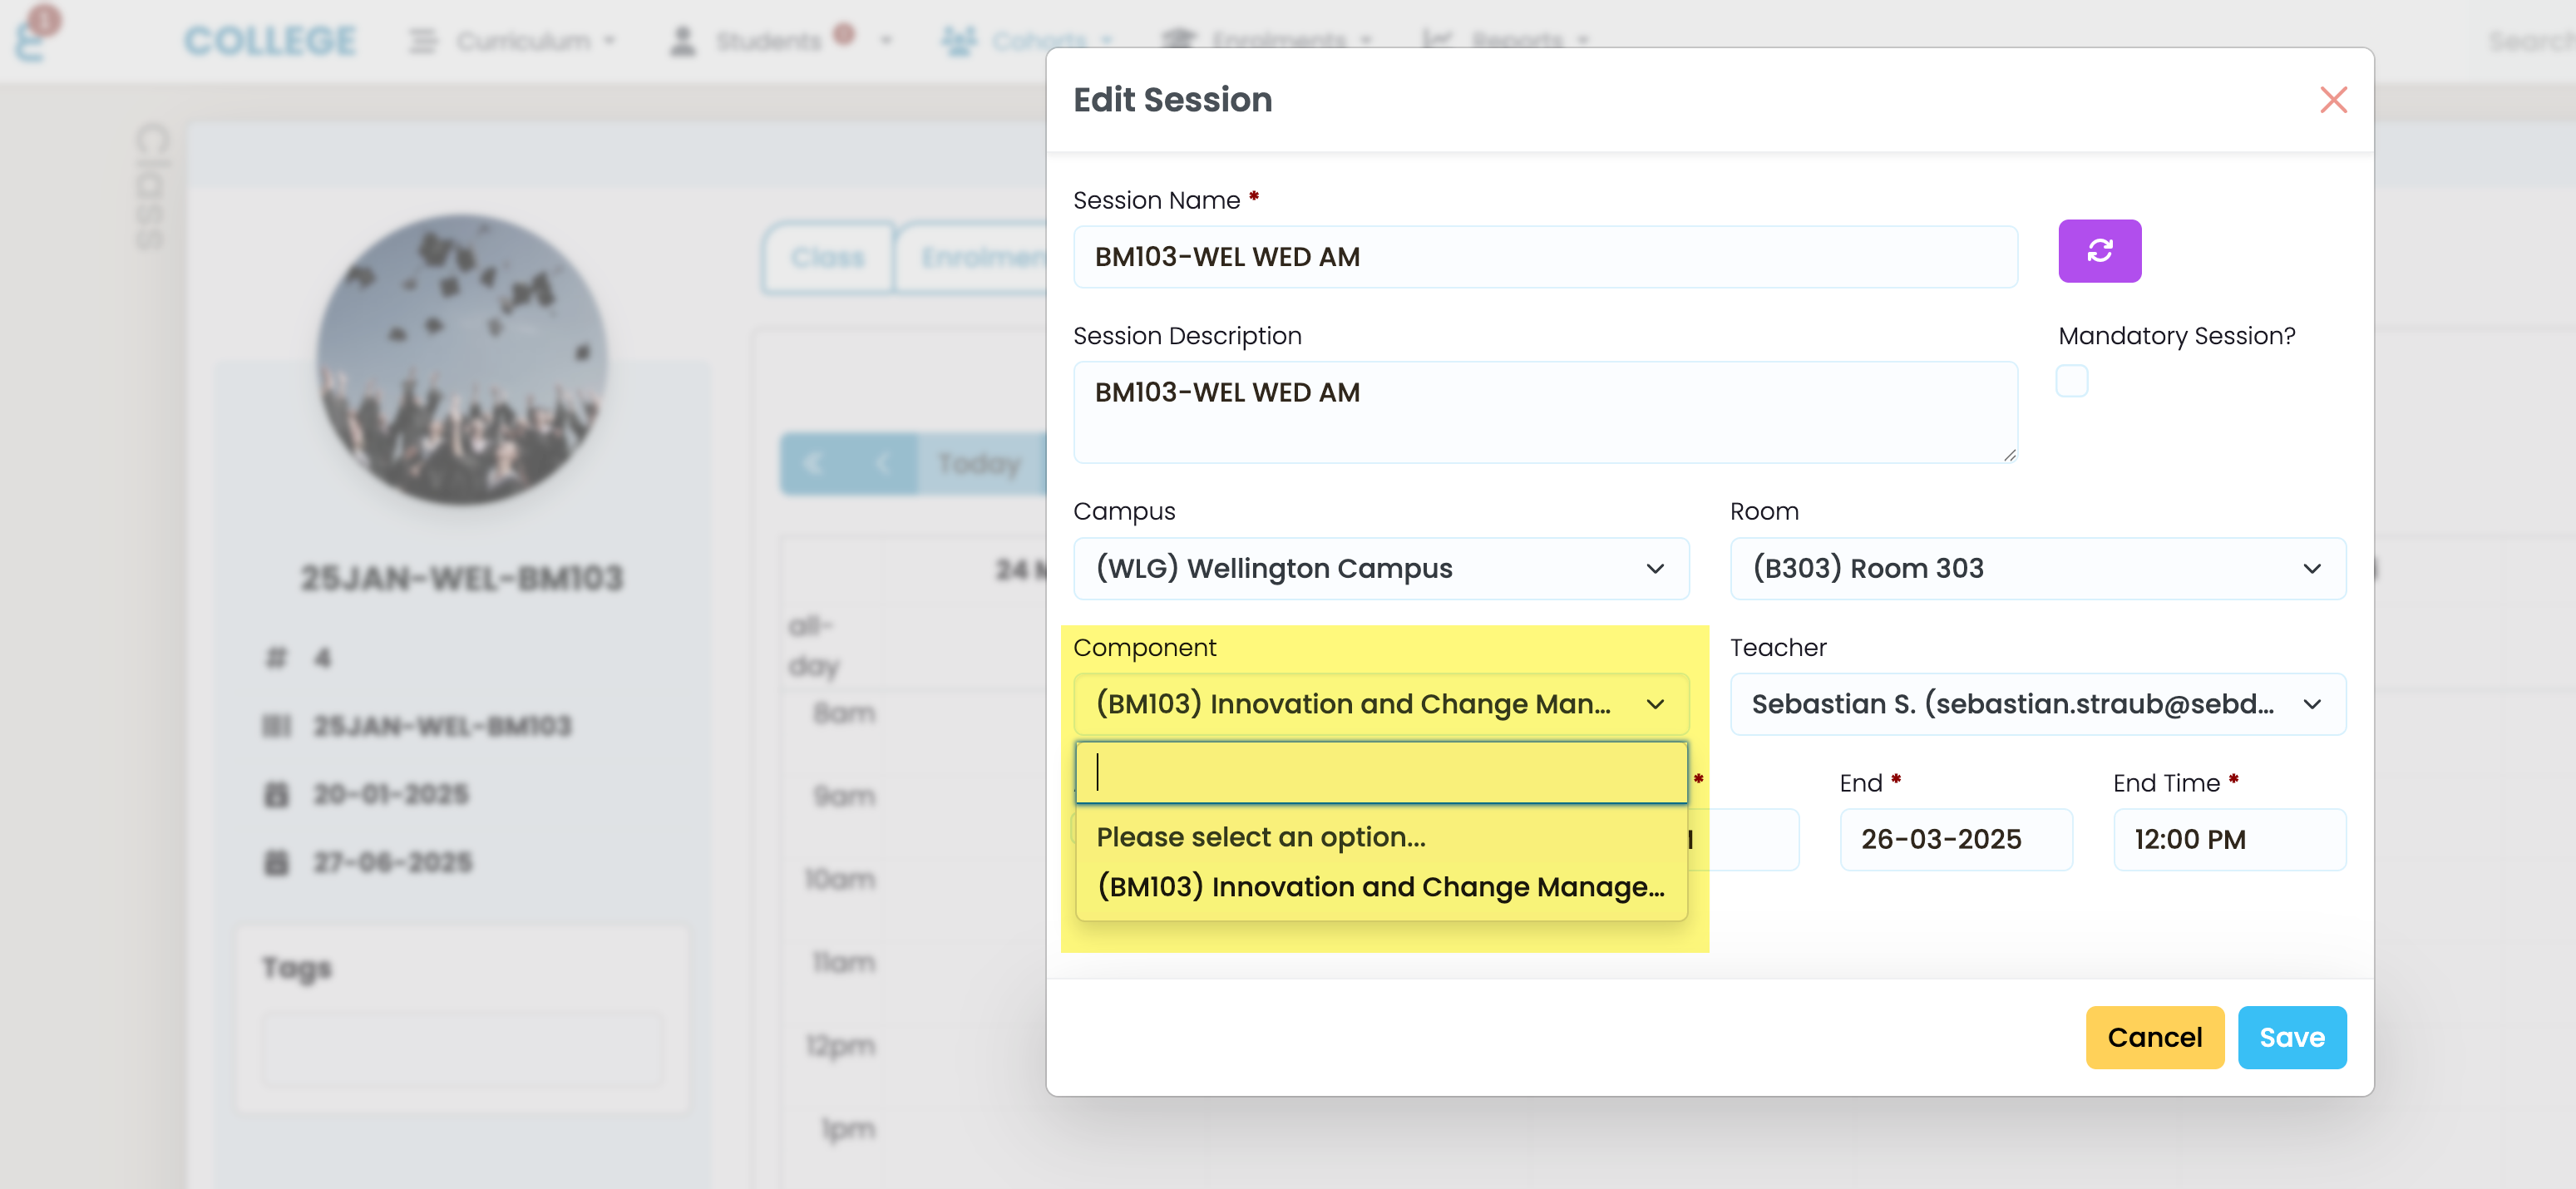
If one or many subjects are linked on the classes main tab “Class”, only these subjects are available for selection when creating or editing a session.
Students Timetable
The student’s timetable will be the combination of all classes, intake sessions, and students’ individual sessions. For Higher Education providers, it is typically the combination of all classes a student is enrolled into.
In below example, the student is linked to three classes:
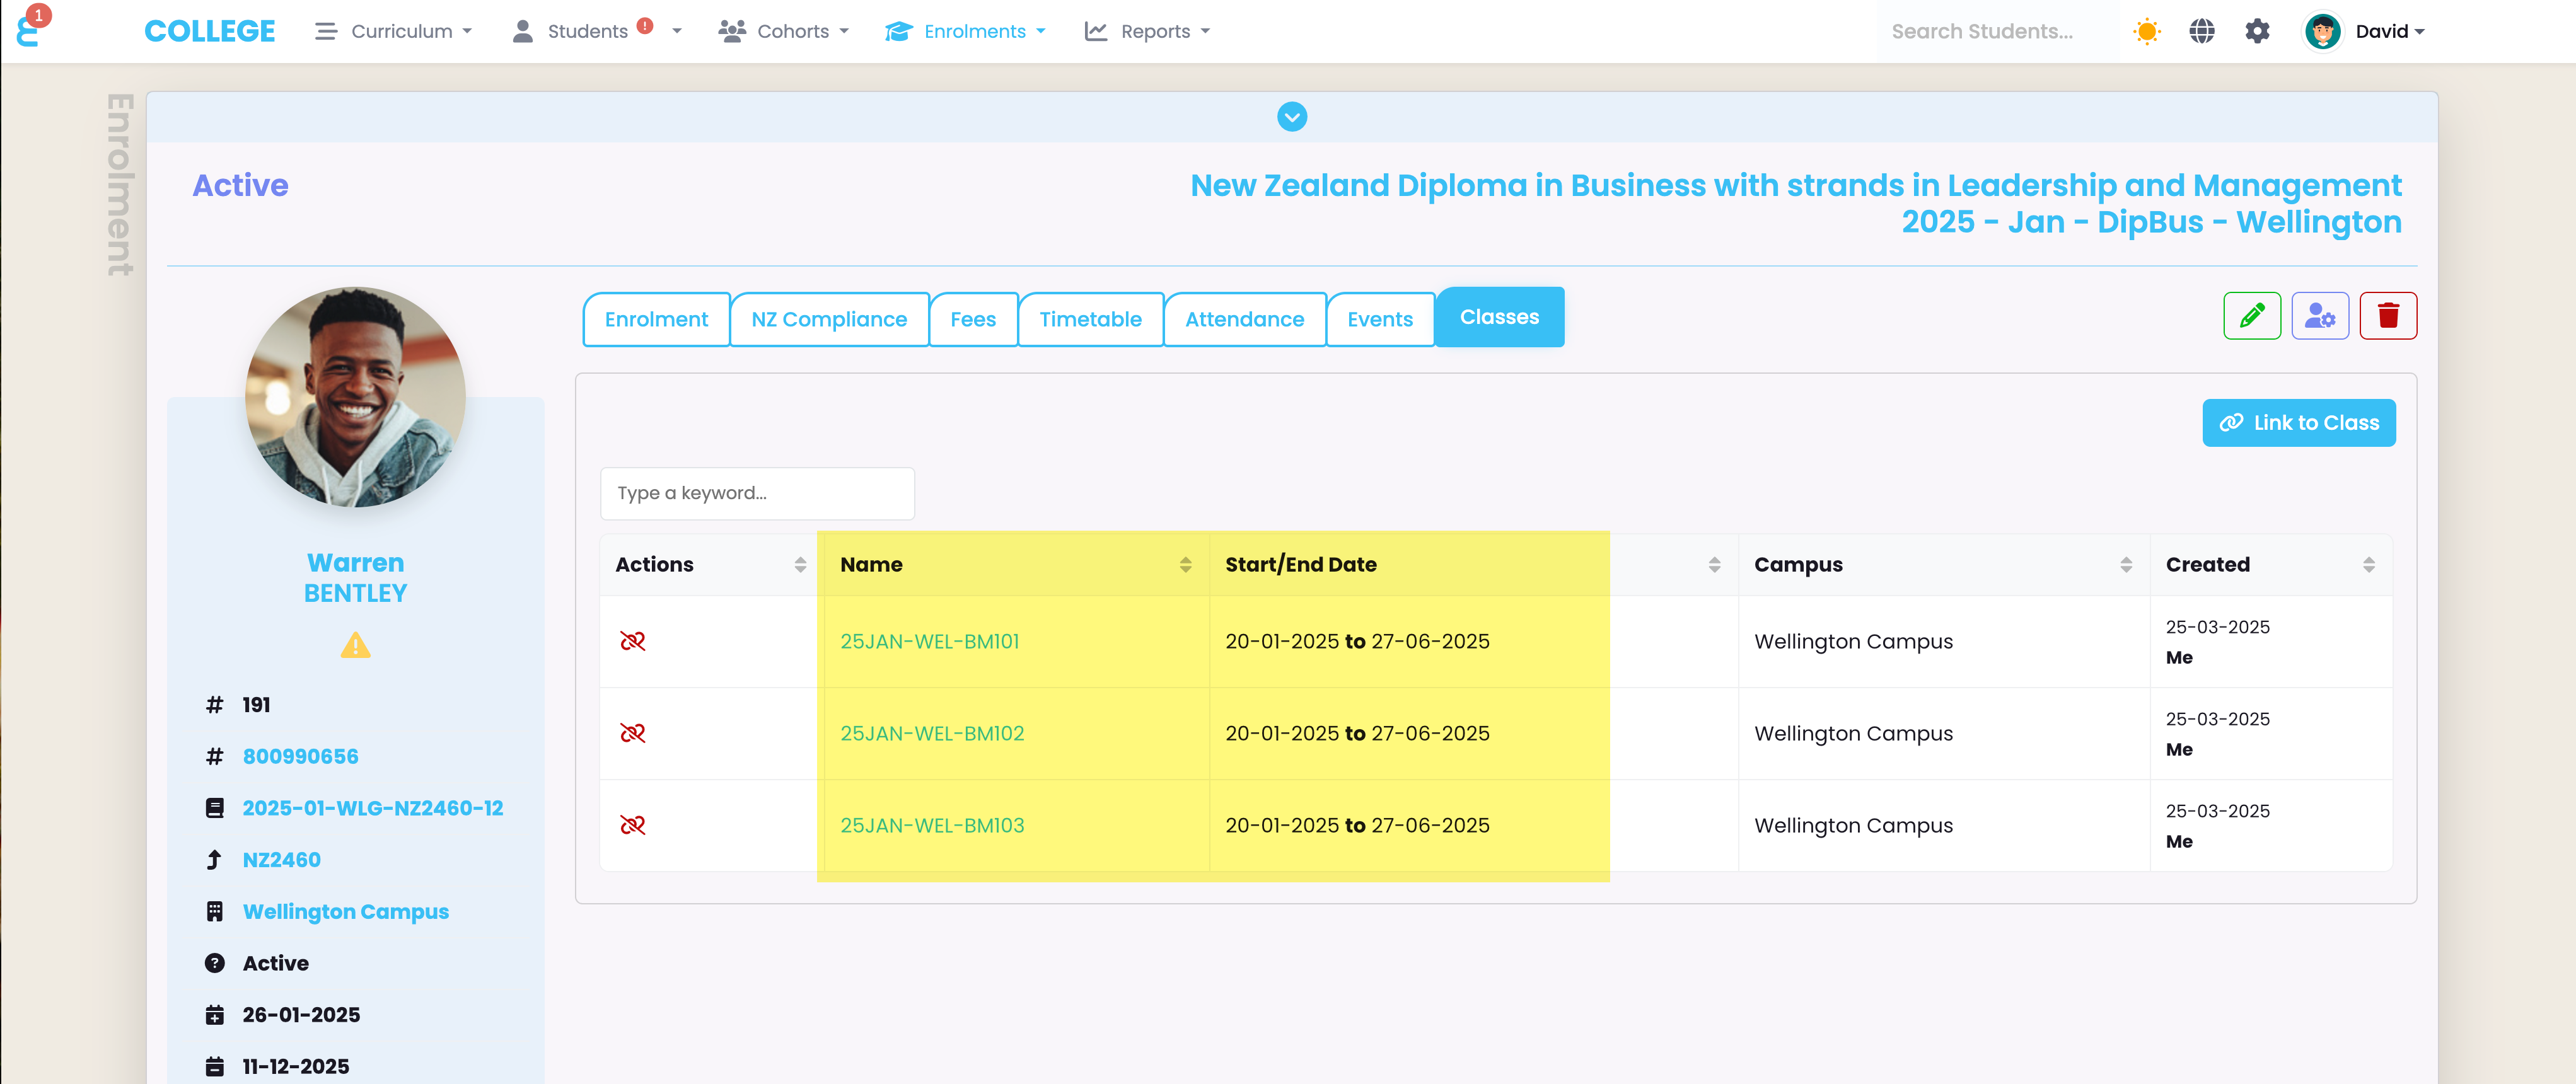
The timetable shows the sessions of all three classes, the colours of the sessions are based on the component (subject) the session is linked to:
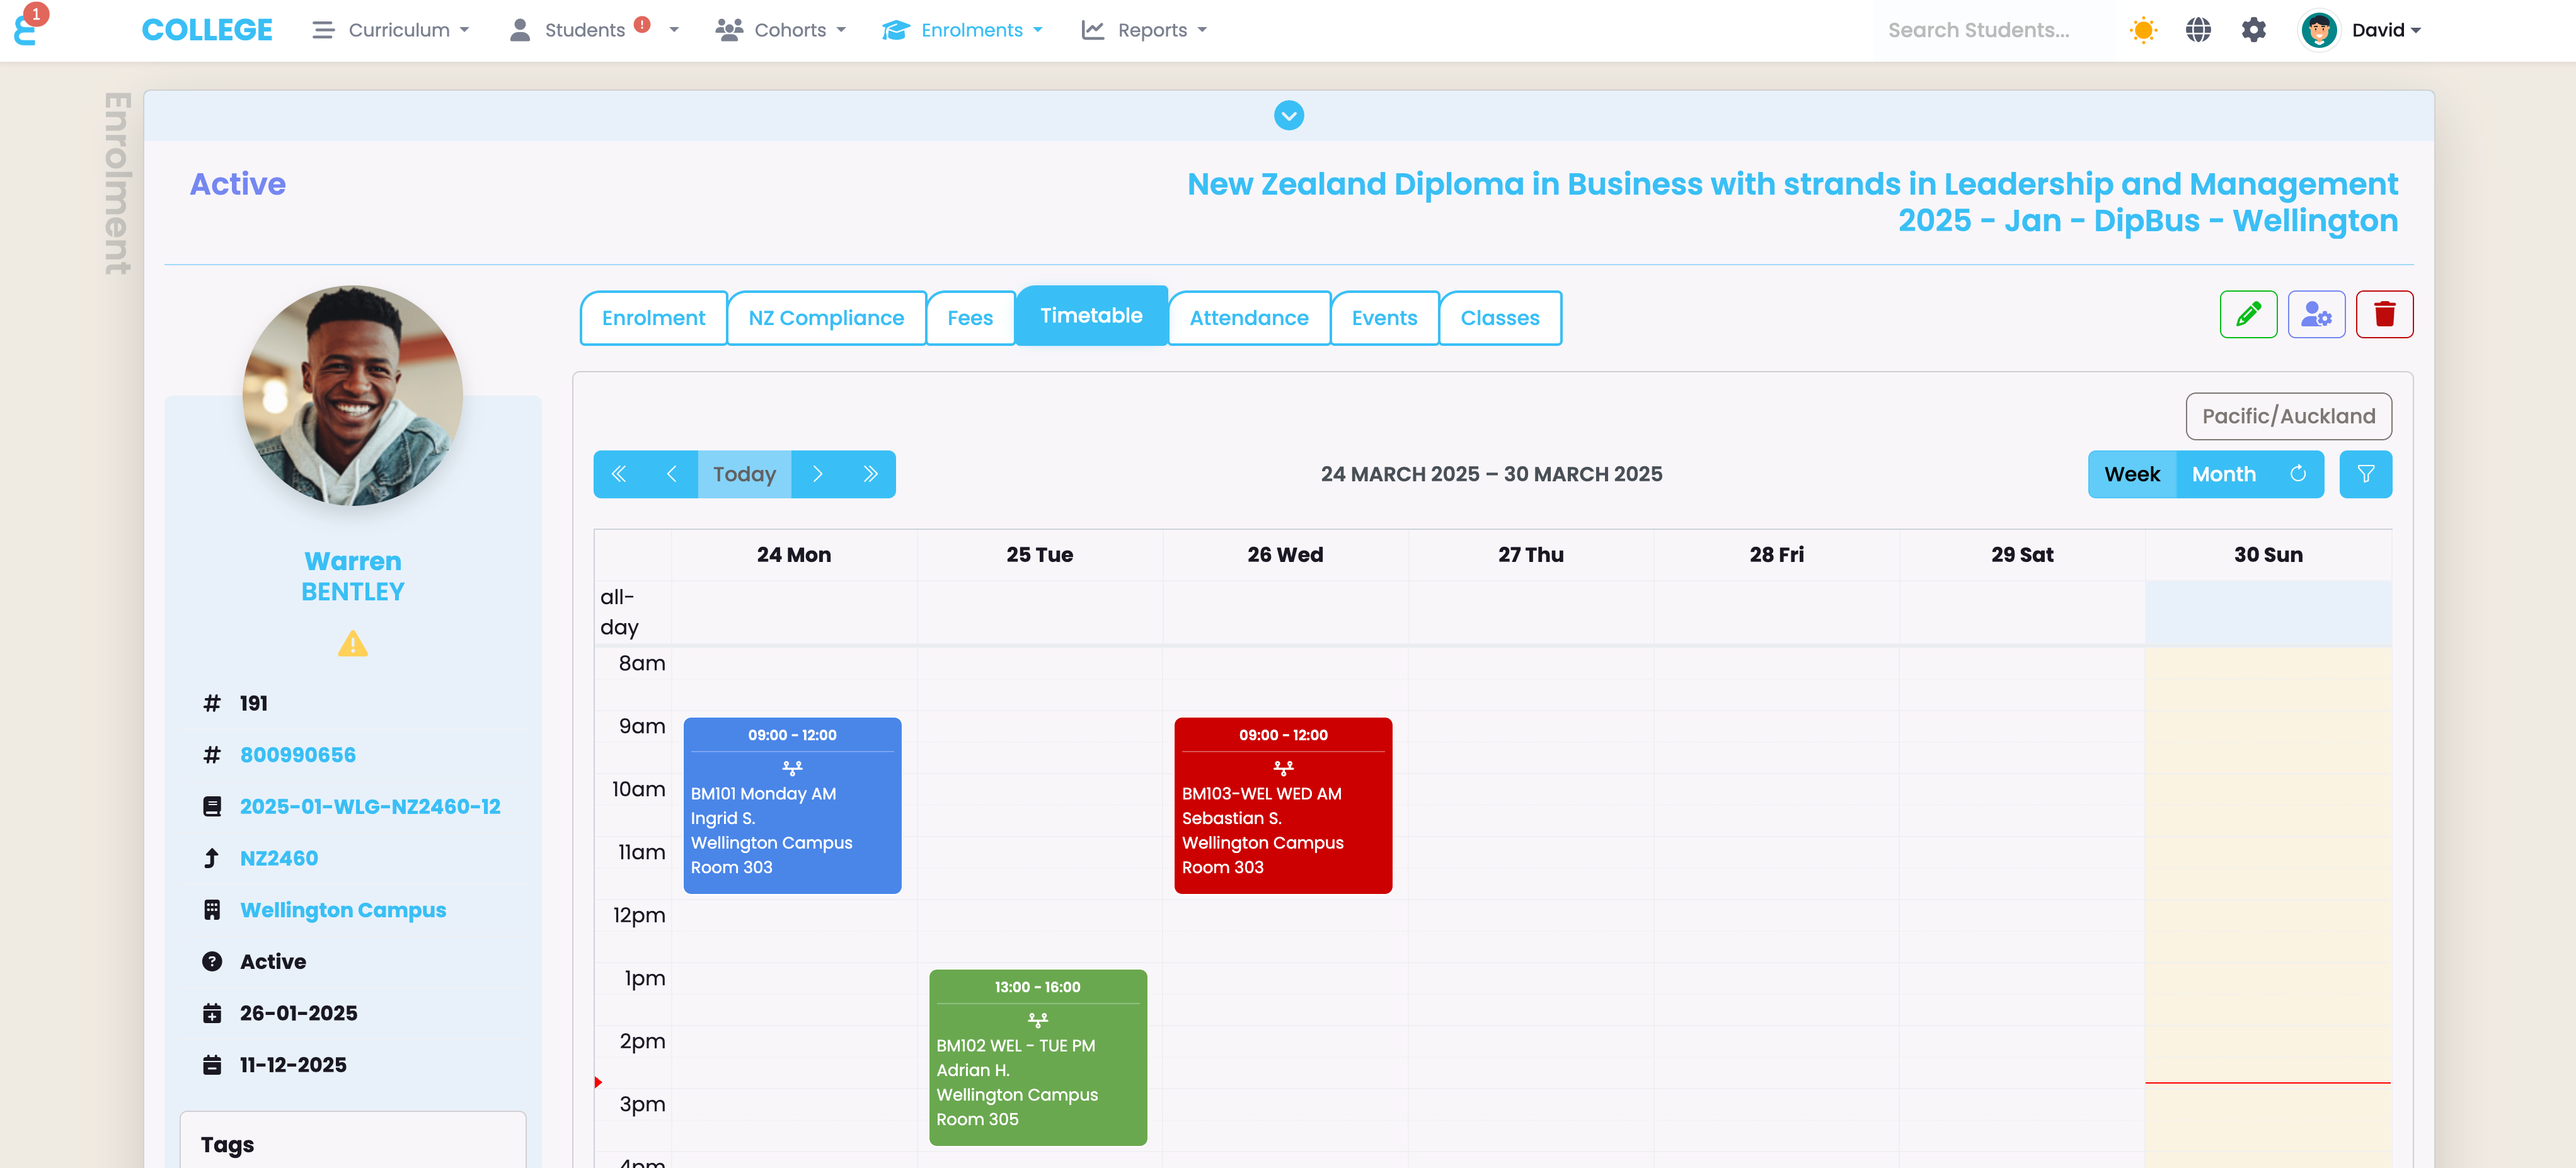
Create a Session on an individual Enrolment
Sometimes a student has a 1:1 session/training which needs to be timetabled only for the specific student. This could be an extra session, a 1:1 music class, or a provider that goes and works with an individual at their workplace.
If you wish to add an “ad hoc” session for an individual, go to their enrolment, and to the timetable tab:
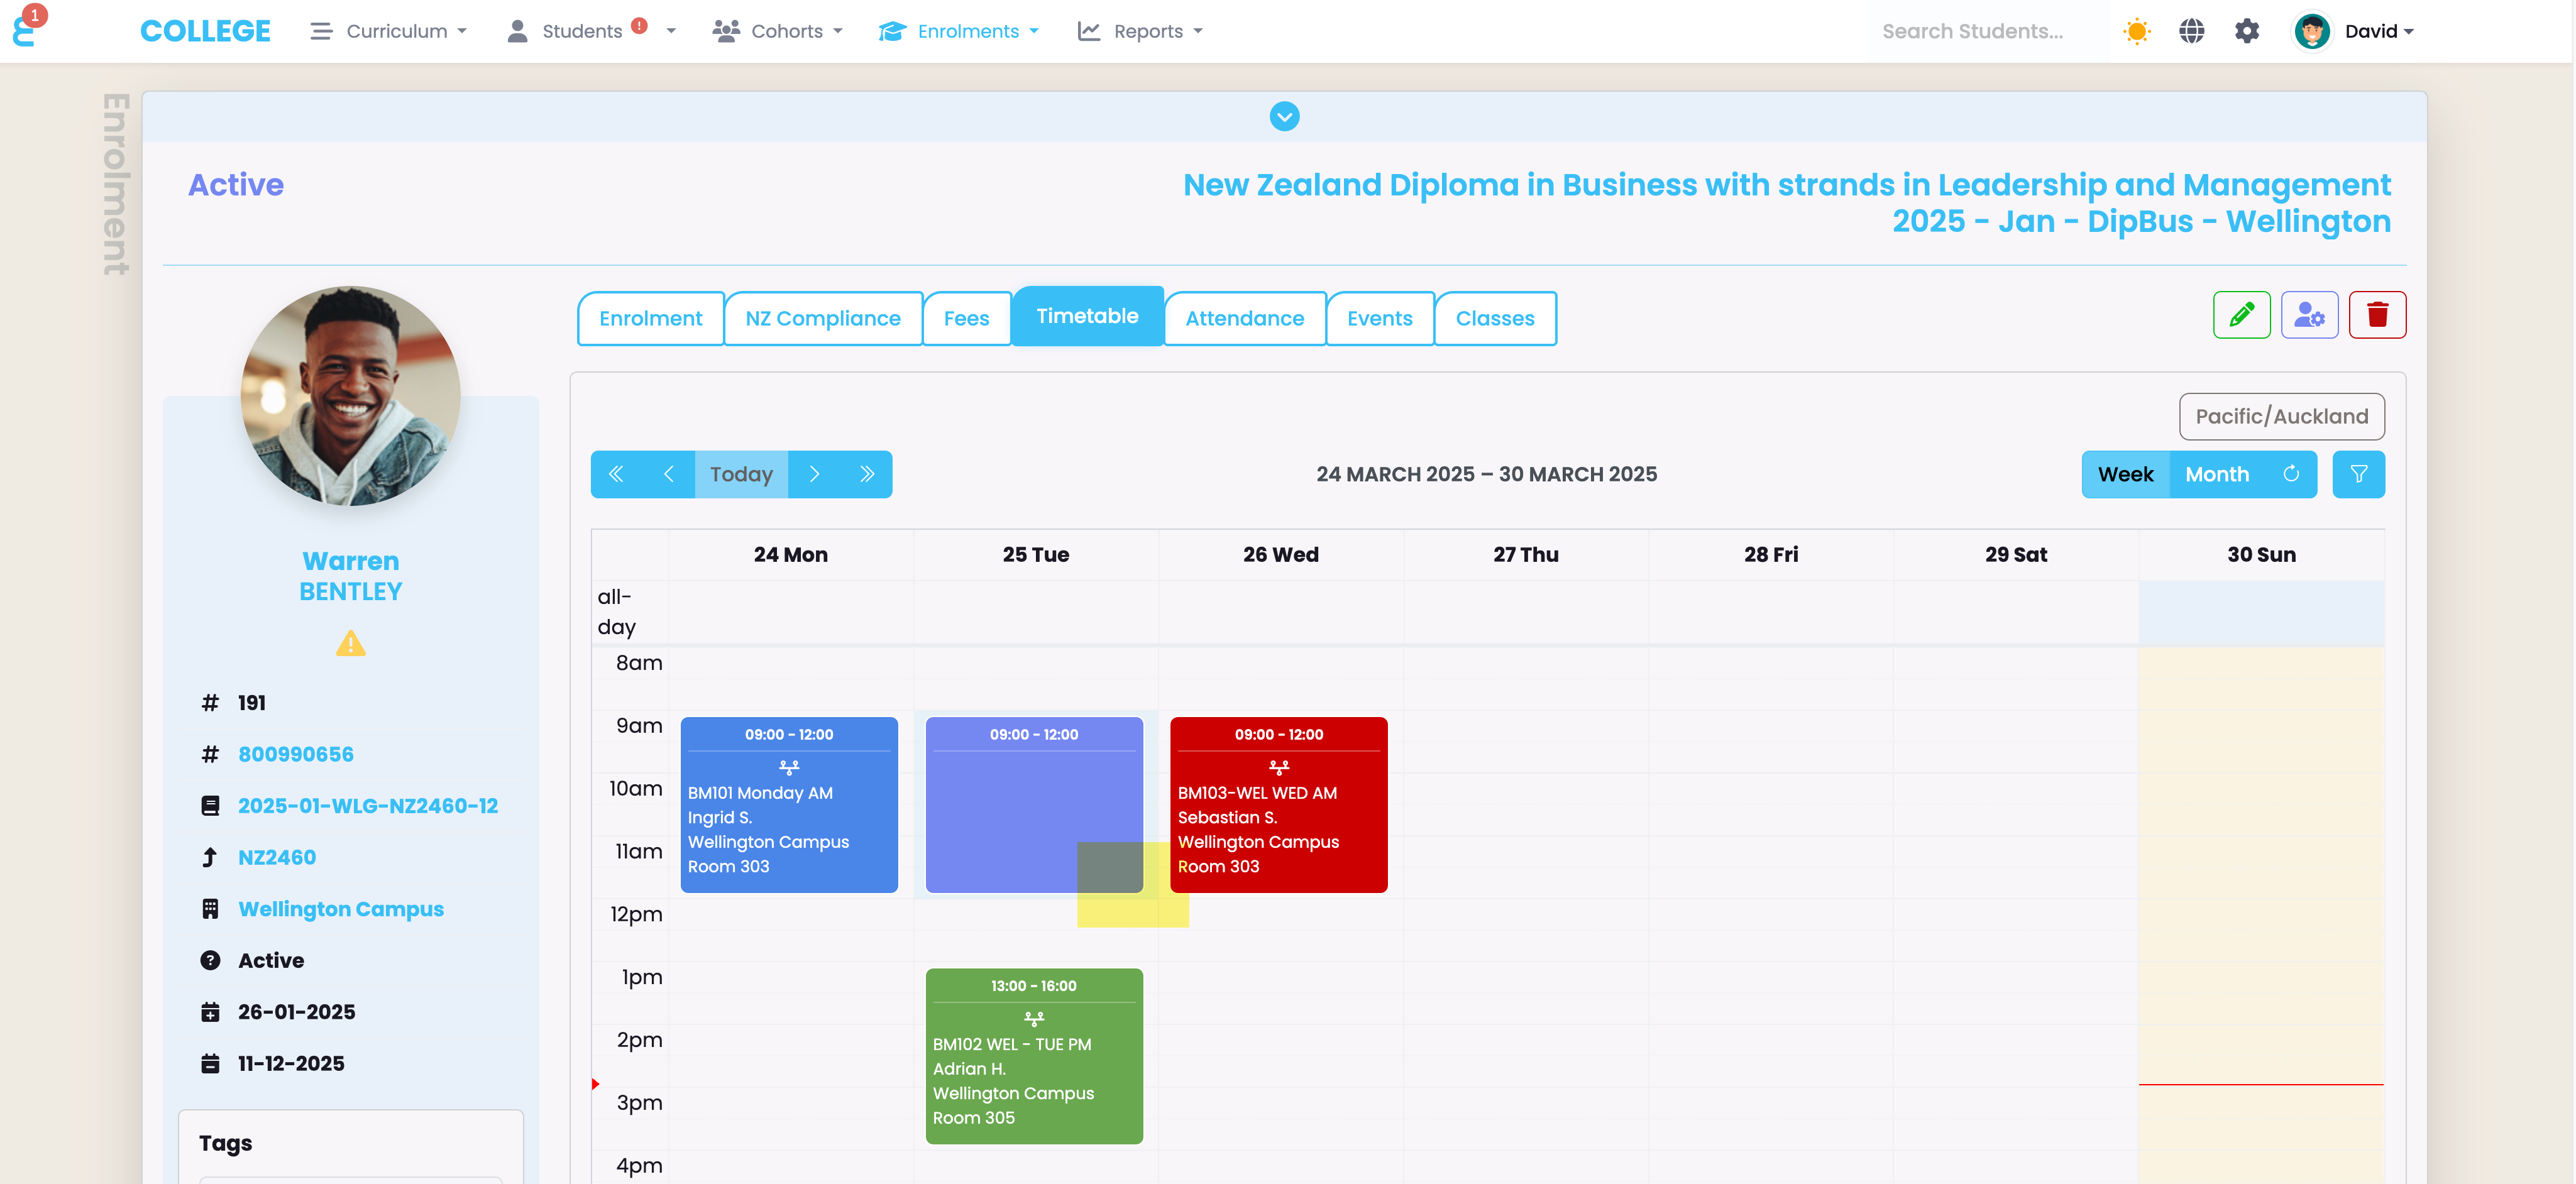
You will not be able to edit sessions that are timetabled through a class or an intake, but you can click and drag to create a new session only for the student.
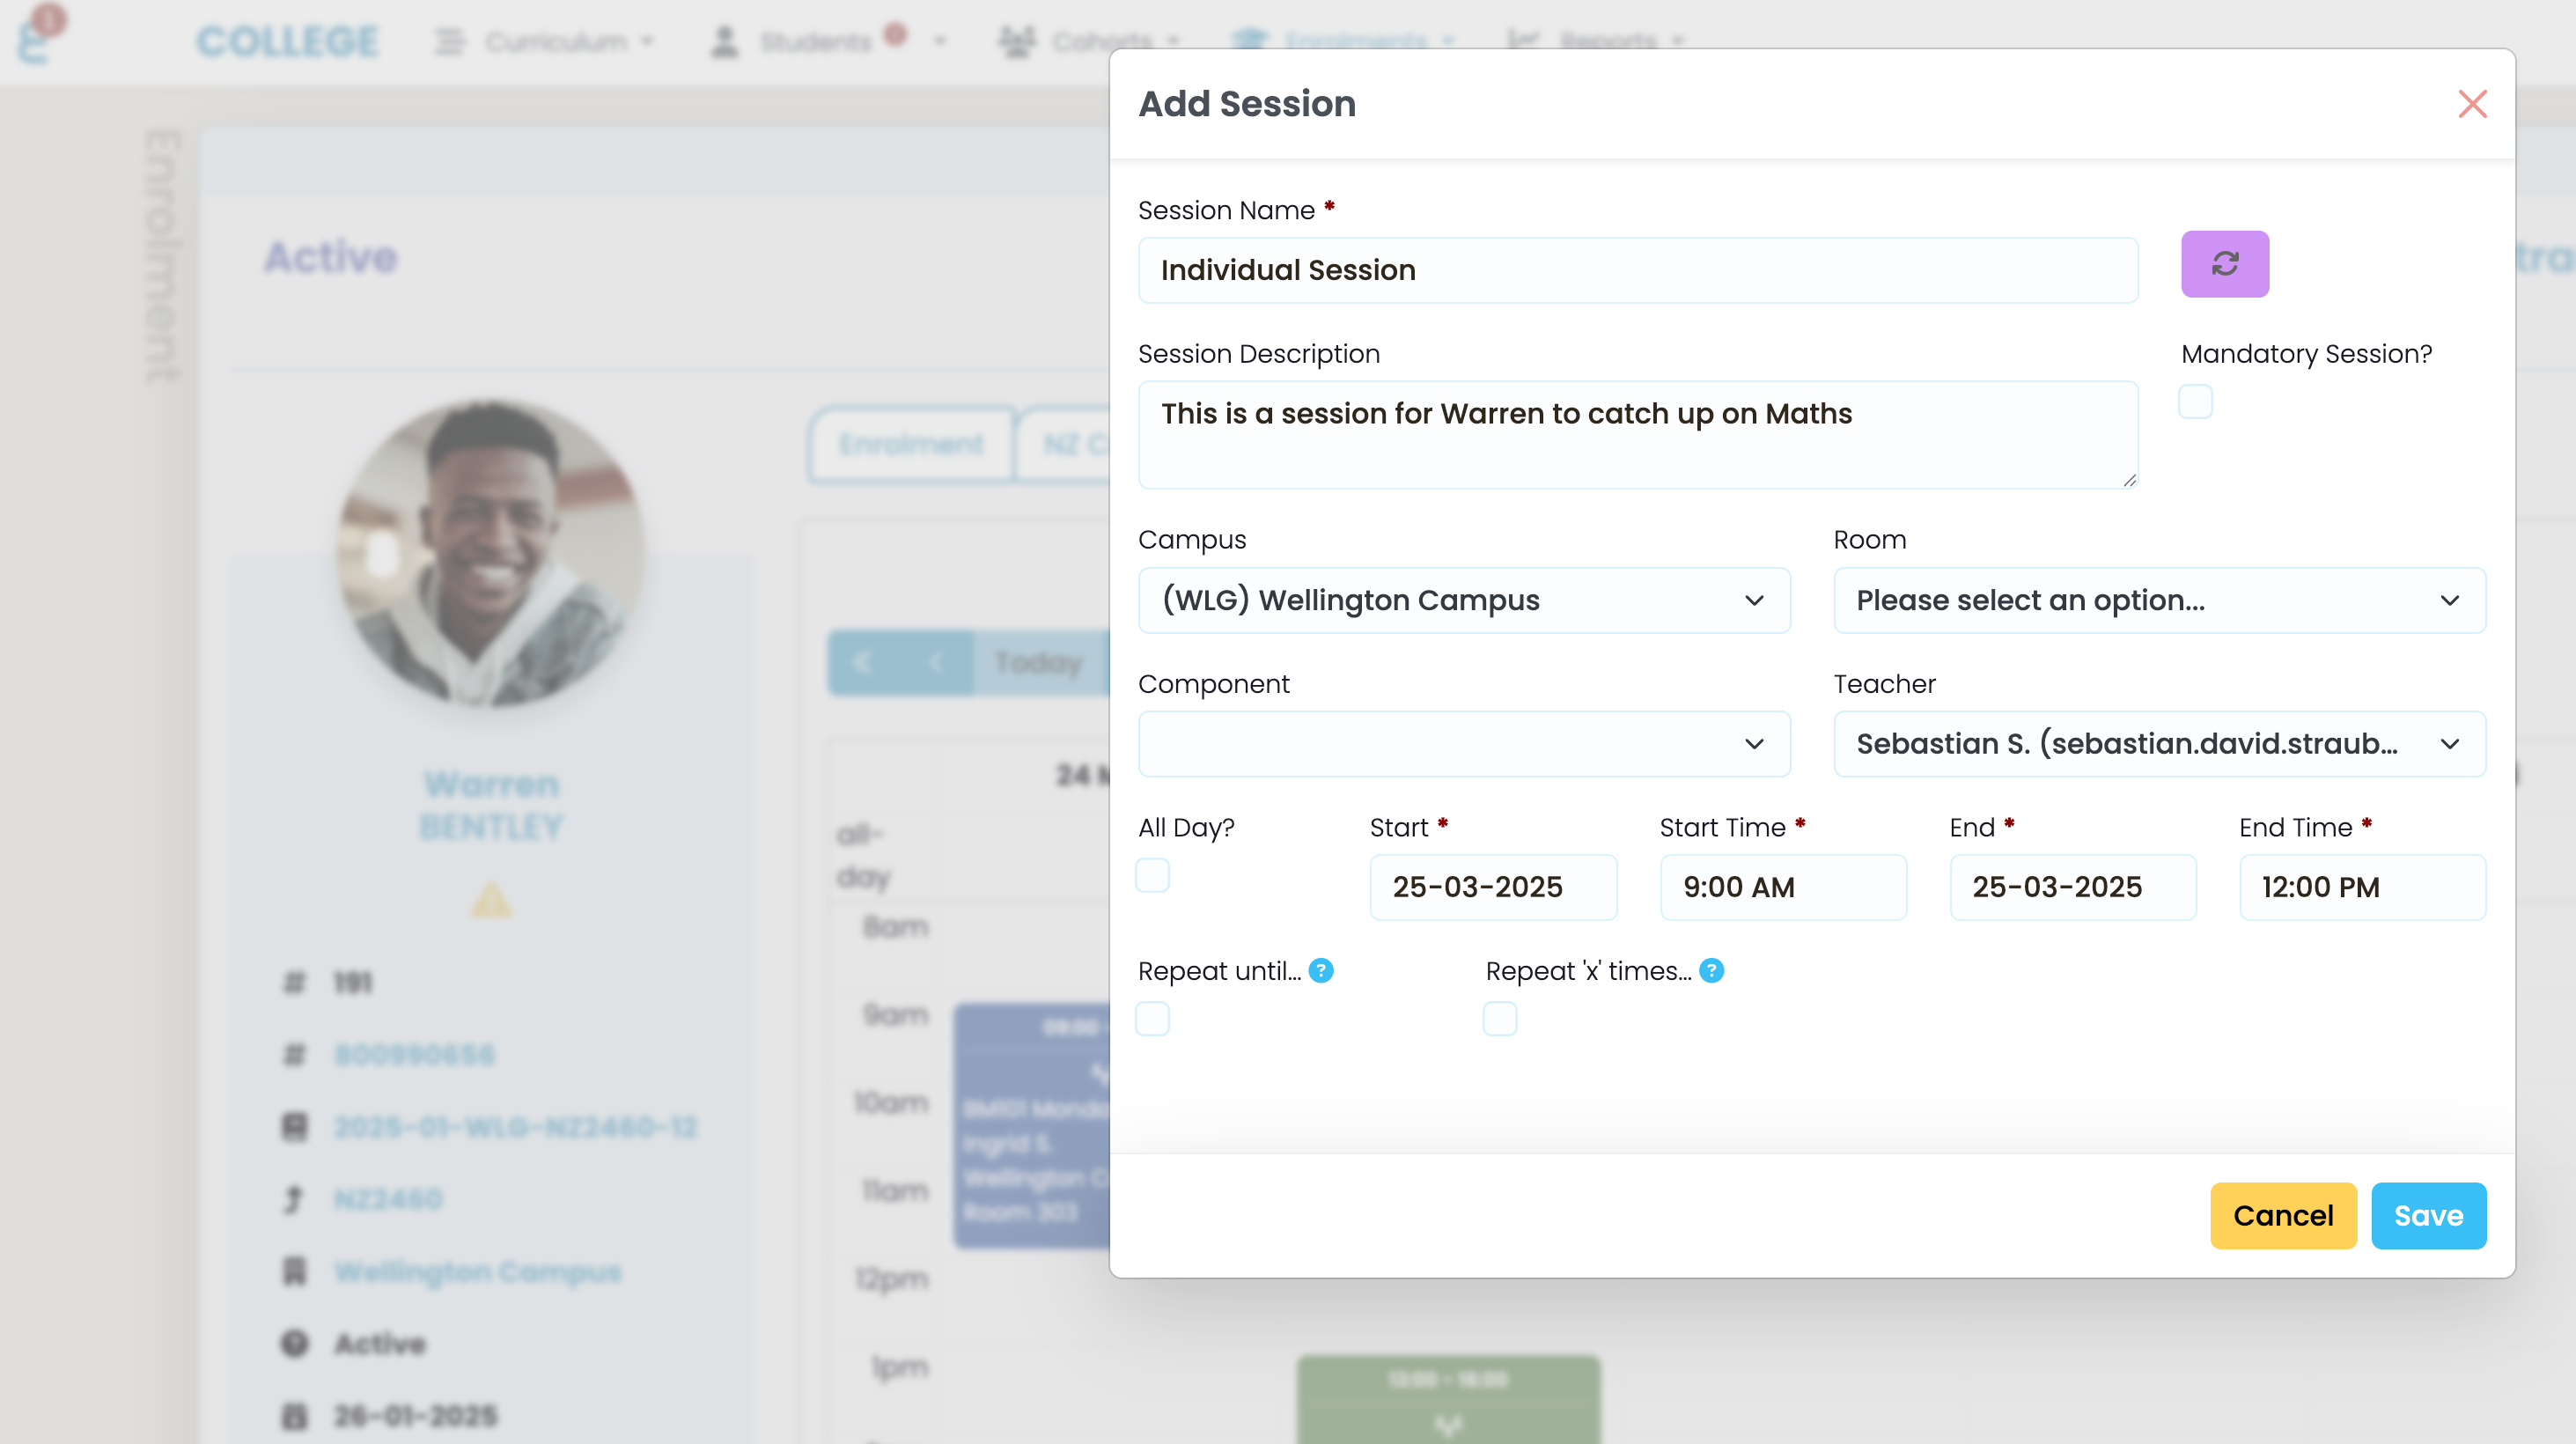
The session that was created for an individual, will show an edit button:
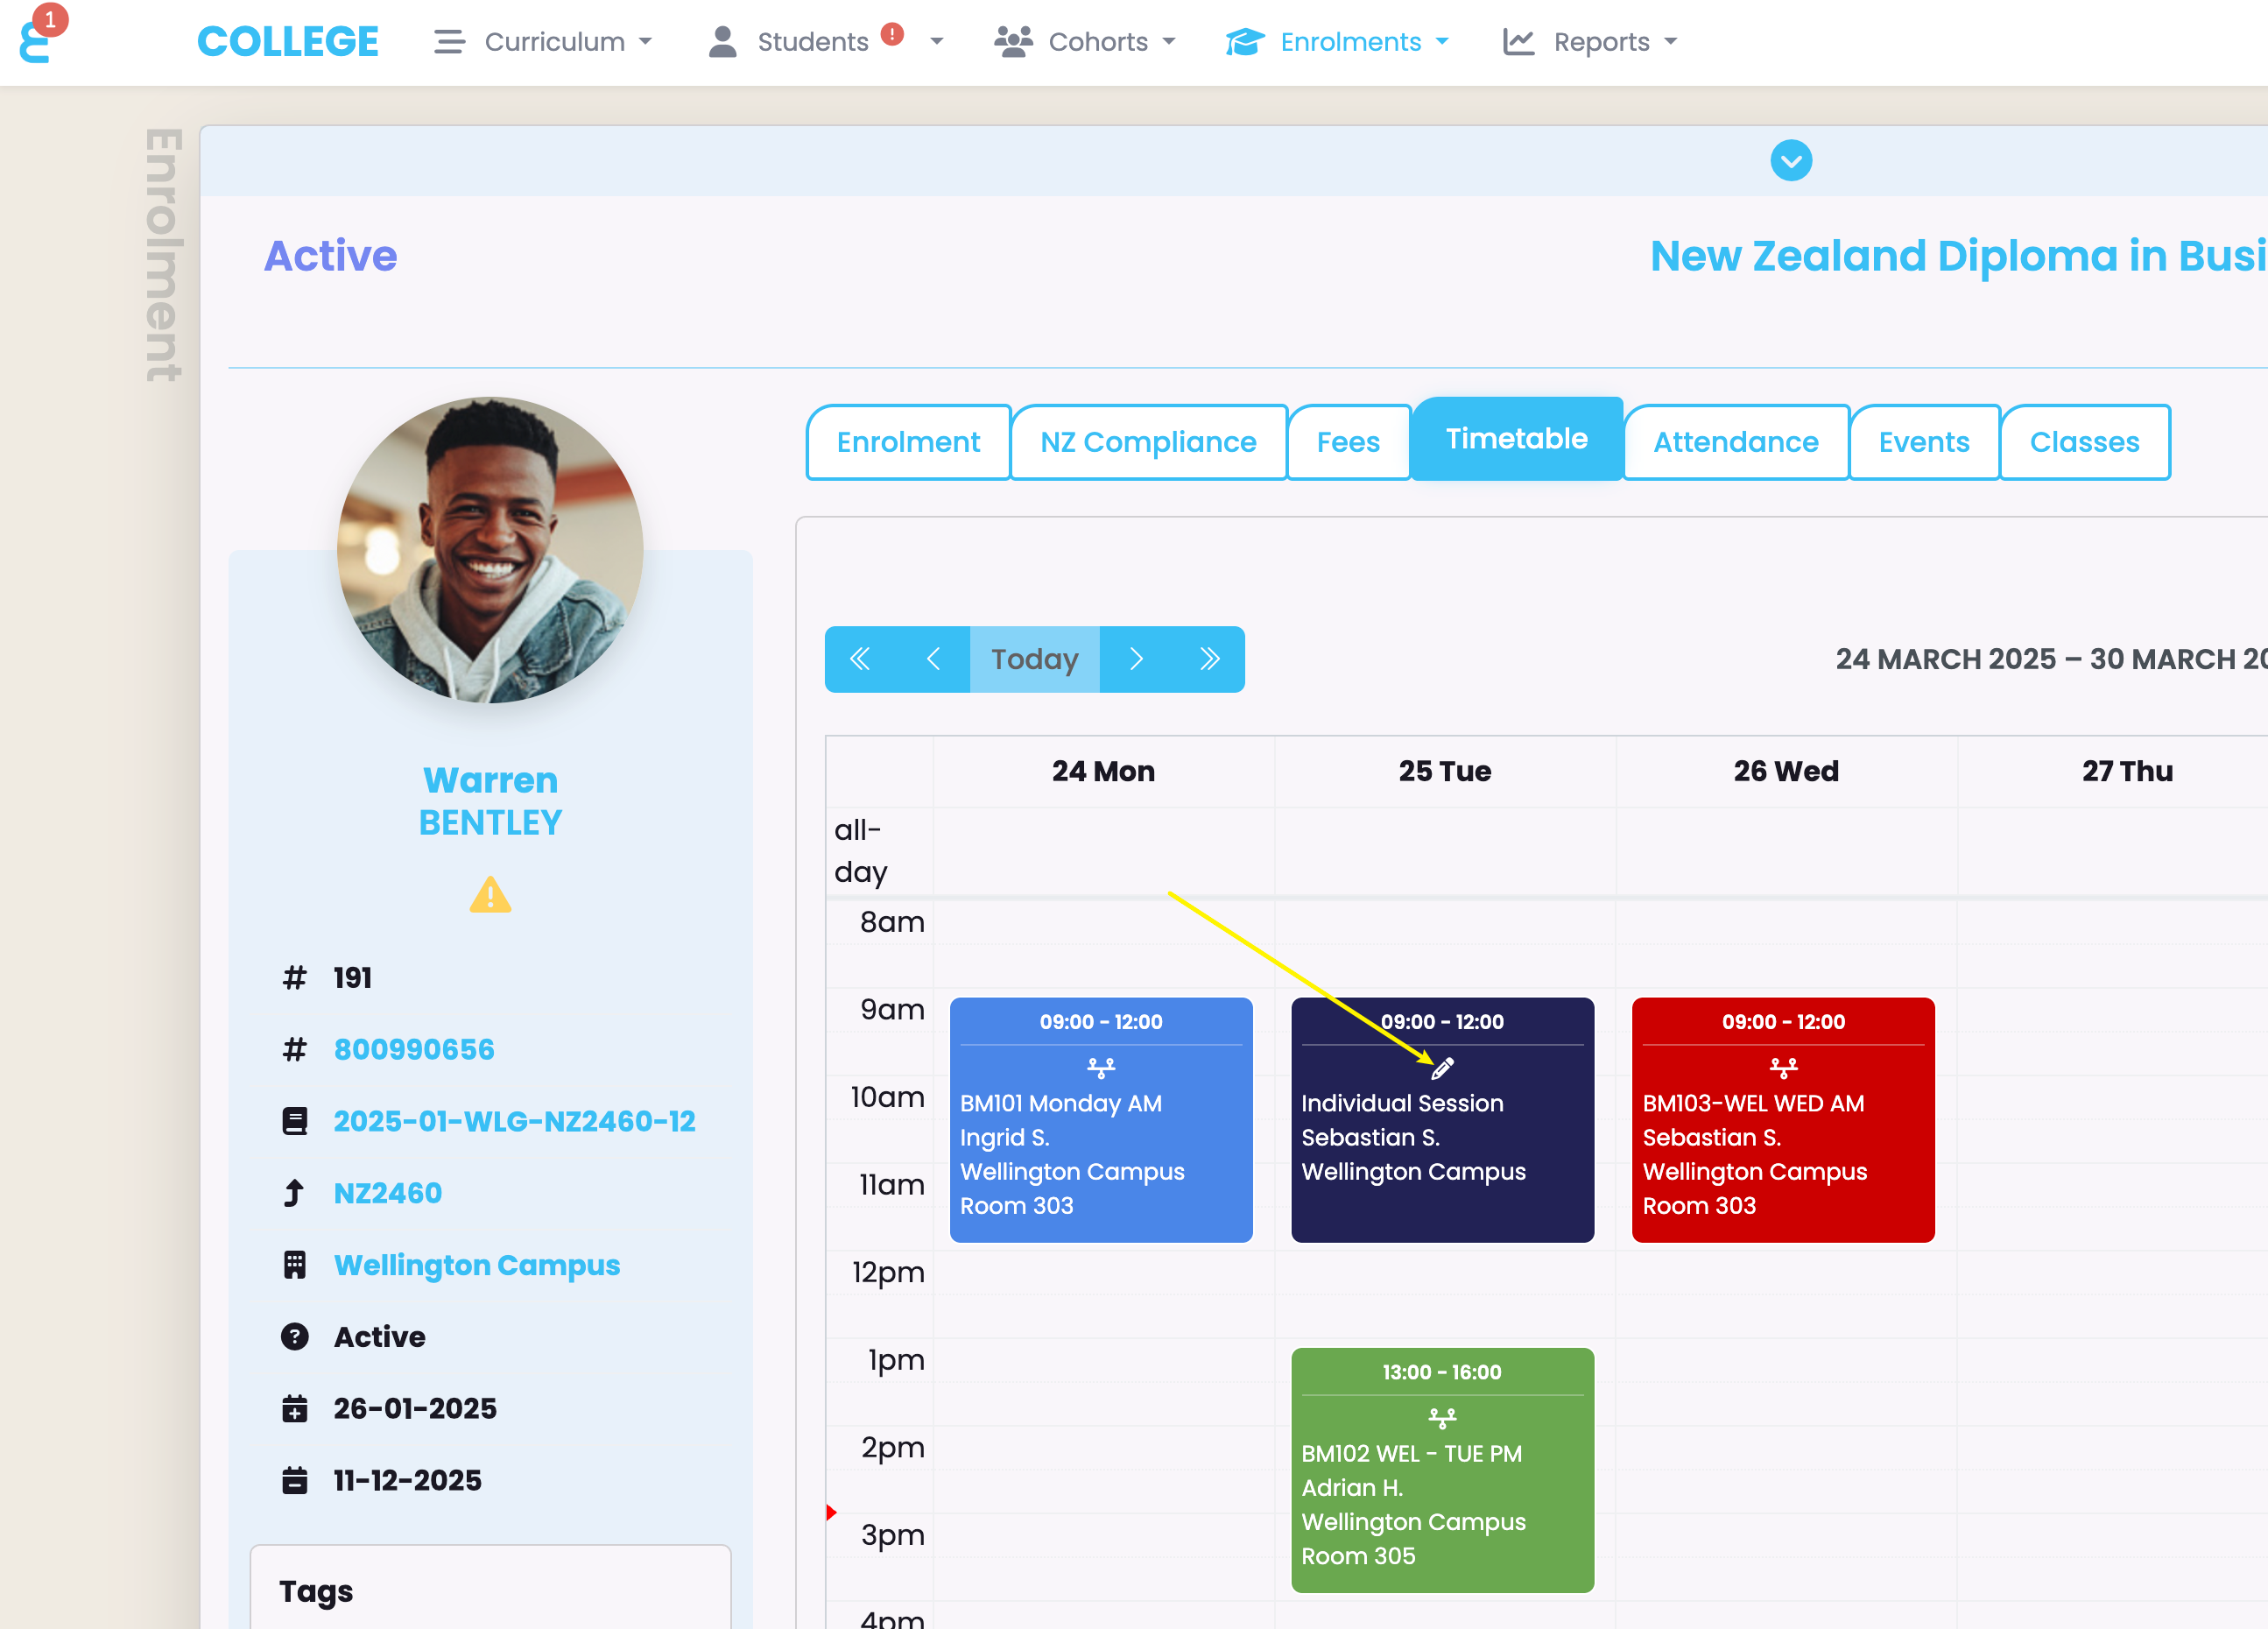
You may now want to click the refresh button for this session to create an attendance register to mark for the student:

