Event Log
The event log is one of the most powerful features of SELMA. It keeps track of all actions, notes, communication, and critical events on all relevant objects which include:
- Student Object
- Class
- Intake
- Enrolment
- System User
- Organisations
- Contacts
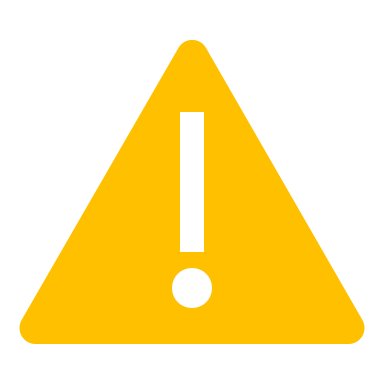 |
Note that event log entries added on an enrolment also show in the student’s event log entry. Therefore, the student event log shows all event entries from the student including events on their enrolments. |
The event log entry
The event log in SELMA records a chronological history of key actions and changes within the system on the records. It acts as an audit trail, capturing events such as:
- Status changes
- Emails Sent
- Notes Entered
- Text Messages Sent
- Reminders Raised
- System Completed Components
- etc.
Each event entry typically includes several pieces of key information outlined below:

- A specific icon that identifies the log entry in the timeline, in the example the task icon is shown
- The event type, in this example it is a “Task” but may be a note, email, text, or any other event type you can add under “System Settings – Lookup Data”.
- The subject / title of the entry
- The body of the entry which might be instructions, notes, or the email body
- The timestamp and user who created the entry – this might be the “System Admin” if it was an auto generated entry
- In case of the entry being a Task, it also shows the assignee and, due date and, if completed, the completed flag
Each event log entry also has action buttons:

- If you have access to edit the note or entry, you will see an edit button
- Email the entry – You can click the email button to send the event log entry to another SELMA user
- View and download attachments – If the entry has one or many file attachments, you can view and download them with this button
- Delete – You may be able to delete the entry if you are the author of it
Emailing an Entry
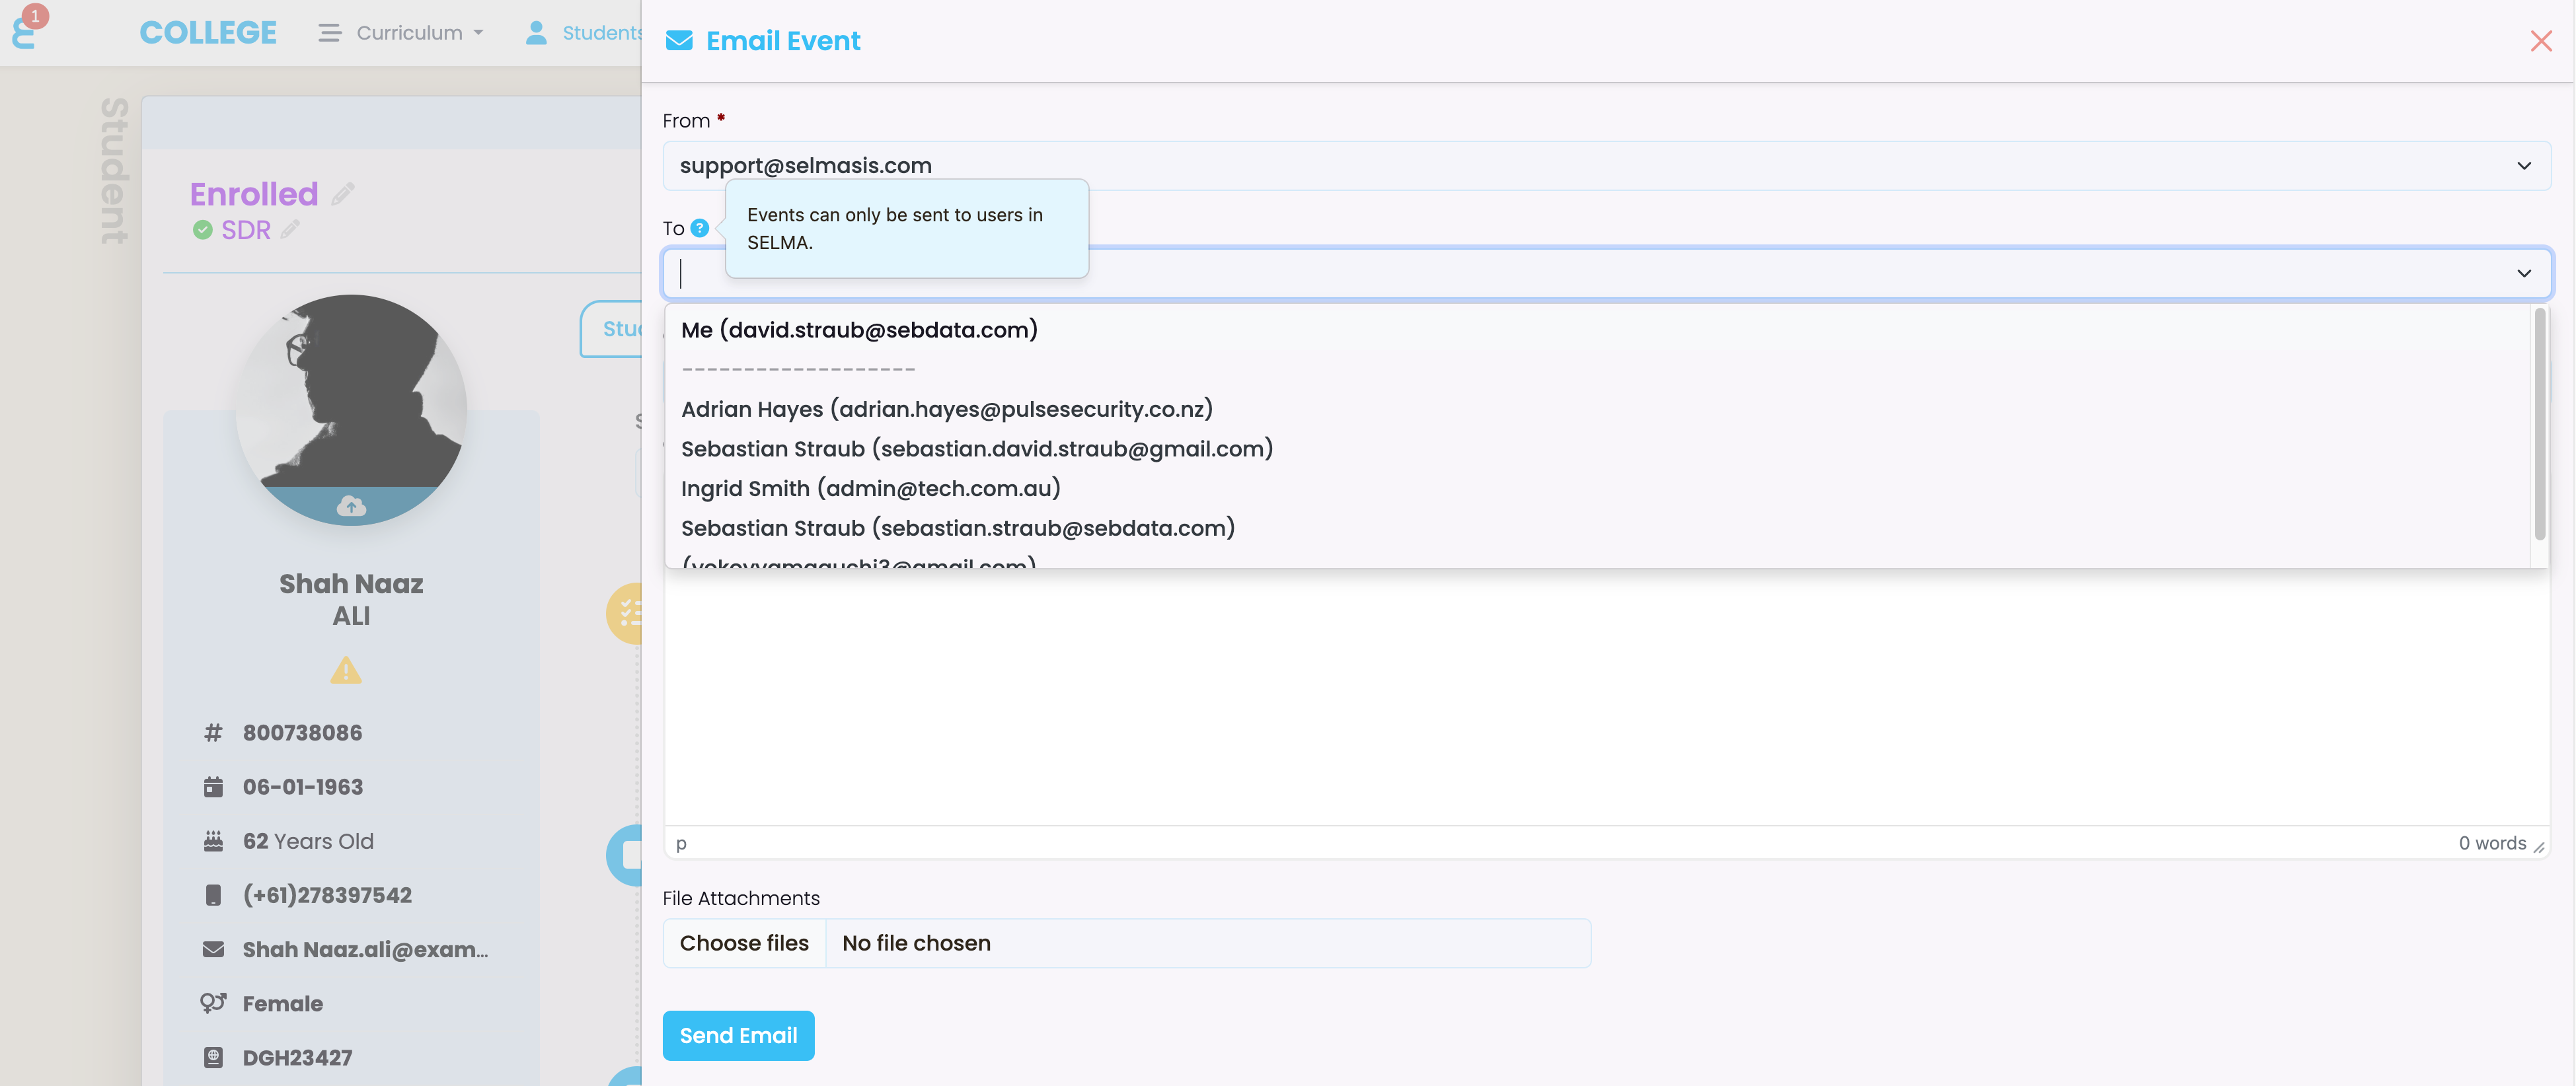
If you choose to email an event log entry to another SELMA user, the email slide in will appear. You can forward the entry via email to another user of SELMA but not to email addresses outside of the SELMA user scope. You can add a note to the forwarded entry if you wish:
Managing Tasks
The event log entry of “Task” will show up on your dashboard as a post it note if assigned to you. You can click on the note to open the record, see and action the tasks, and mark it as completed (1):
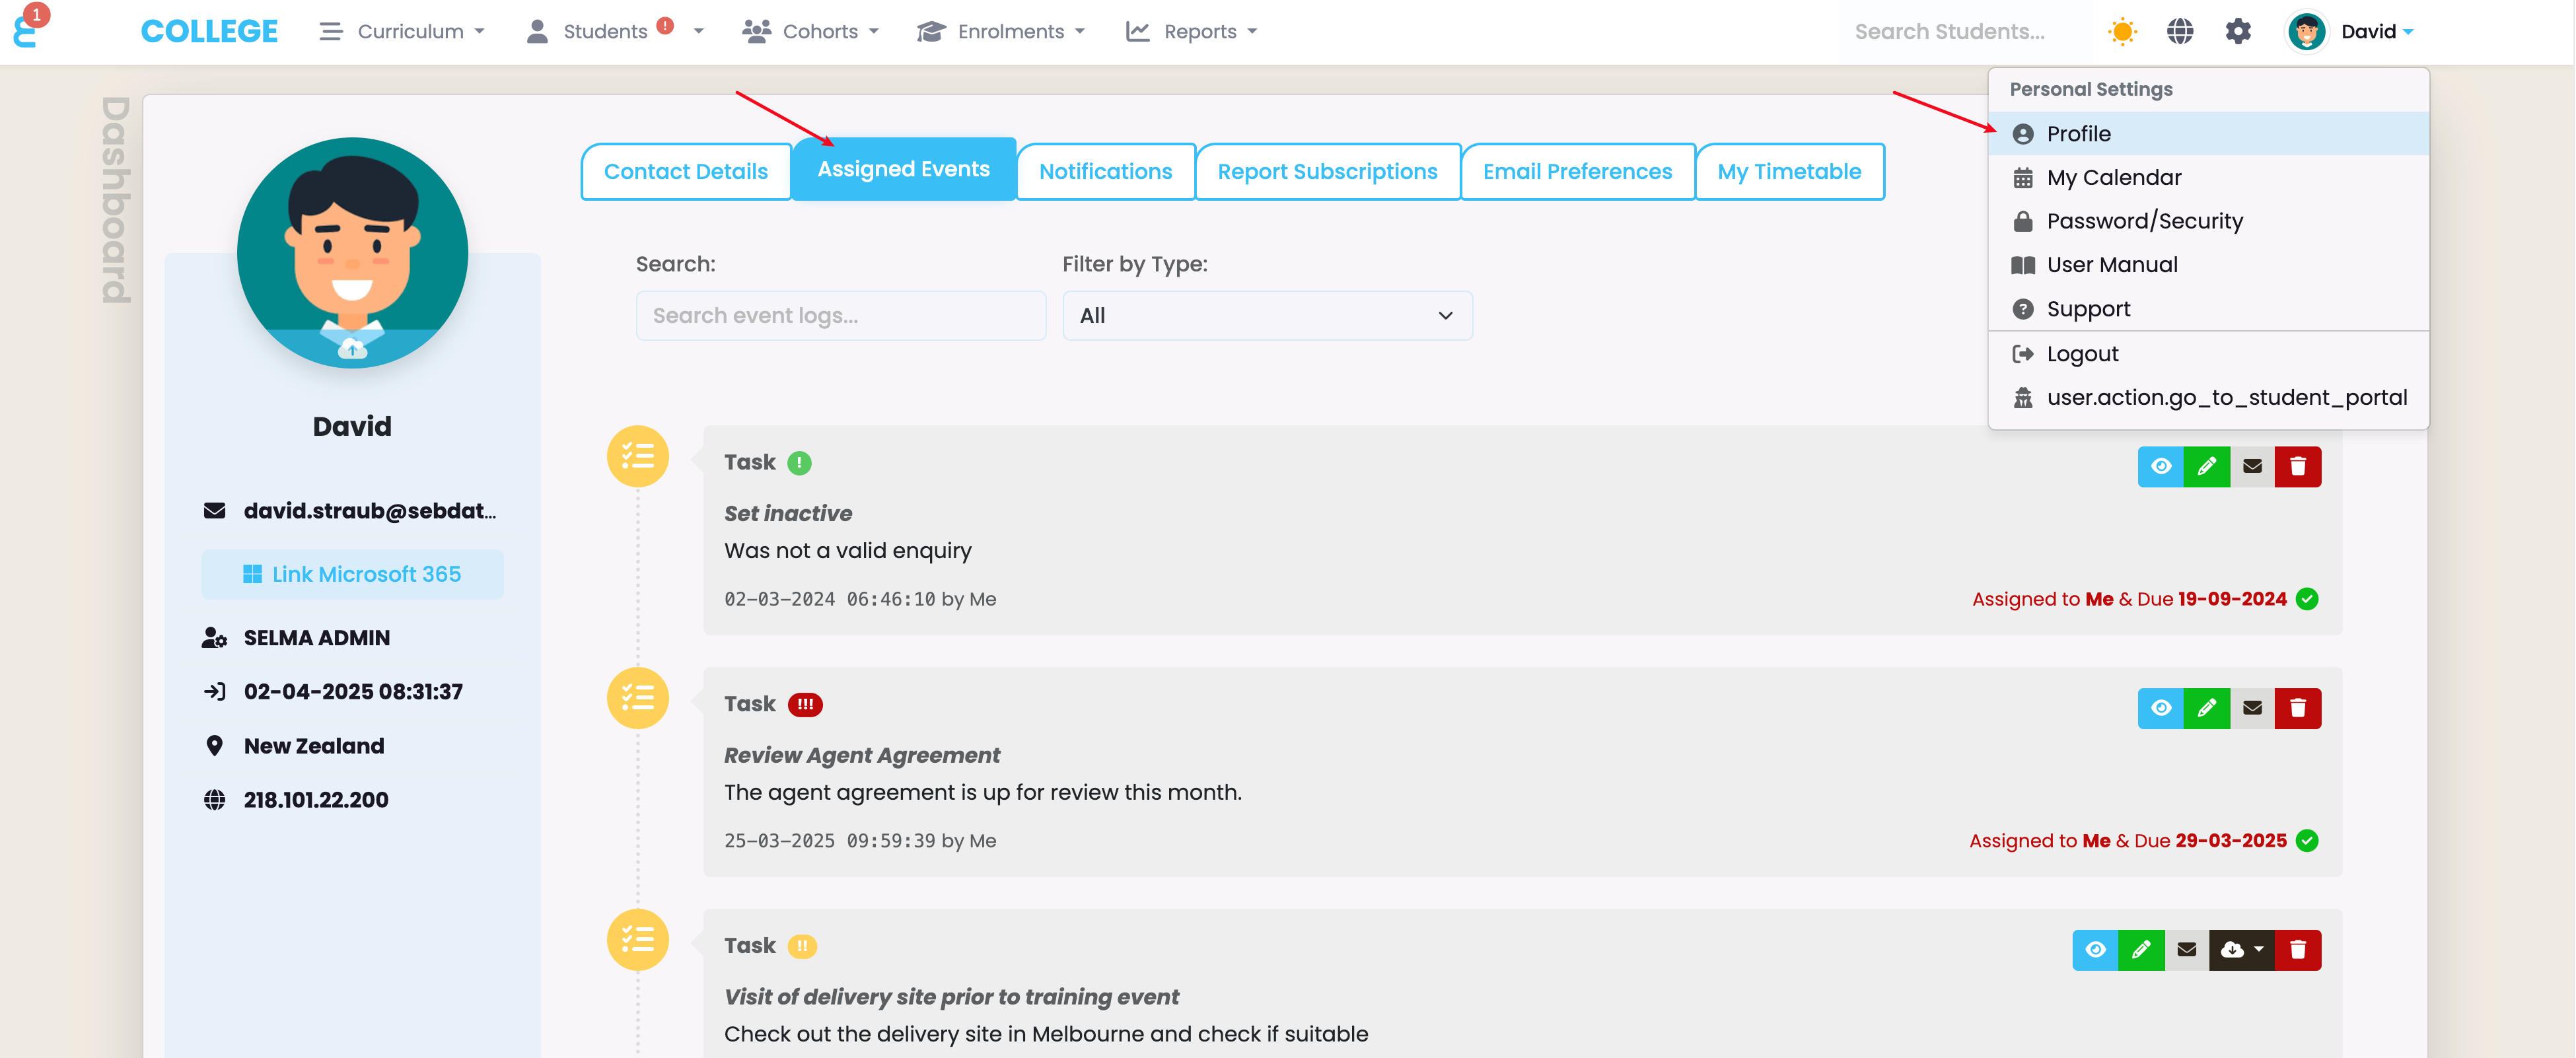
You may also click on the complete button (2) to mark the task as completed straight from your dashboard. If there are too many tasks to display on your dashboard, they can be found under your user profile “Assigned Events” tab:
Creating an Event
As a user, you can create events such as notes, tasks, or any other type of entry you like. Check the chapter Lookup Data of this manual to learn how to add more “Event Types”.
To create a new entry, click on “Add Event”

The event creation pop-up form will appear on the screen:
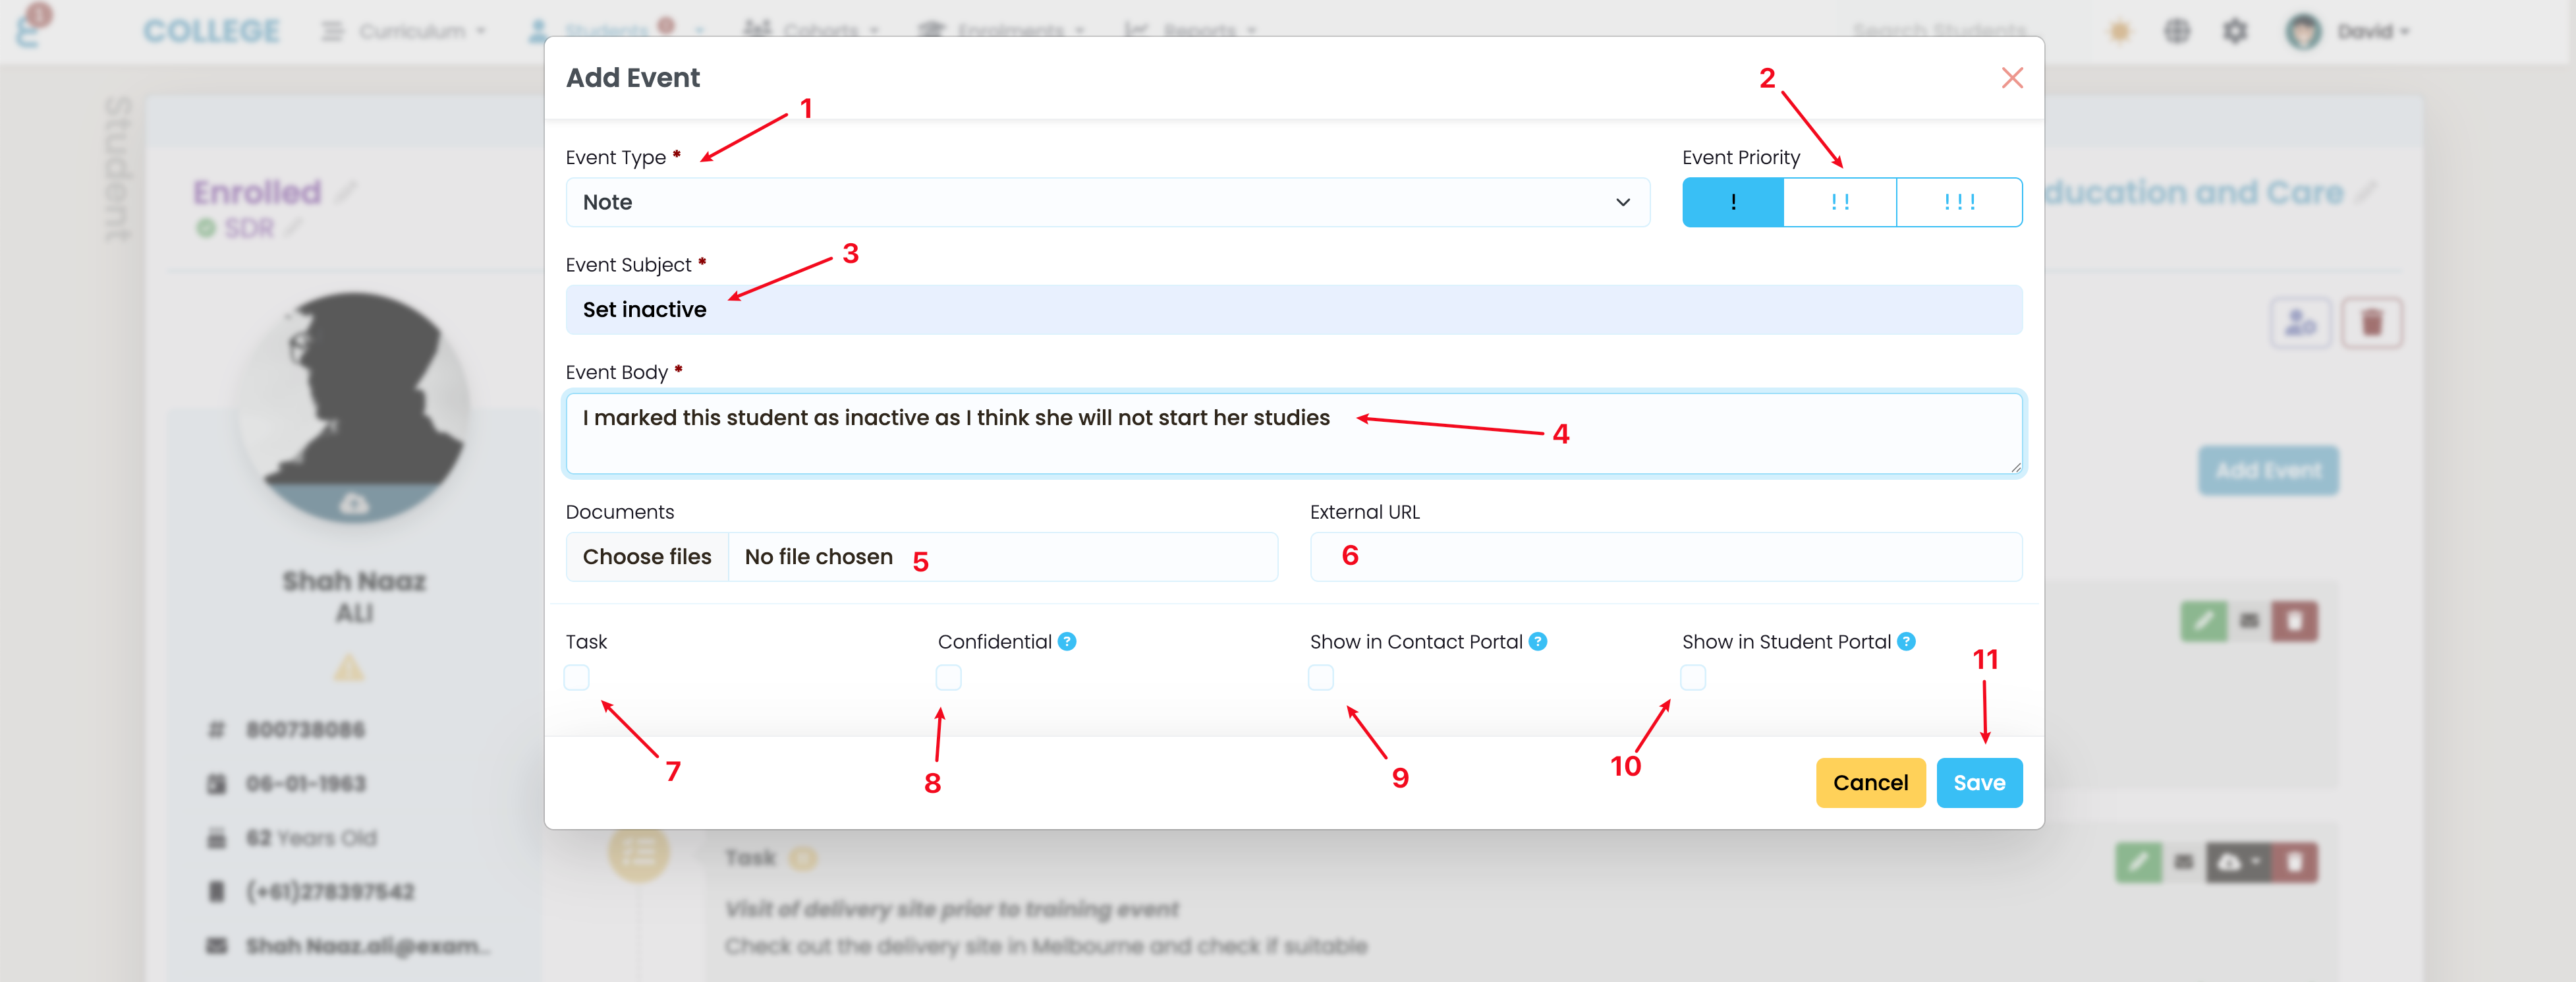
You may save an entry simply with a note type, a subject and a body but much more can be added here:
- Select the event type, there are system default event types but you can add more under “Lookup Data” in the settings of the system
- Select the priority of the event, this can be helpful later in the event log report or to raise the attention of an entry for a user or the urgency of a task
- Provide a subject for the entry. When sending an email from the system, the email subject will be stored here.
- Type your message, instructions, or notes here
- You can select a document from your local computer to be attached to the entry
- You can copy and paste a link to e.g. your SharePoint to link to a relevant file or website
- If you click the task button, further fields will appear to manage the assignee and the due dates of the task. This menu also automatically appears if you choose the event type to be “Task”
- Set an event lot entry to confidential if you want that only the author, and system users with the permission to see confidential notes can see the entry.
- Tick the Contact Portal option to show the event log entry in the stakeholder portal
- Tick the Student Portal option to show the event log entry in the student portal
- Save your entry and add it to the timeline
System Logged Events
The system also creates events automatically upon certain trigger events. The most important ones are:
- Status change of an enrolment
- Marking of components by the completion workflow
- Sent emails and text messages
Below is an example of an event log timeline with system generated events:
