Editing a Student Profile
A Student Profile has sections of information pertaining to the student and their time spent studying at your institution. In this guide we will be covering what these sections are and how to edit them.
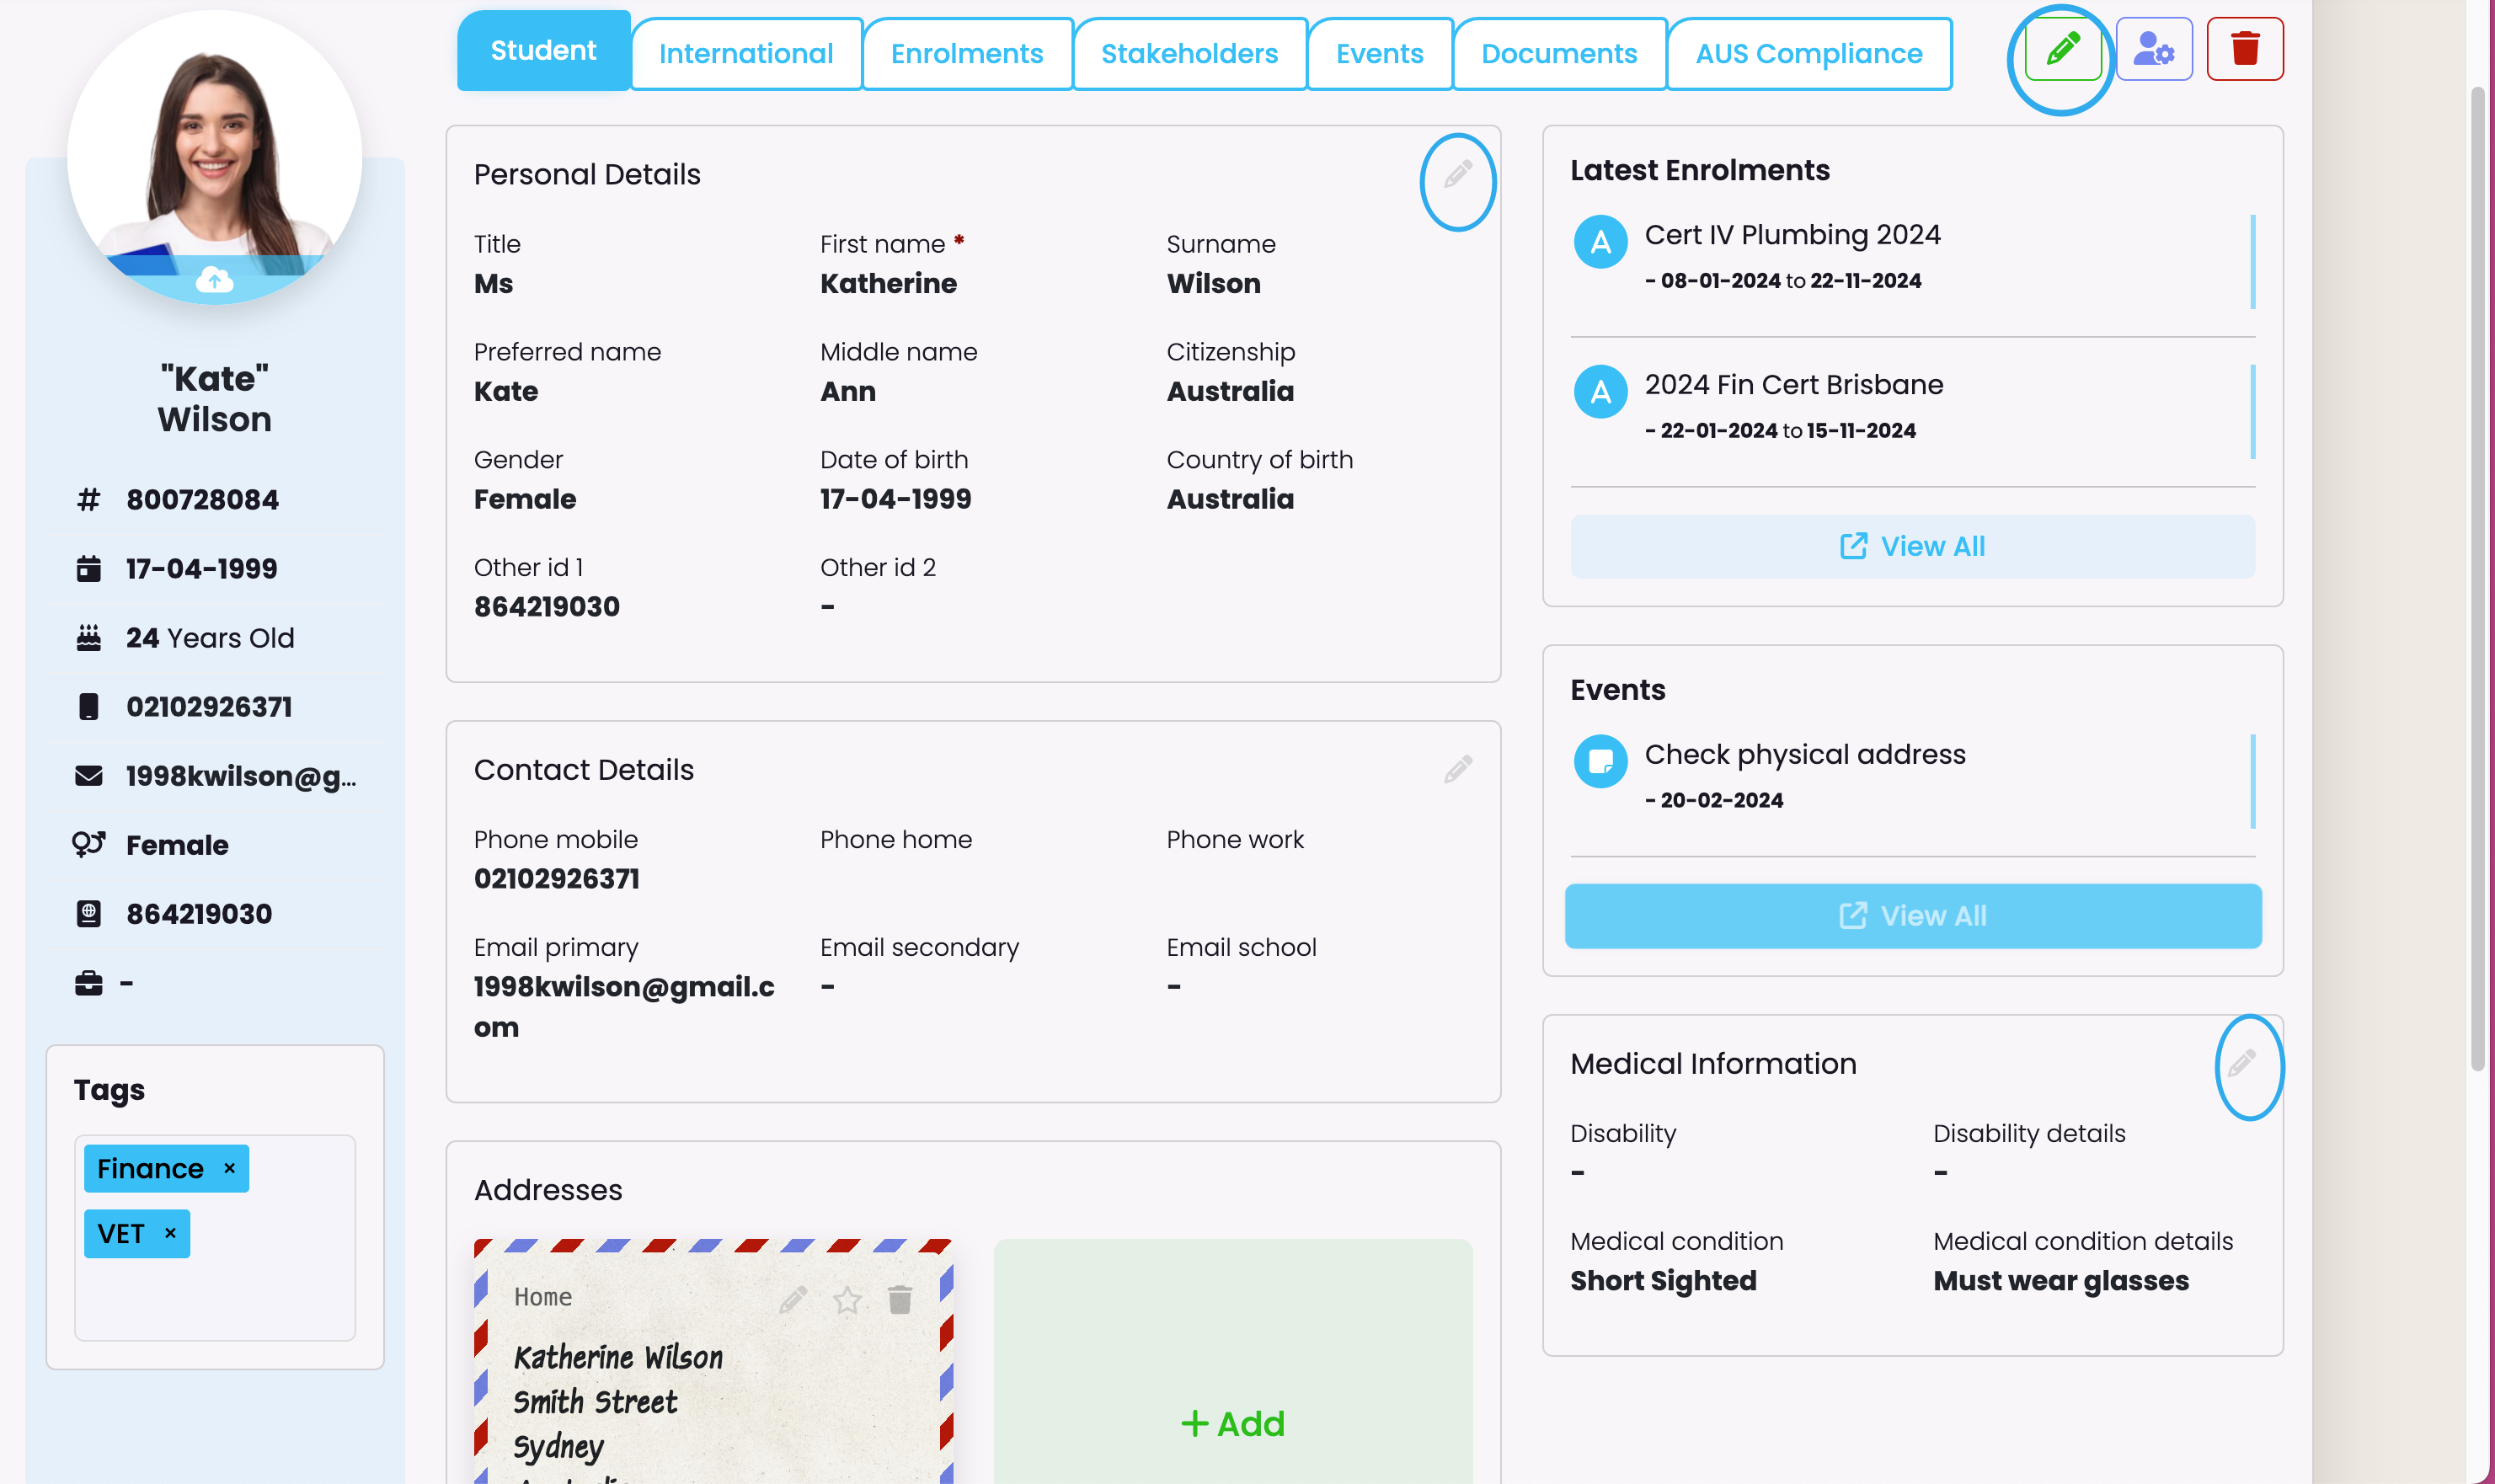
Top Bar – Student Details
- Edit this information by clicking on the grey pencils next to each section –

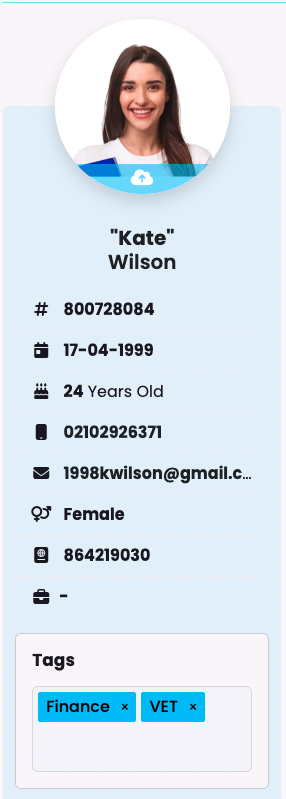
Side Bar – Student Snapshot /Tags
- This section provides an overview of key student details. Information will automatically be updated when changed in corresponding sections of the student profile.
- You can also add relevant Tags to the student’s profile here – check out article for SELMA Tag Manager here – and upload student photo.
To edit information on the front page of student profile click on the green pencil (right) or where available, the grey pencils on individual sections.
Top Tabs
Student profiles are segmented into 7 pages – each page can be accessed and edited via the tabs at the top.

Student
To edit these sections, click on grey pencil or green pencil, right.
- Personal Details
- Contact Details
- Financial details
- Medical Information
Latest Enrolment + Event sections to be accessed via tabs.
Addresses
- To add a student address, click on add –
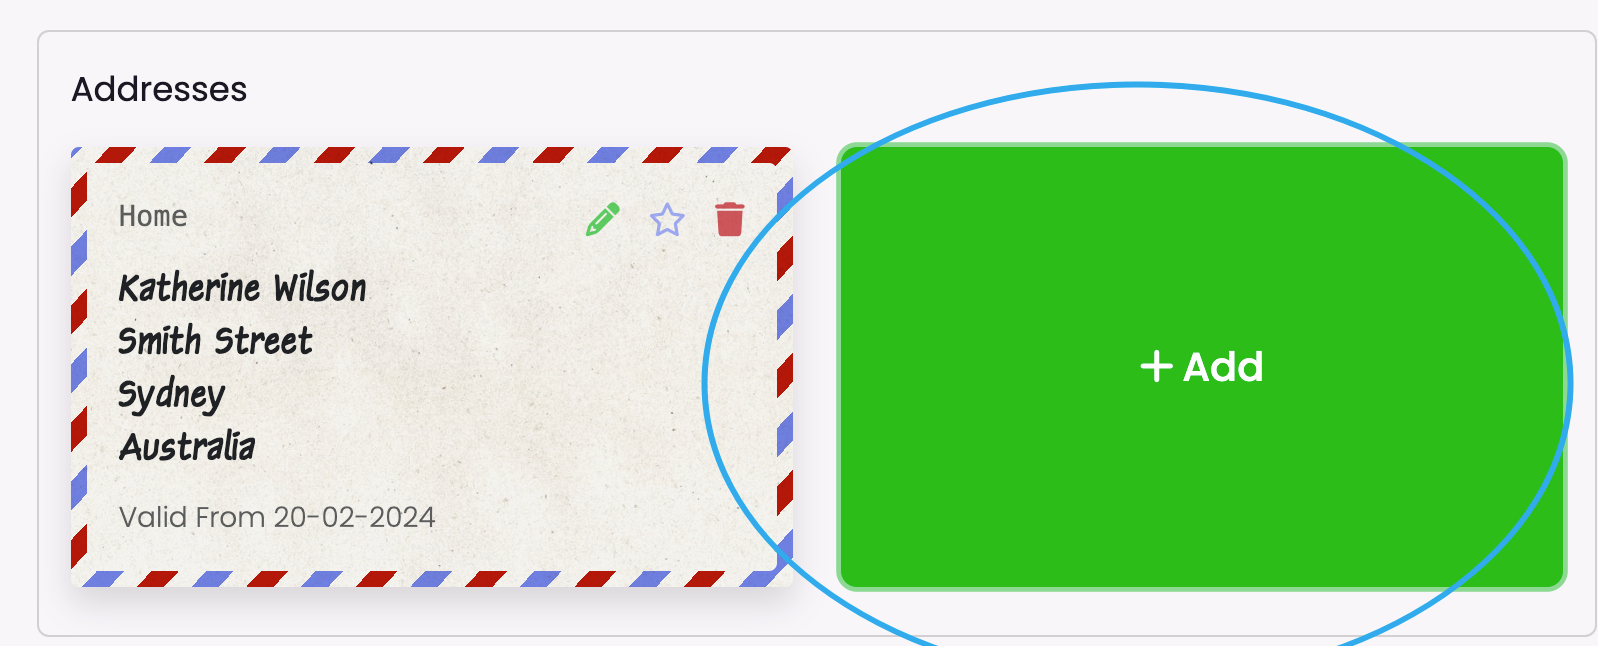
- Enter student details and click ‘Save’
NOTE: For NZ compliance, NZQA requires an address. In SELMA, you must set one of the addresses as the default so the system can fetch the address for NZQA reporting.

International

Enrolments
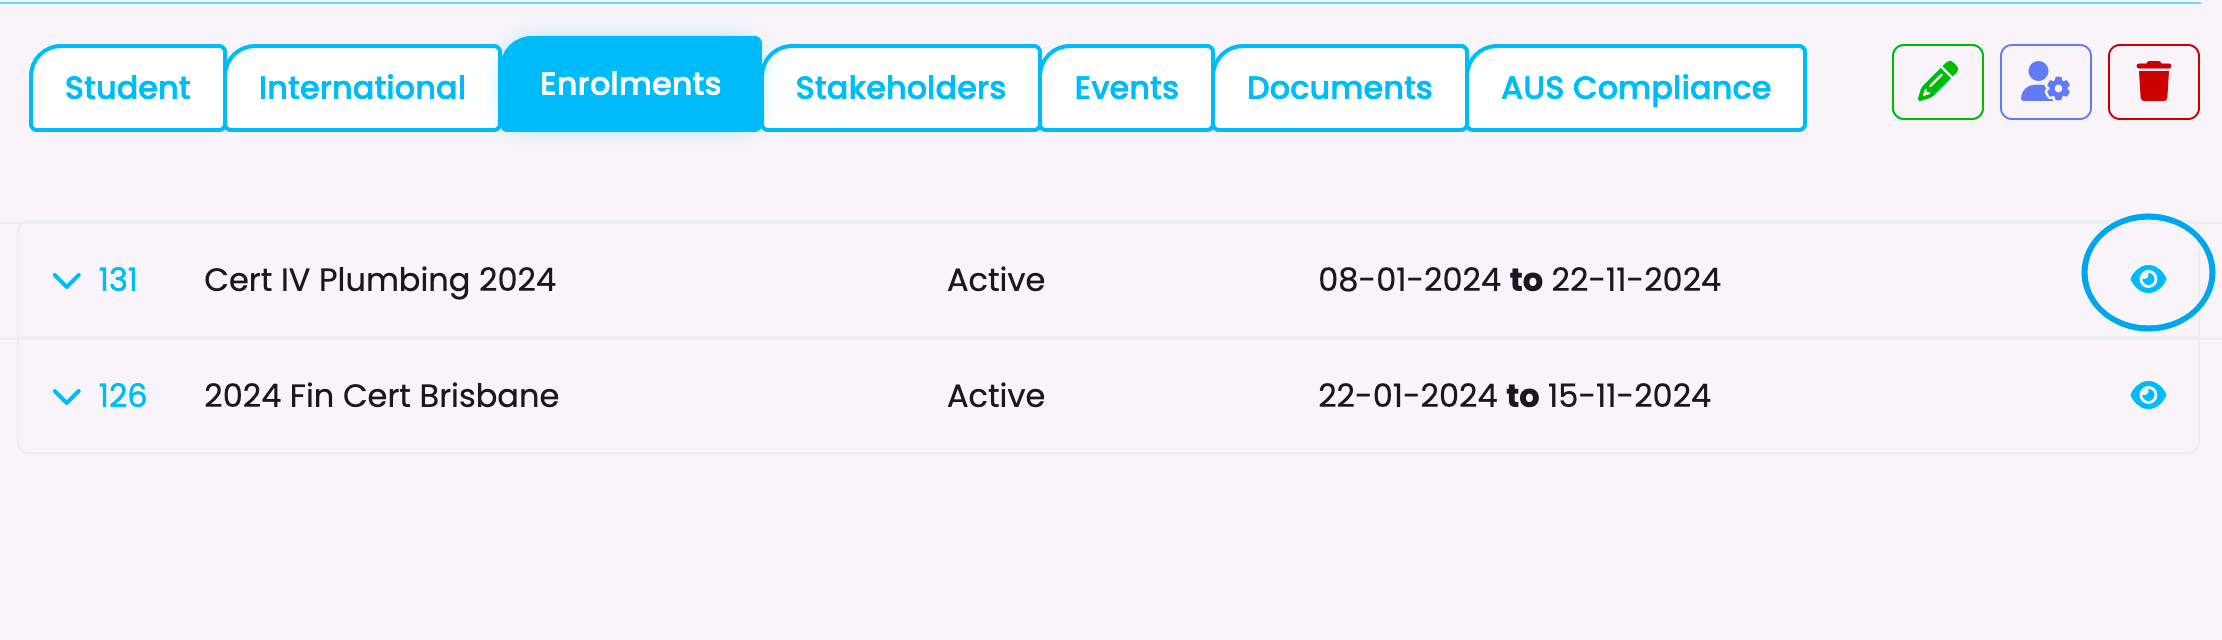
To view and edit Enrolments click on ‘Eye’ icon to navigate to Enrolments section in SELMA – details will open in a separate tab in your browser.
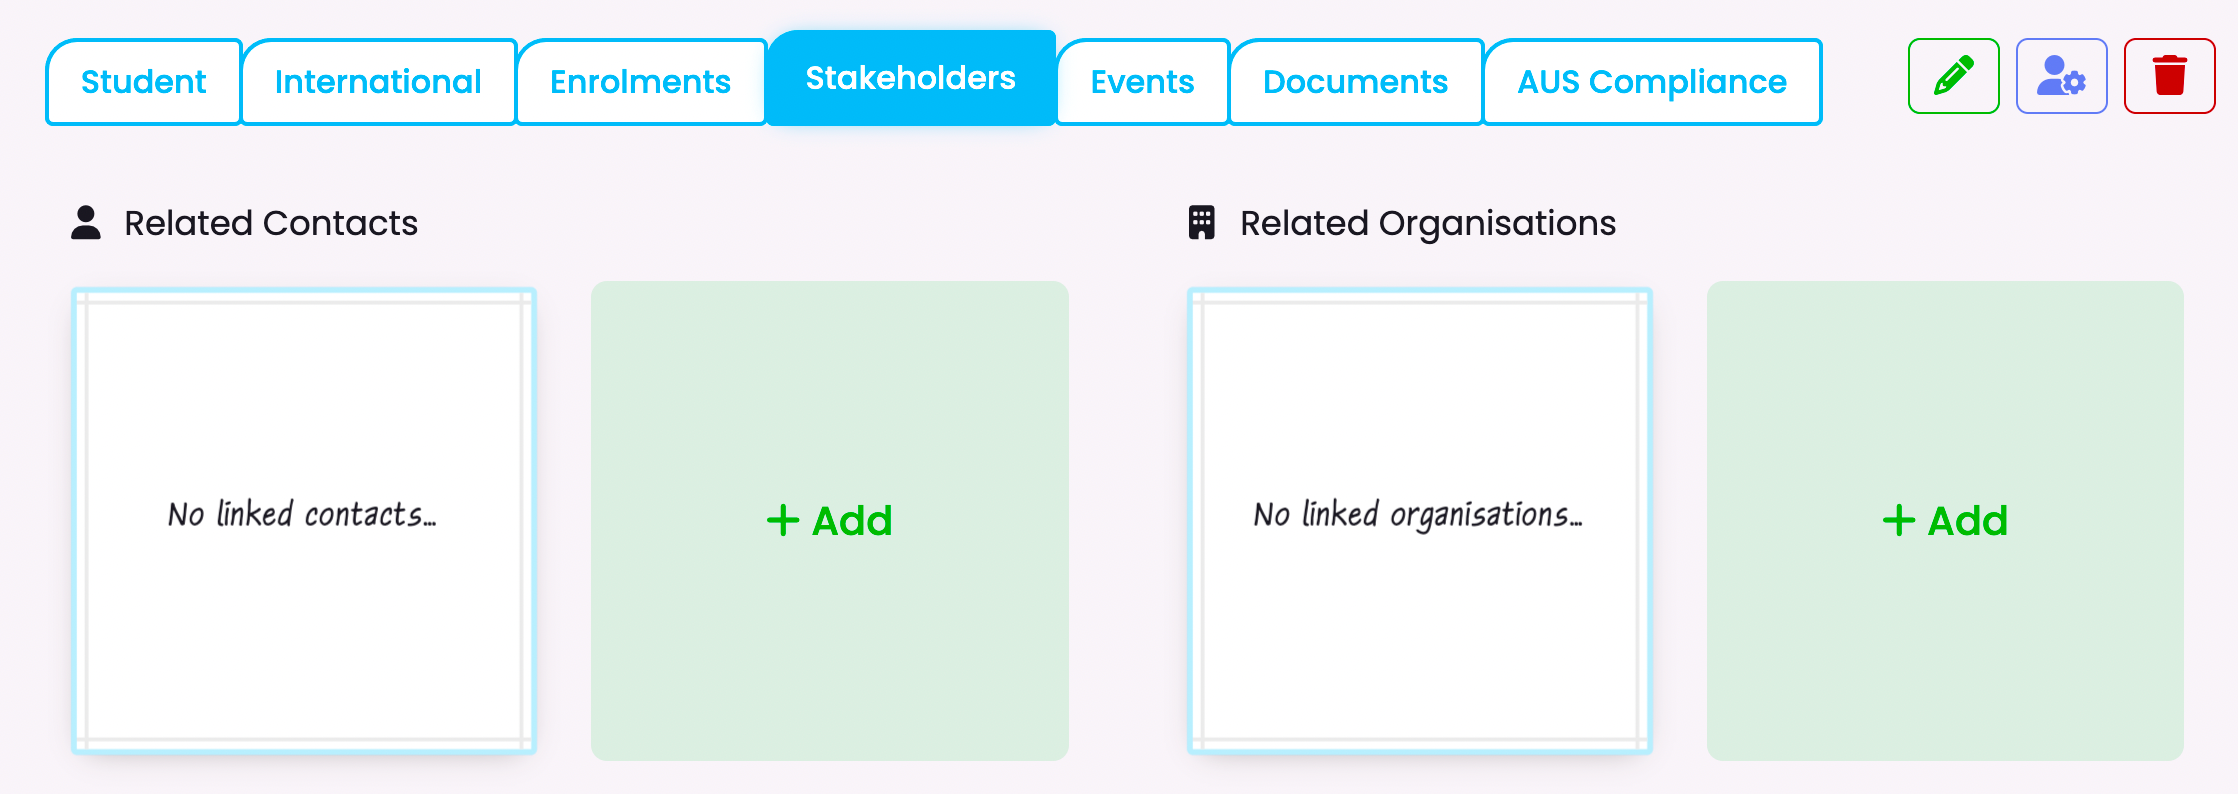
Stakeholders
Relevant Contacts and Organisations can be added to a Student’s profile via the Stakeholder tab. You can view article on creating Contacts and Organisations in SELMA here.
Adding Related Contacts –
- Open Stakeholder tab and click on +Add
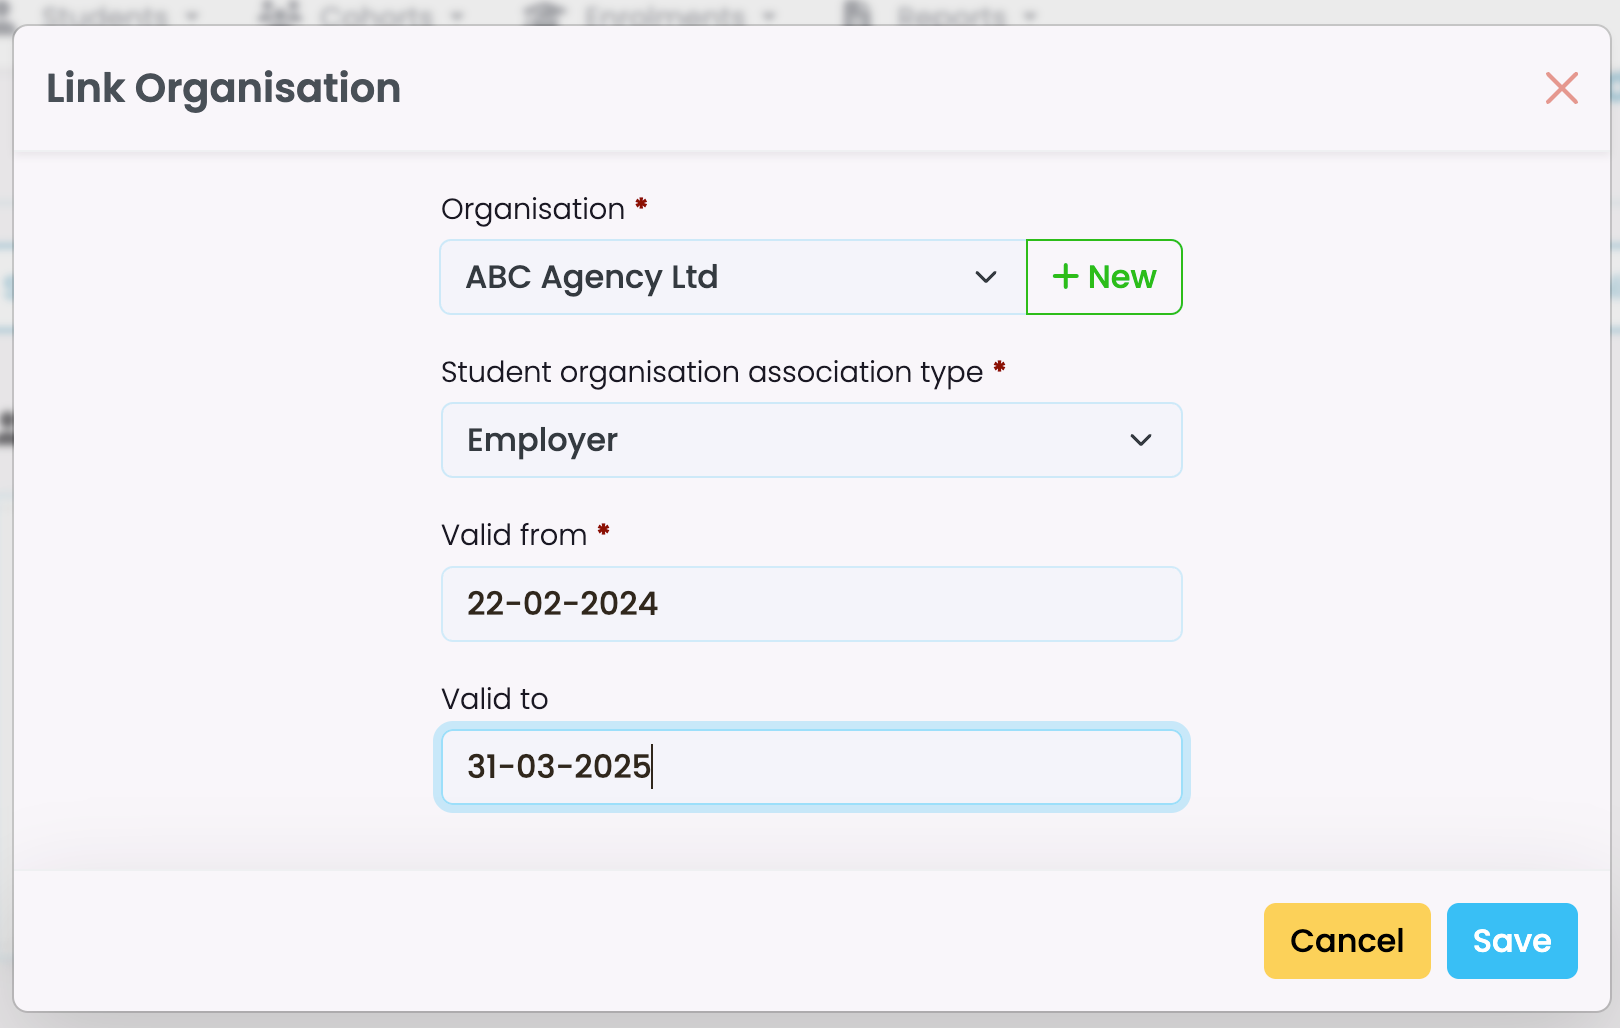
- Select relevant contacts. Association type, tick Emergency/Primary/Include in Student Comms / and length of time that contact is valid for.
- Click Save
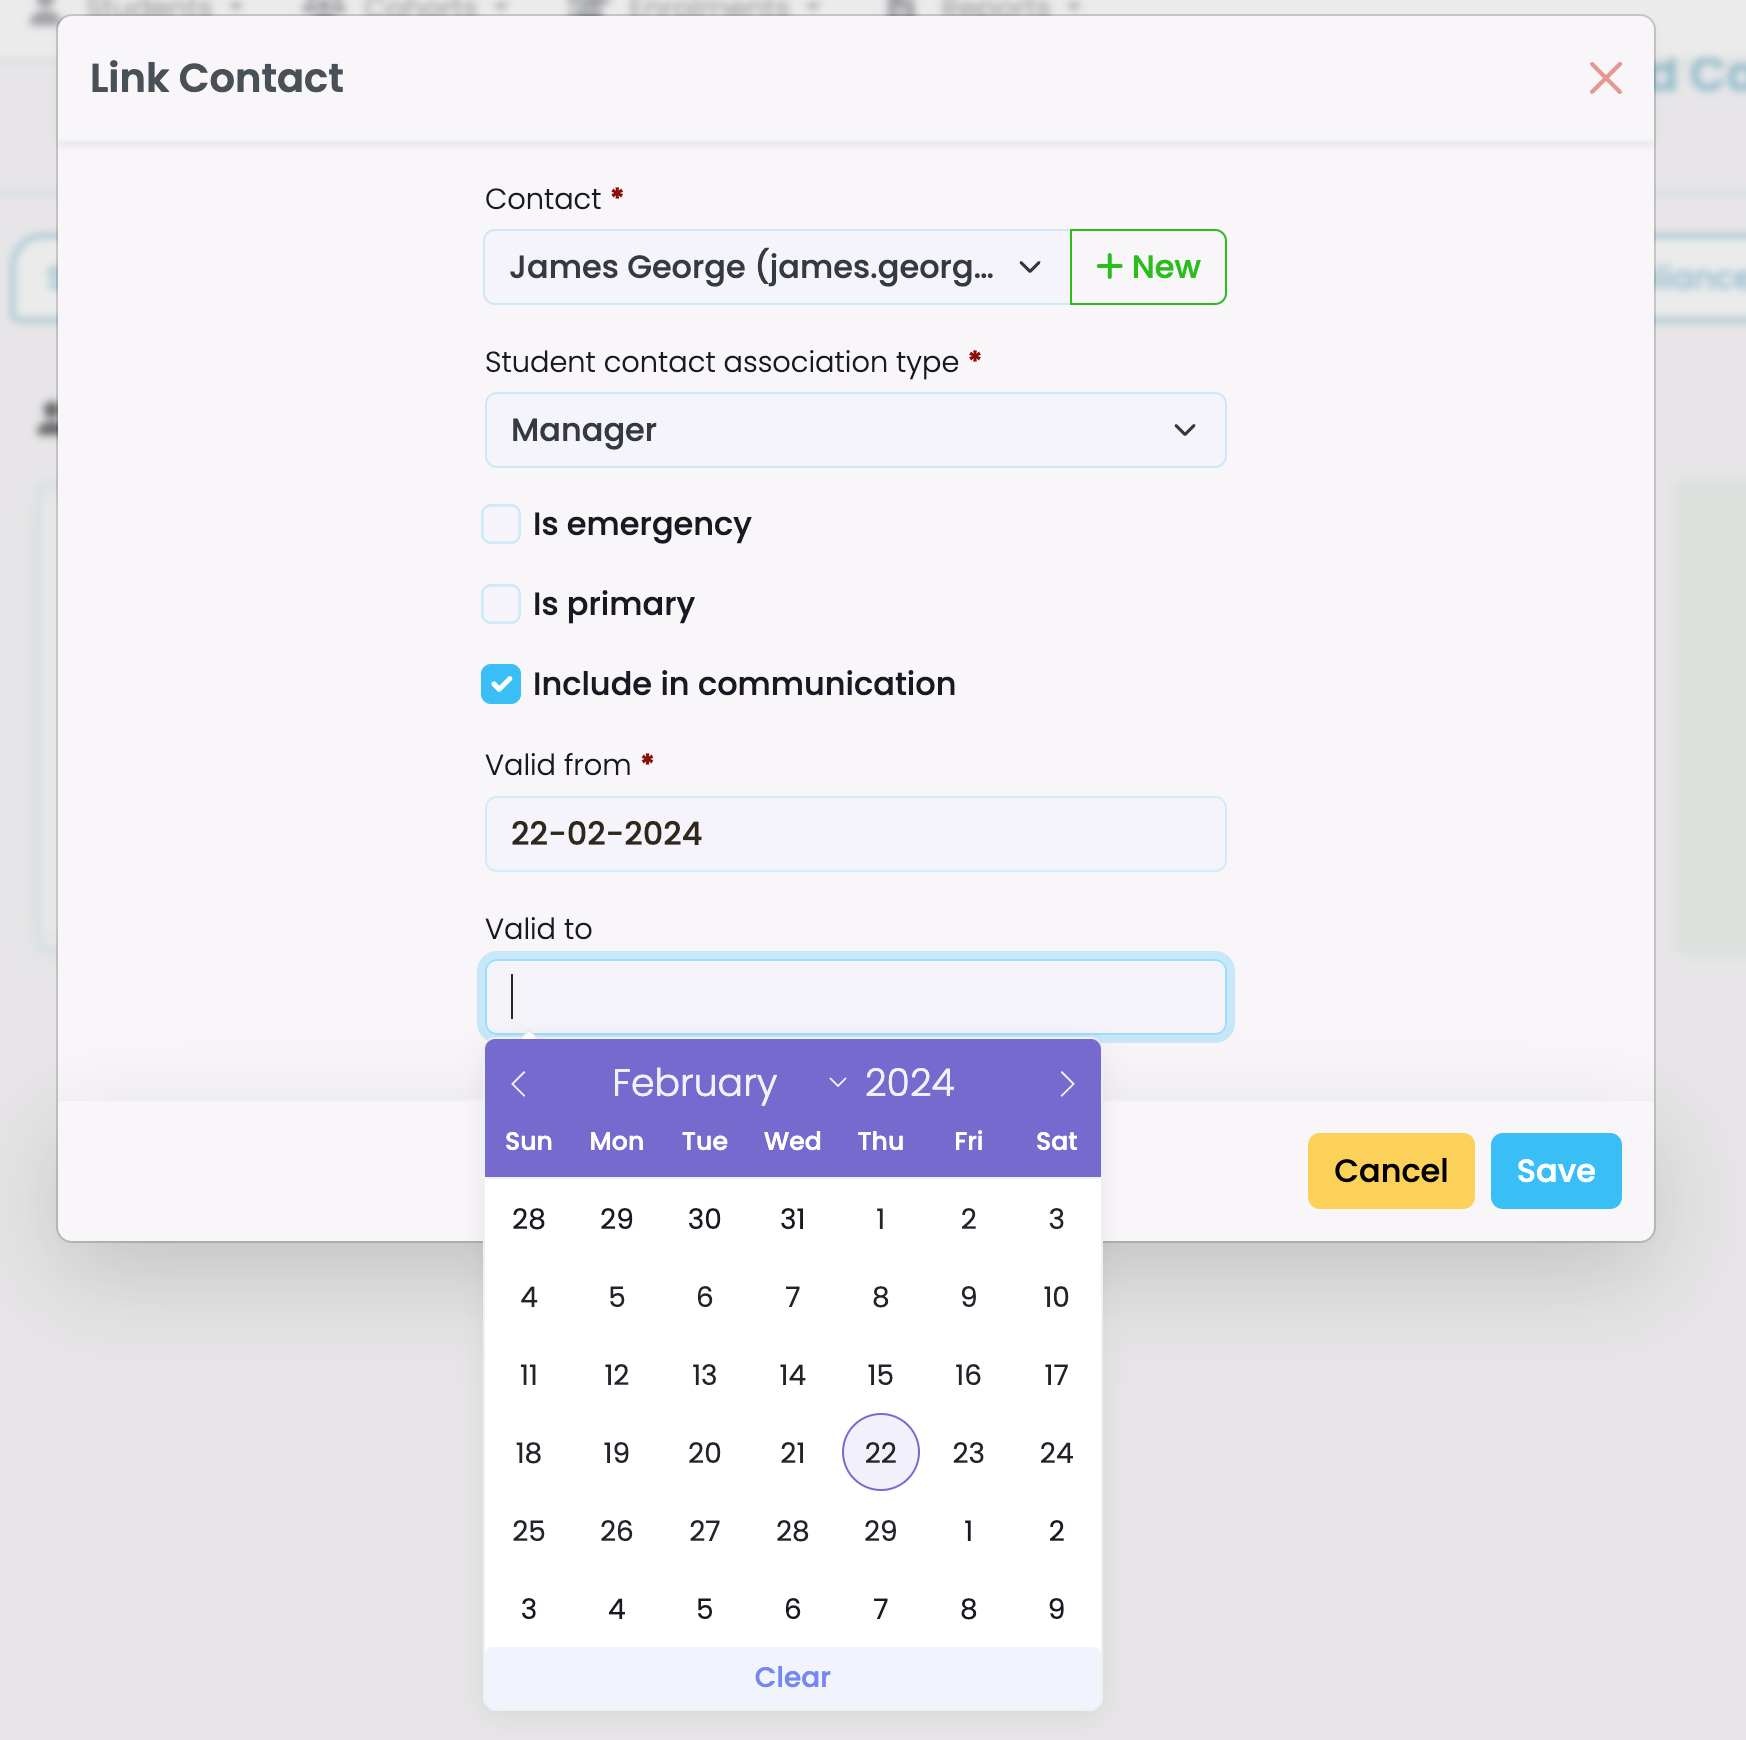
- Contact card will then appear in Student Profile.
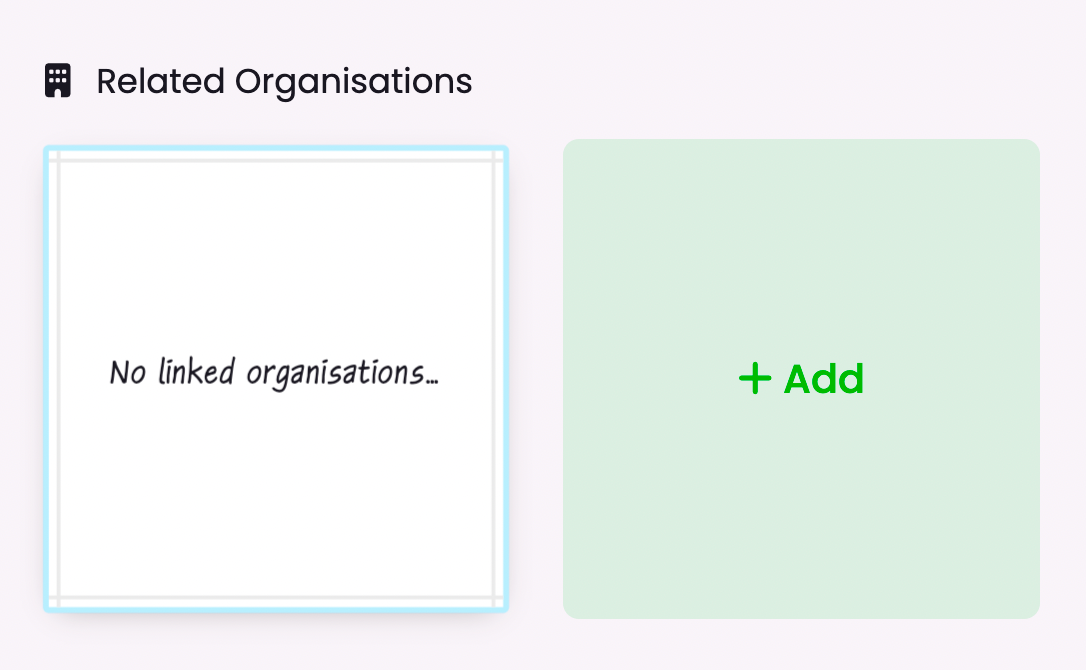
Adding Related Organisations –
- The same steps can be followed here –

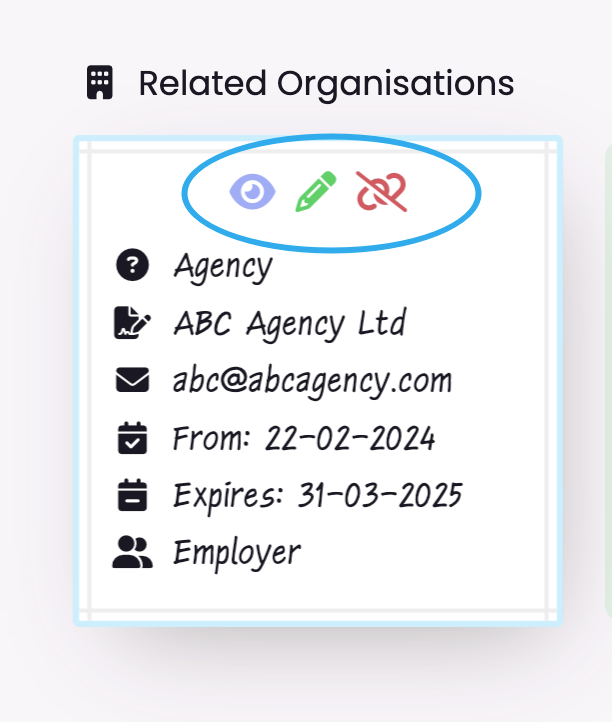
Unlinking Contacts / Organisations –
- When you click on these cards, they spin around to reveal details. There is also options to View (Eye) / Edit (Green Pencil) and Unlink the Contact/Organisation from the student profile (Red Link)
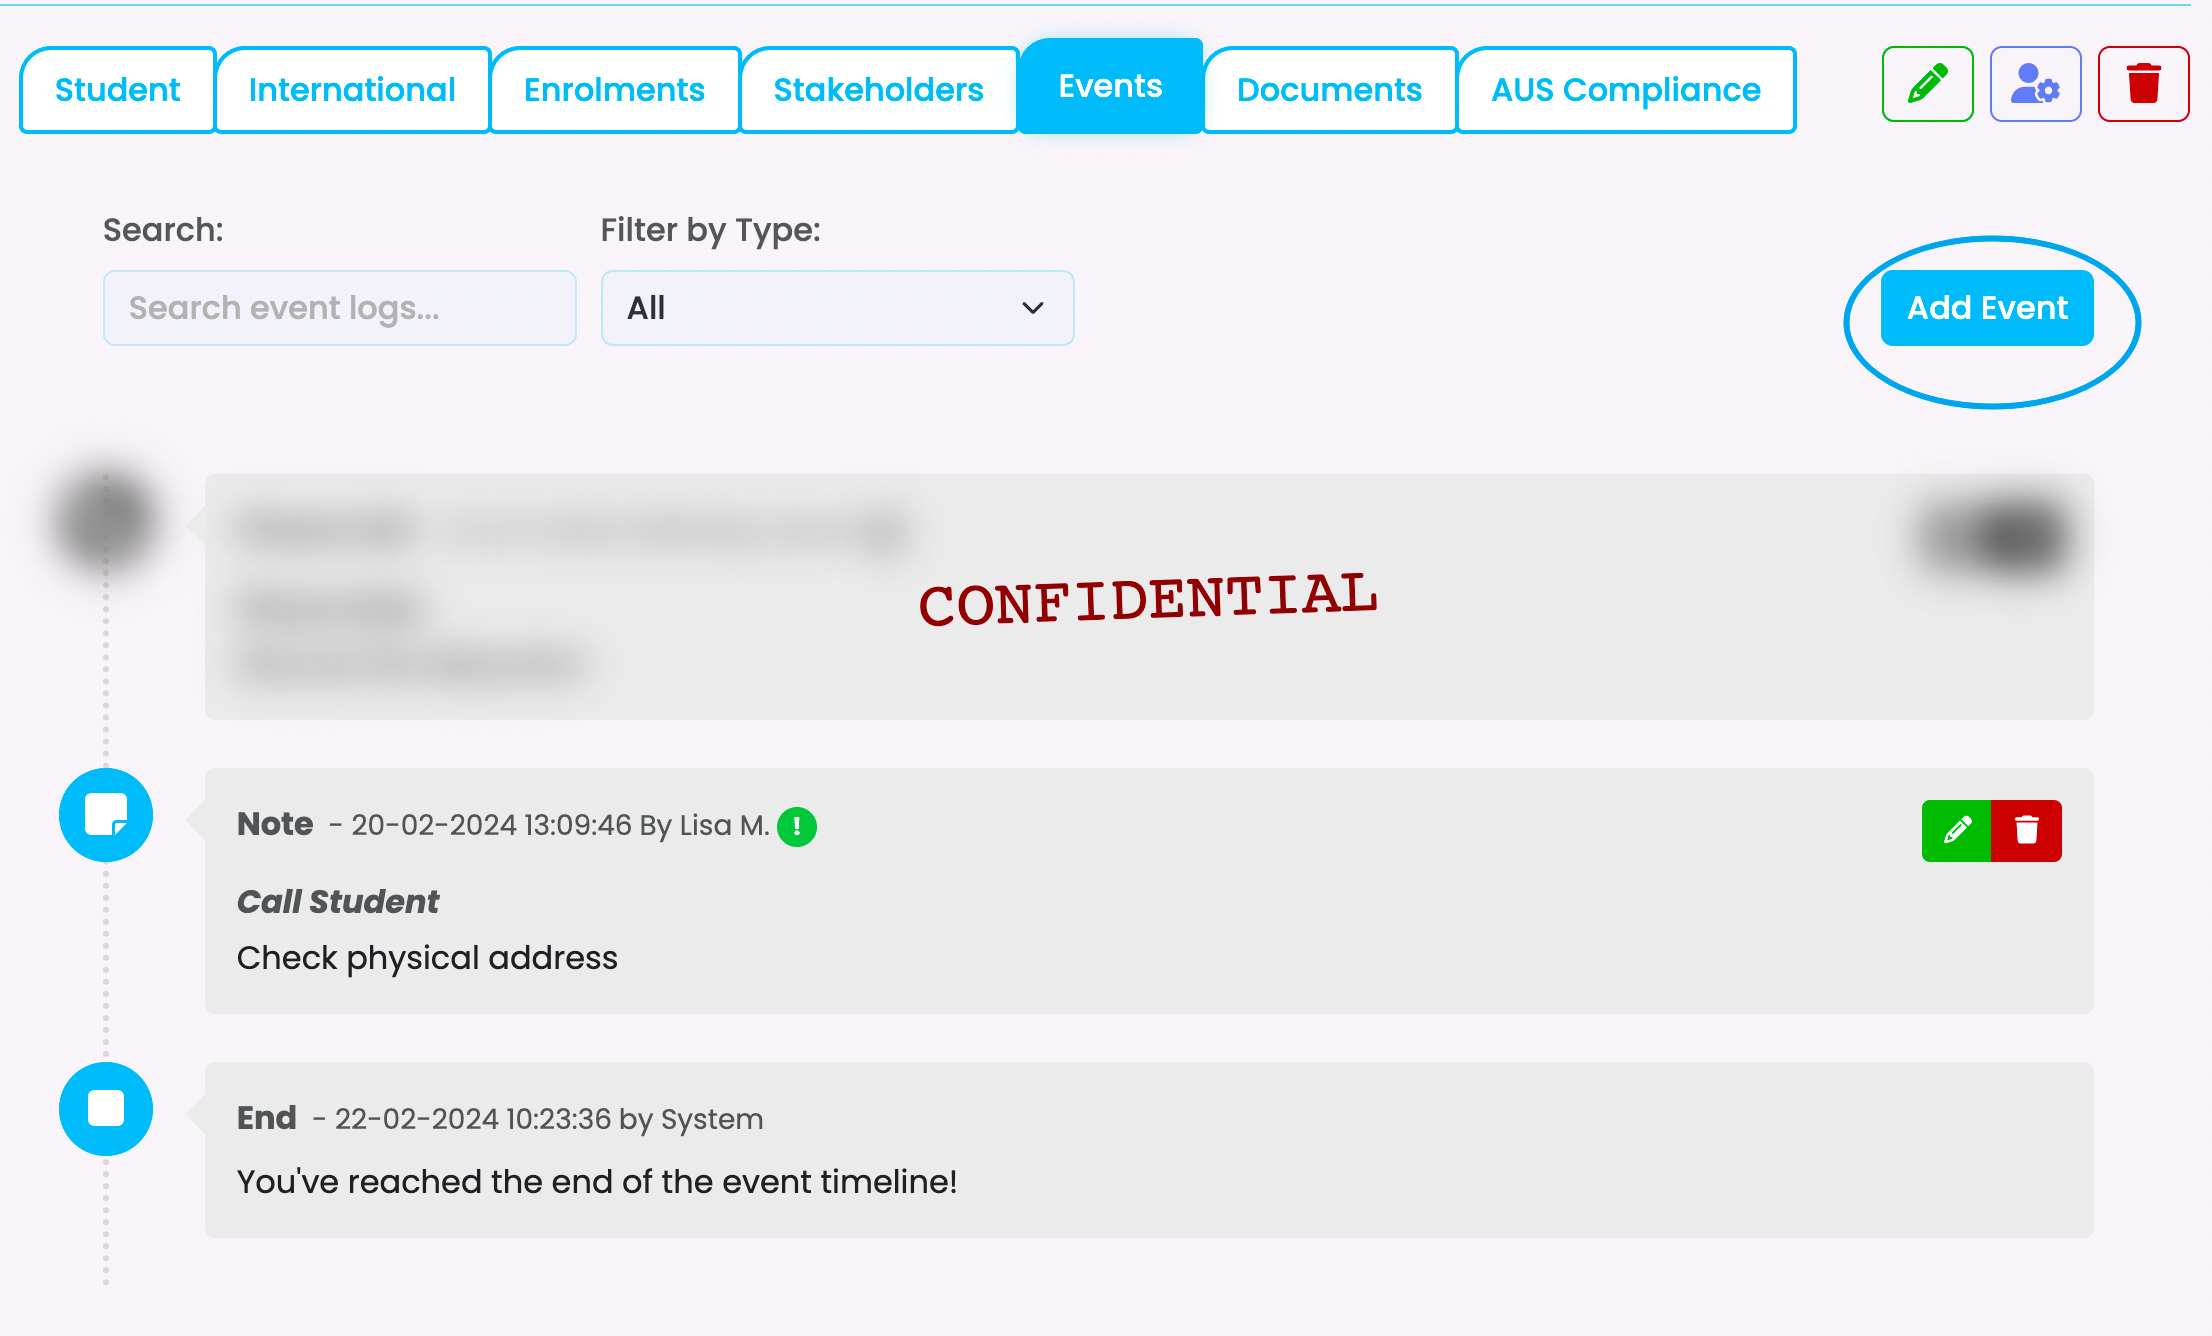
Events
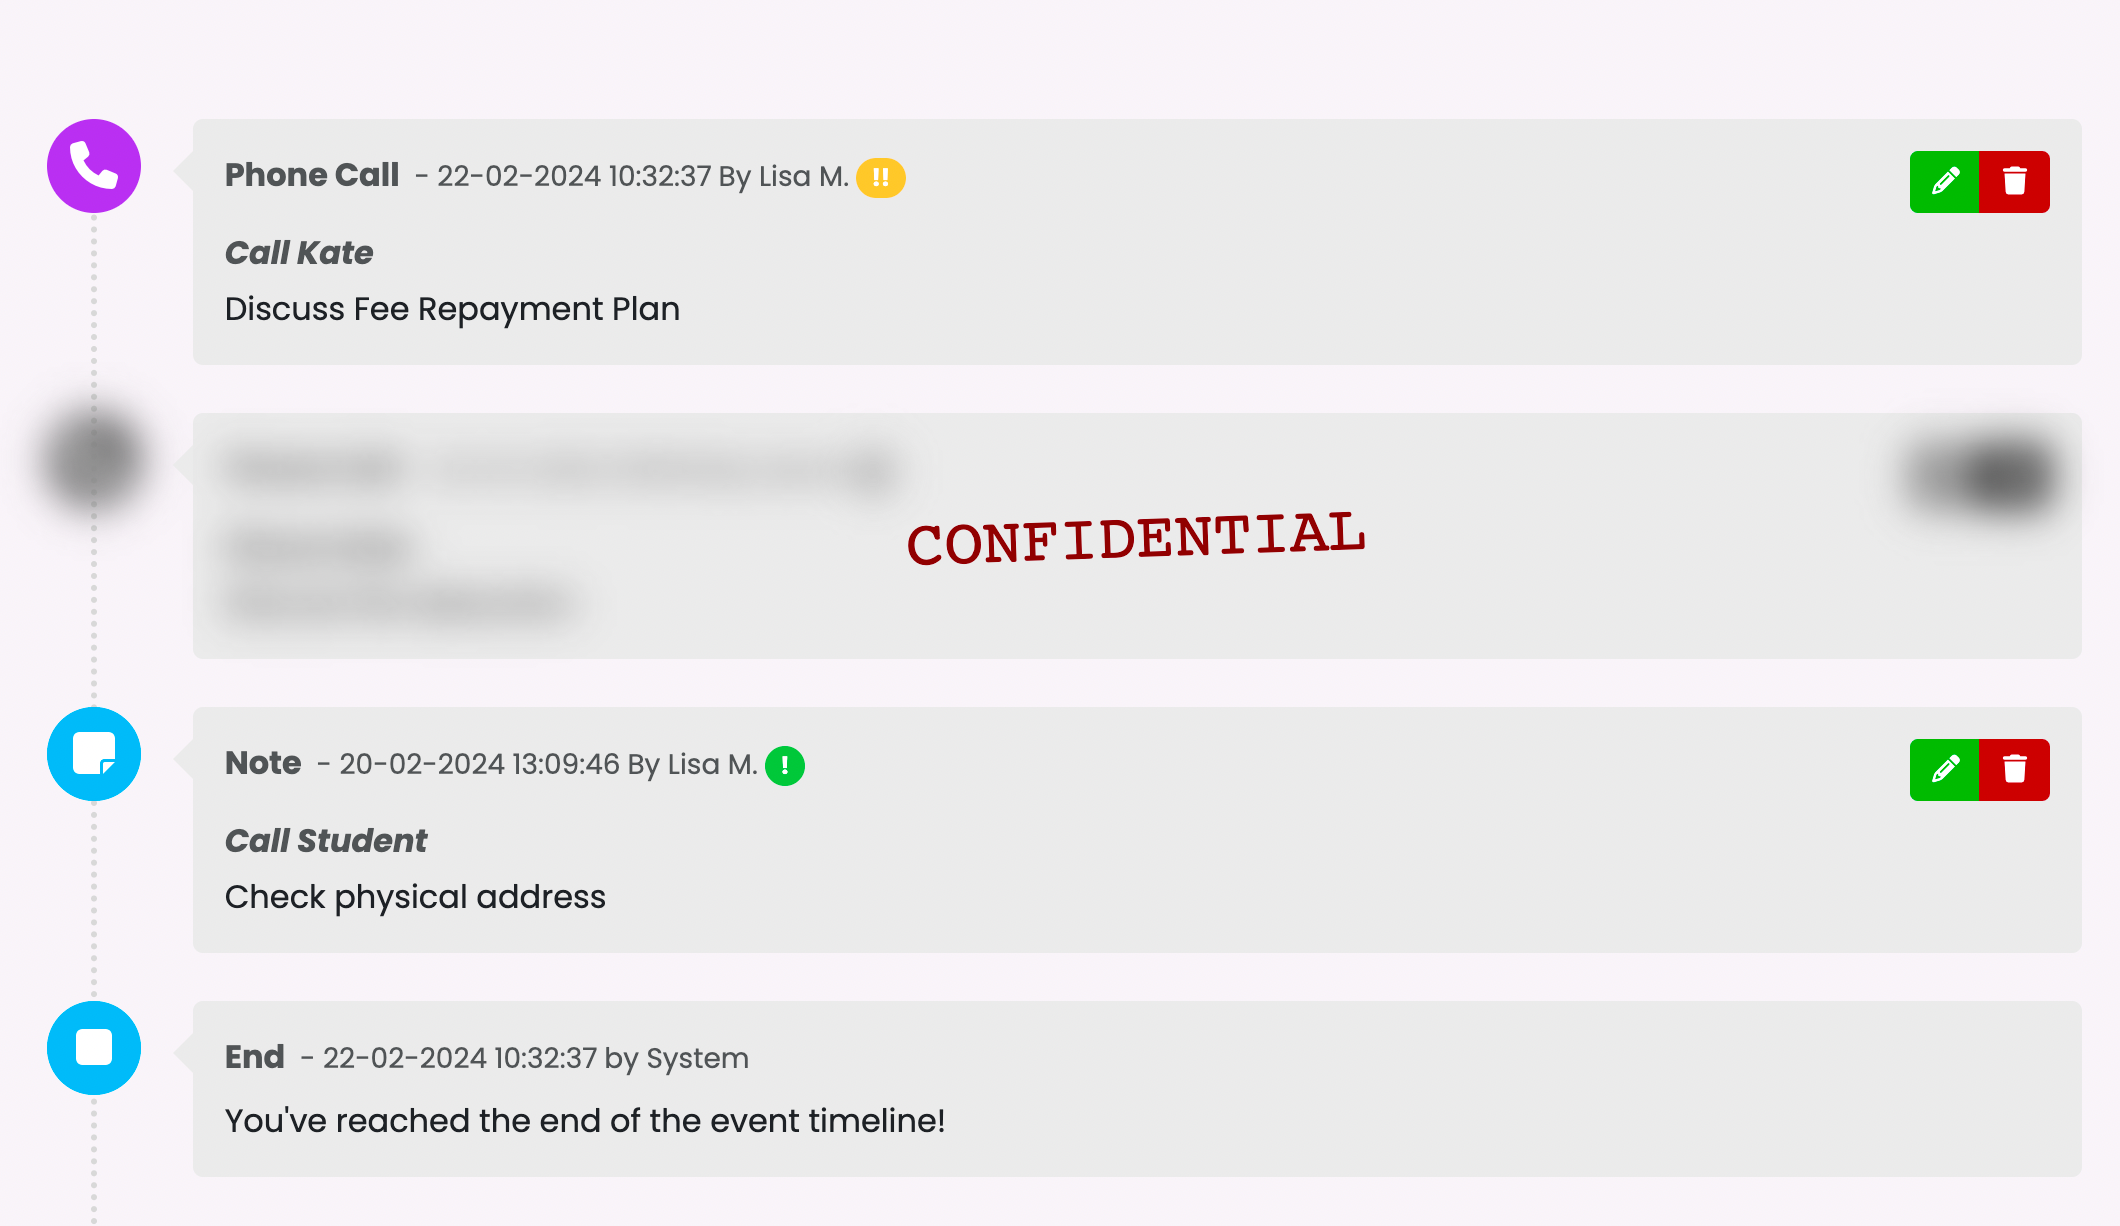
The event scheduler can be used to add notes and allocate various tasks pertaining to a specific student.
- To add an event, click on ‘Add Event’ (right)
- Complete event details –
- Event Type / Event Priority
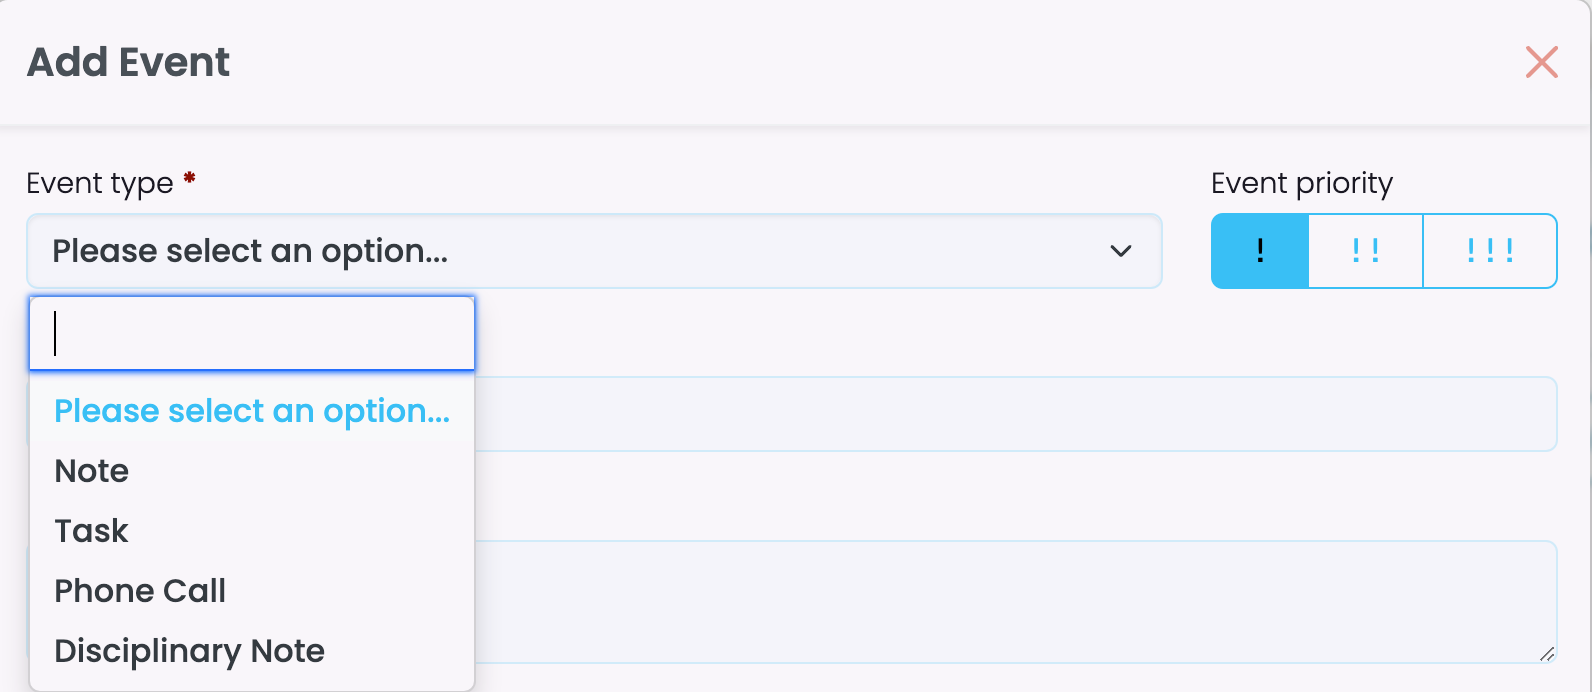
- Event Subject / Event Details
- You can upload relevant document / add URL
- If the Task box is checked, you have the option to allocate it to a member of your team and select a date that the action must be completed by – these allocated tasks will appear on the users main dashboard.
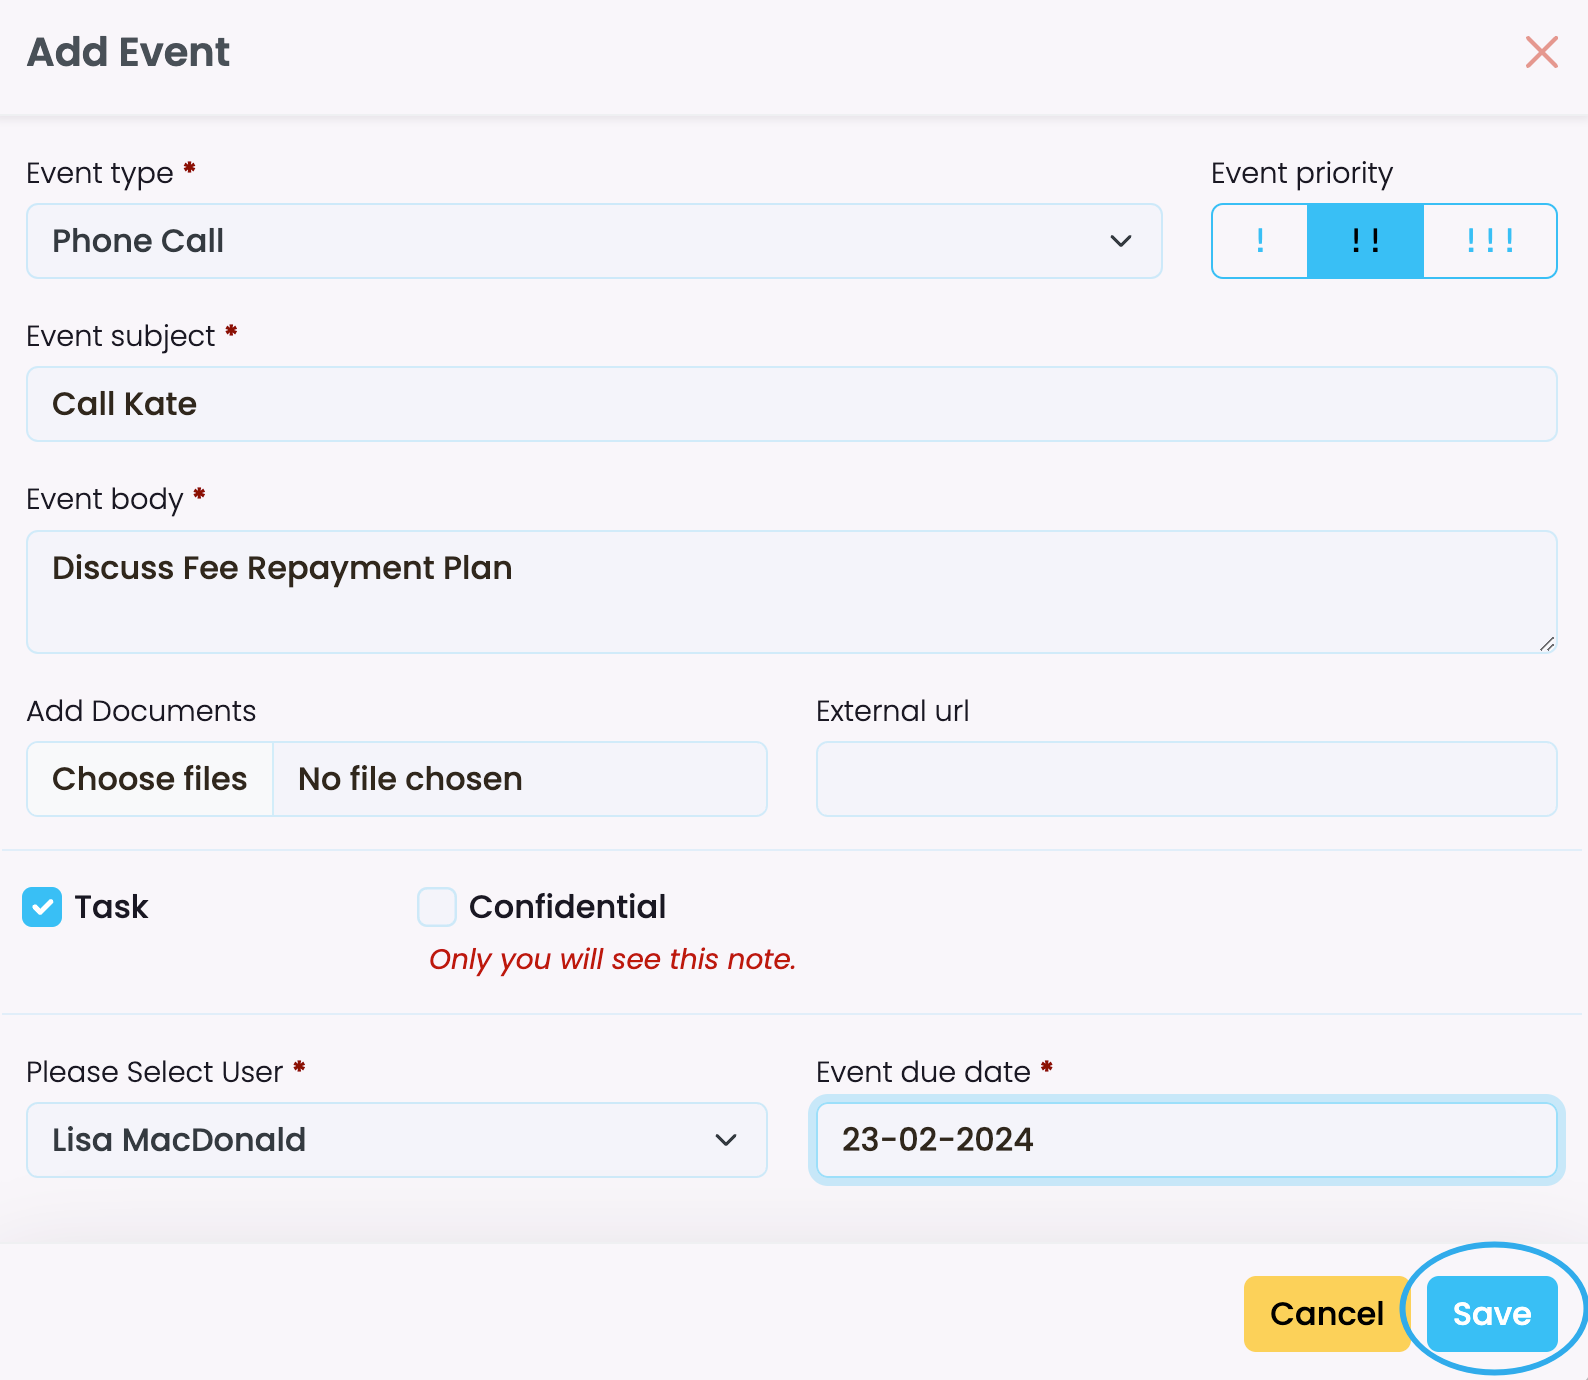
Note: If you check the ‘Confidential’ box, only you and the relevant User will see the details.

The event will be recorded in event log–
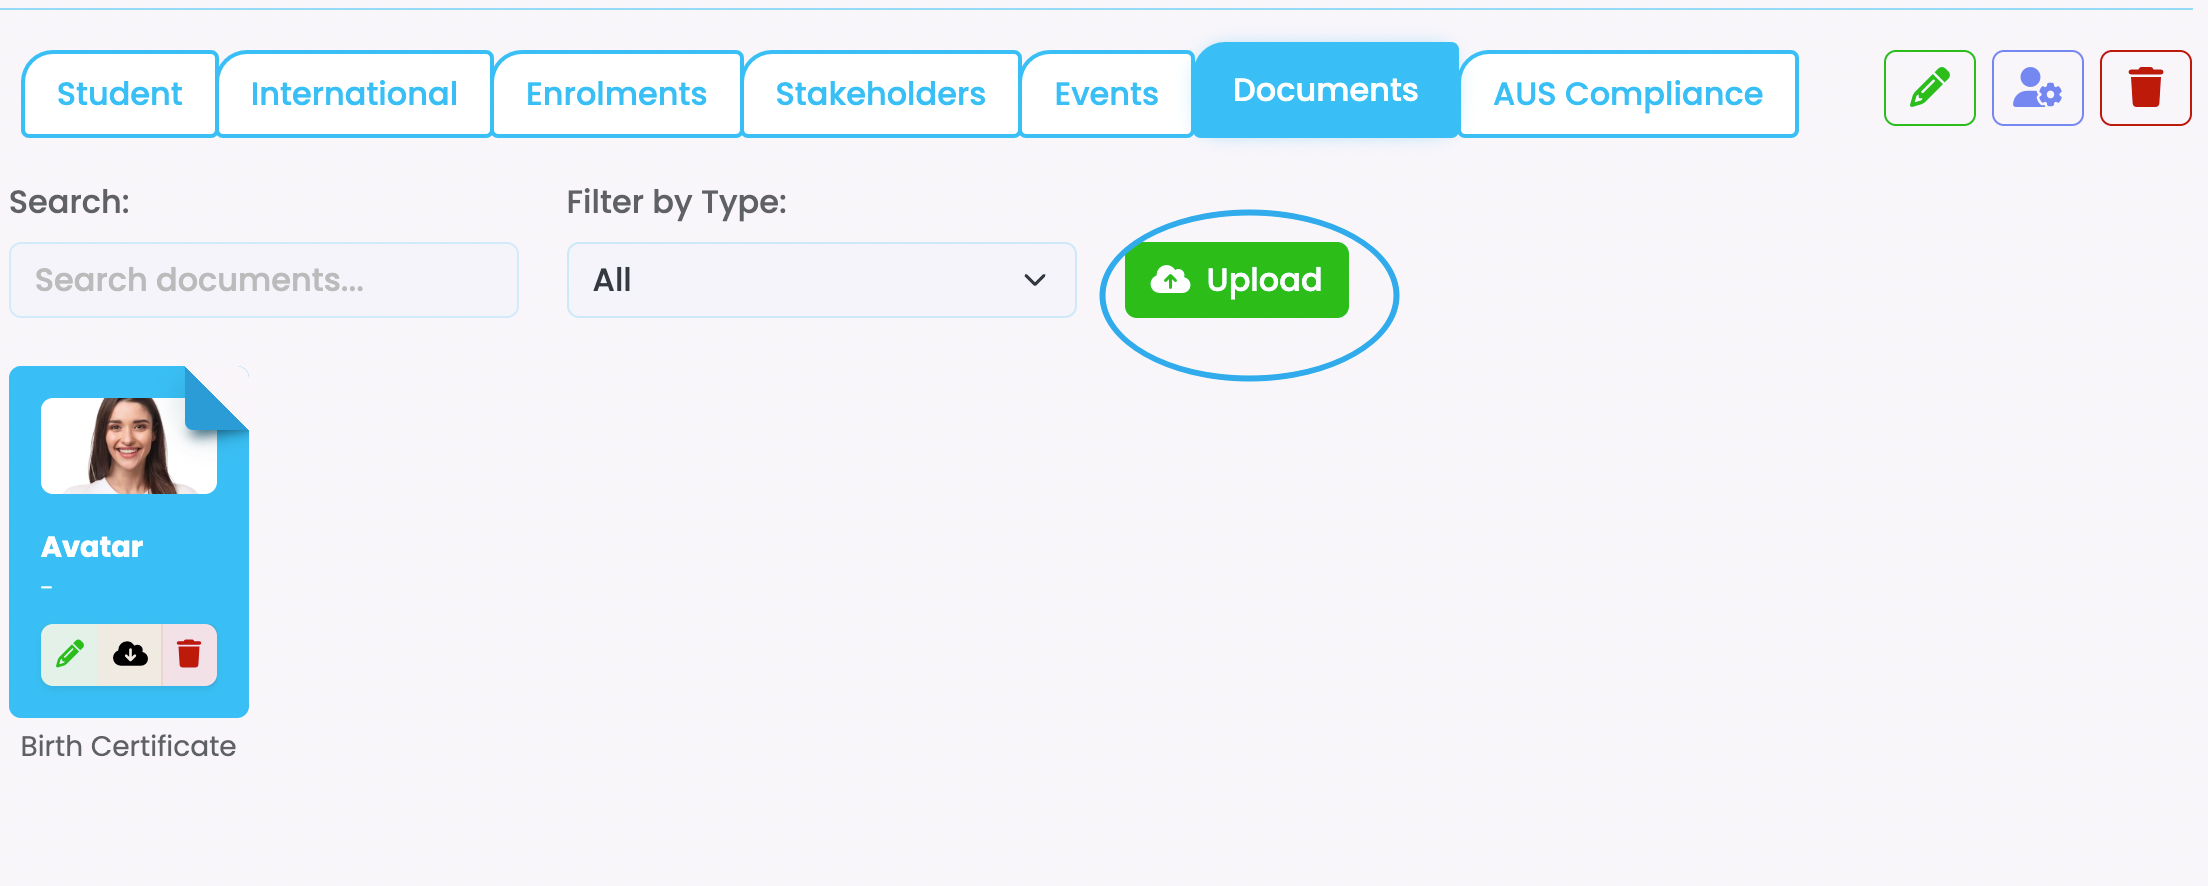
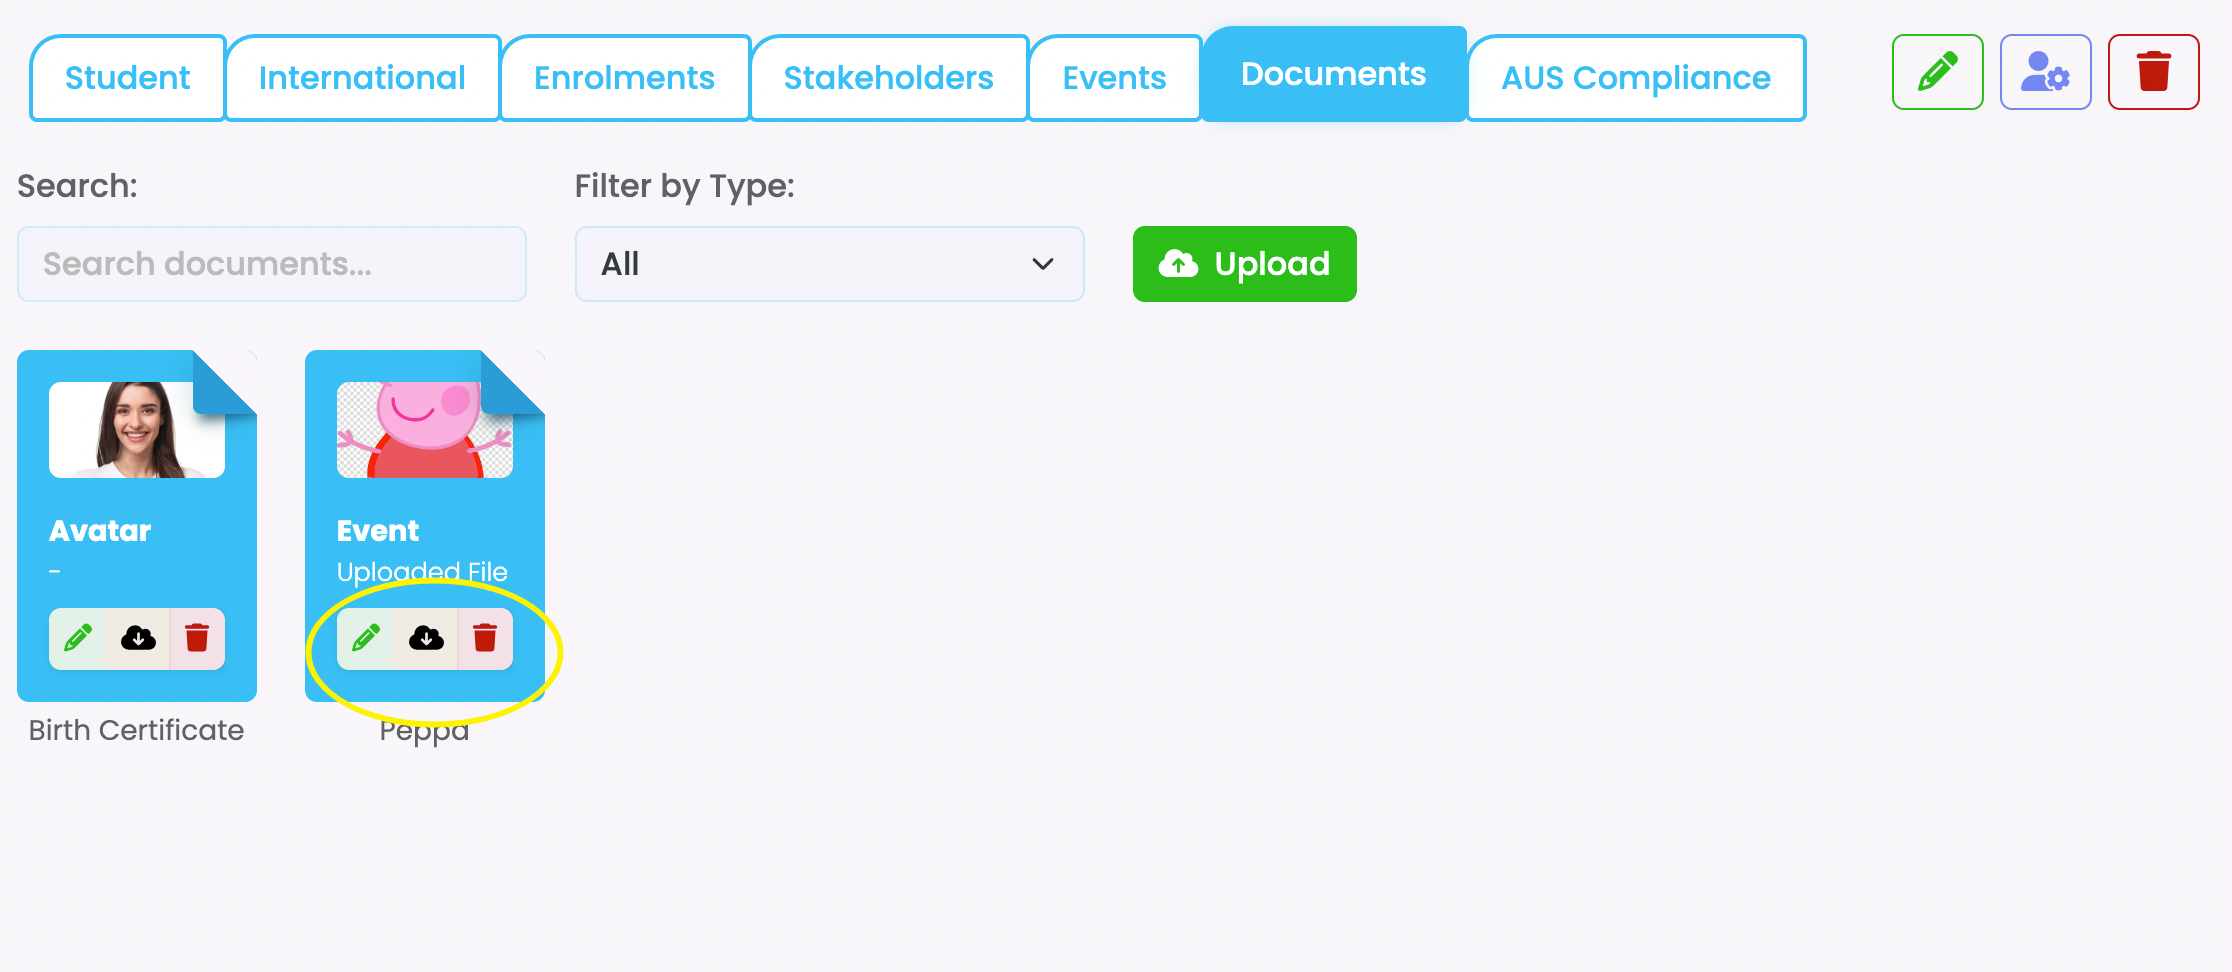
Documents
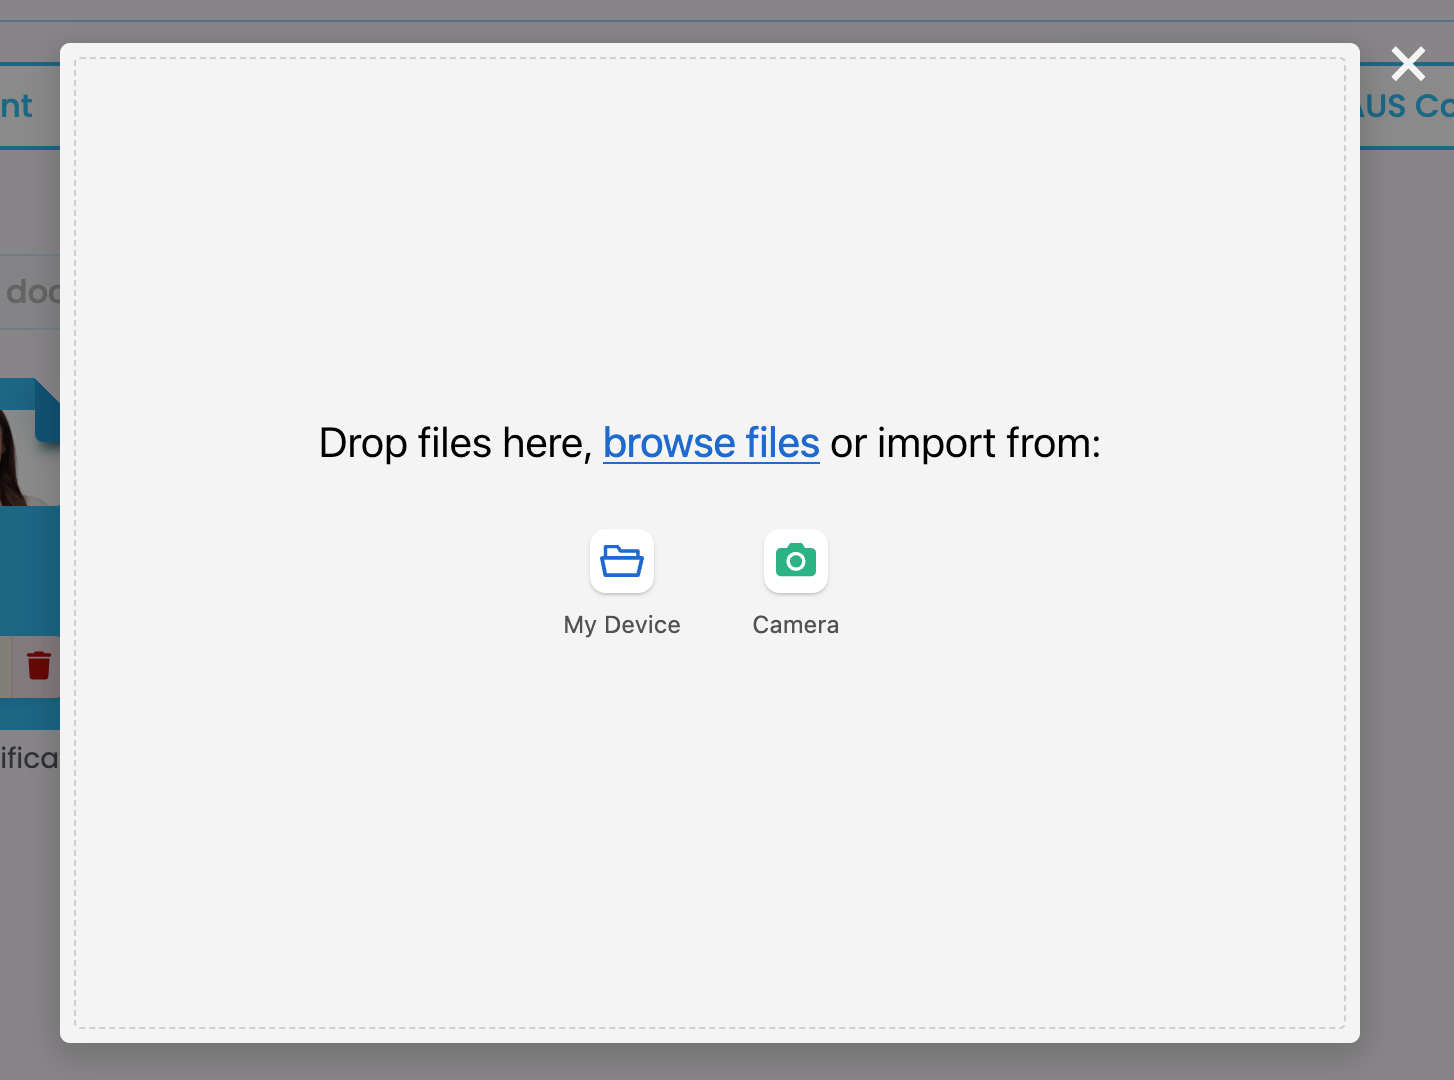
- Click Upload
Select documents from your computer / device or access device camera to take a photo and upload directly.
- Edit document details – green pencil / Download document – black cloud / delete document – red bin
- Filter documents by type
- Search for documents
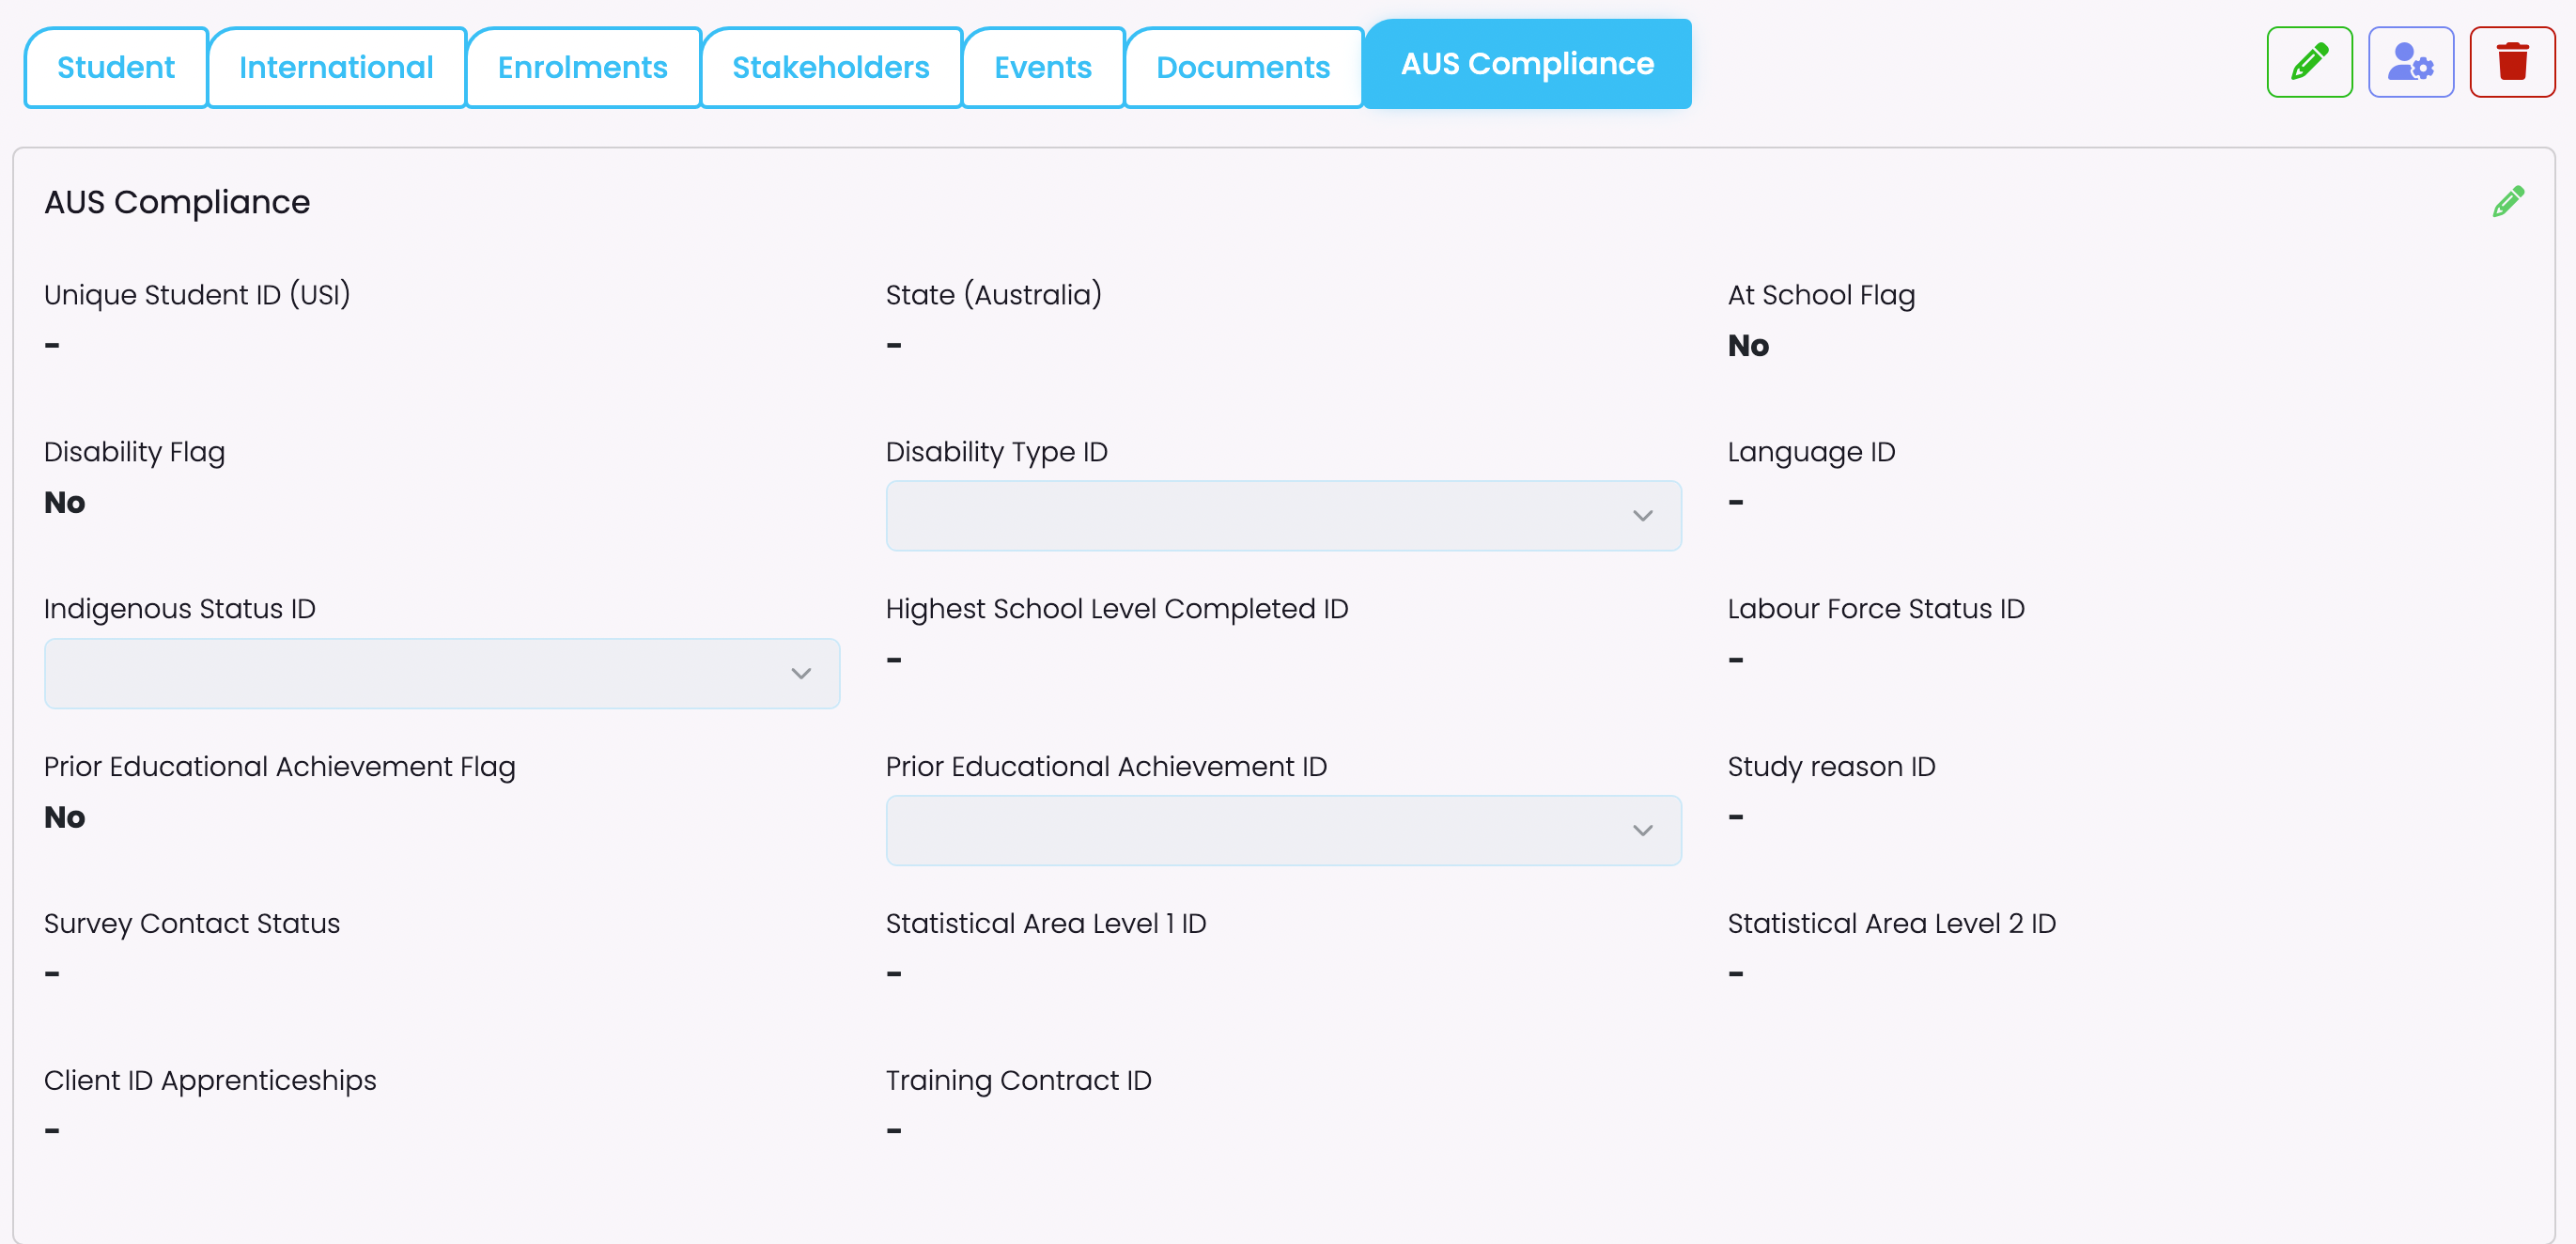
Compliance