NZQA details standard learning outcomes that should be met by New Zealand education providers through the delivery of a Unit Standard or Qualification. When these outcomes are successfully achieved by a Student, you can reward them with an NZQA-approved certification.
In this Section:
Prepare File Downloads
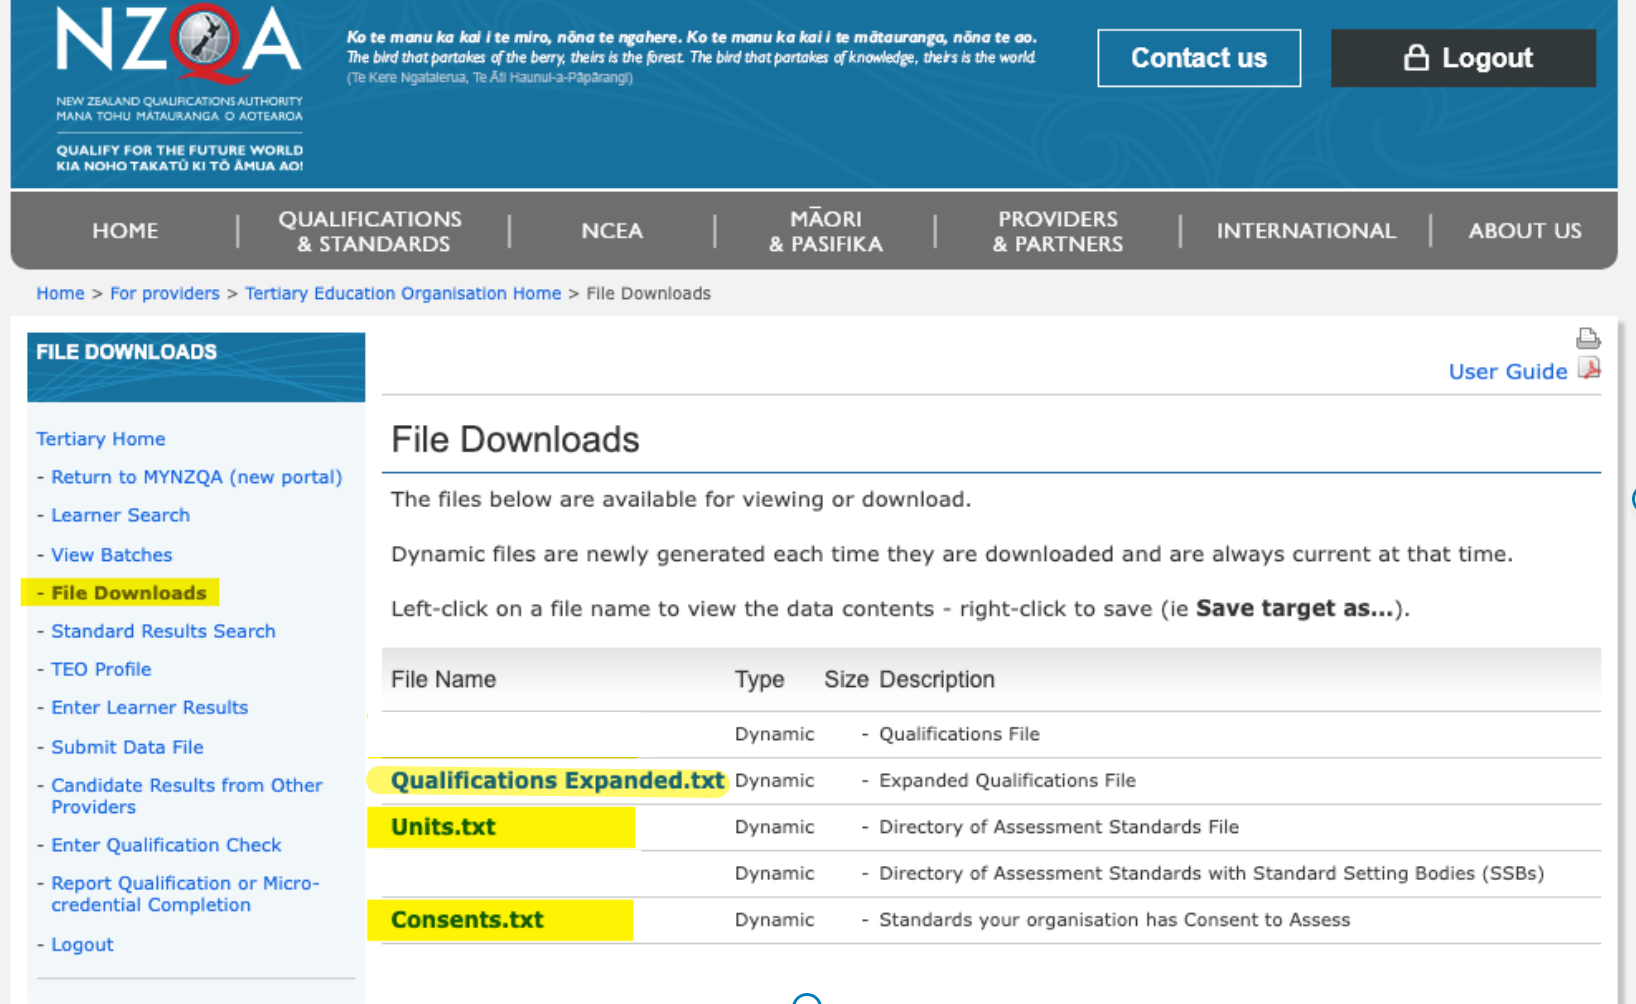
If you haven’t already, login to your NZQA account and download the following files:
- Qualifications Expanded.txt (Qualifications file)
- Units.txt (Units file)
- Consents.txt (Accredited Units file, also known as accreds.txt in SELMA)
NOTE: You must save the files to the “Downloads” folder of your device by right-clicking on the “File Name” and clicking “Save Link As…“
Figure 1: Download Files from NZQA
Navigate to “File Downloads” (yellow, left panel) and download the relevant files (yellow, table).
Importing Unit Standards to SELMA
To import your Unit Standards, navigate from Curriculum > Unit Standards, and upload the following files from the “Downloads” folder on your device:
- Units.txt (Units file)
- Consents.txt (Accredited Units file, also known as accreds.txt in SELMA)
Once you click to “Upload and Import” the selected files, you will see a dynamic loading icon below the “Status” of your file for up to 20 minutes, while your file is being imported.
- Feel free to navigate away from this page, if necessary, as your upload works in the background.
Figure 2i: Access Unit Standards Index
Find the “Unit Standards” Index (red) from the “Curriculum” tab in the top navigation bar (orange).
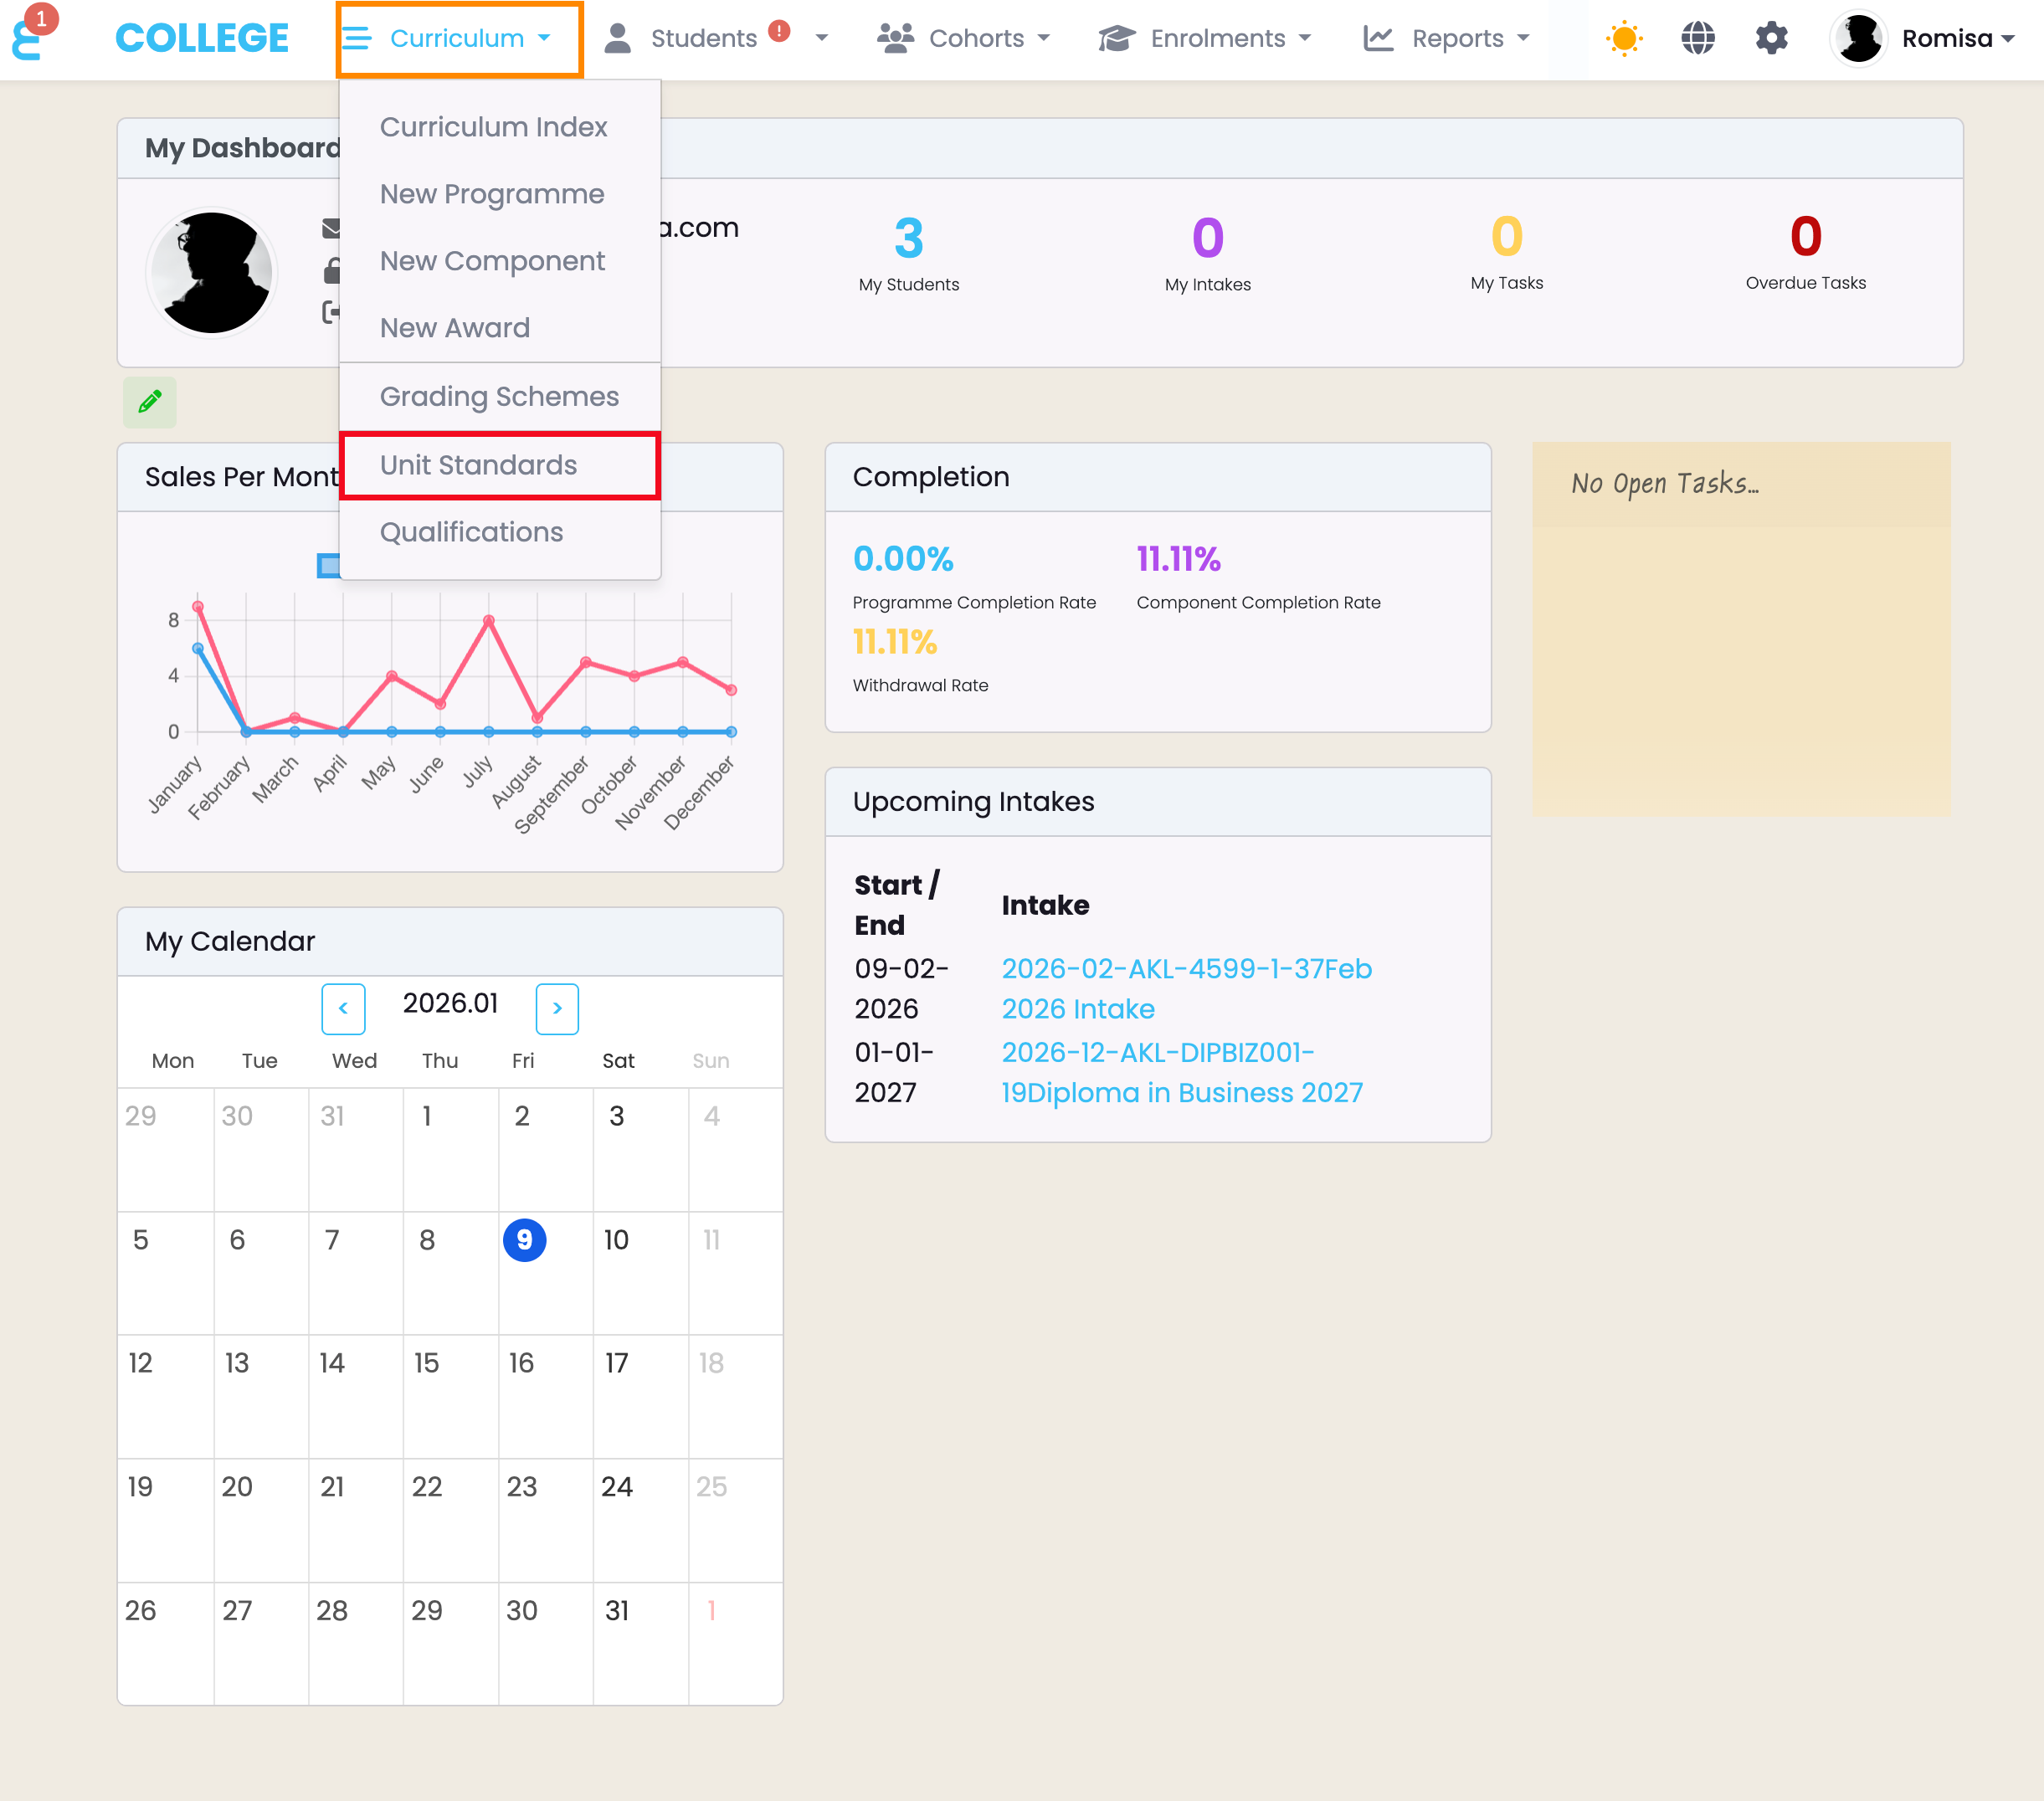
Figure 2ii: Upload Unit Standards
Click the “Upload Unit Standards” button to import new Unit Standards to SELMA (red). Use the interactive counts to filter by Unit Standard Status (orange), or use the “Advanced Search” feature to find a Unit by number (Standard).
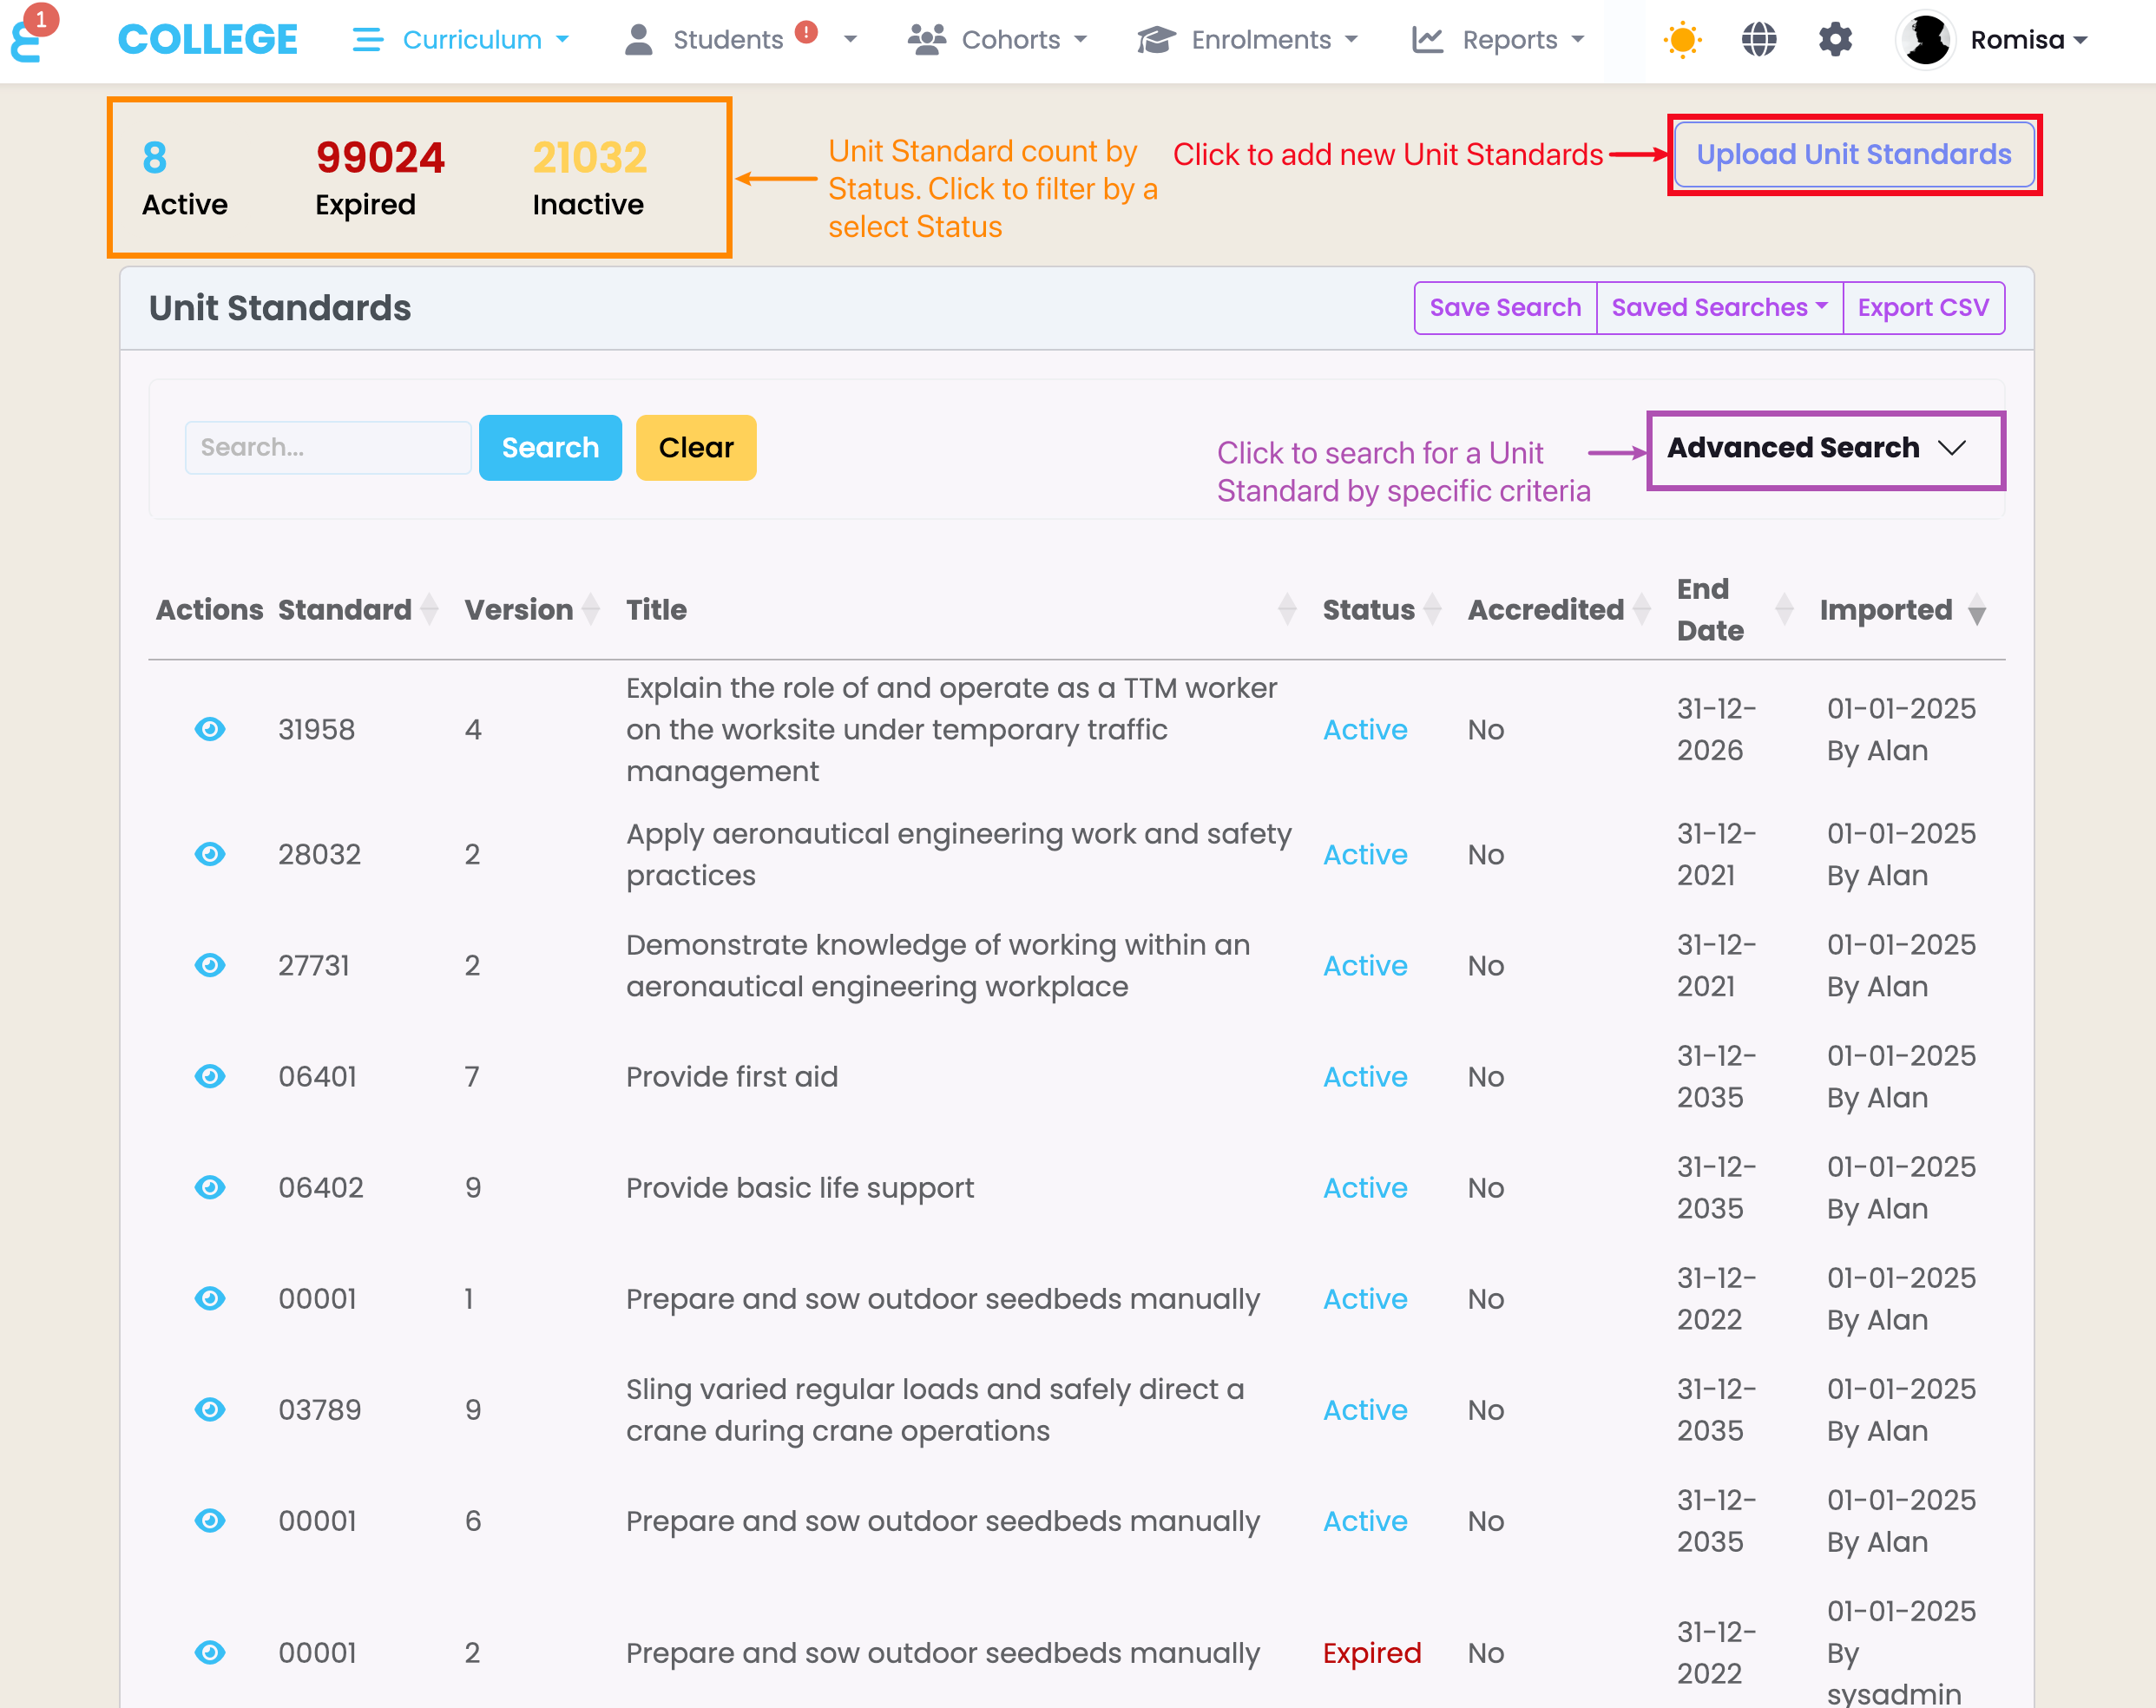
Figure 2iii: Select and Upload Files
Click the “Choose file” buttons to select the relevant files to upload from your “Downloads” folder (red). Then, click the “Upload and Import” button to upload the files and save them as Unit Standards in SELMA (purple).
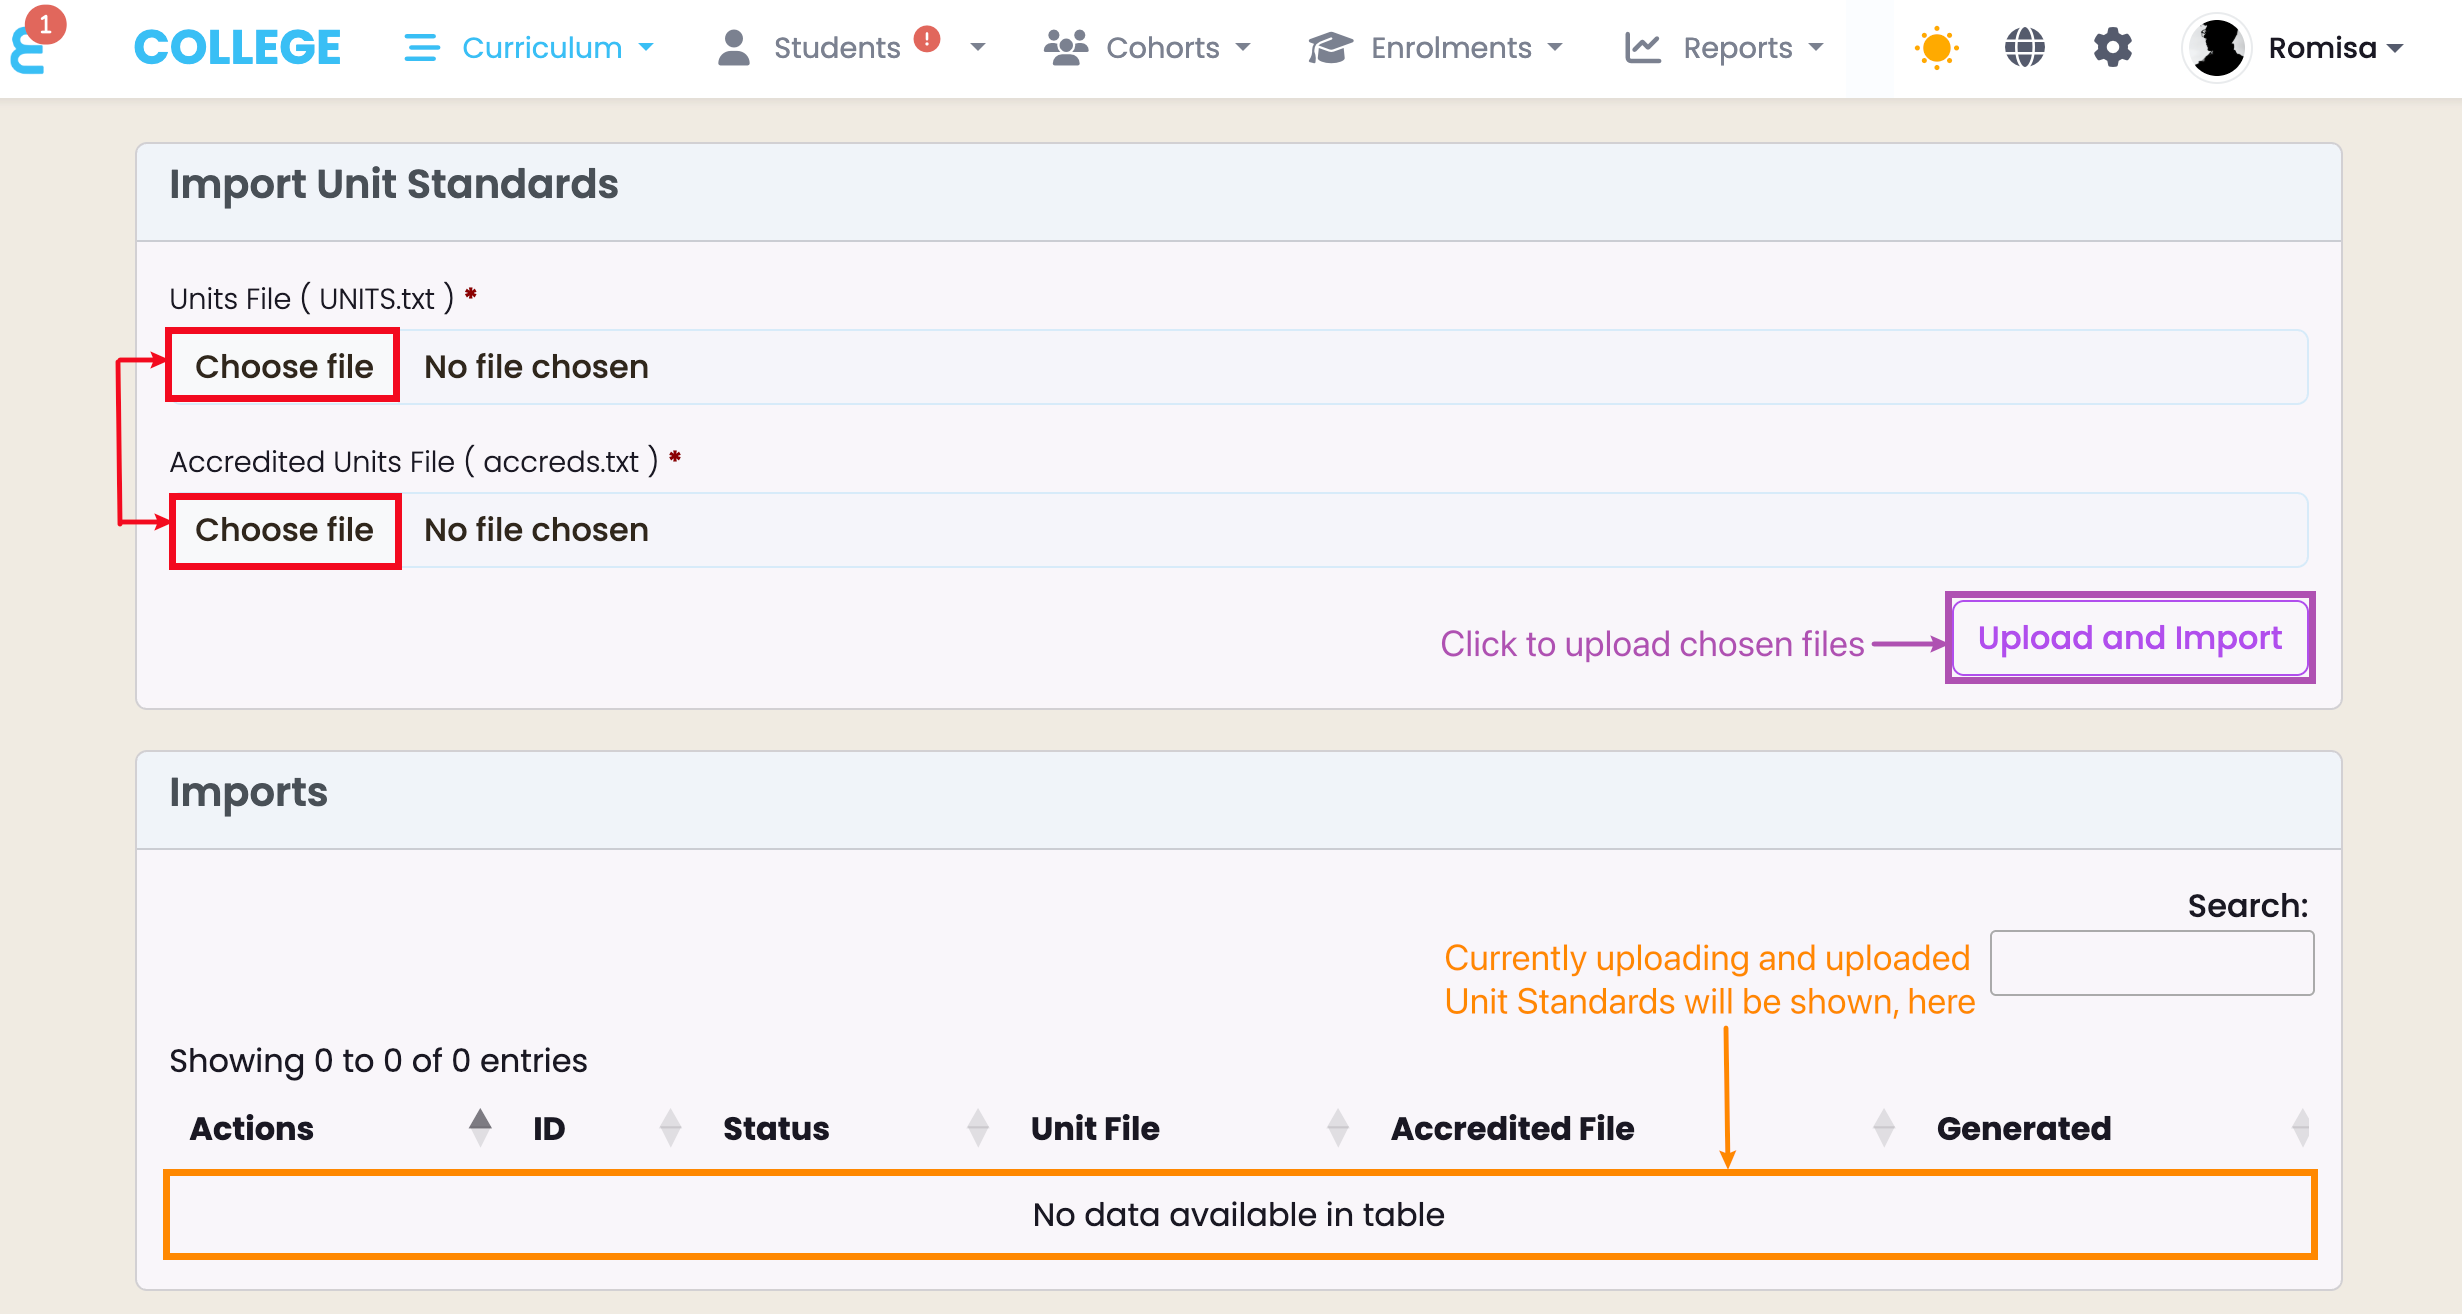
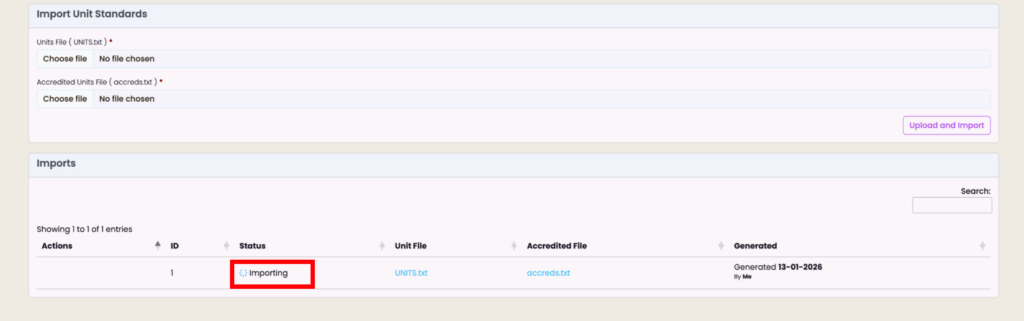
Figure 2iv: Import Status – Importing
After clicking “Upload and Import“, you’ll see the import status as “Importing” in the Imports table. The system will process your files for up to 20 minutes, and works in the background if you choose to navigate away from this page.
Create a Component To Link the Unit Standard
Once the import “Status” has changed to “Completed“, you can create new Component/s and directly link the Unit Standard to it. Either:
- Click the “Create Components” Action from the Imports menu
- This allows you to create Components using multiple Unit Standards
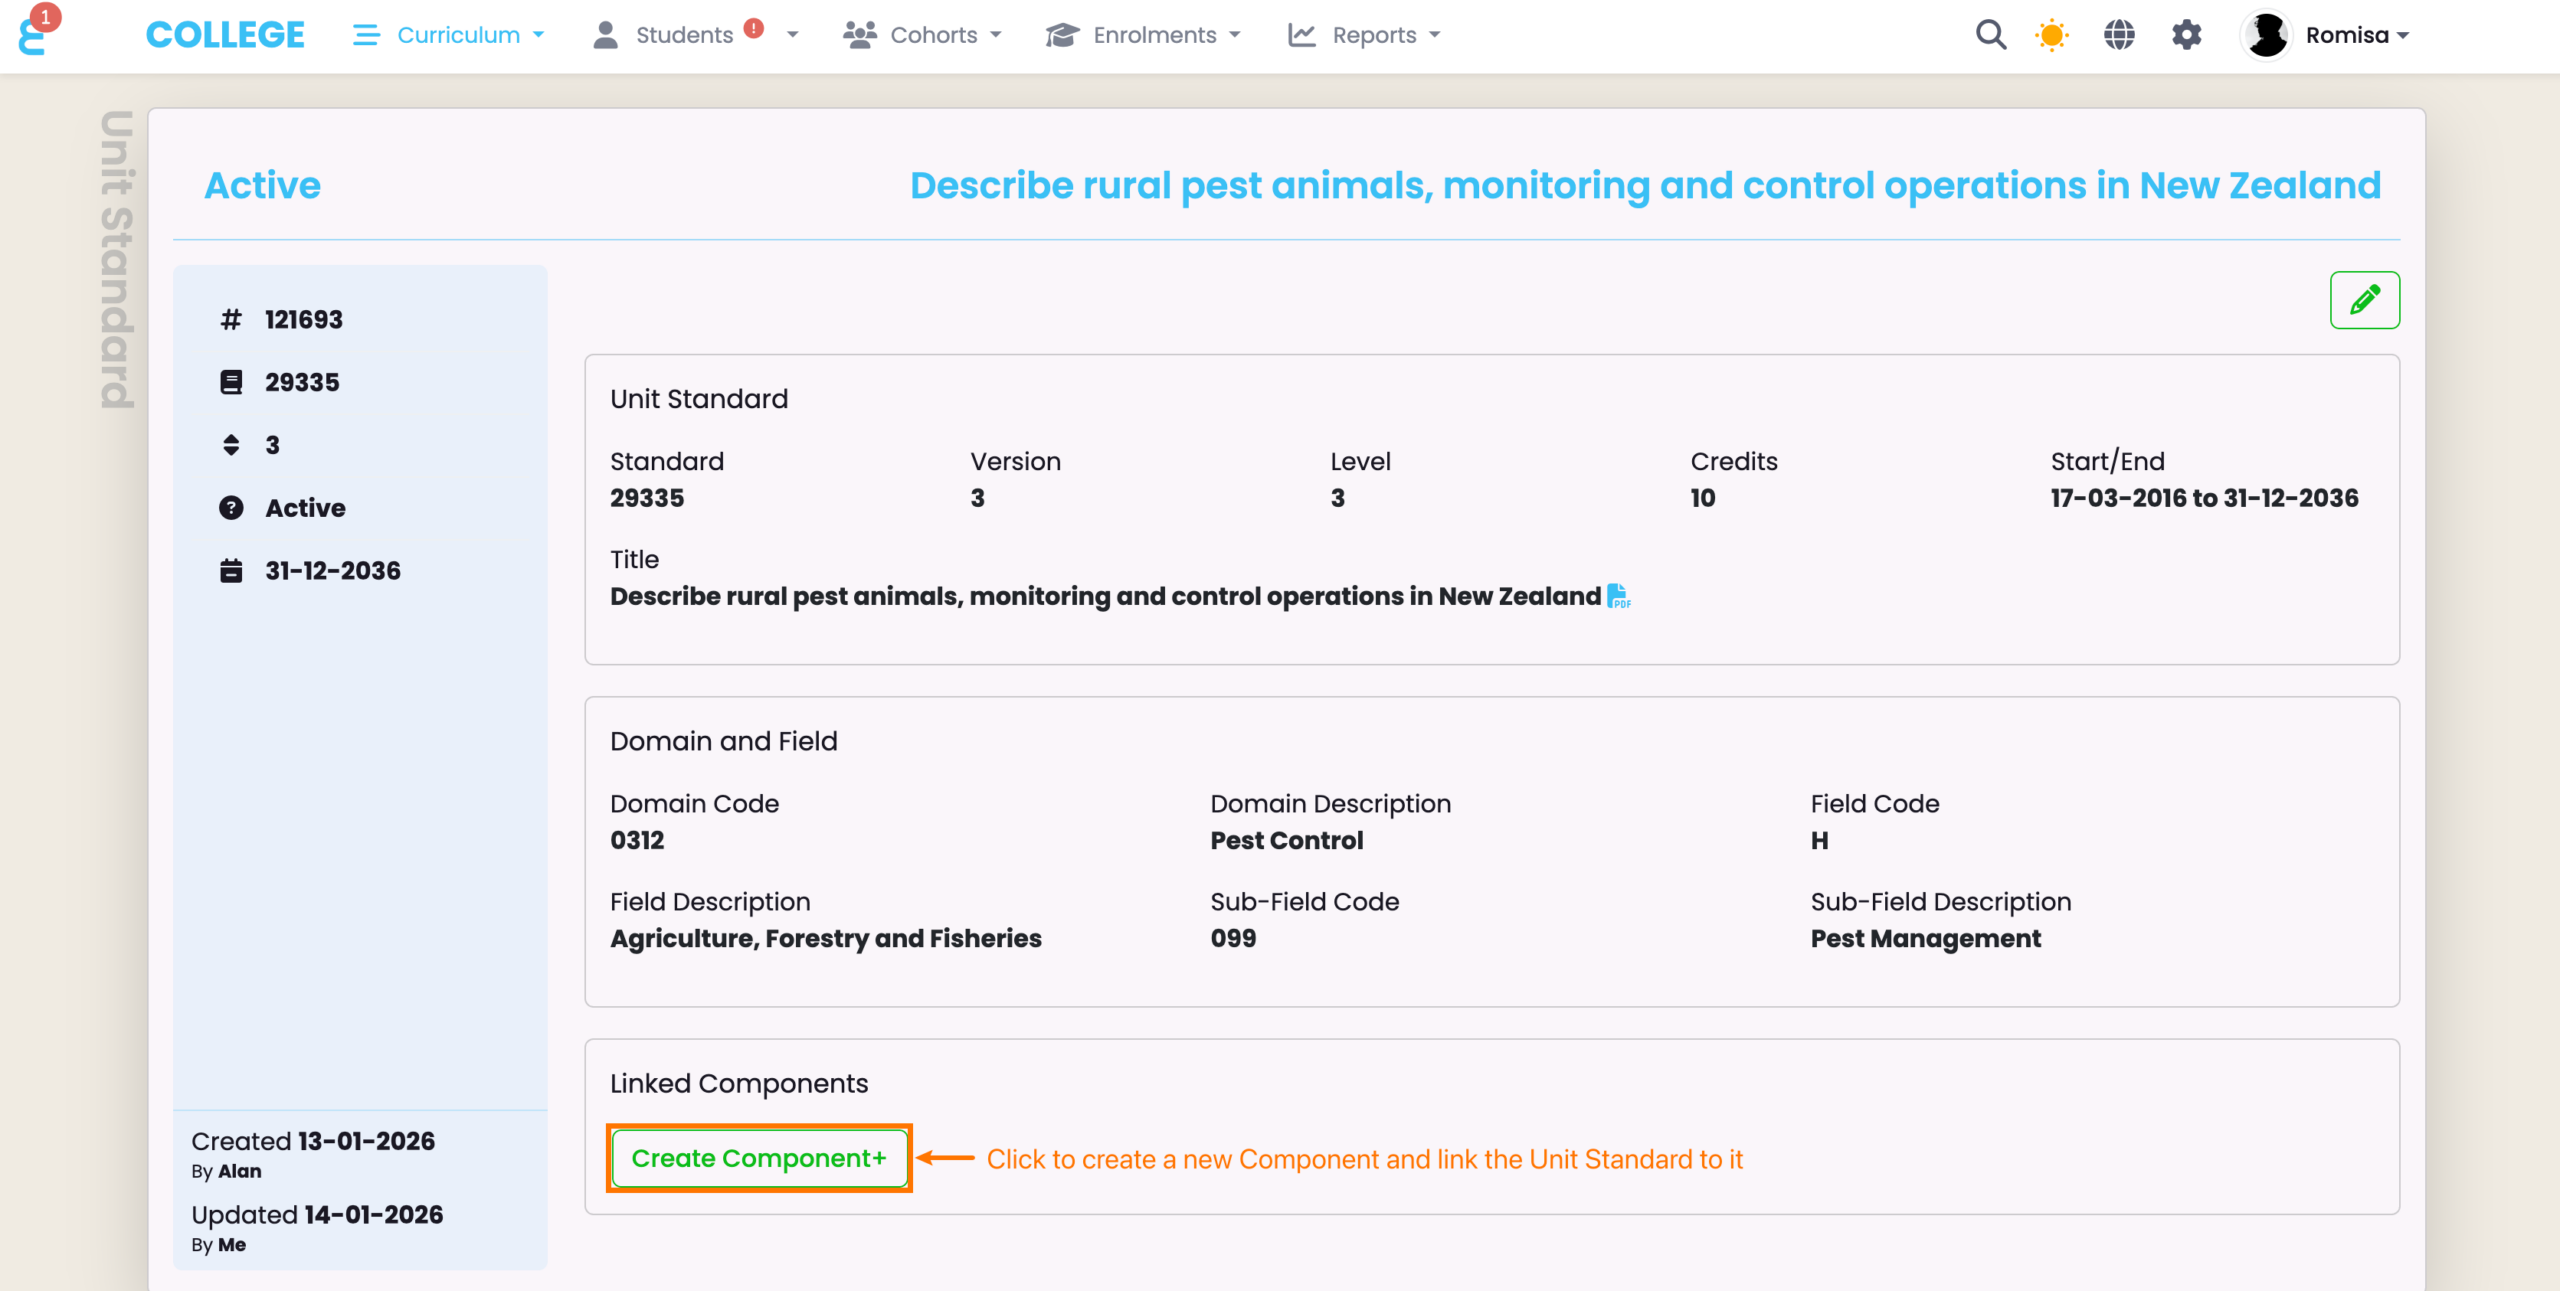
- Click the “Create Component” button on a Unit Standard profile
- This allows you to create a Component using one Unit Standard
Figure 3i: Create Component from Imports Menu
Click the “Create Components” link (red), which will take you to a screen to select multiple Unit Standards. Note: Once you have created a Component you will be taken back to select more. Navigate from Curriculum > Component to view the Component/s you have made.
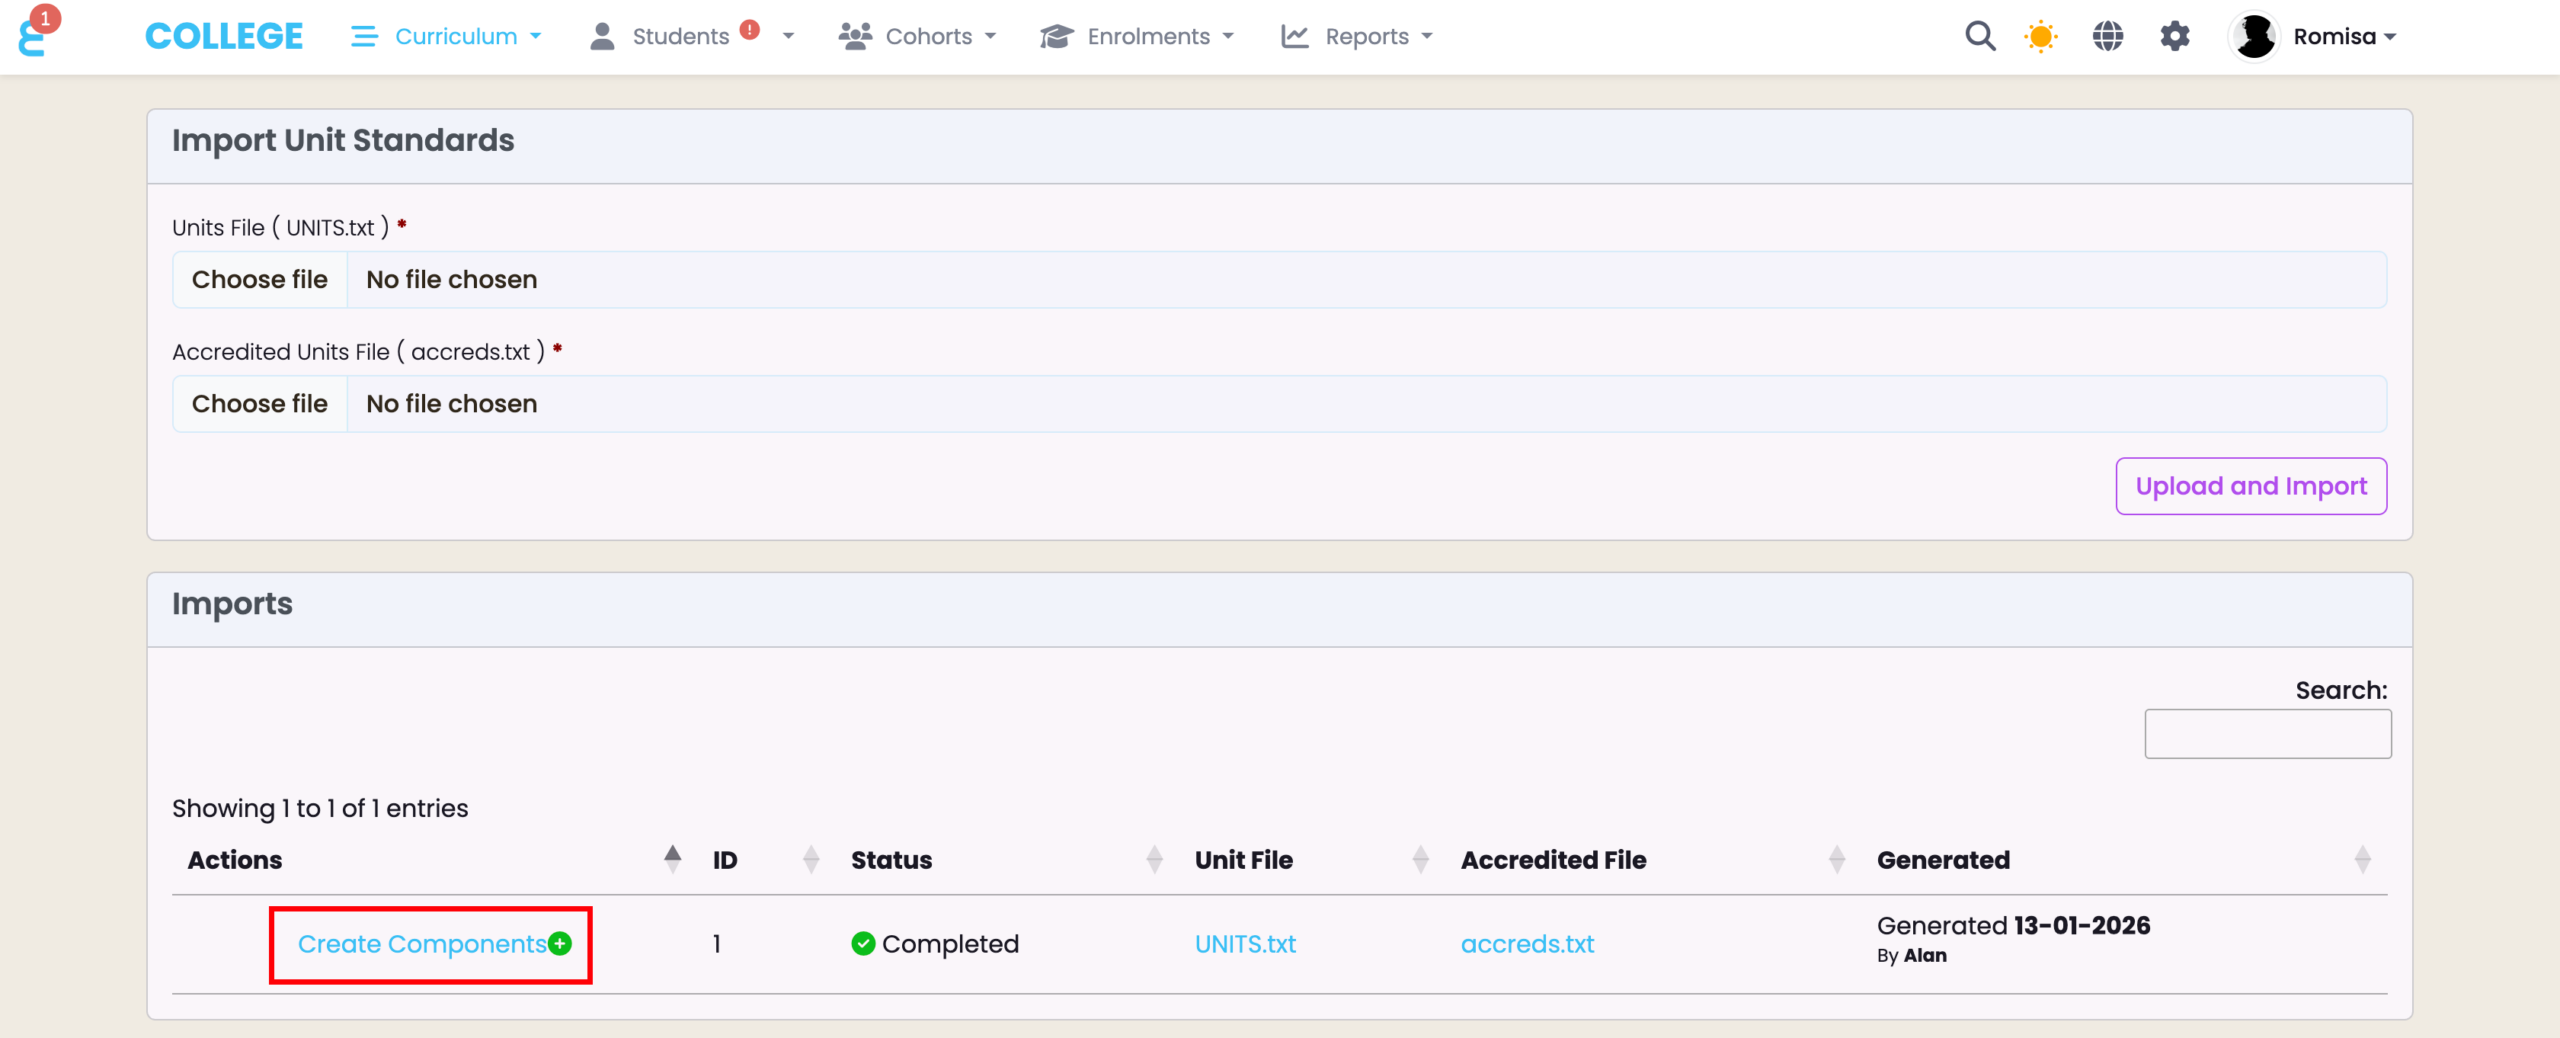
Figure 3ii: Create Component from Unit Standard Profile
Click “Create Component” (orange) to create a Component using one specific Unit Standard.
Link a Unit Standard to a Component
For existing or new Components, navigate to the “Unit Standard” tab of a Component in the Curriculum Index, and link the Unit Standard to the Component.
You can later update a new version of the Unit Standard, here, too.
NOTES:
- All Unit Standards within the Index must be manually linked to a Component, which in turn must be mapped onto an Enrolment.
- A Unit Standard can be reported to the TEC and NZQA.
Figure 4i: Link Unit Standard to Component
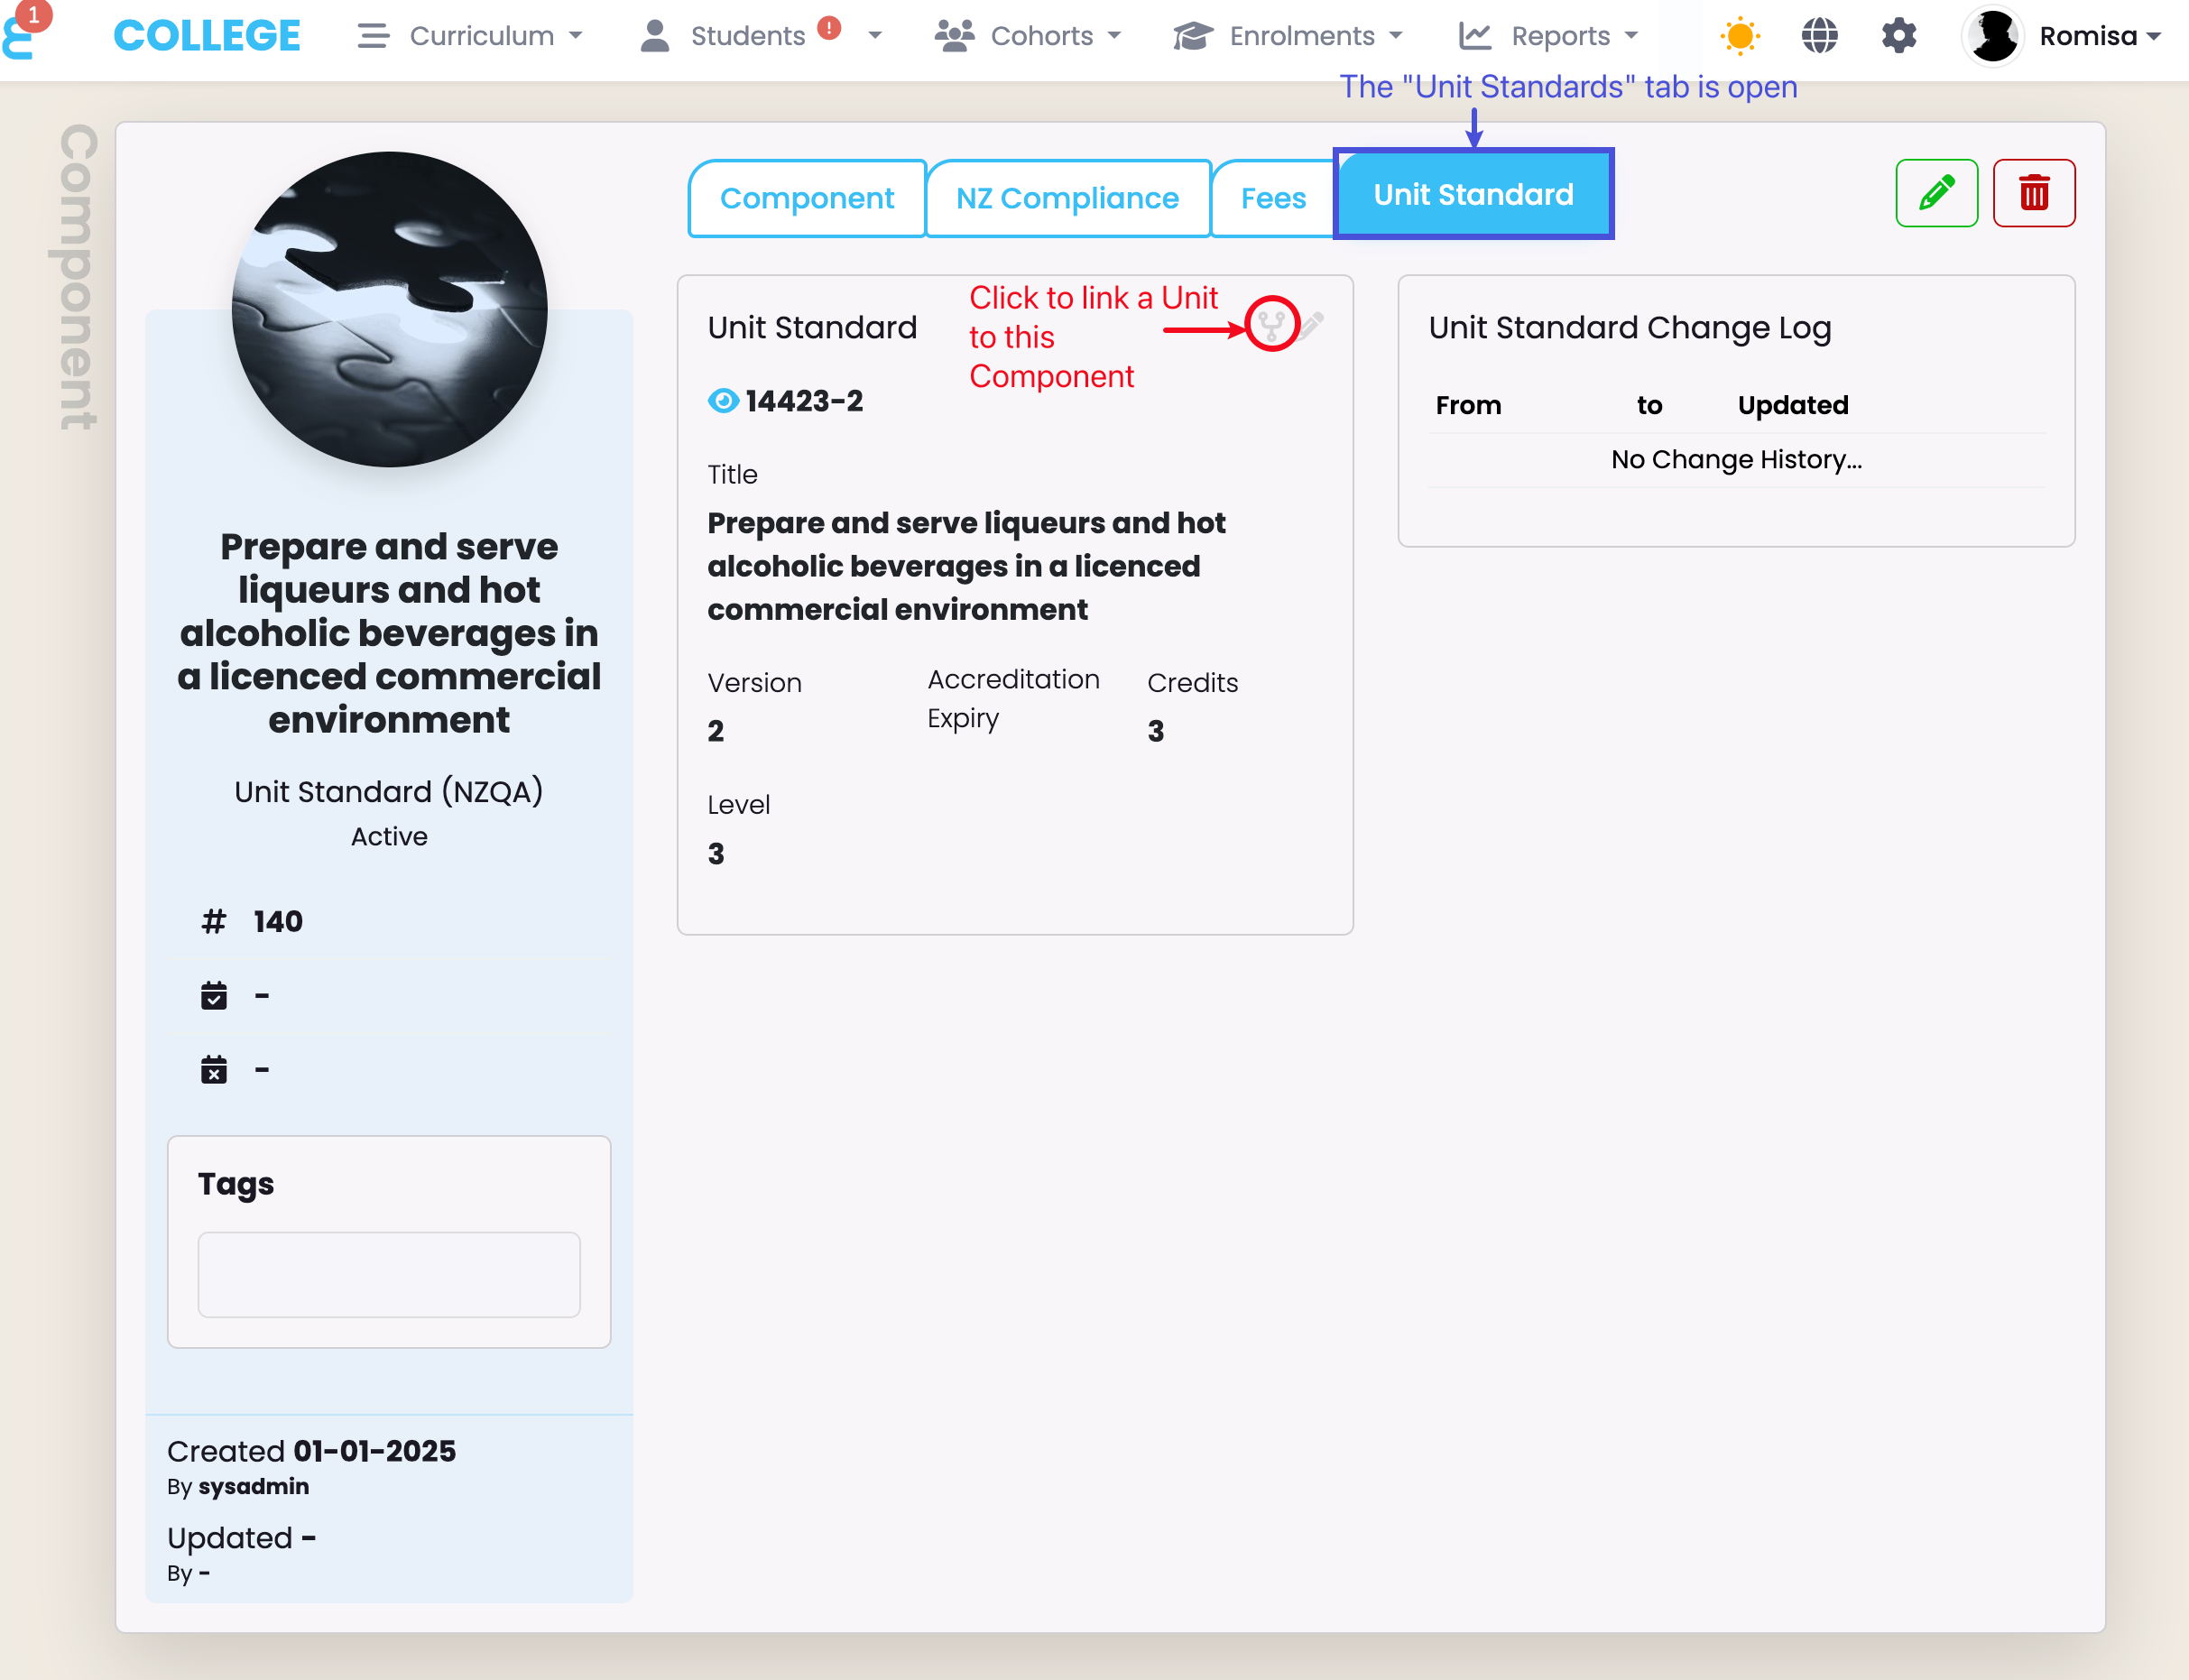
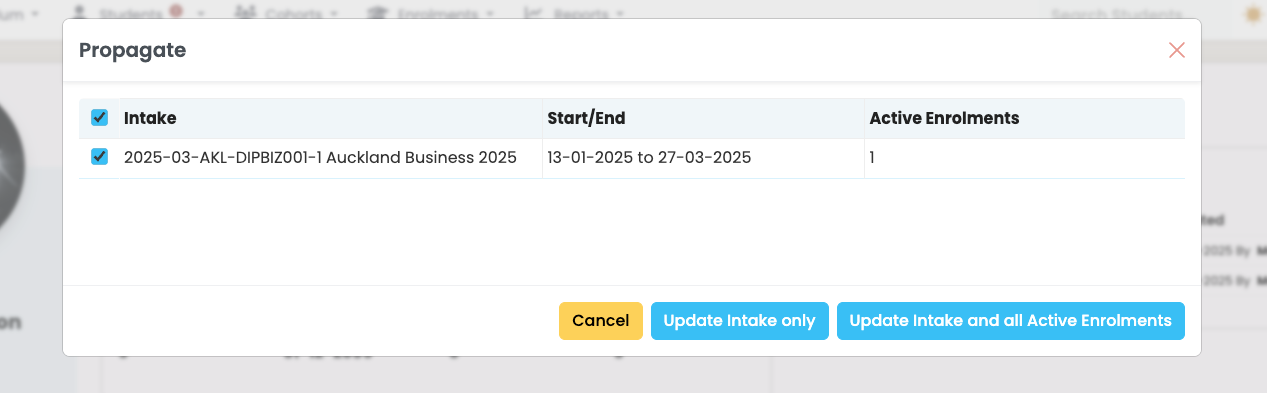
Figure 4ii: Update Unit Standard Version
Select an Intake, and update Intakes and Enrolments with a new Unit Standard version. Click the “Update Intake only” button to update future Enrolments, or click “Update Intake and all Active Enrolments” to update existing Enrolments and future Enrolments.
Importing Qualifications to SELMA
To import a Qualification, navigate from Curriculum > Qualifications, and upload the following files from the “Downloads” folder on your device:
- Qualifications Expanded.txt (Qualifications file)
Once you click to “Upload and Import” the selected files, you will see a dynamic loading icon below the “Status” of your file for up to 20 minutes, while your file is being imported.
- Feel free to navigate away from this page, if necessary, as your upload works in the background.
Once the import “Status” has changed to “Completed“, you can create a new Programme and directly link the Qualification to it. Either:
- Click the “Create Programme” Action from the Imports menu
- Click the “Create Programme” button on the Qualification profile
Otherwise, navigate to the “NZ Compliance” tab of a Programme in the Curriculum Index, and link the Qualification to the Programme.
Figure 5i: Access Qualifications Index
Find the “Qualifications” Index (red) from the “Curriculum” tab in the top navigation bar (orange).
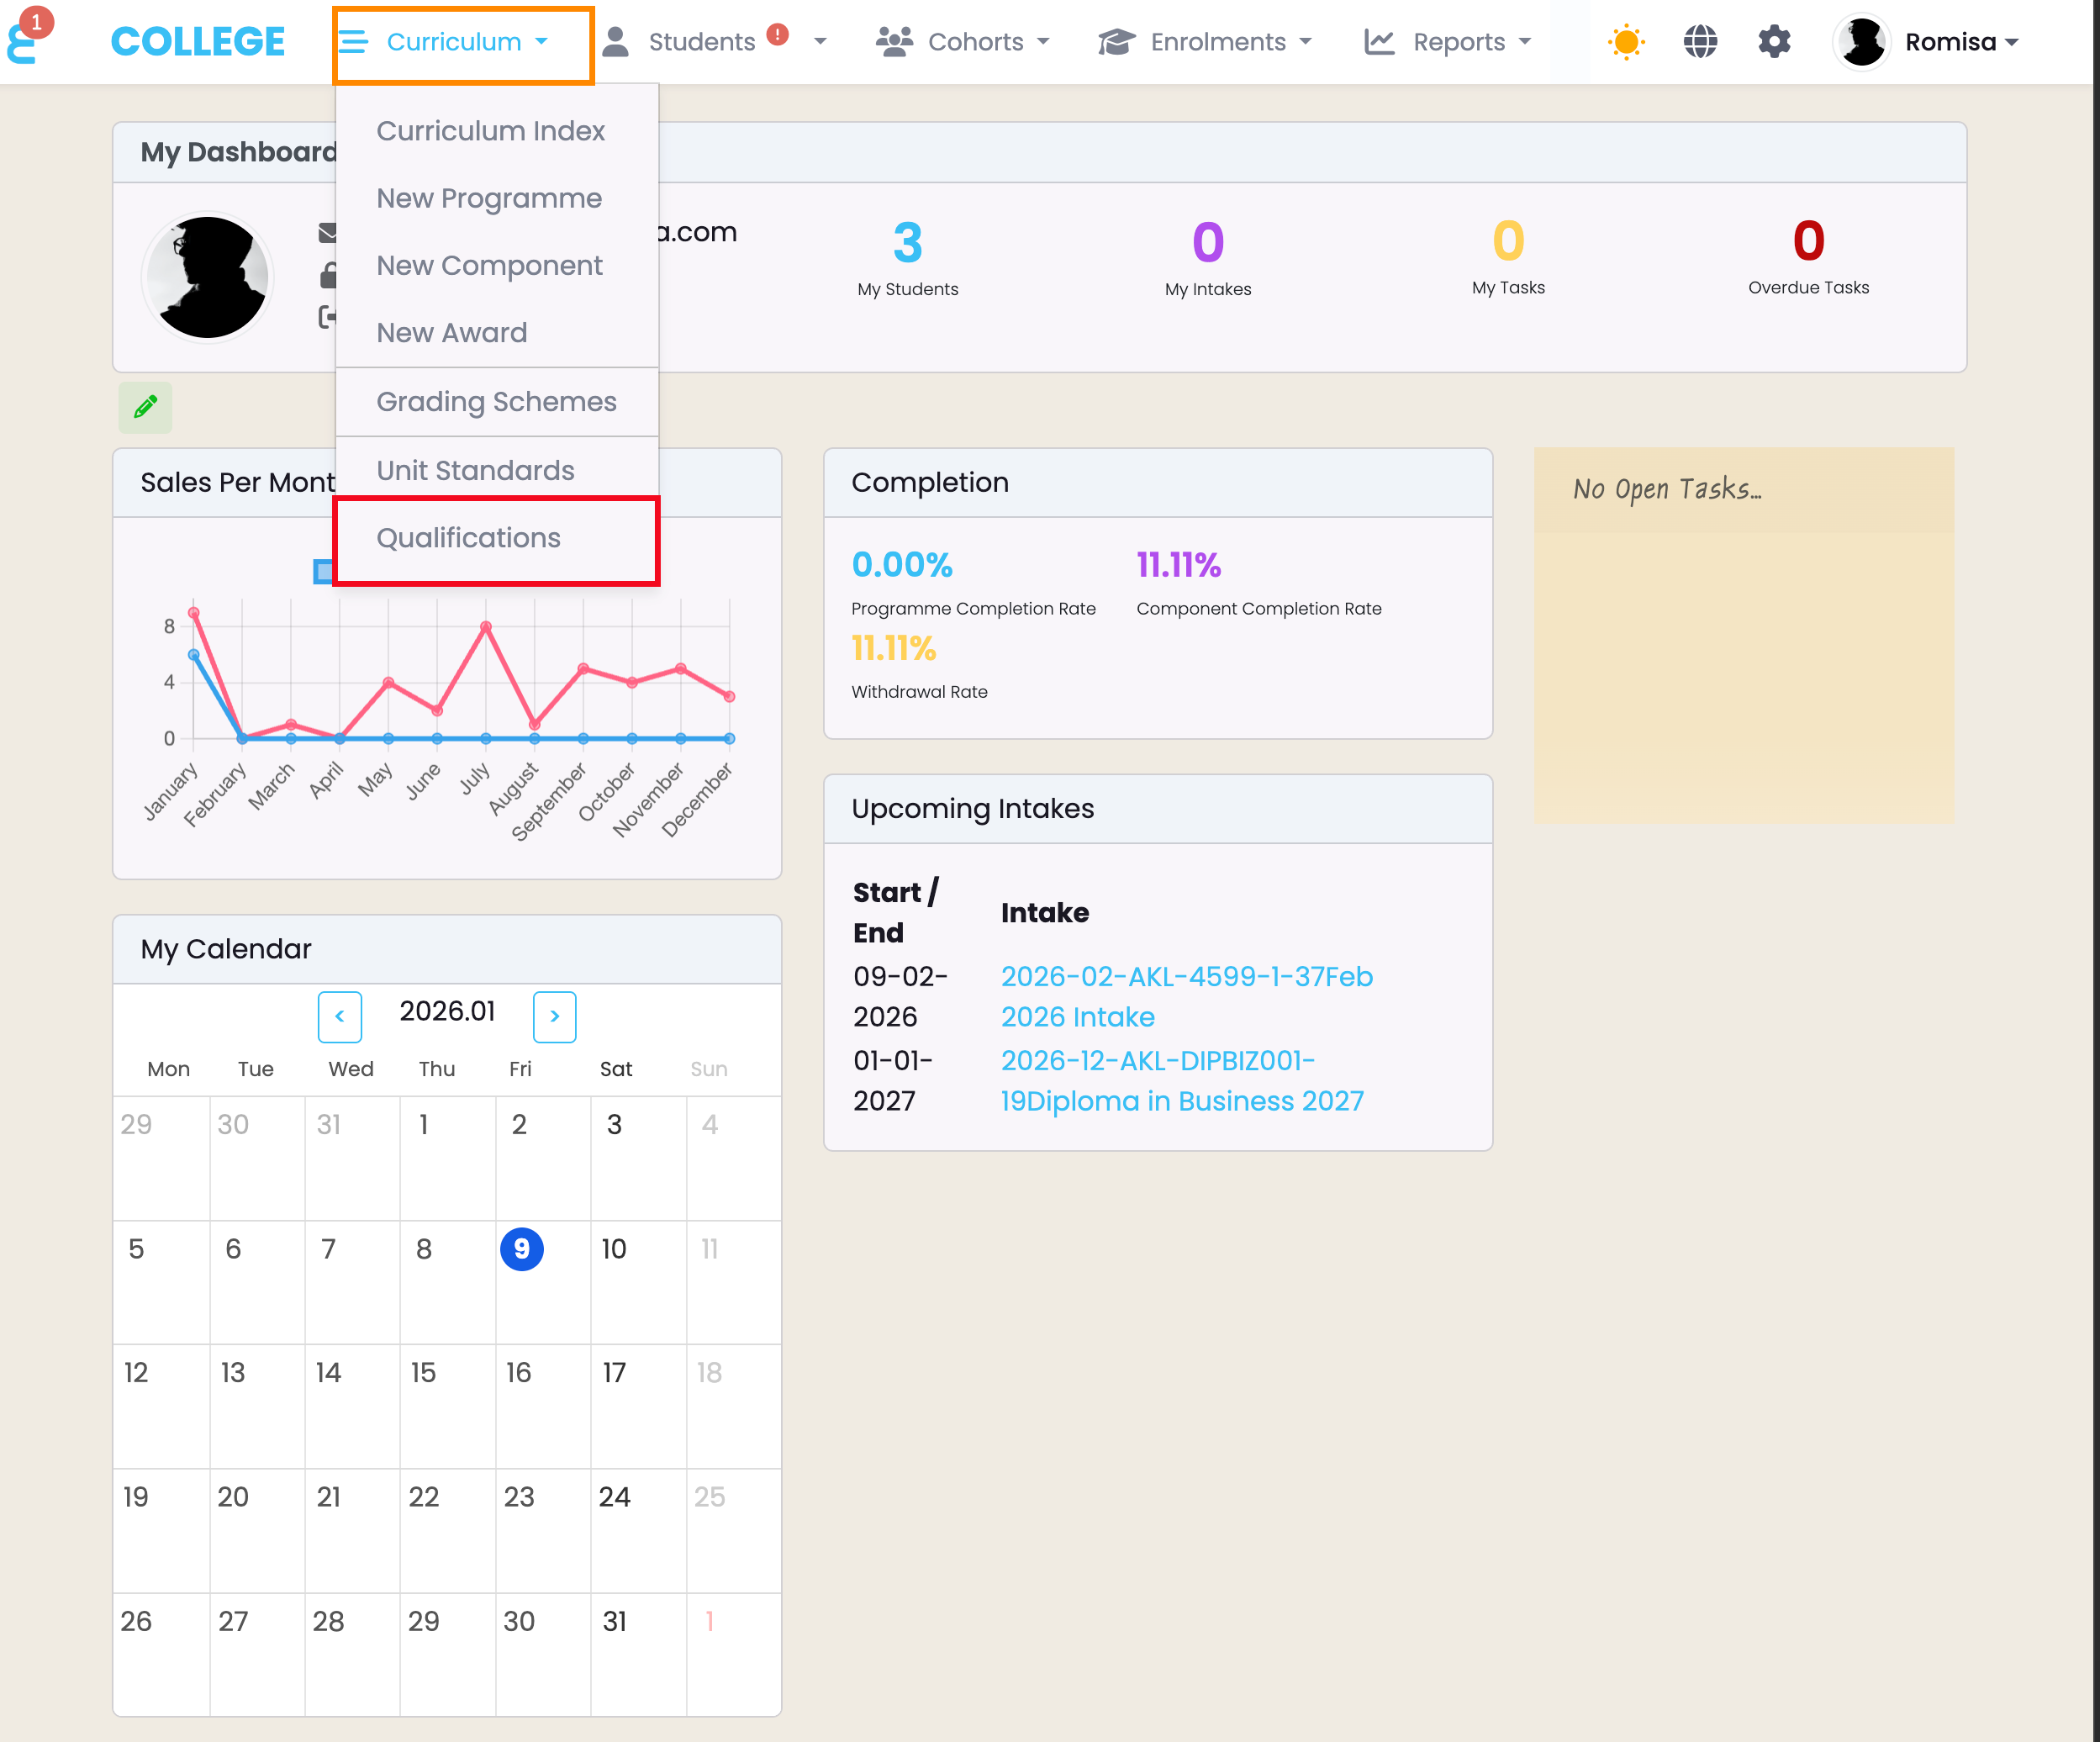
Figure 5ii: Upload Qualifications
Click the “Upload Qualifications” button to import new Qualifications to SELMA (red). Use the interactive counts to filter by Qualification Status (orange), or use the “Advanced Search” feature to find a Qualification by number (Standard).
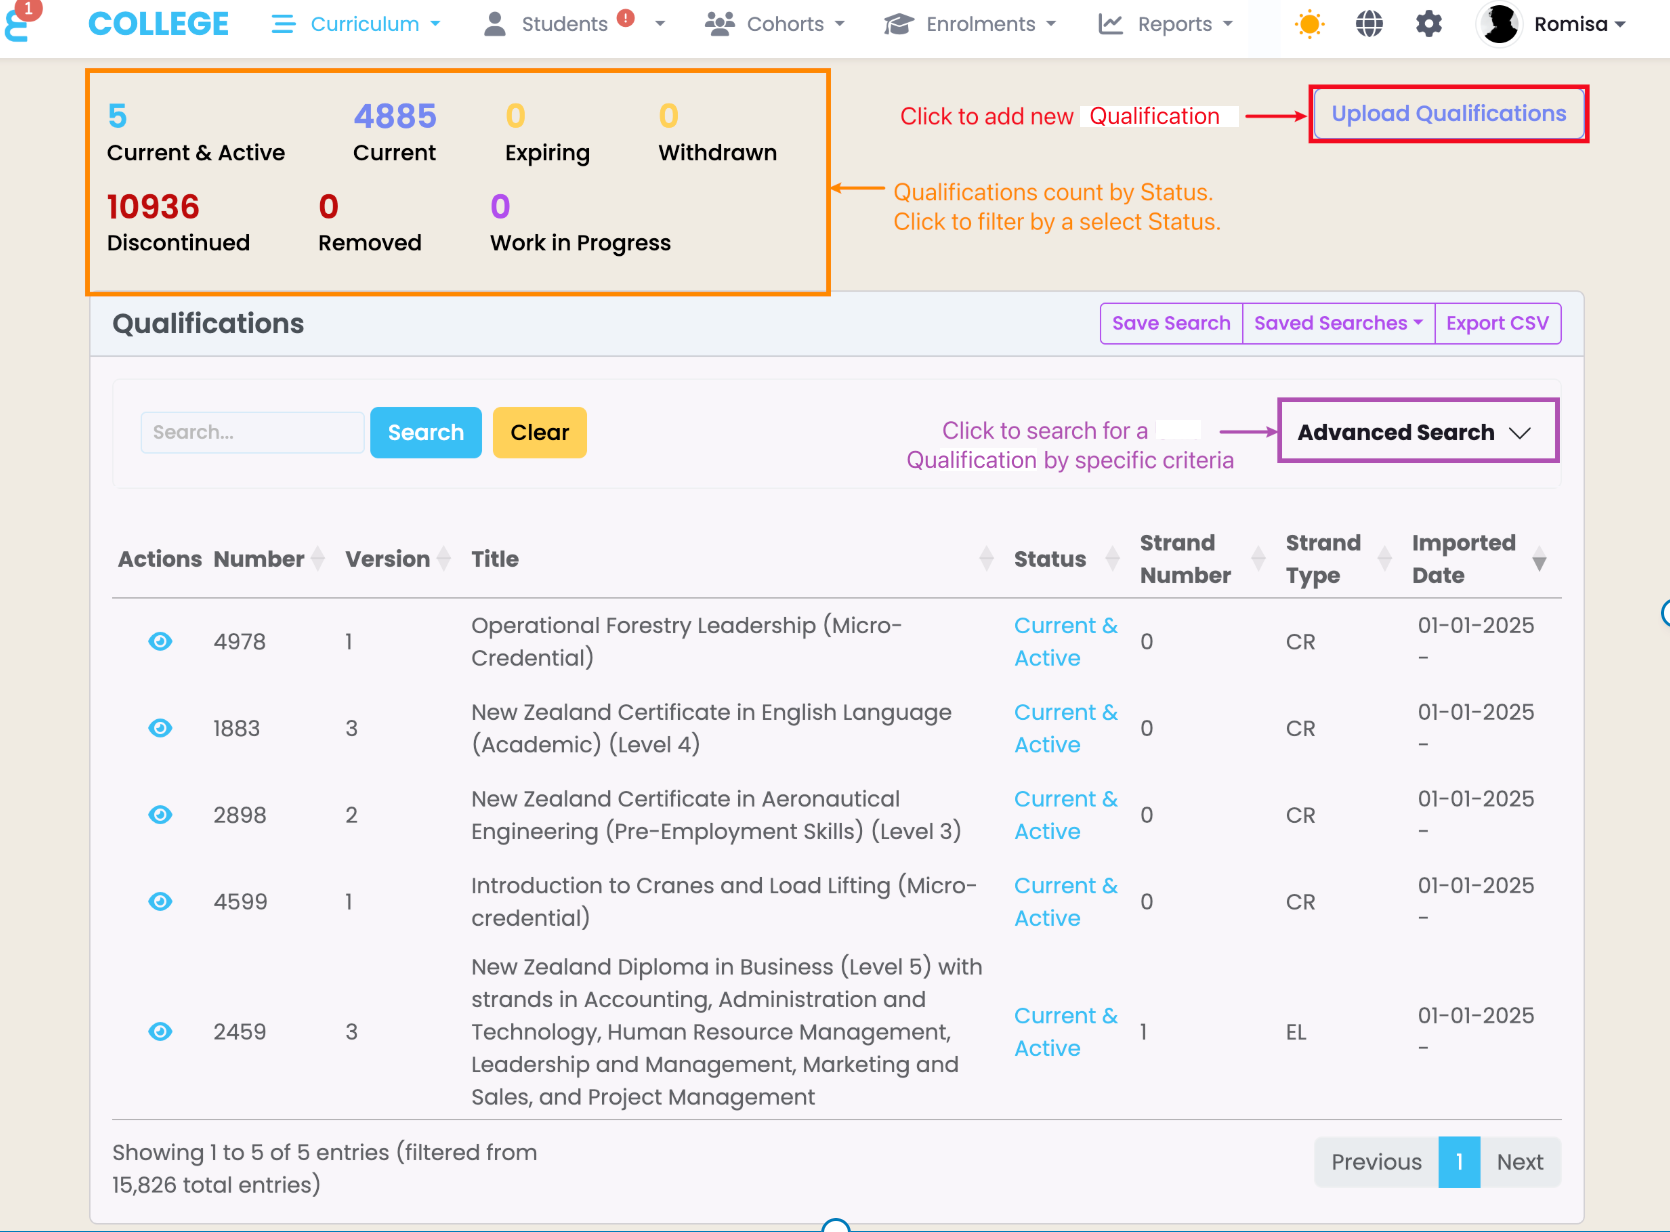
Figure 5iii: Select and Upload Qualifications File
Click the “Choose file” button to select the Qualifications file to upload from your “Downloads” folder (red). Then, click the “Upload and Import” button to upload the file and save it as a Qualification in SELMA (purple).
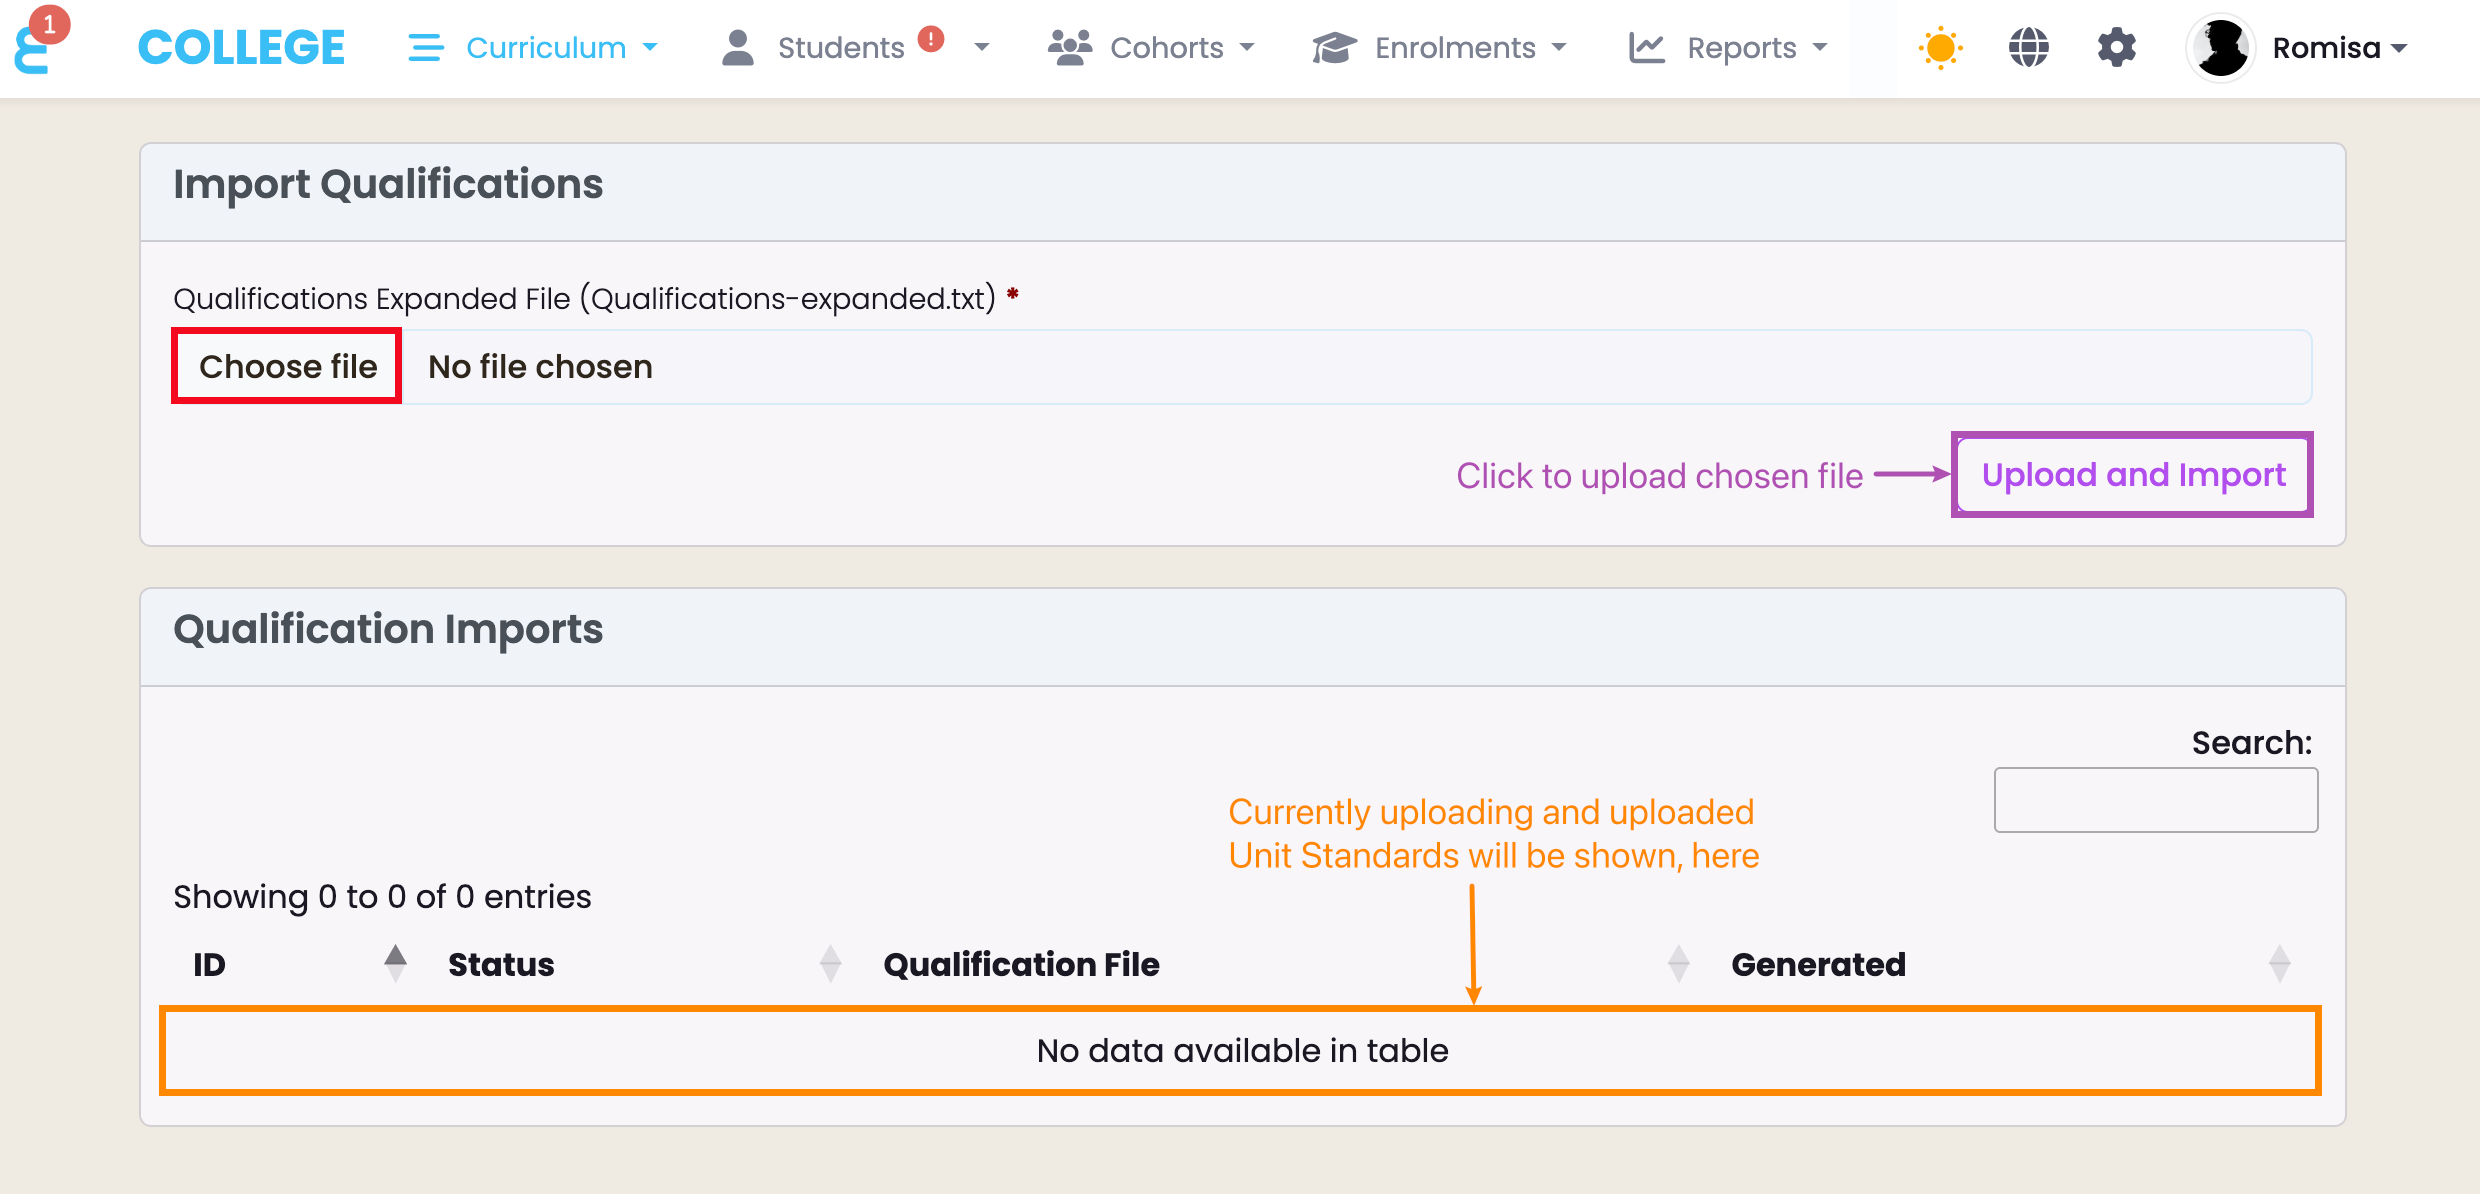
Figure 6i: Upload Status Change
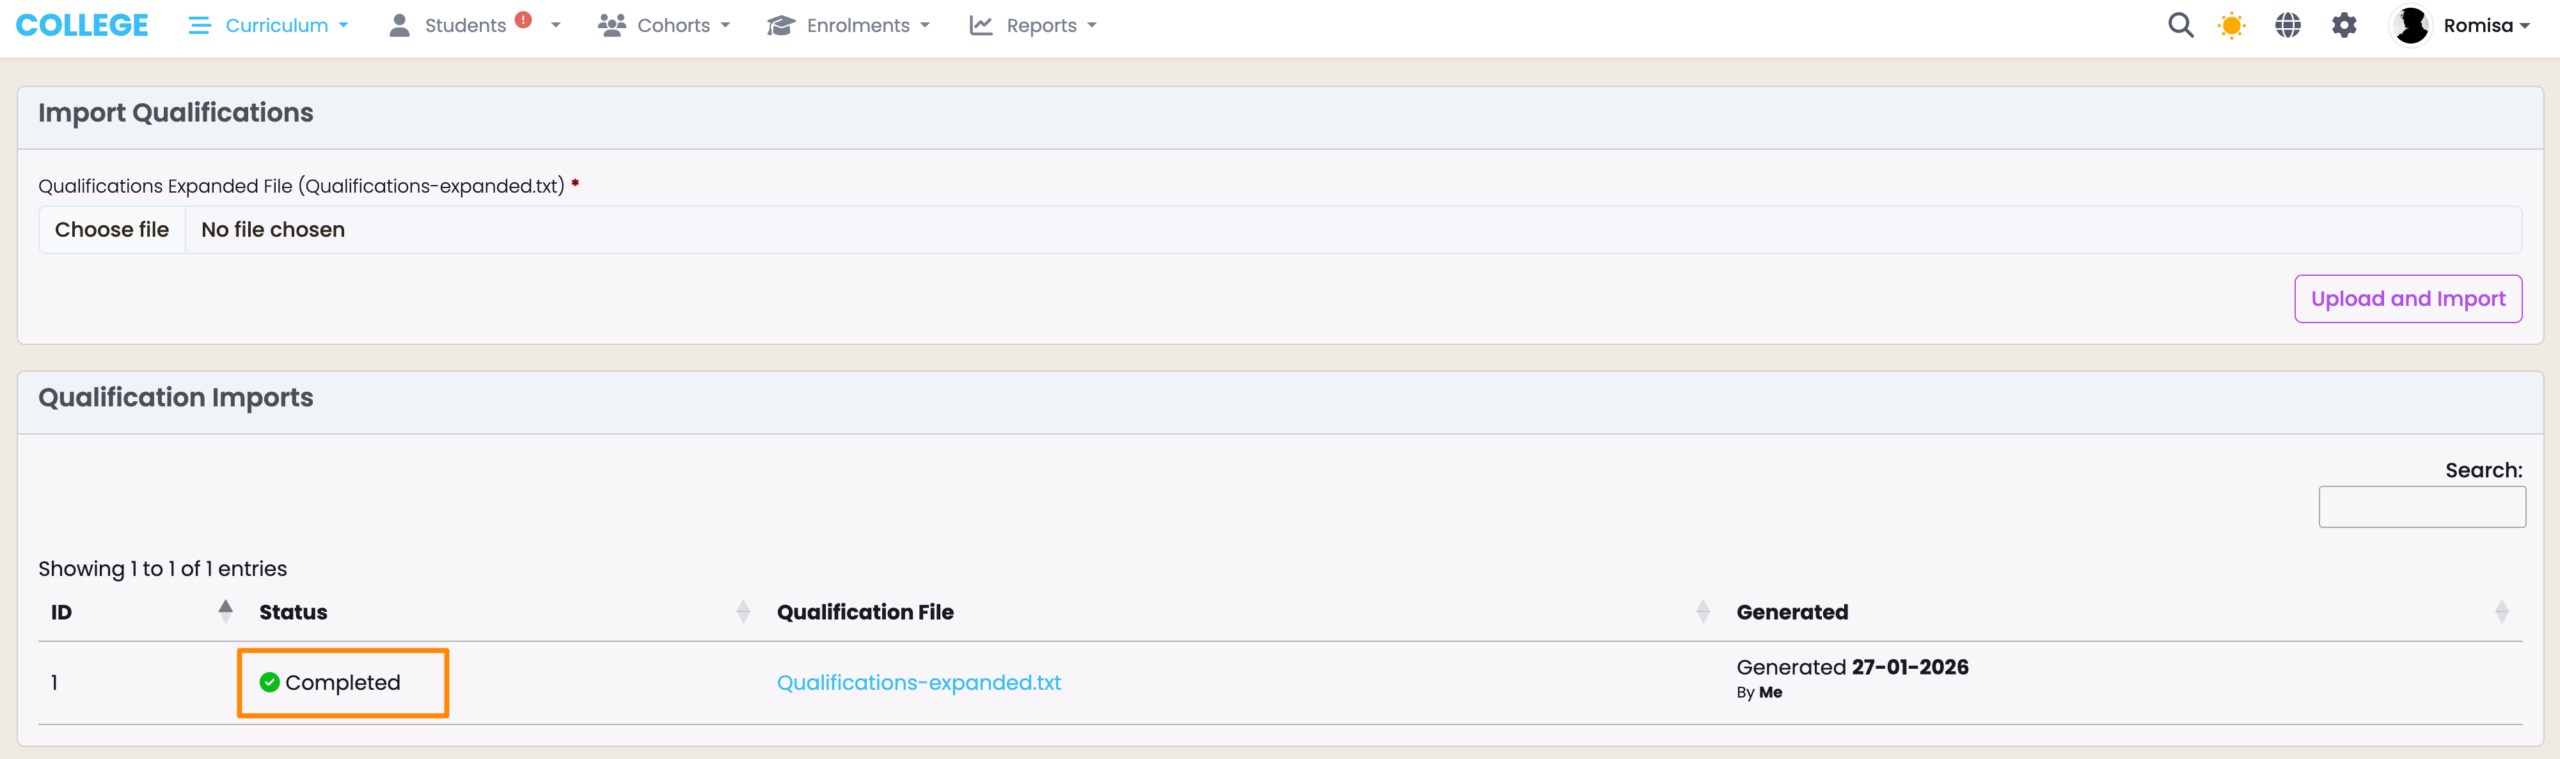
Figure 6ii: Create Programme from Qualification Profile
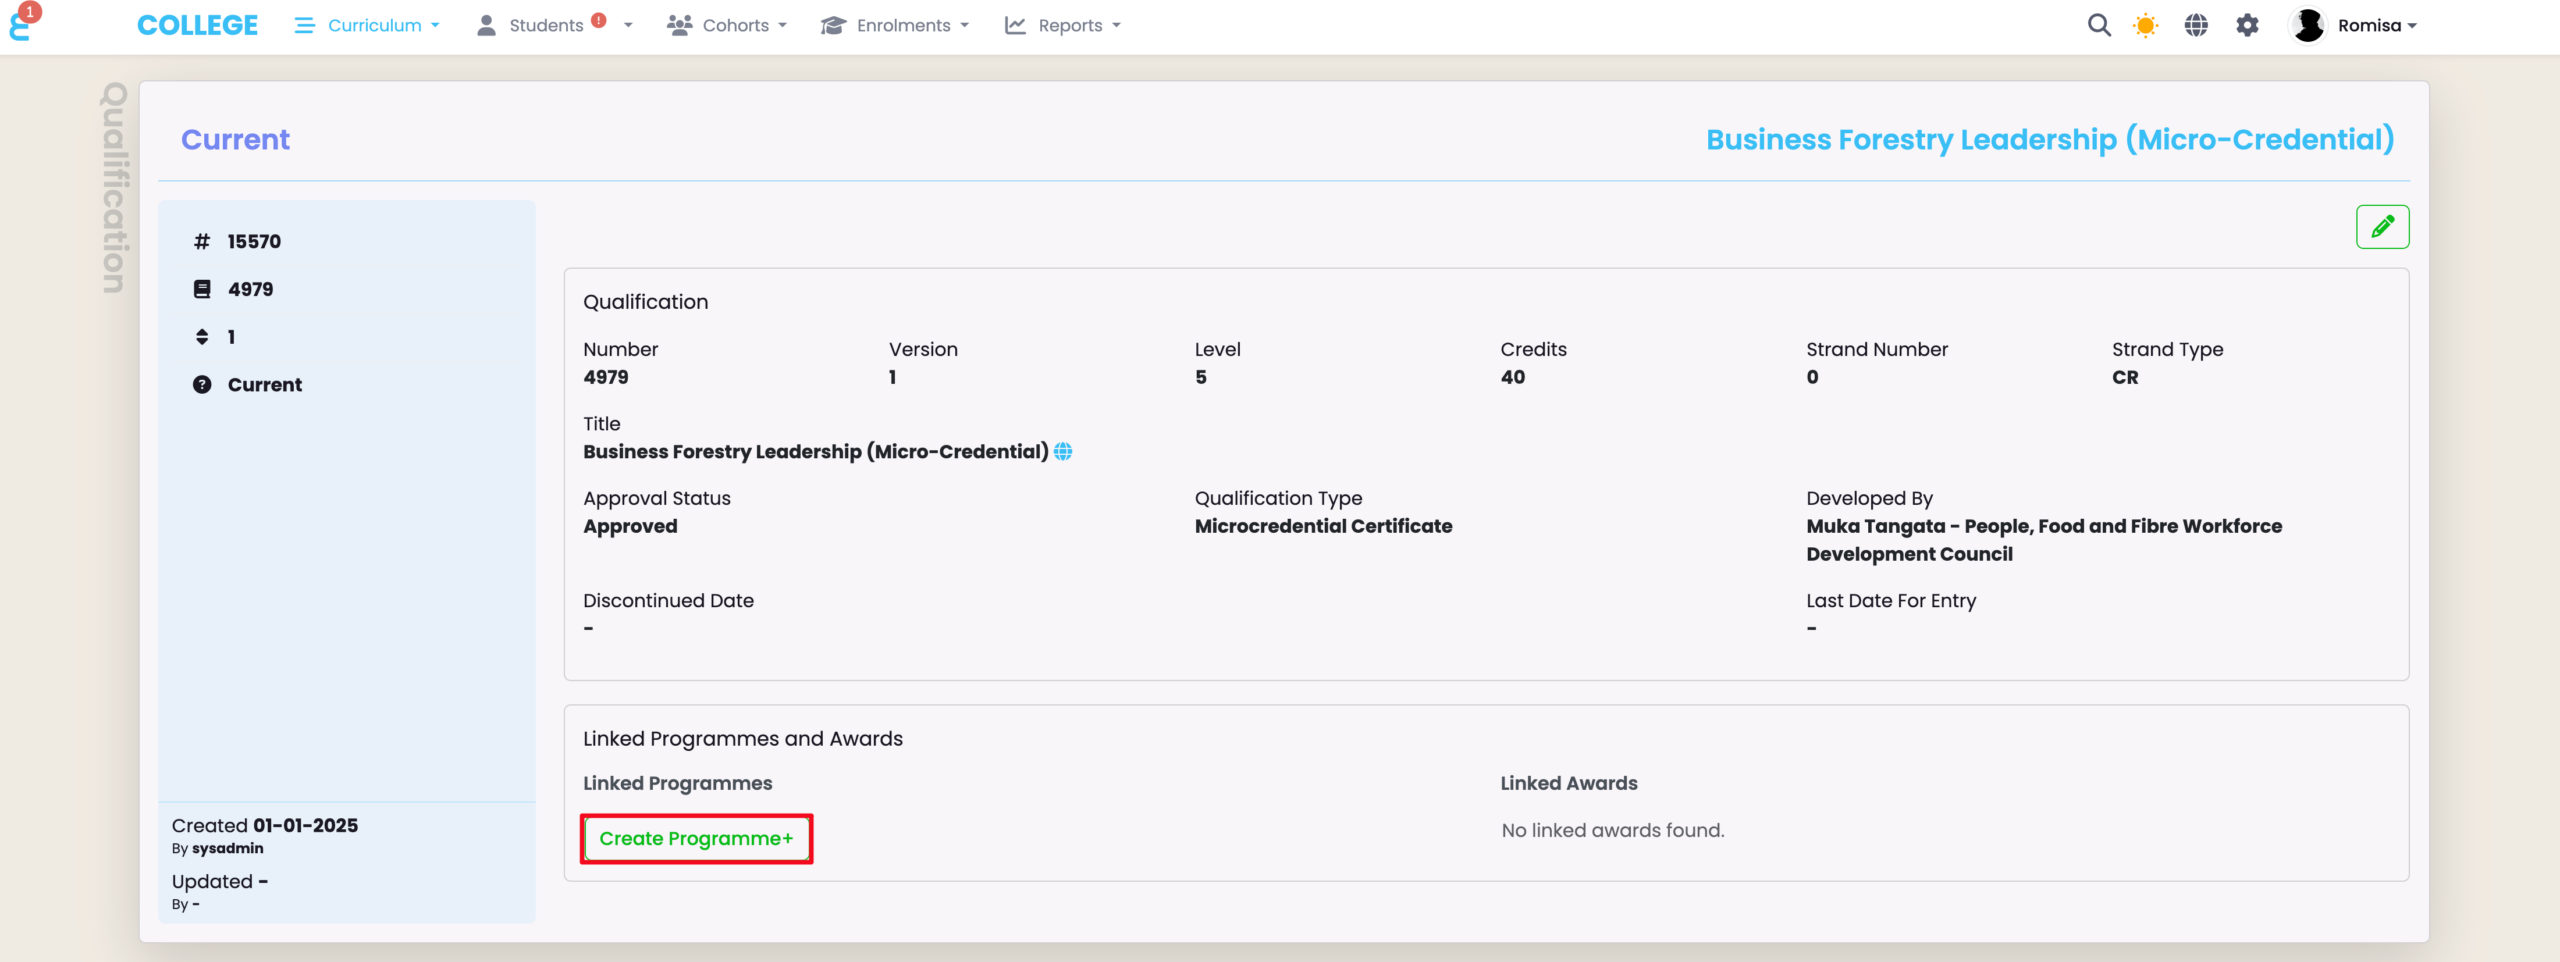
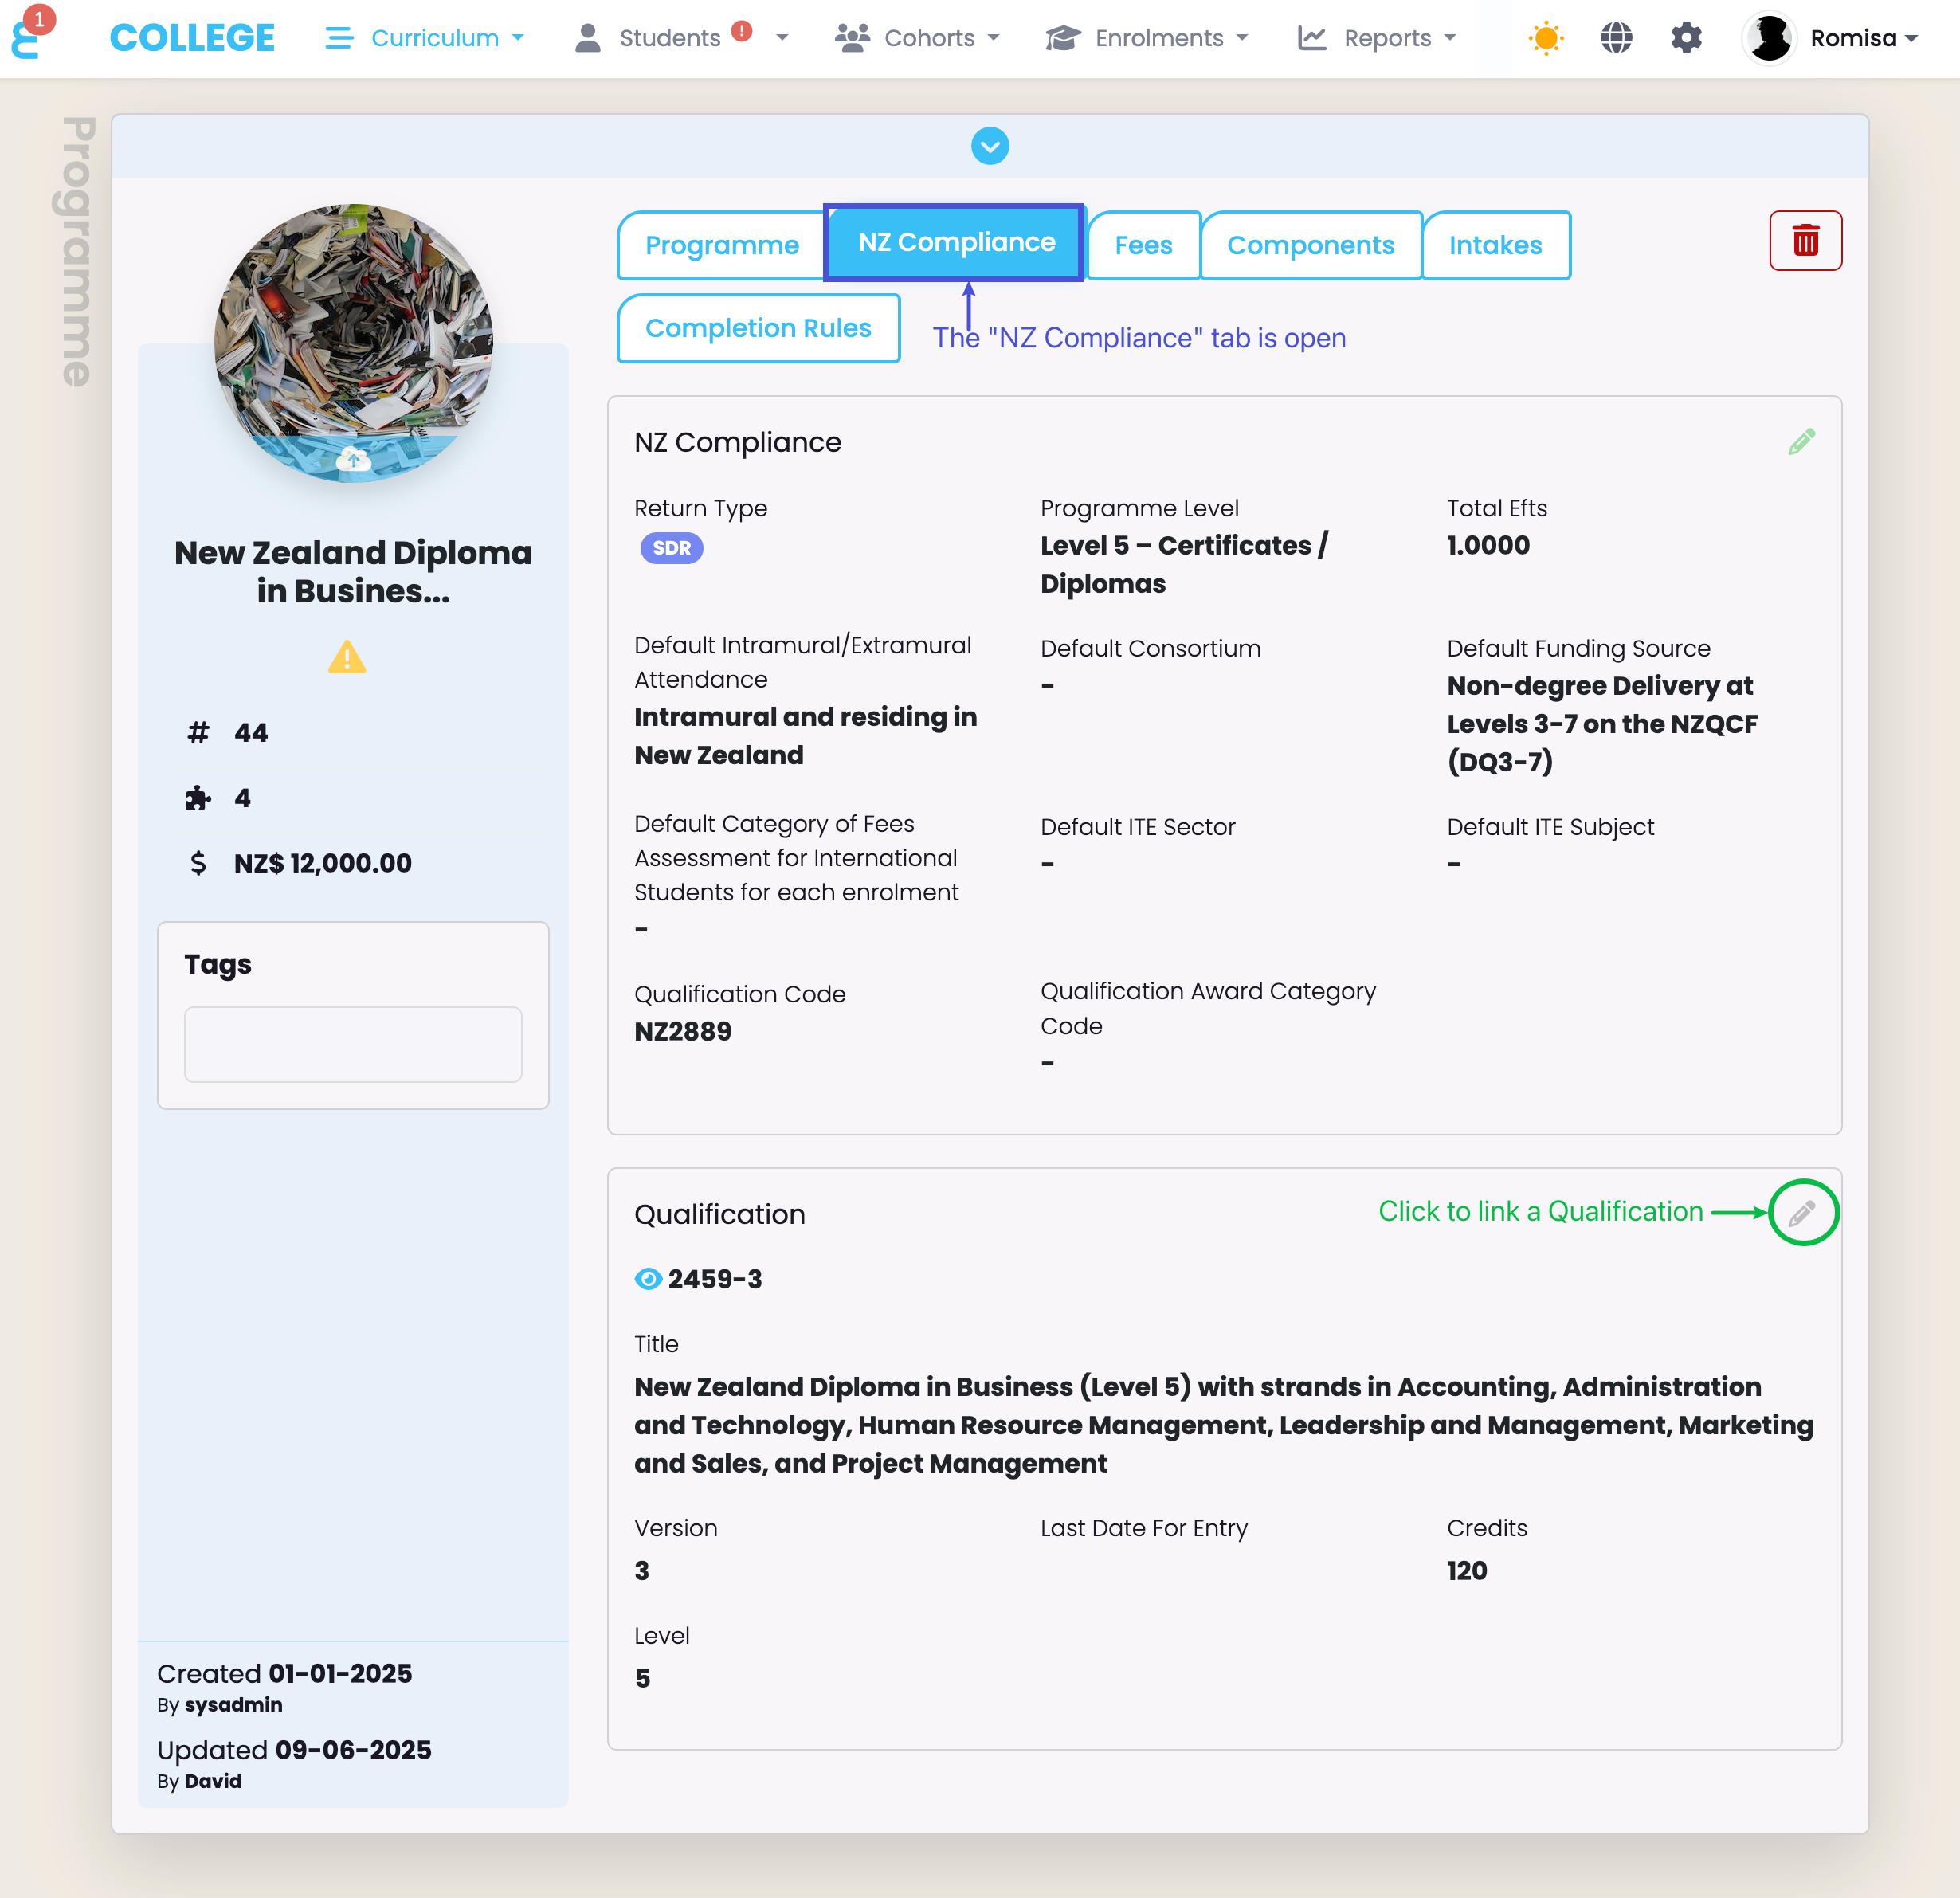
Figure 7: Link Qualification to Programme
Click the pencil icon to link a Qualification or change an existing one (green).
Note: Qualifications you need to link to a Programme will only show if the Qualification Status is “Current and Active”. You can edit the Qualification Status on the Qualification profile.