Intakes are cohorts or groups of students enrolled in the same Programme. They usually share the same set of components (e.g. courses), with the exception of Ad Hoc components specific to certain Students (e.g. electives).
This section discusses the process of managing and creating intakes.
In this section:
Intake Index
Navigate to Cohorts > Intake Index.
Here, you can:
- Search and open existing Intakes.
- Use the Save Search feature
- This saves specific search criteria you have entered into the Advanced Search fields (see SELMA 101 – Tips and Tricks for Using SELMA productively)
- Export the Intake list as a CSV file (Figure 1.).
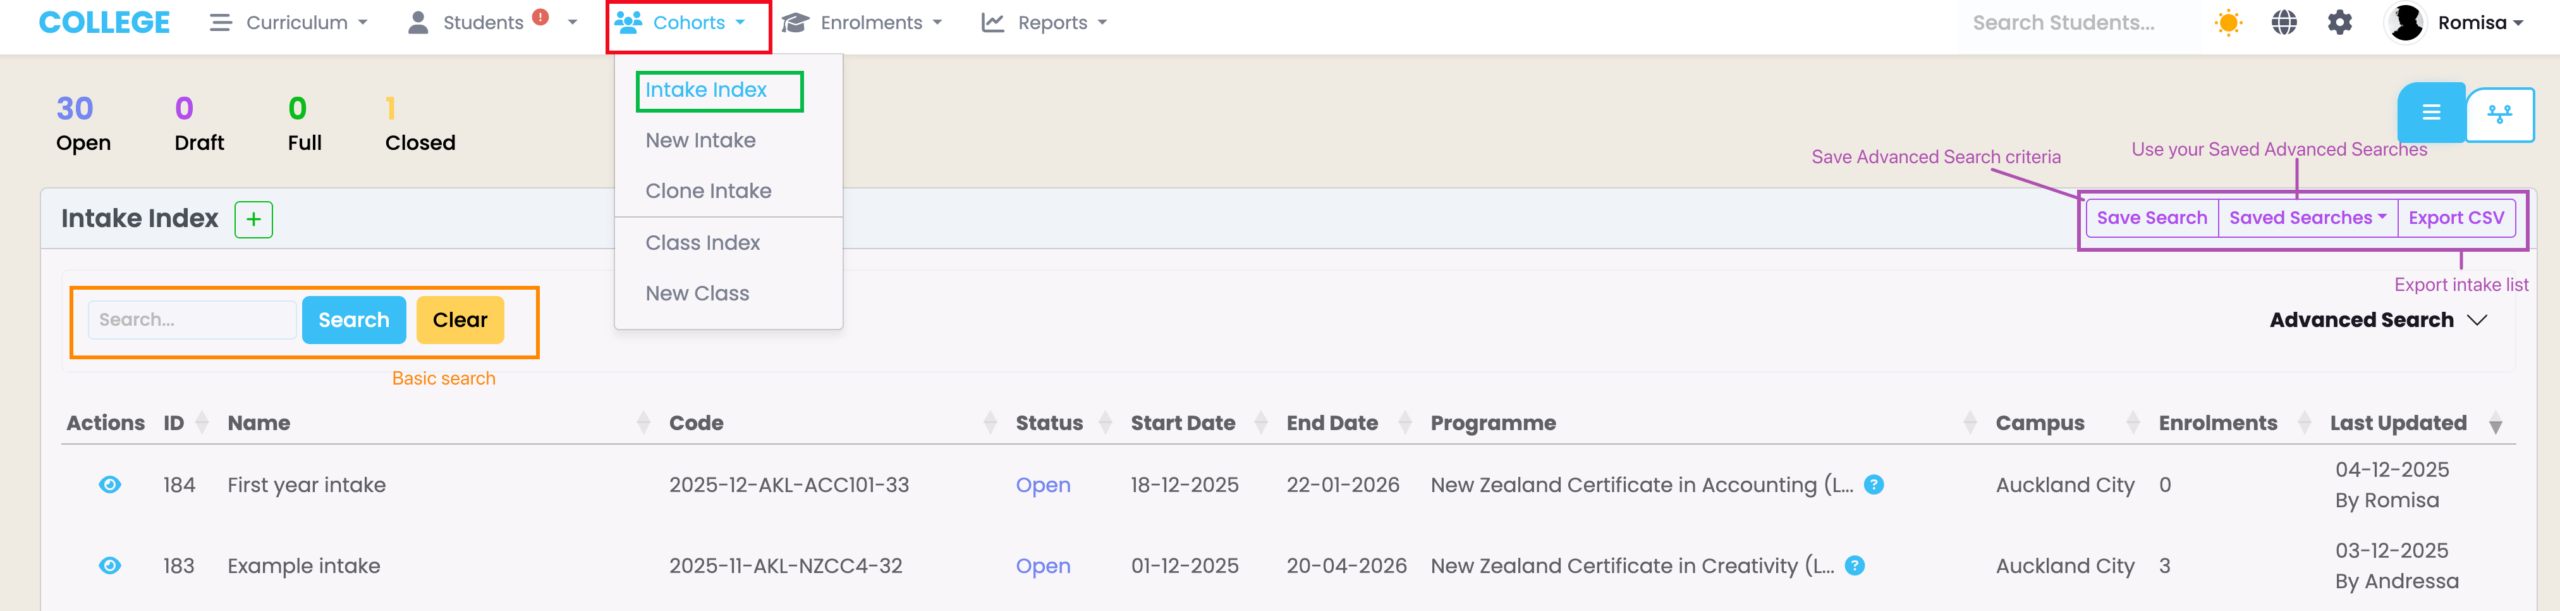
Figure 1. Access the Intake Index (red) via the top navigation bar (green). Use the basic Search (orange) or the Advanced Search, below the Save Search feature (purple).
Create an Intake
There are three ways to create an intake:
- Access the Intake tab of a Programme level (Figure 2.).
- Click the green cross icon on the Intake Index dashboard (Figure 3.).
- Navigate to “Cohorts” and click “New Intake” in the navigation drop-down list (Figure 4.).
Figure 2. Create a new intake via the Intakes tab of a Programme in the Curriculum Index (green).

Figure 3. Create a new intake via the Intake Index dashboard (green).
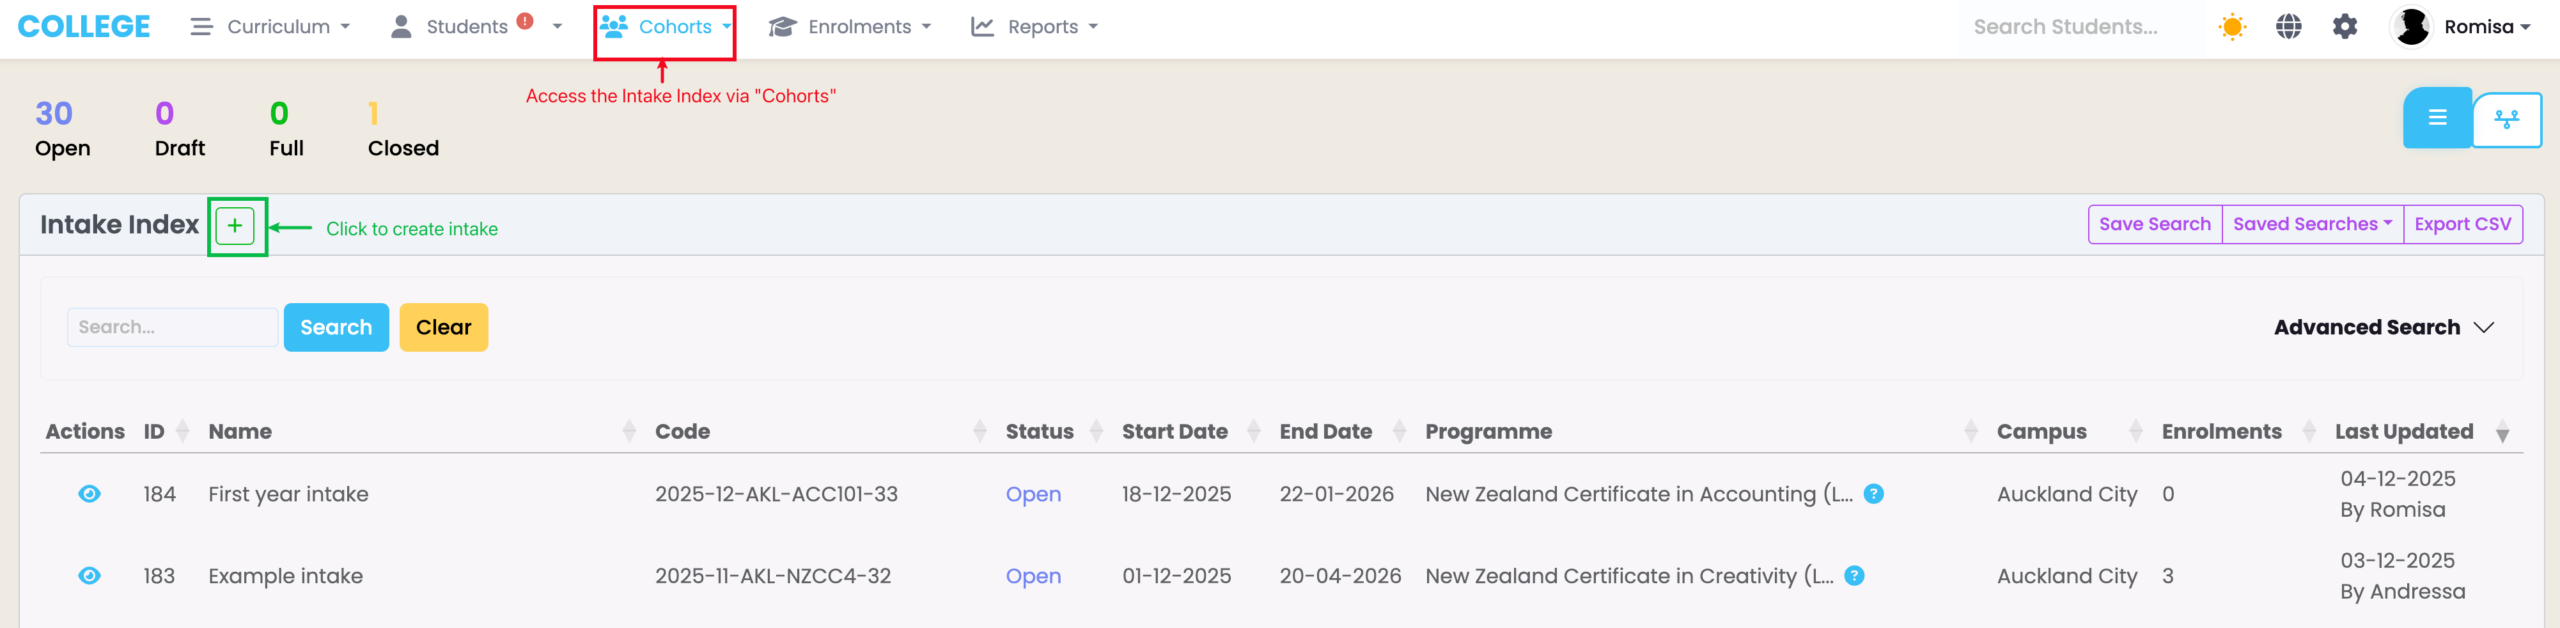
Figure 4. Create a new intake, immediately, by navigating to Cohorts in the navigation bar (purple) and clicking “New Intake” in the dropdown menu (red).

Required Fields on the “Add Intake” Screen
Once you have clicked the relevant button to create/add an Intake, fill out the required fields as indicated by red asterisks. You may also create additional Intakes at the same time. (Figure 5i.).
Important Field Notes:
The “Programme” field
- This field is auto-filled if you accessed the “Add Intake” screen from the Programme level (Figure 5i).
The “Intake Status” field
- This field MUST be set to “Open” to enable student enrolments into the Intake (Figure 5i.).
- Use “Draft” if you are preparing intakes but aren’t ready to begin enrolments.
The “Intake Code” field
- If you have your own Intake Code for the intake, please type it into this field (Figure 5i.). Otherwise, the field can be left blank to auto-generate a code for you, using the intake’s unique Name, Programme, Start-to-End Date and Campus (required fields).
- The Intake Code is often referenced across other areas of the system, so it is best to create a meaningful and consistent code.
- If you have a code to provide for the intake at a later date, the auto-generated code can be updated.
The “Start/End” date fields
- The Start Date must be entered manually, while the End Date can be automatically calculated depending on the Programme duration, if it has been set. To enable the auto-calculate feature, click the purple calendar icon (Figure 5ii.).
“Places Available” fields
- You can use this field to set limits for the number of enrolled students in an Intake (Figure 5ii.).
- If the maximum number of places is reached, the “Intake Status” will automatically be flagged as Full on the Intake profile.
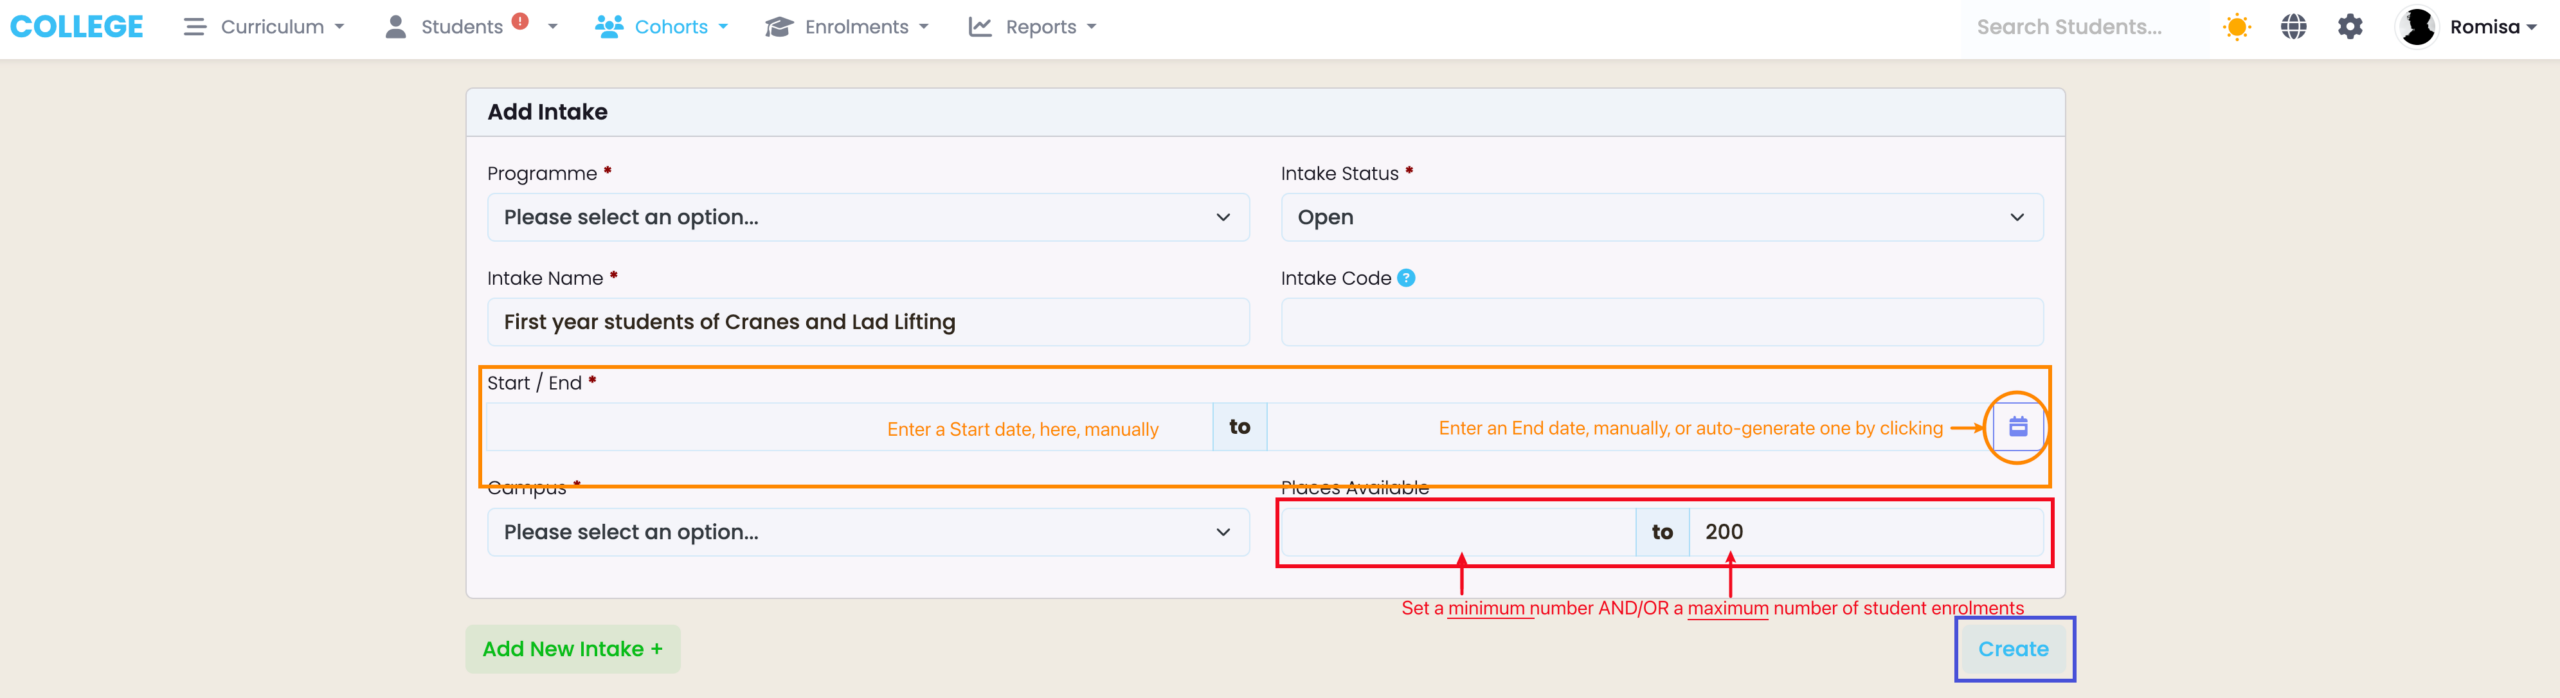
Figure 5i. The Programme field (orange) and Intake Code (purple) may be auto-filled for you. Remember to set the “Intake Status” field to “Open” (red) to enrol students into the Intake, later; and click the “Add New Intake +” button (green) to add multiple Intakes, simultaneously.
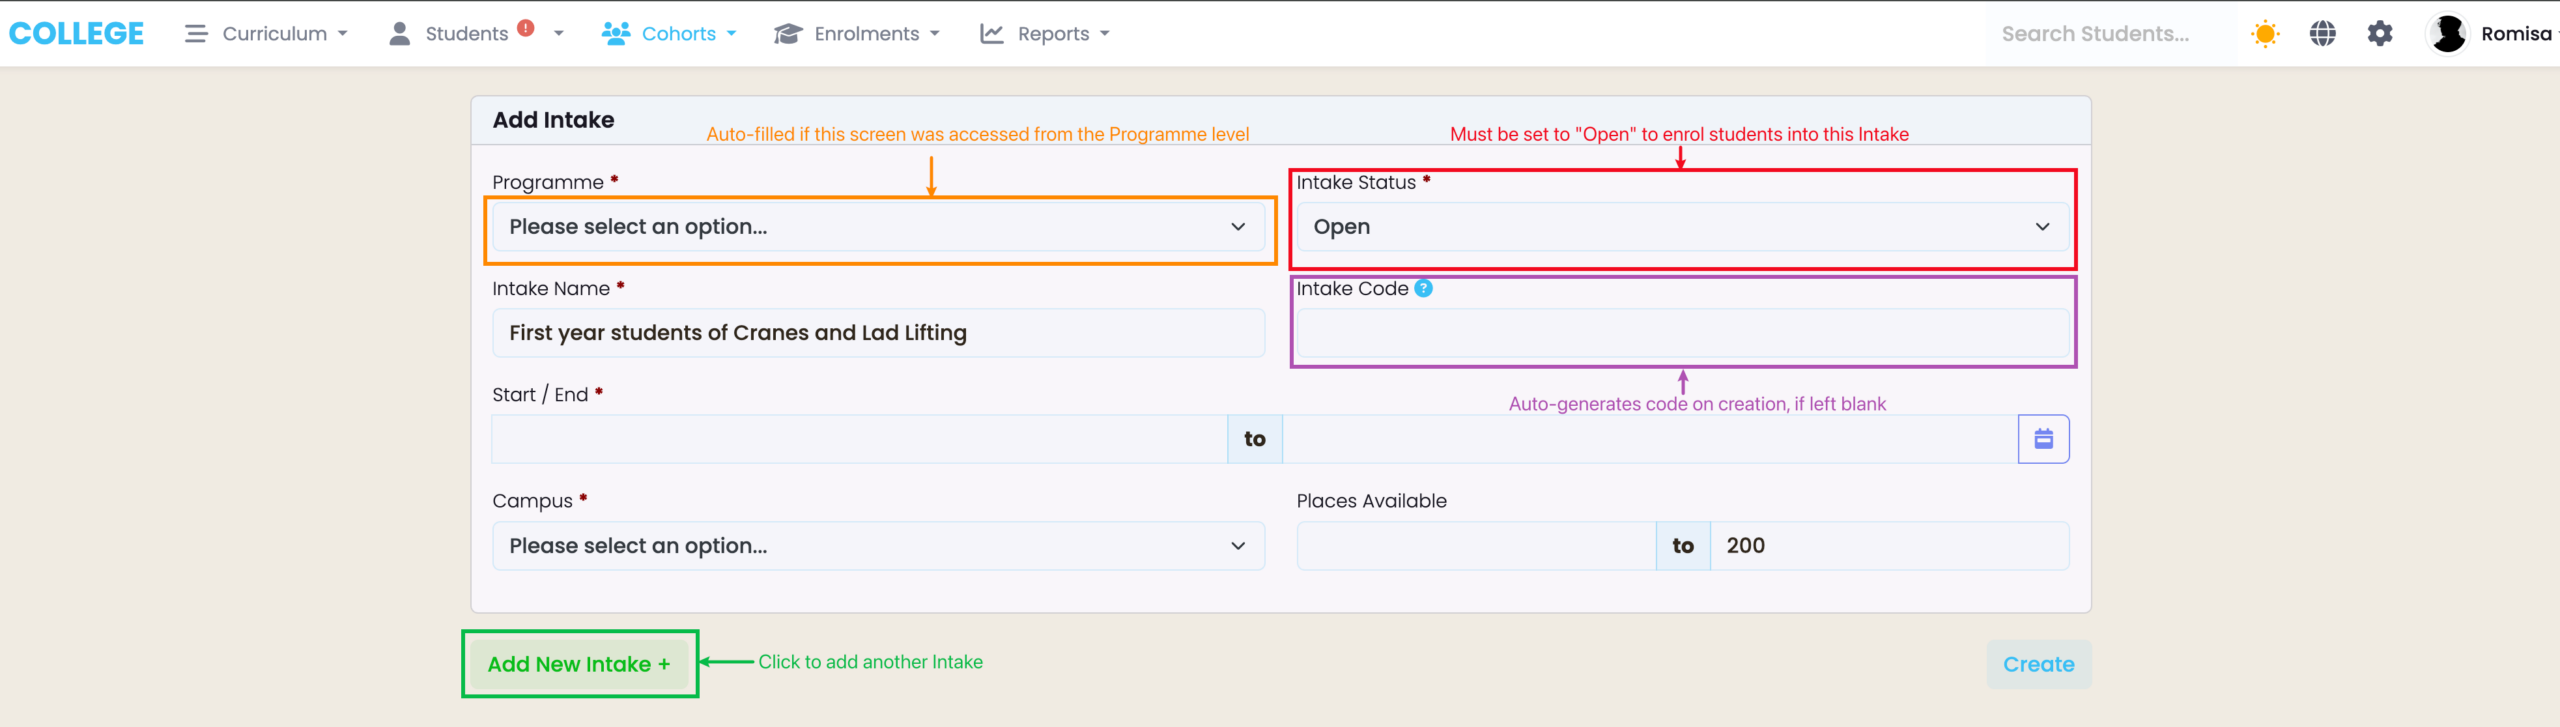
Figure 5ii. Enter the Start/End dates of the Intake, manually, or auto-generate an End date if the associated Programme duration has been set (orange). You can also set limits for the number of student enrolments this Intake allows (red). Click the “Create” button (blue) when you have filled all necessary details.
Programme-to-Intake Component Inheritance
Once you have clicked the “Create” button (Figure 5ii.) and created an Intake, you will be taken to view the Intake profile or to a clickable list of Intakes, if you have created multiple.
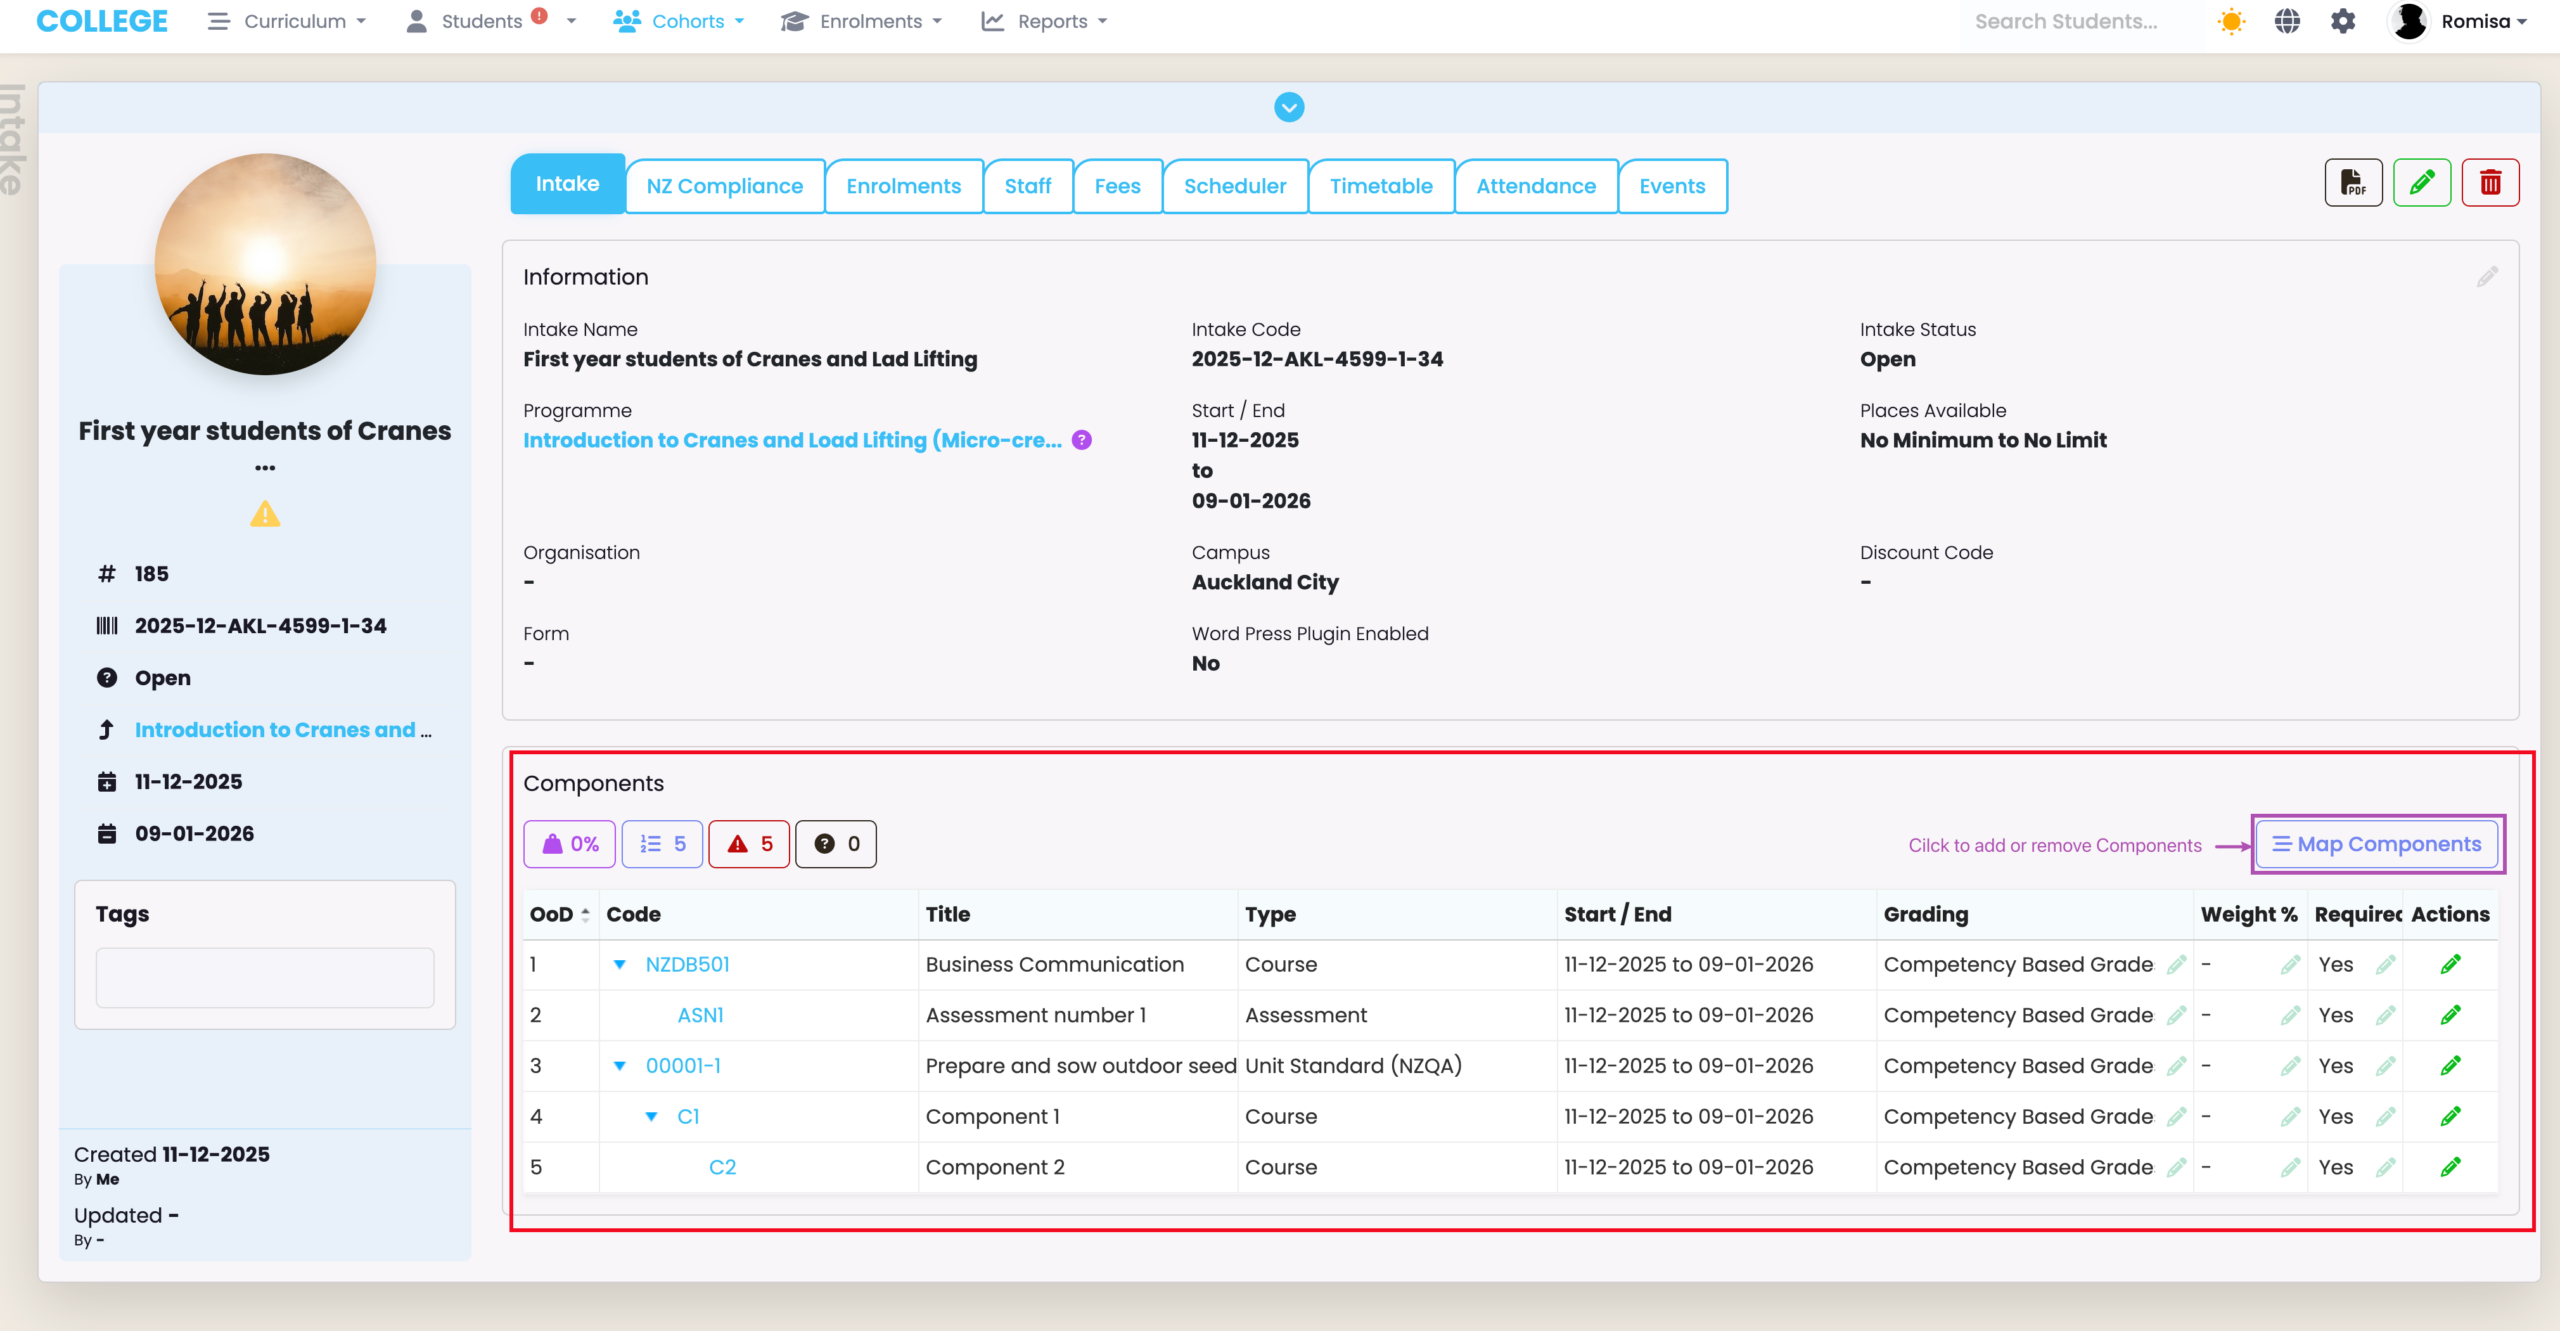
On an Intake profile, you will notice a Components section. This section displays the Components inherited from the associated Programme of the intake, which are in turn inherited by Students/Enrolments when linked to an Intake, later. (Figure 6.).
Note: If a Programme does not have any Components created, you will not see any Components attached to the Intake.
Figure 6. The Components section of the Intake profile (red) shows the Components inherited from the Programme. You can remove or add Components as you wish, by clicking the “Map Components” button (purple).
Enrol Students
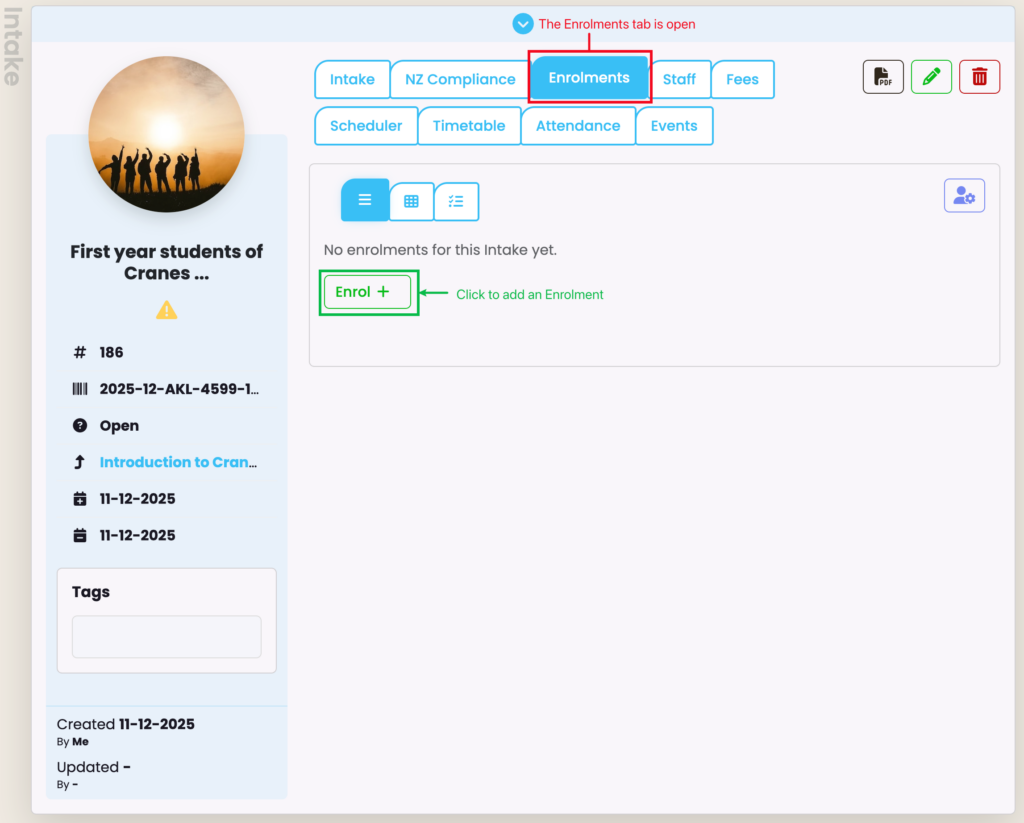
Once Intakes have been created, you may edit values within their profiles and begin enrolling Students into the Intake from the Enrolments tab (Figure 7.).
Figure 7. Enrol Students (green) through the Enrolments tab (red) on the Intake profile.